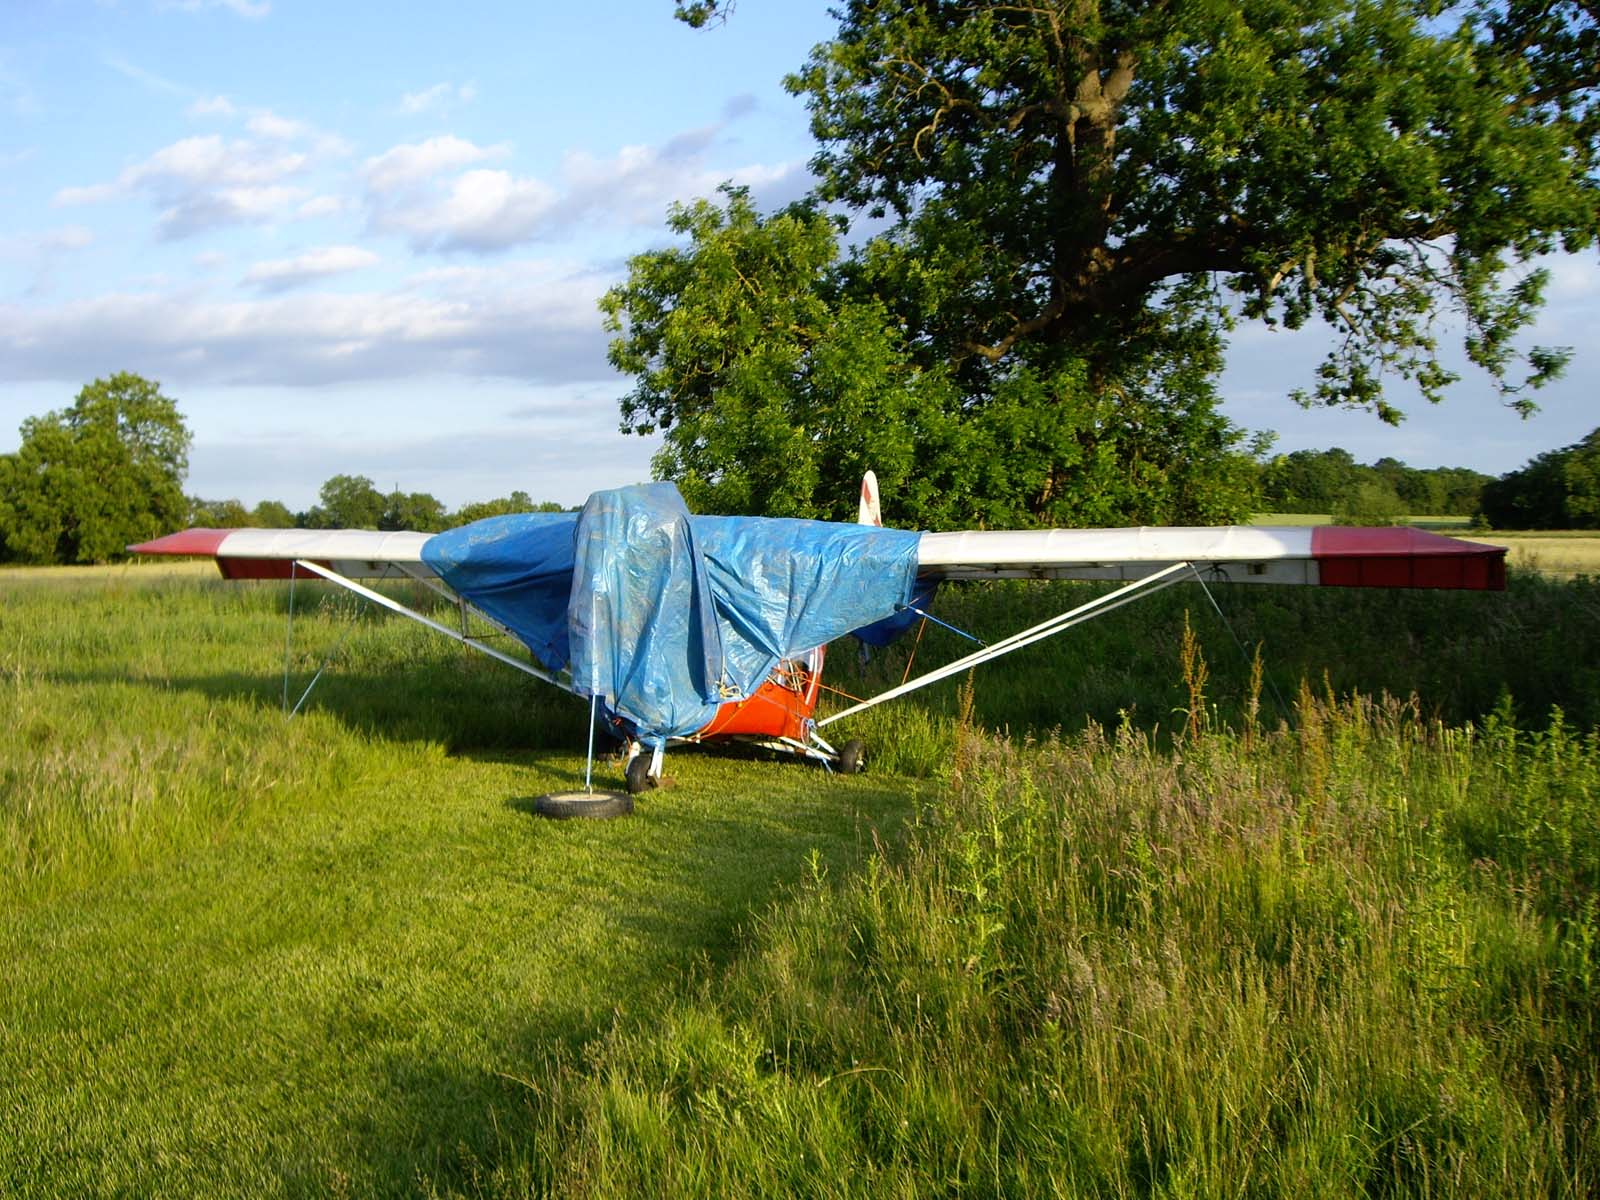
Quite a day!

Remember the old saying, ‘Better to be down here wishing you were up there than the other way round…’

I’d been waiting for nearly two weeks for a weather window (yes, in August :shock:) to get MYRO check flown for Permit and according to the weather forecast on Tuesday, there would be enough of a break in the weather yesterday for a half hour or so ferry flight from Linton to down near Canterbury, the check flight, and a flight back before more weather arrived.

In fact the forecast on the day suggested that the weather would be arriving by about mid-day and I was ready to call it off again, but I decided to go to the field anyway and check things out. Local conditions at Linton were good and Grant said that the most recent forecast was that the weather window had moved back again to about 4.00pm – plenty of time. So off I went.

I know the strip I was flying to very well and the flight was totally uneventful and it was great to be back up for the first time since my GST in June. These are a few shots I took along the way. The first is looking out towards the north-east and the Thames Estuary shortly after I took off.

null

This one is a view showing the Kent Gliding Club site at Challock in the distance where a bit of gliding was going on.

null

Here’s a shot looking east again with Canterbury and the coast in the far distance.

null

But then things began to happen. Before the check flight, we found that the cooling cowl on the engine had come loose and there was a delay while I sorted that out. Then Rosie got away.

null

null

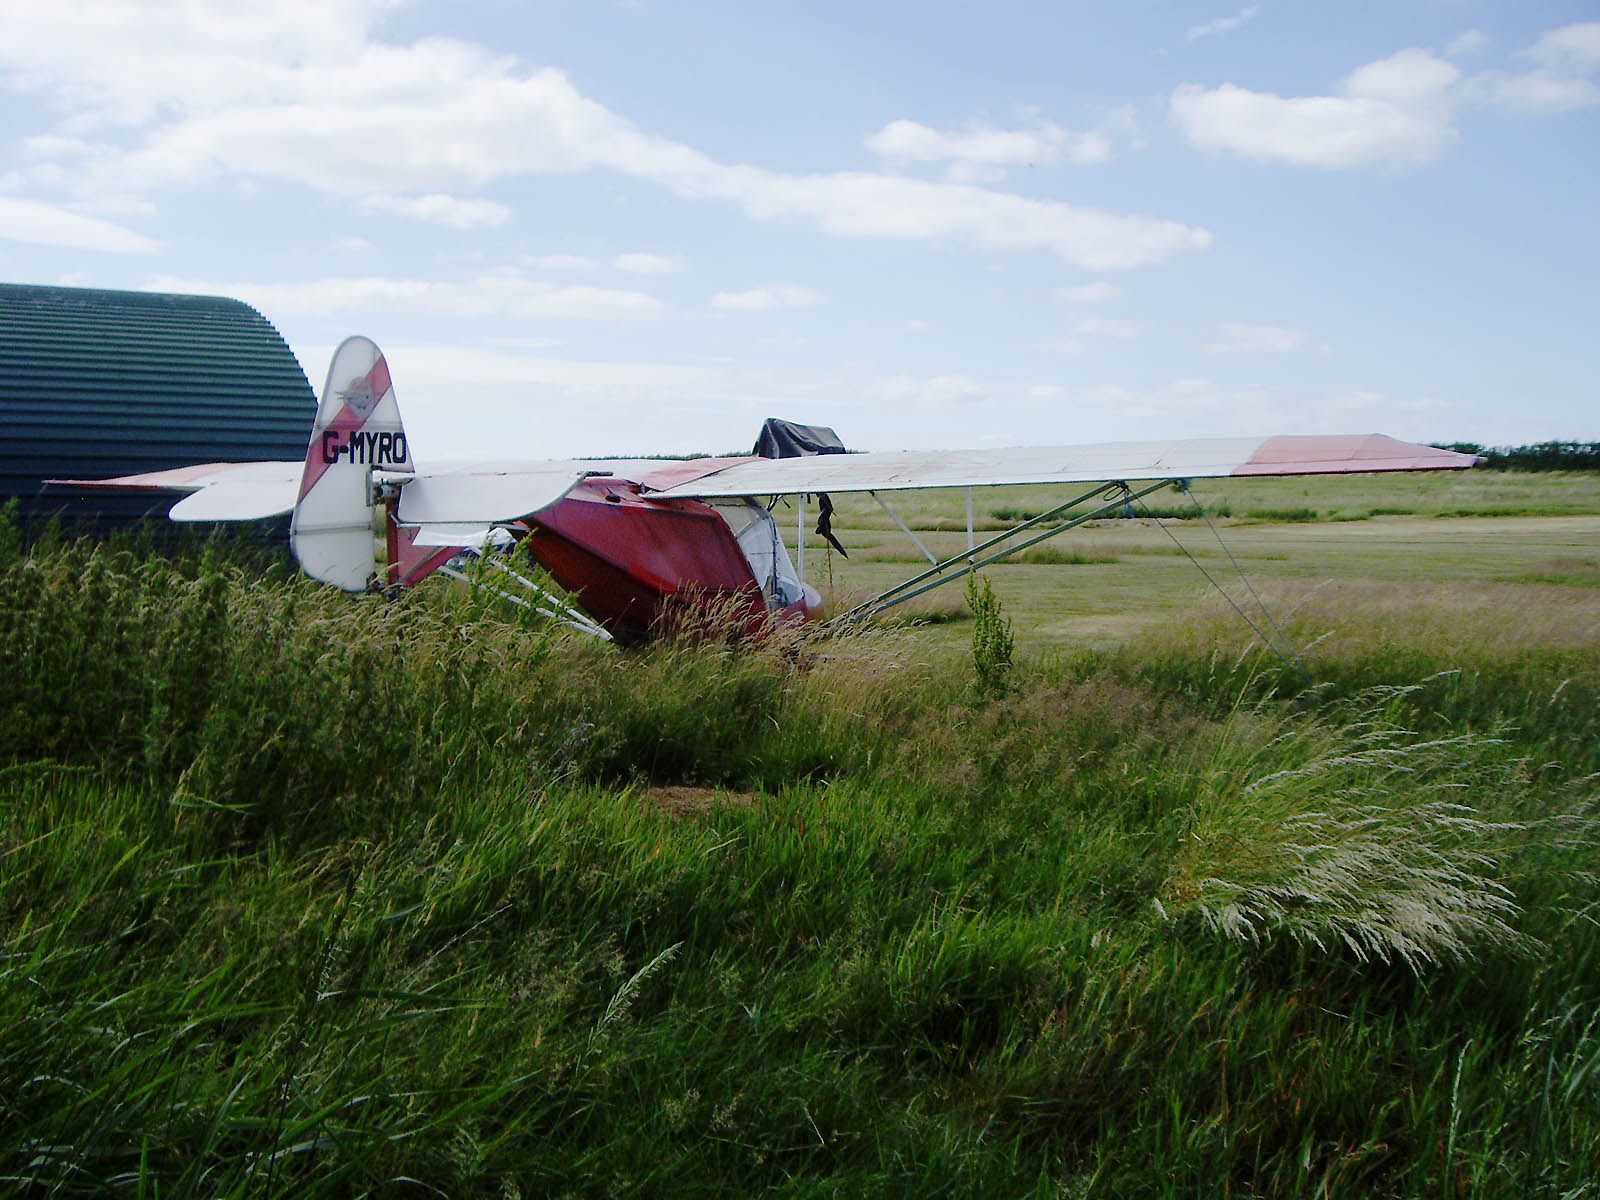
The check flight was successful and it was then just a matter of doing the paperwork, which took a few minutes. Here are a coule of shots of MYRO parked up while Rosie was doing that.

null

null

You can see that already the weather was beginning to worsen. After the check flight I found that the top of the screen was tucking under because of the air pressure it had been subjected to and my first thought was that I’d need to put some extra cable ties in after I’d got back to give it more support. Trouble was, when I went to take off to return to Linton, it did it again as soon as I put on full power, so I aborted, taxied back to where someone was working on their aircraft, borrowed a drill and did the job there and then. But it was another half hour lost.

By the time I was ready to go it was spitting a bit at Canterbury but vis was still very good and the wind very light. I phoned Linton and was told it was bright with a good cloud base and vis in occasional very light showers, so I decided to go for it.

I could see the weather coming in a wide front ahead of me so there was no way of dodging around it. I guess by that time the base was down to about 1800ft and by Ashford I was in pretty steady light rain but with fair vis and good sight of the surface. I got to abeam Headcorn where not unsurpisingly there was no flying going on and knew that Linton was only a few minutes further on. But remember, this was my first flight out of there so I haven’t had a chance yet to get to know the local features and after doing one orbit where I expected Linton to be, the base was down to about 1500ft, the rain was still light but steady and I still had no real idea where the strip was. I thought there was little point in flying around in those conditions looking for a needle in a haystack in the hope I might find it when I could head back and land safely at Headcorn.

So that’s what I did and MYRO is now parked there, where I guess it’ll remain for a few days. A hangar guy showed me where some tie downs could be found and a very kind chap gave me a lift back to Linton to pick up my car and engine cover as an alternative to sitting in Control moaning about not being able to fly.

It’s an inconvenience because I’ll now have to make arrangements to pick MYRO up over the weekend or whatever. But I think it was the right decision because within 20/30 minutes of landing, vis closed in completely and a chap went off for some IMC training without needing a hood!

The upside as well was that because I diverted to Headcorn in an ’emergency’ because of the weather, I didn’t have to pay a landing fee. Silver linings and all that ….. 😉

I have put a little video clip taken on my Pentax digital still camera of MYRO’s check flight with Rosie HERE in the video section.

Thwarted yet again

I’d arranged with Rosie for me to fly MYRO down yesterday so she could do the check flight but the wind just blew and blew and blew. So the plan just went straight out of the window.

Today we’ve had a severe weather warning for ‘constant heavy’ rain here in the South-East but, surprise surprise, not only is there absolutely no sign of it, but this morning would have been perfect for me to have got the check flight done as it’s bright with medium-high broken cloud and practically calm out there. But I can’t because I’m expecting my mother to arrive any time now to visit for the day.

And thanks once again to the Met Office for a brilliant weather forecast – NOT! When will they ever start getting things right because even with all of the technology available to them, they can’t do forecasts with any accuracy at all apparently. And even while I was sitting here an hour ago with bright skies and broken cloud they were still trying to convince me when I checked the Met Office web site for the regional weather that I was actually experiencing heavy rain, as they’d forecast the day before 😕

The worrying thing is, of course, that the Met Office general analysis and forecast is used for the aviation forecasts as well, so they must be just as inaccurate. It seems to me that because of the embarrassment the Met Office has experienced over the past couple of years on account of their appallingly inaccurate ‘long range’ seasonal forecasts (Barbecue Summer and all that) now they have swung the other way and always make their forecasts highly pessimistic. This may be fine for the general population who might feel good when the forecast ‘bad weather’ doesn’t materialise, but not so good for people like pilots whose activities are highly linked to what the weather is actually doing. If I’d been planning some local flying this morning and had decided to do something else instead on account of the weather forecast, I’d be very annoyed indeed 😐

As it is, I’m just feeling a bit frustrated!

Hooray! Good news!

I caught up with Tech Office today. They have received my Permit and Mod paperwork and although they are returning the Permit paperwork to me ‘because it hasn’t been check-flown’ (when we’d agreed they would hold it until the check flight had been done 😕 ) everything is OK and will be processed in due course. So they gave me the go-ahead to arrange the check flight 🙂

null

I phoned Rosie yesterday and she’s now on standby waiting for me to let her know when I will get MYRO down to her. I arranged with my Insurer to make sure I’m covered for ‘Full Flying’ as of last week-end (up to then I’d only been covered for Ground and Third-Party risks to save a bit of cash…) and now all I need is a weather window. As usual, it doesn’t look too good – unsettled and gusty winds when it is bright, so it’s the same old story. But I’ll get there, don’t worry … 😉

And finally…

Well almost…

Yesterday was completely out for the re-weighing because of the weather – rain, rain and more rain – but it gave me the chance to get down to the field and pump the fuel out of the tanks using the electric pump. Almost all of the fuel in the main tank came out but I noticed that about 3 inches of fuel still remained in the other. When I got home I weighed what I’d got out and it seemed to only come out to about 4 kg. This seemed to indicate that there was still quite a bit left in and I decided I’d try to get to the field before Tim, the Inspector, and take the second tank and the fuel it contained right out to get the best weight possible for MYRO.

In the event, my plan was overtaken by events as I got a call from Tim just before 8.00am to tell me that he was already at the field and ready to go! We hadn’t managed to speak yesterday evening because Tim apparently had had car problems and I’d left a message saying that I’d be at the field anyway and if he could make it, I’d see him there. But his call came as a total surprise 😯

By the time I’d sorted out the dog and got there myself it was just after 9.00am and to my surprise, delight and I must say, relief, Tim said that he’d re-done the weighing already by levelling MYRO where it stood and that everything was now fine, both at the current weight with the single tank and at the new calculated weight with the second in place too. This was the best news I could possibly have received and I was so relieved that removing the weight represented by the excess fuel and carefully levelling MYRO before doing the weighing had done the trick. This means that with the two tanks when the mod for the second has been approved, I’ll be able to fly MYRO solo over quite reasonable distances without keep having to stop to refuel, which is what I’ve been hoping for all along 😉

The rest of the time was spent carefully sorting out MYRO’s paperwork for submission to the BMAA for the Permit to Fly. Nowadays you have to make sure that all the i’s are dotted and the t’s crossed because otherwise the papers come back again and you waste time. Tim was a massive help because of his experience and attention to detail. He has really put himself out with this one and I’m so grateful for all of his considerable efforts because without his help and experience I doubt very much if it would have been possible to achieve the result that we have now succeeded in doing.

So the papers can now go off tomorrow but before I send them I’ll ask the Tech Office how long it will take for the Tank Mod to be approved. If it will only be a few days, I might as well get it done at the same time because Tim now has all the data we need. If it will take weeks as Tim thinks, then it’ll be better to do the mod separately after MYRO has been permitted and is flying. But in any event, once the TO have received the paperwork and has let me know that it’s OK and will be processed, then I’ll be able to go ahead and arrange with Rosie for a check flight.

So finally I’m almost there, but still not quite. But I now feel that I’m on a downhill run rather than still struggling up the mountain and that the end really is now coming into view. 🙂

Very interesting but….

There have been some interesting developments since MYRO’s Permit Inspection and weighing. For some reason MYRO’s CG position has come out a long way aft, so far so that although it’s OK with just the single standard tank, as soon as you do the calculations for adding the second tank, you find that it’s impossible to do so and still remain within the TADS aft limit.

But when I contacted the BMAA Tech Office, I found that there’s a Serial Mod for a twin tank set up using the AX2000 tanks, which are bigger than what I’m proposing and would therefore exacerbate the situation even more! So what’s happening 😯

Now I just happened to decide to do my own weighing on Sunday using a good set of digital bathroom scales, not to ‘check up’ on Tim’s results, which I didn’t have at the time, but just to see out of interest what I got MYRO’s empty weight out to. The reason was because when we did it on Saturday, I wasn’t very happy about the flimsy hardboard sheets that we had placed the scales on. I know from my own experiences of weighing myself on different surfaces that the results can vary hugely depending on the type of surface the scales are on and ideally you need something that’s firm and rigid.

I used a rigid sheet of thick plywood as a platform for the scales and placed a concrete paving slab under each of the wheels that were not being weighed. The outcome was that I got a weight that was slightly more than Tim’s figure but with a weight distribution between the wheels that was very different indeed. I got much more weight coming out on the nose wheel, to the extent that my numbers worked for both the official BMAA Serial Mod and, of course, for the tank mod that I want to do. Tech Office also found that there is some confusion with the official Serial Mod calculations and they are now very interested to see what happens because, of course, I will now have to pursue it to find out the true situation. Rob in the Tech Office said that they have done some important work recently which shows the great variations in weight distribution that can result from not having the aircraft totally level and he said that in fact they are now strongly suggesting that a spirit level is placed on the tail boom, or in MYRO’s case, the main tube, to ensure that it is dead level when the weighing is done.

I think that this is the source of the problem. Earlier in the day I spoke to Joan Walsh of Saxon Microlights about their AX3, G-MYHM, which has the same Arplast prop as MYRO and differs only in not having an electric fuel pump. That comes out slightly heavier than MYRO but the weight on the nose wheel is far greater and there would be no problem whatsoever with fitting an extra fuel tank because its empty CG position is far further forward than MYRO’s. I phoned Tim this evening to tell him about my conversations and to ask if he will be available for a re-weighing at the week-end under stricter conditions. Hopefully he will be and we’ll be able to get to the bottom of the mystery. This is a further complication that I could have well done without but I might as well try to get everything sorted out in one go now so I can have a more quiet life in the future. There can be no reason for MYRO to be so different from other AX3s and I can’t let this rest if I am to have my twin tanks – and I would like them if it’s at all possible 😉

Almost, but not quite

So MYRO had its Permit Inspection today and I had to nip behind the inspector doing/redoing little bits of wire locking, replacing dodgy cable ties that might chafe, stuff like that. I also had to slacken off the front suspension bolts that I’d tightened up too much and move the safety tie on the exhaust. Not surprisingly I thought, the fabric being Ultralam sailed through its Betts Test and at the end of the day MYRO would have been signed off.

However, as I thought might happen, I hadn’t received my Mod paperwork back for the prop and the aux 12V electrical sockets, and I also discovered that whereas I’d assumed that the ‘Trading Fuel for Weight’ rules would encompass the extra tank that is needed to contain the additional fuel that can be traded off against the weight being carried, this is not so. The tank itself also has to be treated as a Mod in its own right which is never stated in the documentation. Stupid of me, but I hadn’t realised 😐

So at the end of the day I’ve been frustrated by administration and paperwork. If I’m lucky I’ll get all the paperwork for all three Mods sorted out by next week-end, otherwise I’ll be delayed and prevented from flying for even longer.

I also have to replace a few clevis pin safety rings but doing that pales into insignificance compared to having all of the paperwork sorted. Frankly I am becoming bemused by it all, especially as I have spent almost the whole of the last three days or so getting it organised and still haven’t succeeded. It wouldn’t have hurt the author of the Trade Fuel for Weight Rules to have spelt out the requirement to get the extra tankage separately approved, but such simple common sense is apparently a bit too much to ask 😕

Nearly all done

I nipped down to the field this afternoon and managed to get more or less everything done that I wanted to. I started by sticking all the principal cockpit placards on – I made them yesterday using an old hand Dymo machine that I had in the cupboard. Then I put the new tyres on the main wheels, which took me much longer than expected because I couldn’t get the second wheel back on properly. Somehow it had grown while changing its tyre and was too wide on the axle. I had to strip it apart again just in case I’d trapped a bit of the tube or valve between the rim halves but that didn’t solve it. After struggling for the best part of an hour, even longer possibly, Bob suggested taking the other wheel off and swapping them over. Sure enough that did it – who would believe that two seemingly identical wheels could be that different 😯

Then I took the nose wheel off because I have to bring that home for the local tyre fitter to do the tyre swap. After the struggle he had on Saturday I bet he won’t like seeing me come through the door again :o:

And finally, just before I cleared up to come home, I remade the dodgy electrical connection that pulled apart on Sunday and that I’d done a hasty repair on. So that was it. With the new tyre on the nose wheel, MYRO will be all ready for its Permit Inspection. I just hope all my paperwork comes through and that I haven’t forgotten anything 😉

Getting things organised

MYRO’s Permit Inspection has been arranged for 7.00am on Saturday morning, so I’ve been getting everything ready. One of the important things is the paperwork and although I’m pretty sure that I’ll have the log books and cockpit placards (which are a legal requirement) all in order, I’m not so certain about some of the other stuff.

My biggest concern is to do with the paperwork for the prop. Although I dealt with everything to ensure the prop would be approved last year, I only got round to doing the paperwork for it this week. I may have left it too late because I had to submit a form to the BMAA Tech Office and they then send another back which has to be filled in by the Inspector. To get the latter in time, the Tech Office would need to turn round my form and also get the Inspector’s form out the same day, and the Post Office would then need to deliver it to me the next. It might be too much to ask 😐

Since changing the tyres over last week-end, I’ve been agonising about what to do, as the replacements are themselves old and although they have good side-walls, they show signs of age-related cracking in the tread grooves. I’d hate for MYRO’s permit to be declined because of it so I eventually decided to bite the bullet and buy new ones, which arrived today. I was thinking about nipping down to the field later this afternoon to get MYRO’s wheels so I could do another tyre change-over but I had to abandon the idea because a couple of storms came through with thunder and some quite heavy rain, so hopefully I’ll be able to do it tomorrow.

The final thing I wanted to do, although it’s not essential, was remake the dodgy electrical connections from last week-end, but as they’re working and look fine from the outside, they can wait if necessary until later.

I realise all of this stuff is an unavoidable and necessary part of the process, but believe me, I’ll be glad when it’s all done and dusted 😉

There at last!

Sunday evening update – I put the main wheel back on and it was nice to see MYRO back on three wheels again! Then I replaced the starter switch. Along the way the soldered joint of the main 12V supply to the switch broke away from the fused side of the main fuse holder due to a dry joint and I thought I’d have to abandon the job yet again until I could bring a soldering iron down to the field. However, Colin asked whether it would be possible to fit a crimped spade connector instead and when I checked it was. So that got round that problem.

Then the big moment came to start up and I was disapponted to find that the magneto earthing problem (ie lack of..) still remained. Bob was there and I said I thought that the problem was therefore probably at the engine end. When I got out to show Bob the wiring I realised immediately that the magneto earth cables had not been connected properly! Somehow I’d mixed them up with the smaller yellow and black cables coming out of the generator and sure enough, when I switched them around, all was well. I don’t know how this can have happened – I can only assume that when I connected the engine wiring up last year I’d done it a bit quickly and then hadn’t properly checked, and the mistake had carried forward right up until now.

My big concern, though, is whether I’ve done any damage to the generator by earthing it through the starter switch. I doubt that I have because the only times both generator cables have been earthed have been when the engine was being switched off. There seem to be no ill effects, although I won’t know for sure until I can either check the generator voltage, or find the battery goes flat because of an absence of charge from the generator.

So it could be that the work I did on the switch may not have been necessary after all, but I’m glad I did it because the the internal contacts were not in good condition. The other thing was that it led me to the dry soldered joint in the 12V line which would have failed at some time in the future if I hadn’t dealt with it now and also, when I switched the mag earth and generator connections, a crimped connector in the latter, which I’d inherited, parted. I repaired it as best I could for now but I’ve resolved that I’ll remake all of the connections involved in this afternoon’s work to save electrical problems further down the line.

So that’s it for now! All of MYRO’s systems are now working as they should and to all intents and purposes, it’s flyable! When I arrived at the field around lunchtime, Bob gave Tim the Inspector a ring and said that all being well, MYRO would be ready for Permit Inspection next Sunday. I told him not to tempt fate, but it looks as though he was right after all 🙂

I’m typing this this evening feeling a lot happier than I did previously. I’m also feeling very tired and I’ll be having a shower and an early night tonight. The last couple of week-ends and the series of problems I’ve had to cope with have taken it out of me more than I realised, but I have a feeling it will all be worth it in the long run 😉

Expectation … or hope?

Sunday morning update – it was a dead loss looking for the lost spring in the dark yesterday evening so, so as not to be disappointed, I found a little spring in my odds-and-ends tin that I might be able to use instead. Before starting my search this morning, I modified it slightly to make it more suitable and it looked as though if necessary, it would work OK. I’d turned out half of the conservatory before finding the lost one on the dog’s bed, so either that’s where it flew to last night, or he found it during the night and placed it somewhere safe where I would find it this morning 🙂

Lucky I’ve got a sense of humour.

I also found a little grub screw in the tin and after shortening it this morning, it fitted perfectly. So I’m just off to replace the punctured tube in the main wheel that I brought home with me yesterday and hopefully I’ll report back later, at the end of the day to say that now everything is working as it should.

Surely that’s not too much to ask? 😕

What else, for goodness sake

I am reeling at the end of today. The day’s sequence of events has left me feeling totally punch-drunk.

This morning I decided I’d refurbish the spare Mikuni fuel pump that I have with one of my recently purchased service kits so I could just swap it in for the upper one on MYRO. However, yesterday I had swapped over the main wheel tyre myself for a spare that I had and got a local tyre fitter to do the same for the nose wheel, so my first job was to refit those.

On arriving at the field the first thing I found was that the other main wheel was totally flat and had somehow managed to pick up a puncture while it had been just standing there. I just couldn’t believe it, after all this time. I refitted the other main wheel quite easily and then went on to fit the nose wheel, a job that took me a few minutes the last time I did it. But today, would the bolt holes line up? Would they heck. After about half an hour’s struggling and after chipping my new paint on a suspension damper several times, I eventually got the wheel into place.

Then it was onto the Mikunis. I swapped out the upper one quite quickly and then went on to see if I could do anything with the lower one without completely removing it. While undoing the securing screws I managed to mark the pilot’s side door plastic on a screw head which was a good start. And then when I went on to examine the unit, I immediately found the cause of all my fuel system problems. Firstly, I noticed that the unit had actually been only recently fitted from new when it had been on MYME and wasn’t an old, clapped out unit at all. However, an internal gasket had been wrongly fitted, probably in manufacture, and there was no internal seal between the two small internal one-way valves. So that’s why it wouldn’t pump and that’s why the system wouldn’t hold a pressure. Freak or what? What’s the chance of that happening? If you fit a new unit and it doesn’t work, you notice immediately and can take steps to fix it. But what earthly chance did I have of diagnosing a problem like that? I was going to refurb the unit anyway, but as it was all still ‘new’ inside, I decided just to reassemble it correctly and see what happened. So I did and of course, my fuel system then worked more or less perfectly.

Trouble is, that freak manufacturing mistake has cost me a two week delay.

So then it was onto the starter switch. I thought that I’d have to drop the panel front to get at it but I found that by removing the altimeter I could then remove the switch and detach the connections. While doing it, two of the tiny connection grub screws slipped through my fingers, fell into the pod and then out through the tiniest crack onto the grass below. Naturally, one I found but the other just disappeared off the face of the earth.

Colin said to be careful when I was taking the switch apart at home as you have to watch out for springs flying out. So I was, but two still managed to roll onto the conservatory floor. One I was able to pick up straight away but the other, like the grub screw, just vanished. So now my starter switch is useless, unless I can find the lost spring. I hunted high and low with a bright torch but there was no sign of it. If it means I have to take each piece of furniture out of the conservatory one by one and then search the floor with a fine-tooth comb tomorrow, then that’s what I’ll have to do.

But this day will go down as one of the worst I have had to endure for many a year. I had no idea that just trying to get the final few small jobs on MYRO done could possibly be beset by so many setbacks. And today they have been seemingly unending, one after another 🙁

Feeling a bit brighter

I found a supplier in the UK for the Mikuni repair kits at a third of the price being demanded by the UK Rotax agent, only £14.98 each compared to £45. I think the latter price is scandalous and a total rip-off. I will in future try to avoid buying anything off them if I possibly can. The link to the other supplier is shown below.

ZipNorth Mikuni Service Kit

The kits arrived a day after I ordered them and they look to be of very good quality. They also contain the parts needed to refurb the little internal one-way valves so I have high hopes that they will solve my fuel problems.

And this morning I received my package from America. On reading the paperwork that came with the starter switch service kit, I notice that it would have been quite simple to have opened the switch up and cleaned its internal contacts before fitting it. I think if I had done, I would have avoided my mag earthing problems, but hindsight is a wonderful thing and I’ll know for the future. I still think I’ll follow the service instructions and replace the switch’s internal contacts though, because that will make it good for another 2000 hours or so. Bearing in mind that MYRO has done about 1500 hours and the switch has been standing for almost two years, it’s no wonder really that it should need servicing, which the Bulletin advises should be every 2000 hours.

So as I’ve got my main and nose wheel in the car whose tyres need replacing, which I’ll get done shortly, I feel as though I’m getting back into some kind of shape again. The weather forecast looks good so with a fair wind, I should get all these jobs done by the week-end and hopefully then MYRO should be completely sorted. I hope that’s the case because I’ve been feeling a bit down this week with these and other problems I have right now, and I need something to perk me back up a bit 😐

Double disappointment

Well, John our postman came and went this morning but alas, there was no airmail letter from the USA. So it looks as though it’ll be another week before I can do anything with the starter switch. I’ll just have to live with it I suppose 😐

I went down to the field anyway just to see what would happen when I fitted the non-return valve in the fuel line. Well, initial indications looked positive – when I primed the system with the electric pump and then switched it off, the system retained the pressure. However, as soon as I started the engine, the pressure fell away rapidly just as before. So there’s only one conclusion – either or both of the Mikunis that I got off MYME are faulty and are not making any, or at least not enough, pressure. This is really disappointing as the repair kits for these items are a total rip-off at £50 for a few gaskets that cost a few pence to make (I used to work for a company that manufactured gasket materials and gaskets so I know). This is so typically Rotax 😡

I ran the engine for a bit and even tried getting up to full take off revs, but still no pressure.

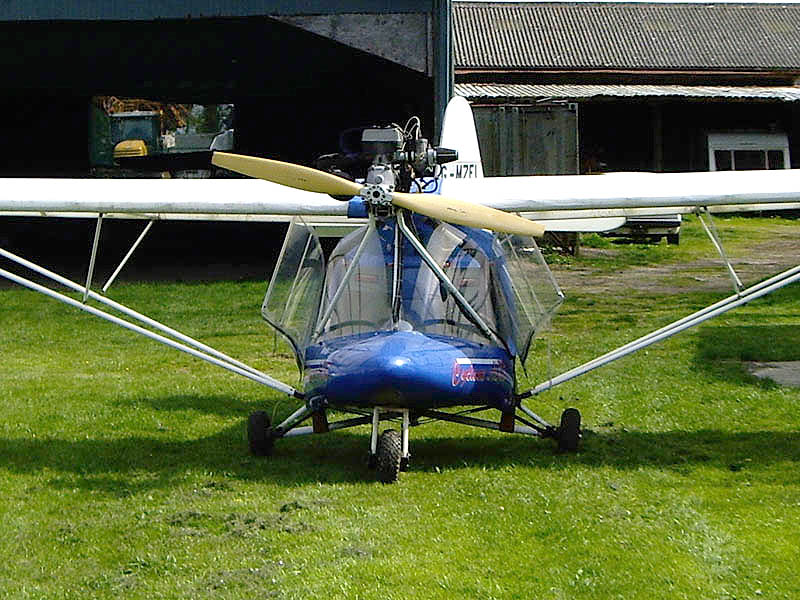
There is one small thing that encouraged me though. MZEL ticks over at 3000 RPM with the 2-blade wooden prop and would stand there all day without moving. At the same revs, MYRO, with the 3-blade Arplast, starts to roll and has to be held on the brakes, so it looks as though the Arplast will give considerably better performance than the original wooden prop. Wonder when I’ll get to fly and be able to try it out 😕

Getting set for tomorrow

I’ve had a couple of discussion threads going on the BMAA forum about my fuel pressure problem and also how I should go about changing the tyres on my nose wheel and one of my mains for two spares Rosie gave me when I bought MYRO. She had swapped the wheels and tyres that were on MYRO with those on MZEL and the two I just mentioned are too perished to get through Permit Inspection. However, the replacements she gave me are fine and just need to be swapped over. I would prefer to let a tyre fitting establishment do it but I’ve heard of cases where rims have been damaged because they are much smaller and more fragile than the ones tyre fitters are accustomed to working with. I’m still thinking about it and will decide later, probably after I’ve had a go at doing it manually.

One of the contributors to the fuel pressure thread said that when an electric fuel pump is fitted, the lower Mikuni should be removed and even without the hand primer bulb being fitted, the remaining Mikuni and the fuel pump should be effective together in retaining the system pressure. MZEL still has its lower Mikuni because it has MYRO’s original fuel system fitted, and so also did MYME as MYRO now has its system. I therefore do not see how this can have been the ‘usual’ thing to do if both MYRO and MYME had passed Permit Inspections. I do not want to remove the lower Mikuni which is now in MYRO, mainly because I don’t want to have a ruddy great hole in MYRO’s pod! I’m also concerned that the only Mikuni repair kits I’ve seen being offered by the UK’s official Rotax agent only include gaskets and internal membranes and do not include any parts relating to internal non-return valve repair. I do accept that the Facet electric pump may be worn even though it’s producing enough pressure to prime the system but I’m loathe to chuck it away while it’s doing it’s job ie priming the system before being switched off.

The hand primer bulb incorporates a non-return valve and one option I have is to replace that in the fuel line. That will still allow fuel to flow up to the carbs but should stop it flowing back. But I have to be honest about one thing – I turned out one of the pics that I took when I first got the parts from Mark at Galaxy when the fuel system was more or less complete and that shows the primer in parallel to the electric pump and by-passing it. Such an arrangement would result in any non-return function it had having no effect so if MYME’s system was working properly, it would have needed either or both of the Mikunis or the Facet pump or all three to be functioning as non-return valves. This does rather indicate that the Facet pump at least is worn and should probably be replaced. I’ve found a source (on the Internet of course 😉 ) and the cost is not that high, but I need to get the part number off the existing unit this week-end. In the meantime I have sourced a small non-return valve intended for fuel pipelines that I’ll fit tomorrow just to see if it does work, thereby confirming my diagnosis. It wasn’t expensive (about £4.75 on Ebay) and I prefer that to fitting the primer bulb, many of which have proven somewhat unreliable and liable to block and cause more trouble than they’re worth, the reason why I took MYRO’s out in the first place.

Now onto the starter switch. I checked and found that a replacement two-mag starter switch comes out at about £145 and an Internet search seemed to indicate that there is a Service Bulletin out on the actual switch fitted in MYRO regarding replacement/repair. The latter idea caught my attention and as part of my search, I found a repair kit for the internal switch contacts, which I am sure have failed in MYRO’s switch, on sale in the US for the princely sum of $16.75. A bit different from £145, eh 😡 So I ordered one earlier in the week, together with an outer bezel plate costing a mere $1.75 that will make MYRO’s switch look almost ‘as new’ again. What would we do without the Internet – how did we use to manage 🙂

I’m now just waiting for the small package to be delivered. The supplier kindly advised me that the delivery method I’d asked for was going to cost about twice as much as the items so they switched it to Air Mail. It hasn’t arrived yet and it would be very nice if it dropped onto the doormat tomorrow. If it doesn’t, that’ll be yet another week I’ll be delayed as I can’t see me being able to do the job until next week-end if I can’t do it this 🙄

So there we are – I shall at least try fitting the non-return valve tomorrow and maybe I’ll be able to make a start on the tyres. I’d like it very much if I could do the starter switch as well, though 😉

Small steps forward

Today my plan was to swap the upper Mikuni fuel pump for the other one I have, to see if that solved the fuel pressure problem and then to see if I could track down why my magneto earthing is not working. I realised when I got the Mikuni out of the garage that this was the one that was previously fitted to MYME, so I reasoned that there was a good chance that fitting it would solve the problem.

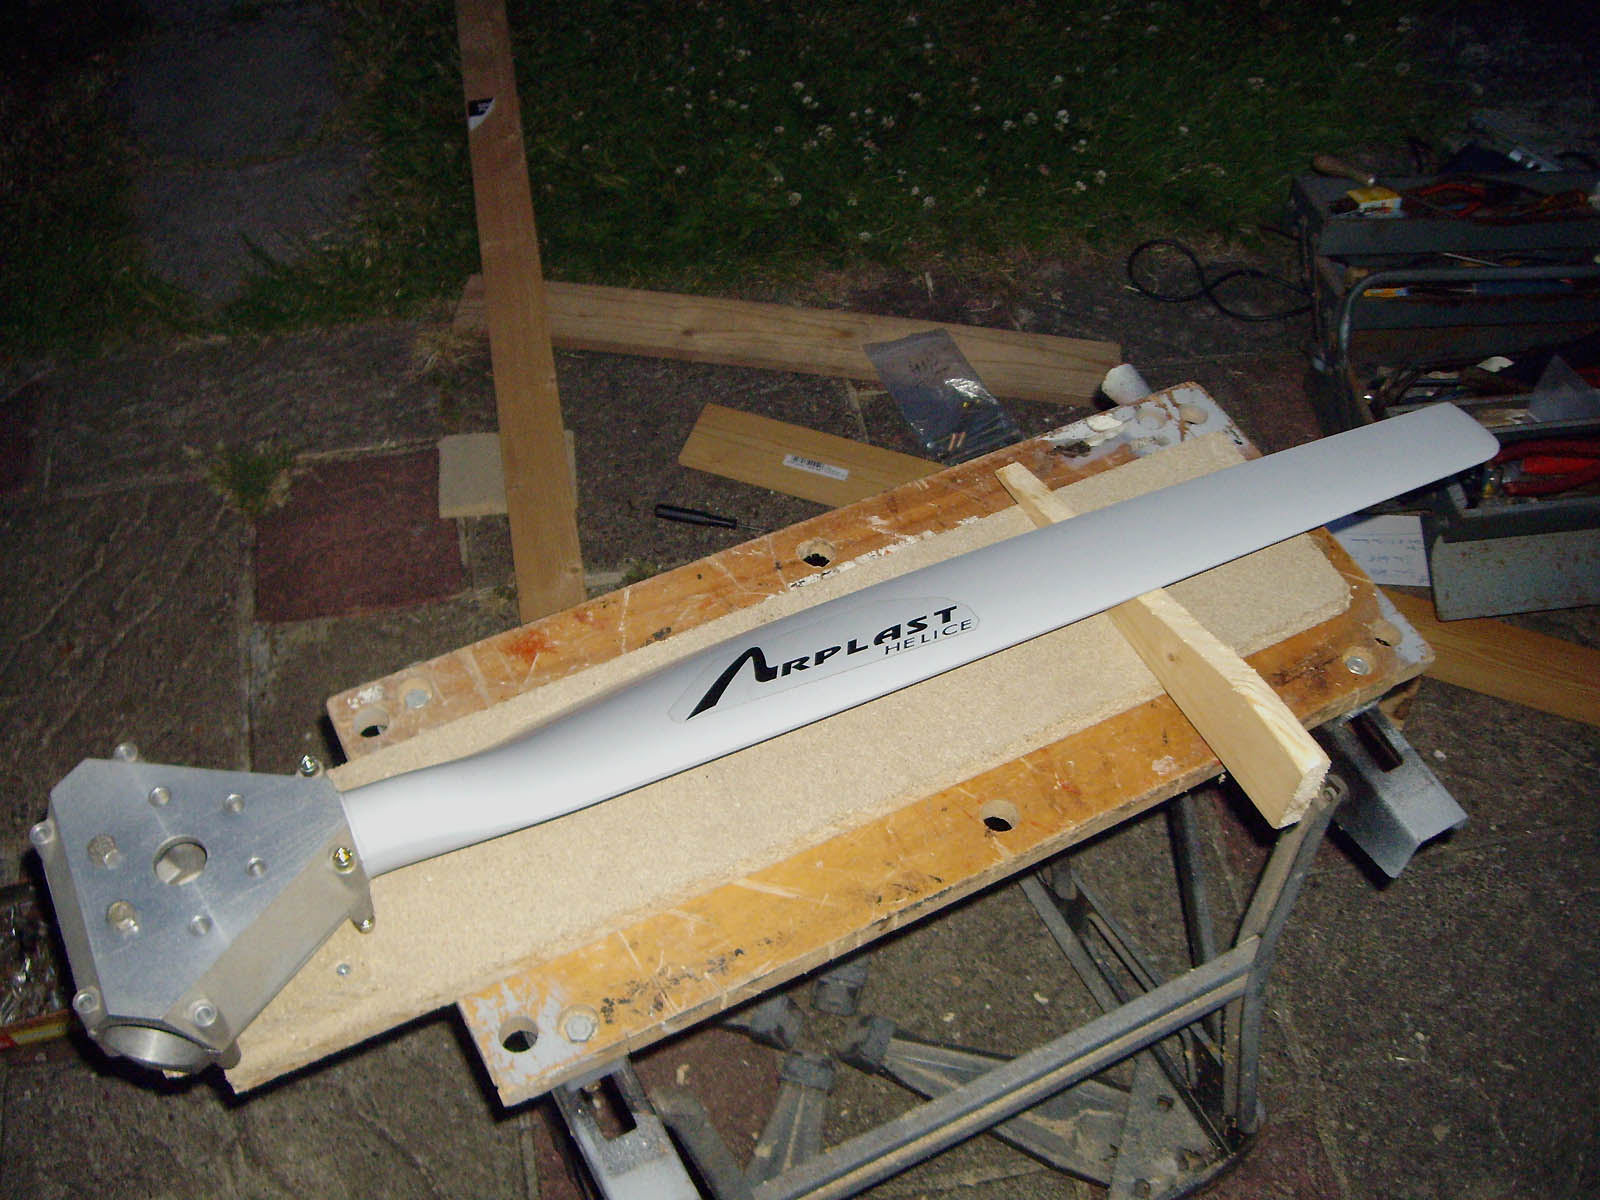
In fact, when I drove onto the field, I found that John and Bob were already there and that they’d dug out a Warp Drive prop pitch tool to see if it would be any good for adjusting my Arplast. This was too good a chance to miss so I decided to check the prop first.

The Warp Drive tool ideally needs two parallel faces to work accurately (front and back faces of the prop) and where you need to fit it on the Arplast is far from that shape (more of an aerofoil shape actually). So there was a bit of guesstimation involved in getting the tool in exactly the same position on each blade to check the pitch angles of each. Even so, it indicated that one blade was 1 degree out (over pitched) compared to the other two, so I changed it to make them all the same.

Then I swapped over the Mikunis and checked the connection of the earth lead that goes down to the starter switch and couldn’t find anything wrong with it, really. So then it was time to start the engine again to see how it ran.

DRAT AND DOUBLE DRAT! I’d forgotten to bring my ignition key, which was still at home in my conservatory 🙁 Only one thing for it – drive home and get it. So that’s what I did. It took an hour and a quarter what with all the Sunday drivers and when I got back, John had gone and only Bob was still there. We had a brief chat and then he also left, leaving me to see what effect the changes I had made would have.

The prop change seems to have worked a treat. Now the engine seems much smoother and I’m amazed how much difference one degree on one blade has made. I did one aborted take off run and I’m pretty certain revs at full throttle were also much closer to where they should be. So that’s that job sorted for the moment, but Kev on the BMAA forum is sending me his Arplast tool to borrow tomorrow, so I’ll check things out yet again properly next week-end.

The Mikuni change, though, made no difference and I now think I know why. MYME (which this system came off) used to have a hand primer bulb in the fuel line and was obviously being operated like that. I removed the bulb because there seemed little reason for it, what with having the electric pump and also because there have been reports of primer bulbs blocking and causing fuel starvation. But the thing is, the primer bulb has a non-return valve in it. I understand that the Mikunis do not contain proper non-return valves and it’s doubtful I think, that a worn fuel pump would effectively stop fuel from flowing in reverse when switched off and under pressure. So that leaves the primer non-return valve as the only effective barrier to prevent this, and I’ve removed it. Makes sense, doesn’t it? Anyway, it’s going back in again next week-end to see if that solves the problem – better that than to lay out £50 each for two Mikuni repair kits only to find that when fitted I still have the fuel pressure problem 😕

Now what about the mag earthing? Well, I’m still uncertain about this. Earlier I’d moved the starter switch earth connection through which the mags are earthed to a different position but the engine was still not switching off. Then it occurred to me, and I confirmed it by digging out my original diagrams and cable colour codes from when I did my MYRO’s wiring all those months ago, that the RPM gauge shares the same earth connection on the back of the starter switch, and that of course is working. This says that the earthing must be good in that case, leaving only the final possibility that the problem must therefore be inside the starter switch. This did not come as a great surprise actually, a I know that when I wired up the switch and indeed the whole of the panel, I took very great care and checked that everything worked as it should. The only mystery now is why has the switch failed after doing that? Anyway, I now need to get hold of a replacement twin-mag rotary starter switch. They can be a bit pricey, though, but there’s nothing else for it.

I’m working my way slowly through the problems but it’s a rather tedious process that’s taking me longer than I might have thought. However, each little step is taking me closer to finally getting MYRO into the air. I just hope that when I finally do, we still have some good weather 🙂

Not such a disaster after all

I bought some new plugs on Ebay earlier in the week, a box of 10 so I’ve got a spare set just in case. I carefully gapped them before leaving for the field and when I fitted them I realised that the leads from each mag are already crossed and are in pairs ready to go straight onto the plugs. Stupidly I didn’t notice that previously and had crossed them again, so I had both leads from each mag on the same cylinders. No wonder it ran rough last time 😯

This time the engine started immediately with plenty of power and ran perfectly. Great 😀

Also all the temp gauges that I’d carefully wired up and checked are in fact working just as they should. I was too impatient last time and they just needed time to come up 😉

But there was still no fuel pressure indicated when the engine was running, although the two Mikuni fuel pumps are producing enough to keep the engine running indefinitely. When you switch the electric fuel pump on with the engine stopped, pressure comes up but falls away again when the pump is switched off, so pressure is being lost somewhere. I haven’t noticed any leaks so I think that one or other of the Mikunis has an internal leak. I even detached and bled the tube running to the pressure gauge by switching on the pump and allowing fuel to run into a container so I don’t think it’s air in the system, which I suspected might be the cause. As a last resort I may have to buy a couple of repair kits for the two Mikunis – not cheap though at nearly £50 each!

But the mags are still not earthing so I will need to find out why that is. As a result I’m still having to shut the engine down by pulling the choke which I don’t like, although I know some two-stroke owners actually prefer to do that all the time because it draws oil into the cylinders when you shut down.

I also did some taxying today. I don’t think my pitch gauge was accurate enough because it isn’t as smooth as I expected, especially when you close the throttle. Having said that with nobody flying because of the wind, I was able to do a couple of aborted take offs. MYRO accelerated beautifully although I think the revs were not quite up to what I want to see at full throttle, so the pitch must be a bit coarse. But the prop seems to whip when you shut the throttle quickly. I don’t know if that’s a feature of the Arplast but I haven’t noticed it before when flying with the wooden GSC two-blade prop, so I’ll have to look into that. I will definitely need to borrow a prop pitch tool, I think.

So my jobs tomorrow are – try the spare Mikuni I have to see if it solves the fuel pressure problem and try to find out why my mag earth connection isn’t connecting. All in all, not as bad as I originally thought, I’m glad to say. I might be flying a bit sooner than I reckoned after last week end 🙂

Back down to earth with a bump

After the successes of yesterday, I allowed myself to be carried away by a sort of euphoria that had me convinced that taking to the air in MYRO was just around the corner and today I allowed that to cloud my judgement. I put 200ml of two-stroke oil in a jerry can and on the way to the field, I added 10 litres of unleaded with the idea that when I arrived, I’d try starting and running the engine for the first time.

I shouldn’t have done it because I hadn’t even bothered to check whether the spark plugs that were fitted were the correct ones let alone that they were clean and gapped correctly. All I know is that they were in there when I acquired the engine and I got Bob to torque them in without further ado. Then I gave the engine a few hand turns.

I added the fuel to the tank and was rather disappointed to see how slowly it transferred from the main to the second tank. Mike who sold me the tank said they found it slow when they had it but I have to say that it was slower than I expected. Then I climbed in, turned on the master and switched on the fuel pump. It rattled away but failed to produce any fuel. I was going to call it a day but Bob suggested turning the engine a few times on the starter to see if that might help. So I did and then tried the fuel pump again. This time it did its job – clever Bob. However, I expected to see the pressure comfortably exceed 0.2 bar but it only just made it. Anyway, I set the choke and gave the starter a whirl. After a few turns the engine fired and started but never ran anything like it should have. It was far from smooth and there was no fuel pressure unless I kept the pump on. Not right at all. I managed to get the engine running fairly smoothly at about 3000rpm but I couldn’t get the revs to rise any higher and I still had the fuel problem. I kept it running to see what would happen with the temperatures and then had a major disappointment. Bearing in mind that I’d carefully re-wired MYRO using MYME’s wiring loom and double checked everything along the way, I was really disappointed to see that only one of the two exhaust gas temperature readouts seemed to be working and neither of the cylinder head temperature readouts. What on earth can have happened to cause that. But even worse was to come. When I shut the throttle and switched off the mags, the engine kept running. This was terrible news. Strangely, Chris my GST examiner had asked me how I would shut down an engine that would not stop on the mags and now here I was barely a few days later having to do exactly what he suggested – apply the choke. It worked, but the problem suggests to me that there is something seriously wrong with the magneto earthing, on one cylinder at least anyway.

This is not a good development at all. I’ve already ordered up some new spark plugs but checking the wiring out is not going to be an easy job now that the panel and wiring loom are in place. But I’ll just have to do it.

After this what can only be described as a debacle, unhooking, untangling and reattaching the rudder cables was a doddle and it was good to see MYRO’s ailerons sitting exactly even and feeling just the way I remembered them. But these engine problems are now going to put me back yet again, probably by another two weeks at least. I wonder when I’m ever going to be able to start flying MYRO at this rate.

And before leaving for home I’d wanted to cover MYRO with my new tarpaulin that I’ve had for quite a few days as we’re expecting some rain in the middle of the week. No chance. Because of the wind, if I’d tried to do it alone, it and I too probably would have ended up in the next field, so I wasn’t able to do that either.

I was not in the best of moods when I left for home. Big problems at Linton are becoming a bit too much of a regular occurrence 😡

To finish off, a few more pics that I took today that put me in a slightly better mood – just 😯

null

null

null

null

Dratted birds

A few off-topic musings that came to me while I was walking the dog this morning and which I posted about on a forum of which I’m a member.

null

The roadsides and other green areas of the estate where I live are peppered with cherry trees. I guess when the original planners conceived of the idea they had visions of the glorious display of blossom in the Springtime and they were, of course, quite right. The magnificent spread of white and pink is indeed a joy to behold and especially uplifting to the spirit after a long and dismal Winter such as we had to endure this year.

But there’s one factor that the planners either overlooked or ignored. This year the conditions have been almost perfect, with a damp Spring followed by a glorious hot period that has resulted in a bumper cherry crop. They are almost all of small varieties that you wouldn’t like at twice if they were on sale in a shop but nevertheless this year they are delicious. And nobody ever bothers picking any.

Except for the birds that is. They love them. Even if any human did bother picking any from the lower branches they would still be left with the majority of fruit that is out of reach at the higher levels. And they take good advantage of that. They take great pleasure in devouring this at high speed and beginning their unique process that converts the fruit into a product that varies in colour from deep purple to garish red. This they then promptly deposit over the waiting cars that have been parked by loving owners below them, in waiting for the moment.

They make no distinction – the most expensive Mercedes is treated in exactly the same way as the most rusty old banger, sometimes the Mercedes might even receive two or three pot shots while the old banger might go completely unscathed. But woe betide the owner who, if their beloved motor is on the receiving end, ignores the fact because this stuff is like battery acid and will eat through your paintwork in a trice. How the birds’ backsides stand it I’ll never know. Luckily, I don’t have an expensive Mercedes, only an old Honda Accord, so I don’t have to worry to much when the birds wreak their vengeance on it 😉

A successful day

The scorching hot weather that we’ve been enjoying in the south for the past couple of weeks or so looks set to continue for quite a few more days yet and although we’ve been told to expect some light showers on Wednesday, the temperature is still expected to stay pretty high. I bumped into a lady while walking the dog this morning and she said although it’s hot here, she’s just returned from Germany where they have temperatures of 38 and 39 deg C and without the breeze that we have that helps make it more comfortable.

Today was the day for the proper test of my patent prop pitch gauge and first of all I had to move the garden table to find a bit of shade where I could do the work. Here’s a shot showing everything laid out ready to start.

null

I’d had to take a bit of a ribbing about my gauge from my mate Terry Viner on the BMAA Forum but I didn’t mind that in the least. The proof of the pudding and all that 😉 Here’s another shot that I took of the gauge in use.

null

Actually I’d finished by then and I’m delighted to say that it seemed to work an absolute treat 😀 I was amazed how easy it was to set the prop up and how quickly I was able to do it. I’d finished within 10 or 15 minutes which I found incredible. And from what I could see, the pitch on each blade looked to be very consistent, although I won’t know for sure until the engine is run and I see what revs I get on full throttle and whether there’s any vibration.

My next job this morning was priming my new battery that was delivered a couple of days ago. It’s a small Varta motorbike battery and was recommended to me months ago when I asked for advice on the BMAA Forum. I got it from Tayna Batteries and it only cost around £25 so it wasn’t worth taking up the offers I’ve had from time to time of second-hand ones. The battery is a sealed unit but the acid comes separately. I wondered for a while how to get it into the battery itself (I’m sure there were instructions but they weren’t immediately obvious) and then I realised that you invert the acid containers (all six of them, one for each cell, which are joined together) over the battery cell openings then press down so the containers are pierced allowing the acid to flow into the battery. Then when done, you press the rubber seal into place and that totally seals up the battery. Ingenious.

Then I was off to the field. Bob and Paul were there sitting in the shade with, would you believe, two electric fans running powered by a small generator 😀 I left them to their brews as I couldn’t wait to get MYRO’s prop on. The guys came down to lend a hand a bit later and Bob loaned me his torque wrench which is smaller than mine and possibly more accurate, to run the main prop retaining bolts up. I have a feeling I’ve over-torqued the prop blade pinch bolts which only need to be at 6 ft-lb but I’ll leave them now they’re done. I think my torque wrench may need a bit of ‘exercise’ as it hasn’t been used for such a long time. It’s well-known that torque wrenches need to be regularly used for them to retain their accuracy and that’s the problem with mine I think. It’s not permanent, it just needs to be operated a bit. Then I fitted the battery and connected it up. I knew it would work because I’d tested the basic electrical system at home when I’d finished it but I still couldn’t resist seeing the warning lamp light up when I turned the master switch on and hearing the fuel pump click into action when I operated the switch 😉

All I then had to do was refit the wing join top and bottom covers and MYRO was finally finished. I said to Bob later when I left to drive home, it’s the first time that I’ve left for home and left a fully complete aircraft behind! Here are the first shots I took of a now complete MYRO.

null

null

null

null

It was a great feeling to see how far I’ve come with MYRO and to know that now the end of the project is so close. But not quite! I found that somehow I hadn’t noticed that when I uncoiled all the cables that had been wound together in MYRO’s fuselage, one aileron cable was still wound across the rudder cables. So that’s my job for tomorrow. It won’t take long, just to disconnect the rudder cables, untangle the aileron cable and reconnect them. Bob was saying today that he couldn’t understand how I could fit the prop today and not want to start up the engine! Well, I was going to keep the fuel tanks empty until MYRO had been weighed as part of its permit inspection but maybe I will take a few litres down with me tomorrow and give in to the temptation 😆

A triumph of function over form

I’ve been trying to borrow a prop pitch gauge for ages now but although I thought I had one lined up, it hasn’t materialised. Ginge over at Saxon Microlights has one but we don’t know if it will work with my prop. The same goes for Bob. His is for a pusher arrangement anyway so it may not work with my tractor prop, although I don’t know for sure if there’s a difference.

But anyway, I really want to put the prop on tomorrow as I’ve now bought a new battery and with the prop fitted, MYRO would be more or less ready for inspection. I was searching the Internet over lunch for topics to do with pitch gauges and came across a very interesting article on how to make your own. It was actually for model aircraft builders, but as they said in The Flight of The Phoenix, the principles are just the same. The article described a design that was relatively quite elaborate with an adjustable protractor so it could be used to adjust pitches over quite a range but I realised that what I need is something far simpler, just the ability to set my prop blades to one specific angle. It got me thinking.

My prop is a 3-blade Arplast of 165cm diameter. The ‘rules’ in the form of what is called a ‘MAAN’ to which I must strictly adhere in order for my set up to be approved, are quite specific. I must set my blades to a pitch of 14 degrees at a radius of 53.5cm. The more I thought about it the more I realised that using a similar method to the one I read about at lunch time, this is actually a lot easier than it sounds.

All I needed was a flat board about 70cm long with a raised block that the prop hub could be mounted on at one end with all three prop blades in place and a line drawn across the board at the 53.5cm position at which a 14 degree wedge could be positioned. Then for the first blade, with the pinch bolts loose enough so the prop blade could be rotated in the hub, all that I would need to do would be to position the wedge on the line and rotate the blades until they sat tightly on the sloping face of the wedge and then tighten the blade pinch bolts. With the process repeated for the other two blades, that would be ‘job done’. Piece of cake 😀

It isn’t often that you can conceive of a plan such as this, find the odd materials that you will need in your garage, set to with saw, drill, screwdriver etc and end up with a finished article that works as planned. But that’s what I did this evening and it only took an hour or two! The most accurate part was making the 14 degree wedge. For that I used an engineering adjustable protractor that used to be my father’s and I’ve had since I was small boy, to mark a line at the correct angle on a suitable piece of timber and then I carefully cut down the line using a hand saw. I completed the job by planing the sloping face to make it nice and smooth.

Initial tests indicate that it works like a charm – but that’s not surprising because it’s so simple, what can go wrong? It was getting dark by the time I finished but here’s a pic showing the gauge in all its glory with a blade and the wedge in place showing how the 14 degree setting is achieved.

null

It may not be very elegant but who cares if it does the job. I think it will – but I’ll find out for sure tomorrow 😉

On the home straight

I had a couple of little bits of luck today. The first boat chandler I phoned this morning at Wateringbury said they’d be open all day and that she had a selection of stainless steel shackles in stock. So after I’d got myself sorted out, I dropped into Portguide Marine at Bow Bridge on my way through. What a very nice lady she turned out to be. When I saw the shackles that she had available, they were all a bit too big and chunky for what I wanted and intended more for larger river boats than small sailing dinghies, which is the kind I was looking for. I happened to mention that although I was going to buy two matching shackles in fact I only needed one and that was only because the clevis pin and safety ring had been lost from the one I already had.

She then nipped smartly round to the rotary display rack that I hadn’t taken much notice of up to then and started pulling blister packs of replacement clevis pins off it to compare them to the one I was holding. She even ripped a pack open to take a closer look. It turned out that there was a pack of two clevis pins on there of exactly the same size as mine – £1.70 + VAT complete with rings. I apologised that I couldn’t spend more with her as she counted out my change and then off I went. What a bit of luck and what a Happy Bunny I was 🙂

I didn’t bother untying MYRO and pulling it out because with the nose and tail tie-downs left on I could clamber around inside without fear of it tilting and over-balancing in either direction. I’d already attached the external aileron cable connections and all that was needed was for me to attach the two inner ones. I did the first one without too many problems and Bob arrived while I was getting ready to do the second. That was another bit of luck because I knew that the last connector would be the biggest problem because of the tension in the aileron cables.

I propped both ailerons up to minimise the tension in the cable run as far as possible and struggled for a bit to connect the last shackle, but without success. So I then decided to stop for a cup of tea and a chat. Afterwards Bob said that he’d come down to give me a hand to do the last connector but before he did, I realised that if I disconnected one of the external aileron connections it would then be easier to connect the one I was having problems with inside the aircraft, because the aileron cables would then be totally slack. That would also mean the last fiddly one would be on the outside where I could easily get at it. It worked like a charm, so it shows that it pays to use your brains before starting the job rather than after.

When Bob came down, I removed the prop from under the aileron on the side that I’d disconnected and asked him to gently lift it. He did and I had the last shackle fitted in a couple of seconds. In many ways this was a bit of an anti-climax because with that shackle on, bar the prop, it meant that MYRO was at last fully back in one piece for the first time since August 2008. It was great to move the stick from side to side and see the ailerons moving up and down as they should – quite an occasion to celebrate 😀

All I could do then was tidy up but I had to take a few pics, of course, to mark the occasion. If you compare the next shot, below, with the last shot from the previous post, you’ll notice that for the first time since the wings went back on, the ailerons now don’t both droop downwards but instead line up as they should.

null

The next two shots show that MYRO is at last beginning to look like a complete, flyable aircraft, just the way it should.

null

null

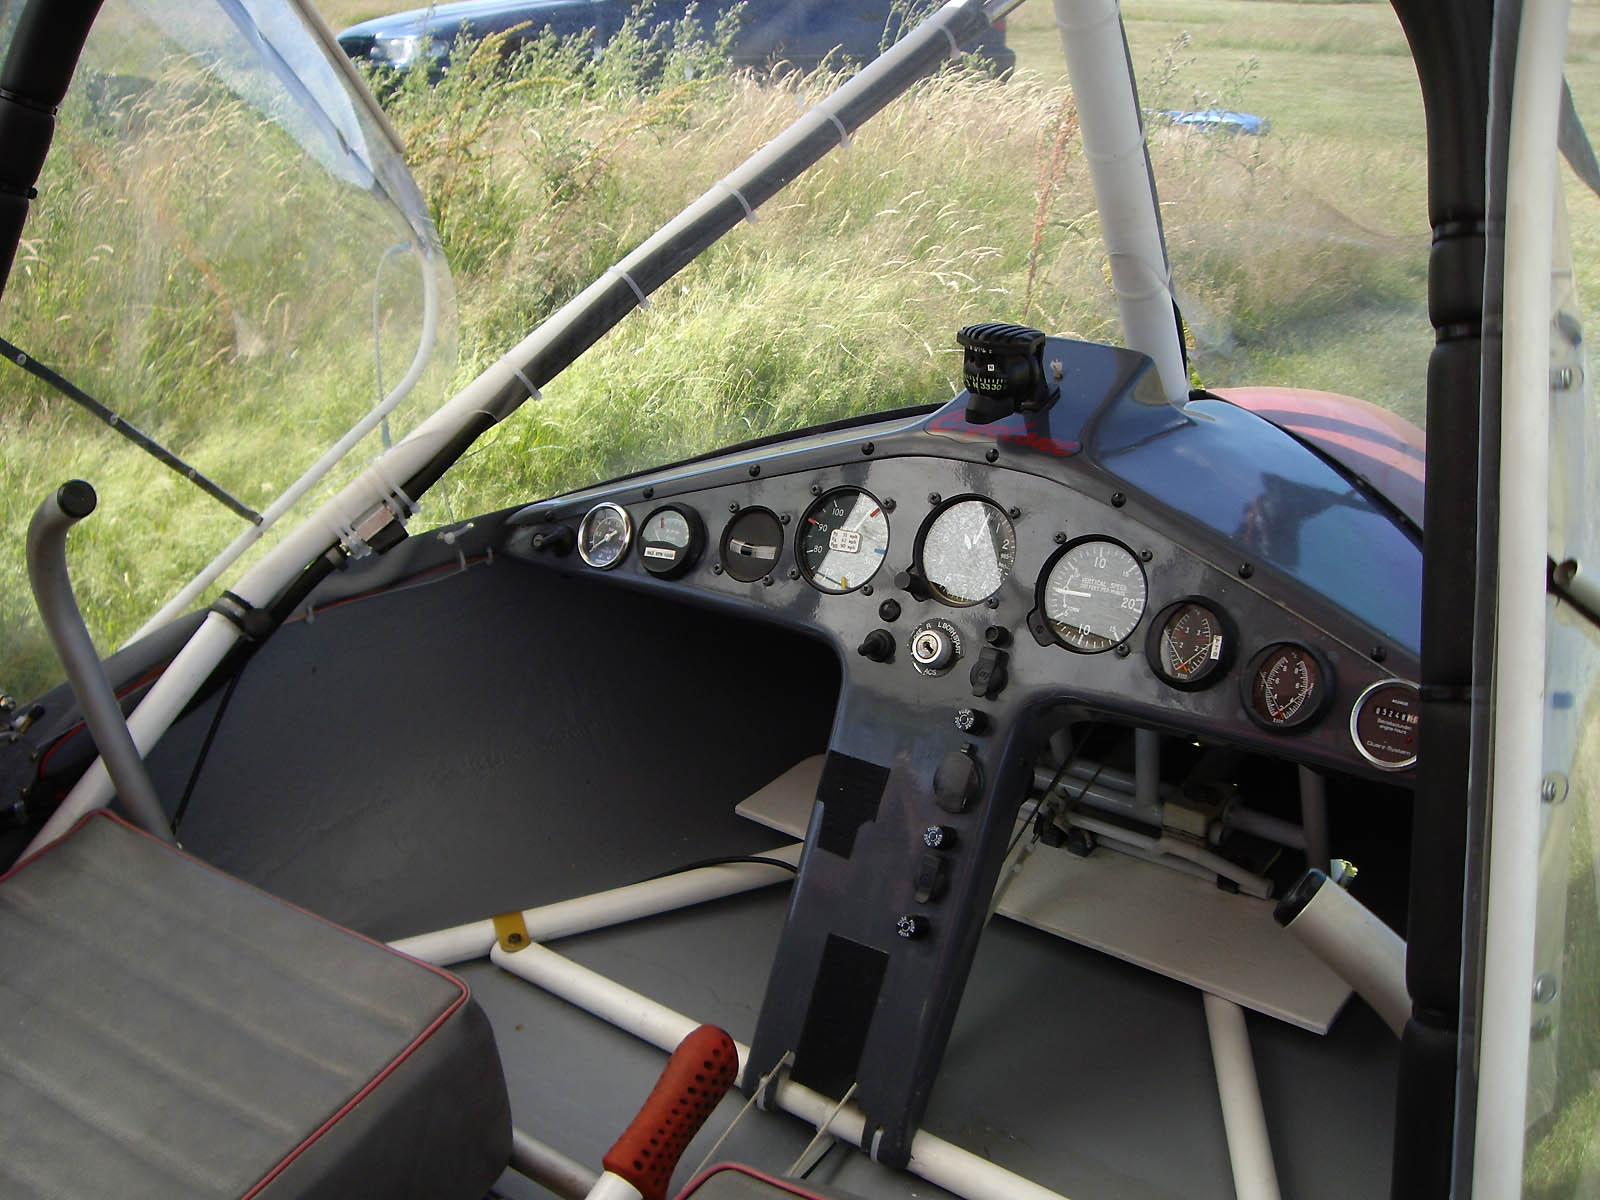
The next pic is the first shot I’ve taken of the new panel since the wings went back on. All of the panel shots taken up to now with the wings off have given a totally wrong impression because of the amount of light entering the cabin. With the shadow produced by the wings this shot shows much more what it will be like flying MYRO with its new panel.

null

We’ve had a strong, gusting south-westerly wind today (the last thing you need really, when working on ailerons…) so before I secured MYRO’s doors to go home I took a strong bungie cord and used it to lock the control stick so it was held down and was also unable to move from side to side. That way the wind will not be able to damage any of the control surfaces by banging them up and down. The final shot I took from the rear shows the ailerons now nicely lining up with each other.

null

So what’s left to do? Not a lot now. The remaining biggest and most important job is fitting the prop and aligning the blade pitch, but with the right tool that should not take too long. Then all I have to do is tidy up the little digs and nicks in the fabric, do the paperwork for the Mods that now apply and make the placards that must be on display in the cabin. Then MYRO will be ready for inspection and permitting. Yes, I really am on the home straight now, with the finishing line almost (but not quite) in sight. 😉

Nice surprise for a change

I phoned Bob late morning to see if he knew whether anyone planned to be at the field today. The reason was that to get MYRO’s wing back on I now know it can be done in just a few minutes if you have a couple of helpers. He said that Robert might be along later in the day but otherwise as far as he knew there would be no one else there. I felt like going anyway just to feel some fresh air on my face so after I’d finished a couple of things I had to get done, I set off.

When I got there I found that Bob and Tony had flown off earlier and were still away so I went down to make sure that the tarps covering MYRO hadn’t moved and the tie-downs were still taught. Everything was fine and while I was pottering about, Robert turned up. Apparently he’s got an altimeter problem on his Easy Raider. Poor Robert’s had a bit of a bad time of it over the last couple of months. First he had an engine problem that after a lot of messing around he diagnosed as problem with a split or perished rubber tube and now it’s his altimeter. I hope he manages to sort it out – if he can’t he’s thinking about fitting a digital readout gauge which will be interesting.

Then John arrived. He came down for a chat too (I’ve said before many times, it’s one of the best bits about flying microlights). I said that I was now planning to get MYRO’s wing on tomorrow and they both said, why wait! Now that was an offer I could not refuse, so while they chatted together, I pulled MYRO out and got everything ready.

Sure enough, within a few minutes, now I know how to do it, the wing was back on. The next shot was taken after the wing and all the struts had been fitted and the one after, after I’d fitted and connected the pitot (the open-ended small tube fitted to the front strut on the left wing) in which air pressure is created when in flight that produces the airspeed readout.

null

null

When both wings are attached, there is a gap between them. There are a number of webbing straps that span across the gap top and bottom and when they are pulled taught they apply tension and pull the fabric tight on both wings. Then top and bottom fabric covers are fitted attached by Velcro. The next two pics show MYRO with the covers off while I was still working and then with the covers on when I’d done everything I could for today.

null

null

Here are a few more pics that I took in the early evening before I cleared up and went home. The covers make MYRO weather-proof and as we are not expecting any rain tonight anyway, I didn’t bother to put the tarpaulins back over MYRO today.

null

null

null

I connected up the aileron control cables on the outside quite easily but I decided it was time to wrap things up for the day when I went to connect the aileron cable that’s inside the aircraft. The reason was that it’s connected by a shackle at each end and one of the shackle pins and its safety ring had been lost. I need to check, but there are some boat chandlers at Wateringbury and Teston Lock who I’m sure will be open tomorrow on my way in to Linton. If so, I’ll just need to buy a couple of new stainless shackles of the right size, and Bob’s your Uncle 😉

When I’d tied MYRO down I was so pleased to see it looking like a complete aircraft at last and took this last pic for the day.

null

If I can get the shackles I need tomorrow, I’ll actually be able to get MYRO all finished bar fitting the prop and I can’t do that yet because it needs a prop pitch adjustment tool. But it was a very nice surprise to get done what I did manage today because I’d mentally resigned myself that tomorrow would be the day for getting the wing back on. How nice it was to actually see it on this evening when I left for home 😀

From bad to worse and back again

This has not been a very enjoyable week-end by any means as what I thought would be a day’s work to deal with the problem bolt eventually took both yesterday and today to complete. It also felt as though every step was beset with problems and I have to say that compared to all the work I’ve done on MYRO over the many months previously, including the ‘biggest’ and ‘worst’ jobs that I had to tackle in that time, the work over these last two days has been by far the worst.

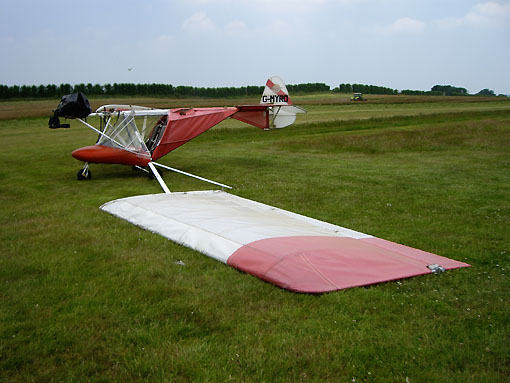
I arrived at Linton yesterday at around 11.30am and with the prospect of a hot one ahead of me, the day was already beginning to warm up. I had a quick cuppa with Bob and Tony and an early lunch while my hands were still clean and then got cracking. The first job, which I needed a bit of help with, was to remove the left wing and this is how poor MYRO looked afterwards.
null

null

So far, so good and by now it was beginning to get pretty hot. I had to keep working though, otherwise I would never get the job done. First I removed the aileron and then I pulled out all the wing battens and carefully laid them out in order to one side. Battens are lengths of aluminium tube that are curved at one end and pushed into tubes called batten pockets that are incorporated in the fabric of the wing covering. Much as weight-shift microlight wings in particular are referred to as sails, battens and batten pockets are another hangover from the world of sailing. The function of battens is to give the wing the profile that it needs to produce lift as it passes through the air.

Anyway, because of MYRO’s age and also because the wing fabric is Ultralam, a plastic/fibre laminate material that becomes a bit harder and brittle with age, ideally one would not want to remove the battens unless there was a special reason. Obviously on this occasion I had no choice because of the need to remove the wing covering to get to the bolt.

With the battens out and a strut that passes through the underside of the wing fabric released, I was able to pull the wing fabric down towards the wing tip until I got to the offending bolt. I then realised that in the process, the bolt had fallen out inside the wing, together with two essential plastic spacer washers. I managed to locate the bolt but I was never able to find the washers and that therefore presented me with a problem. Without the washers I couldn’t reassemble the joint that the bolt secured.

I looked around MYRO and decided that the best option was to remove two plastic washers from a rudder cable connector because I could replace them at any time as they are fully accessible. So I removed them and got back to the bolt. I put one washer into place but then found that the second one was too thick so I had no option but to try and thin it down a bit. All the while it was getting hotter and hotter and although I’d brought a flask of iced orange squash with me, I was rapidly working my way through it even by this stage. John the other AX3 owner at Linton, has a small bench in his hangar and I started rubbing the washer like mad on a sheet of wet-and-dry paper, which is all we had, on it. I’d been going for what seemed like ages but could only have been 10 or 15 minutes and the sweat was pouring off me. But worse, the amount of progress was negligible because the wet-and-dry was far too fine.

It was then that Bob had a look inside his tool box, never thinking he would have any plastic washers let alone any of the correct size, and found some. I was mighty relieved I can tell you. I gratefully took them and headed back out into the heat of the day to finish the job off. Or so I thought.

I got the bolt and joint secured and then had to refit the wing covering. That wasn’t too bad though, accompanied by regular swigs of my rapidly depleting orange squash, and I was constantly spurred on by the thought that everything I did brought the end of the job closer. I could even see myself getting the wing back on again by the end of the day, never for a moment realising how hopelessly optimistic this would prove to be.

With the wing covering back in place, all that remained was to replace the wing battens. The first one, followed by another and another…I was delighted how smoothly it was all going. And then, of course, it happened. The fourth from last, about five or six feet in from the wing root, didn’t slide in smoothly. I gave it a bit of a push, obviously too hard with hindsight, and there was an ominous ripping sound. I turned the wing over and although the main damage was inside the wing, there was the tip of the batten sticking out through a small hole that it had made in the underside of the wing. I was absolutely mortified and highly fearful of what might have happened inside the wing. John came down to see how I was getting on before he left and I told him what had happened. His excellent advice was very simple. ‘Roger, it’s late, you’re very hot and very tired. Put it away and come back to it tomorrow and it probably won’t look half as bad as you think’.

So that’s what I did. By the time I’d moved MYRO back to its parking spot, tied it down and covered it and the loose wing with tarpaulins for the night, not only was I exhausted but I also felt physically sick. It was then that I realised that I’d probably got a touch of sunstroke.

After a surprisingly restful night, I awoke early this morning and after picking up a few things, like more orange squash to fill a much bigger flask, and some long-life milk for our tea, I headed off to the field. When I arrived, Lee who has a Quantum had flown out some time ago with a passenger so before getting started I opened up the hut to get some air into it as the day was already very hot. I decided that I wouldn’t make the same mistake as yesterday and that I’d stop for a long break when the sun was at its highest and for shorter ones when I began to feel really uncomfortable. I’d made a plan of how I’d proceed. I thought that with the wing laid out on the soft grass, I’d remove all of the battens along from the problem one up to the wing root, then carefully crawl inside the wing and inspect the internal damage. So that’s what I did and I was delighted to find that despite the horrendous ripping sound, all that there was was a batten sized hole in the batten pocket through which the batten passed every time it was inserted. With me inside the wing to guide it, if someone carefully pushed the batten in, once I’d got it over the small hole, then it would slide into place as usual.

Lee gave me a hand after he’d finished putting his Quantum away and the job only took a couple of minutes to do. I’d had to pull a pin out of a wing strut and turn it a bit, as I’d done yesterday, to free the wing covering up enough to do the job, but as this only took a few minutes to refit yesterday, I thought that I’d soon be finished. It didn’t take long to refit the aileron – only three bolts with wing nuts and safety rings. Then all I had to do was refit the aforementioned strut.

Now I don’t know whether it was due to the heat, which had been exceptional all day, or what, but lining up the holes and spacer washers and refitting the pin that holds it all together was a nightmare. The wing seemed to have twisted somehow taking the holes totally out of alignment. In fact what took minutes yesterday was almost impossible today. Bob said to go away and leave it for another day, but you can’t keep doing that or you’d get nothing done. I tried carefully lifting each corner to induce a kind of twist in the right direction and eventually succeeded. I guess what took a couple of minutes yesterday must have taken two hours or more today, and in the most intense heat as well. But at least the job was done.

I still, of course, have the little hole punched through by the batten in the underside of the wing, but this is not serious, just cosmetic. With a small patch on it will be almost unnoticeable. But the wing is at last ready to go back on, and I at least had that as a source of satisfaction as I pushed the wing over the soft grass back beside MYRO and covered it with a tarpaulin.

null

Surely my misfortunes must now have come to an end? I’ve had enough of them since bringing MYRO to Linton, that’s for sure, and none of them of my own making. Whoever, banged that bolt up into the wing has caused me so much grief and so many problems. But now with a bit of luck, MYRO should come together completely next week-end. It’s still a two week delay, though, when I’d been hoping to be getting MYRO permitted while my licence paperwork was being processed. I’m very annoyed and disappointed by how such an apparently trivial thing escalated and escalated until it became a major problem. And all so needlessly.

Done and dusted

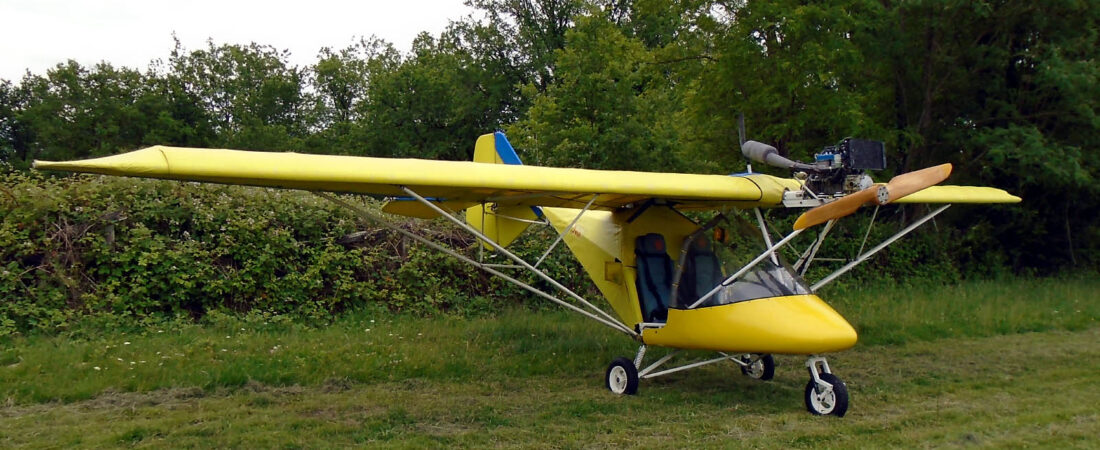
Today was the big day. I had an early night and felt much more refreshed this morning than I did yesterday. Rosie and I did a quick 40 minutes before the GST proper and apart from getting caught out on approach when returning to the field and having to go around (mind you, we did try cutting in very early from the downwind leg as an experiment and there was just too much lift around to get down), my flying was much better and tidier today than yesterday.

My Examiner Chris Childs flew in in a Quantum flexwing from Stoke and perish the thought that I’d ever mention that he got caught too by the same bit of lift for the same reason and also had to go around, so I won’t 😉 After a brief but thorough briefing off we went in MZEL.

null

For me it was 1 hour 30 minutes of pure fun. Chris was great company and I really enjoyed myself. Learnt a lot too – shows how useful it is having sessions with different instructors. Chris used to own and train in an AX3 and knows what it can do. As a result he demanded 60 degree 2g turns that made your bum press hard into your seat and his extreme attitudes were – well – extreme! I won’t make any assumptions about my flying but all I can say is that after a very thorough session, I was told that I’d passed 🙂

Thanks to Rosie my instructor for preparing me for it, many thanks to Joan Walsh of Saxon Microlights in Essex for finding the change in the rules that allowed me to take my GST earlier than I might have previously expected and thanks to Chris again for taking me through the GST in such a professional yet enjoyable way.

So that’s that milestone reached. I’m tired but happy after the most demanding just over two hours of flying that I’ve had in a day, for a very long time. Now I can focus my attention fully on MYRO and getting it finished, permitted and flyable, because then I’ll be able to fly as much as I want, whenever I want. That’s what the freedom of microlight flying is all about. You just need a bank account that can stretch as far as you need it to 😀

GST day -1

I’d arranged with Rosie to do another pre-GST in advance of the real thing and today was the day. Did an hour and ten minutes and quite honestly my flying was very scrappy. But I didn’t mind too much because I was tired after a late night finishing off some web site work and my legs were still stiff after last week-end. My main problem was rudder coordination and at least I have a reason why, although I didn’t make a thing of it at the time.

I say I don’t mind too much because I feel pretty confident that I will be physically on much better form tomorrow and as there were no major disasters today anyway, that can only bode well. Rosie said that although she agreed several exercises I did were more untidy than usual, I would still have got through. She suggested maybe another half hour getting into the swing of things before doing the GST. I agreed and I said I’d aim for 1.30-ish tomorrow afternoon, but I’ll have to see how work pans out before shutting shop early and just going off as there are a couple of things left un-done from today.

So this evening (what’s left of it anyway) I’ll spend some time just relaxing and then it’s early to bed so I awake bright-eyed and bushy-tailed ready for tomorrow’s exertions. I’ll do a post about it afterwards 😉

Dare I say it?

I phoned Rosie today. My GST is booked for Thursday at 3.00pm. I have to say that I’m looking forward to it. It’s going to get hotter over the rest of the week so there’s a possibility that it could get a little thermic by that time of the afternoon. That’s OK – I’m pretty much used to that now as I’ve mentioned on several occasions. But it will make accurate flying a bit more, let’s say, challenging 😀

I said that I’d like to get another pre-GST session in before then so that’s been arranged for either Wednesday morning or afternoon, depending on my circumstances at the time. Rosie said that she thought the morning would be better but I think I prefer the afternoon because then the conditions are likely to be more like what I might expect the same time the following day.

The light at the end of the tunnel is getting ever closer – I just hope it isn’t attached to the front of an oncoming train 😆

A day of mixed fortunes

Today was the day for MYRO to start coming back together again. I haven’t seen MYRO with wings on since I last flew it back in Summer 2008 so I was really looking forward to achieving a real milestone today. I don’t have a key to Paul’s hangar so I had to make a late morning start and when I arrived a bit before Bob at around 11.00 am, Linton was totally deserted and looking absolutely stunning. The first pic was taken from the up-slope on the northern side of the field and the second was shot directly along the main runway looking towards the west.

null

null

Bob does all the looking after of the field and I have to say that it’s an absolute credit to the work and effort he’s put in. The main runway looks a lot better than my back lawn actually 😉

I pulled MYRO out of Paul’s hangar and down to the other hangar where the wings have been stored. I decided it would be best to work down there because it’s close to where MYRO will be parked and at the end of the day when I would probably be pretty knackered I wouldn’t have far to move it before leaving for home.

I’d made a plan for re-rigging MYRO based on the instructions in the User Manual and my first task was to lay out the the various parts in the order that they’d be needed. I also had to replace an aileron bracket as I’d only done one previously because I needed the old pivot bush when I fitted the rudder and found one for that was missing all those weeks ago. Here are the parts all laid out – lucky I knew we could expect good weather today, eh 🙂

null

null

null

As well as replacing the second bent aileron bracket, I also had to re-secure the wing tensioning cables. There are two diagonal cables on the underside of each wing that apply tension between the cross-strut in the middle of the wing and the wing root, crossing over each other in an ‘X’ roughly in the centre of the wing. There is absolutely no need to remove them when removing the wings but for some reason, someone had released the inner cable fastenings. Anyway, it was a simple enough job to re-fix them with the wings on the grass and I wanted to renew the rusty bolts anyway. It never occurred to me that, having released the inner fixings, anyone would ever, ever, think about undoing the nuts holding the outer fixings as although they screw onto bolts that protrude outside, the bolts and the cable fastenings are totally inaccessible inside the wing structure itself.

This was in fact to prove my downfall, but more of that later. With the help of Paul who had arrived by now, and Bob I was able to get the wings and struts on with sufficient clevis pins to secure them. I was very, very happy when I stood back to see MYRO at last looking like more like a complete aircraft again, even if my satisfaction was somewhat dampened when I saw for the first time the several niggly little nicks and scuffs that the wing leading edges had suffered during their journey months before into Linton on the trailer.

null

null

null

null

I was surprised just how difficult it was lining holes up to get clevis pins in and I have to say that I don’t think I’d have been able to do it without my two helpers. I think it would even have been difficult with just one, so I was very fortunate that Paul had decided to drop in to give his Quik a clean and polish. I think he managed to do it even with all the time he and Bob spared me, but it must have been a bit of a close run thing even so 🙂

I then pressed on and got the jury struts on the starboard side on and with the rate of progress I was making, I had high hopes of getting both wings on, the aileron cables fitted and the upper and lower central wings covers on before putting MYRO to bed for the night.

null

null

And that’s when it all went pear-shaped. I was going around putting all the clevis pins and rings into place that I’d missed when we initially positioned the wings and struts. I’d finished the starboard side and was working on the port wing when I noticed a bolt hole in the centre underside of the port wing leading edge. When I checked I found that it was the hole that should have been filled by the cable securing bolt that I mentioned previously – the one that you can’t get access to because it’s up inside the structure of the wing.

Well it seemed that not only had someone removed the nut and washer, but they’d also tried to bang out the bolt that didn’t need to be removed anyway – into the wing. There was enough of the bolt in the hole (but only the tip) to hold the cable in tension so I didn’t notice when I secured the cable’s other end. But now it was too late. By looking through a hole in the fabric I could see the bolt standing up inside the wing but there was no way of getting access to it. Paul and I tried by removing the front strut and trying to work through the hole in the wing fabric that the bracket that the strut attaches to comes through, but there just wasn’t enough space to get at it. After Paul and Bob had left for home, I had another go by myself and actually succeeded in getting the bolt a good inch or so down. But it’s difficult enough getting three or four holes lined up to get a clevis pin to pass through when you have easy access, so I came to the conclusion that it would be impossible to get this bolt to successfully pass through that number and a cable bracket besides, when access was totally impossible. It’s obvious that the wing will need to come off to do the job, but that’s not all. To get to the bolt, the wing cover will need to come off too and to do that the port aileron will also need to be removed. In fact it will require a total wing strip down, back to the frame, probably the best part of a days’ work. All because someone tried to remove a bolt that didn’t need to be removed at all really. I feel like the proverbial football manager – as sick as a parrot, although that’s actually an under-statement.

So that’s how the day eventually drew to a close – like a bit of a damp squib. More was yet to come, though. As I mentioned earlier, I had to move MYRO into it’s parking spot which also involved shifting the tie-downs to where they were needed. They are really heavy and I found that totally exhausting after all my efforts during the day. And then I had to get some tarpaulins on to cover the gap between MYRO’s wings and the cabin. I can tell you, doing that by myself was no fun with the gusty wind having a real old laugh at my expense 😕

I eventually succeeded but it needed the best part of an hour to get everything tied down so the wind couldn’t get under the tarps and possibly damage them while no-one was looking. Here’s how MYRO looked parked up and eventually tucked up snugly for bed just before I left – at around 8.00pm!

null

null

null

null

I was thinking about the job to come during the drive home – which is to take two or three steps back, remove the port wing, strip the aileron off, remove the battens and cover and sort out this bolt. And then do the whole thing again in reverse. I can’t say that I relish the prospect at all 🙁

This week? Don’t think so..

Well, after last week-end’s success story and Rosie’s and my joint resolve to get a GST booked for this week with another practise session thrown-in in between, it looks as though our plans are going to be dashed yet again. Why? Same old story – high winds. Take a look at this weather forecast for the area.

Canterbury Weather Forecast

Just look at the strength of those gusts. And what’s also noticeable this year as the winds are predominantly northerly, is how chilly they are compared to previous years. But high winds are high winds whichever direction they come from, so the danger is that this year could go the same old way as previous ones have.

The forecast seems to indicate a small weather window on Friday but I don’t think I can really bank on that, not for what I want to do 🙁

But on the brighter side, if the winds are not too bad at the week-end, maybe I really will be able to think about getting MYRO’s wings on in readiness for its permit checks.

Almost there

Just back from a 50 minute GST refresher. Needed it too because when you’ve just been more or less flying around building up hours, as I have recently, you tend to neglect many aspects of flying technique. You also tend not to practise the kind of specific exercises that are examined in the GST.

It also didn’t help that it’s been a month since I last flew but taking that into account, things didn’t go too badly. My first steep turn was a bit scruffy but the ones that followed were pretty good. Same with stalling, especially steep into a turn, but they came together after a couple of goes or so. My forced landings were very good though, I’m glad to say, because funnily enough that’s something I’ve not practised a great deal. And my absolute piece-de-resistance was the landing at the end – a glide approach side slipping to lose height and finishing with a gentle greaser.

My conclusions at the end of it all were to constantly be more aware of the required attitude of the aircraft given the throttle position and the manoeuvre that’s intended, to do HASELL checks every time when a manoeuvre has been requested (and refuse to be hurried) and to shout out more that engine checks and lookout are being performed regularly.

Other than that, Rosie is trying to get a GST booked for this coming week and I’ve said when we know which day, let’s get another pre-GST in before if we can, if the weather is kind to us.

So I’m now drinking to that 😉

Grrrrrr!

I’m now becoming more than just frustrated. I’ve established that all I need to do is pass a GST to get microlights added to my lifetime PPL(A), right? So that should be OK, with a couple of hours of revision and consolidation work to get myself set up. Simple. Do that, book a GST.

So I phoned Rosie yesterday evening to crack on with the flying bit and …… she’s been away and has come back with a cold. So she doesn’t feel like flying today. And do you know what? That’ll be another week gone (at least) because this coming week is forecast as being disastrous yet again. More wind and rain.

How much longer have I got to be the owner of an aircraft that I’m having to pay out for to keep in a hangar while I’m perfectly capable of flying it, as I’ve proven in recent weeks, but be unable to do so because of Red Tape. I can now understand why some people just stick two fingers up to the system and do their own thing. Really. 😡