Check flight done

We have had a beautiful day today and are still enjoying it at the time of typing this, which is earlier than usual. The reason is that there’s a Marché Gormande at Plazac this evening which I’m going to as it’s the first one of the season.

They are great fun. The village has put out marquees for the attendees with trestle tables and chairs and on the evening, which starts at 7.00 pm, there will be lots of vendors of many different types of food and refreshments. Then you go around to see what’s on offer, choose what you want, buy some wine to go with it and sit down with your friends and enjoy it. Plazac usually has a little band as well providing music, so it’ll be good fun.

But that’s not the reason for this post, which is about the flight I did this morning in F-JHHP to check its new radio and transponder with Bergerac. Everything went just fine. I asked the controller for a radio and transponder check but he was a bit busy and just responded normally to my radio calls, so I assume that’s working OK. He also gave me a squawk code and there was no adverse response, so I’m assuming that’s OK too.

We had a QNH of 1025 today, so quite high. I seemed to detect quite a discrepancy between the transponder FL and my altimeter readout and I’ve been a bit concerned about the latter for a little while. It’s too early to say whether it’s inaccurate or not so for now I’ll just keep my eye on it.

The flight was from Malbec to Sainte-Foy-la-Grande via the Bergerac reporting points NE and NW to the north of the Bergerac zone and then from Ste Foy to Sarlat to the south. I wasn’t intending to take any pictures as that wasn’t the purpose of the flight, plus it became very thermic as the flight went on, but I did fire off a few shots.

Here’s a shot of Ste-Foy-la-Grande as I climbed out en route for Sarlat.

null

A bit further on to the east of the town I noticed this newish golf or country club, presumably where the Ste Foy wine barons go to get their weekly exercise.

null

Here’s a shot I took of the airfield at Belvès in the middle distance as I flew on my way.

null

Here’s a shot of the old town of Belvès itself perched up on it’s promontory overlooking the surrounding farmland.

null

To finish off, here’s a shot of the new panel actually in use. It shows the squawk code that Bergerac gave me which I was no longer using as I was by then back to squawking 7000. When I took the shot I was being thrown around quite a bit by the thermic bumps so I’m surprised how well it came out. As you can see, I’m not getting an oil temperature readout so I’ll have to find out why that is.

null

So that was mission accomplished. I can now go ahead and arrange an appointment at La Rochelle to get the installation checked and signed off, which you have to do here with a brand-new set up and every 6 years thereafter. Sadly, the weather doesn’t look as though it’s going to play ball during the coming week so I’ll just have to remain patient and see how it turns out. Oh, and by the way, my second new headset arrived today so I’ll be well set up for it.

A satisfying day

The new Polini primer bulb arrived today for the Weedhopper. I think it should be called the Picollo Polini because it turned out to be the smallest primer bulb that I’ve ever seen! You couldn’t tell, of course, from the pictures on the internet but it is about half the size of the one it’s replacing, so a quarter of the volume! Here’s a shot of it after I’d fitted it.

null

I didn’t start the Weedhopper’s engine today but I did try the primer out and, oh well, I guess I’ll just have to get used to giving it a few more pumps before every flight!

I had another little job that I wanted to do on the Weedhopper today. Way back in 2011 before I came to France, one of the feet on MYRO’s panel got damaged in the landing incident when I was flipped over by the wind. I repaired it at the time as the following pics show.

null

null

MYRO’s panel is now being used in the Weedhopper, of course, and that repair has lasted all this time. However, I noticed a short time ago that it had snapped again, probably as a result of being stressed differently in a different aircraft and pod, so I did another, albeit rather poor, repair in-situ.

I realised a few days ago that that repair had failed again so did another yesterday using heavy duty 2-part epoxy compound that I hope will last forever. Today I went back to the repair and used the same epoxy soaked into fibreglass matting to add much needed strengthening to the rear surface and that I’m sure will do it.

Then onto the Savannah. I’m now on the final stretch of what has turned out to be a longer journey than I expected. When I replaced its screen a couple of years or so ago I also replaced the covering material on the top of its instrument panel. I couldn’t make up my mind what to use at the time and ended up buying two types, a foam backed leatherette that I eventually used, and a fuzzy black car-boot lining type of material.

The floor of the Savannah used to have some kind of covering which was removed before I acquired it and since redoing its panel top, I’ve always intended to use the left-over car-boot type material as interior carpet as it closely matches the material that’s used in the rest of the cabin.

So that’s what I also did today. I cut the pieces out that were needed and fixed them to the bare metal floor using two-sided carpet tape so they won’t move or lift and get under my feet, and here are some shots of the final result.

null

null

null

So I’m very pleased with today’s results which bring me close to finishing the work that was needed on both aircraft. I’ll need to finish rubbing down the Weedhopper’s panel repair and put some colour onto it and then it’ll be all ready to be readvertised. Hopefully now that summer seems to be about to start (temperatures up around the 30 degrees Celsius mark in the next few days) there will be a heightened level of interest from potential buyers.

The Savannah is all ready to go now. Depending on what I have to do over the next couple of days I may fly tomorrow, which is a national holiday in France, or Friday and see if I can do my planned radio and transponder checks with Bergerac. It’ll also be great to get back up into the air in it again, both aircraft actually, and get a few landings in. I’m looking forward to it very much 😉

Wash and brush-up… and a warning!

Now that the Savannah’s new instrument panel is finished, I need to test the new avionics before I make an appointment to get the system signed off at La Rochelle. But before I can do that, I needed to give the aircraft a good clean. Both aircraft, actually, because while they’ve been standing in the barn they’d both acquired a thick coating of yellow pollen.

In the seven years that I’ve been here, I can’t recall seeing so much in such a short time, but maybe that was because only my old X-Air was in the barn for the last few years and it had plastic covers on it. Anyway, today was the day for both 77ASY (or F-JHHP if you like) and 28AAD to be wheeled out into the sun and given a good old wash and brush-up to get the pollen and other muck off (loads of mouse droppings on 28AAD’s port wing) and get them looking good again.

Here’s are some shots of my now-reduced (from three to two) fleet in the yard after I’d finished both aircraft.

null

null

null

And even though there was nobody around today to give me a hand by being on the other end with my Vertex portable, I also managed to test the Savannah’s new radio with its engine running. I had concerns that there might be something going on when the engine was running to cause interference or even some kind of signal breakdown.

The reason for that was because the last time I flew to the UK and was flying around the Solent controlled airspace, they complained that due to my signal being so bad, they couldn’t read my callsign but said not to worry so long as I remained clear of their zone. So that was not at all satisfactory and it needed to be addressed.

I did the check by myself quite simply by setting my portable up in my car next to my phone which I put into sound record mode. Then I went off into the Savannah, started the engine up and made a few test transmissions.

One of my new headsets arrived on Saturday so I was using that for the test (incidentally, the headset is in fantastic condition – absolutely like new) and I’m delighted to say that I needn’t have worried. You can hear the hiss of the carrier wave but even with the Heath Robinson set up that I was using, the transmissions were clear as a bell and completely interference free.

So that was a great relief and now I just need to run a test on the transponder. I’ve decided that now I know that the radio is OK, I’ll do a flight this coming week just outside the Bergerac Class D airspace and give them a call to see if they’ll run a test of my transponder for me. They get so little traffic, I think that they’ll be pleased to give me a hand, so I’ll see how it goes.

Now a few more shots of my fleet standing in the sun – actually, it was beating down the whole time that I was washing them and then nipped behind a huge cloud just as I got my camera out.

null

null

null

null

null

And now the warning. After I’d finished up I thought that as I haven’t flown it for a while, I’d do a short flight in the Weedhopper and take in a couple of landings. So having climbed in and got myself belted up, a gave the rubber primer bulb a couple of squeezes… and got showered with fuel!

The bulb had been eaten through by the alcohol in the fuel. I was absolutely shocked even though this is not the first time that this has happened with this aircraft. But what makes it shocking is that the failed bulb was only replaced with a brand new one a few months ago, in September of last year as I recall. This is clearly a serious potential hazard which, although I was aware of it as it happened previously, is evidently much worse than I originally thought.

I confess that the two bulbs that failed were inexpensive ones ie Chinese rubbish that were bought on Ebay and Amazon I think, and this time around I have ordered one which is a bit more expensive and branded Polini, the paramotor manufacturer. I hope that when it’s fitted, it lasts longer than the others because the last thing you want when flying at 2000 feet is to start being sprayed with fuel.

And to make it even worse, today I had to compress the fuel pipe with Mole grips to stop it because it was syphoning out of the three-quarters full tanks. Imagine having 30 or 40 litres of fuel being dumped over you while you look for a suitable field in which to land. Not very nice at all 🙁

That’s it, all done

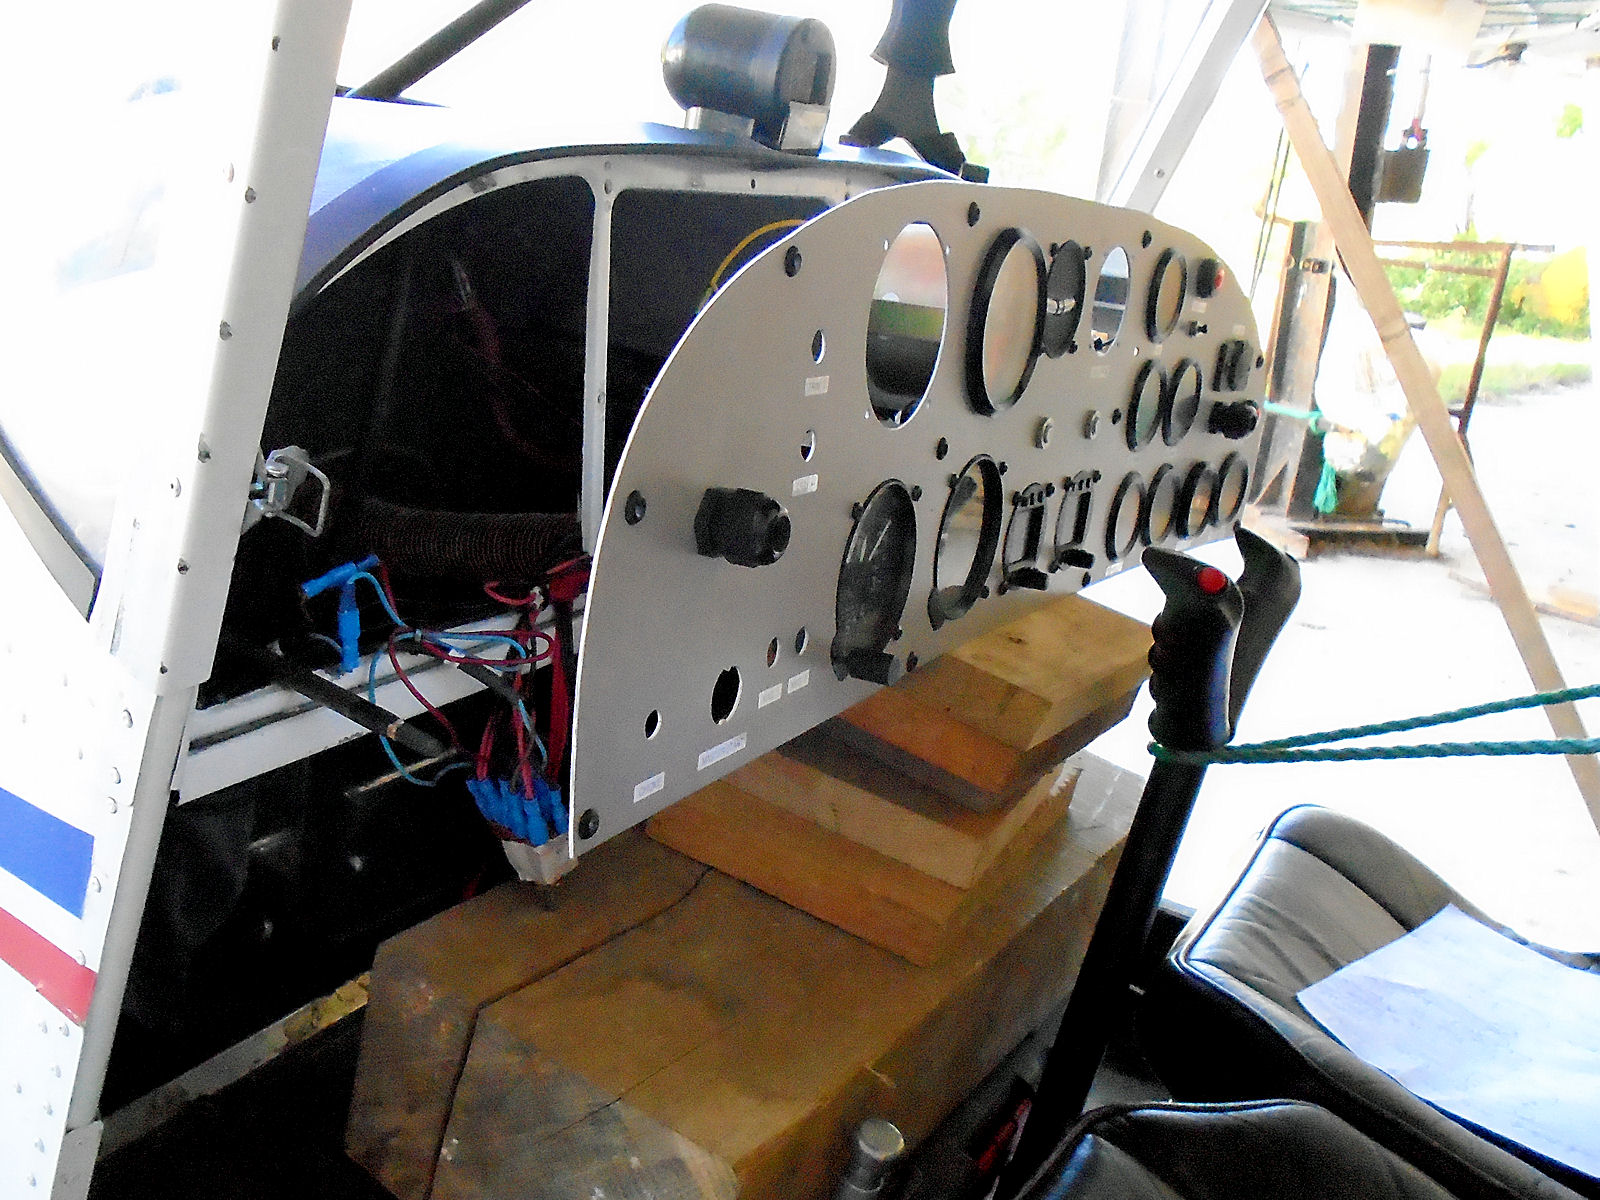
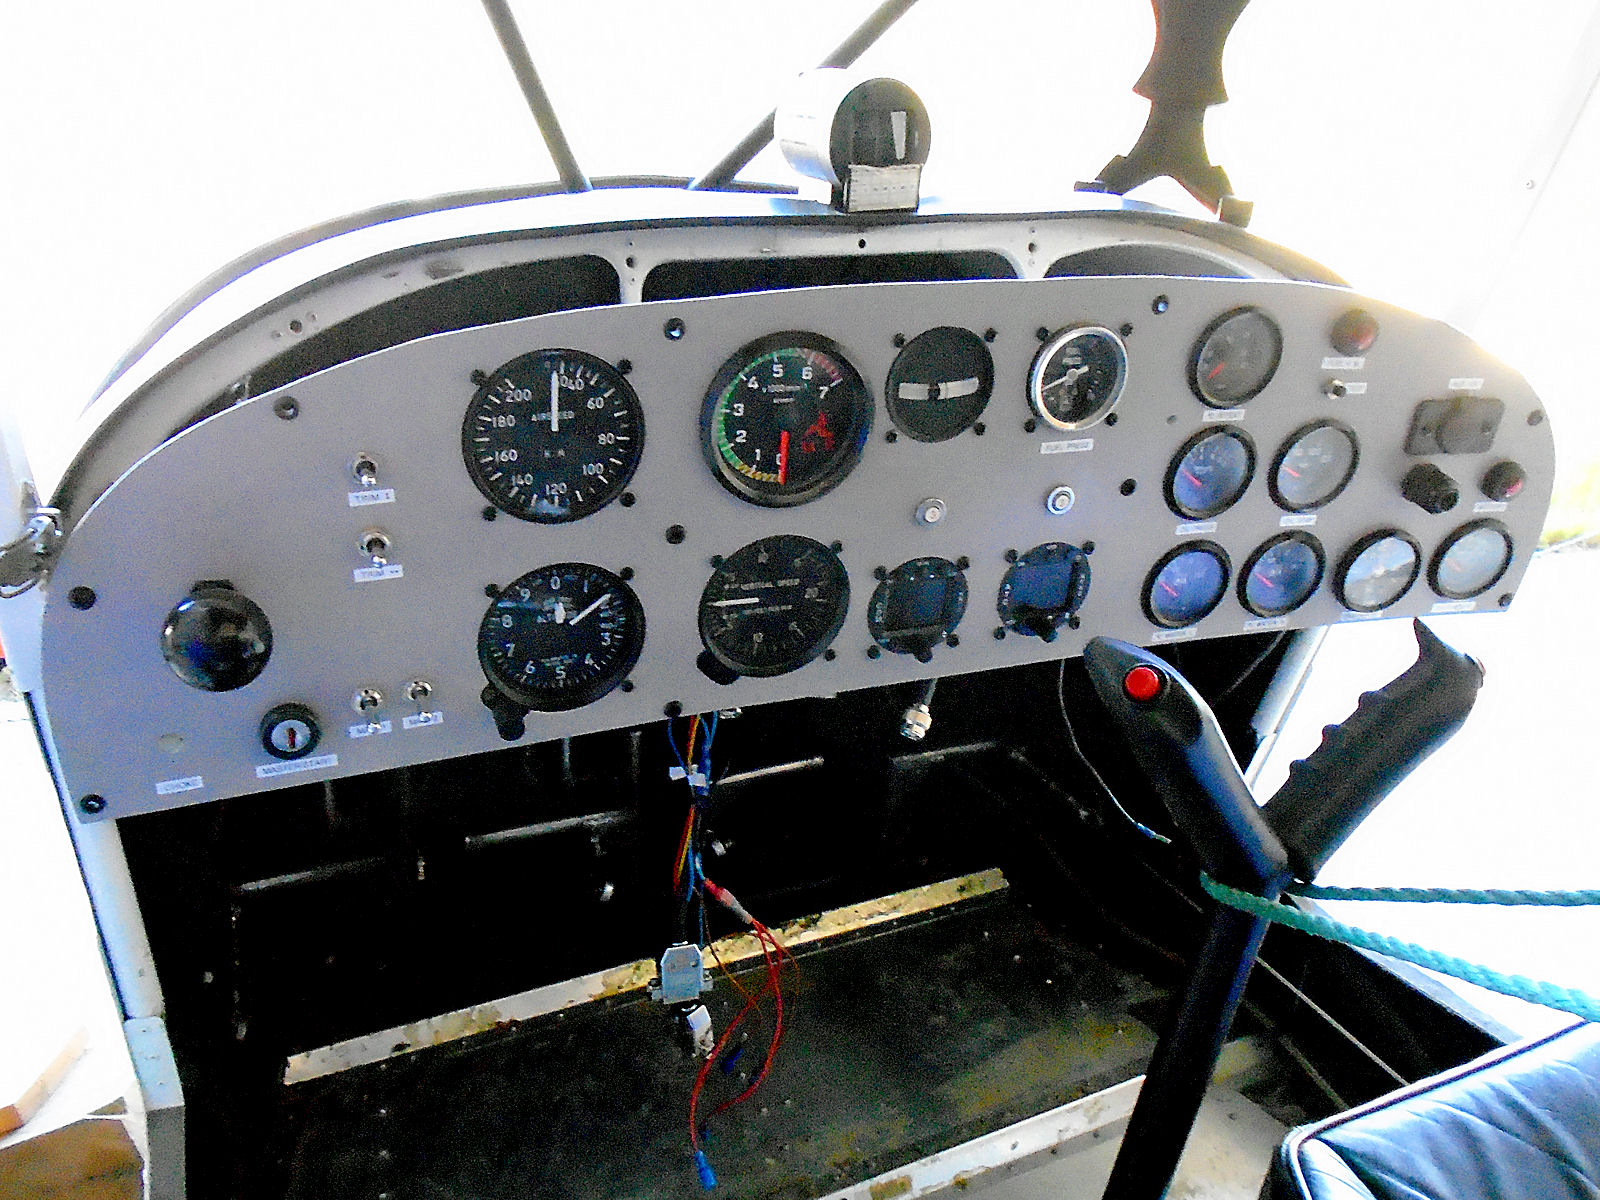
The Savannah’s new instrument panel and avionics are in and the transponder has been programmed with the code that I received this morning. Let me tell you about the latter and the tortuous process that I had to go through to obtain it that would have been amusing if it hadn’t revealed such painful ineptitude.

I mentioned previously on My Trike that in anticipation of the French habit of making what should be a simple process unnecessarily complex as a result of their love of bureaucracy, I’d sent off my application for a 24-bit transponder code well before the time that I’d actually need it. However, despite now having 7 years worth of experience, I still managed to underestimate the unique capability that French bureacrats have to complicate things.

Not unexpectedly, my letter and paperwork disappeared into a black hole at the OSAC, the organisation to whom the DGAC has delegated the issue of codes, so last week-end I found an email address for the organisation and sent off a message with copies of the paperwork and a comment that the matter was now urgent. But apparently nobody in this august organisation checks either letters or emails, so my missive again went unanswered.

Until this morning when I phoned them up and apprised them of the situation. This must be quite normal for them because the lady on the other end of the phone gave no obvious reaction and said that if I dialled another number I could speak with her colleague responsible for issuing codes directly. So I did.

The very pleasant young lady who I then spoke with asked me to email copies of my paperwork yet again and promised to send me my code ‘by return’, so I did and then waited. That was after we’d spent several minutes with me trying to take down her email address. She had a long Greek surname and no knowledge of the phonetic alphabet, so she was telling me things like ‘I for Isabel’. I still can’t decipher what ‘T’ was for, and there were quite a few of them in her name, but sure as heck it wasn’t ‘Tango’.

After several minutes I got an email back, but not one that contained a transponder code. It merely said that as my aircraft is an ULM, they couldn’t help and that I had to go to the DGAC direct. It left me wondering why it had taken 6 weeks or so to discover that when they’d been sitting on my application all that time? And why the heck couldn’t she just ask the simple question this morning, while we were speaking?

I find it astonishing that an organisation responsible for a key task that presumably they know well and do every day can’t recognise when a ‘faulty’ application is received that they then refer straight back to the applicant with pre-printed advice on what to do next. It’s understandable perhaps when a letter and stamp are involved, but not when a simple question during a conversation would settle the matter. You find this time and time again in France, it’s maddening and the conclusion that you have to come to is that they just can’t be bothered. Very sad.

And so began lap two, starting with a phone call to the DGAC at Merignac and now the game got tougher because instead of a person answering the phone, you just get a recorded voice giving you a list of new numbers to phone with no indication whatsoever as to what each number covers. So having a choice of Drone/ULM Licencing, Safety and Navigation, I decided to go for Safety.

Bad choice because all I got was a message service. OK, How about Navigation then? Good one, this time a real voice answered. I told the lady what I was phoning about and she said OK, I really need to phone Safety. I told her that I already had and had just got a message service, which wasn’t a lot of use to me. She said to phone again and probably tipped off her colleague across from her in the same room, so when I did this time I got an answer.

But not the one I wanted. She told me she couldn’t help and to phone ULMs, but not the number given in the main menu when I first phoned. By this time I was beginning to lose the will to live, but took down the number that she read out, very badly and very unclearly, repeated it back twice and then rang it. Good news, another female voice answered but I sensed a note of hesitancy in it, so I asked if this was the ULM service of the DGAC. It wasn’t. It was a wrong number.

You have to wonder how such a simple, well defined process, like applying for a transponder code using paperwork downloaded from the official web site can be turned into such a cock-up, but I have to say that the French, lovely people that they are, do have a special talent for such things. Remember how it took me over a month to obtain my French driving licence, not to mention the problems that I had registering my Ford C-Max in my name on line.

And the heated argument that I had with the local tax man who had the cheek to dip into my bank account without my knowledge all because he had used my old UK address that I’d left to move to France and from which he’d naturally received no reply and it hadn’t occurred to him to try contacting me at the address that I’d just bought and moved into in France. And the list goes on, but I digress.

So what to do? The clue was in the words ‘ULM service of the DGAC’ which I googled and got yet another web link to, together with yet another telephone number. But this time I hit the jackpot – it had only taken me about three hours so far. Yes, they said, they issue transponder codes for ULMs (if only they’d made this information freely available on the web site where I’d downloaded the application form it could have saved me an awful lot of time and anguish) and could I just send them over the form that I’d filled out.

Within ten minutes or so, Olivia at the DGAC had replied with my transponder code plus a request for a bundle of other paperwork that I will only be able to return once my new system has been signed off by the relevant avionics test organisation, mine being at La Rochelle. So this afternoon I programmed the transponder, checked the Savannah’s plugs and got it ready to fly again at long last. Now all I need to do is give it a really good clean and, if the radio checks out while in the air, which it should do of course, arrange an appointment to get the system tested and signed off.

By golly, it’s been a long and winding road and a tortuous process. You have to ask yourself, why not put the application process on line under headings like ‘Commercial’, ‘General Aviation’ and ‘ULM’ with each section containing all of the links necessary for the relevant paperwork and the necessary contacts. Far too simple, one must assume, plus if you make it too straightforward you’d be putting people out of jobs. Can’t have that, even if it would benefit the victims… err, sorry, clients.

All systems are go!

At least, I think they now are. I arrived at Malbec bright and early (for me anyway) this morning with the aim of cracking on and getting the Savannah’s full new avionics and instrument panel installed and working. However, I was brought up short immediately, but only temporarily, because I found that I’d attached the extensions to the little headset brackets that I made yesterday the wrong way round.

Luckily I had my drill and pop riveter with me so all I had to do was drill the connecting pop rivets out, turn the extensions around and pop rivet them back on again. Here are a couple of shots with them finally mounted in position on each side of the cabin under the dash panel. They are a big improvement on what was there before which were very floppy and flimsy.

null

null

Then it was time to start on installing the radio cable kit. I decided that before I went ahead and permanently installed it, I’d connect everything up and make sure it worked properly first. And that’s what I did. It wasn’t difficult because it was only a matter of connecting up the two PTT buttons, the 12V power supply and the system earth and here’s how it looked all ready to switch on and try out.

null

null

As well as my old Aerolite headset that I haven’t used since the 1980s when we had our Piper Cherokee, I’d also taken my little hand-held Vertex VXA-220 transceiver with me ready for just such an event and as it happened, Victor had arrived a bit earlier to modify the lifting mechanism on the hangar doors. So I gave him the Vertex and told him what I wanted to do as a test.

Initially, although I could hear him very clearly on the new radio, he said that he could hear me transmitting on the Savannah’s right-hand head set but not on the left, which was just transmitting carrier wave. I surmised that this was down to my not having re-run the mic set up and this proved to be the case as afterwards transmitting and receiving turned out to be perfect.

So then it was a matter of mounting all of the cabling securely behind the Savannah’s instrument panel and finally securing the panel in position. I forgot to mention that earlier on I’d traced why the low fuel test system wasn’t working – some earth leads had become detached from the back of a gauge when I’d moved the panel forwards before I’d had a chance to record which tag they should be plugged to, due to the original cable ties being too tight. So that was a bit of luck as I hadn’t fancied trying to trace whatever the reason for the problem was.

As the end of the afternoon approached, the job was finally nearing completion and here are a couple of shots with the panel powered up and working.

null

null

The climax came with the first engine start since I began this project over 6 weeks ago. The engine started very easily with its new carb rubbers and idled and powered up OK. All of the gauges began to read as expected, which was a relief, except for the oil temperature gauge which always takes some time to show a reading. But what of the little microelectronic device controlling the hour meter?

The hour meter didn’t start running at low revs, just as intended. It was a bit problematic running the engine up to over 3000 rpm because the Savannah was still in the barn with my car next to it. However, I ran it for a short while at an indicated 3400 rpm and the hour meter did advance, so it looks as though all of the systems, both original and newly-installed, are working as they should.

I now need to do a flight to make sure and then arrange for the new avionics to be signed off at La Rochelle. That should be a great flight if the weather is anything like today, not much wind and a high of 25 degrees Celsius, and I’m looking forward to it very much after all of the grind of the last few weeks to get the whole panel project completed. At least it now looks as though it is 😕

Clearing the logjam

At last! I’ve been tracking the Savannah’s radio wiring loom on it’s way to me from England and this morning it said that it had arrived at its distribution depot in France. No mention of it being available locally for delivery or whatever, so I was surprised when at 10.30am this morning it popped into my post box!

But not being one to look a gift-horse in the mouth, I grabbed it and began to make plans to start installing it. The first thing that I’ll need is a pair of dual-hole mounting brackets for the new headsets, so I set about making those straight away from some of the left-over aluminium sheet from the panel work. Here’s a shot of my initial attempt.

null

I had to actually have two bites at the cherry, however, because I’d forgotten that the old ones, that I hadn’t removed at that point, were on little extension pieces to lower them below the dash and to bring them backwards a bit into the cabin. Here’s how I modified them this evening ready to install tomorrow, as it was too late to return to Malbec by the time I’d finished.

null

But that wasn’t the only time that I went off a bit half-cocked today. I was half-way to Malbec just after lunchtime and thinking about the wiring loom when it occurred to me whether or not they had shorted pin 12 in its D-plug to earth as it will need to be in my arrangement. The D-plug that I’d bought to solder myself was already shorted but as the wiring loom allows the option of an external intercom, which requires the pin NOT to be shorted, my guess was that it wasn’t.

But I hadn’t checked, so I had to stop, turn around and return home again to do so. And lucky I did. The pin wasn’t shorted but instead they’d added a little external switch between it and its earth wire to allow the option of shorting it or not.

I wasn’t at all keen on that arrangement and as I’ll not need the option, I cut the switch off and permanently soldered the wire ends together. Actually, this wasn’t as neat as my D-plug in which the shorting was done internally, but no matter as the wires are of very small diameter and there are another couple in the loom that I won’t need with which they can be bundled together and ‘lost’ behind the panel.

So that was it for today, a start but not much more. Wim and I were going to go flying in the Weedhoppers tomorrow but sadly, I decided to put that off despite having hardly flown this year. After all this time, I couldn’t concentrate on flying knowing that the wiring loom was all ready and waiting to be installed and that I was doing something else and not actually doing it 😐

Landing light

I fitted an LED landing light on the Savannah not long after I acquired it but never really managed to get it very well secured. I started just by sealing around it with white silicone and hoped that that would be enought to hold it in, but it wasn’t.

I then tried using the ULMiste’s friend, cable ties, to stop it dropping out but they have never remained tight enough to firmly hold it for very long, to the point that a few days ago I arrived at Malbec to work on the instrument panel and found the landing light hanging out of the Savannah’s nose. Evidently the cable ties securing it had eased sufficiently in the direct sunlight to release it.

So I needed to do something and now was the ideal time, while I’m waiting for the items I need to complete the instrument panel. I’ve been thinking about alternative methods that didn’t involve screwing through the Savannah’s engine cowling and came up with an idea that uses two specially made aluminium securing collars and a large jubilee clip. Here are some shots of the finished job.

null

null

The light can’t move backwards into the cowling because there’s enough of a lip around its lens to prevent it going through the hole. I can’t get the little collars tight enough to stop the light moving a little bit in its mounting but I think it’s quite secure enough. Only time will tell, but at least for now, that’s another little job crossed off the list 😉

Waiting again

I can’t do very much for now while I’m waiting for the cabling kit for the Savannah’s new radio to arrive from the UK. This is what I’m expecting to drop into my mail box some time during the early part of next week.

null

And what an amazing resource Le Bon Coin is. I logged on yesterday evening to search for general aviation headsets. I wanted to get hold of two in very good condition and both of the same model, of course. I immediately found three of the same model that fitted me down to the ground. One (the cheapest 🙂 ) was already sold subject to payment so I went after the other two, one of which is in Albi in the far south-west and the other in the outer Paris area, and I’ve acquired both of them. Here are the shots of them that the sellers posted in their ads.

null

null

So amazingly, after deciding that I had to completely re-do the whole radio fit in the Savannah, in under 24 hours I’ve managed to acquire all of the items I need to do so at ‘cut prices’. Now that has to be a result, if not some kind of record!

Today I removed the headsets and headset extension cords from the Savannah and tomorrow I’ll strip everything else out leaving just the PTT and power supply connections ready for the cable kit when it arrives. Some weeks ago I applied for the unique 24 bit code for the Savannah’s new transponder but, this being France, have received no reply.

So today I’ve sent the issuing organisation (NOT the DGAC) with a chaser email, so with a bit of luck I’ll have that by the time the new avionics system is ready to go. Then it’ll just be a matter of arranging a ‘rendezvous’ with the radio testing station at La Rochelle and finally I’ll be back in business and rarin’ to go!

Now we’re getting somewhere

I emailed Alphatec yesterday asking whether my headsets are compatible with my new radio and they replied very promptly this morning saying that they are not, and indeed not with any GA standard radio. And my pal Roger has, I think, put his finger on the reason why, namely that the ‘Mickey Mouse’ single jack headsets that we use in ULMs that are compatible with hand-held radios, like the Icom that was installed in my Savannah, are not signal-split ie the headset microphone and headphones all have a shared ground connection.

Or maybe they were compatible because they interfaced with the Icom via a separate Alphatec intercom, which they said I could do if I wanted to with my new radio. Obviously I wouldn’t because the new radio has an intercom built-in making an external intercom unnecessary, and that’s without thinking about the extra weight. So in any case, I’ve now got to do some more modifications to the radio installation in my Savannah as it has to be changed to a twin-jack set up with GA-type headsets in order to function.

That’s a relief to know in many respects because I at least now have an action plan again. As I spent a lot of time (but not money luckily) wiring up the radio’s D-plug I thought that I’d try to retain as much of it as possible and change the under-dash single jack plugs myself to doubles. Just sourcing the plugs was a nightmare, however, as suppliers who have them in stock either want silly money for them or to charge upwards of 20€ just to send them, or those who don’t hold them have a delivery lead-time of several weeks.

This got me thinking because the easiest and quickest way of solving the problem would be to purchase the radio manufacturer’s prefabricated wiring loom that comes complete with two pairs of headset sockets already attached. It would allow me to strip out all of the radio cabling in the Savannah as apart from plugging it into the radio itself, it only needs a power and an earth connnection and for the PTT to be connected to the appropriate wire in the loom.

And lo and behold, a Google search revealed that a new and unused one was up for sale on the AFORS web site in the UK for quite a bit less than I’d have to pay for a brand new one from a ‘proper’ supplier in Europe, so after contacting the seller (Great Western Airsports) I paid for it by Paypal and it’s now on its way to me. In the meantime, I’ve found quite a few GA headsets that will work with it for sale on Le Bon Coin and have chased two matching ones from different sellers.

Unfortunately the less expensive of the two has already been sold, but I’m in no big hurry as even if I get my radio working, while I’m waiting I still have an elderly Aerolite 360 GA headset from my Piper Cherokee days back in the 1980s which is still in good condition and should still work fine. And in the meantime I’ll keep my eyes open for a pair of matching GA headsets on Le Bon Coin and strip out the cabling that’s now in the Savannah before the cable loom arrives.

My UK flight is therefore still postponed but it least now looks as though I’ll be able to start making plans again in the not too distant future. And I must say, it will be a relief to put this instrument panel project to bed 😐

I’ve hit a brick wall

It’s quite worrying and I’m also now beginning to find this whole instrument panel project rather draining. After yesterday’s problems I returned to Malbec and working on the assumption that Alphatec had provided me with incorrect information, switched the connections around in the main under-dash headset sockets in my Savannah, so mic cables became headphone cables and vice versa.

And sure enough the radio then powered up as it should do, all of its buttons functioned normally and I could hear a small pop in the headphones when it finished booting. So it appears that Alphatec did provide me with incorrect information, raising the question of how much I would be able to trust them if I approached them asking for assistance with further problems. And further problems I do indeed have.

The radio is still dumb. It shows the RCV sign when it receives a signal but the headphones are dead. It doesn’t transmit when a PTT button is pressed and the intercom doesn’t work, so as far as I know, the mics are also dead. I have checked the wiring diagram and I’m still convinced that I’ve wired the system up correctly, so as there still appears to be a headset problem I’m wondering if my Alphatec Pro headsets are compatible with the radio.

In the set up menu, the radio detects the mics as being ‘dynamic’ but it still seems to think that there’s an external intercom, which of course, there isn’t, and I suspect that this anomaly is something to do with the mics themselves. I’m at the point when I don’t know what else I can physically do myself.

And I also don’t have a friendly radio man who I can call up and talk to, so it’s difficult to know where to go from here. I think that I’ll try contacting the radio manufacturer, giving them all of my details and seeing if they can point me in the right direction.

In the event that I don’t get help from there, I’ll have to locate a radio expert locally and get him to go through the installation. I’m worried if I do that, though, that I’ll end up ripping the whole panel back out again, with all that that entails, and you can imagine how I’d feel about that.

The new instrument panel

At last! I’m just back from Malbec for a quick lunch (salad, what else on a beautiful day like today) and here are the first shots of my Savannah’s new instrument panel actually in position, although not yet secured.

null

null

null

I managed to get all of the wiring connected by cutting most of the cable ties that had been previously fitted but it was still a tricky job getting it into place and some paintwork on the surround has been scratched. The task wasn’t helped by my not releasing the throttle locking screws which prevented the throttle lever rods from sliding through the panel fittings no matter how much I pushed – until I realised.

Most things that I’ve tested after connecting the power seem to be working OK, although I’ve not yet been able to start the engine to see whether gauges like the oil pressure and the oil and water temperature gauges are functioning correctly. The test button for the low fuel warning lamp isn’t working when it was before. It’s the same lamp as is used for the low battery warning which I don’t think was working before but now is, so maybe I’ve switched them round and one isn’t working correctly. I’ll have to check later.

But what of the new radio and transponder you might be wondering? The transponder powered up correctly and seems to be functioning OK. Certainly the codes change as they should and the buttons all appear to be working correctly.

Sadly, the same can’t be said about the radio. It powered up correctly but then none of the buttons did anything and there was no sound at all in the headsets. I then disconnected the headsets and all the buttons then seemed to function correctly, so it’s a headset problem. I’m wondering whether I was right all along and Alphatec gave me the wrong information about the headset monojack connections that I mentioned in my last post?

The Savannah has headset extension cords that run from the standard under-dash sockets to behind the seats so you don’t have cords draped across your legs while you’re in the air. When I return to Malbec shortly I’ll try plugging the headsets into the standard sockets and see if that resolves the problem. If not I’ll have to assume that I was misinformed by Alphatec or I mis-traced the wires down from my headsets. If that’s the case I don’t fancy resoldering the radio D-plug so I’ll probably either switch the connections in the standard sockets or those in the extension cables. I’ll decide depending on what I find – stay tuned!

The weirdest thing just happened

It’s now 11.40 pm and it happened 10 minutes ago. I was sitting at my computer desk as I am now typing this and I glanced down to see a tiny field mouse on the floor at my feet. Something caught my eye a short while before but something larger, more like a cat but only for a split second and I thought that I was imagining things.

I thought that the little mouse was dead but when I looked at it more closely I could see that it was still alive but was struggling to breathe and although it could kick its legs intermittently, it was unable to walk. I could see that it had two puncture wounds on either side of its body which I surmised had been caused by something like a cat or another animal that had caught it earlier but then left it to die.

My neighbours have cats but I don’t and I checked through the house to ensure that one hadn’t found its way inside, but sure enough there wasn’t one. I don’t have mice in the house and I’ve no idea where this little one had come from as there are no holes that it could have come in through, as far as I’m aware anyway. And the other strange thing was that an hour or so before I’d dropped something on the floor, which I’d bent down and picked up and the little mouse certainly wasn’t there then.

I couldn’t leave the little thing to suffer as it obviously wasn’t going to recover so I took it into my wood store and despatched it quickly with my sharp little axe. Since my recent health issues I have a great aversion to killing anything that I don’t need to, even flies and spiders, but I think that what I did was for the best.

The whole episode is a total mystery to me. I can’t understand it at all.

Total nightmare

Today was the big day when my Savannah’s new instrument panel was supposed to be all done-and-dusted, installed and working. I thought that with all the preparatory work I’d done it would be a fairly straightforward matter to get everything connected up and the complete panel installed but I couldn’t have been more wrong.

The first thing I found was that, as I’d suspected, the panel with most of its gauges etc mounted, missing just the airspeed indicator, fuel pressure gauge and a few switches, was unwieldy and difficult to line up and hold in position in order for its missing items and all of its connections to be installed. The very real danger was that if it was allowed to topple onto the floor of the aircraft real, and expensive, damage might be done to it.

The easy solution to that was to place my toolbox on the floor of the cabin with several wooden blocks on top of it to bring the panel up to about the correct height. The problem, of course, was although I removed the tools that I thought I might need, I then kept needing others that were still in the box and inaccessible. Here are a few shots showing what I mean.

null

null

null

But that wasn’t the main problem. As soon as I came to connect up the gauges and switches I found that the wiring under the dashboard just wasn’t long enough to reach the panel. I couldn’t remember everything being so tight when I removed the old panel, but whoever had done the wiring work previously had not only cable-tied everything very tightly indeed but had also made it all into a terrible tangle.

The following picture gives an indication of how little space there was between the new panel and the instrument dash, hardly enough to be able to get my hands behind the panel, and the wiring was still too short to reach most of the gauges and switches that needed to be connected.

null

By the time I’d realised just how bad things were I’d already installed and connected up the switches and gauges on the pilot’s side of the panel, and with some difficulty because of the limited space in which to work. And I was also very concerned the whole time about the possibilty of damaging the new radio and transponder by bashing them and dragging them against the metal of the panel surround.

This last shot shows how far I got before calling it a day, clearing up and heading for home in a not very positive frame of mind!

null

I’m going to have to think about how to proceed tomorrow because it’s clear that I can’t continue as I’m doing. I don’t want to have to remove the panel and start all over again and my initial thought is to pull the panel as far forward as I can, get underneath it and try to cut all of the cable ties that are currently securing the wiring.

Freeing it up should, I hope, give me the amount of clearance that I’ll need but I won’t know until I give it a go. If it doesn’t work, the only alternative will be to start all over but that could turn into a fairly major undertaking and I’d like to avoid it at all costs if I can.

Slow progress

Painfully slow at times over the last couple of days, but at least it’s been steady. But it’s not surprising as the work I’ve been doing is the most critical of the whole project, namely making up the cabling for the new radio and transponder. The fact is that if I mess things up big-time, there’s a considerable amount of money at stake and things are quite a bit more complex than just wiring up an Icom hand-held through a simple interface, which is what was installed previously.

Things are by no means as straightforward as I’d like them to be, except for the transponder that only has two connections (12V positive and earth). But even that has turned out to be more complex than it appears to be, on the face of it. The problem has arisen because the radio and transponder connect into the system via D-plugs that I elected to make up myself.

Although I could have purchased wiring looms already made up, due to the multitude of configurations that are possible, for the radio at least, it seemed daft to pay a considerable amount of money only then to discard half of the installed cabling that would be otherwise unused. Plus I would also then have had lots of external connectors away from the D-plug, which is something I am trying to avoid.

At order time, the supplier offered, and I ordered, two different D-plugs for the radio and the transponder, but when they arrived, they were the same item. On close and careful inspection, I was very pleased to find that the internal cross-connections in the plug required for the radio have already been done for you thus much simplifying the soldering work that’s needed to make up the connections for the power and earth, headsets and PTTs.

However, when I compared the set-up for the transponder, although not all of the pins in the plug are used, the cross connection that is required is different from the ones already in place for the radio and although I was able to un-solder one of the latter and make the new one that’s needed for the transponder, the one that remained could not be cleared. Now it appears that this ‘short’ for want of a better term is across two unused plug pins, but what I don’t know is what’s happening inside the unit on the other side of the plug.

I’m hoping that the supplier knows what he’s doing as the plastic envelopes for the D-plug kits are clearly marked as being for BOTH the radio and the transponder, so I’m hoping that what I’ve done, which is according to the drawing except for the ‘short’ that I can’t take out, will be OK. However, although an experienced avionics engineer would know immediately, I won’t know for sure until I eventually come to connect the unit and its programmed and tested. That’s if it lights up as it should do in the first place!

Having made the decision to modify its D-plug but to leave the ‘short’ that still remained (I had no choice) I made up the connector for the transponder a couple of days ago. While I was reading the transponder installation instructions, I read that it is MOST IMPORTANT not to run its antenna cable in close proximity to any other RT or navigation antenna. I always knew that really and when I ran its cable alongside the Savannah’s existing radio antenna cable I had major misgivings. I therefore decided that I had no option but to revisit the job yesterday and relocate the radio cable from the passenger side (right) to the pilot side (left) of the aircraft.

I felt much happier once I’d done it and although I didn’t have time to do much more afterwards, it was a job worth doing. What I did manage to get done was apply my new panel labels. When I fabricated the new high-level panel in the Savannah, I used labels from a pre-printed sheet that I acquired from a supplier in the UK. I was never very happy with them. Firstly, the sheet was very much aimed at ‘GA’ aircraft so most of the labels were inappropriate for the Savannah and were unused. Secondly, some of the labels I wanted weren’t present on the sheet and I had to make do with ‘approximations’ that weren’t all that satisfactory. And thirdly, the sheet wasn’t cheap once carriage was added into the cost.

So I decided to bite the bullet and buy a little Brother hand-held labelling machine, for not much more than the total cost of the pre-printed sheet actually. I experimented a bit and eventually decided on a style before running off all the labels that I’ll need. Here’s how a few of the labelled-up gauges now look.

null

I’m very happy with the result and think that the investment was well worth it, certainly given the total cost of the whole project. And I’ll also be able to label up everything now in my home and office area 🙂

So having studied the connection drawing yet again for the umpteenth time and drawn out my own simplified connection plan, today was the big day for cabling up the new radio. I still had an outstanding query, which was quite a major one. Which connection on my Alphatec Pro headsets powers the headphones and which one the mics? I thought I knew the answer and was all ready to proceed on the basis of my assumption when just before leaving for Malbec, an email from Alphatec came in.

At the end of last week I’d sent them a drawing of a monojack with each of its segments numbered asking what is connected to each one and this was their reply. And how fortunate, because it turns out that my assumption was wrong and that the mic and headphone connections are the reverse of what I’d assumed them to be. Shown below is the picture as confirmed this morning by Alphatec.

null

So what a bit of luck that I hadn’t already blasted ahead and made the new connections up, because as I found today, the soldering involved was intricate and very time-consuming. It took me literally hours to do this afternoon, obviously much longer than an experienced avionics engineer would most likely have needed, but I had to be very sure that what I was doing was exactly according to the connection drawing and also that I made no mistakes, like allowing solder to run onto adjacent pins.

But eventually it was done and as well as the radio’s D-plug connections all being in place, so also were the power supply and earth and the PTT connections. Here’s how it looked – not a lot to show for the hours that it took to do.

null

So I’m now in a position to connect all the new wiring up, reconnect all of the gauge and switch cabling that’s still in the aircraft and install the new panel. Connection of my new little electronic gizmo will be quite easy but along the way I’ve got to find a way to mount it so it’s secure but accessible should I need to reprogram it in due course. But somehow I think that that will probably be one of the least of tomorrow’s problems.

Getting hands on now

Not yesterday, today. Yesterday wasn’t a very nice day – rainy and a bit windy – so I spent the time indoors finishing off my little microelectronic gizmo, which has to be done in order to finish off the Savannah’s new instrument panel. I first trimmed its circuit board down to size and then made a little plastic container for it out of 1mm polycarbonate windscreen plastic.

I first tried sticking it together with superglue but it was very messy and didn’t work. I then decided that as the board and its components were to be encased in silicone inside it anyway, I may as well try using the silicone to hold the tray together, and as the following images show, it worked.

null

null

I’ve kept the end connections on the Arduino microprocessor that are used for programming it clear of silicone so if necessary I can reprogram it in the future to modify the revs at which it will start and stop the hour meter recording but for now all I can do is wait until the instrument panel as a whole is finished and installed to see whether it works as planned.

Today was the day when work on the aircraft itself began as a preliminary to being able to install the instrument panel. The first job was to fit the new transponder antenna. I had noticed the following holes in the underbelly of the Savannah without thinking too much what they were there for but as soon as I set about ordering the new avionics fit I knew instantly.

null

null

They were there because a transponder had already been fitted at some time in the past and then removed, so by ordering the same antenna that had fitted into them, I could fully re-use them and make a neat job of the new fit.

Getting the antenna cable through into the cabin was the simplest of jobs because there’s an unimpeded route below the seats.

null

However, the best route is along the side of the fuselage and cabin, where all of the other cables have currently been run.

null

Here’s how it came out inside with the antenna cable attached.

null

And here’s an external view of the new antenna. Very nice I think

null

The cable entered the cabin on the passenger (right hand) side at floor level. My only concern is that by running the transponder antenna cable alongside the radio antenna cable there will be interference to the radio signal, but I’ll just have to wait and see. If so, I’ll have to move the transponder cable over to the left hand side.

null

Both cables now pop up in front of the passenger door and will cross over to connect with the radio and transponder in the lower centre of the panel.

null

My next problem is to sort out the radio connections that are present so I can solder up the wiring looms for it and the transponder. The latter will be easy – just two wires – but I’m still trying to resolve which of the wires coming down from the headset jacks are for the microphones and which for the headphones as although I don’t think that connecting them the wrong way round will do any damage, I just don’t want to waste the time having to take them out and resolder them. I’ve emailed Alphatec, the maker of my headsets, to see if they will tell me but time is pressing and I won’t be able to wait longer than 24 hours before pressing on and finding out the hard way 😕

Another small step

I decided that I’d finish last night on a high by adding the external connections to my little microelectronic device that I made to control my Savannah’s hour meter. I finished the basic device a few days ago and all that was needed to connect it to the outside world was a set of flying leads, for the 12V power and earth, the input from the rev counter and the output to the earth of the hour meter. Here’s how it looked once I was done.

null

So all ready to give it its first test by connecting it for the first time to a 12V power supply. I didn’t know what to expect but my initial hope was that it wouldn’t start smoking and fry itself because I’d made some stupid error when I worked out all of its connections and its layout on the copper strip board. Anything else I thought would be a bonus, so I approached connecting the 12V power and earth to a battery with some trepidation. Here’s what happened.

null

It turned out that I needn’t have worried at all. All that happened was a lttle red light illuminated on the Arduino microprocessor and everything else stayed cool and calm, including myself. Obviously I won’t know that it’s actually doing the job that it’s intended for until I finally connect it up but it’s a big relief to know for now that nothing seems to be amiss with it.

But more seriously, it doesn’t appear at this stage as though it’ll be a source of danger, which is always the worry when you introduce a strange electronic device into an aircraft with its potential for shorting and causing a fire, especially when it’s going to be installed in an inaccessible place where it won’t be visible. However, I’ll continue to keep my guard up until it’s actually fitted, I’ve run the engine and it’s proven to be working correctly.

Fully loaded

Well, almost. The missing gauges and switches which you can see in the picture below are still in the aircraft and they’ll be fitted as soon as the completed instrument panel can be installed.

null

I’m over the moon with how it’s turned out. I made the panel for my old UK AX3, G-MYRO, which is now enjoying a new life in my French AX3, 28AAD, I partially re-made a panel for an X-Air in the UK before I came to France and I then made the panel for my French X-Air from scratch after I got here. But this one for my Savannah, F-JHHP (or 77ASY to give it its local ‘name’), is the one that I’m most proud of.

It was a bit tricky today getting all of the gauges to sit nicely in their allotted holes. The new transponder in particular was the least cooperative but it wasn’t its fault. I found in the end that the seating problem was down to the amount of paint that I’d applied around the lip of the hole and after I’d cleared some of it away, its screws all eventually lined up with the mounting holes and it sat in nicely, as the new radio had.

To finish off, I’ve now got to put a dab of Loctite on each securing screw thread and a second locknut on the securing screws of the instuments that have them around the periphery of their dials. I’ll then be able to start on the work of installing the panel in the aircraft, starting with the transponder antenna and then the wiring looms for the radio and transponder.

The looms will be the tricky bits because I have to solder all of the connections in the connecting ‘D’ plugs and as of now I don’t know which cables coming from the headset plugs are for the mics and which for the headphones. But I’ll find out. The rest to complete the job should be easy as it’ll just be a matter of replacing connections etc that have all been labelled up in the aircraft. That will be the really exciting bit!

Panel nearly there

I went across to Malbec this morning and dropped the new instrument panel into 77ASY. And I couldn’t have been more pleased. It fitted so well that you might think that it had been made for the aircraft 😉

Seriously, it fitted perfectly, much better than my original effort. It dropped exactly into the correct position and all of the mounting holes lined up perfectly, unlike the last one, so I was delighted to know that I can now press on, finish it off and start loading the instruments and gauges into it. Here are some shots of it in place.

null

null

null

So my job this afternoon was to complete the preparation work and give it a coat of finishing. The special aluminium primer that I used had a sort of rubbery feel to it even though I’d left it overnight and it was dry. It did in fact prove to have a rubbery character to it when I started to give it a light rub down and it sort of wouldn’t! It proved to be impossible to completely rub out the brush marks without rubbing it so hard that I would have started to remove it in some areas, around the edges of the gauge holes for example, and as I didn’t want to do that, I had to be content with some remaining slightly visible. This shouldn’t be a problem, though, when it’s installed in the aircraft and fully loaded with gauges.

After giving it a good coat of universal spray primer, I left the panel outside in the sun to dry off. It was very summer-like today with a temperature of 22 degrees Celsius, so while it was out in that drying and hardening a bit, I went off to buy a can of spray satin grey finishing coat. As usual, I went all the way to Montignac and couldn’t find what I wanted and ended up going back in the opposite direction to the smaller Bricojem store in Rouffignac, which is quite a bit closer to my home.

After giving the freshly primed panel a very light rub down with a fine sanding pad, I then gave it a final coat of the satin grey and here’s how it finished up at the end of the afternoon.

null

I’m very pleased with how it’s turned out and I’m really looking forward to getting on with loading the instruments and gauges into it that I’ve had waiting on one side for what seems like an age. And you never know, I think there’s even a slim chance that I might get everything finished off and installed in the aircraft by this week-end. However, I’m not banking on it and will be content to take one step at a time making sure that nothing goes wrong while I’m doing it.

Phew!!

I finished off the new Savannah instrument panel fabrication work today and it was with a big sigh of relief I can tell you. It was tricky enough cutting all of the large instrument holes yesterday and you’d think that it would be a piece of cake drilling all of the smaller ones today. But that wasn’t the case, especially after the first two that I drilled got ‘messy’, but luckily not so much as will be visible when all of the instruments etc are installed.

There were two main problems – the first was that several holes and cutouts had to be shaped by hand and when you’re filing away, there’s always the chance that you’ll make a mistake and mess the whole thing up. Luckily that didn’t happen. The other thing is that several of the gauges have securing screw holes around their perimeter and if you don’t drill those in exactly the right positions, the gauges in question end up crooked ie not vertical. Luckily that didn’t happen either.

So I was very pleased to end up with something that will be quite presentable when it’s all finished and installed in the aircraft. It’s not perfect, but something made by hand, especially if that hand is relatively unskilled or inexperienced, is never going to be as perfect as an item made on precision machinery.

I stipped the protective film off the shiny ‘front’ face of the panel and then rubbed it down with fine wet-and-dry paper so I could then give it a coat of special aluminium primer. Unfortunately, I’ve only managed to find it here in brushable form and as I’ve had it for two or three years, it’s thickened up a bit as well. My idea is to give it a good thick coat of primer and then rub the brush marks out before spraying it to get a smooth satin finish, so I’ll have to see how things work out.

Here’s a shot of the ‘finished’ panel at the end of this afternoon.

null

In fact, I’ve realised that I’ve forgotten to drill the holes for the two screws that will hold the new 12V aux socket in and also the holes for the circuit breakers for the radio and transponder, but that won’t cause any problems. I’ll be taking the panel over to Malbec tomorrow to see how it fits and I’m hoping that after all my careful measuring it’ll drop straight in. Watch this space!

New and old

As I had the new sheet of aluminium that arrived from Germany on Friday and it was too windy to fly today in the Weedhopper, after completing the main assembly work on my little microelectronic gizmo, I was a able to press on today with fabricating my Savannah’s new instrument panel. Here’s how far I got. That’s the new one on the bottom below.

null

I learnt the lessons well from my previous efforts and this time I took plenty of time to mark everything out and spot drill the centre of each hole that I had to drill. You can see that the main changes that I’ve made compared to the original layout are in the centre section where I’ve moved the right hand pair of large gauges (rev counter above, VSI below) a bit to the left to allow the section to accommodate four rather than just three smaller diameter instruments (slip ball and fuel pressure above and radio and transponder below). I think that the layout works pretty well and looks quite neat.

I was thinking about taking some time off tomorrow for a flight in the Weedhopper with Wim but finishing off the panel is my main priority otherwise I’ll never get away to the UK. So I’m going to press on and continue with this work instead tomorrow and will hopefully get the panel finished, bar unforeseen mishaps, all except the painting, which shouldn’t take any more than another day. Then I’ll be able to think about going flying, while the paint’s hardening, if the weather decides to play ball that is 😉

Moving forward again

The main thing that happened today was that the new sheet of aluminium for my instrument panel arrived. It’s got bent in one corner but that doesn’t matter because that will be cut off anyway, but at last I can get back to getting my Savannah ready to fly again.

I can’t see me getting much, if anything, done on it this week-end because tomorrow we’re going to a book fayre in support of the local British run dog rescue centre (Phoenix) and on Sunday I hope to be flying in the Weedhopper, but at least I’ll be able to take a running start into the coming week.

Even so, I somehow can’t see me making the third window that I identified for flying to the UK, starting on Saturday 25 May. I have to fabricate my new panel front, install all of the instruments including the new radio and transponder for which I have to create new wiring looms, fit it all in the Savannah and test it out on the ground and in the air to make sure everything works as it should.

And only then can I make an appointment to fly into La Rochelle in the Charente to get the complete avionics installation checked and tested by the approved body there for it to be signed-off so I can legally use it.

Somehow I can’t see me getting all that done in the time available so I’ll be ready to then take the aircraft on a long and demanding flight to the UK with total security, but I’ll just have to see what I can do. In the meantime I’ll have to check and see what bank holidays there will be in the UK and France in the following months which might make the basis for further flight windows (now checked – just the one in the UK, August Bank Holiday Monday 26 so not much flexibility there).

And also on a positive note, today I finished putting together the little microelectronic device for controlling my Savannah’s hour gauge. Here are a couple of shots that I took to show its front and back.

null

null

I now have to check again that I’ve soldered all of its components in the right places, that I’ve cut the copper strip on the back of the circuit board where I was actually supposed to and that there are no shorts across the cut gaps as a result of not quite completely cutting the copper, which is not difficult to do as it’s so narrow.

Only then will I be able to try putting 12 volts across its live and ground terminals and seeing whether it promptly shorts out, overheats and fries itself because I made a mistake when I figured out the circuit board layout, which I obviously hope that it will not do. Until I’ve finished the panel I won’t be able to actually test it but in the meantime I’ll be able to make a plastic enclosure for it out of old windscreen Lexan of which I have a goodly supply.

When it is all tested and working I’ll be able to pot it (enclose it) in neutral, non-acid silicone that I’ve already acquired, although I’ll leave the programming points of the Arduino microprocessor free so the unit can be reprogrammed in the future. I set it up to start the hour gauge recording when the engine reaches a figure of 3200 RPM and switches off when it falls to 1600 RPM but only actual use will show whether these figures are suitable. Exciting times are coming back… 😉

Started work!

At last, after so many miserable weeks of delay and disappointment due to stuff not being delivered on time. Only on the little microlectronic device rather than the instrument panel itself, but that’s much better than just wasting time doing nothing constructive at all.

I was originally going to head over to Malbec and install the new transponder cable on the Savannah but our latest postie is arriving much earlier than the old ones used to and before I could leave, she’d arrived and delivered the final package of electronic parts that I’d ordered including the copper strip board. So I decided that I’d get cracking on some electronic assembly work instead and leave the transponder cable to another day.

Here’s a shot that I took a short while ago of my ‘work bench’ in front of my computer screen on my computer work station.

null

I’ve soldered in the Arduino Pro Mini microcomputer plus a few more components and the LM1815N integrated circuit is in position ready to be soldered in also. I was a bit shaky to start off with but I’m getting better at handling the little components and the soldering as I slowly master the necessary techniques.

I was lucky because I already have a pair of magnifying goggles and a little 15 watt soldering iron that I haven’t used for ages. In fact it still has a UK plug on it. I was also amazed when I was searching for something yesterday in my atelier to come across two little tools that I didn’t know that I had for cutting the copper strip between adjacent holes on the circuit board.

That’s one of them in the photograph with what looks like a small drill bit in a little blue handle that you hold between your thumb and forefinger and spin in the hole on the board where you want to cut the copper strip. I just tipped them into a bag with lots of other ‘junk’ when I left the UK and they’ve been in my atelier ever since. I only now know what they are for after reading information on the internet about how to do this project, so what a coincidence and how useful!

I’m going to do a little bit more now although I’m not sure that I’ll be able to finish the whole job this evening. I’m finding it challenging because of the intense concentration needed to ensure that I position everything exactly where it should be according to the layout plan that I prepared earlier, but it’s very interesting and also very satisfying.

I just hope that it works when I’ve finished and that I won’t have made a mistake that will make it fry itself when I apply 12 volts to it! Oh well, got to get on… 😉