Know what today is?

It’s ‘end of contract’ day and construction of my house is now formally completed.

The plumber showed up early, around 8.00am, installed the WC in the bathroom and fixed the one in the separate toilet to the floor, so his job was done. He didn’t connect the heat pump because I think a specialist has to do that.

Shortly after he’d gone two workmen from the builder arrived in a small open back truck. Their job was to clear away all the rubbish that’s collected over the months and the wood that was left over from the roofing work. I originally planned to keep it but it’s become something of an eyesore and had to go.

They had to make two trips and returned in the afternoon to finish off. So that’s it! The builder’s work has been completed and as any problems have been dealt with as they’ve arisen, that should be the last time they need to come on site.

I think the electrician will probably have to return when the system is commissioned but that should be just a formality when the time comes. Now it’s all just down to me 😉

Get the idea?

Not much to see today but what I did do tired me out. I took the opportunity to hitch my large trailer to the car and get rid of all of the packaging material that’s been taking over the living room. All the new appliances have come packed in masses of expanded polystyrene and plastic and I carted it all off to the ‘décheterie’ in Rouffignac and disposed of it.

While the trailer was attached I had an idea. As I’ve mentioned previously, the stone that’s been laid around the house is more for effect than anything else as it’s not been tamped down enough to take any weight at all. Even walking on it leaves footmarks so there’s no chance that my outdoor furniture that I brought with me from my old house could be placed on it, let alone used.

However, I’d like to use the area at the rear to take a break on while I’m working in the house and it occurred to me that if I laid stone slabs out there they might disperse the weight enough to make the area usable. To get there you’d need to use the pathway on the south side of the house which also consists of soft stone so in order to avoid destroying that by walking up and back on it, stone slabs would have to be laid on that first.

So that’s what I got started on today, by taking my trailer over to Brico Depot and loading it up with the stone slabs that I want. To do all around the house I’ll need several hundred but initially I’ve calculated that for the side pathway and the terrace area at the back around 200 will do. I loaded my trailer up with the first 70 and my guess was that it was already then overloaded, but I got them all home and laid as the side pathway is fairly level and here’s how it looked afterwards.

null

null

Do you get the idea? I think that it’ll be a quick and effective way of getting a good looking result and it needs to be done before there’s too much foot traffic on the surfaces involved that will affect their levelness. And it’ll be nice to be able to sit outside and enjoy a cool beer under my large parasol. That’s if the mice haven’t got to it first 😕

What’s the next thing you need when you have a washing machine?

A clothes line, of course. Unlike when I left the UK to come to France, I brought my rotary clothes line with me from my old house at Plazac. I had to leave the plastic tube that it was inserted into in the ground but I found a replacement on Amazon a few weeks ago, so I was all ready to set it up again here. I even bought a sack of cement for the purpose from Brico Depot in Brive when I picked up my new washing machine yesterday.

The place I’ve chosen for it is outside the rear of the house in the angle of what will be the terrace.

null

The position is perfect for two reasons. Firstly, it receives uninterrupted sunshine from first thing in the morning until the early evening. Secondly, how many people have a view like the next shot when they’re hanging out their washing 🙂

null

I did the job properly, dug a hole for it, put hardcore in the bottom and then filled the hole with several buckets of concrete. It took me ages before I’d judged that I’d got it completely vertical!

null

I received a call from the tiler this morning saying that he wanted to come and completely finish the job off by doing all of the shower joints. He turned up with his whole family, his wife who gave him a hand getting water and mixing the mortar (despite my saying that I’d do it), and his three lovely little children, a son and two pretty little daughters who also decided to ‘help’ in their own way.

He told me that they were leaving for holiday tomorrow and you know how it is with kids. I guess they were so excited about going that anything to get them out of the house and occupy them was a useful diversion 🙂

null

null

The good news is that although I haven’t got my shower screen yet, which I plan to buy next month, I’ll be able to use the shower from tomorrow.

Coincidentally I collected my floor laminate from storage this morning and moved the fridge so I could get past it. The best place for it was where it will eventually be and when it was in position the kitchen finally took the shape that I intended it to have in my plans. I just need to turn its door round.

null

So it only remains for the plumber to finish installing the WCs in the bathroom and separate toilet and the builder to remove all the rubbish that’s accumulated outside, both of which I assume will happen next week before the August break. The electrician will have to come back when the power has been connected but that won’t stop me using the house in the meantime.

There’s also another upside. Several months ago I made the decision to concentrate 100% on the build to make sure that it continued moving along and I got the results that I wanted. As a result and also because I’ve been doing a lot of work myself inside, I’ve been missing out on the many nice things that come with living in this part of the world – things like eating out and socialising with friends. Now that the build is winding down and the demands being made on me are reducing I’m looking forward very much to rectifying those things in the coming weeks 🙂

A special day

I had a special event planned for this afternoon but the day started with me putting all of the bathroom furniture into place so I could get an idea of how it will look when it’s finished. The plumber needs to come back to install the WC and also the other one in the separate toilet because I found today that that one hasn’t been fixed to the floor either.

I still have to source the shower screen but when that’s in place, the tiler has filled all of the shower floor joints and I’ve painted the ceiling, the bathroom will be usable.

null

null

null

null

So what was the ‘special event’? It was picking up a new washer/dryer from Electro Depot in Brive from where I also sourced my oven.

null

Now I know that this wouldn’t be very ‘special’ for most people but bear in mind that I’ve been living in a caravan for over 2 years, that I’ve had to use the public machines in Rouffignac for the ‘bulk’ washing I’ve done and that other small items I’ve had to wash by hand.

It was very satisfying for me when I connected it up to the water supply in the ‘cellier’ and plugged it into my extension lead that’s connected to my electrical ‘branchement provisoire’.

null

My first (huge) load of washing is going through the machine as I type this and with the drying cycle that I’ve included to make sure that it’s working properly, it’ll be finished at around 2.15am.

null

What also makes this special is that it’s getting me even closer to being able to move in 😉

I have a house

Well, almost! As of today, all of the construction work has been completed. Yesterday I received a message from the tiler saying that he would be coming to my place today and sure enough he and a colleague arrived on site at about 8.45am.

When he saw the problem that I’d been complaining about and it was explained to him that all of the miscoloured tiles had to be removed he wasn’t very happy but I wouldn’t take ‘No’ for an answer and left them to the job of removing the tiles from the plasterboard backing as best they could. I knew it wouldn’t be easy.

Sure enough, when I went up a while later to see how things were going they looked pretty bad. The tiles wouldn’t come off the plasterboard without bringing the latter with them – and I mean the whole board. It soon became apparent that the only way to proceed was to cut the affected areas of the walls away completely, insert plasterboard patches and then tile the patches from scratch.

So while they continued with cutting out the affected sections of the wall I went off with my trailer to Brico Marché at Le Bugue to buy a sheet of waterproof plasterboard which the second man got cracking on straight away when I returned to cut the panels that would be needed. For the main area this meant 1 1/2 rows of tiles across almost the whole width of the wall. But it worked and turned out to be the most effective way of dealing with the problem.

Here are some shots of the job as the day progressed starting with the main problem area after the panel had been inserted and tiled.

null

Here are shots of the other two areas higher up that also had to be rectified.

null

null

The next shot shows preparations being made for laying the floor of the walk-in shower.

null

Here’s a shot of the other long wall that hadn’t been tiled at all previously, before it was grouted.

null

And finally, shots of the whole bathroom at the end of the day after all of the work had been completed.

null

null

null

null

null

null

The tiler said that he’ll have to return to fit the joints around the shower base (you can see the empty gaps in the photographs). I think he said that the shower could be used anyway after a day or so but I won’t, just to be sure that everything is perfect before being put into use.

It only remains for the plumber to return to install the toilet in the bathroom (and possibly the hand basin if I can persuade him), turn on the water to all areas (there’s no water going to the bathroom and front exterior tap) and for the heat pump to be connected. The house will then be complete according to contract and it will just be down to me to decorate it right through and paint the shutters.

It’s been a long haul, very stressful at times, but this close to the finishing line, I can’t wait to move in, which I’ll semi-do even before the electricity is connected. Camping in the house will I’m sure be more comfortable than camping in the caravan, which I can’t wait to see the back of. I can’t really complain about it though, because it’s saved me thousands of euros (literally) in rental fees and domestic taxes which I’d have to have paid if I’d rented a small house or apartment for the last 25 months 😉

This is what it’s all been about

I managed to do a lot of work in the kitchen today and it was a huge step towards being able to move in. It was all about getting the wall units up but it wasn’t as straightforward as all that as I’ll go on to explain.

Here’s a shot of the first one. Due to the length of run of the wall I had to pack the floor units away from the wall by 16mm so I had to do the same with the wall units to make all of the widths coincide.

null

The first tricky bit was building in the cooker extraction hood. Luckily it measured exactly 60cm in width, the same as the oven unit, so that was a good start. Nevertheless it had to be a specific height above the hob unit and exactly level so all measurements had to be precise.

null

I can’t fit the rest of its chimney until the kitchen ceiling has been painted but it’ll be easy to finish the job later. I’ll have to start off with it being recirculatory for the time being until I can get around to drilling the kitchen ceiling and connecting the extraction side to a roof vent.

null

The next challenge was installing the next wall unit exactly vertically and maintaining exactly the same height above the worktop as the ones that were installed previously. This will be very important when I come to the tiling as the gap between the worktop and the underside of the wall units is exactly two tiles plus joints.

null

Then came the ultimate challenge, which was fitting the final wall unit in the gap between the previous unit and the wall. Up to now I’d had no idea whether all of my measurements had been correct or not. But actually things could not have worked out better.

I had to go to Brico Depot before they closed at 1pm to pick up a length of 18mm Contiboard to pack out the final unit from the wall and after cutting it to size and fixing it in position the final unit went in accurately to the millimetre. I was both delighted and highly relieved 😀

null

null

Then it was time to fit the shelves and doors and press on with the final two wall units on the other side of the kitchen.

null

null

null

null

Today was another very long day. I started at around 9.00am and finished at around 9.00pm with a brief stop for lunch but the results speak for themselves. I haven’t aligned and adjusted the wall unit doors yet – that’ll be a job for tomorrow, as will be fitting the kick boards.

But I’m now close to being able to mask the kitchen up for painting its ceiling and its untiled walls. I’ll also try to do the ceiling of the separate toilet and that of the bathroom at the same time which will get me well along the road to having the house partially decorated.

More kitchen progress

While the two guys were working outside yesterday I was making slow but steady progress in the kitchen. It was a bit slow because everything involved a certain amount of precision eg drilling expensive facades for handles by measurement alone, without templates, and assembling the facades for the two swing-out corner units. I didn’t want to make any mistakes and by the late afternoon all of the floor-mounted units were complete bar the finishing touches (little bits of trim on the hinges, stuff like that).

null

null

null

null

null

null

null

I was really pleased as all of the openers have soft closing including the heavy swing-out corner units. The first one I did needed slamming and seemed to click shut and I thought that was how they worked. It was only when the second one wouldn’t close and I investigated why that I found it was because the soft close unit, which hadn’t been mentioned in the assembly instructions, was in the closed position. Merely flicking it open made it work perfectly, as did the other unit when I did the same with it. Oh for some detailed instructions!

The next job is to mount the wall-mounted units. I need to know exactly how much they will have to be packed out at each end so at the end of the afternoon I placed them all in position on the worktop to get an accurate measurement.

null

I don’t want to be too over-optimistic, but getting them all up onto the wall shouldn’t take too long. It’ll be great when they’re up because strictly between you and me, with all that storage space, running water in the kitchen and a working toilet I’ll run the electricity cable in through a window and move out of the caravan.

I think that camping in the house will be much more amenable and considerably more comfortable, especially as yesterday I ordered a gorgeous inflatable double bed which will function as a superb spare once I’ve furnished the house and have a proper bed of my own 😉

Builder back on the job

I was beginning to worry that the builder would be unable to complete the house by the end of this month but my fears were partially allayed today when the sound of large vehicles heralded the arrival of the earth-moving team for the final time. I was planning to continue working on the kitchen but before I’d started, while we were talking, a large tipper truck arrived and deposited a load of stone.

null

null

null

After the tipper had left the two men who remained got cracking ‘terrassing’ the ground all around the house to get the slopes and levels right before laying the stone to make a flat area on the top of the slope at the rear of the house, a level pathway all around it and a much more even drive-in. I’d hoped that the stone used would be the crushed white kind that I had at my old house but unfortunately they used more of the ‘blue’ stone that they’d used right at the start of work to create the drive-in.

null

null

null

null

null

null

null

This how the place looked after they’d finished and left for the last time. They’d had to move all the rubbish that had previously been in front of the house to one side and that will be picked up later, possibly tomorrow, by one of the builder’s trucks with a grab.

null

null

null

null

null

null

null

null

It all looks much more presentable but to be honest they only did the bare minimum that they could get away with. The stone around the house has not been well tamped down and the ‘terrace’ area will not be able to take the weight of my outdoor furniture and chairs. I think I’ll have to lay stone slabs there and on the pathway around the house to make the areas stronger and more stable as I’ll be unable to build a ‘proper’ terrace area this year given the amount I have to do myself inside.

But anyway, we’re getting there. They connected up the water supply while they were here so the main is now buried and my standpipe has gone, so my caravan is now connected to the rear outdoor tap. But the bathroom is still problematic. The shower tiles have arrived but there’s now a problem with the tiler. I’m hardly surprised given the mess he made of the main wall in the bathroom and it’s now up to the builder to find a way out as he came recommended by them 😕

So, so slow

I’d hoped to get all of the drawer and door fronts onto the kitchen floor units today so I could move on and start thinking about other things. But it didn’t happen.

I have two units with a drawer over a reduced height door, one is 60cm wide and the other 40cm. I got cracking on the 60cm one first and got the drawer assembled and fitted fairly quickly, taking trouble not to rush and make any mistakes. One thing that’s different this time around is that there’s no template for the handles – I’ve had to choose how to position them on each type of front then measure and drill for them myself.

The 60cm unit came out OK – the only reservation I do have is that I’d have liked the handles to be a bit smaller but these were the only ones of this type that Brico Depot had and although I don’t love them, they’re OK.

null

Then I moved on to the 40cm unit and that’s when the problems started. The first thing was that the drawer pack contained only one drawer slider, not two as shown in the next pic. So that meant yet another unscheduled trip to Brico Depot – and the best part of two hours of worktime lost.

null

The nice lady at Brico Depot, who I’m getting to know quite well, took a drawer slider from another drawer pack but I had to wait around for quite a while as she had a queue of kitchen customers waiting for her to deal with them. I then dashed for home so I could get going again on the smaller floor unit.

And my troubles didn’t end with the drawer slider. All of this kind of kitchen unit are computer designed and pre-drilled in multiple places for hinges, drawer sliders, shelves etc, you name it. Except my one wasn’t. I thought it was weird because usually the shelf heights of all floor units are the same, but my one was different.

When I looked more closely I could see that it hadn’t been pre-drilled for drawer-sliders and also the drillings for one door hinge are in the wrong place and I’ll have to measure and drill myself. I didn’t have time to get the door on – just getting the drawer slider positions and drillings right took long enough – so the door will be the first job tomorrow. Here’s the unit with its drawer in place.

null

I don’t think I’ve ever had a job like this one before. All these little errors and cock-ups are taking so much time going backwards and forwards to either Leroy Merlin or Brico Depot and they’re making the job so, so slow 🙁

Got that sink-in feeling

It took half a day but the kitchen sink is at last in and fully working.

null

null

Along the way I found another leak – the plumber had capped off the hot and cold supplies to the sink but just as with the valve fitting for the rear outside tap, had only made the cold supply cap finger-tight. No wonder water was seeping down the pipe and creating a damp patch on the floor below. I’m surprised more wasn’t letting by.

All of the fittings in the house (toilet hand-basin mixer, shower, bathroom basin mixer and this mixer on the kitchen sink) are high quality Grohe fittings from Germany so should give good service. The only downside, if it is a downside, is that they are all on the heavy side and this mixer especially moves from side to side due to the thickness, or lack of it, of the stainless steel from which the sink is made. I’ll probably make some kind of metal under-sink securing bracket to hold it firm.

In case anyone is interested, here’s a shot of the sink fixings I created using the plastic corner blocks.

null

In general I’m now becoming rather worried about how, yet again, time is slipping by with no activity by or word from the builder. They assured me that the house would be ready inside and out by the end of this month before France shuts down for August but it’s becoming harder by the day to see how this can possibly happen given the state of the bathroom and the amount of exterior ‘landscaping’ that needs to be done.

An elegant solution

I didn’t have to mess around with wooden dowels to install the kitchen sink after all. Before I started on the kitchen I made a small collection of fixings – brackets, stuff like that. I’ve been working my way through them as I knew from experience I would but so far had only used one plastic block-type corner fixing. And I’d had enough trouble even locating them. Brico Depot didn’t recognise the product at all (despite them being a ‘go-to’ fixing in the UK) but I found them at Leroy Merlin.

It had occurred to me that now I’d notched out for the sink’s securing brackets there might be sufficient clearance for them to pass these plastic fixings which, if carefully fitted for height, would then give the brackets a ‘step’ to bite on. And so it proved. Here’s what I’m talking about.

null

null

And sure enough all of the fixings got a grip and eventually the sink was installed. I say ‘eventually’ because in the process, after I’d forced a lot of white silicone all around under the edge of the sink to form a waterproof seal one of the fixing brackets fell apart. It had to be the most difficult one to get at, behind the sink bowl, so the whole thing had to come out again. However, after many magic cuss words that always seem to do the trick, the sink was finally in and looking good.

null

I thought twice about permanently installing the waste because it could make getting at the mixer tap connections more difficult than necessary. In the end I did and it both looked ‘right’ and worked fine with no leaks after I’d filled the sink with several litres of water and let it go.

null

The next job would then have been fitting the mixer tap. However, the sink has to be drilled with a hole 35mm in diameter to take it (I purposely chose an undrilled sink as I did in my old house rather than one with two holes in it to allow for the drainer to go either way, one of which then has to be plugged – yuck!) and drilling a hole that big ends up being a bit brutal. I decided therefore to leave that until tomorrow when the silicone seal around the sink top has had a chance to cure.

So I had an early finish at around 5.30pm which gave me a chance to have a clean up, fit the shelves, empty the cooker to which I’d fitted a plug earlier (cooker and hob are now both connected) and replace the shelves in the dishwasher which have been gathering dust in the living room for too long.

null

null

To finish off, an especially notable event happened today. Gerald, a neighbour with connections to the Mairie, turned up with my house number which I fitted before resuming work in the house.

null

This means that I’m officially now a proper ‘Fleuracois’ and my house is now officially on the record. The latter unfortunately also means that the tax authorities will now know precisely where to send their demands 🙁

Thwarted!

To be honest, I hadn’t much looked at the hob unit until yesterday and to my surprise (although it’s normal apparently) it didn’t come with any connection lead. So I had to go to Brico Depot yet again while they were open (Sunday hours) to pick up some of the correct gauge cable. I only needed a metre – I had to buy five for over 22€!

When I got back I checked Indesit’s fitting instructions and helpfully (so it seemed) there were the two dimensions I needed – overall and the size of the hole to cut in the worktop. The overall figures helped me to place the unit between the wall and the worktop’s front edge and I then used the second dimension to mark out and cut the hole to fit the hob into.

The only problem was that it didn’t. For some reason the second smaller set of dimensions were the bare size of the bottom tray of the unit into which the hob is built and by cutting a hole that size the tray can’t go through. The dimensions need to be at least a millimetre or so greater in each direction.

So then I was involved in another marathon as (a) it’s not easy trimming all around the edge of a hole in a 3.8cm thick worktop without damaging it and (b) I had to avoid taking too much out in case the securing clips that came with the hob unit (and are rather crude actually) then wouldn’t work.

But that wasn’t the end of it. When I managed to get the tray of the hob unit dropping into the hole in the worktop I then found that the four retaining clips wouldn’t also go through and needed further notches cut into the edges of the hole for them to do so. This again took quite a long time in order to avoid making a mistake.

In the end everything dropped in and as the retaining clips had little teeth rather than screws (which is why I had to be so careful not to remove too much material to accommodate them) that meant the hob was at last fitted as securely as it was ever going to be.

null

Then it was time to finally secure the worktop in place. This was a doddle compared to getting the hob unit into it but took a while as a couple of fixing screws were almost inaccessible inside the corner unit and I had to add some extra fixing brackets due to some fixing positions no longer being available.

Now all that was needed was to connect the hob to the special high-amps power point that the electrician had put in. Just a simple connection – but of 3 ultra-heavy duty 6mm2 cables while bent double in a small space under the worktop. By this time not only was I getting tired but it was also hot and sweaty down there, but it turned out OK.

null

I couldn’t connect the oven because I found that I didn’t have a spare plug, but that can easily be rectified. I think the cooker and hob make a fine pair and I’m very pleased with my choice.

null

null

Then it was on to the sink if I was going to stand any chance of having the hob unit fully installed and connected and a working sink by the end of the week-end, as I’d hoped. I already knew that, much like the hob unit, the sink’s fixing brackets were fouling the sides of the hole cut into the worktop for it. Once again, I was wary about cutting to much of the worktop away but eventually by trimming some of one end away slightly and cutting notches at each end, I got the sink to drop into position.

But the anti-kitchen installation gods were against me because I then found that the securing brackets were too short to work in a worktop of this thickness (3.8cm). So I had no choice but to call it a day, but all is not lost. What I’ll have to do is buy a length of small square section dowel and secure it all around the inside of the hole in the worktop 5mm or so above the bottom.

The sink should clear it and it’ll provide a step for the securing clips to bite into from below. That’s the theory anyway but I won’t know until tomorrow whether it’ll work in practice. Watch this space. What a tricky installation this is becoming – the most tricky of any I’ve ever done…

Yet more kitchen

I had a late start today because I had to pick up yet more stuff that I found I needed from Brico Depot. However, before I went I checked on the angle joint in the worktop that I glued yesterday.

null

null

null

null

It’s not perfect but I hope that it will stand the test of time when the kitchen gets into use. The main job today was screwing the worktop down, starting with the long joined length. The next piece that I fitted was the length over the dishwasher and here’s a shot of the join between it and the long length. It’s much neater and far less of a germ and dirt trap than the joins I had in the kitchen of my old house.

null

I’ve sealed all the cut surfaces including the ones that can’t be seen under the joins on both sides of the kitchen and also around the cut-out for the sink which is most vulnerable to damage by water.

null

null

I’ll do the same for the cut-out for the cooker hob which I started marking out before calling it a day.

null

Work moved on only very slowly today. Partly it was because I was dealing with things that were intricate and needed care but also because quite honestly I’m feeling pretty tired and when you’re tired, that’s when you make mistakes.

I’ll try to get an early night tonight and see how things go when I continue pressing on tomorrow but in any case I think I’ll meet my target of having both the hob and sink installed and the sink working by the end of the week-end.

Good progress today

The first job was to re-make the shelf unit to fit into the angle between the worktops. This time it went pretty well and it’ll look fine once it’s completely finished.

null

null

With that out of the way I could at last move on to getting the worktops ready for fitting, starting with cutting a hole for the sink unit. The manufacturer didn’t give the dimensions of the hole so I had to take careful measurements myself and trust to luck. Too small and all of the cutting would have to be re-done and too big the sink could end up fitting too loosely allowing water to seep under its edges that would end up destroying the worktop. I’m glad to say that my measurements were about right.

null

The hole also had to be correctly positioned as when I fitted the floor unit I had to weld the PVC tubing that will make up part of the waste. There will be a tiny bit of room to juggle a bit, but not much.

The sink can’t be installed until the worktops have been permanently fitted. The tricky bit was the glued joint and all the while I’ve been fixing floor units in position and even while I was making the shelving unit, I’ve had to be meticulous about levels as otherwise the glued edges would not exactly match. A difference in level of even half a millimetre can be easily felt to the touch and would eventually lead to the exposed edge being damaged over time as objects were slid over it when the worktop was in use.

I ummed and ahhed a bit about inserting a couple of dowels in the worktop ends to be joined. This is an easy process with proper woodworking machinery but less so with hand tools. I did it for the joint in my friend Val’s kitchen worktop so in the end decided to do it in mine too. Then it was time to bite the bullet, apply the glue and make the joint as best I could.

I’ve used good quality waterproof exterior wood glue. This makes a foam as the joint begins to cure filling up any gaps and actually oozing out of the joint as curing progresses. I think I’ve got the two surfaces dead level by clamping the free end and weighting the centre sections and the other end so both pieces are at exactly the same height throughout.

null

null

null

I won’t know until tomorrow how successful the process has been but it looks as though things will be fine. Once the end clamp and weight have been removed the cured glue that has oozed out of the joint will be visible and I’ll have to carefully remove it with a sharp chisel. That will then leave the way clear for the sink to be fully installed and connected up.

I’ve had water for the last two days – what luxury to be able to pee in a proper toilet! When I turned it on there was a huge leak coming from behind the cabinet where the sink water pipes are. I had a nightmare vision of having to rip the unit out again to fix it but then realised that the plumber hadn’t tightened a cone fitting on the shut-off valve for the outside tap.

How he didn’t find it when he tested the system I’ll never know but the panic was over when I managed to get an adjustable spanner in there and tighten it. I’m glad to say that the replacement shut-off valve that I fitted for the dishwasher was completely leak-free in comparison 😉

My kitchen installation continues

I’ve been quiet for the last few days for obvious reasons, but that doesn’t mean that things have come to a complete stop in the house. Firstly, I completed the housing for the dishwasher. This was a cause of some relief for me because although you try to measure and build everything accurately, you can never know until the appliance, on this occasion the dishwasher, is properly in place with all of its connections made. And it looks great too 🙂

null

null

null

For the last three days or so I’ve been working on building a custom shelving unit to go in the space created by the angle between the floor mounted cabinets. My original intention was just to box it in completely but it occurred to me that some kind of storage unit would be a much better use of the space. It’s been a tedious, painstaking process which would have been been easier if I had access to proper woodworking machinery, but I just have to do the best that I can with my basic hand tools.

Here’s a shot of the basic structure. It looks simple but believe me, it’s much more complex than it looks and every cut has had to be accurately done to measure.

null

Here’s where I got to by early this evening. Unfortunately I’ve got to remake the front panel because although I thought I’d judged them correctly, the securing screws I used were a fraction too long and have just blown through the front surface.

null

This may be a blessing in disguise actually because due to the poor quality of the board, its white surface has broken away very badly along its cut edges and when I remake it tomorrow I think I’ll be able to do a lot better.

The circle of life

We said goodbye to my sister Sandra yesterday. She suffered bravely with MS for most of her life and Mike, her husband of 60 years, dedicated himself to looking after her every need when lesser men might have thought about throwing in the towel.

In the end the disease was too much for her body to cope with any more and she passed away peacefully in the early hours of yesterday with Lesley her daughter there to hold her hand and say goodbye.

null

On the same day I missed a call from Brad, my son, just before Mike phoned me to tell me about Sandra. Brad’s call was to give me the wonderful news that Charlotte, his partner, is now expecting a baby. I’m overjoyed and delighted for them and can’t wait to become a granddad in January.

null

And so the circle of life turns in front of our eyes. It’ll be a joyful event when the new-born arrives but it doesn’t make losing the other any easier.

Sandra is now free. She’s escaped at last from her useless body and now she can fly and soar with the angels. Bless her.

Quite slow… but very accurate

I picked up my new dishwasher as arranged yesterday and although I wanted to go only a few kms further up the road to buy some more materials that I needed for the kitchen install I thought that a brand new dishwasher on an unlocked trailer might prove to be too big a temptation for someone. So I brought it straight home and unloaded it into the house.

null

null

That meant that I still had to go back to Périgueux to buy the stuff I needed and this is one of the main reasons why DIY jobs go so much more slowly here than back in the UK. Where I lived if I needed tools or materials I could be out and back in an hour or so. Here it takes half a day, or in my case yesterday, the whole day to pick up the dishwasher and get the items I needed.

My first port of call was Brico-Depot which is on the east side of Périgueux. I don’t know what’s happening to them because their store is becoming more disorganised every time I visit, they increasingly don’t have common items in stock and as I found yesterday, items like Contiboard are often on the racks for sale damaged. So I ended up having to go and get all of what I wanted from Leroy Merlin. The trouble is they are on the west side of Périgueux and there are lots of roadworks with roads blocked off on that side of the city at the moment and that’s where the rest of the day went.

As I mentioned previously, I’d planned for the first job of the day to be doing the angle cut in the worktop. As I’ve said several times, it’s essential for the cuts on both of the worktop sheets to be extremely accurate. They have to be vertical to get a good joint when they are glued and the cut angles on the sheets have to be complementary and also spot on so the sheets on both sides of the angle sit snugly against the wall.

I ended up adjusting my circular saw yet again because I still wasn’t happy with the verticality of the cut. I then went ahead and did the cuts on both worktops and quite honestly, after measuring, remeasuring and measuring again before cutting, things couldn’t have gone much better. Here’s the first view I had of the angled worktop on my Workmate and trestles before I checked it ‘in situ’ on top of the kitchen units.

null

null

And here’s the first view I had of it ‘in situ’. I was super pleased and also very relieved because quite honestly, the join couldn’t have been very much better.

null

null

null

null

With the pressure now off, I was then able to carry on with the next series of jobs. These included making the waste system for the dishwasher, permanently fitting the cabinet that has the dishwasher services behind it, assembling its pull out corner storage unit and making my ‘non-standard’ cabinet joiners as I can’t use the ones supplied by Brico-Depot as I don’t have the space. I made the two I need but only installed one of them before I called it a day.

null

null

null

From now on it’ll just be a matter of ‘knifing-and-forking’ it as the trade say ie just doing one task after another until the whole job’s done. There’s nothing really challenging left to do although I was rather concerned today by the plasterboard fixings I used, even good quality Rawlplug ones that came from the UK, tearing the plasterboard sheets and needing special care to get a good solid fixing. I think the quality of the sheeting that’s been used may have had something to do with it so I’ll have to pay special attention tomorrow.

Pure frustration

It’s been a very long day today. I was up at about 5.30 am after a fitful night’s sleep disturbed by a thunderstorm and took the opportunity to deal with a boring but essential sanitary function that nevertheless has to be done on a regular basis. I’ll say no more. Then after a clean and tidy up and a leisurely breakfast I decided to make an early trip to Leroy Merlin to buy some more stuff that I need for the kitchen installation.

That included some more plumbing items and also a high quality, fine cut circular saw blade. I bought a Bosch one that was quite expensive but when I tried it out after returning home it proved to be exactly what I wanted. After a couple of experiments I confirmed that by cutting a worktop from the underside it was possible to get a perfectly clean cut with no damage at all to the worktop surface.

But there was still a problem. When my circular saw was new and I’d used it for the installation of my friend Val’s kitchen I didn’t have to worry about the worktop cuts that I’d made. Every cut was clean and just as importantly, perfectly vertical. Since then I’ve used the saw for various jobs and also loaned it to someone who used it for a heavy job and now things were different.

Although the new Bosch blade was giving me a nice, clean cut it certainly wasn’t vertical and when doing thick cuts, like for worktops, it’s absolutely essential that it is. And even more so when you want to glue join two cut edges, as I do to accommodate the angle between my kitchen walls. Luckily I had enough spare worktop in order to cut overlong lengths for each worktop segment, checking the cut and then making adjustments to the saw and cutting again. But it took literally hours, and I mean hours, of frustration making cut after cut before I got anything approaching cuts that were vertical.

But get there I did and I got everything cut and ready to fix except for the cut angle.

null

null

The walls and floor of the kitchen are so true that I can do all of this work without the cabinets having to be permanently and rigidly installed.

null

null

On each side of the kitchen there’s a right angle join. The next shot shows how I’ll do them, based on an idea I got from looking at a kitchen display at Brico Depot. I think it looks very neat and tidy – much better than the awful big joints that I had in my old kitchen at Plazac which were unhygienic dirt traps.

null

I’m not sure yet whether to use the same type of strip to cover the worktop cut ends, as below, or to use the usual stick-on edge tape.

null

That just leaves the angle cuts to do which will be the first job tomorrow after I’ve picked up the dishwasher from Conforama. For the time being I’ve just roughly marked out where the cuts will be made on the two segments of worktop by placing one on top of the other and marking where the outside of the joint will be on each one.

null

null

By then marking each sheet where they overlap at the corner of the angle and joining the ends of the line on each one, voilà, there’s where you make your cuts.

null

You need to be very careful and accurate, which is why I left it for tomorrow. By around 7.00 pm when I called it a day I was much too tired to do such job. And anyway, although it was a very frustrating day, I was still pleased with the progress I managed to make 🙂

As a footnote, as I type this we’ve got a wild orange sky, thunder and storm force winds that are trying yet again to tear down my ‘tonnelles’. I’m just keeping my fingers crossed that they won’t succeed as I’ve really and truly got enough on my plate at the moment.

More done in the kitchen

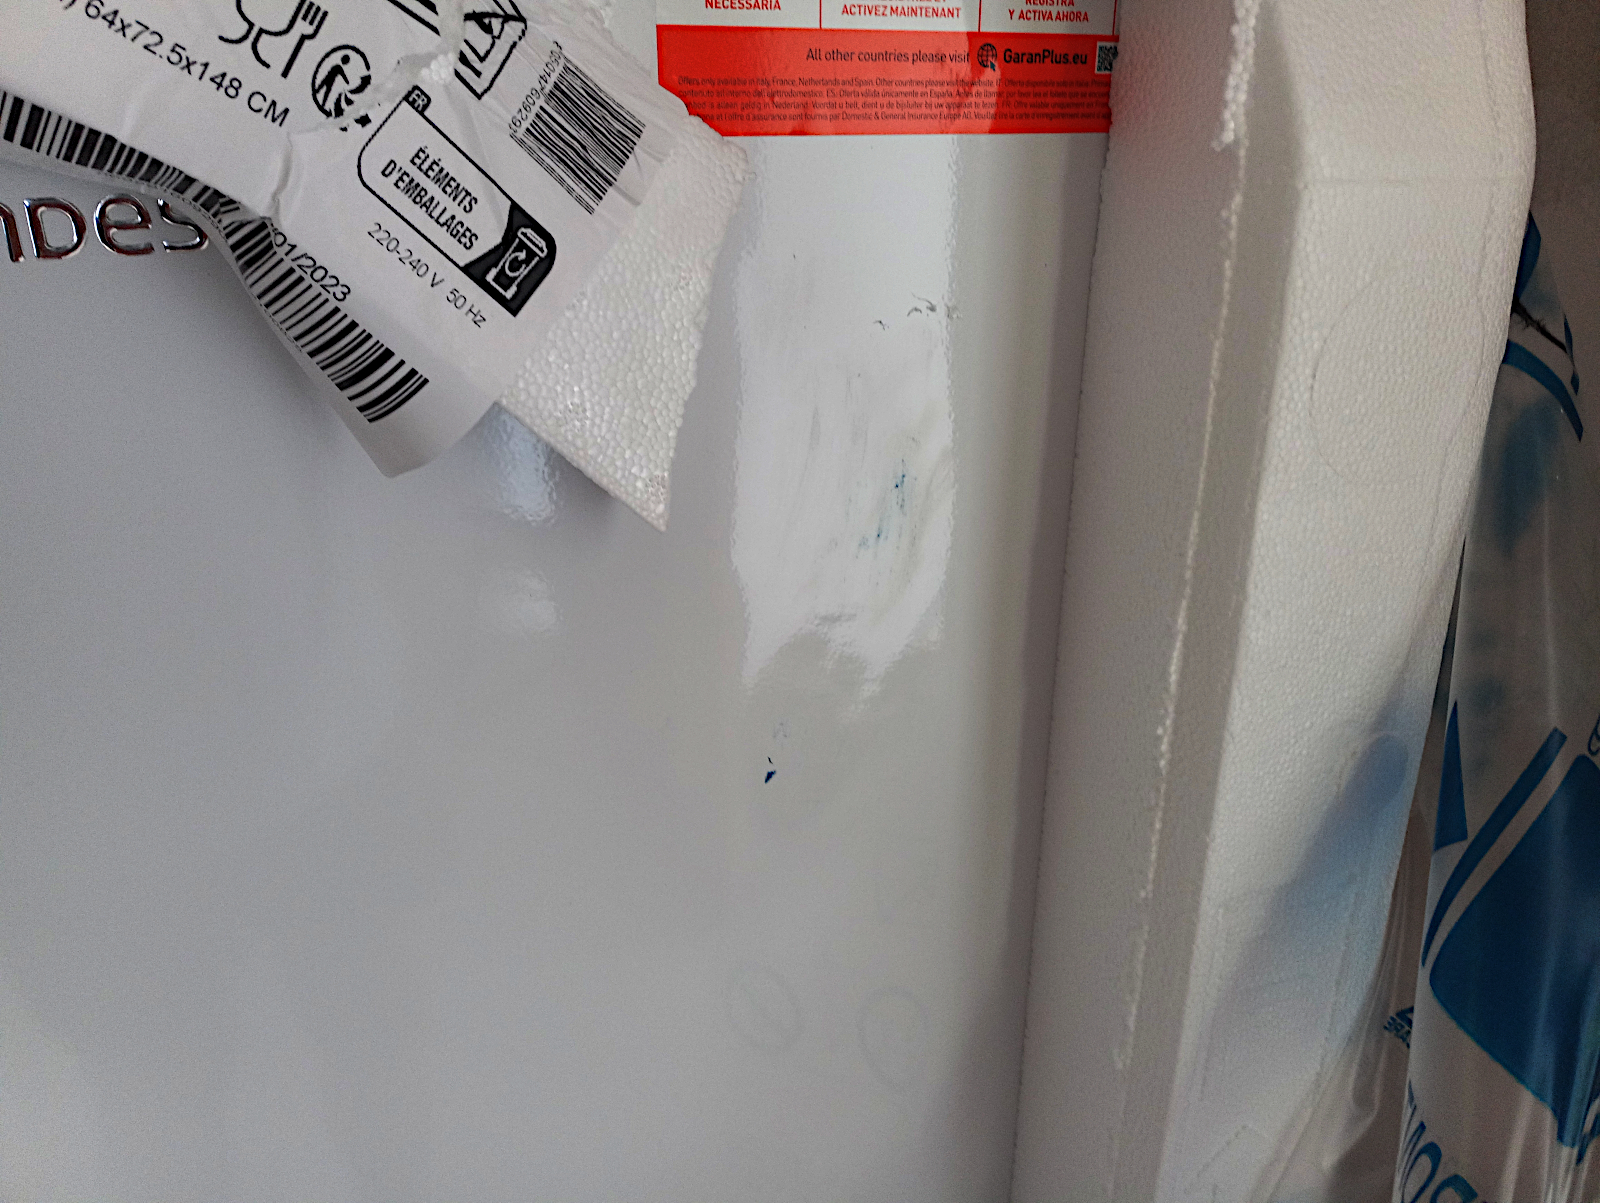
I had a bit of a delayed start to the morning’s work because I had to write an email to the fridge supplier. I received a reply during the day which I’m considering so I’ll leave it there.

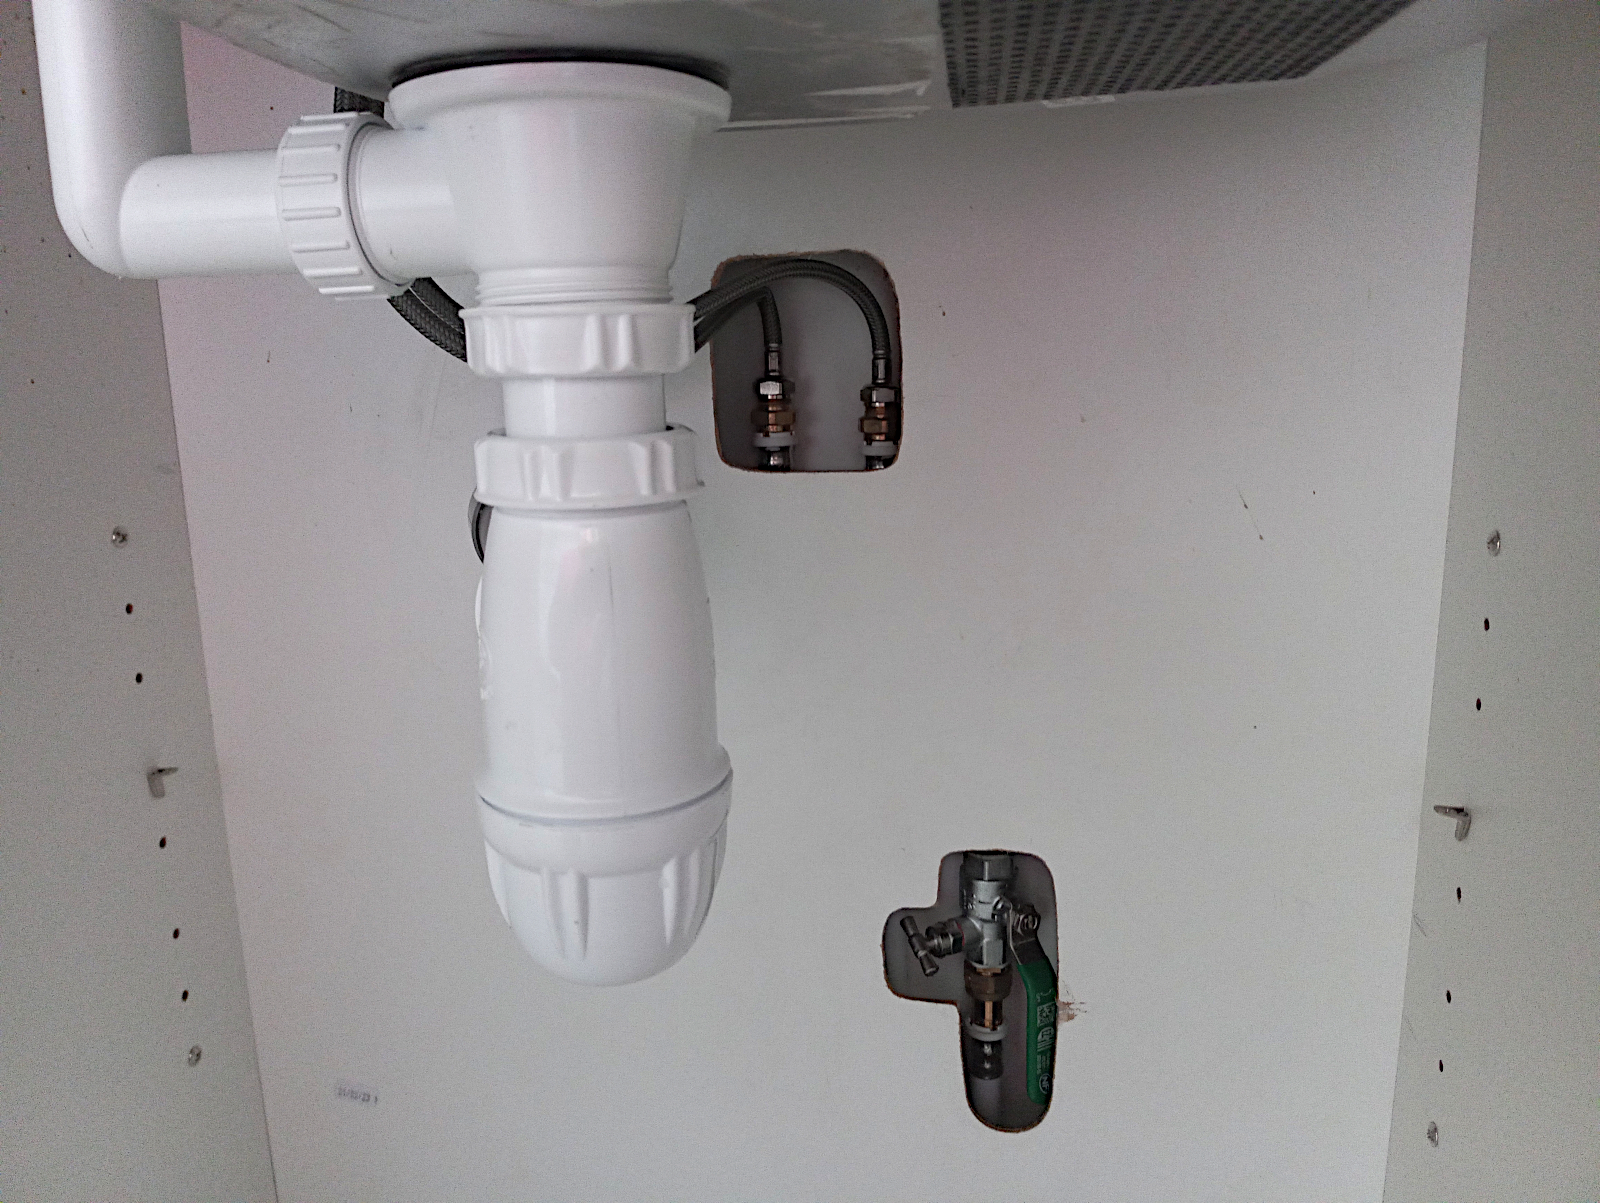
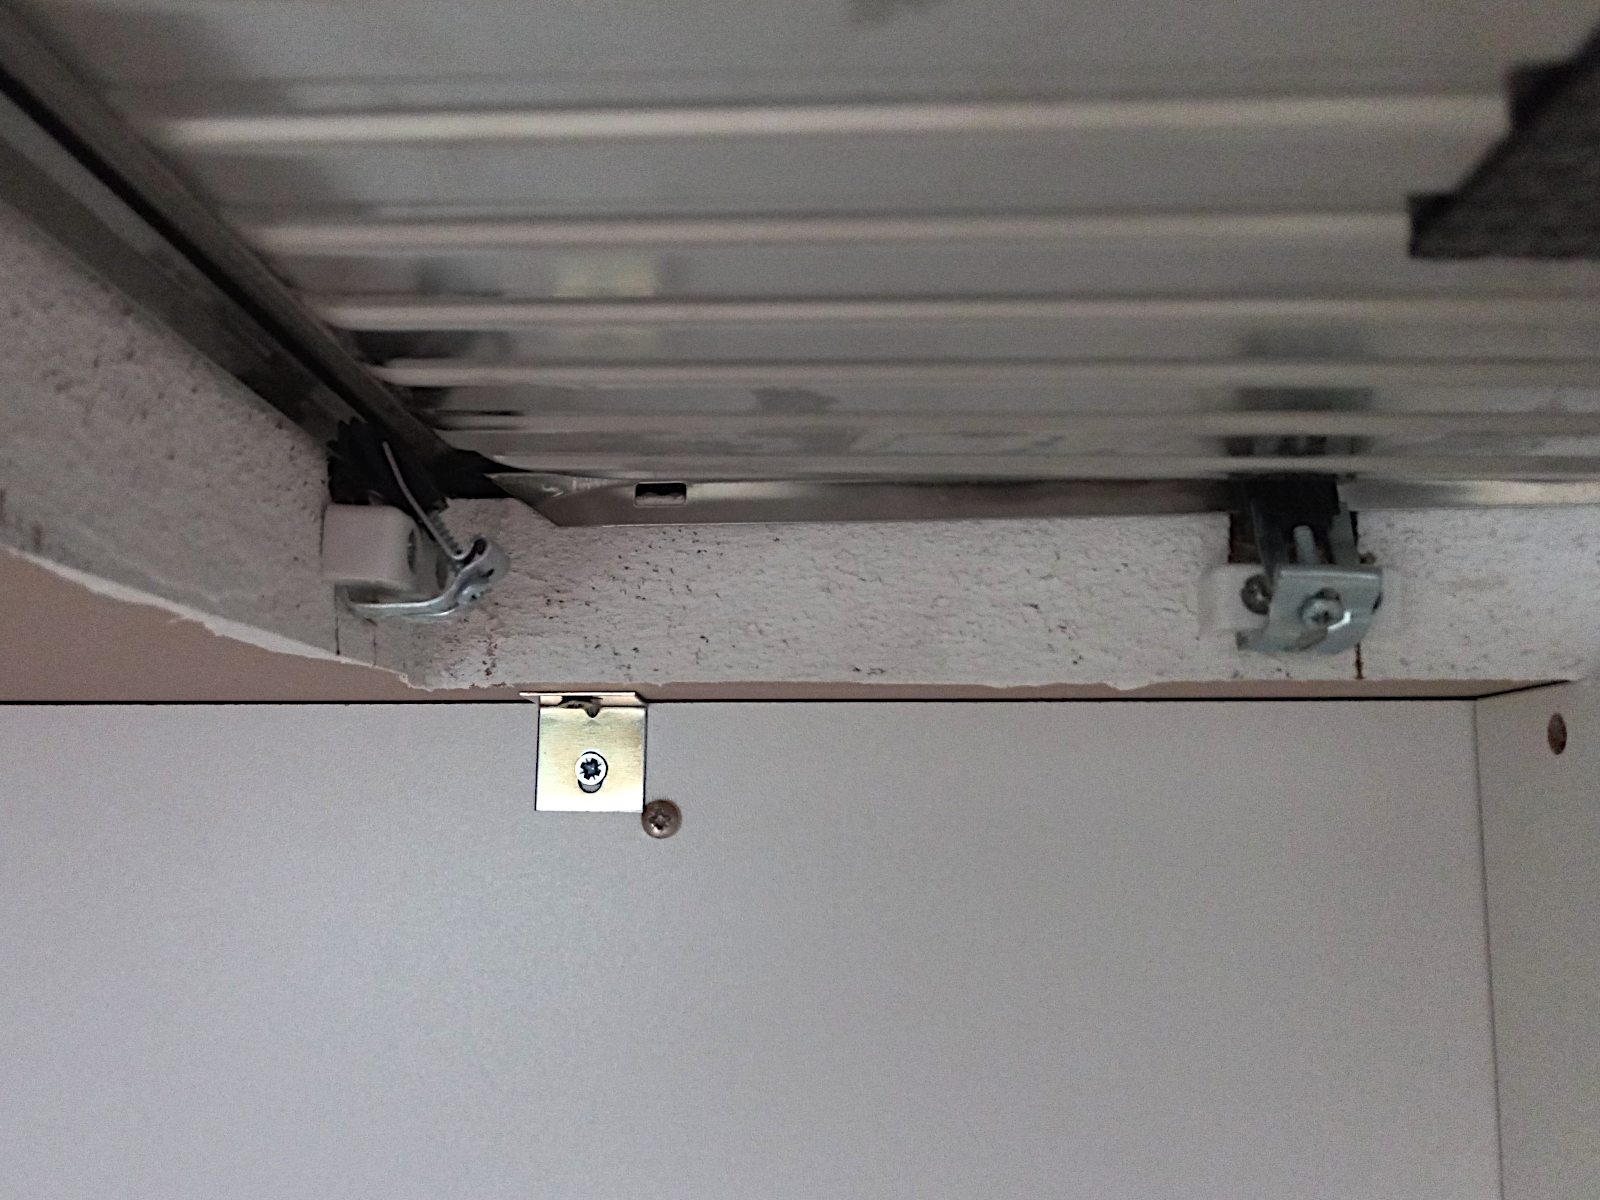
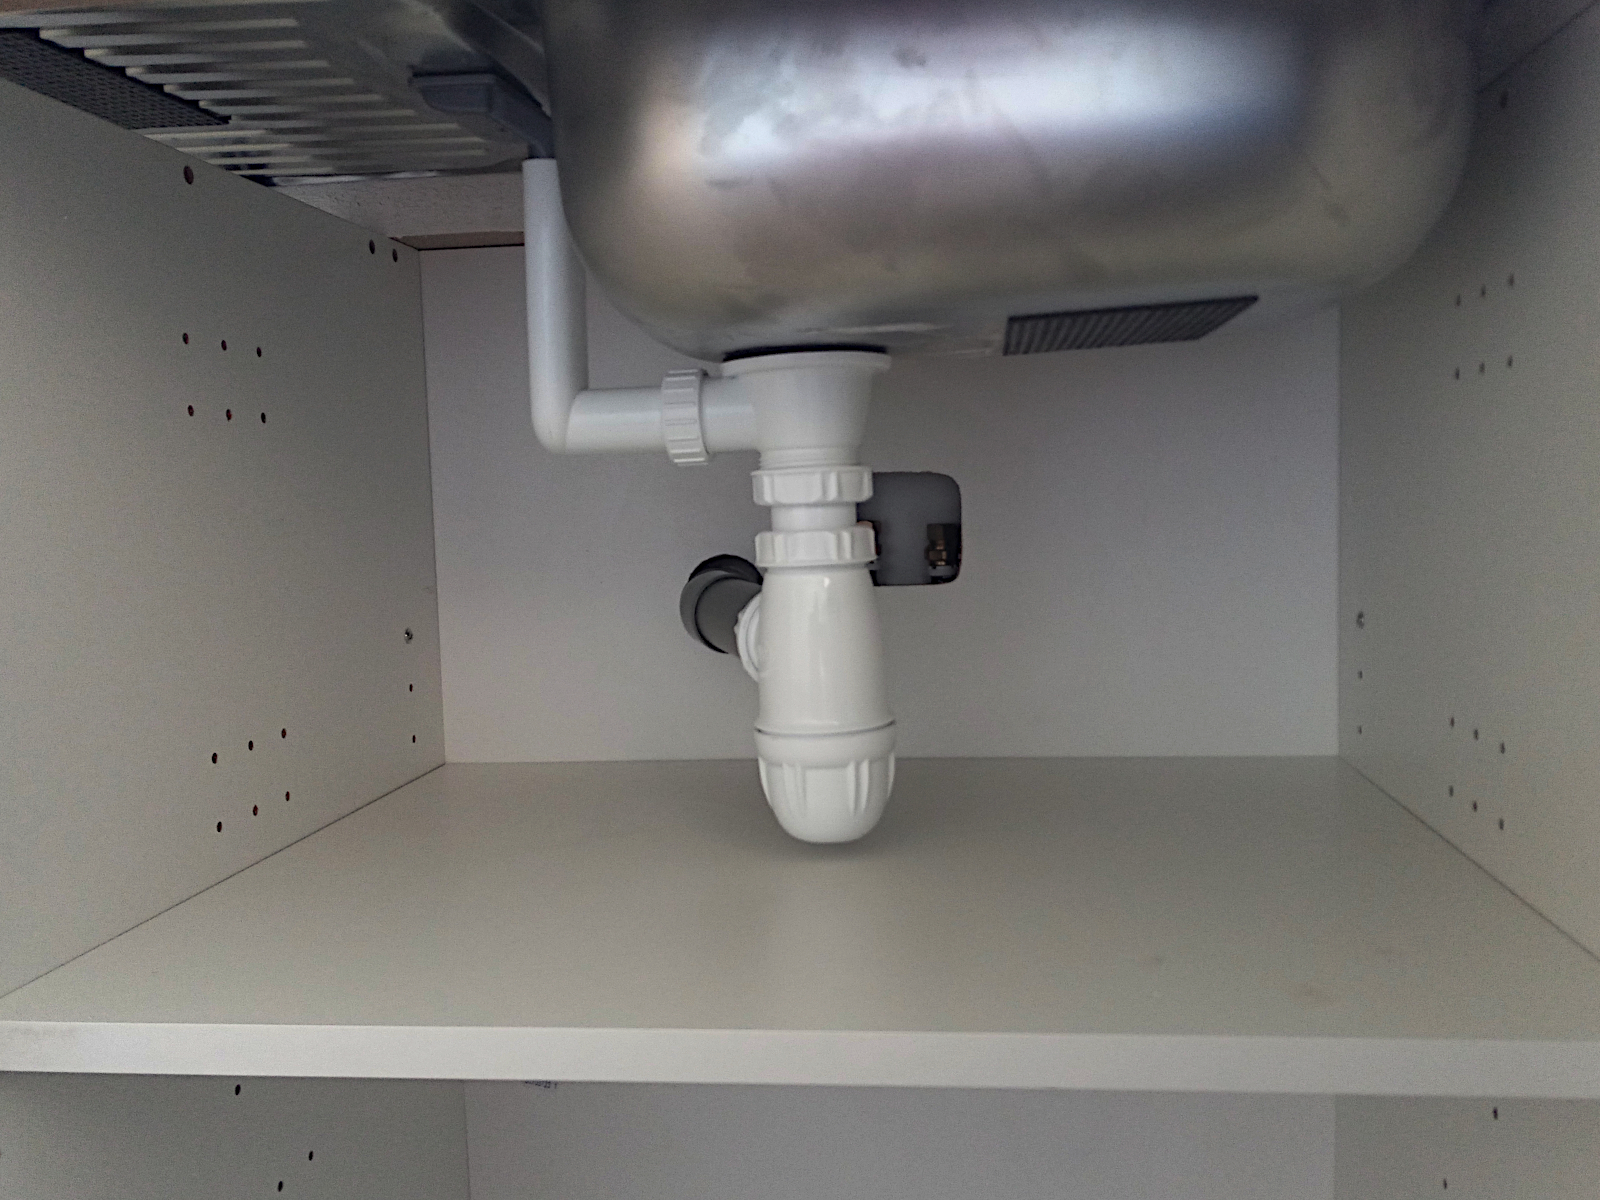
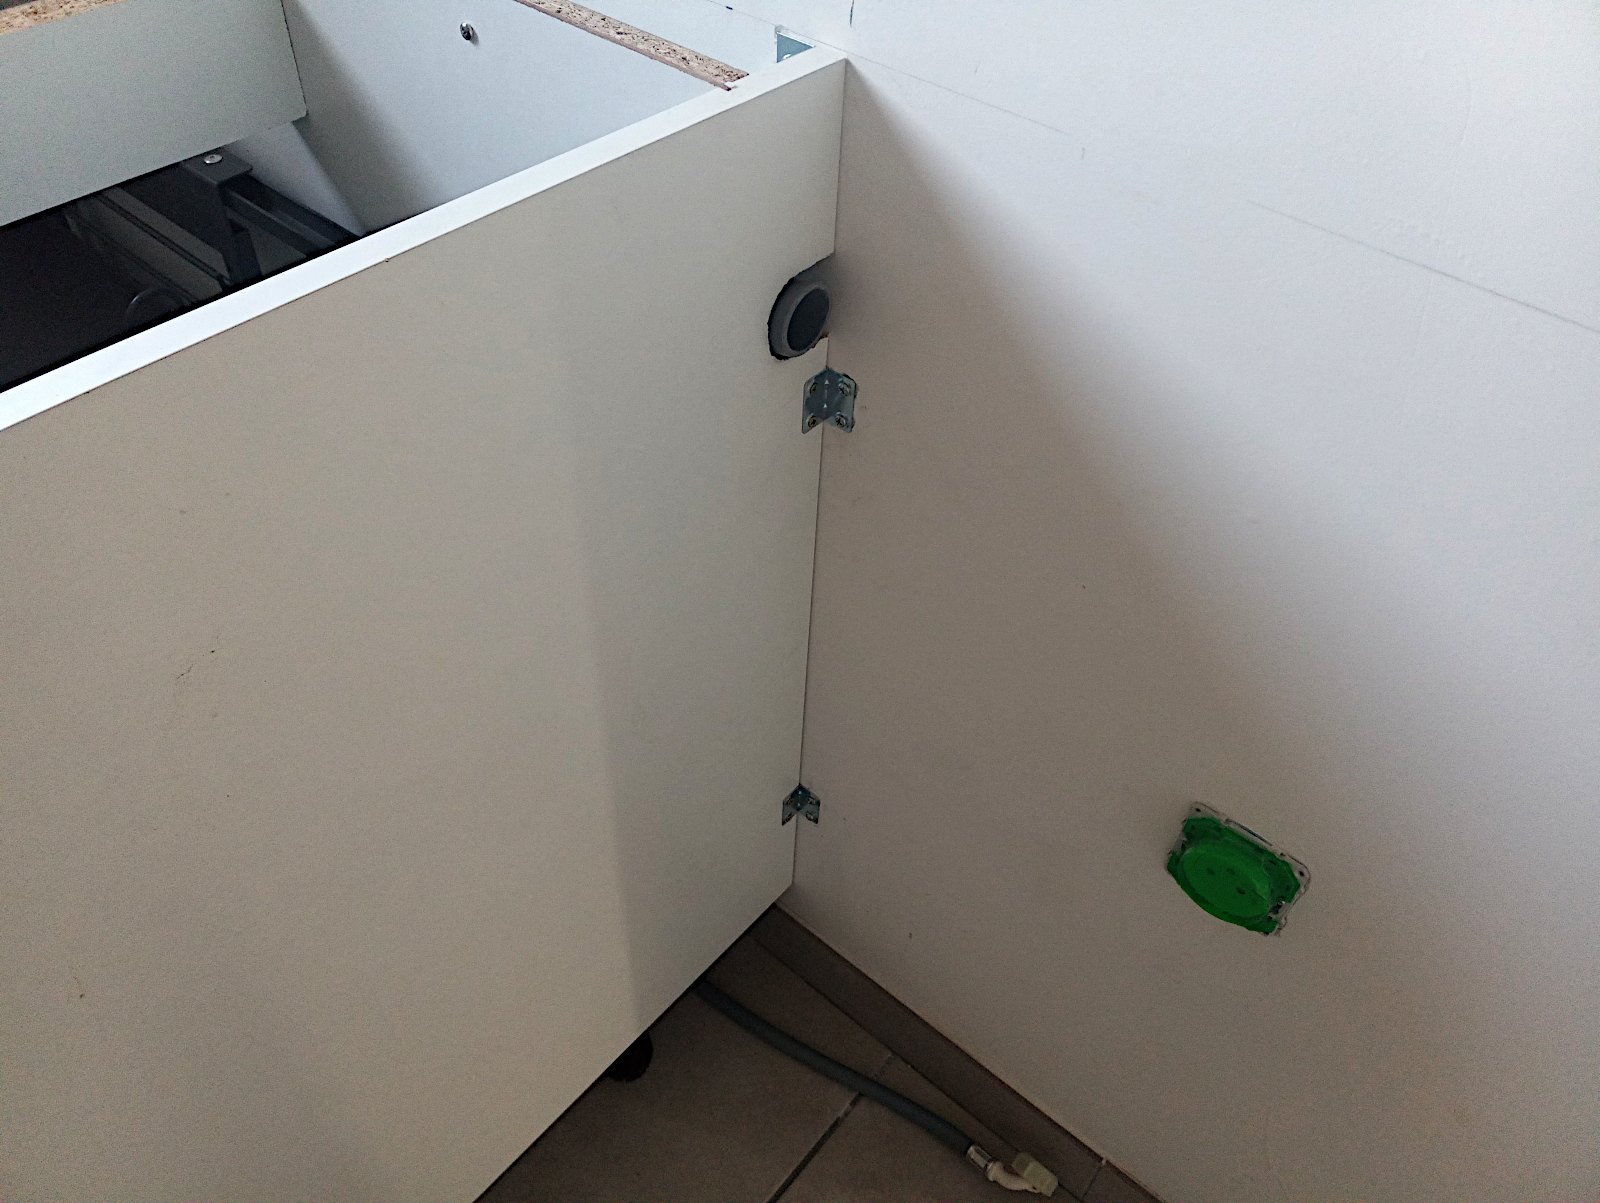
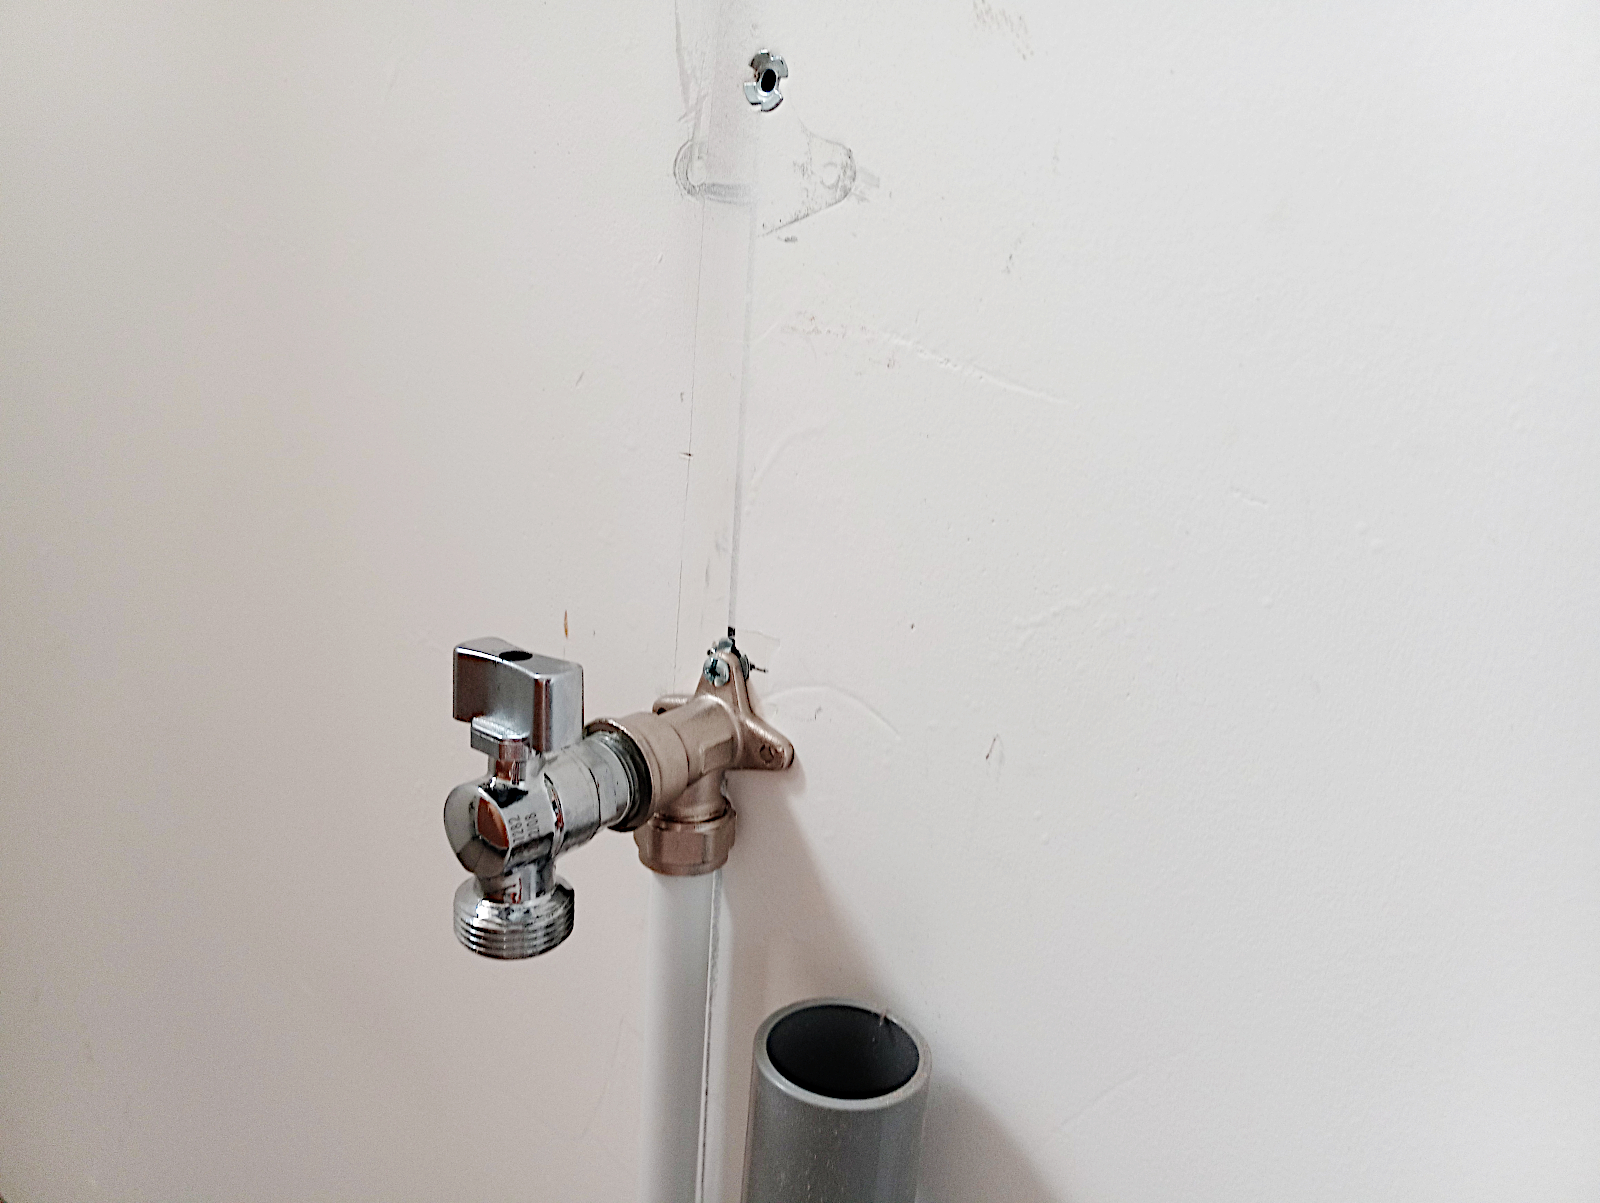
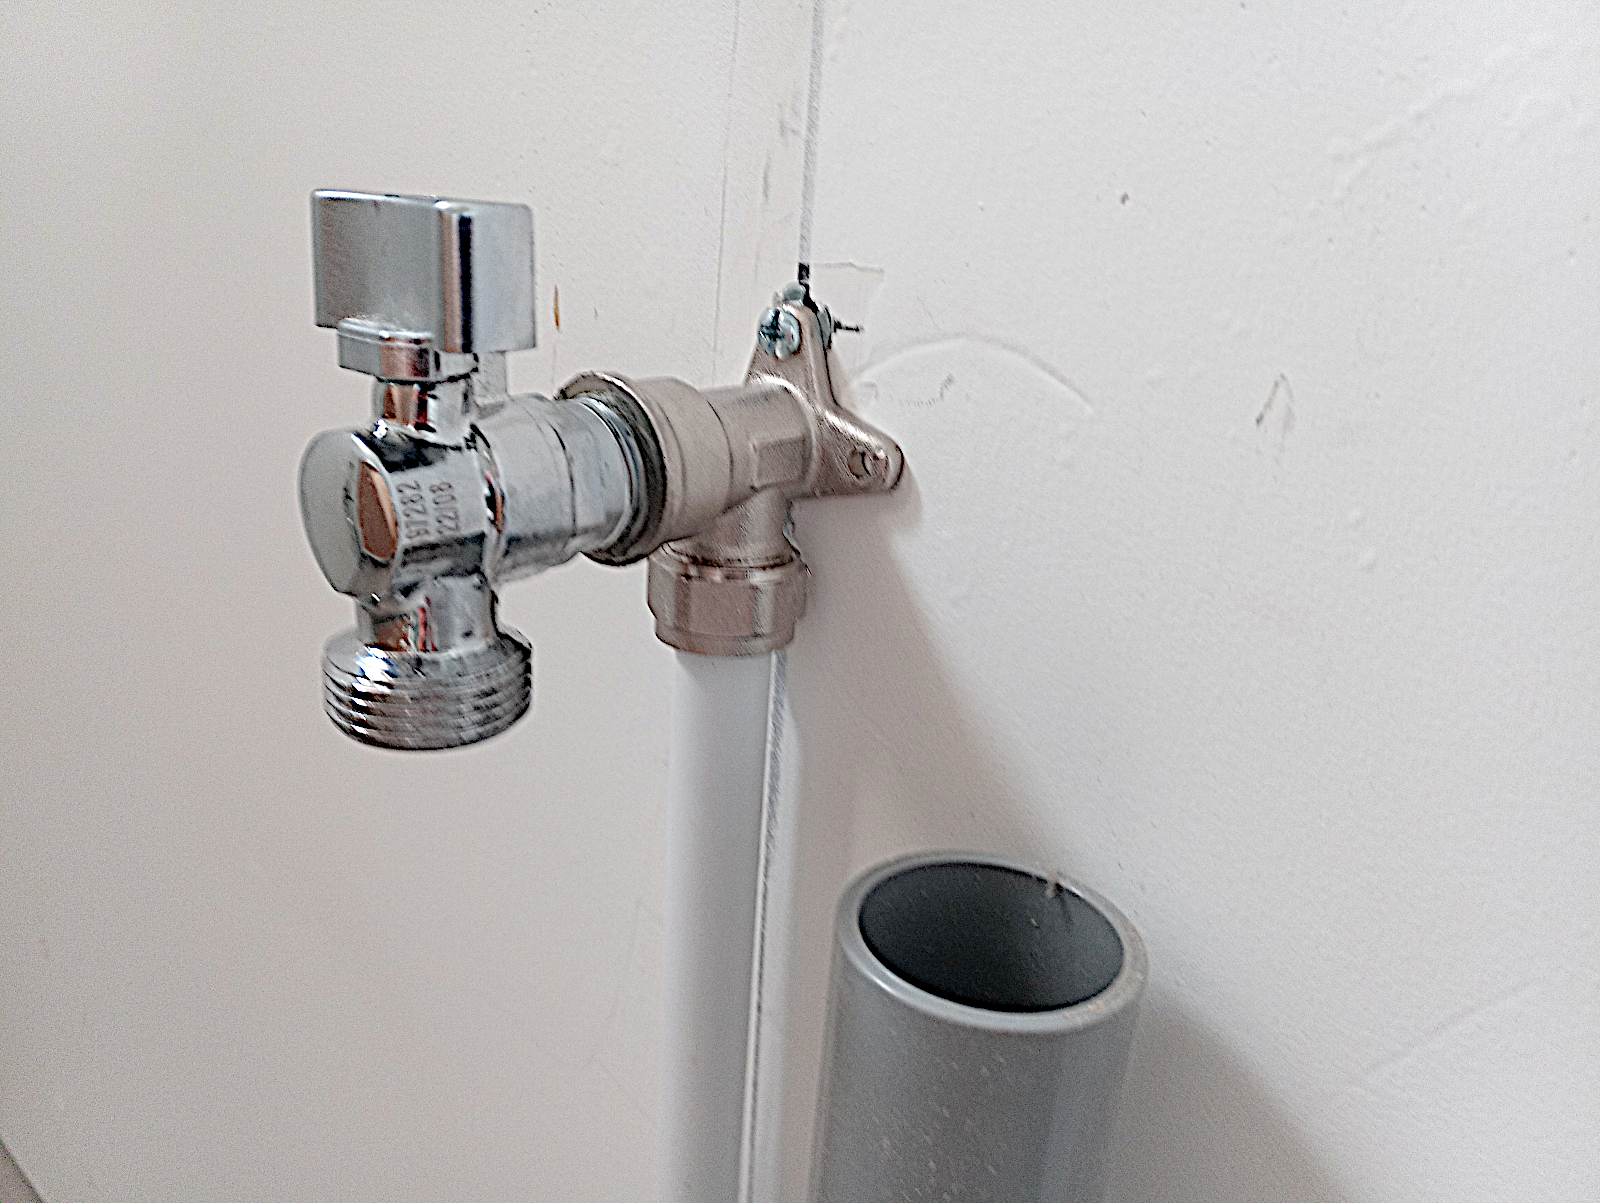
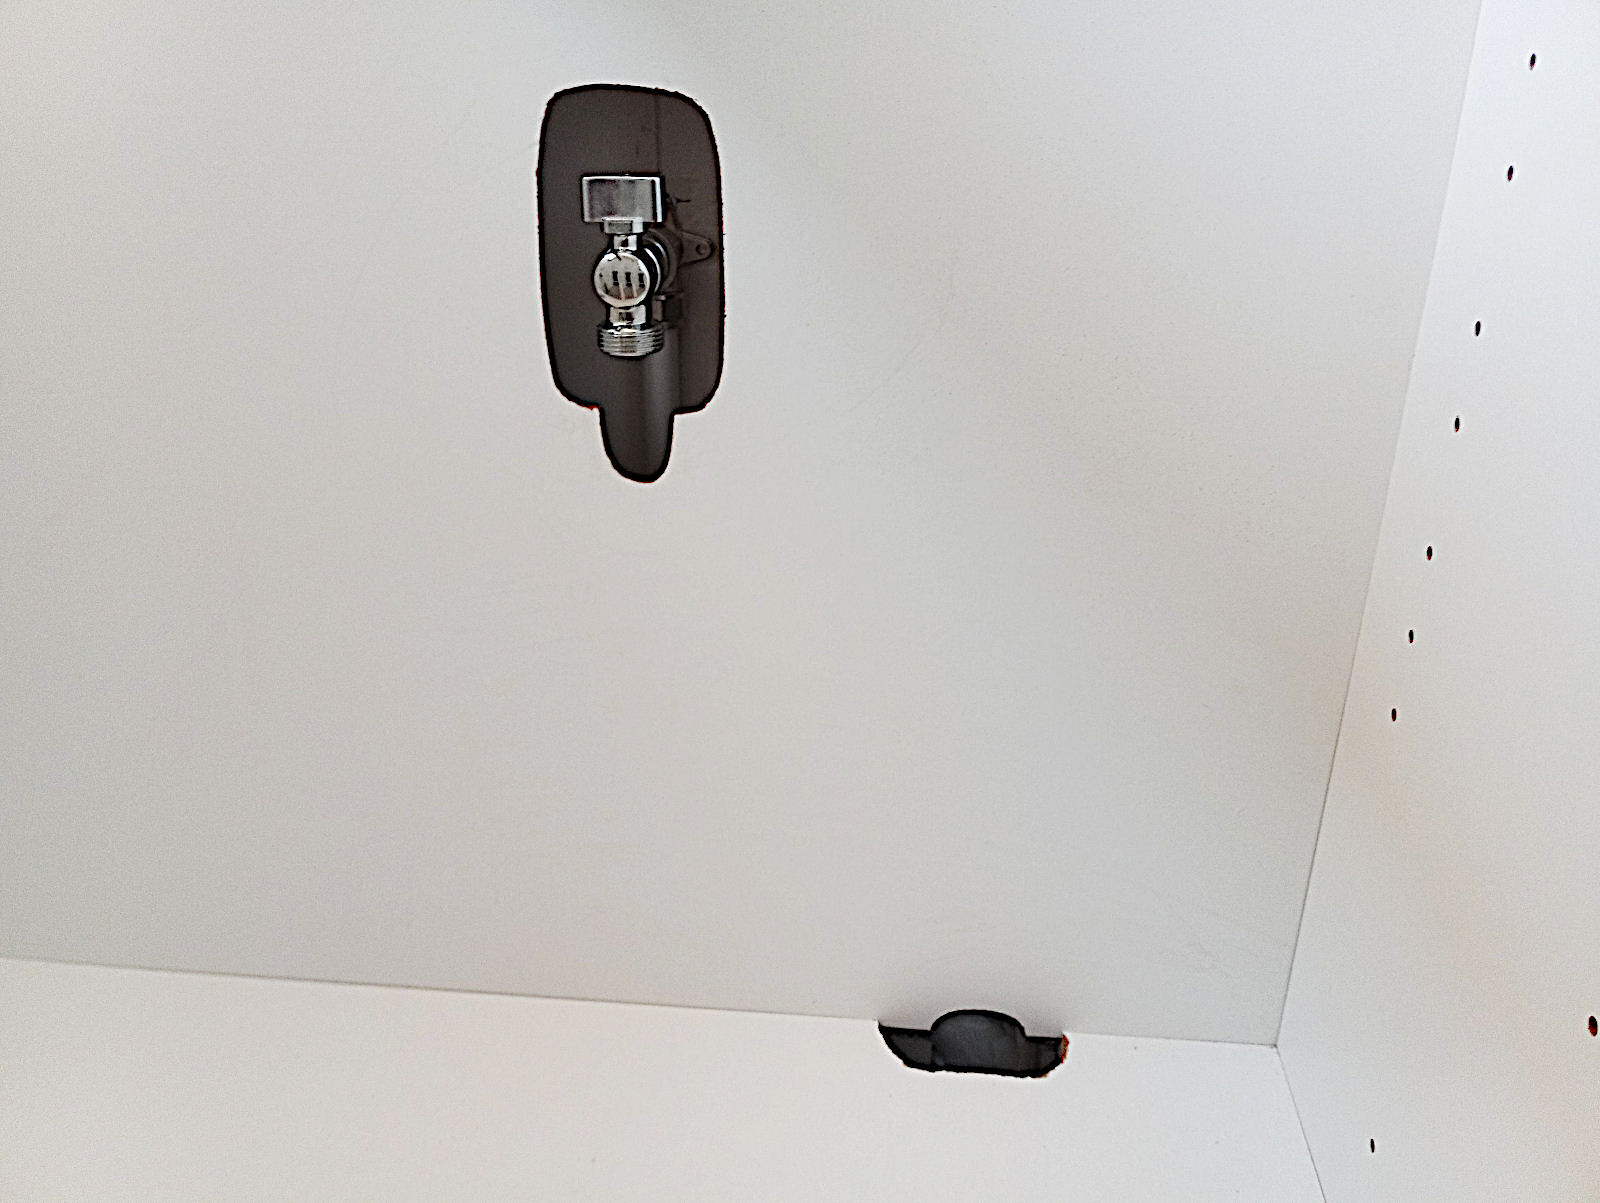
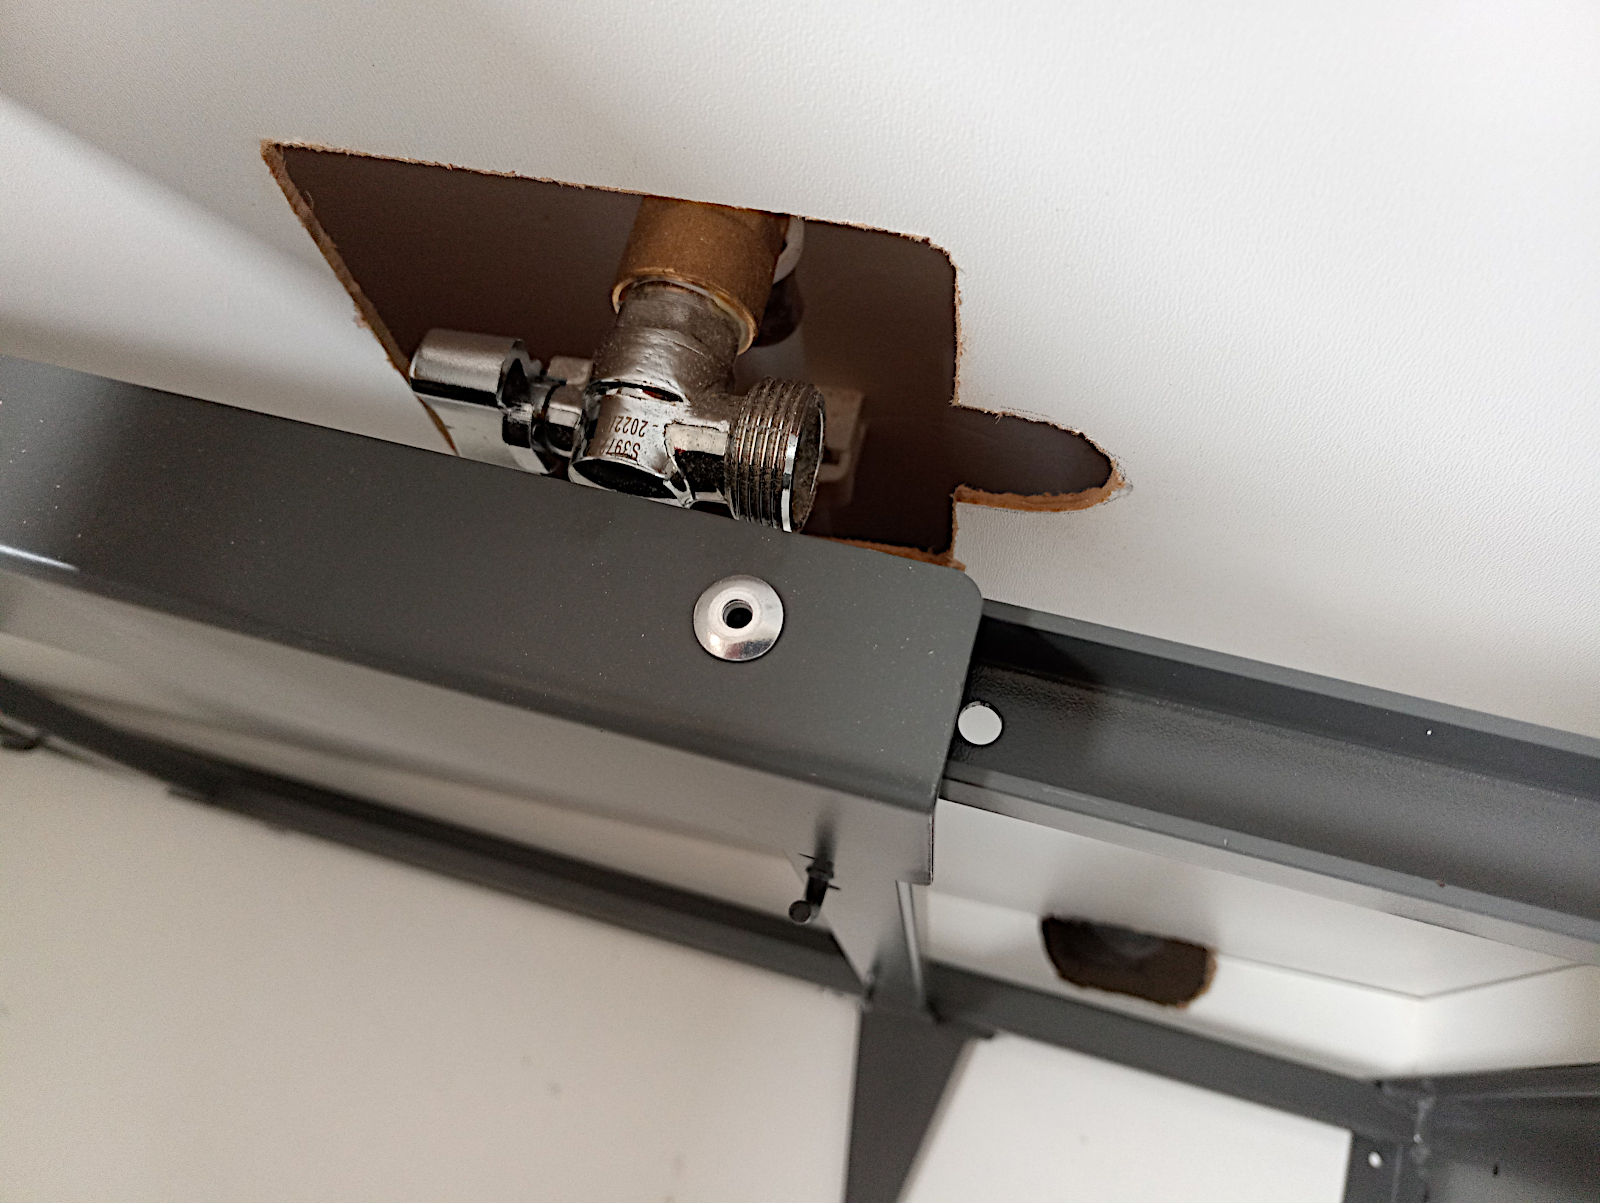
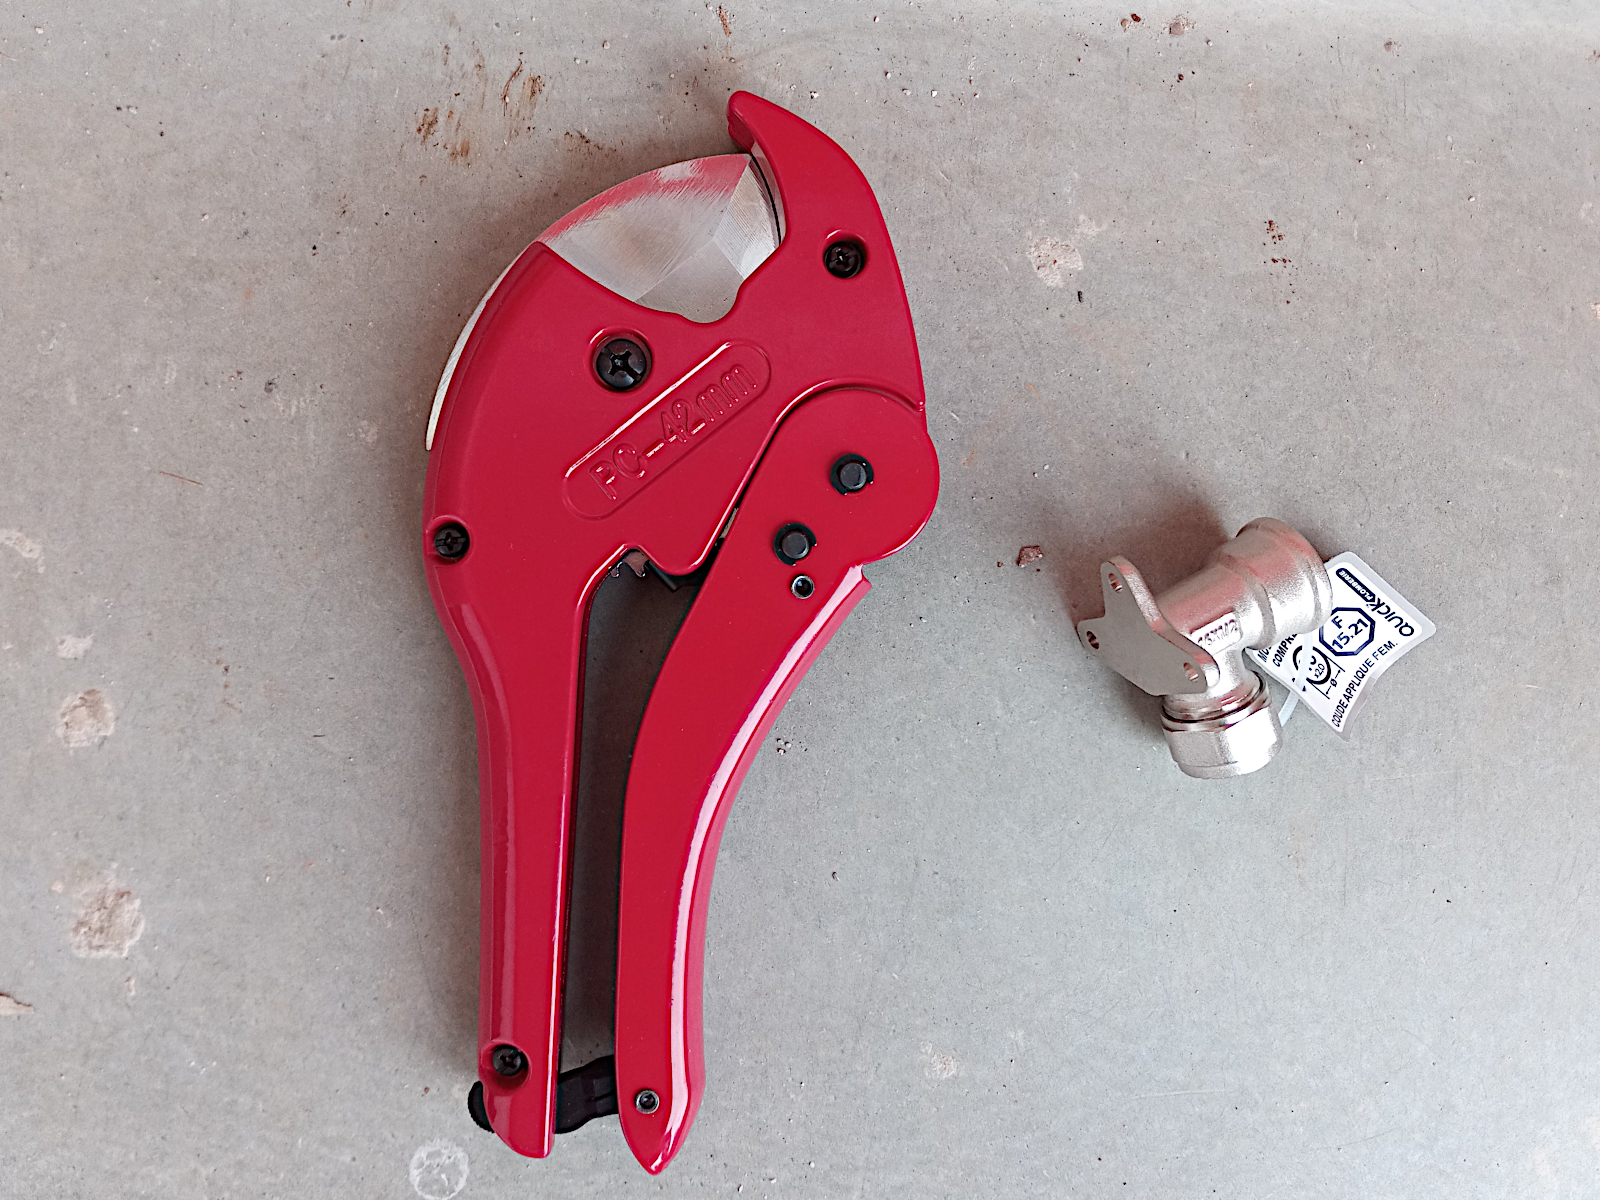
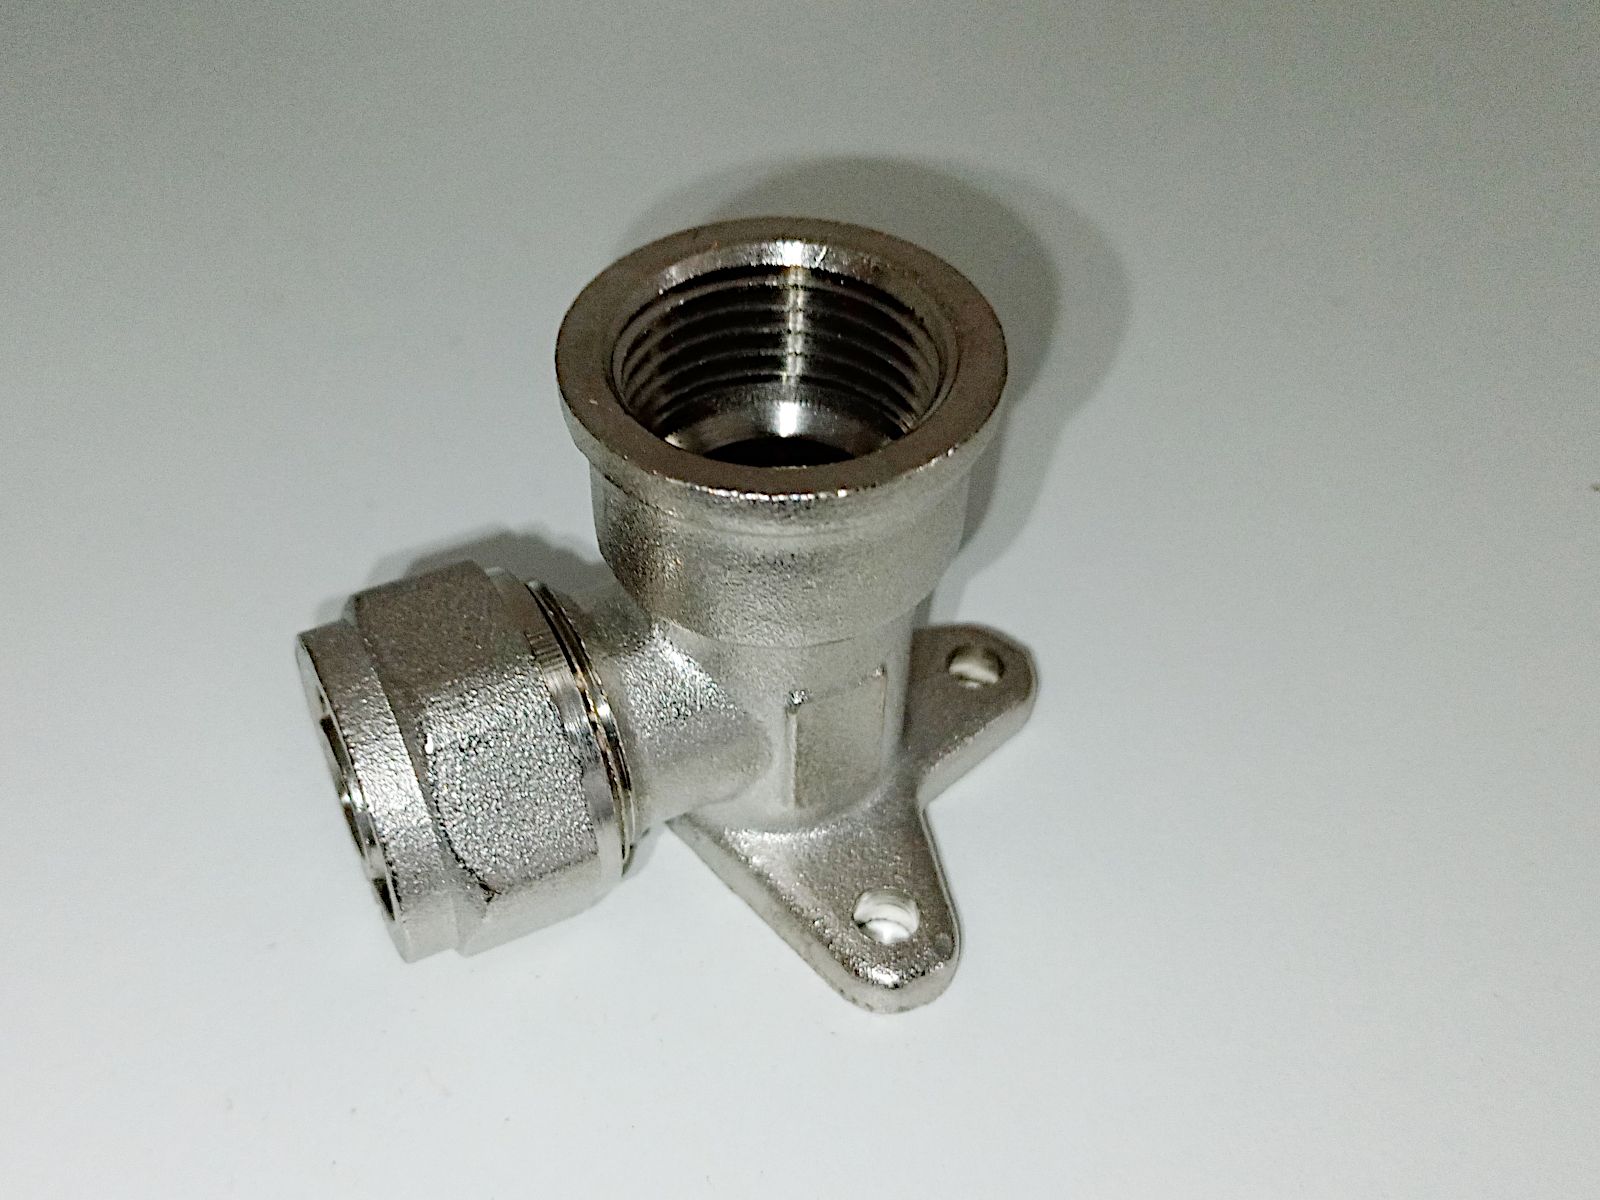
After that I got straight on to lowering the height of the dishwasher stop-valve. It took a few minutes to carefully measure the amount to cut down the tube by so I could use the screw hole to secure the wall connector that was being used for a pipe clip, followed by 10 seconds to cut the pipe and another minute to make the connection.

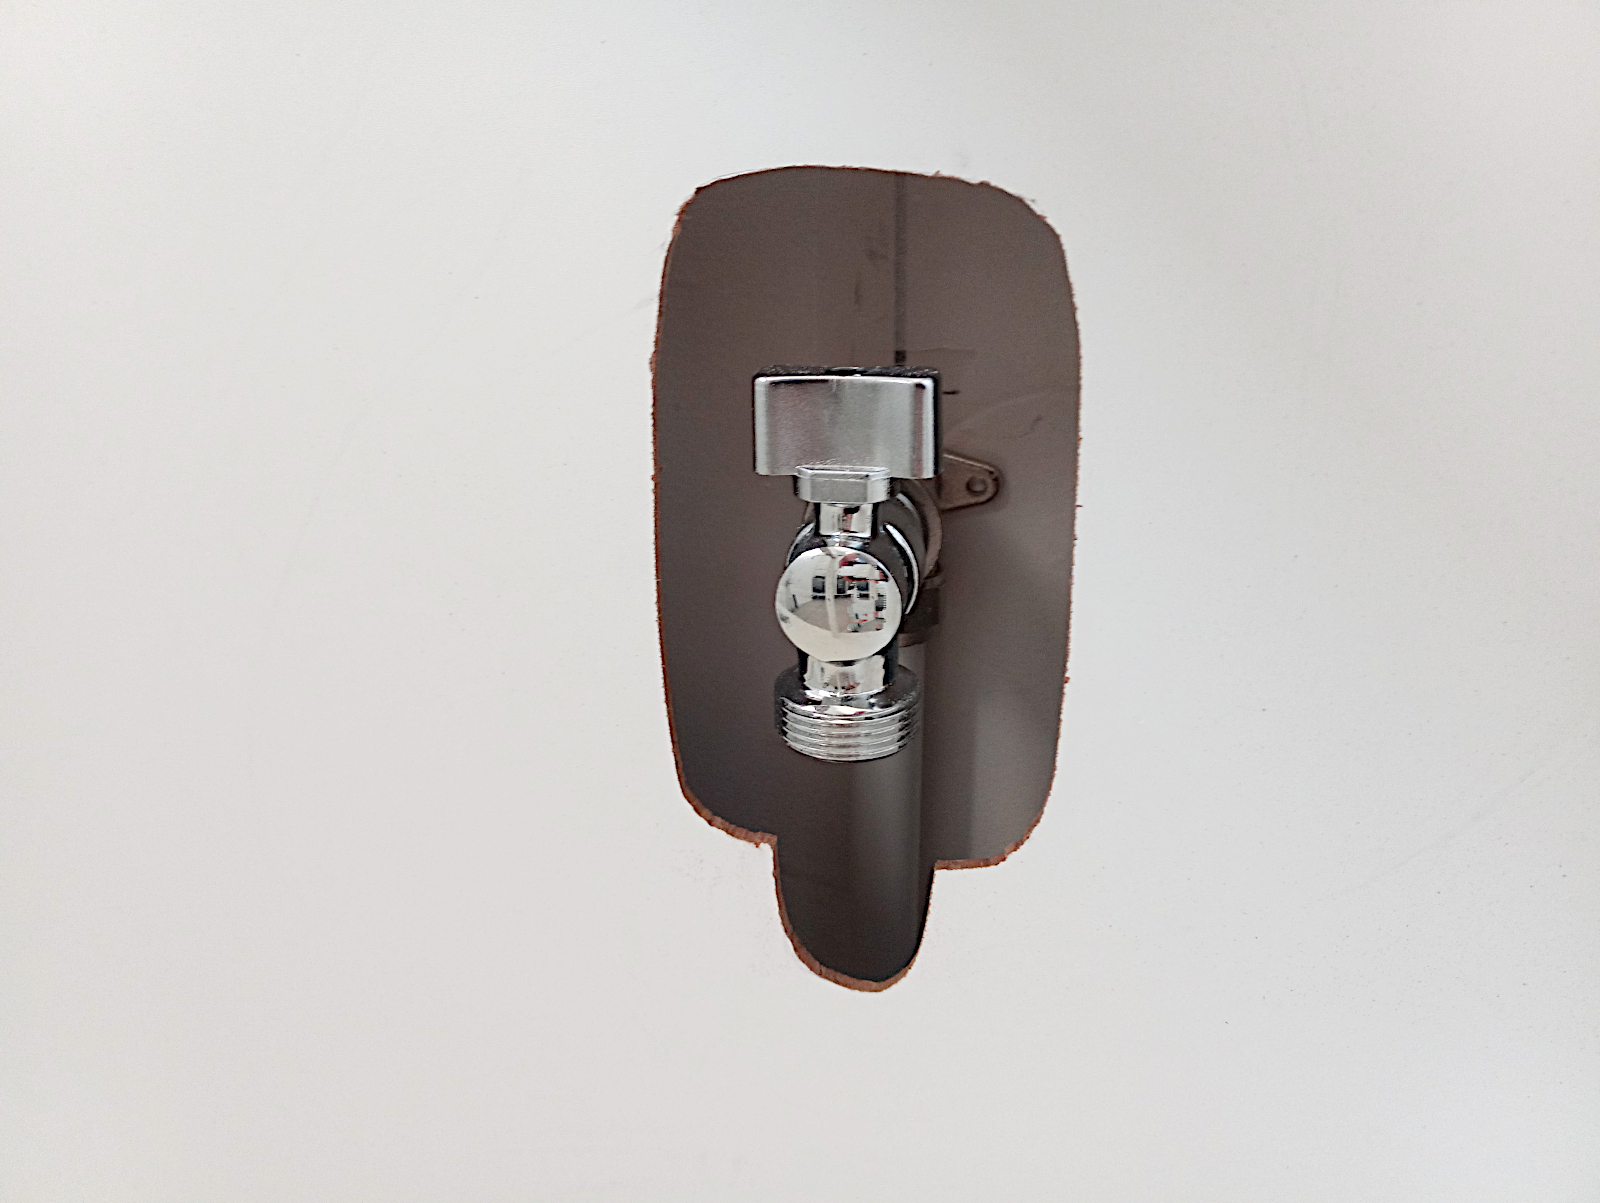
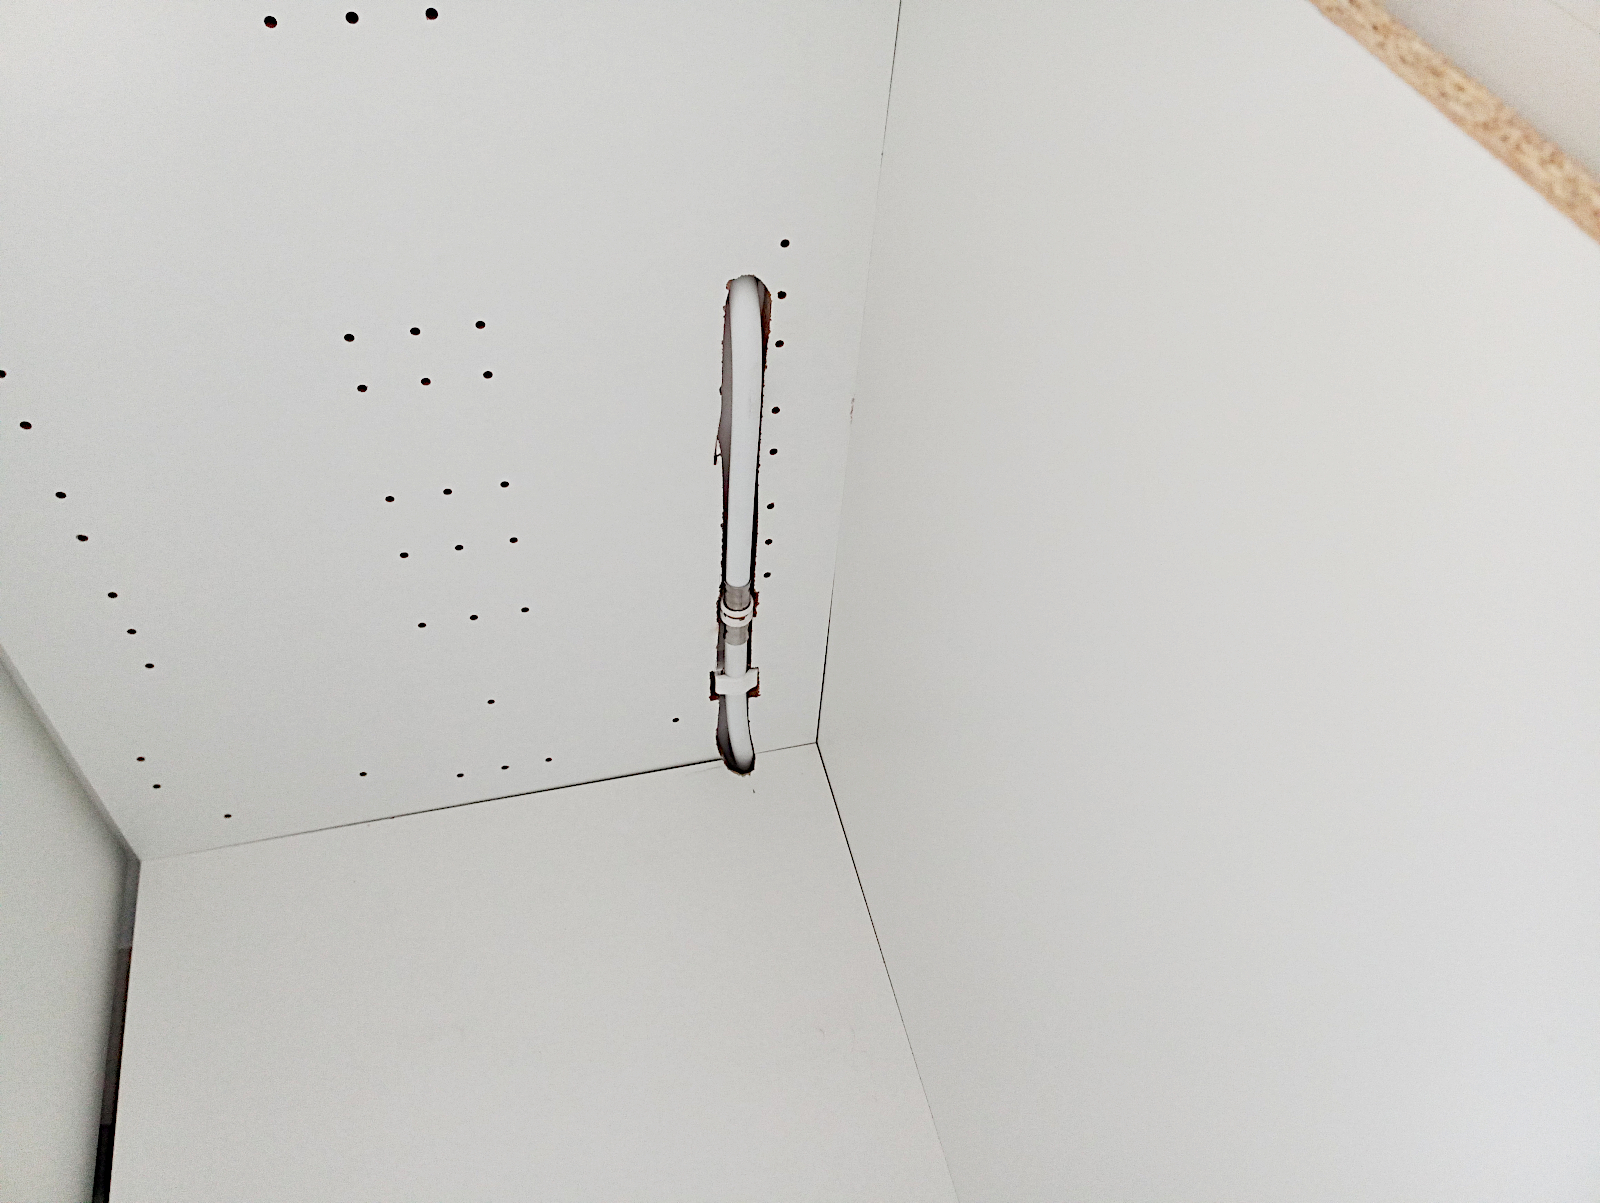
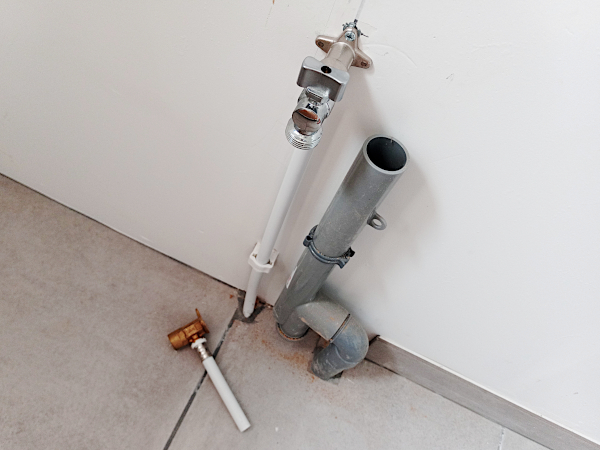
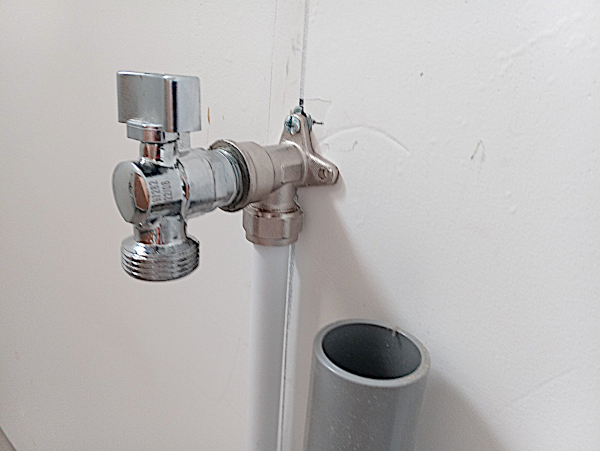
Here’s the result which I’m very pleased with and hopefully it will be leak-proof when the water is turned on and it’s connected to the dishwasher.

null

null

null

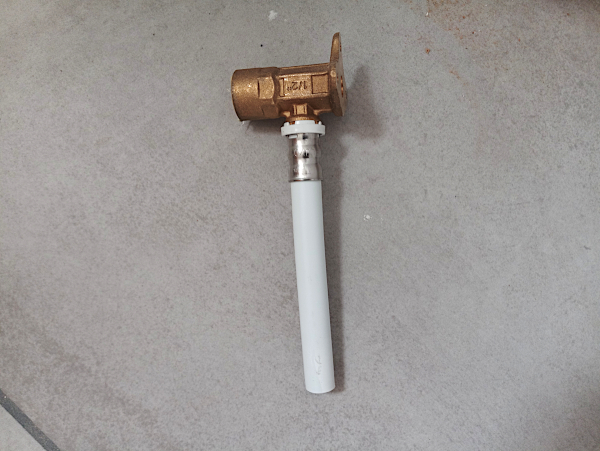
Here’s the bit that was left over showing the amount I reduced the height by.

null

As the access hole that I’d previously cut in the back panel of the cabinet was now in totally the wrong place it was then time to make a replacement. I purchased a suitable sheet of white faced hardboard yesterday from Leroy Merlin and it was in the living room ready to be used.

null

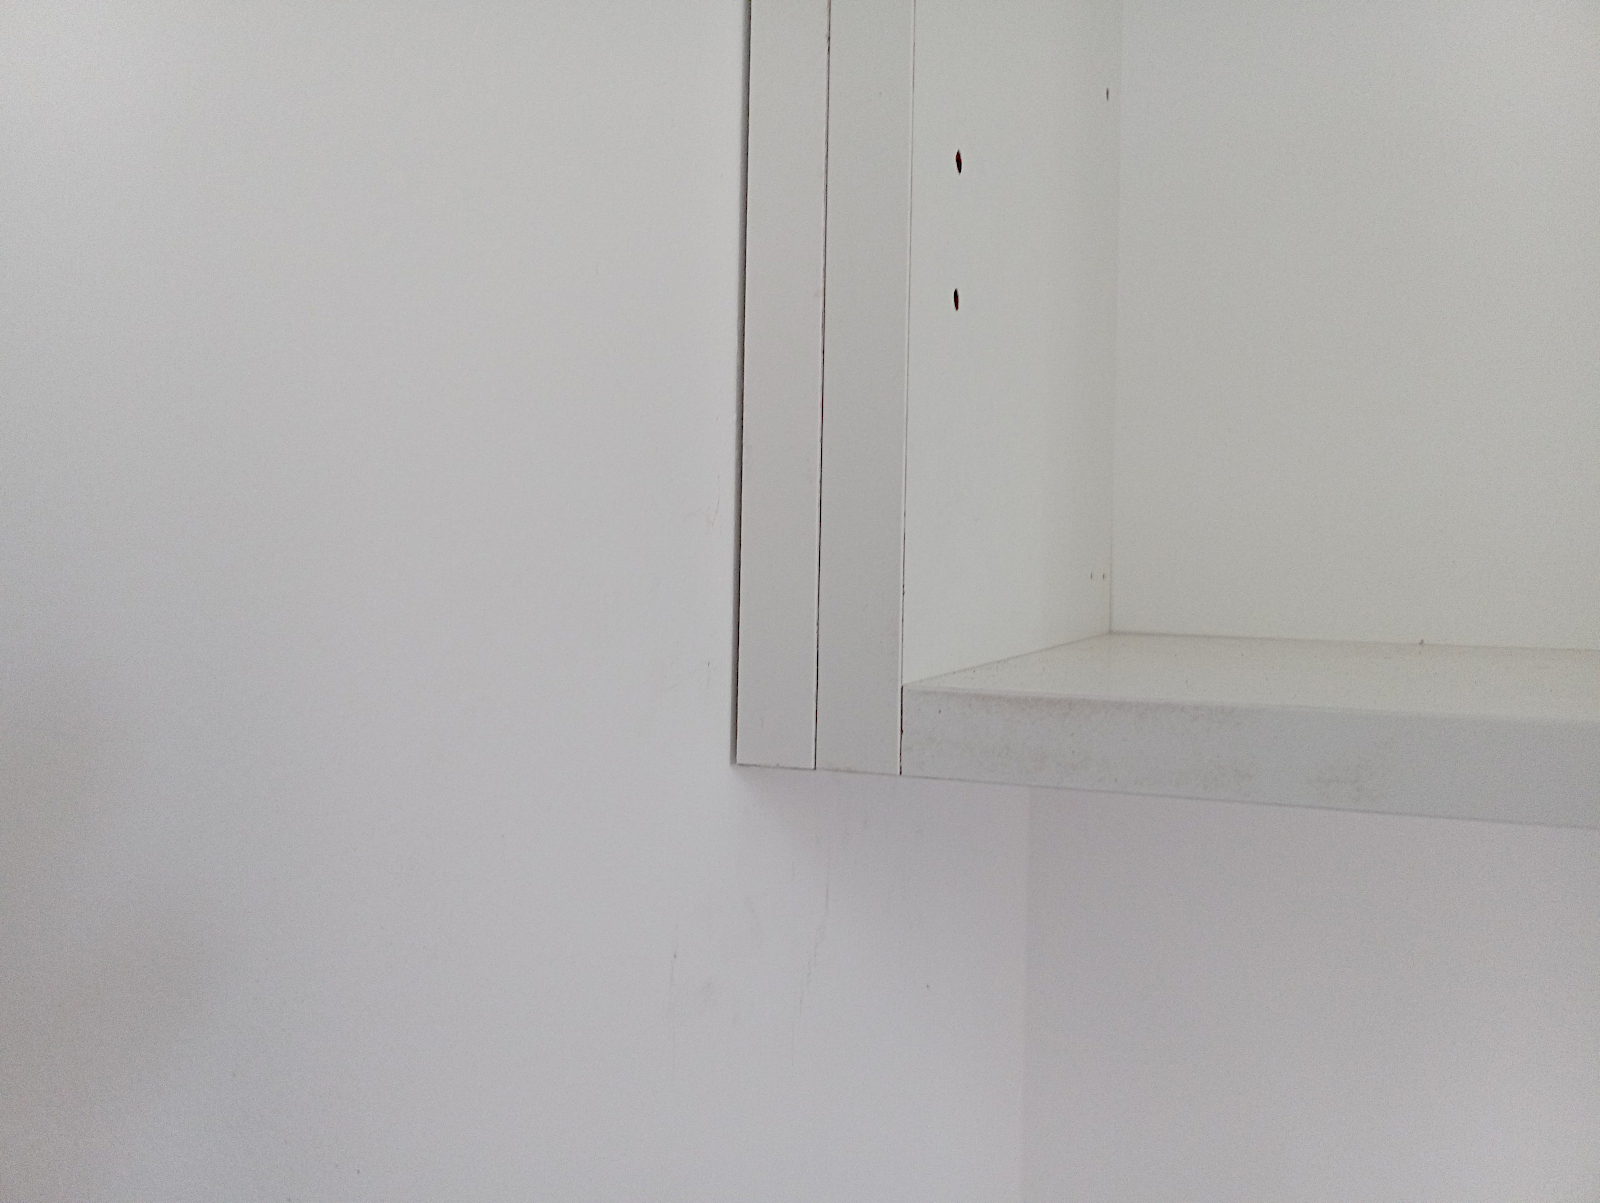
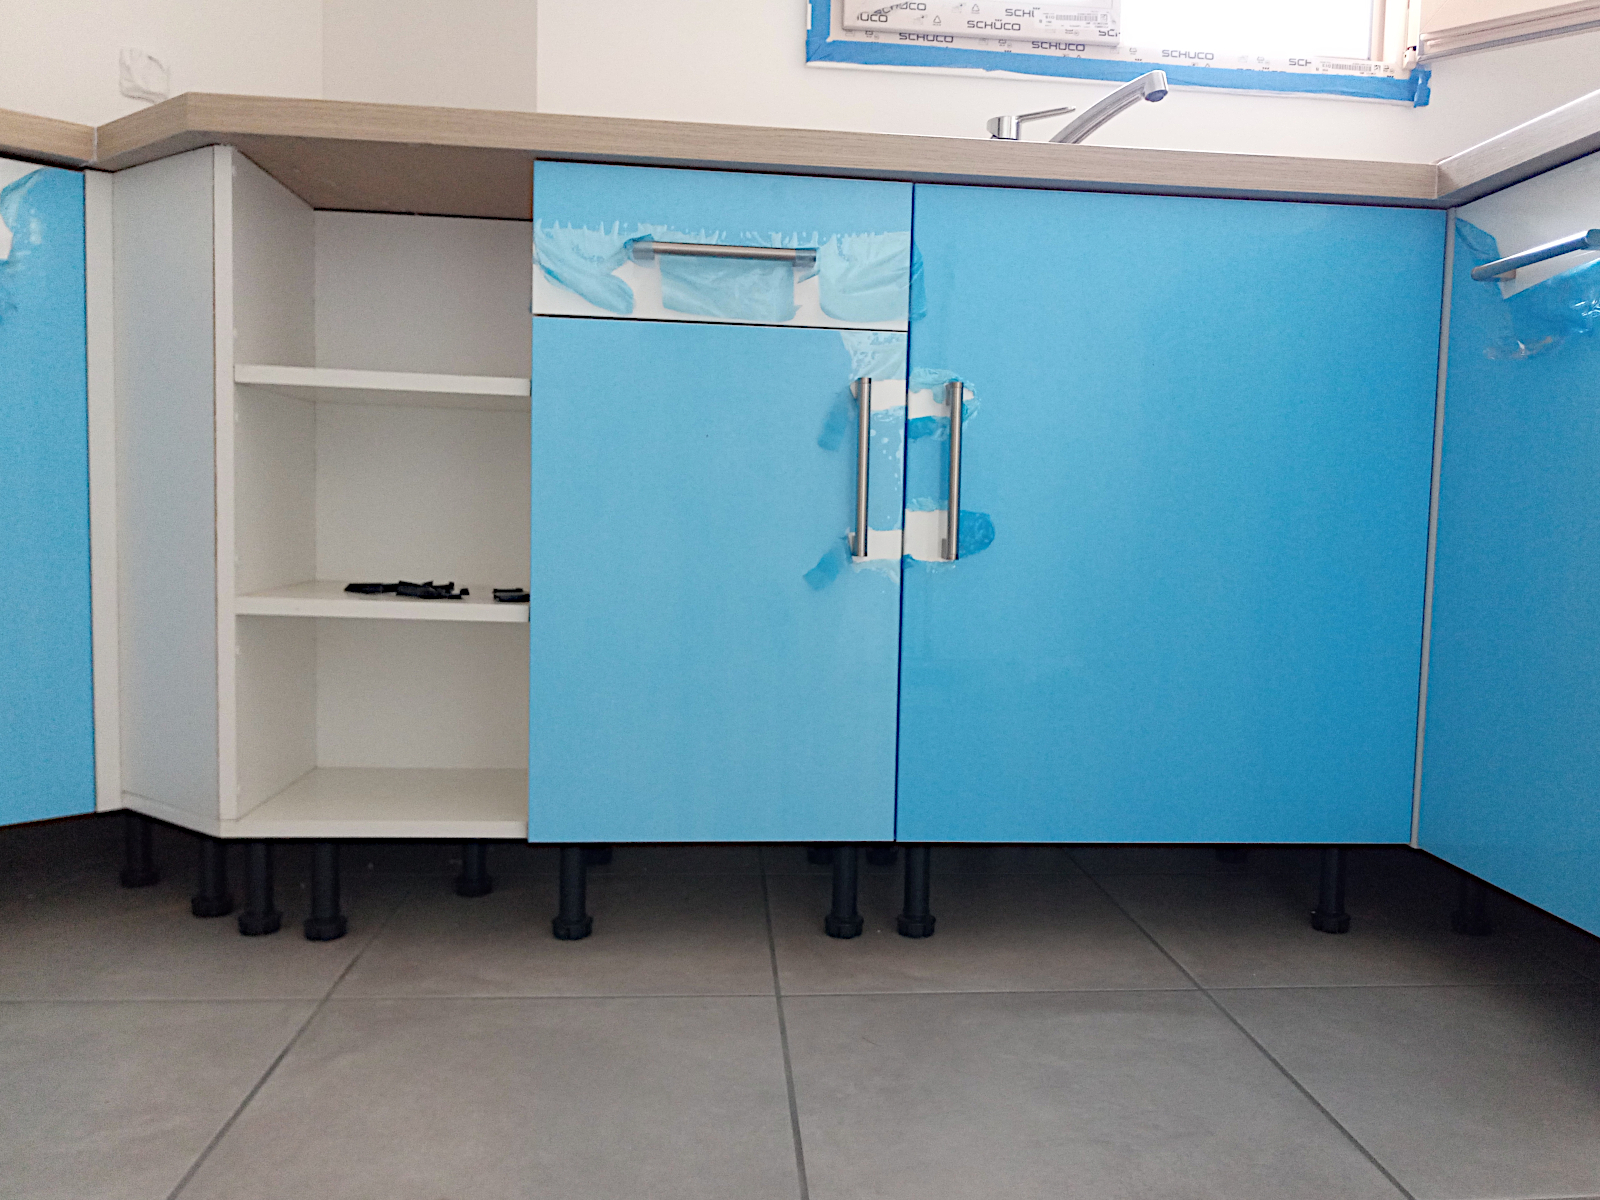
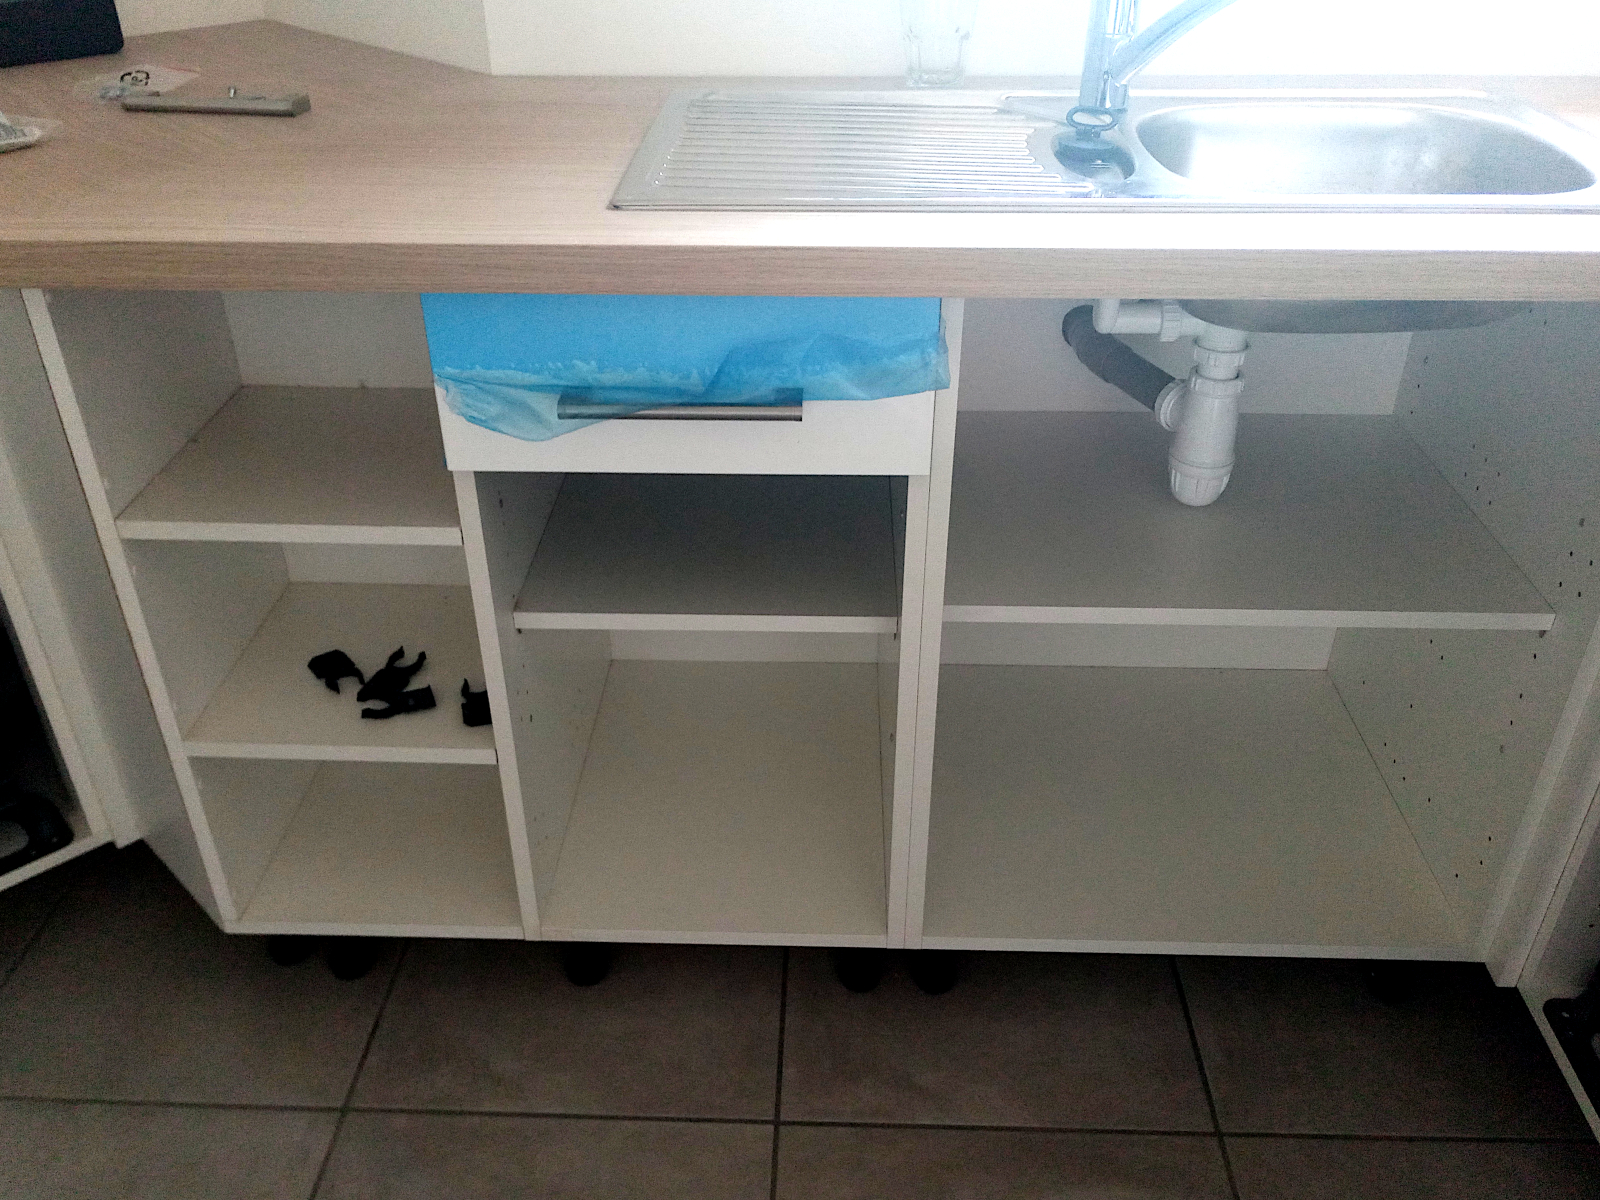
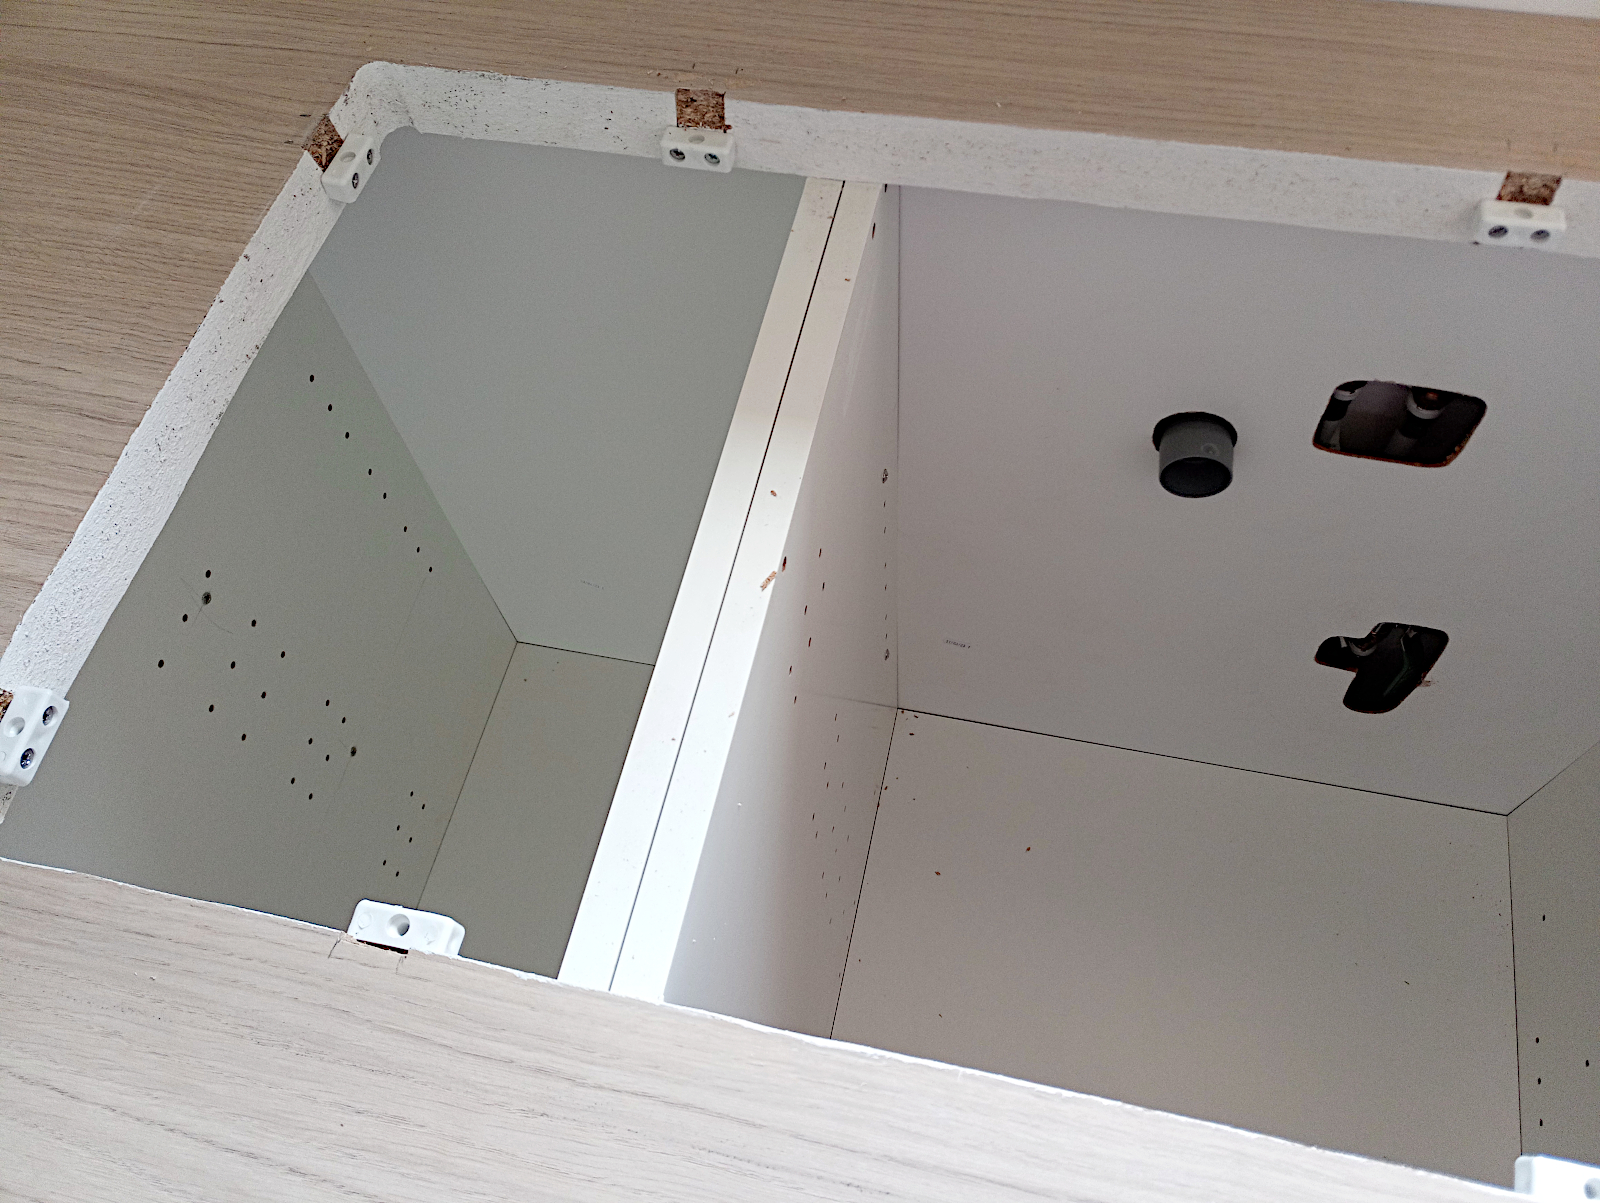
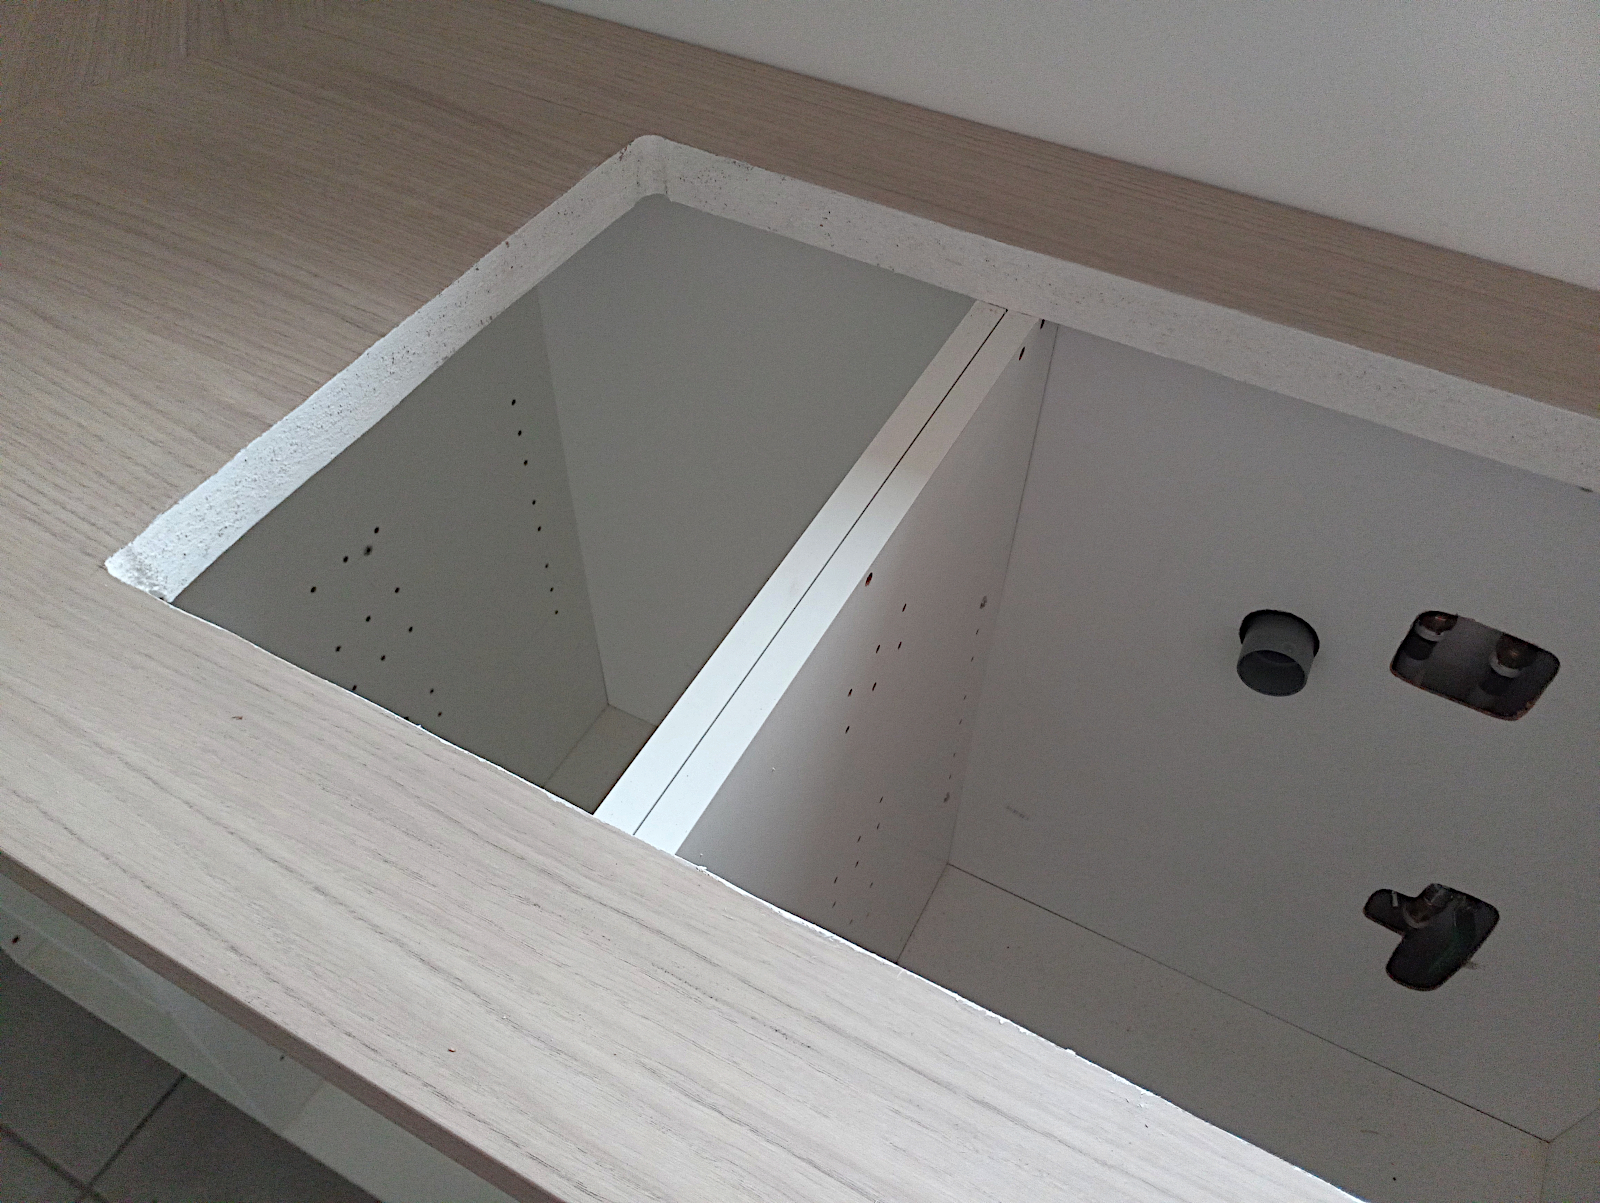
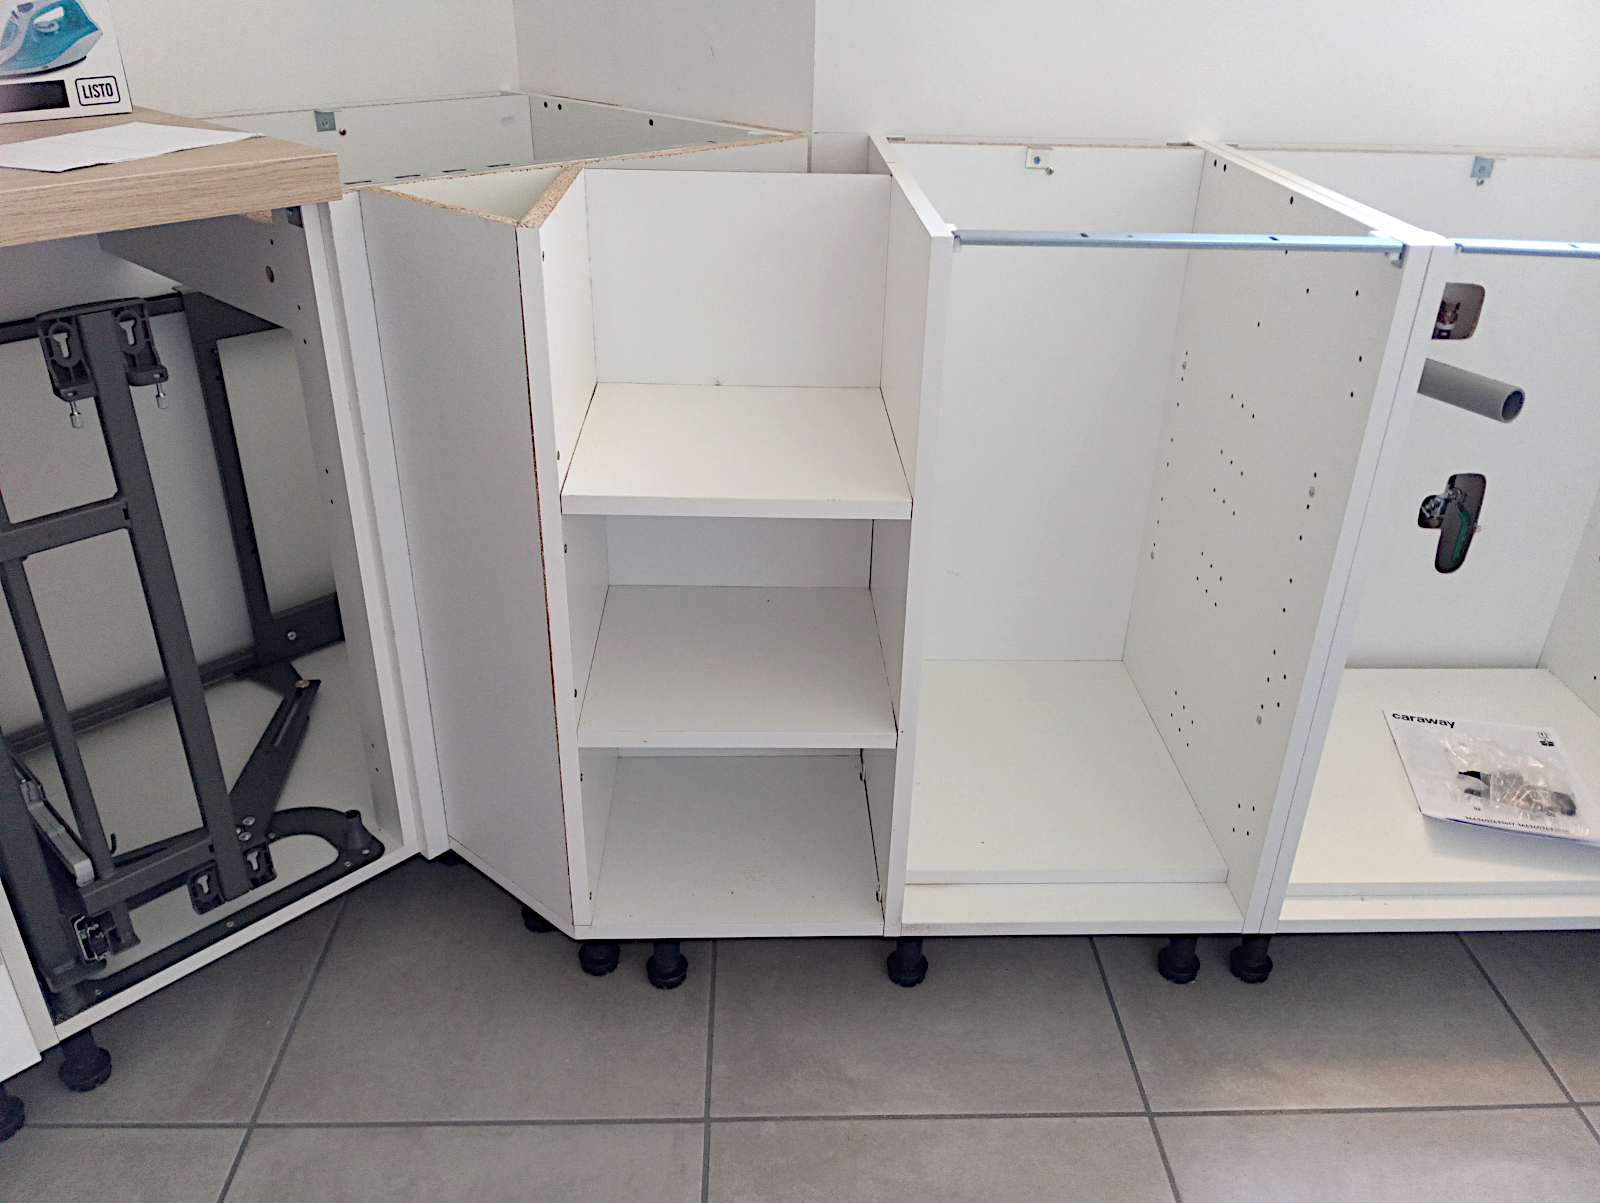
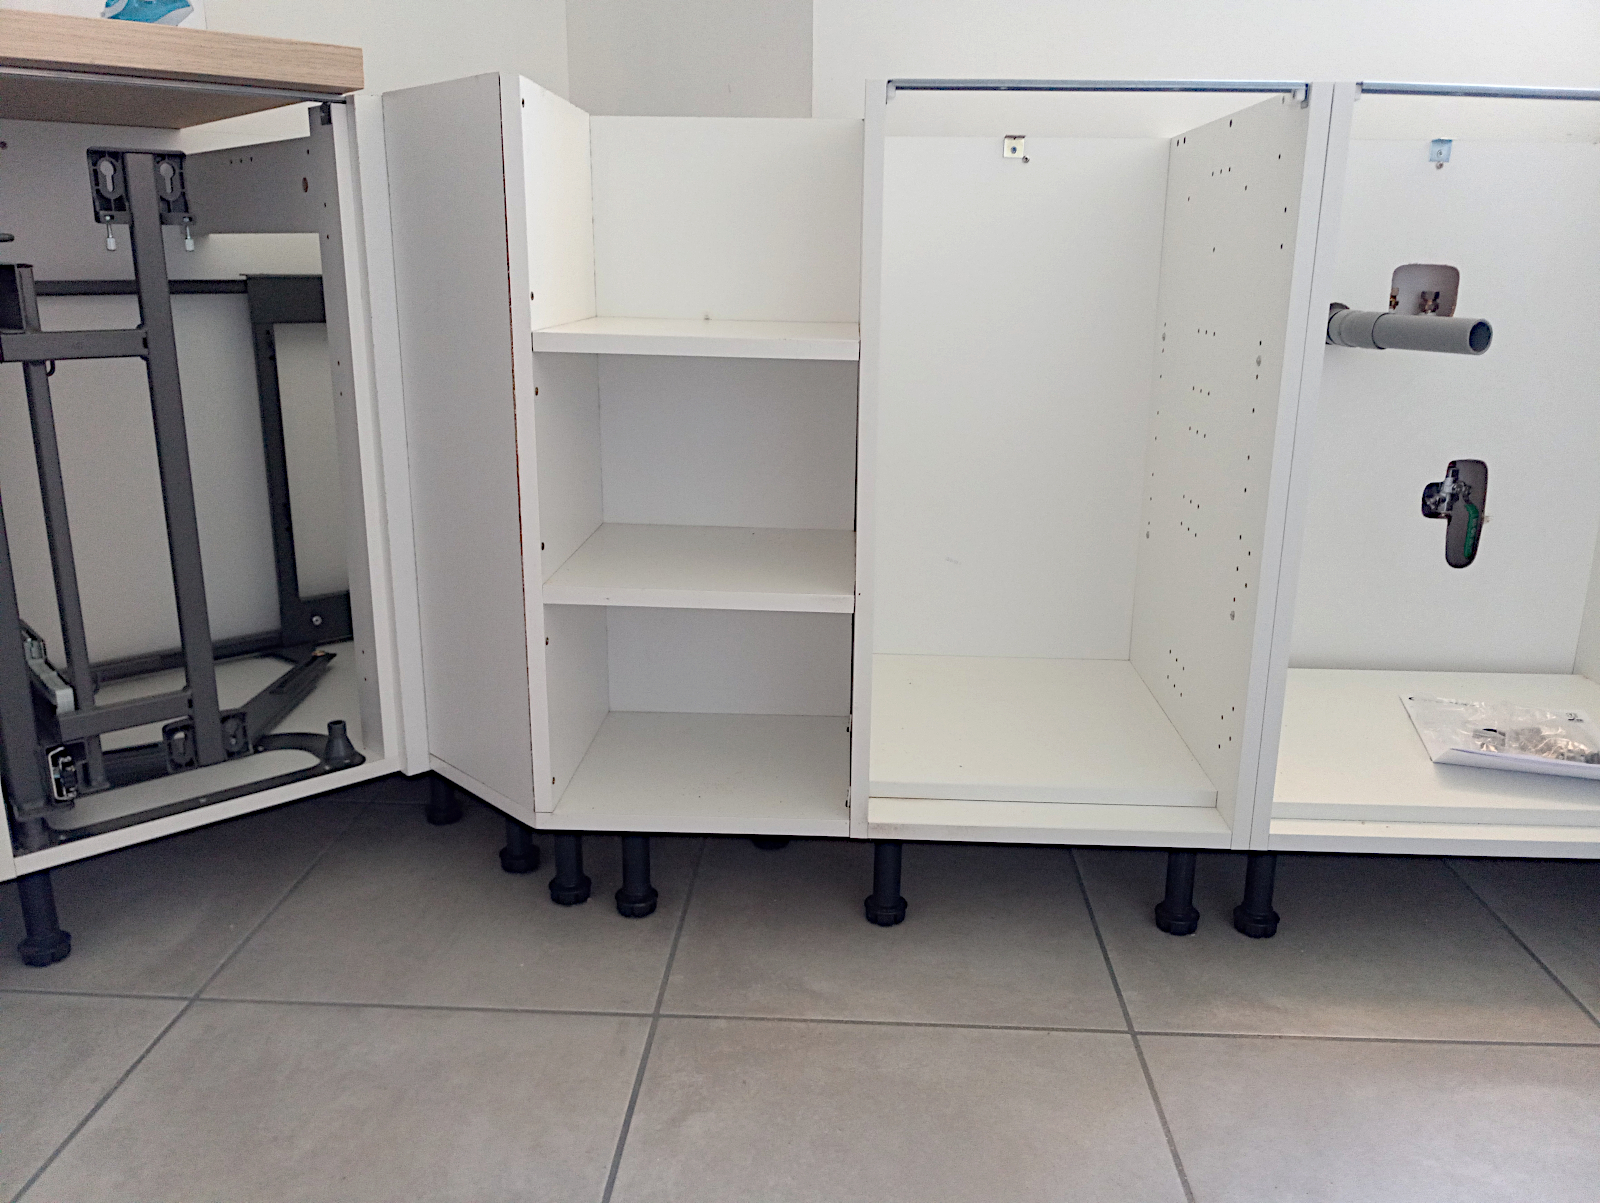
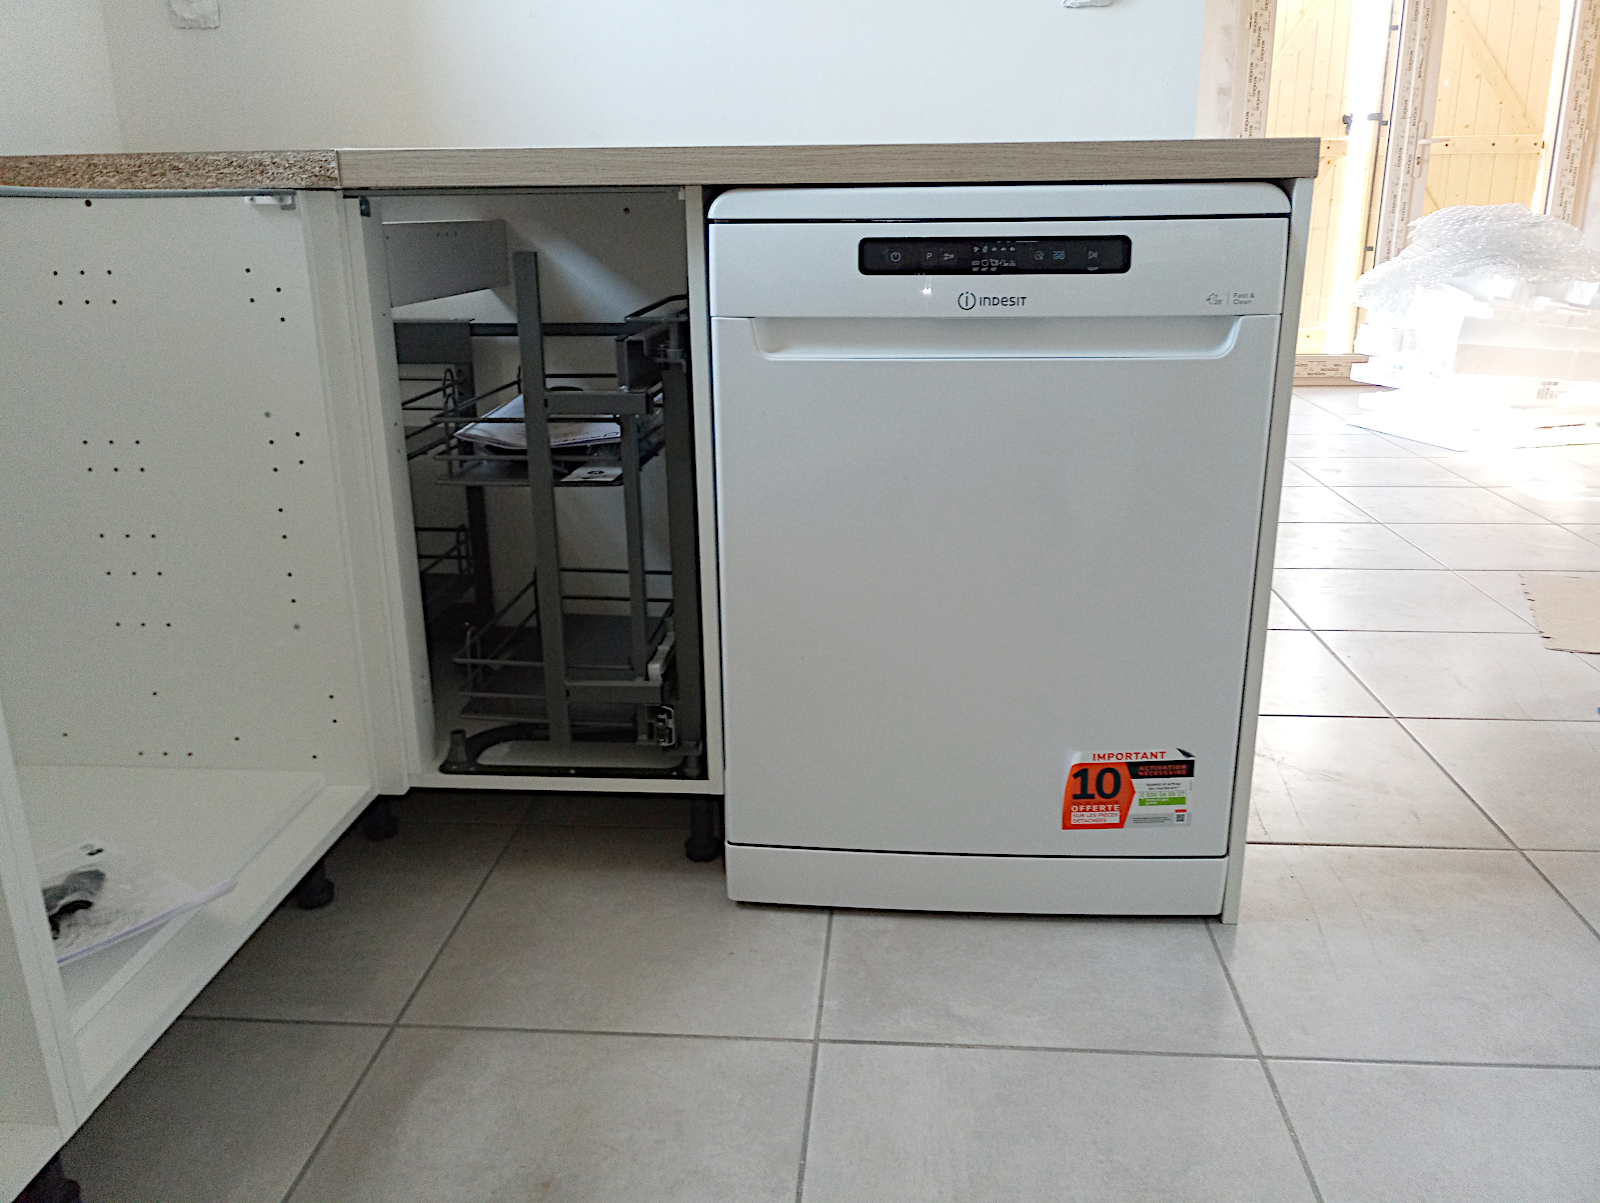
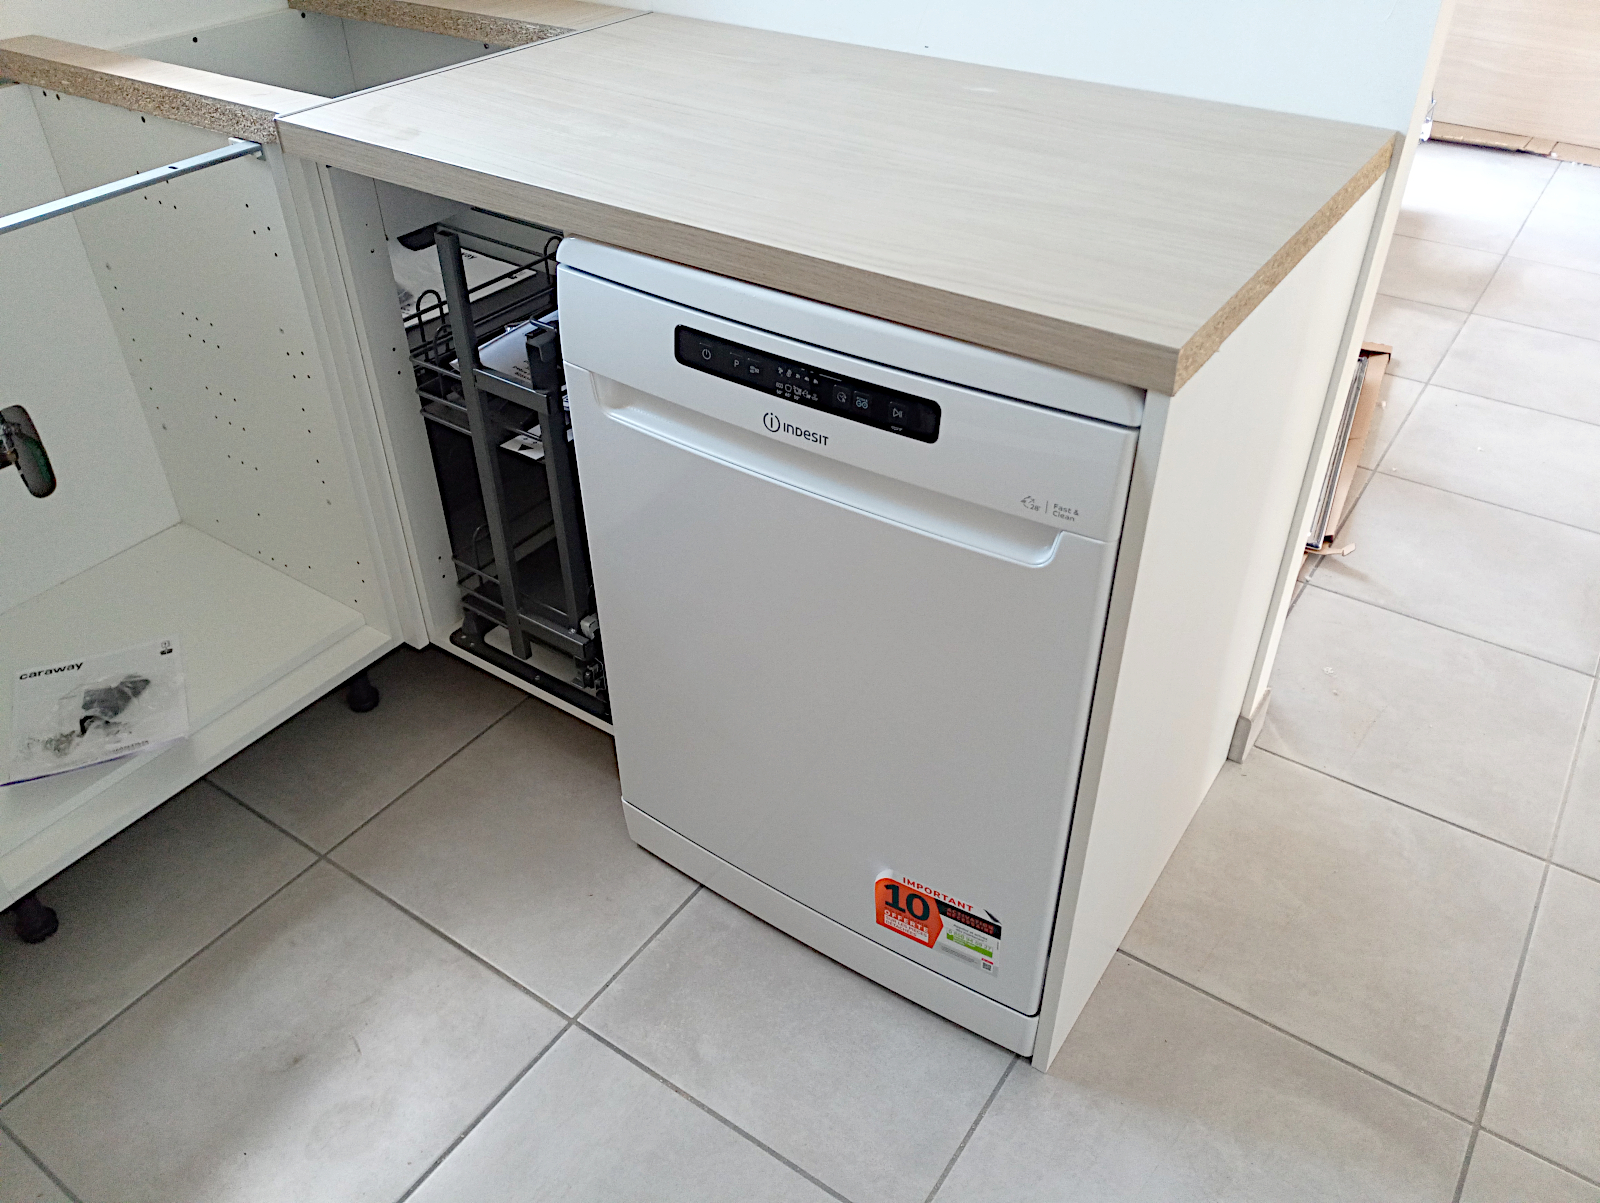
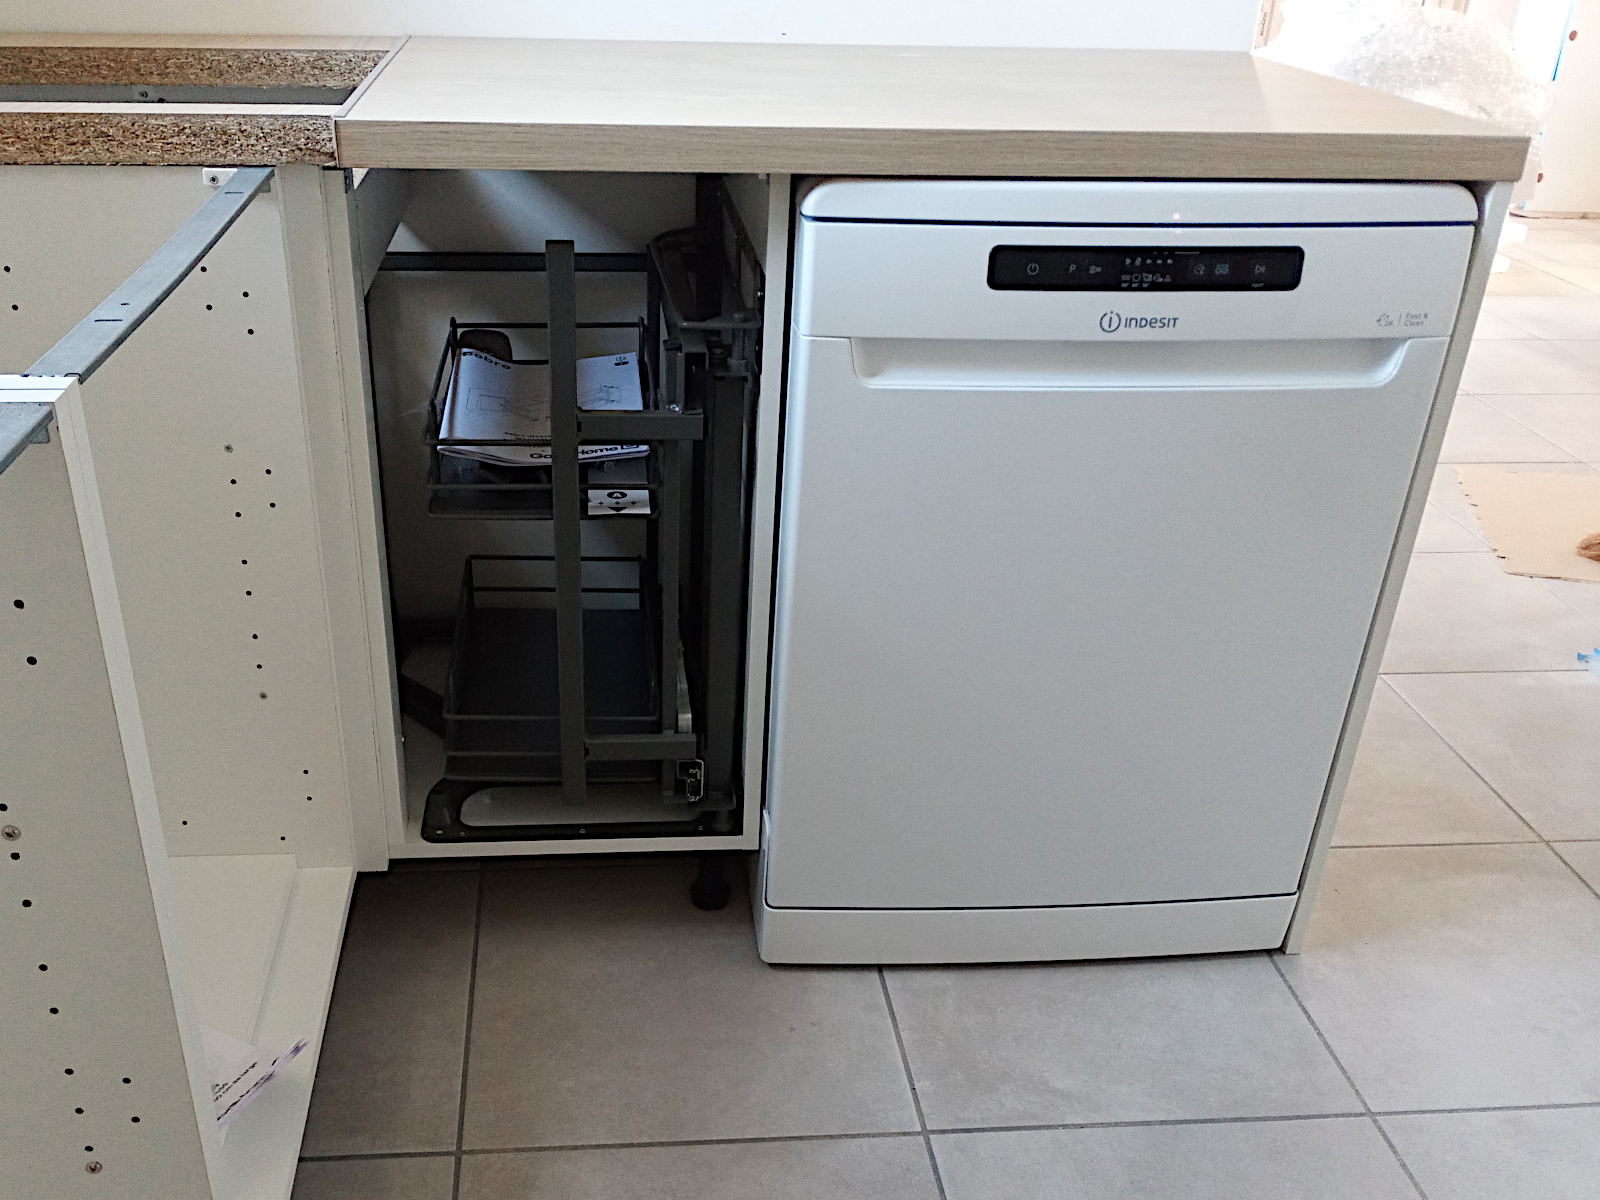
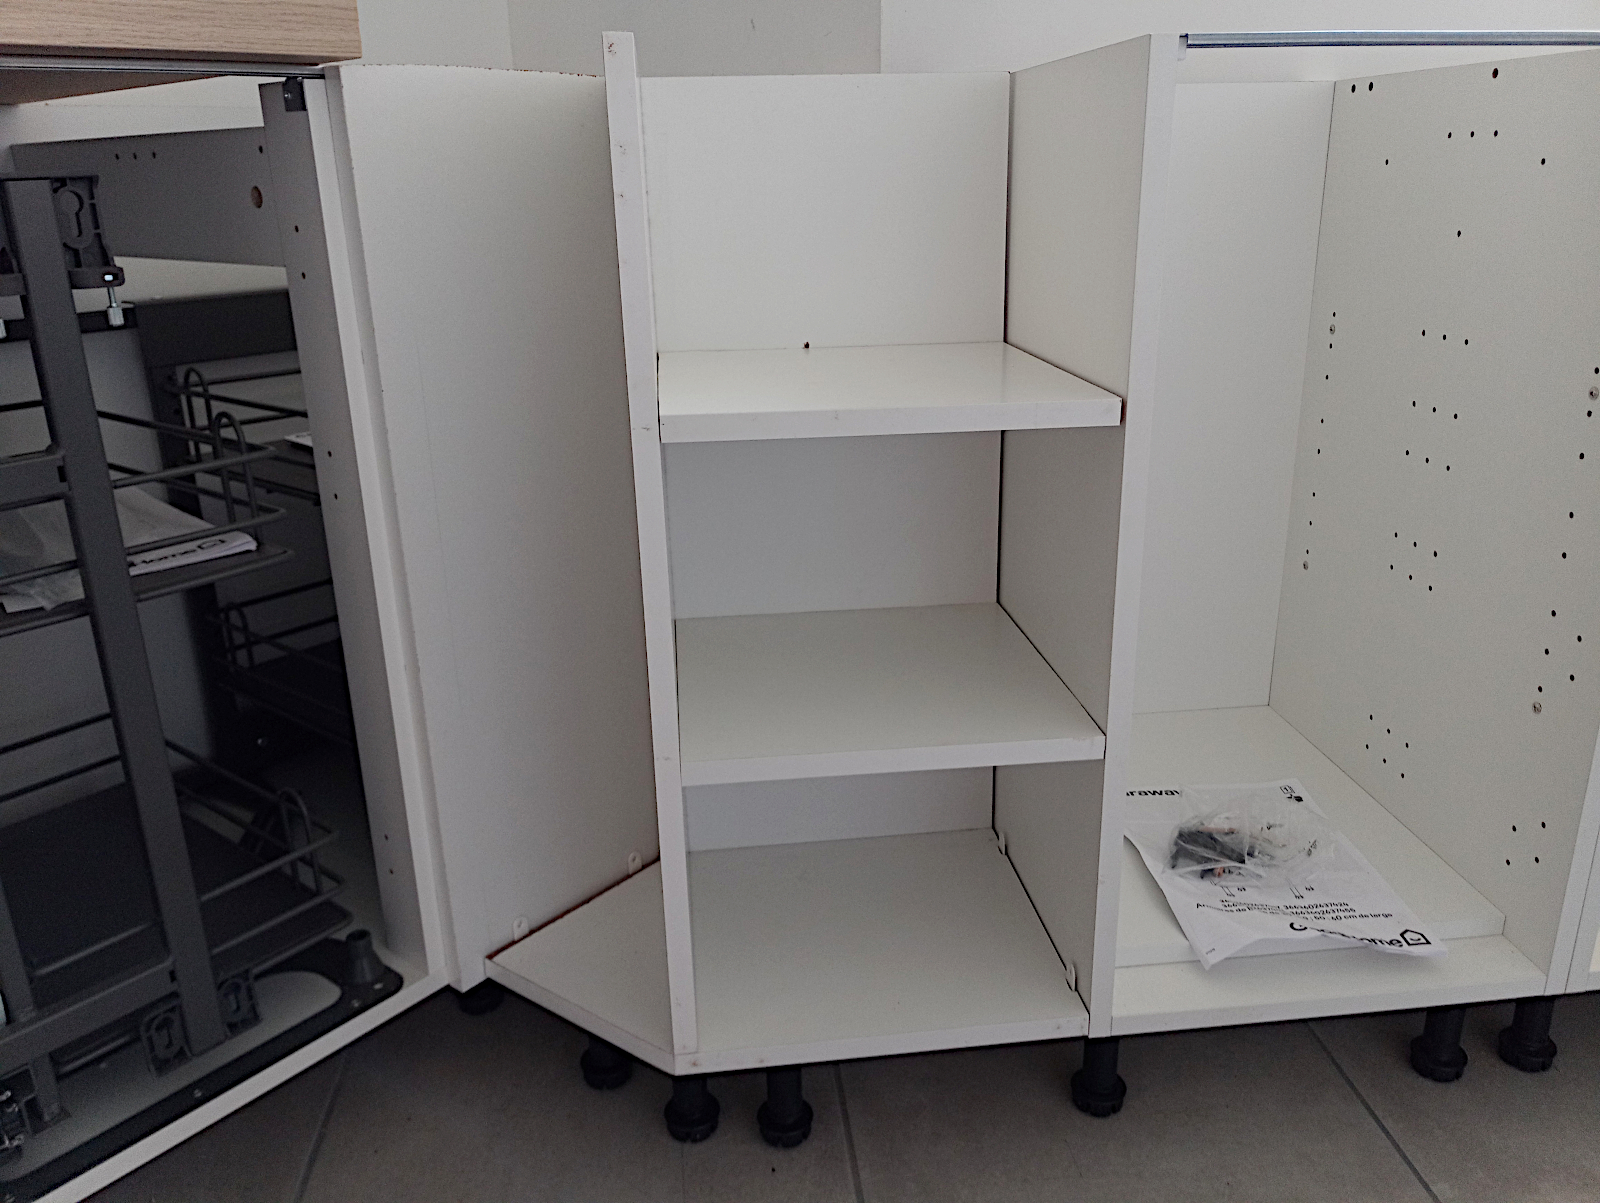
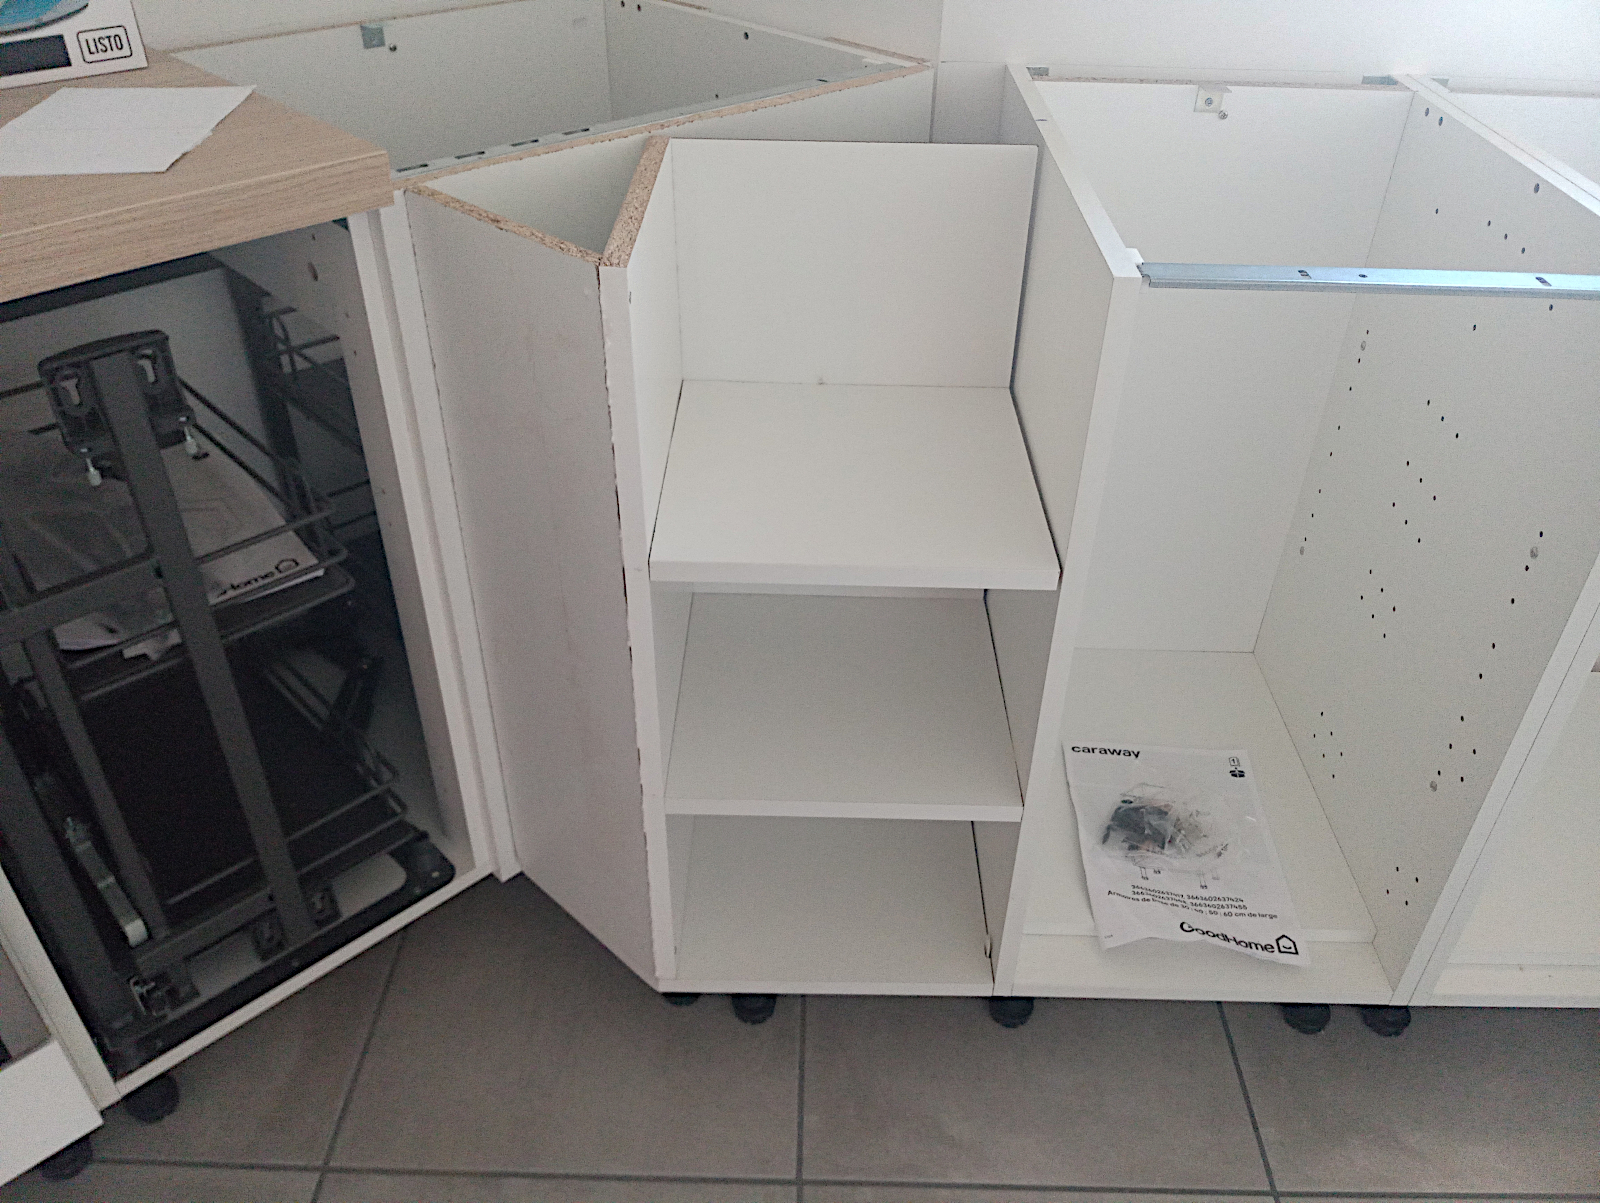
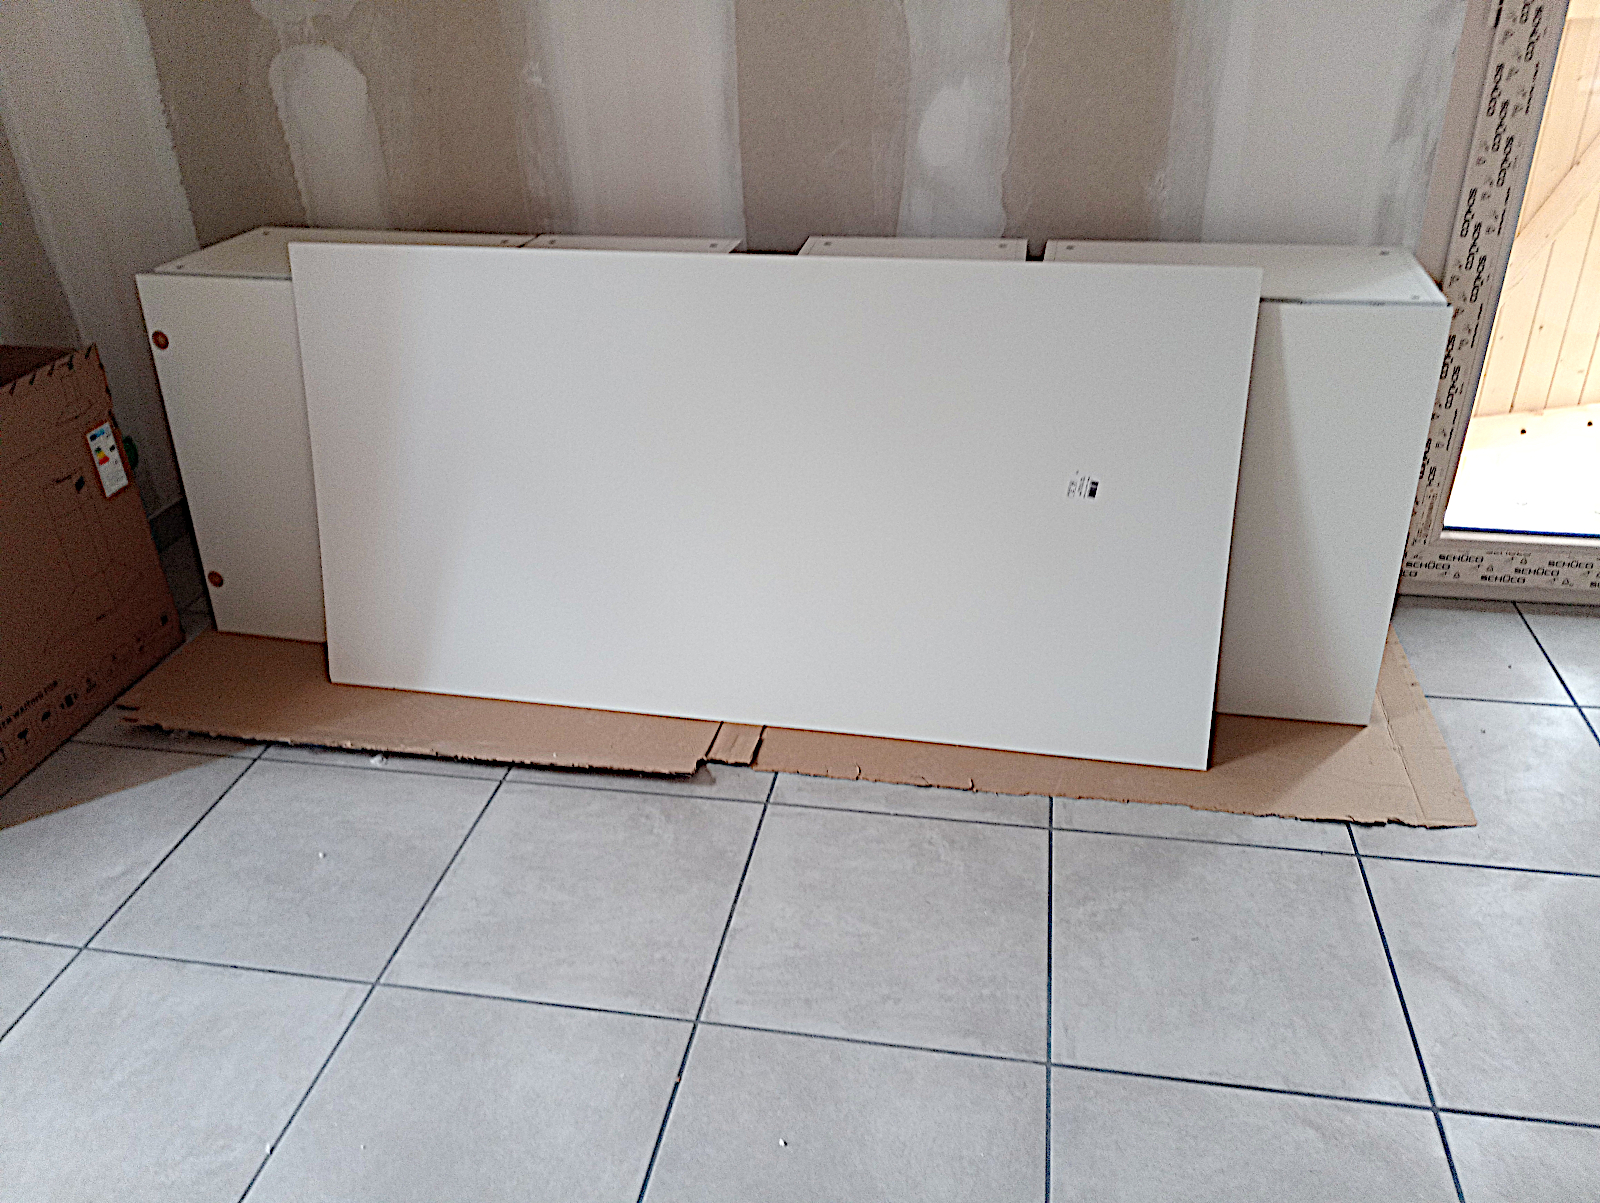
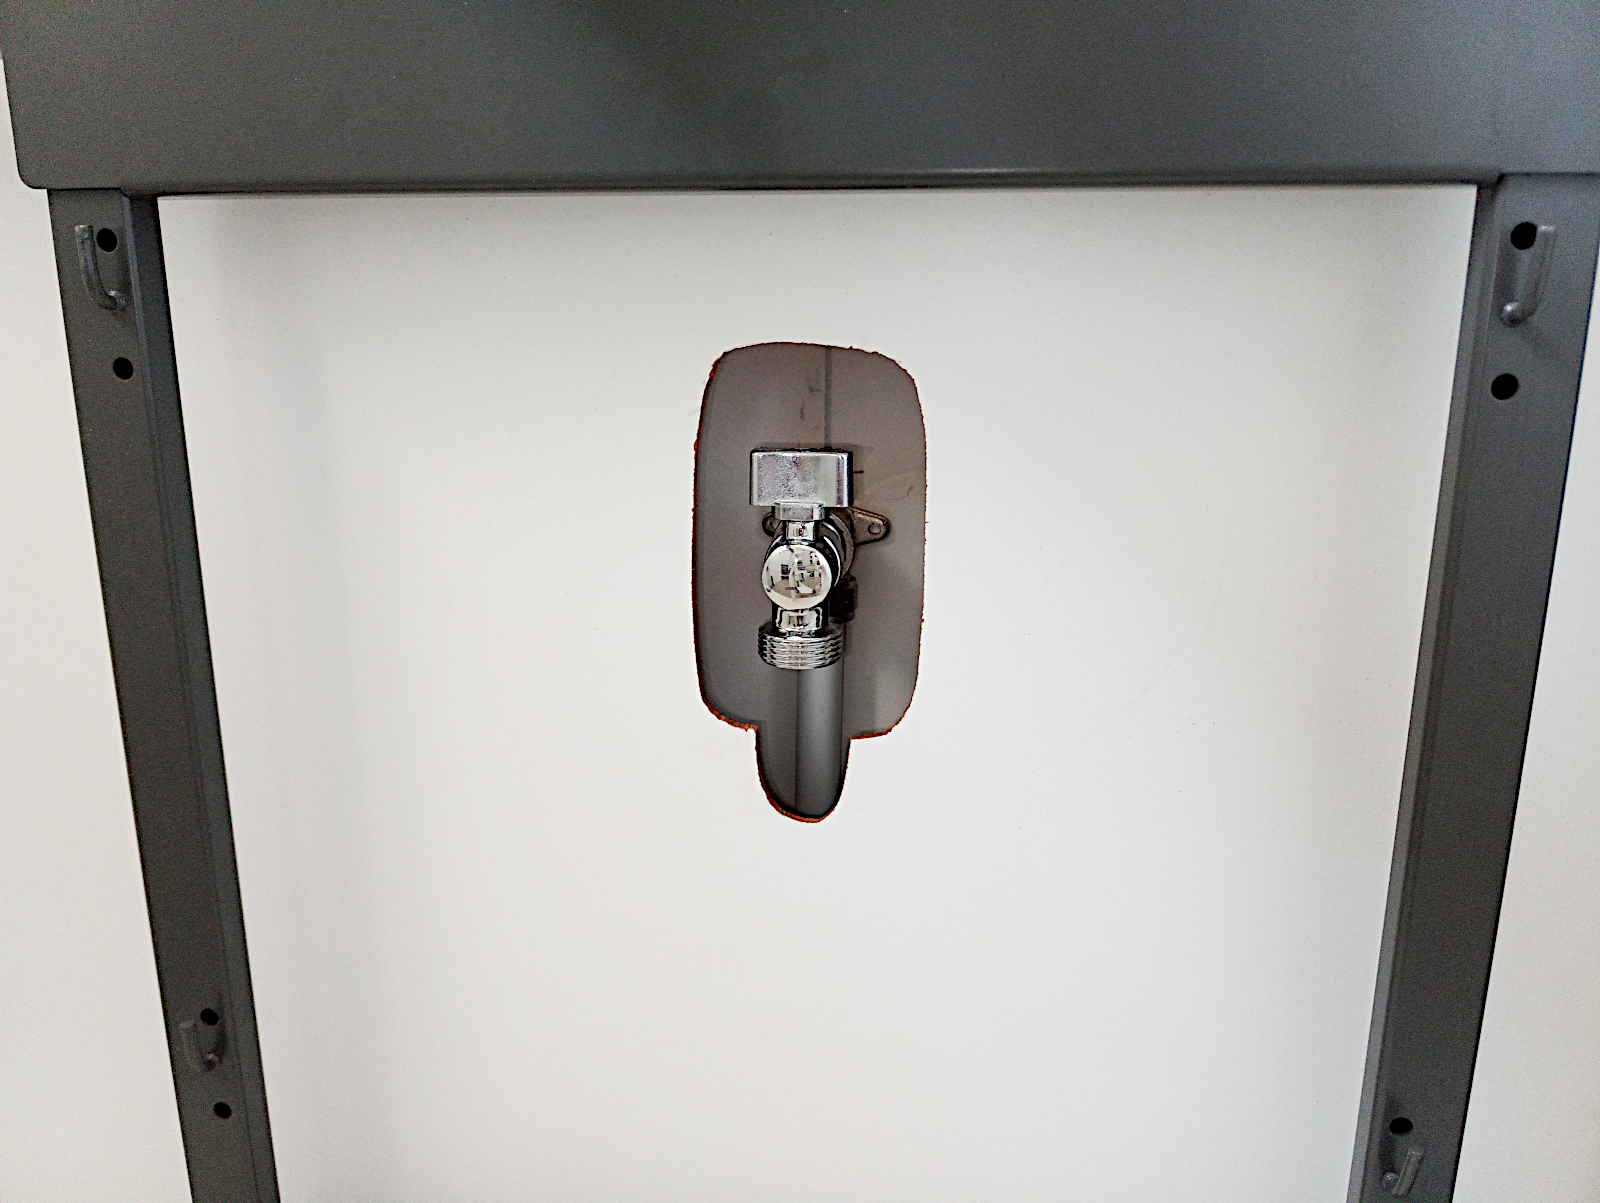
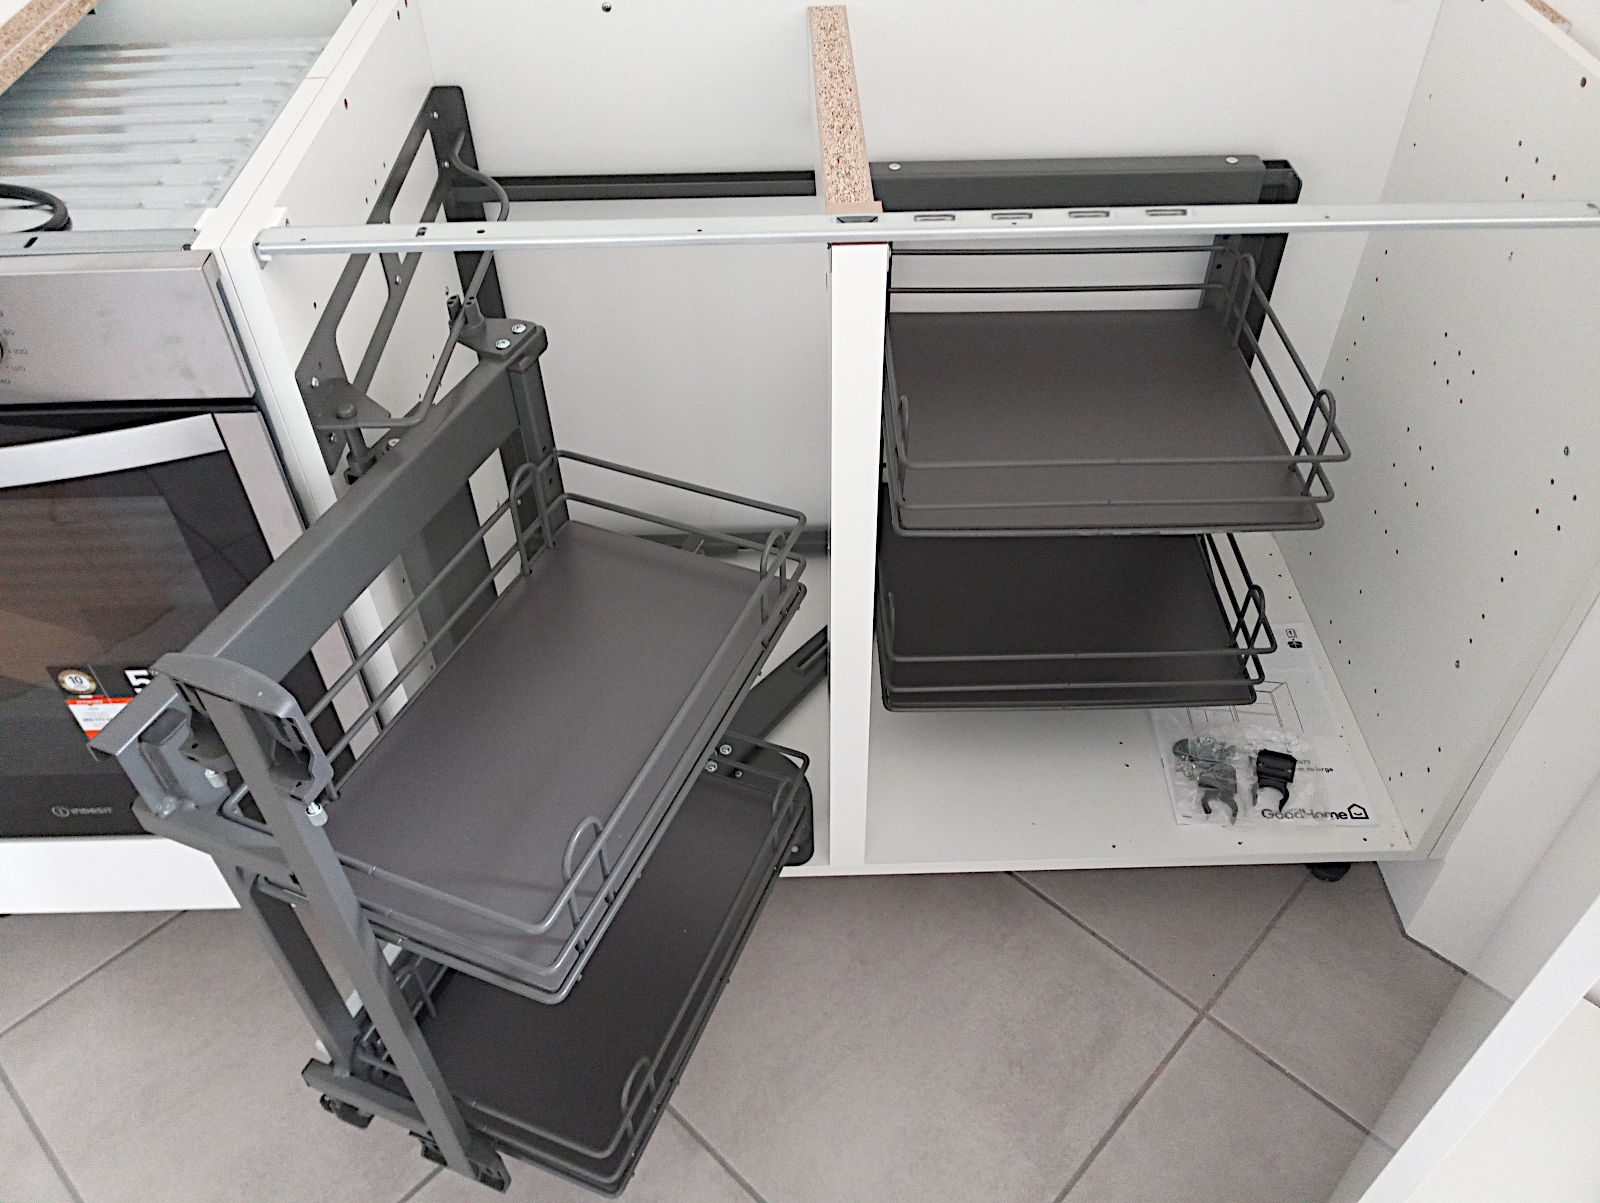
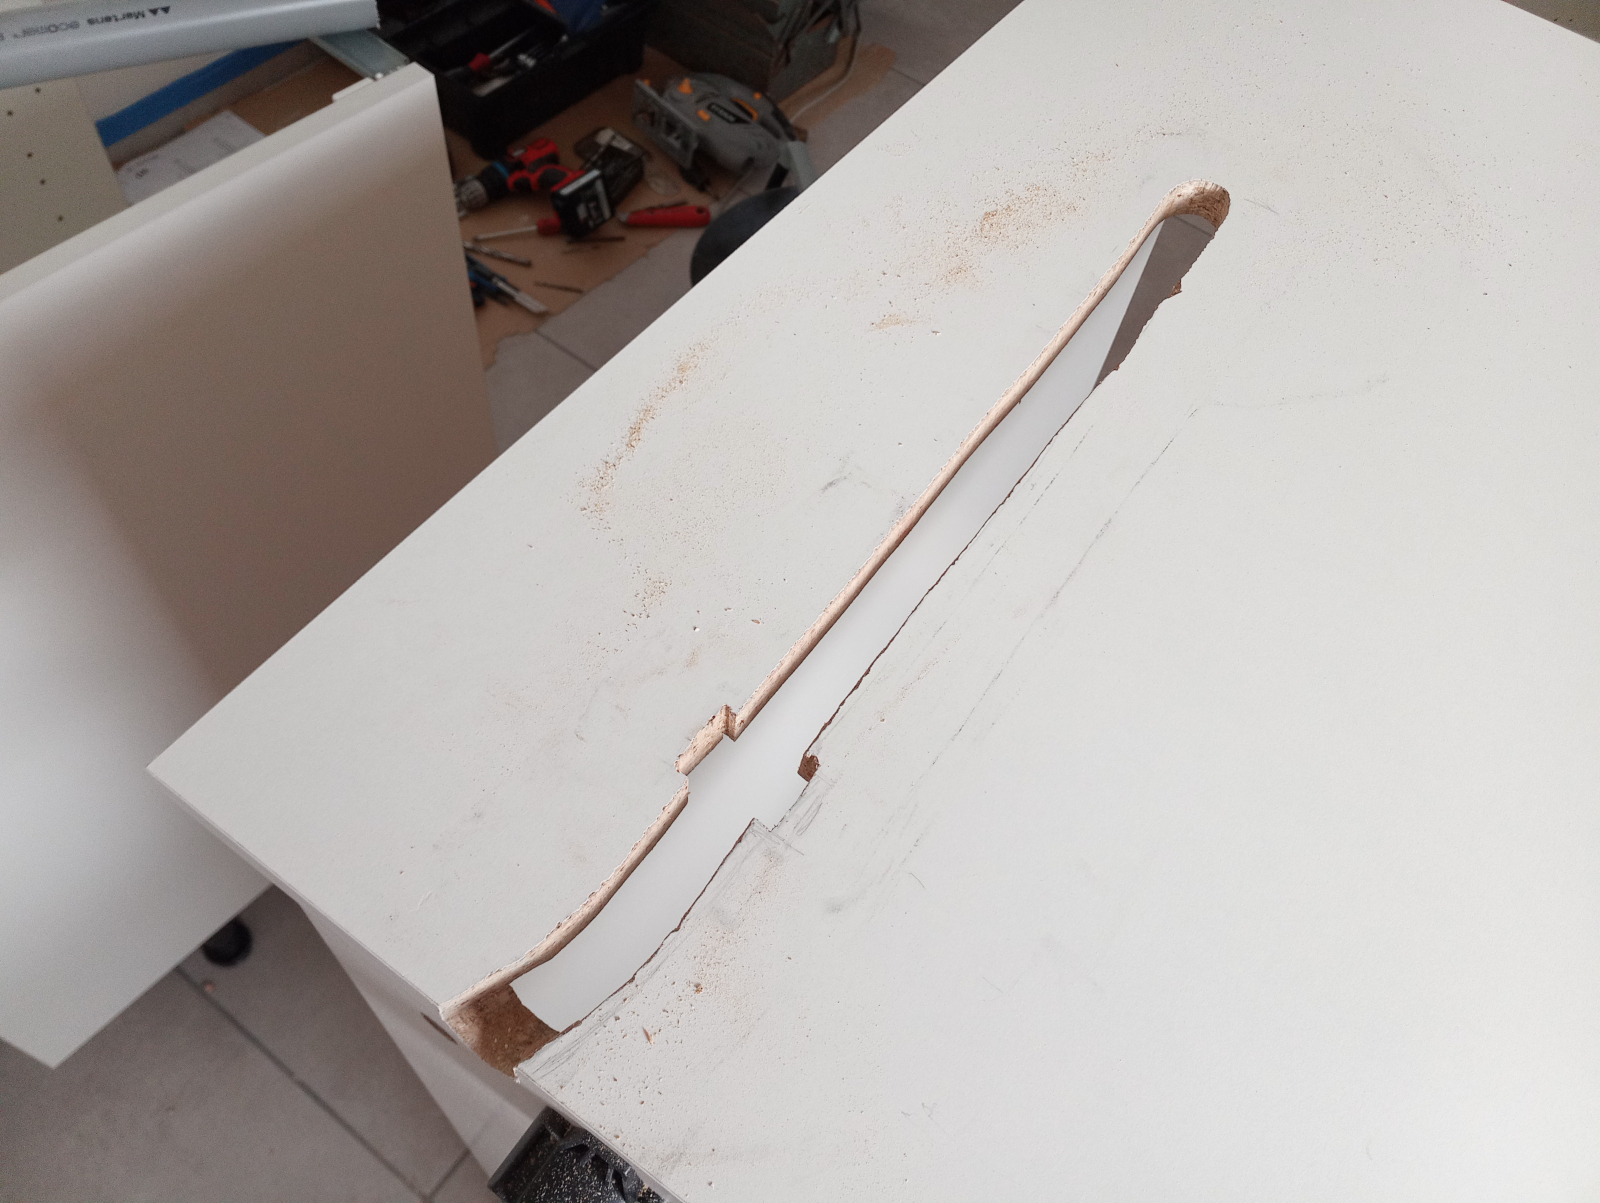
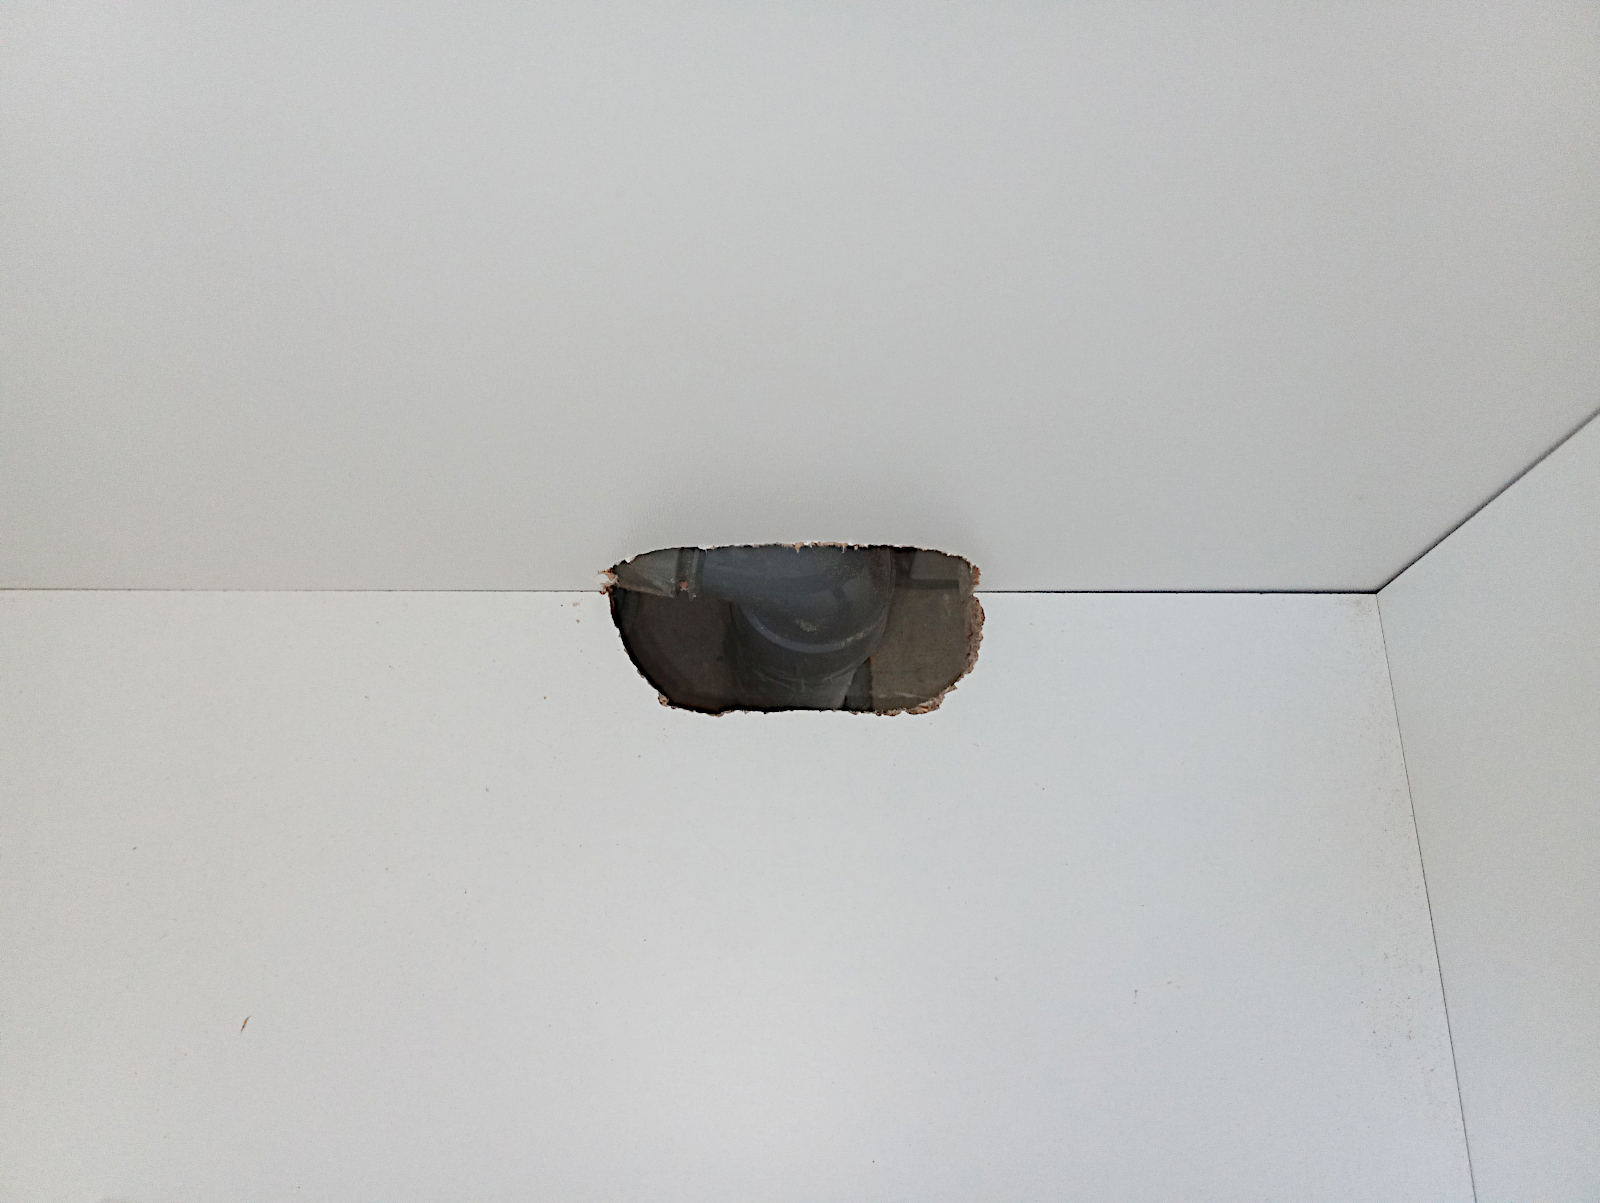
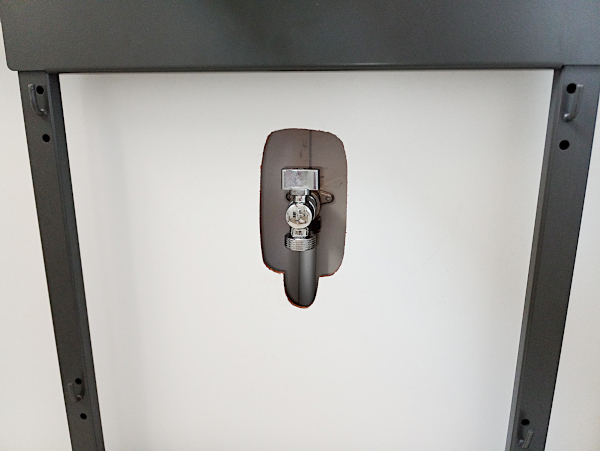
Apart from measuring and cutting it accurately it wasn’t a difficult job to do and using the old panel as a template it was much easier than before to get the cut-outs in exactly the right places. Here’s the result, which is much tidier than the original.

null

null

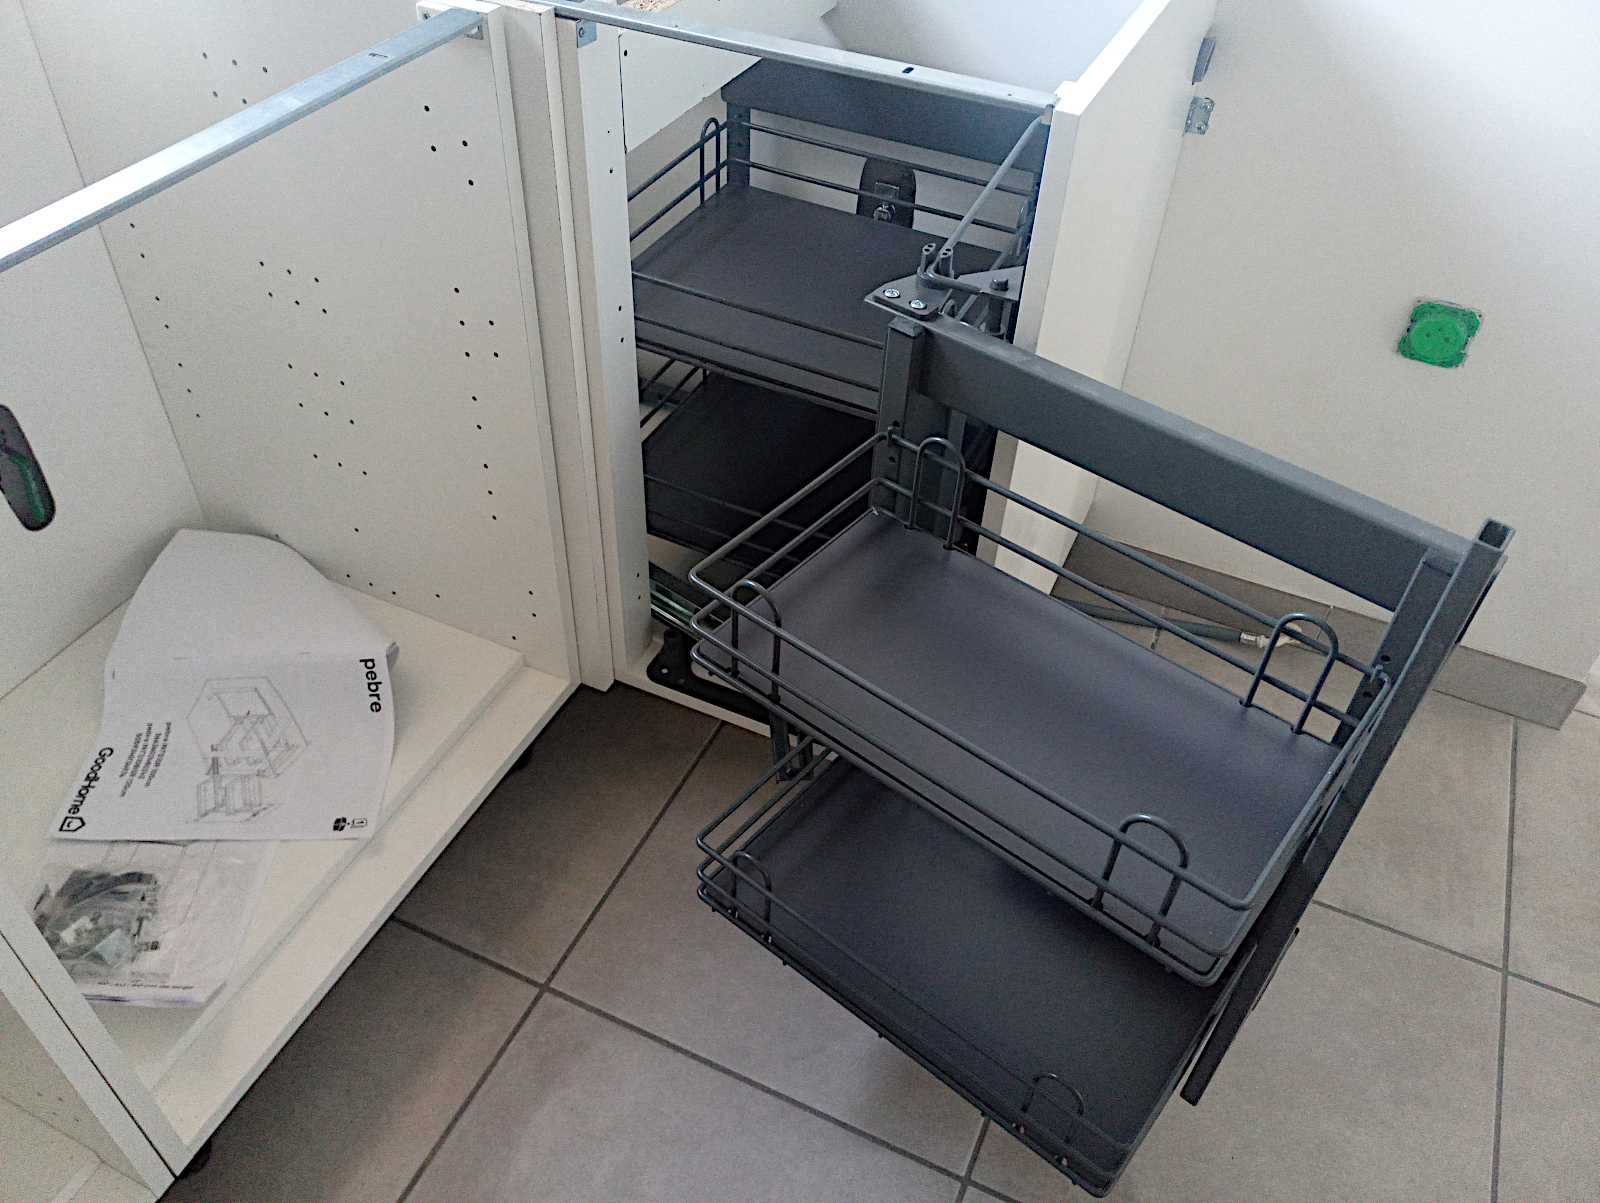
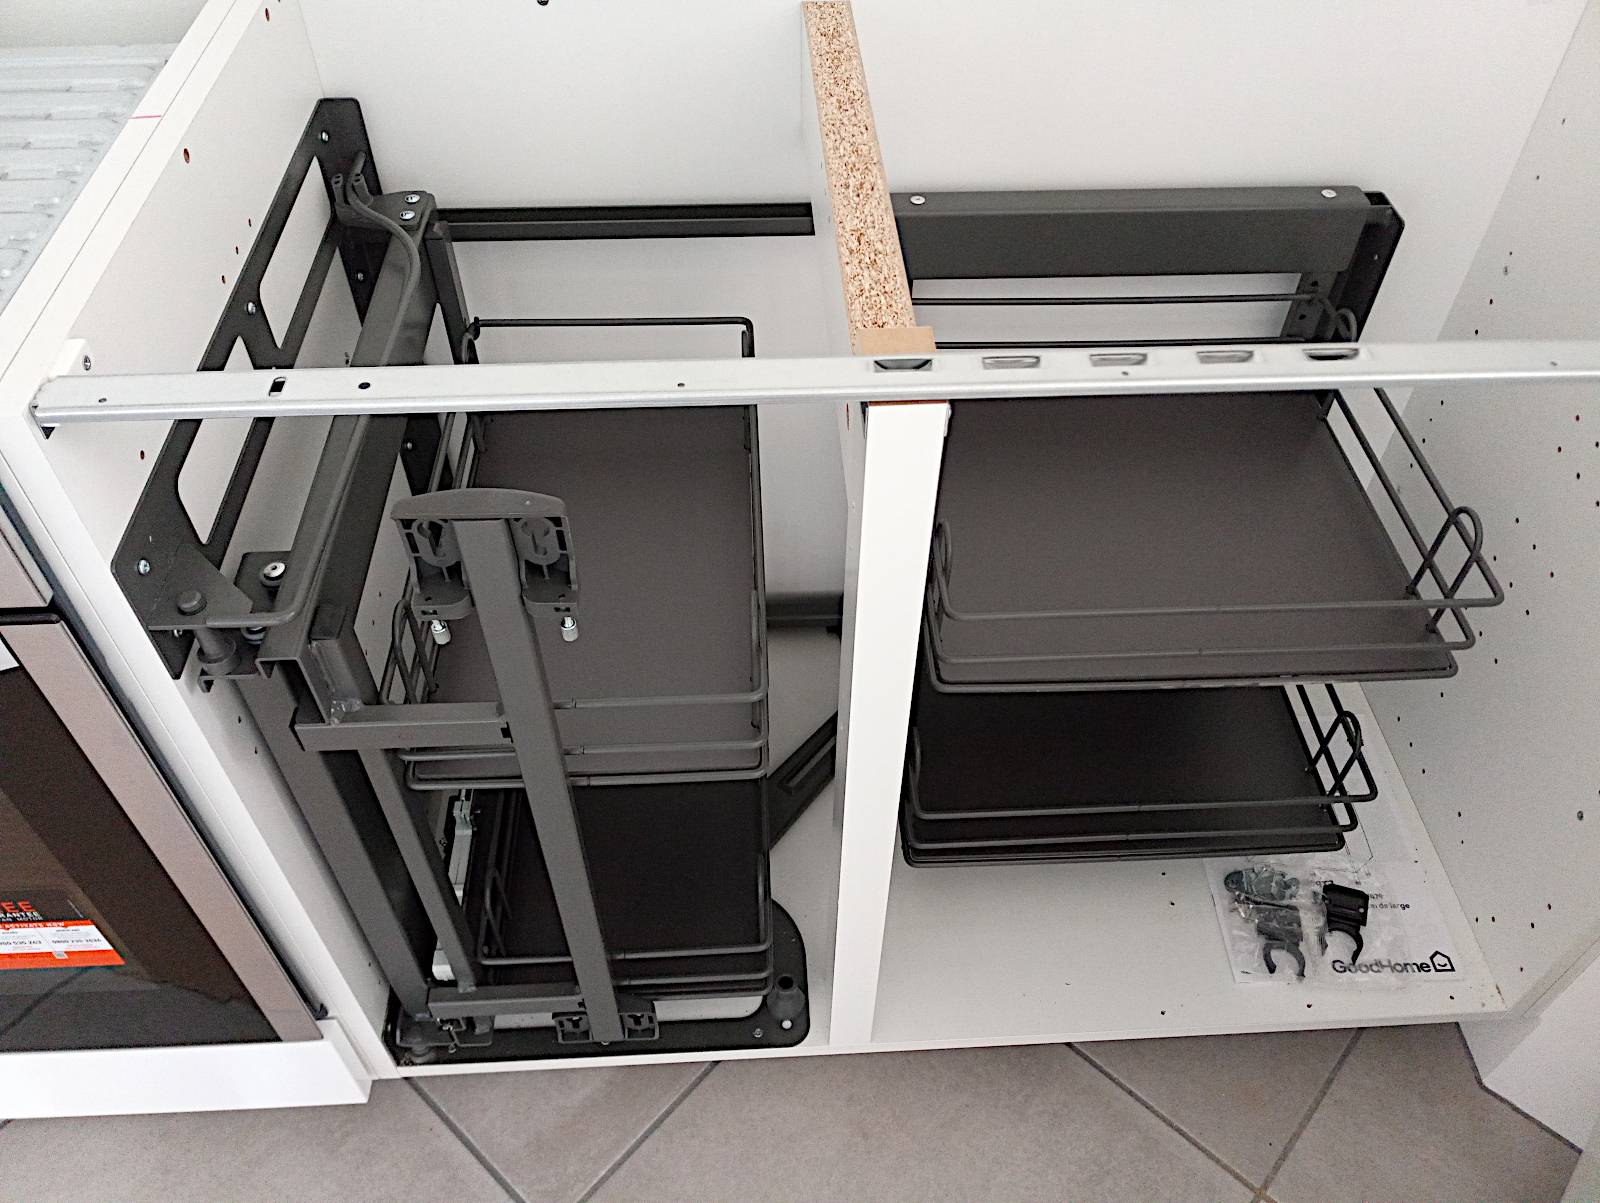
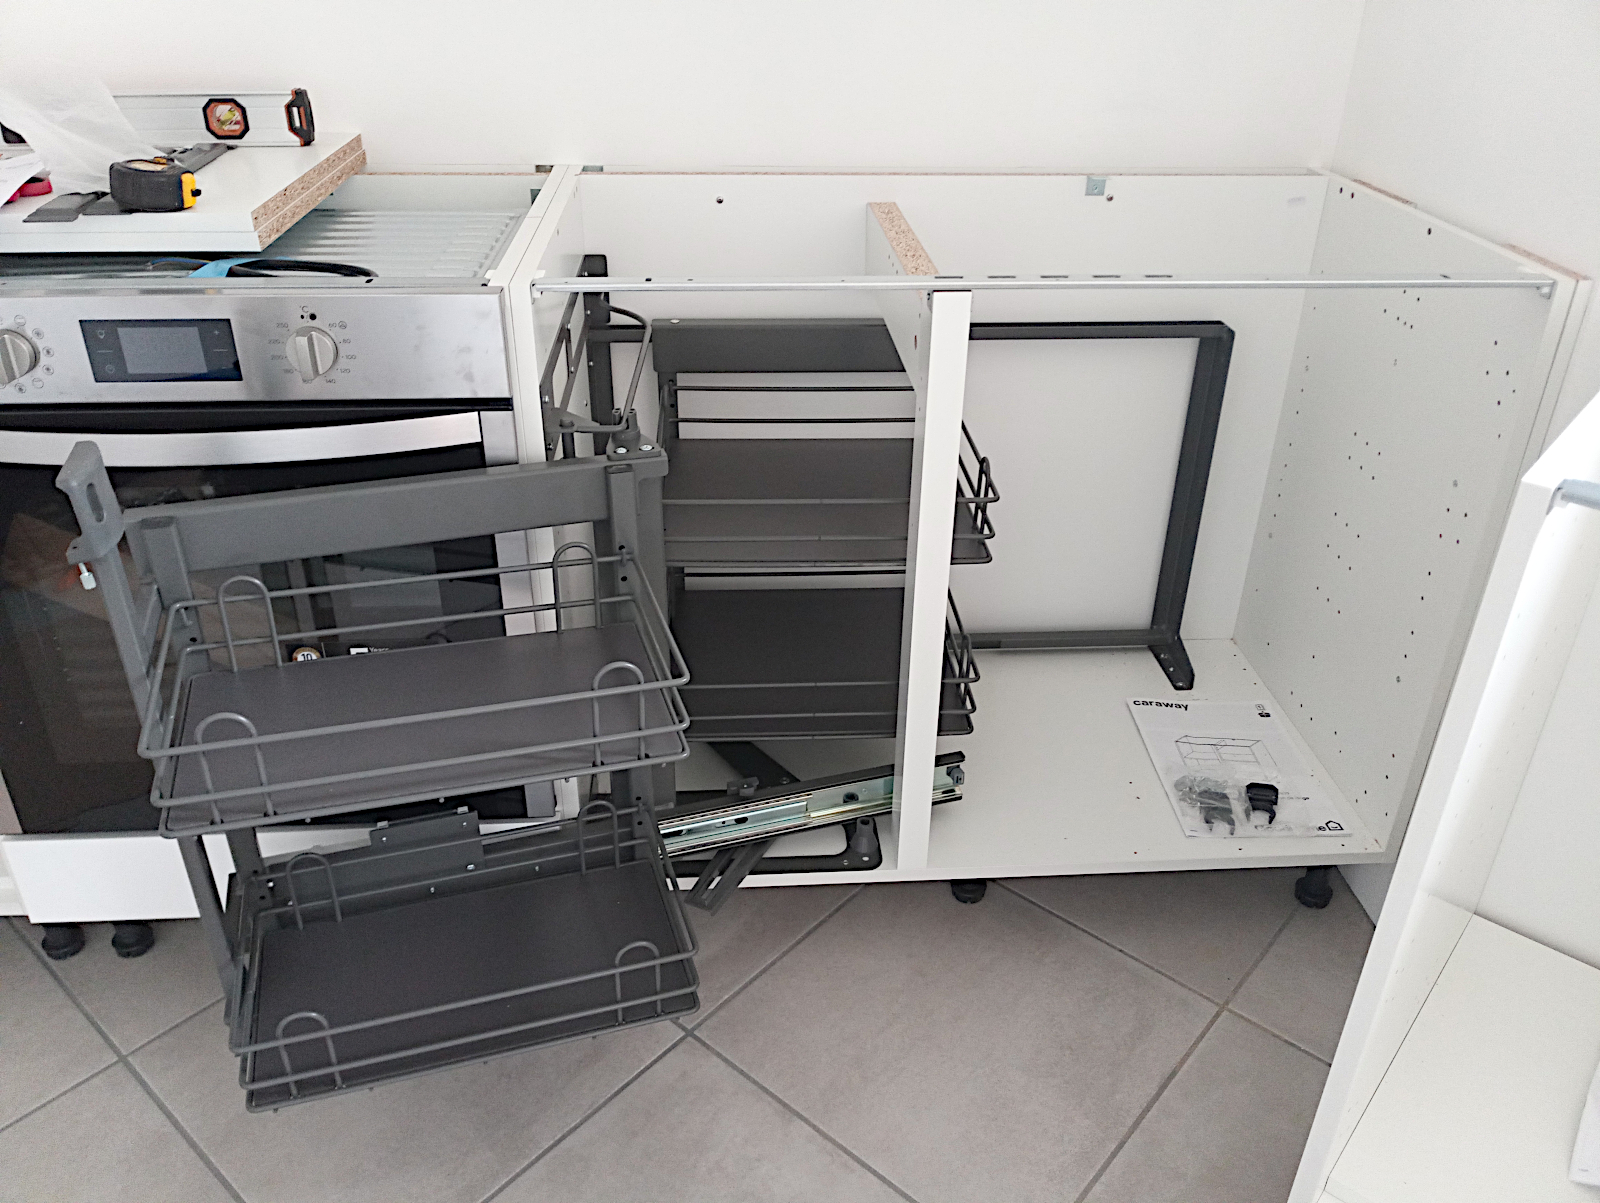
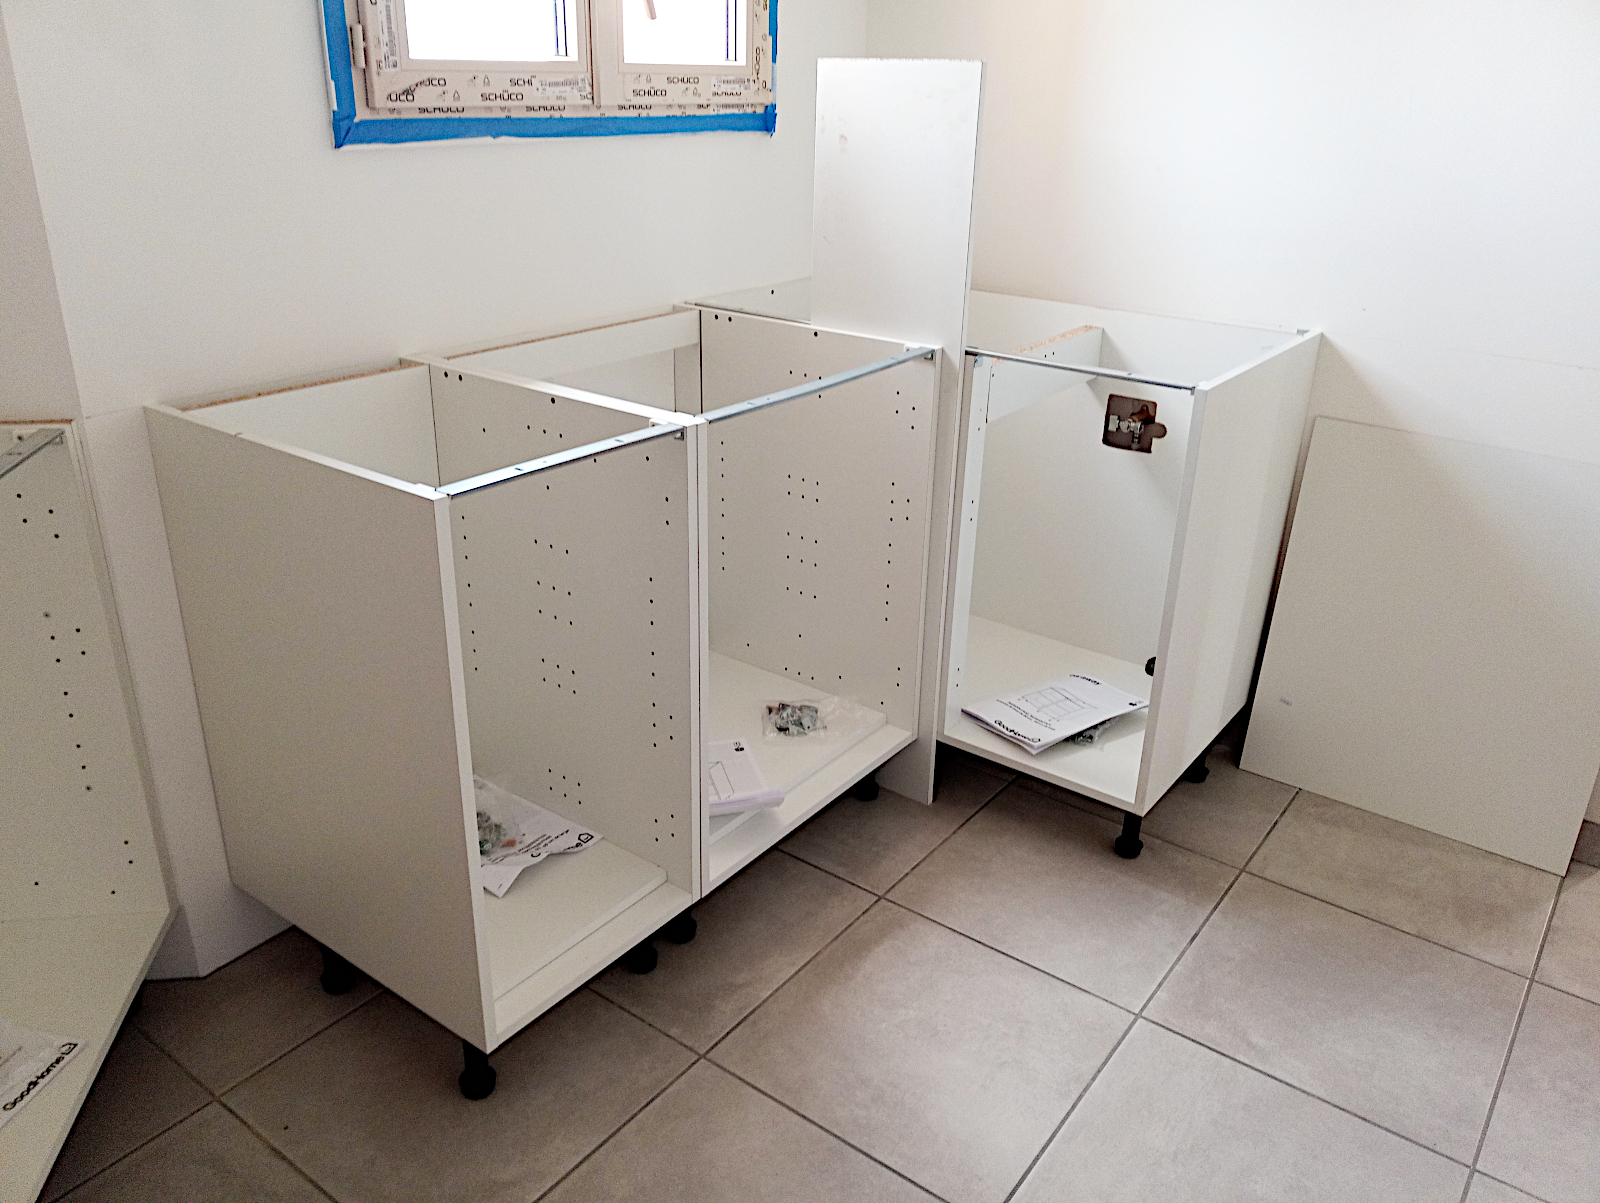
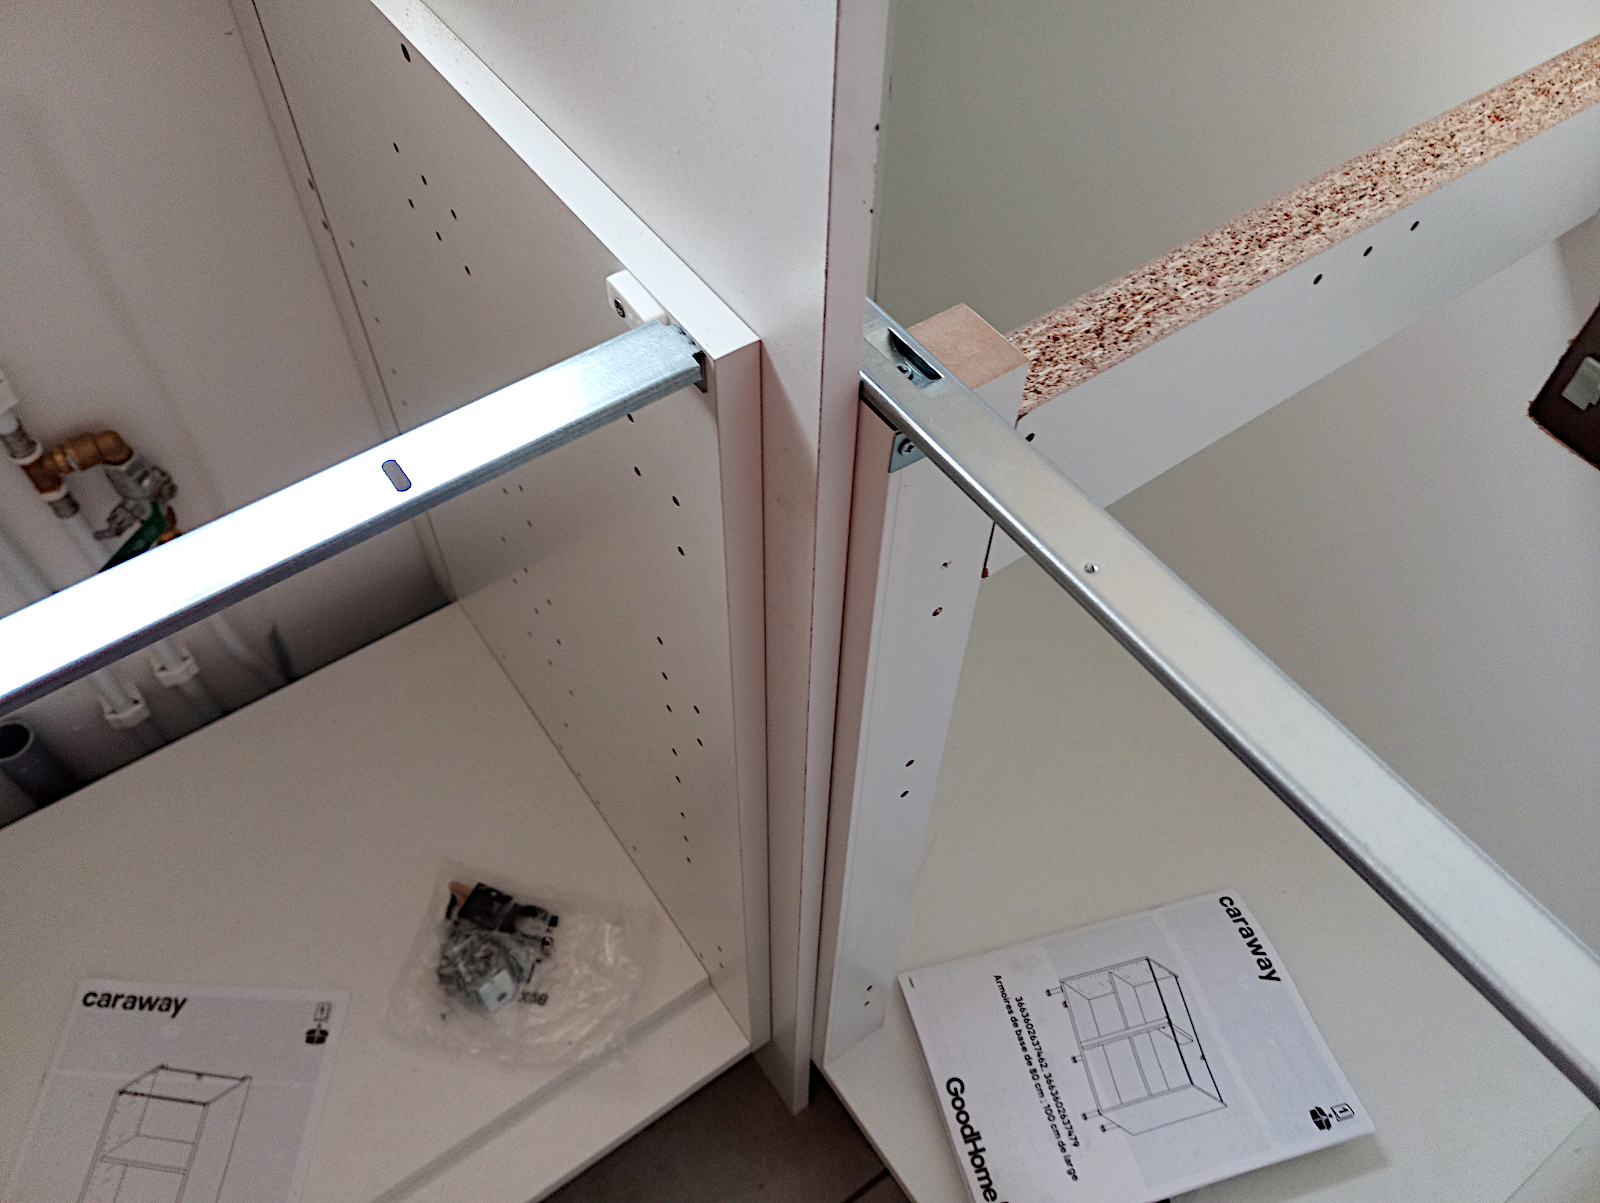
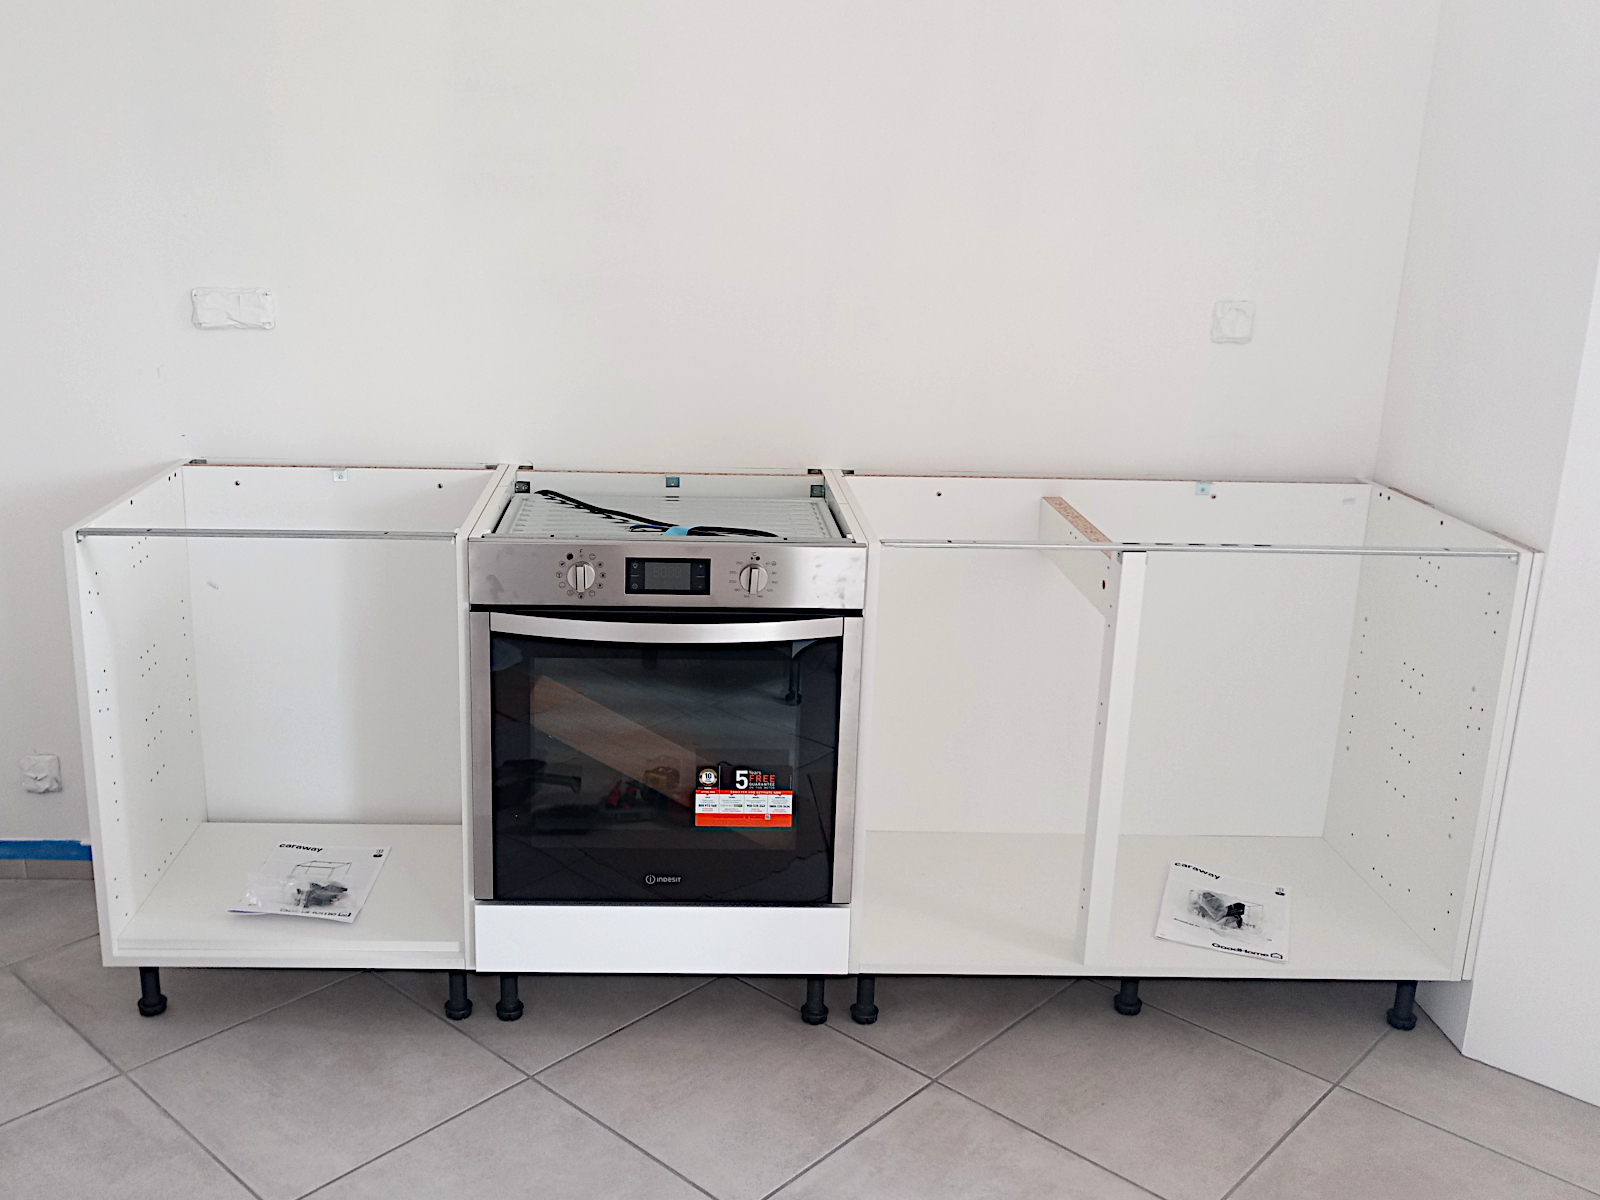
And now with the storage unit frame in position showing how well it now works.

null

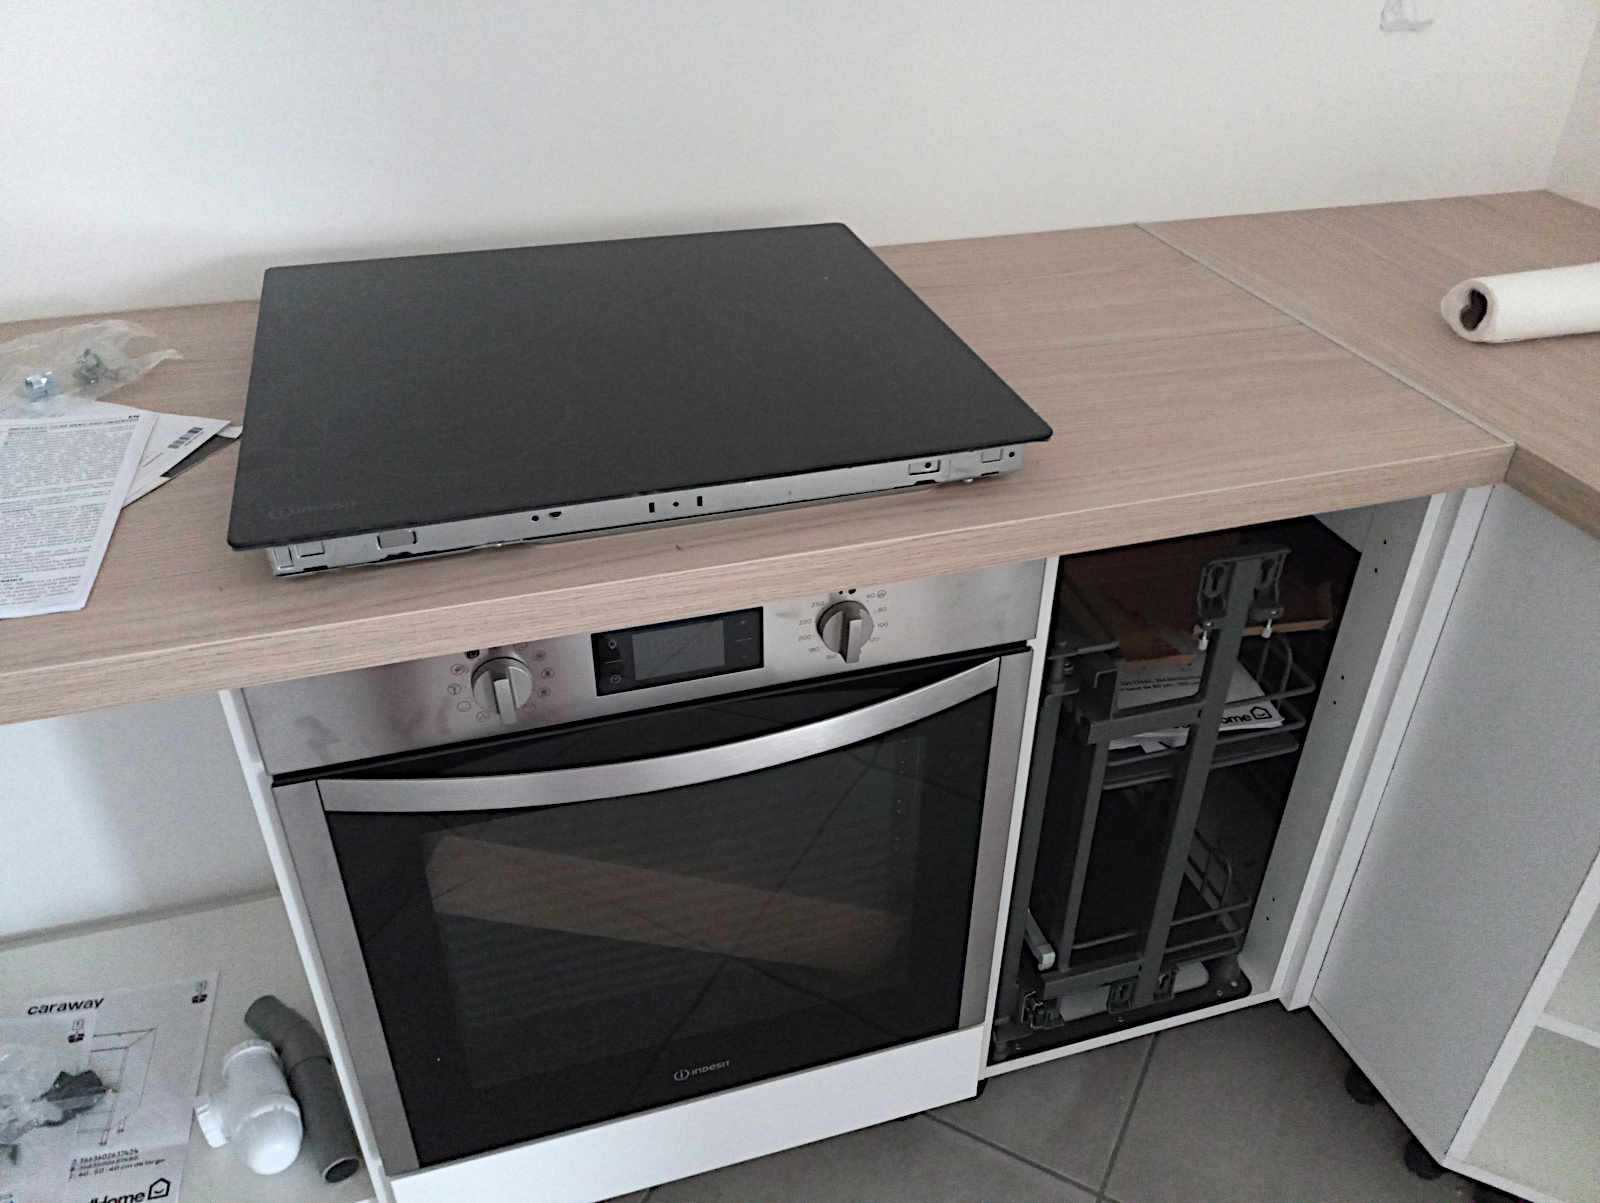
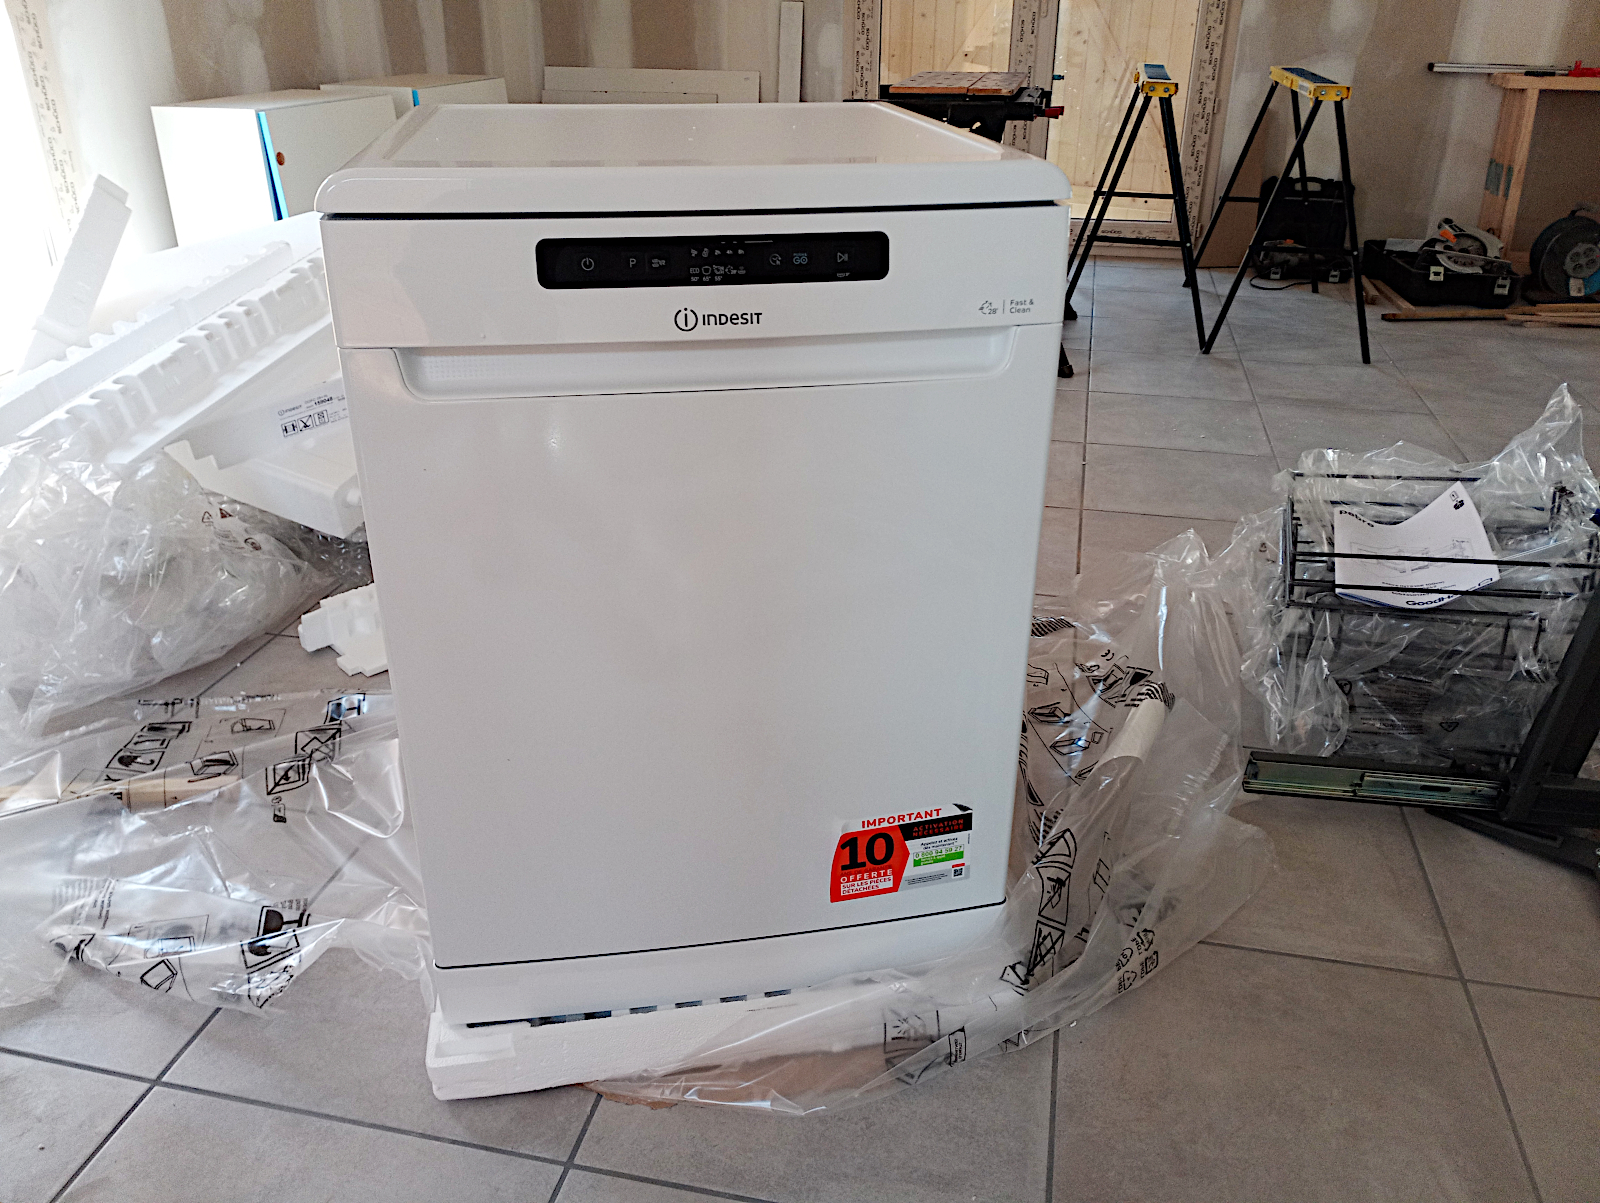
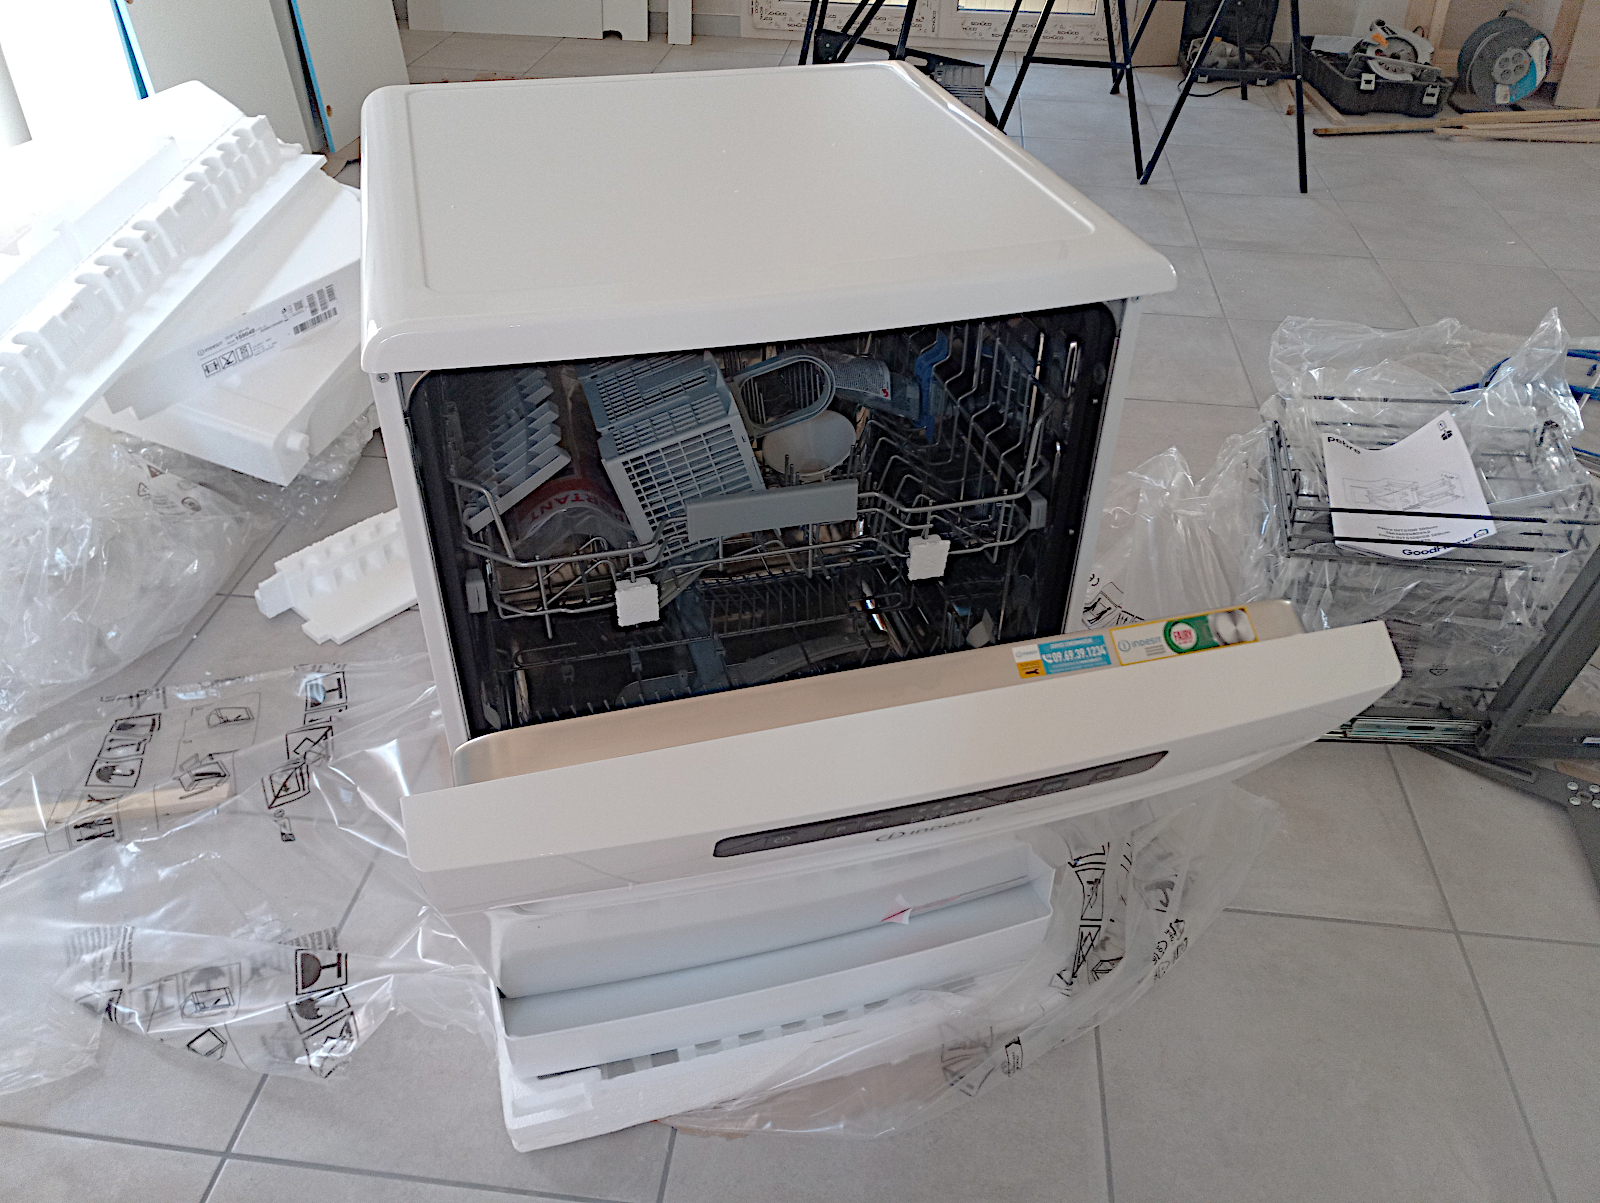
I can’t now do much more with this cabinet until the dishwasher is available. It’s actually waiting for me to pick it up at Conforama in Boulazac but as I was expecting quite a few deliveries over the days prior, including today, I made an appointment to do so for Saturday morning as I knew then I’d be free. I wish now that I’d made it for tomorrow.

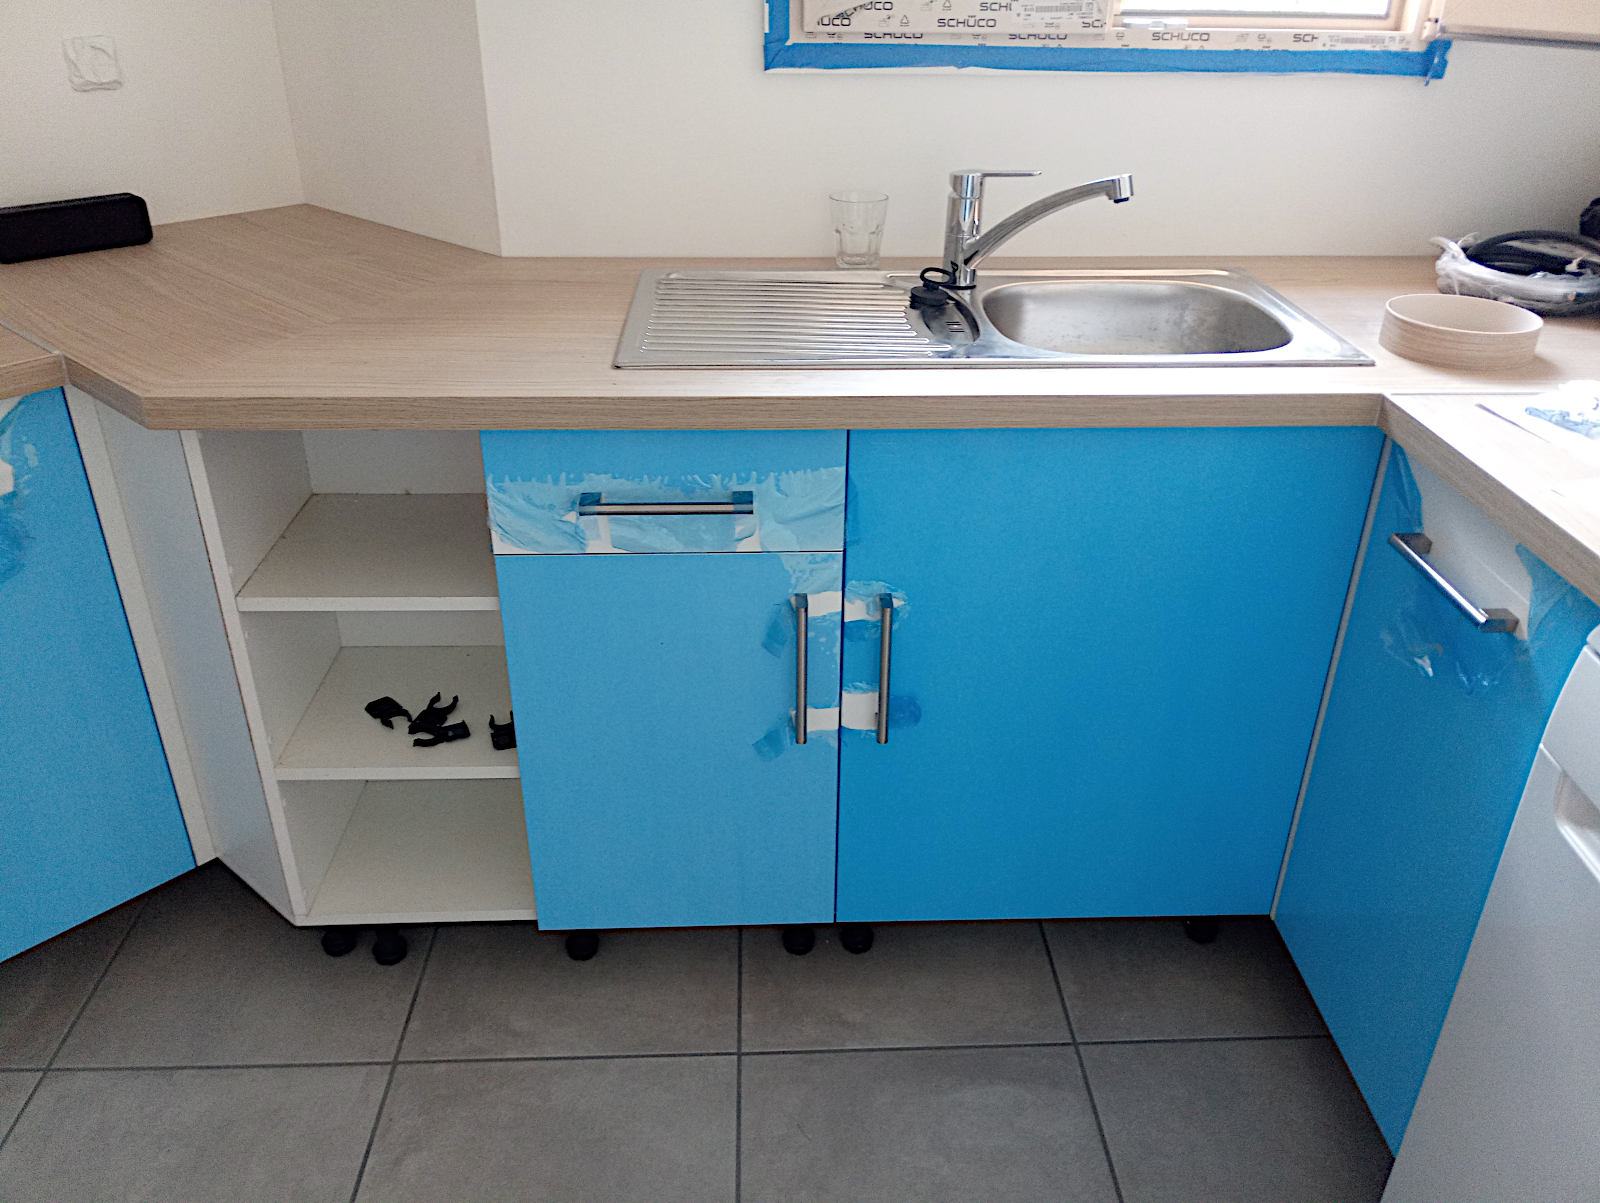
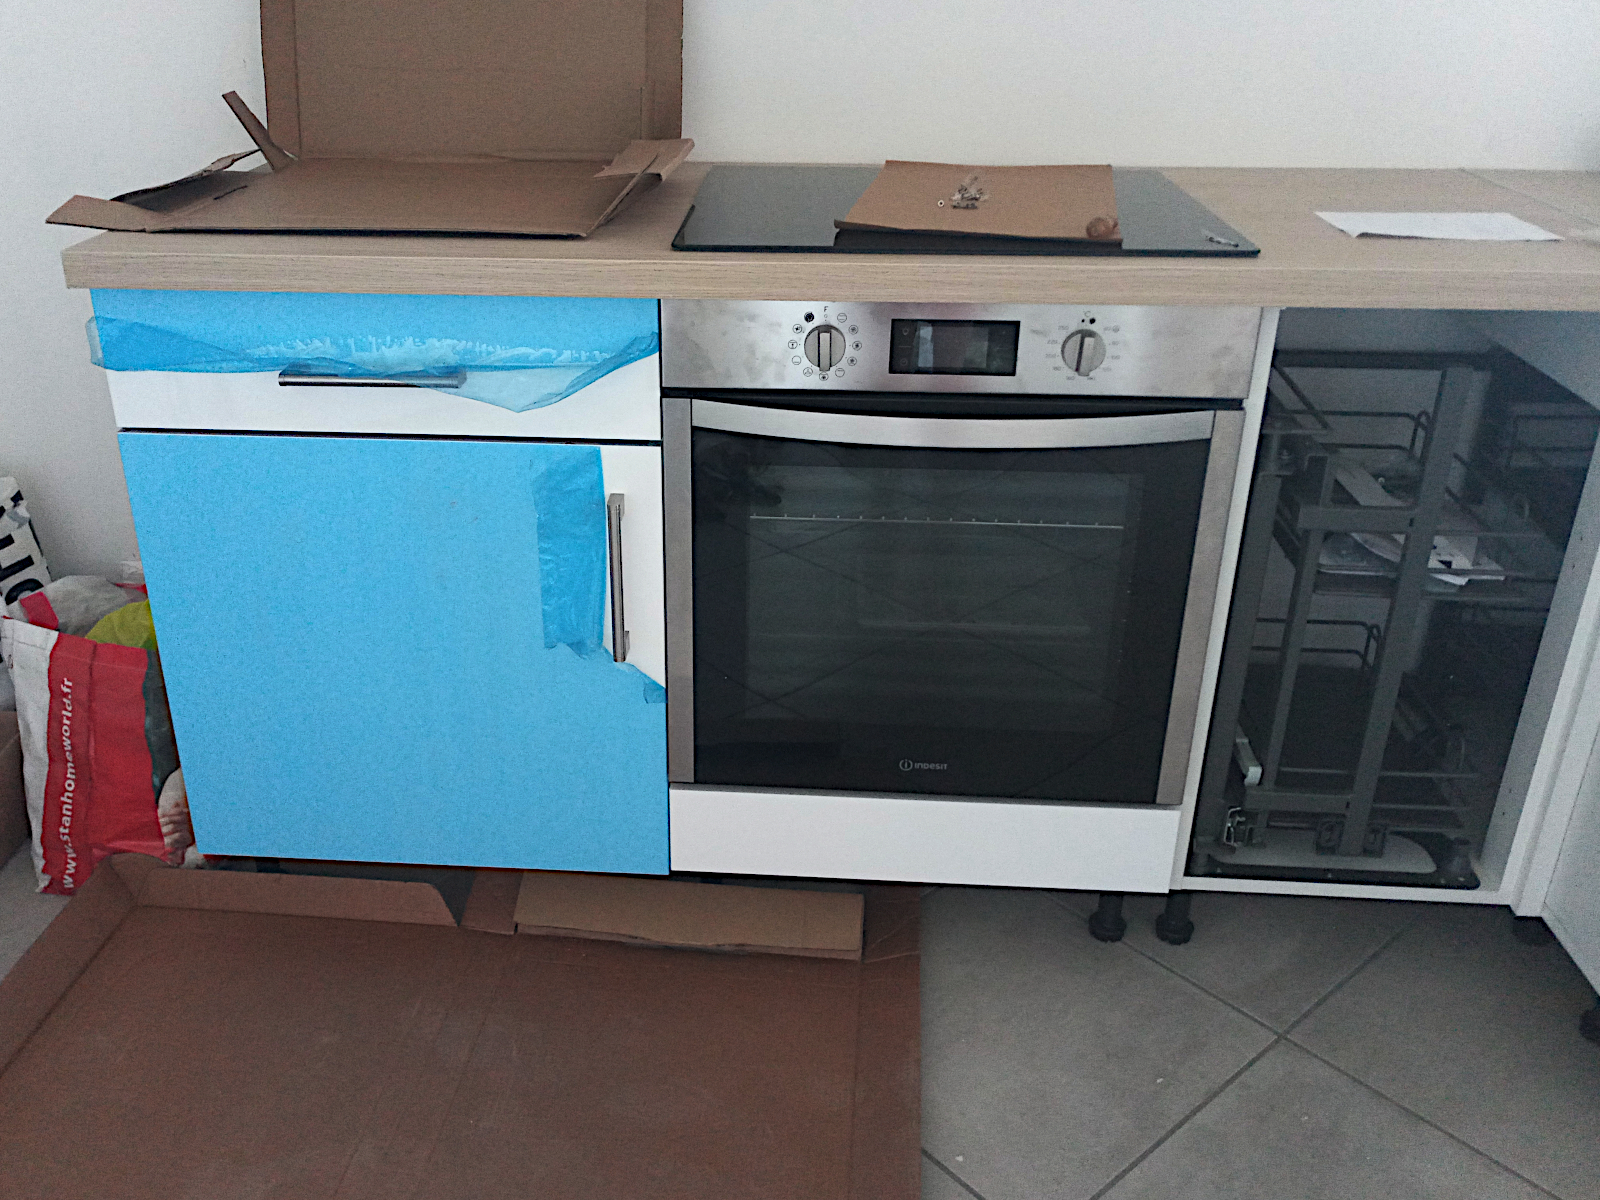
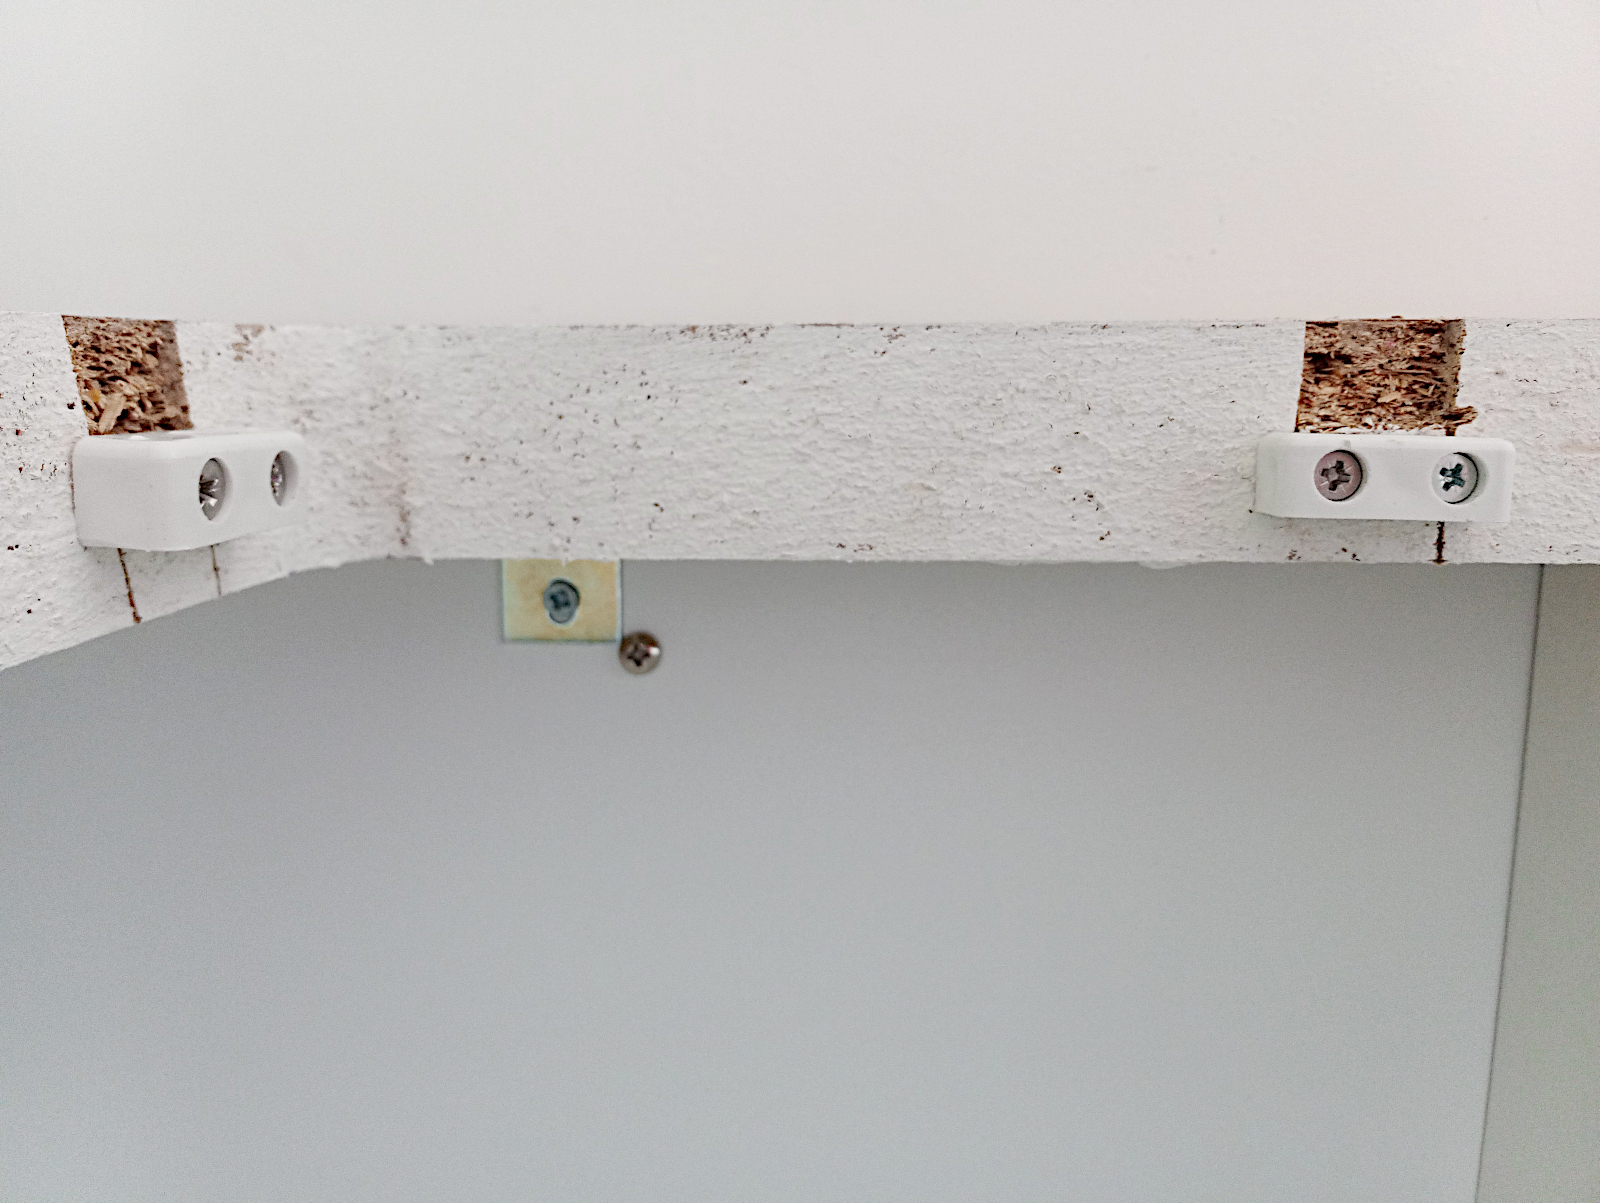
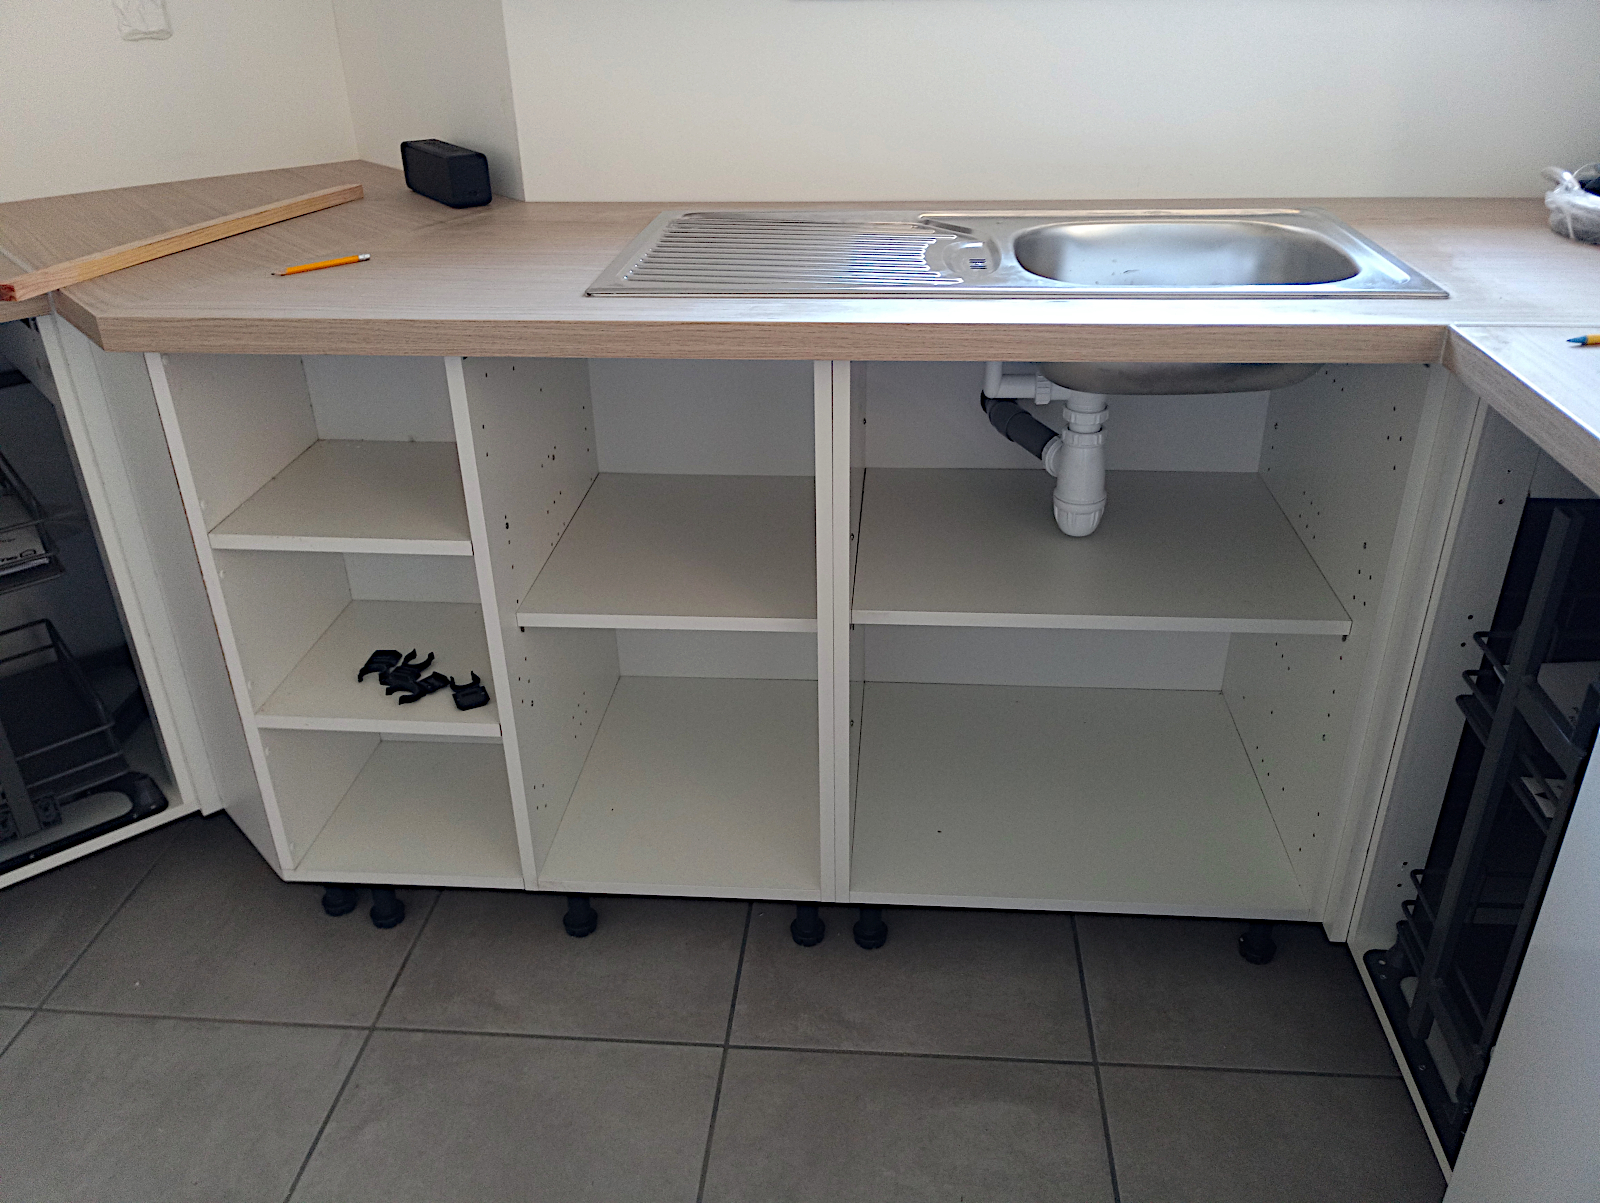
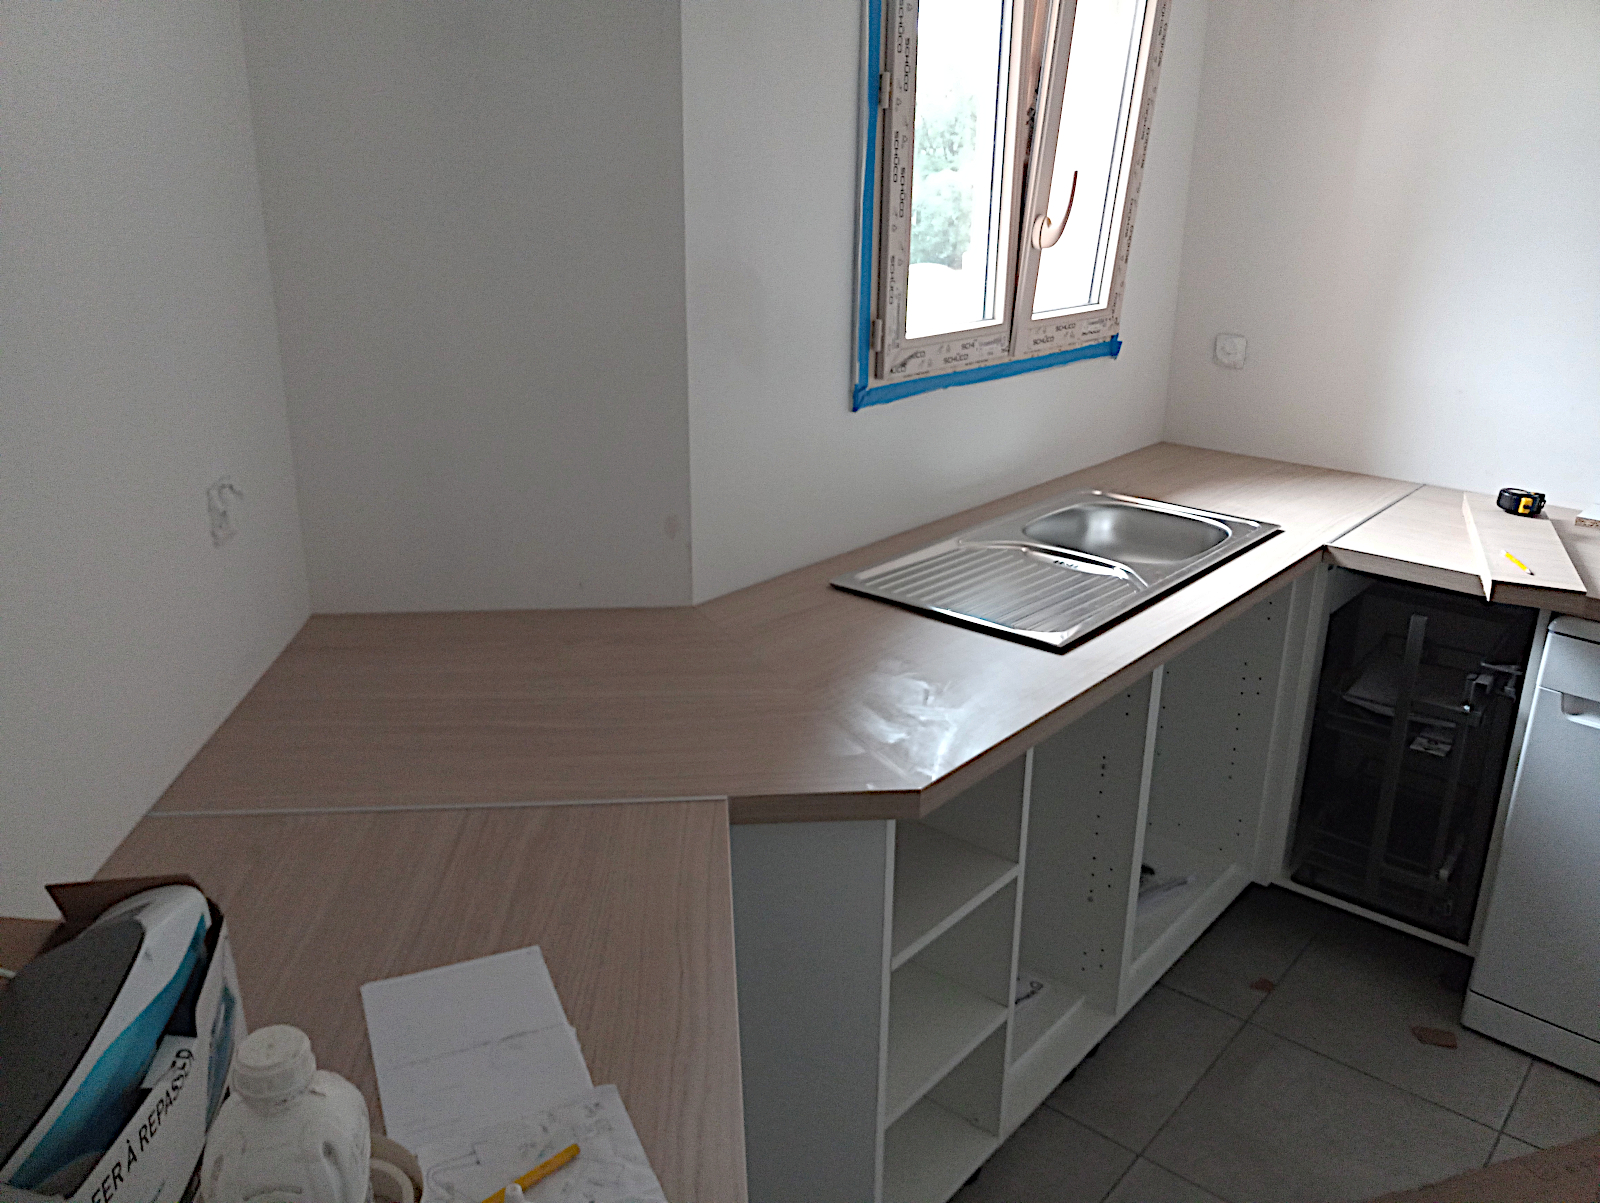
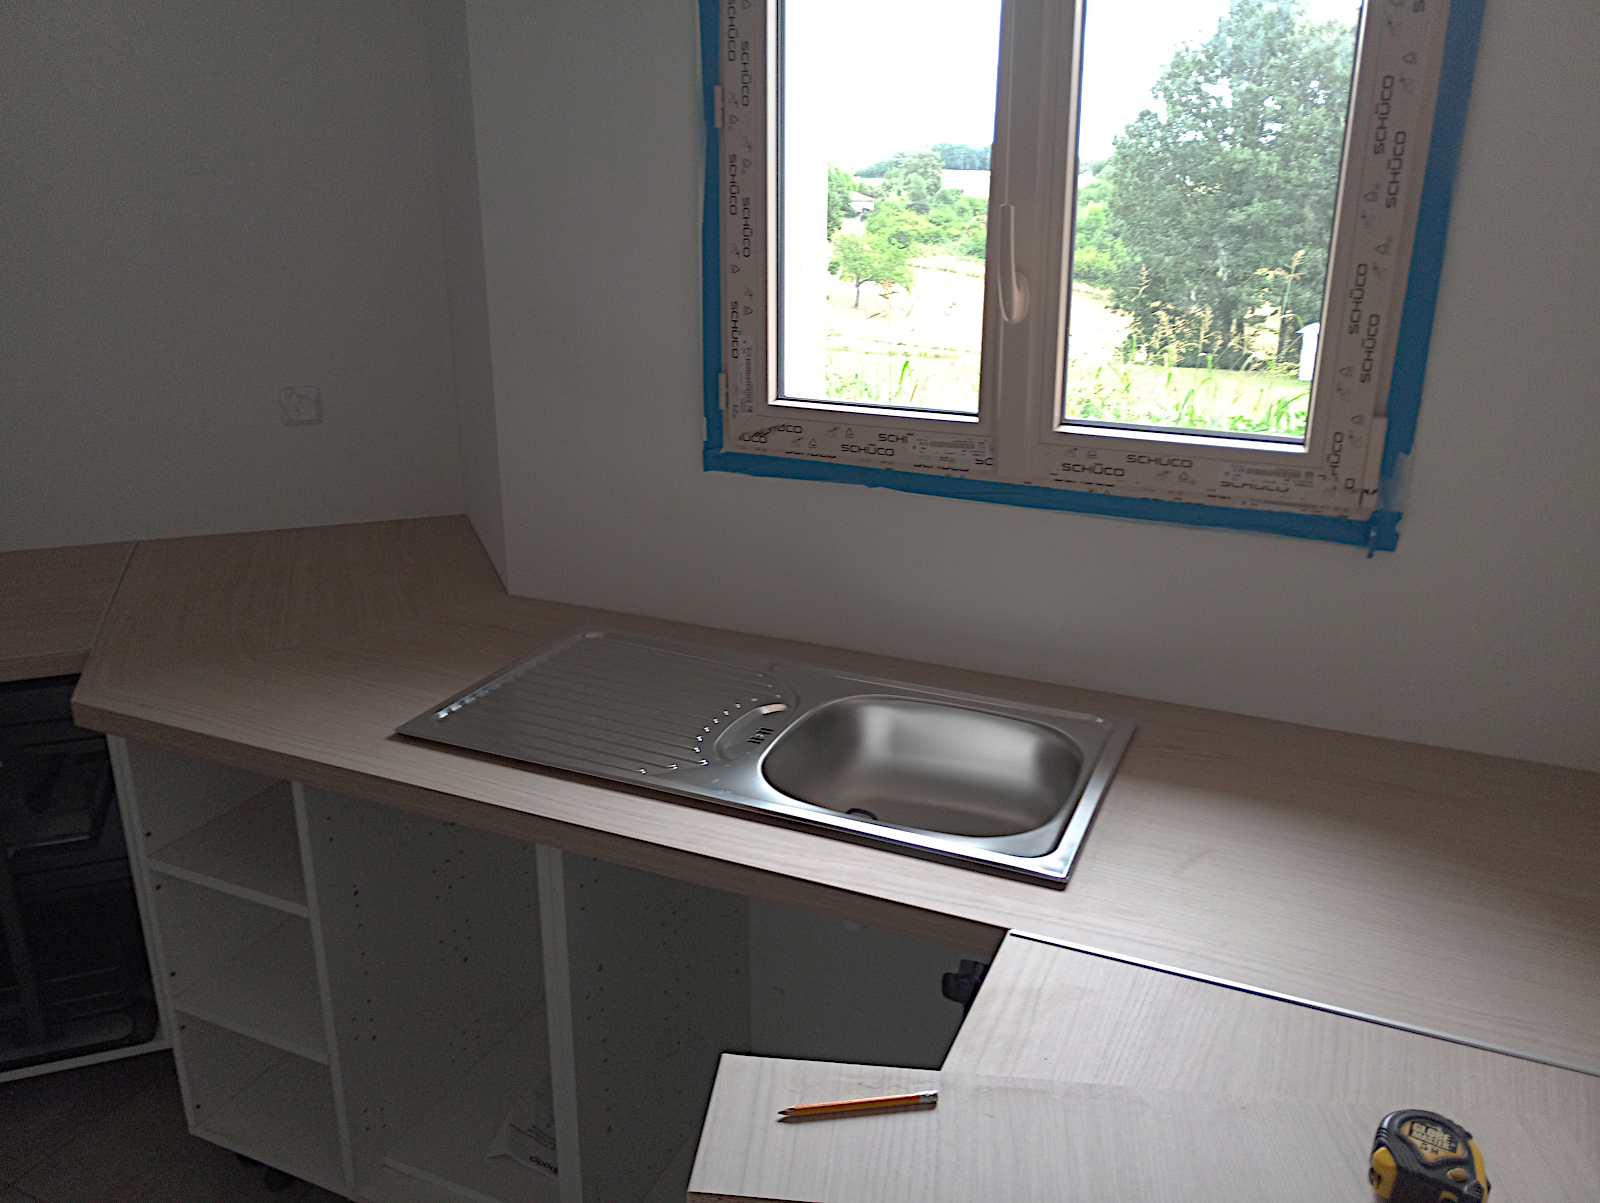
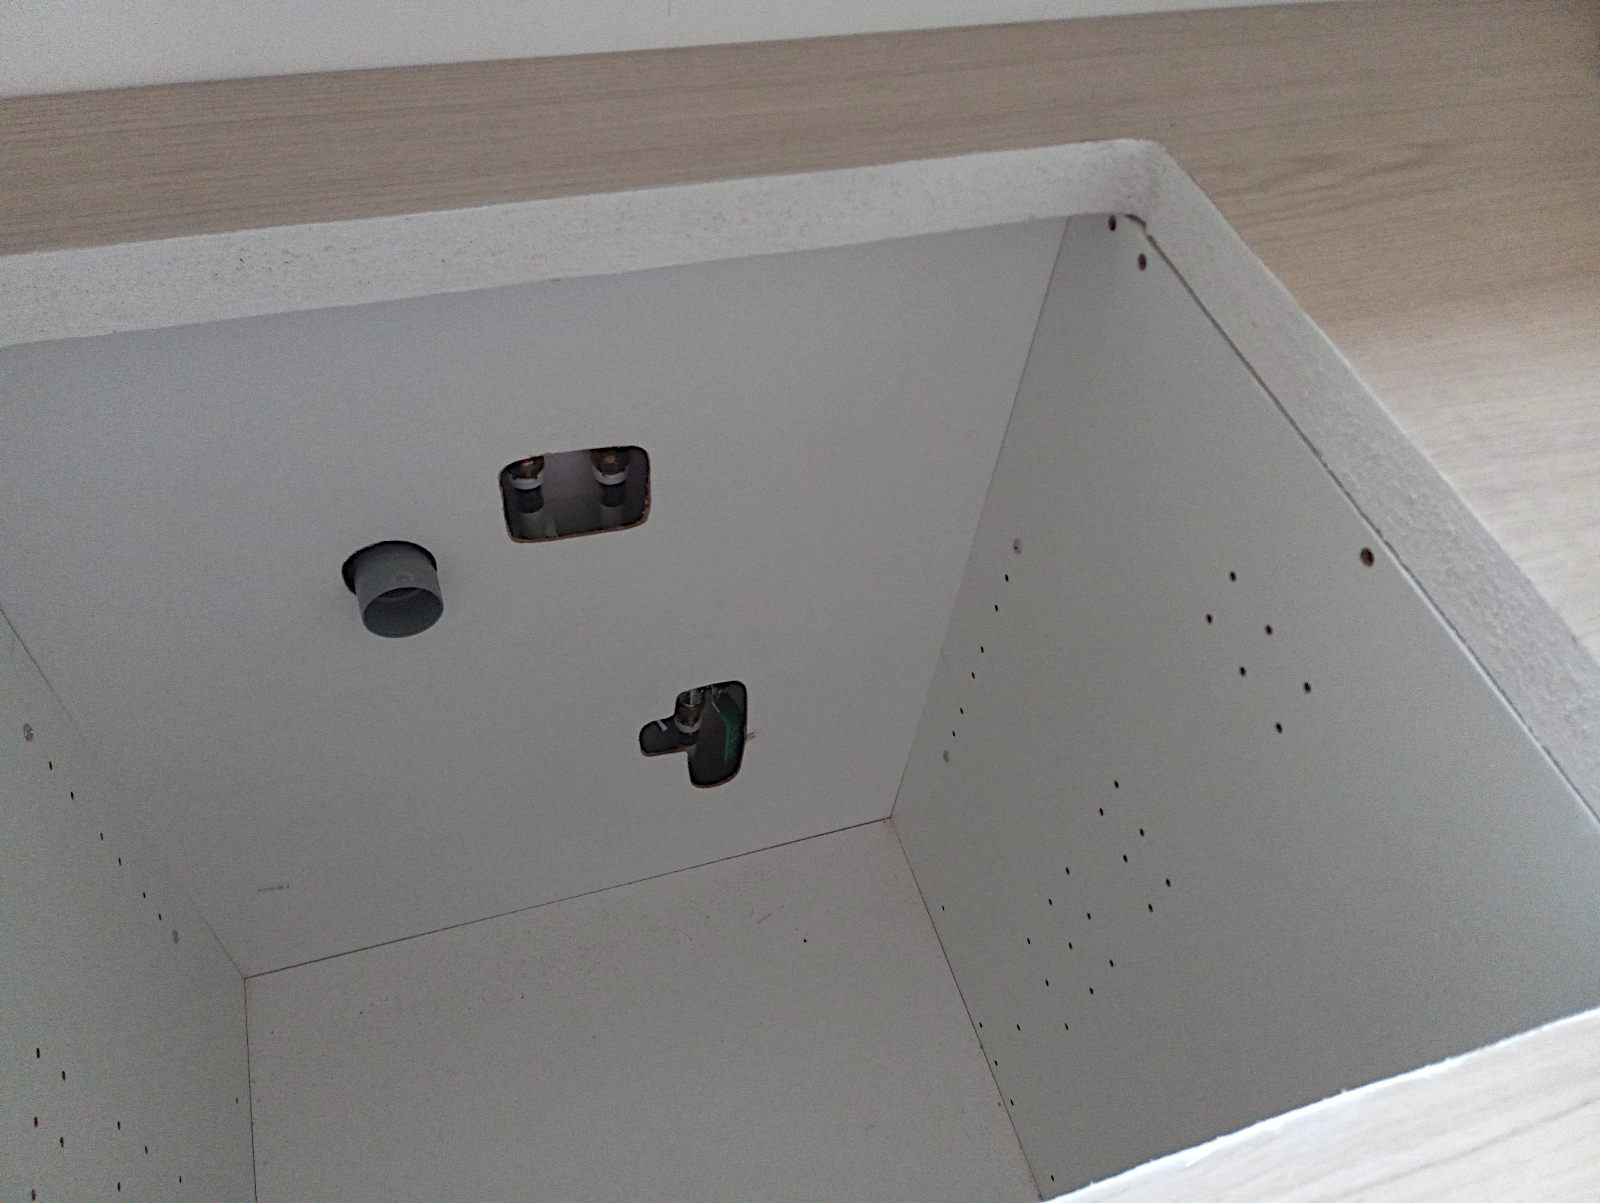
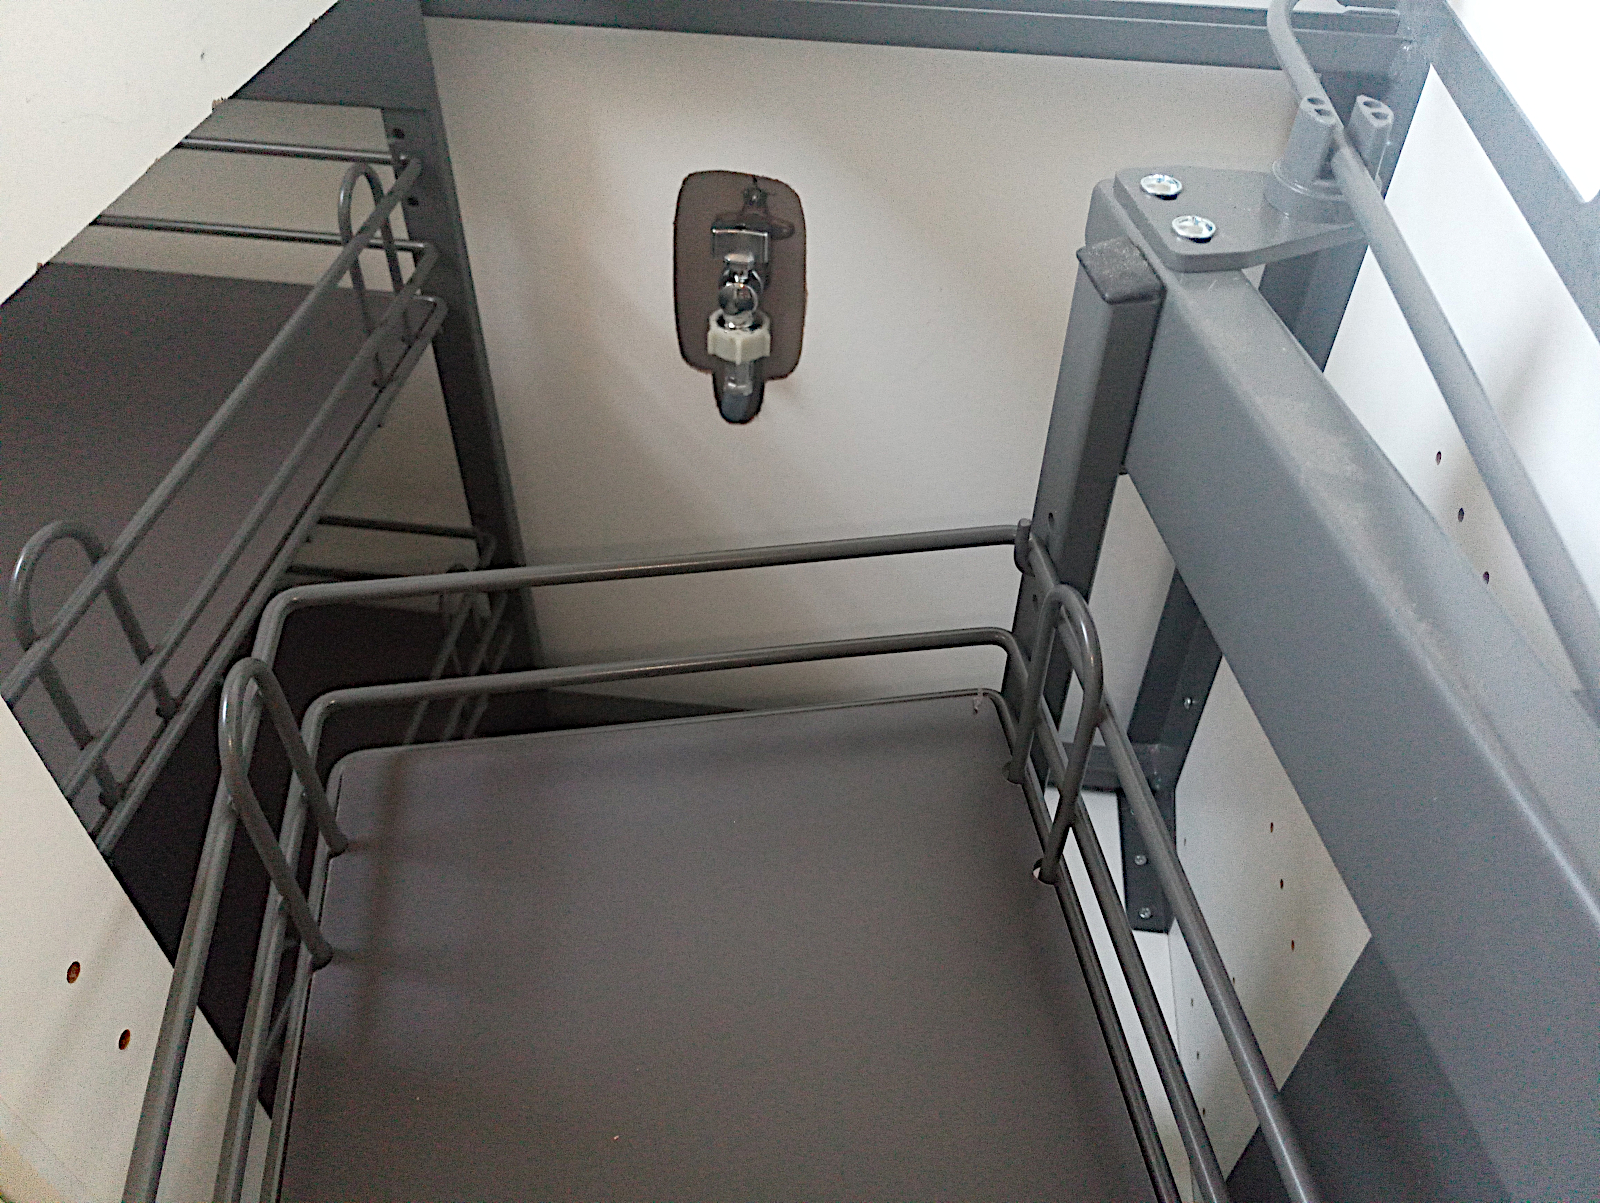
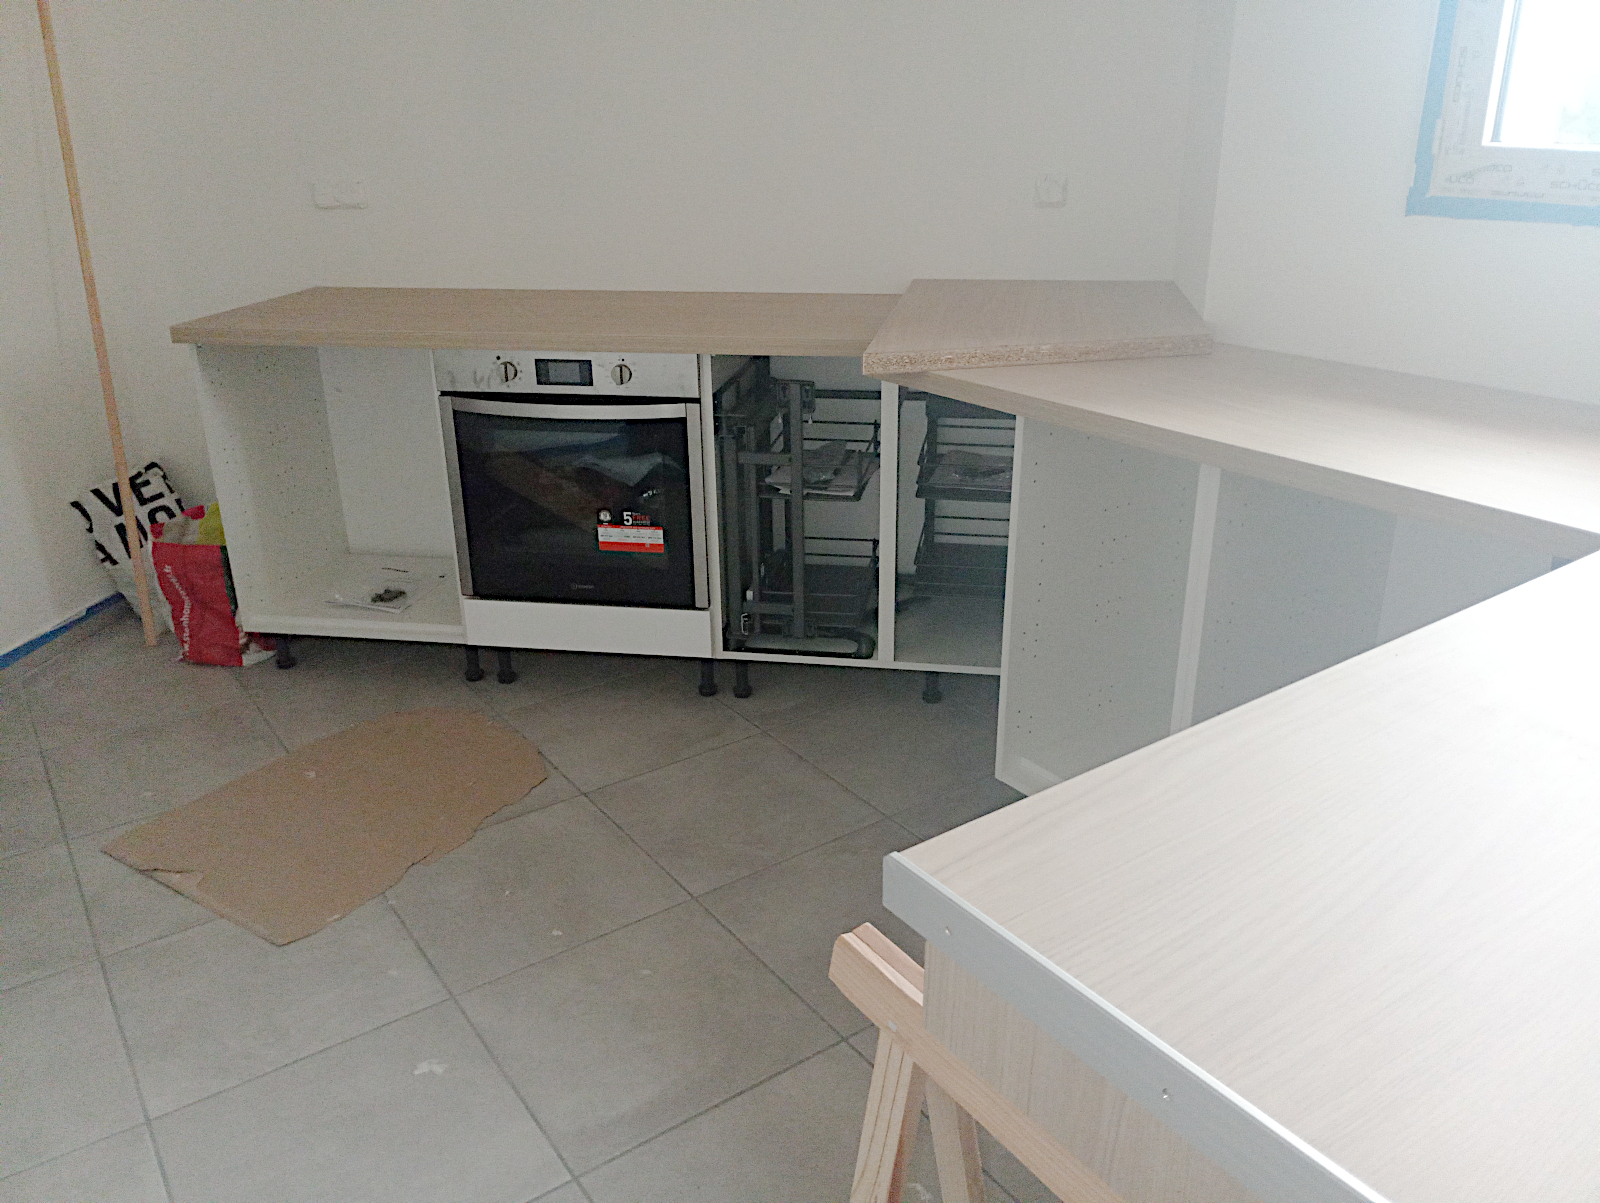
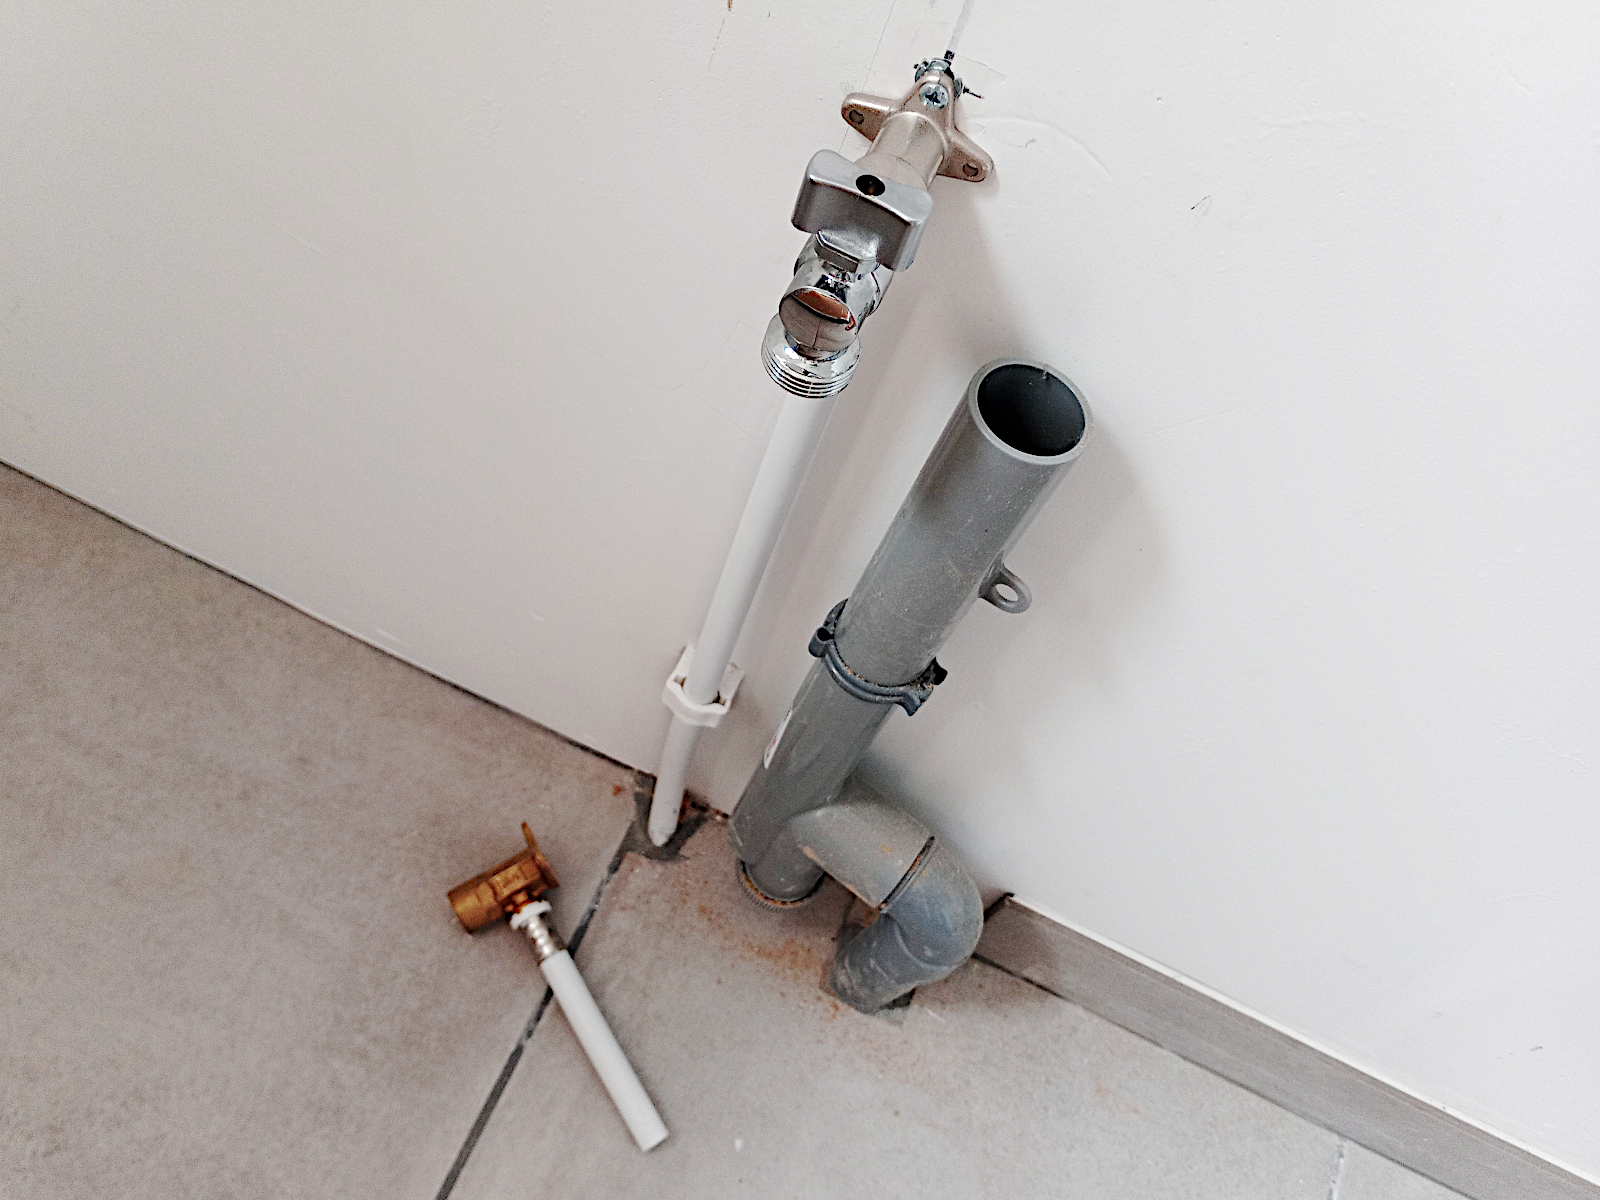
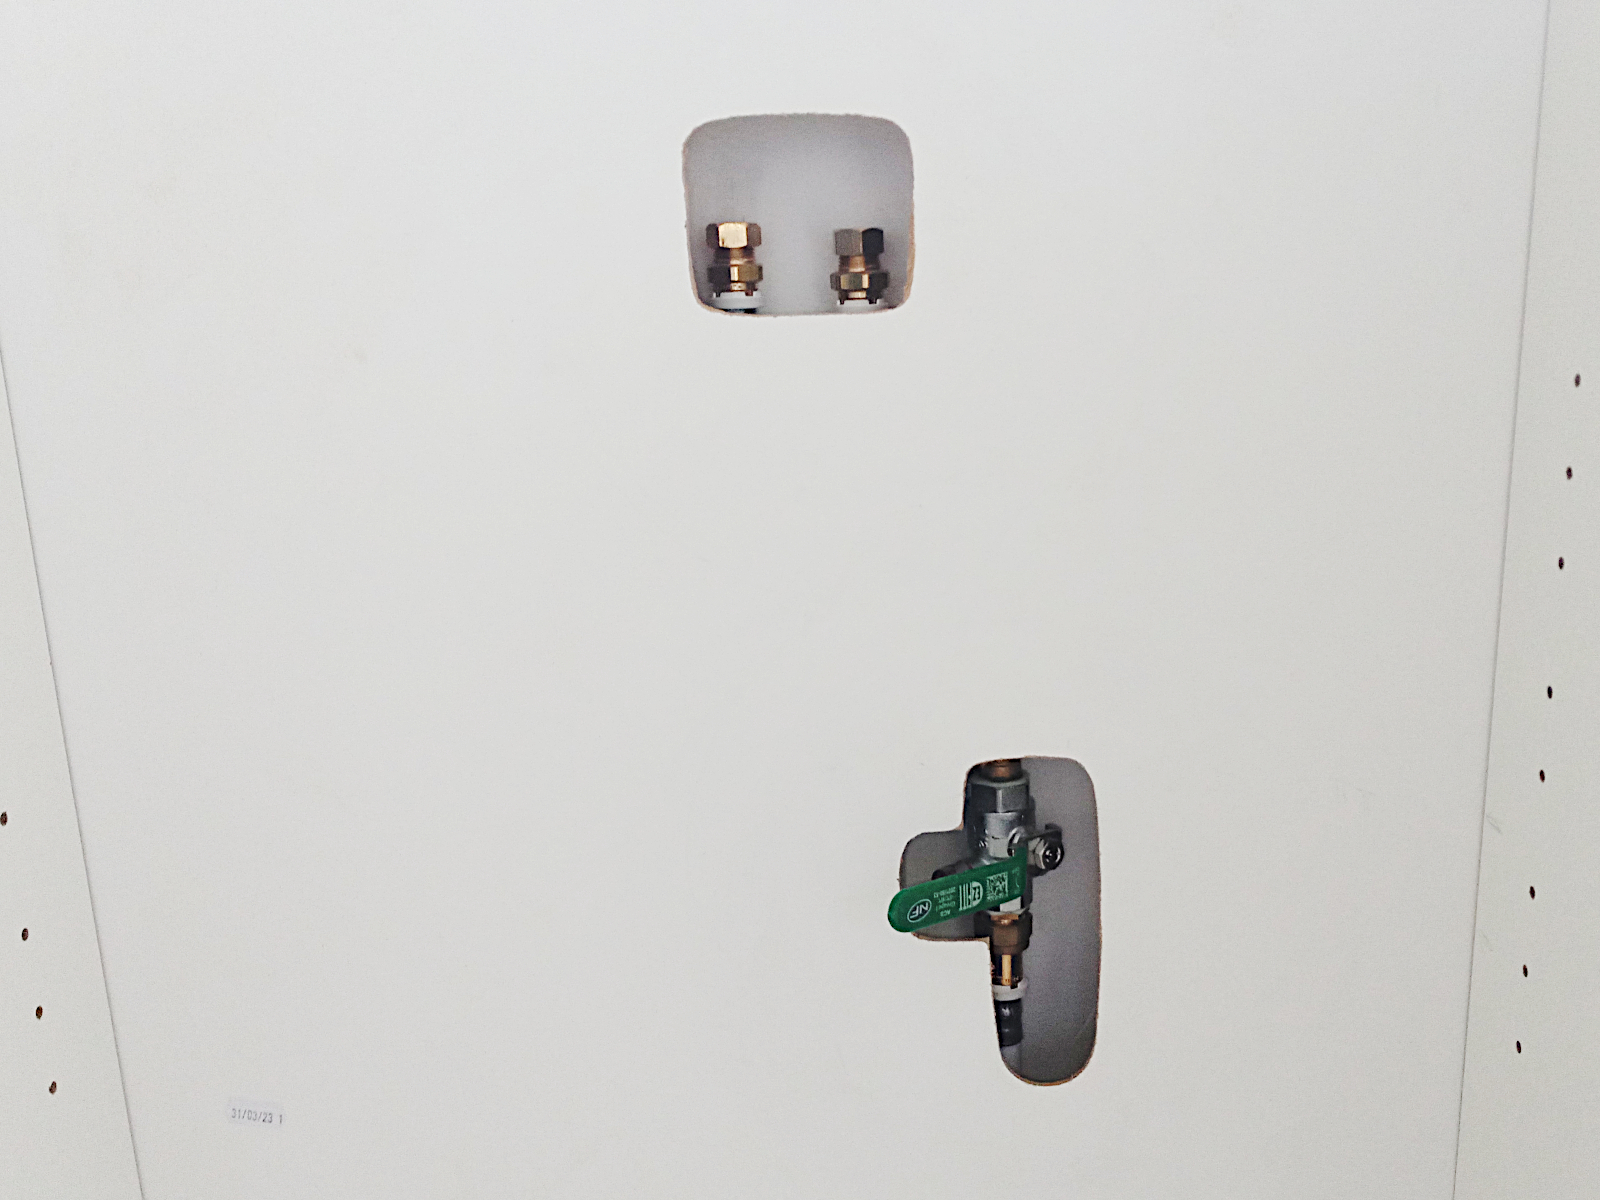
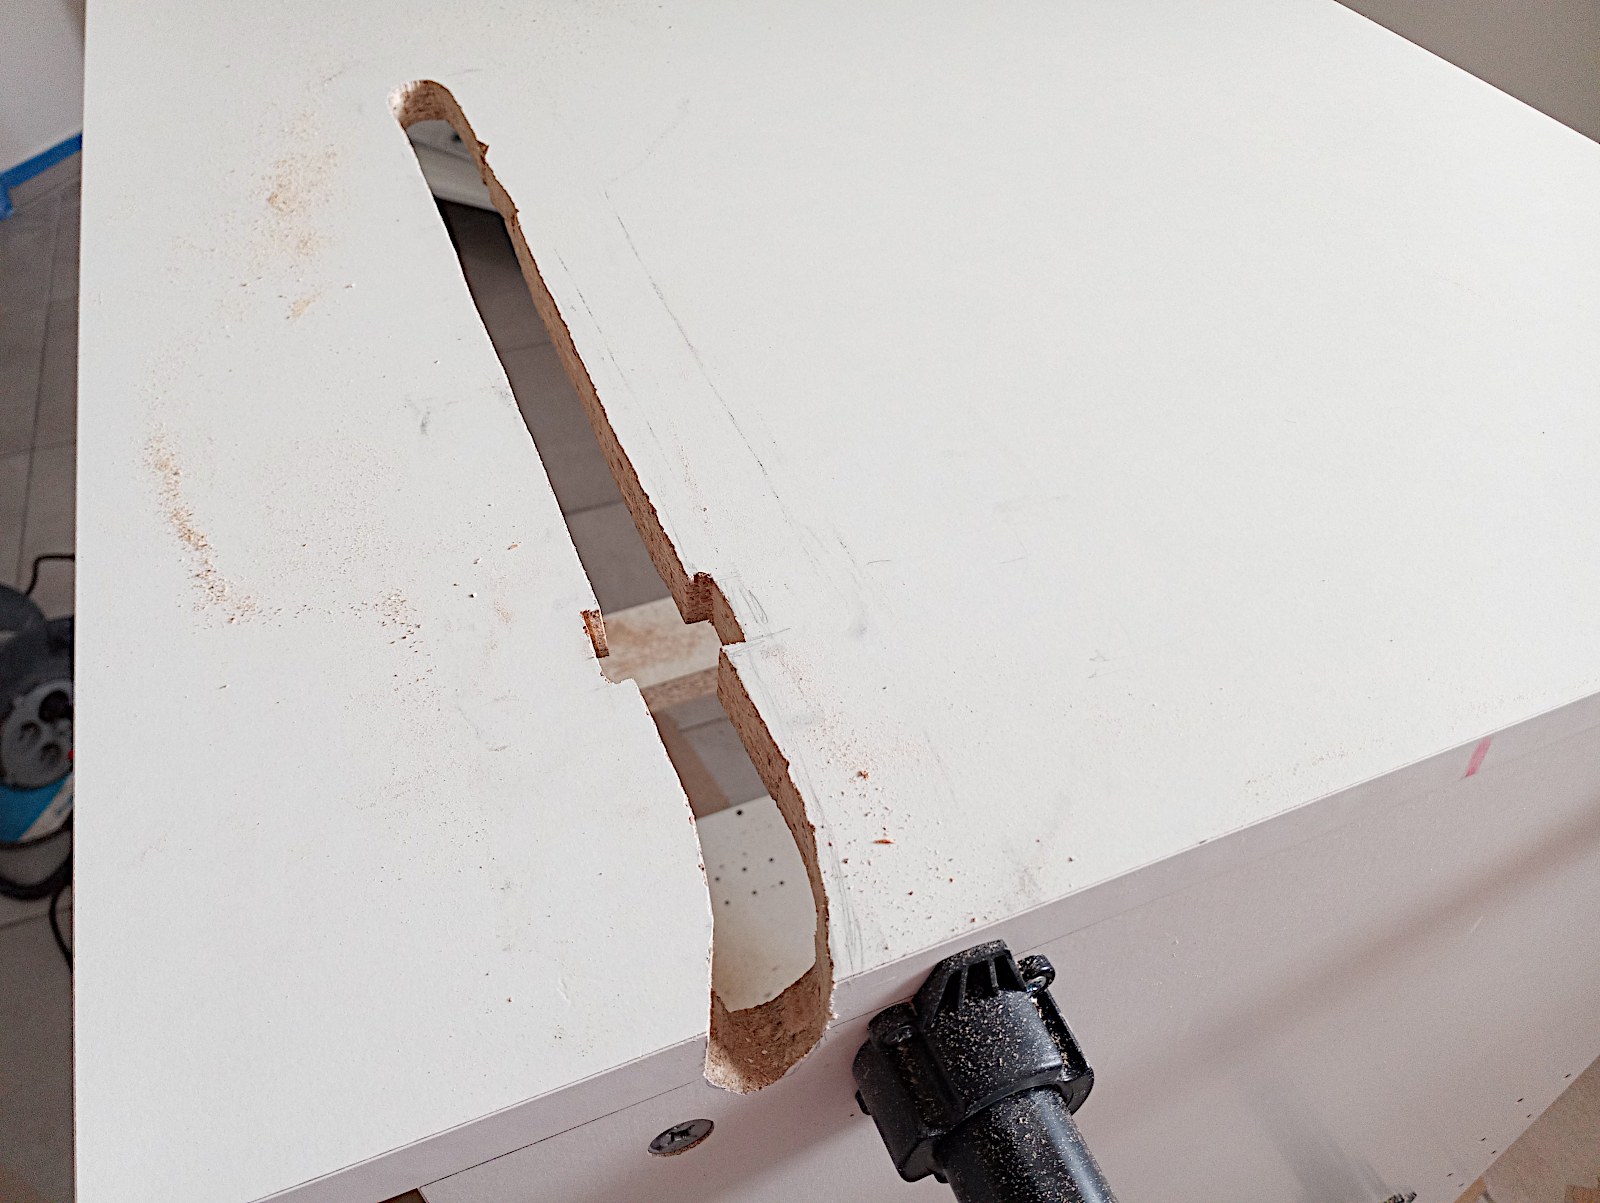
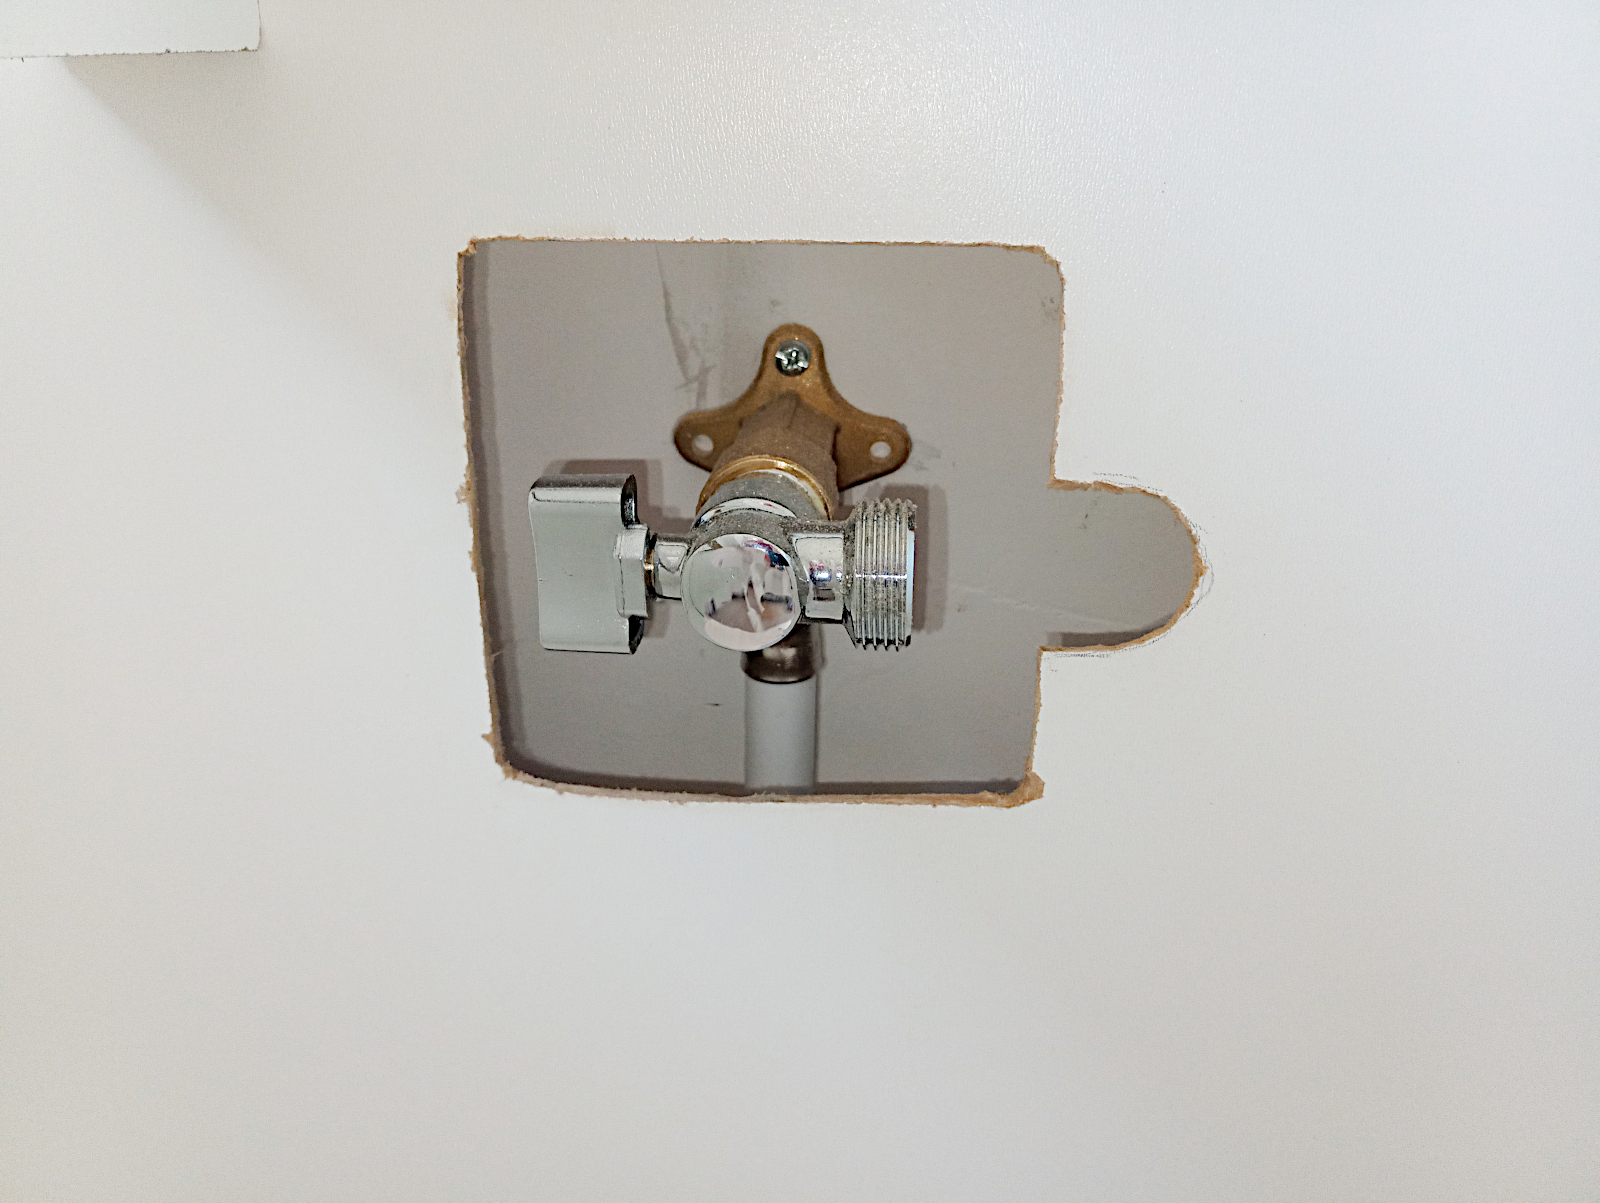
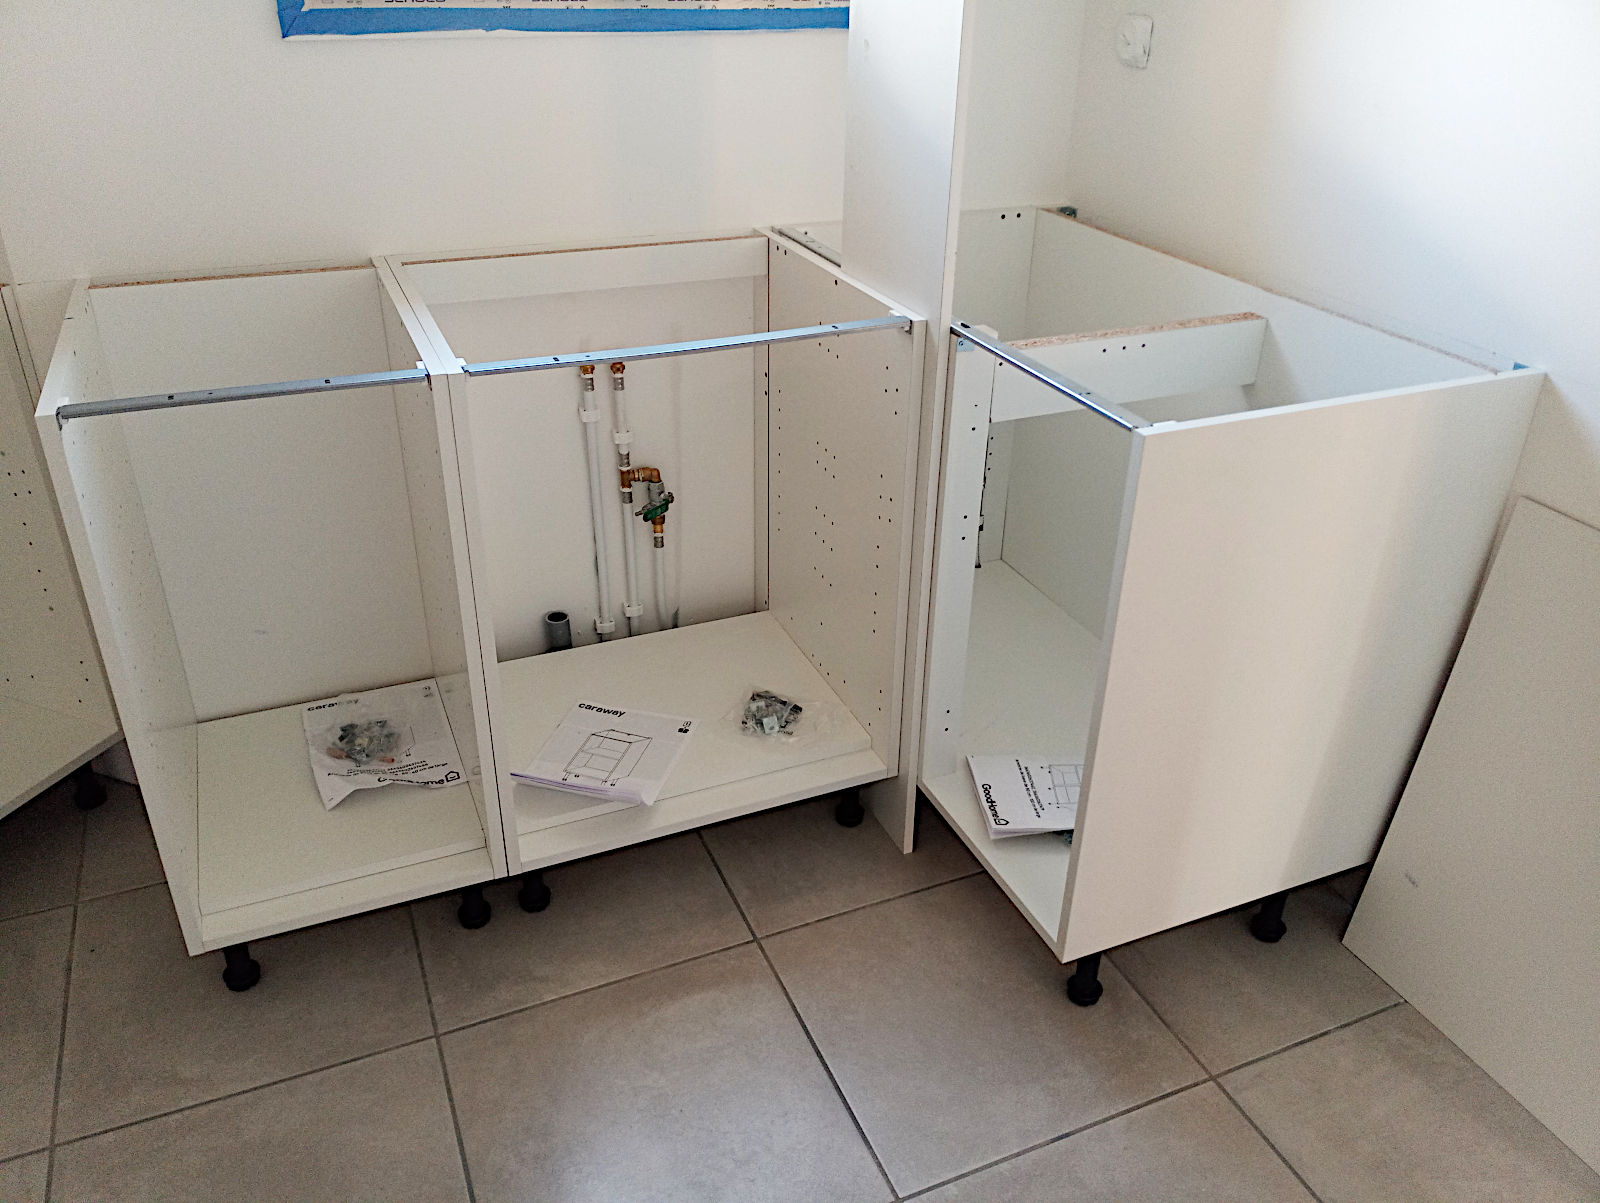
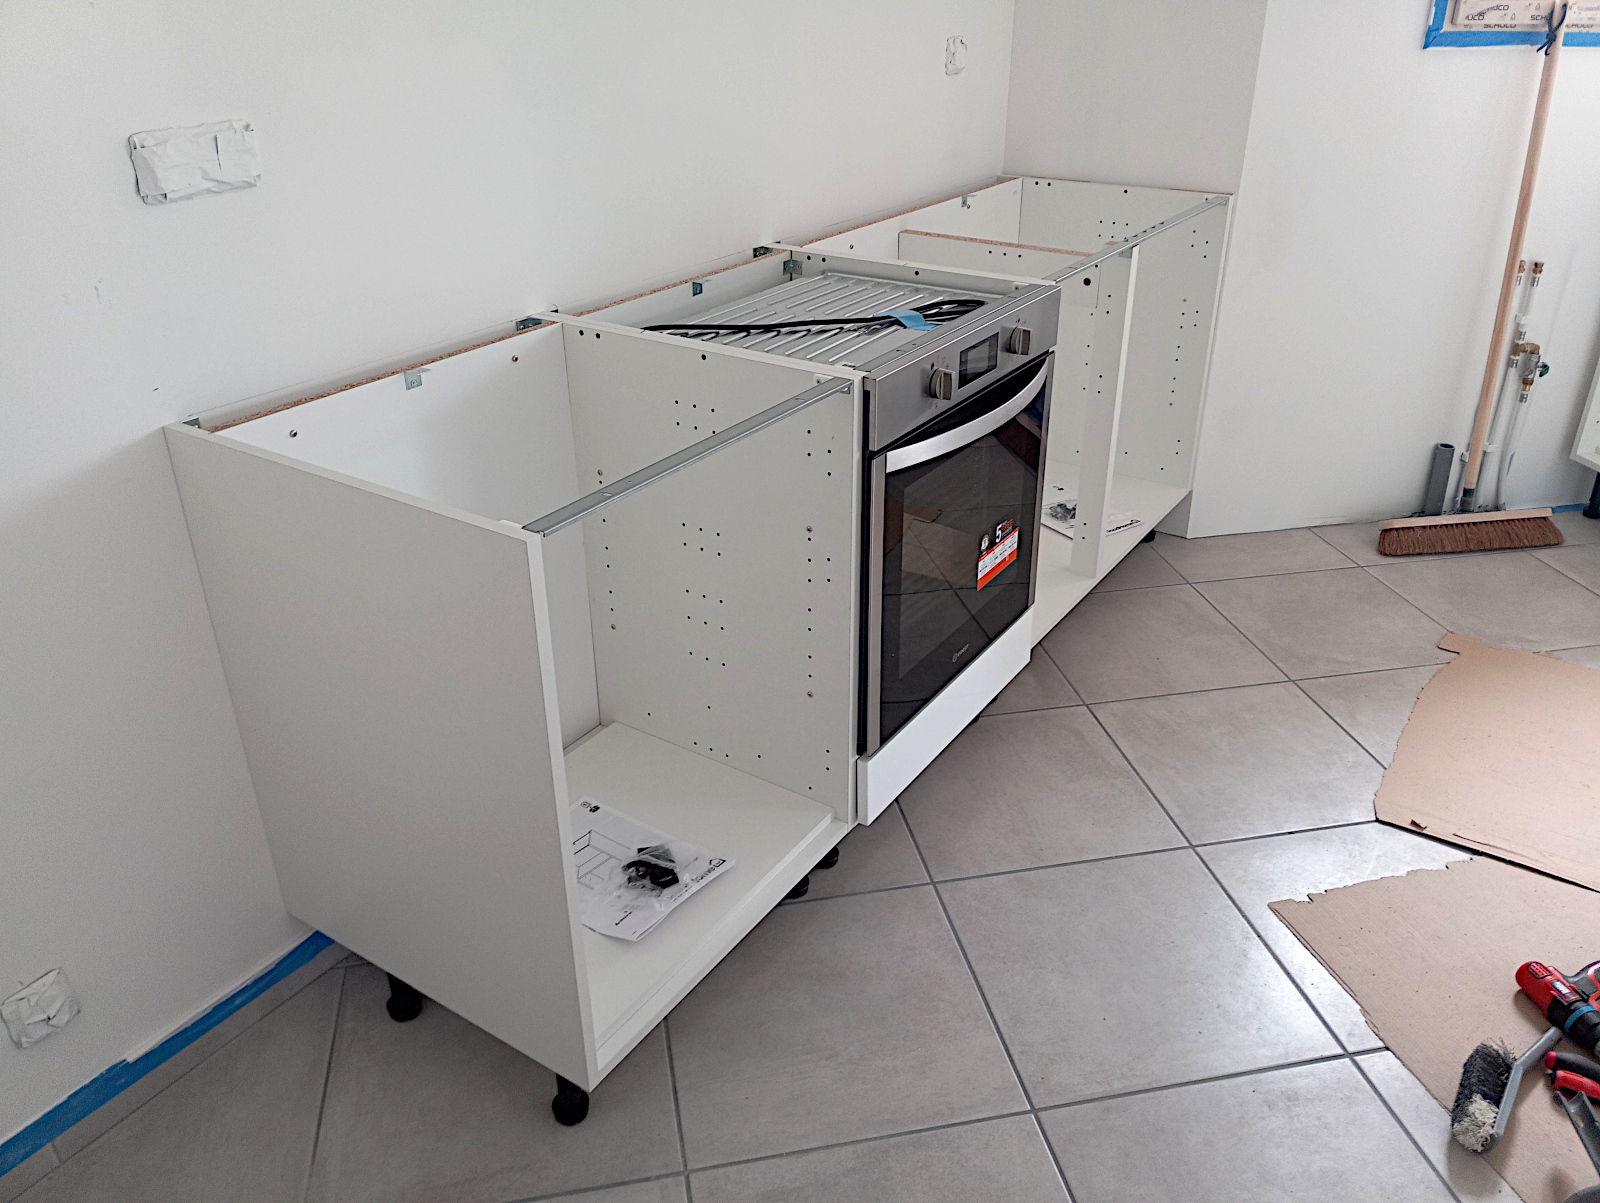
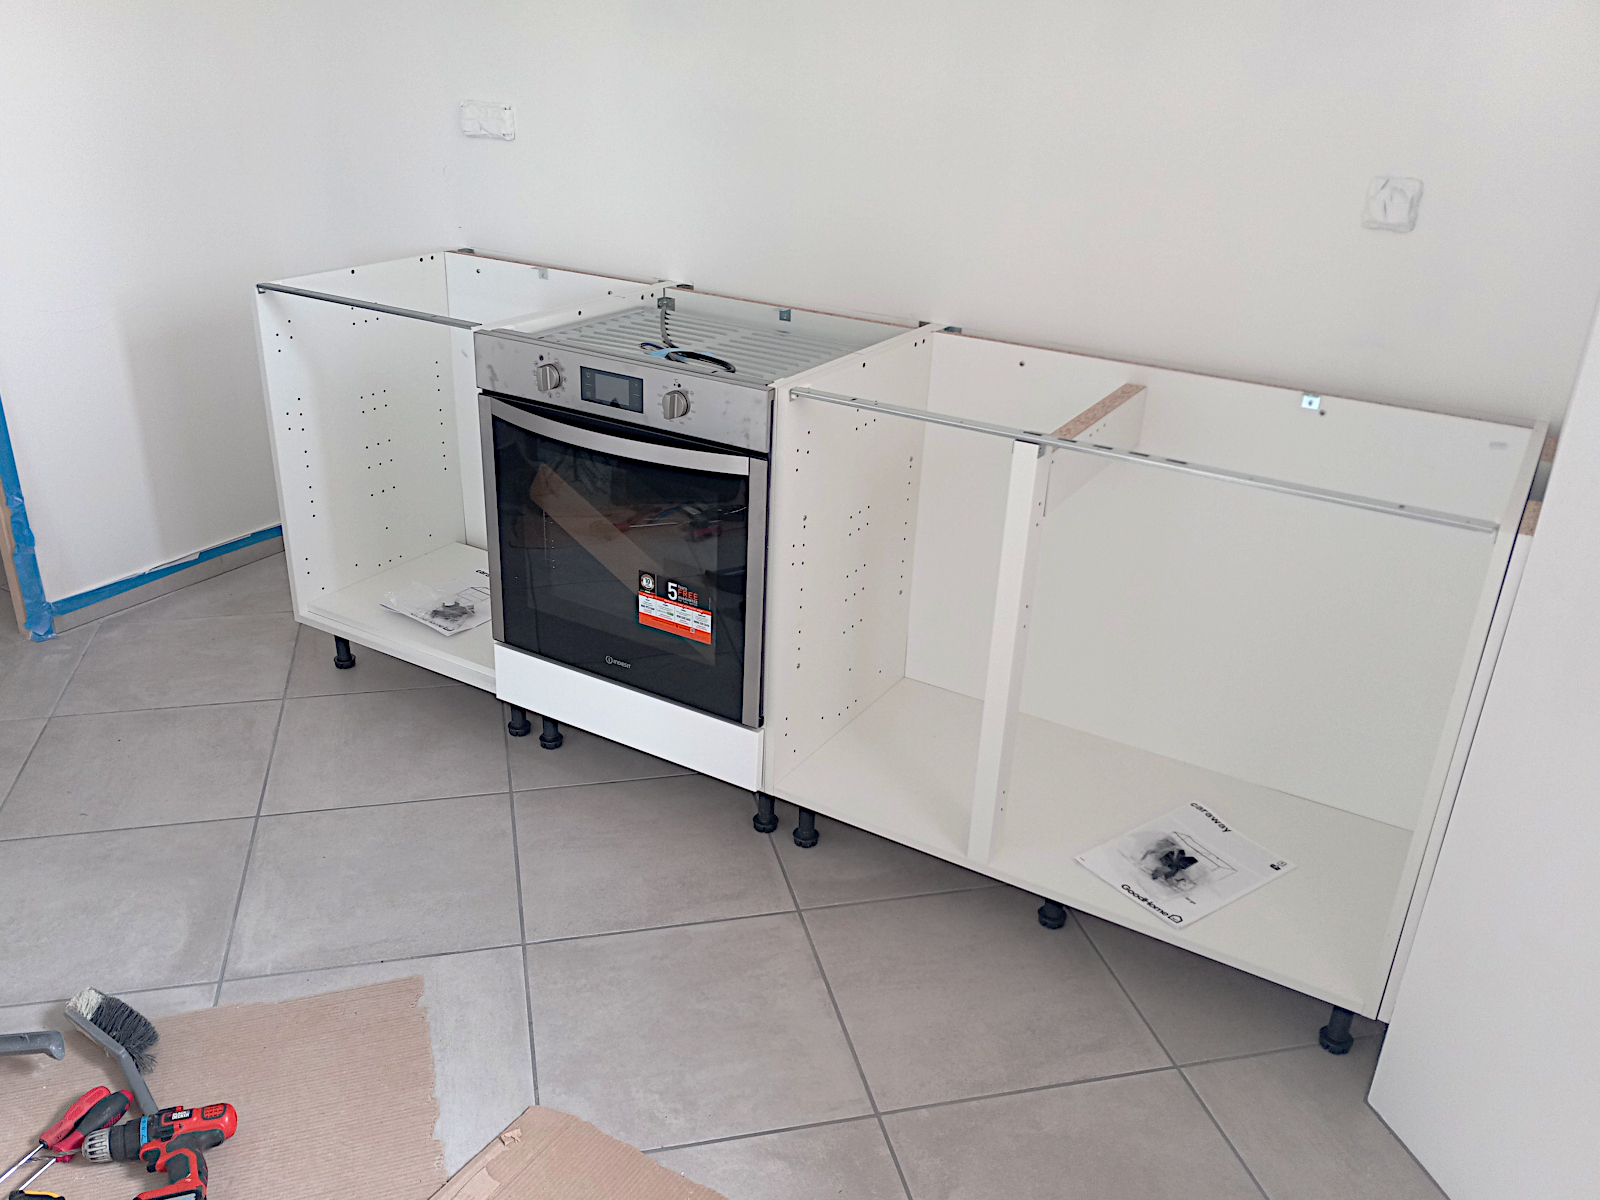
As it was I could now move on to the next cabinet which is the one over which the sink will be positioned and which therefore has the services for it at its rear. Although the cabinet can’t yet be fitted I could go on to make the necessary cut-outs in its back panel. Despite being complicated by the presence of the much over-specified (by the plumber) ball valve that only controls the rear outside tap, it came out OK.

null

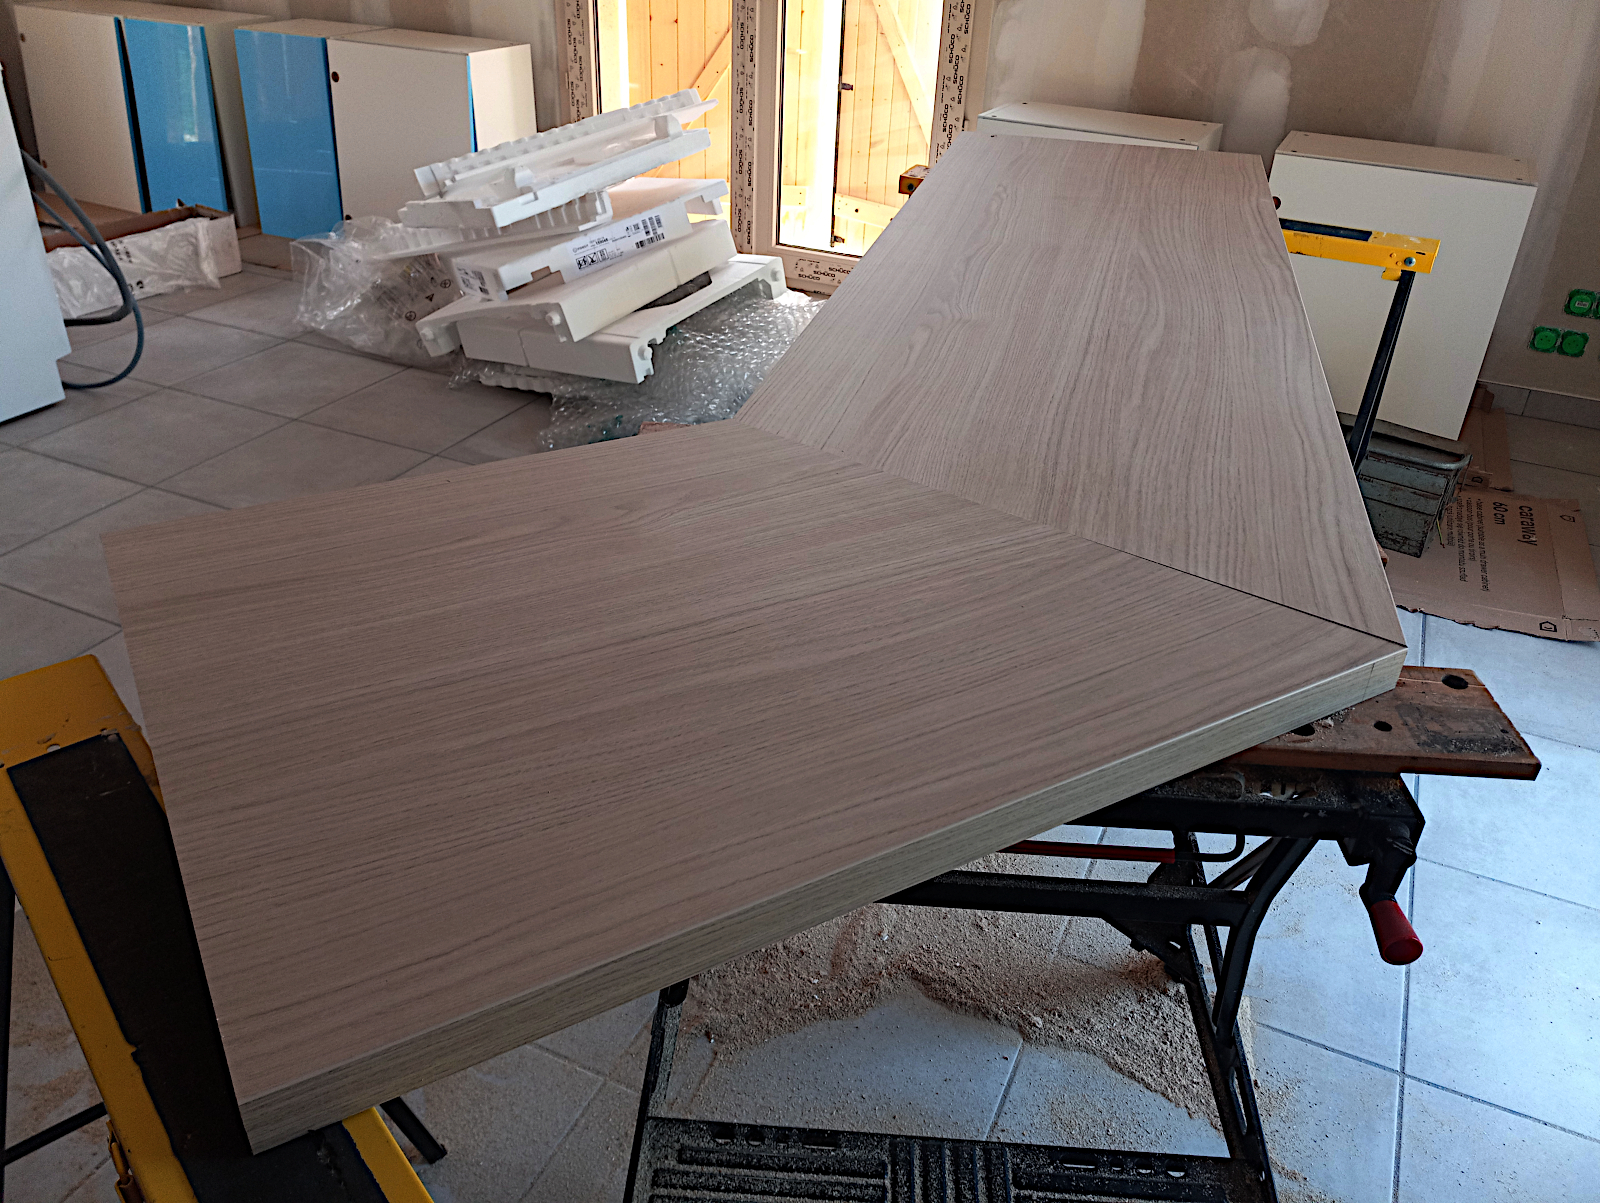
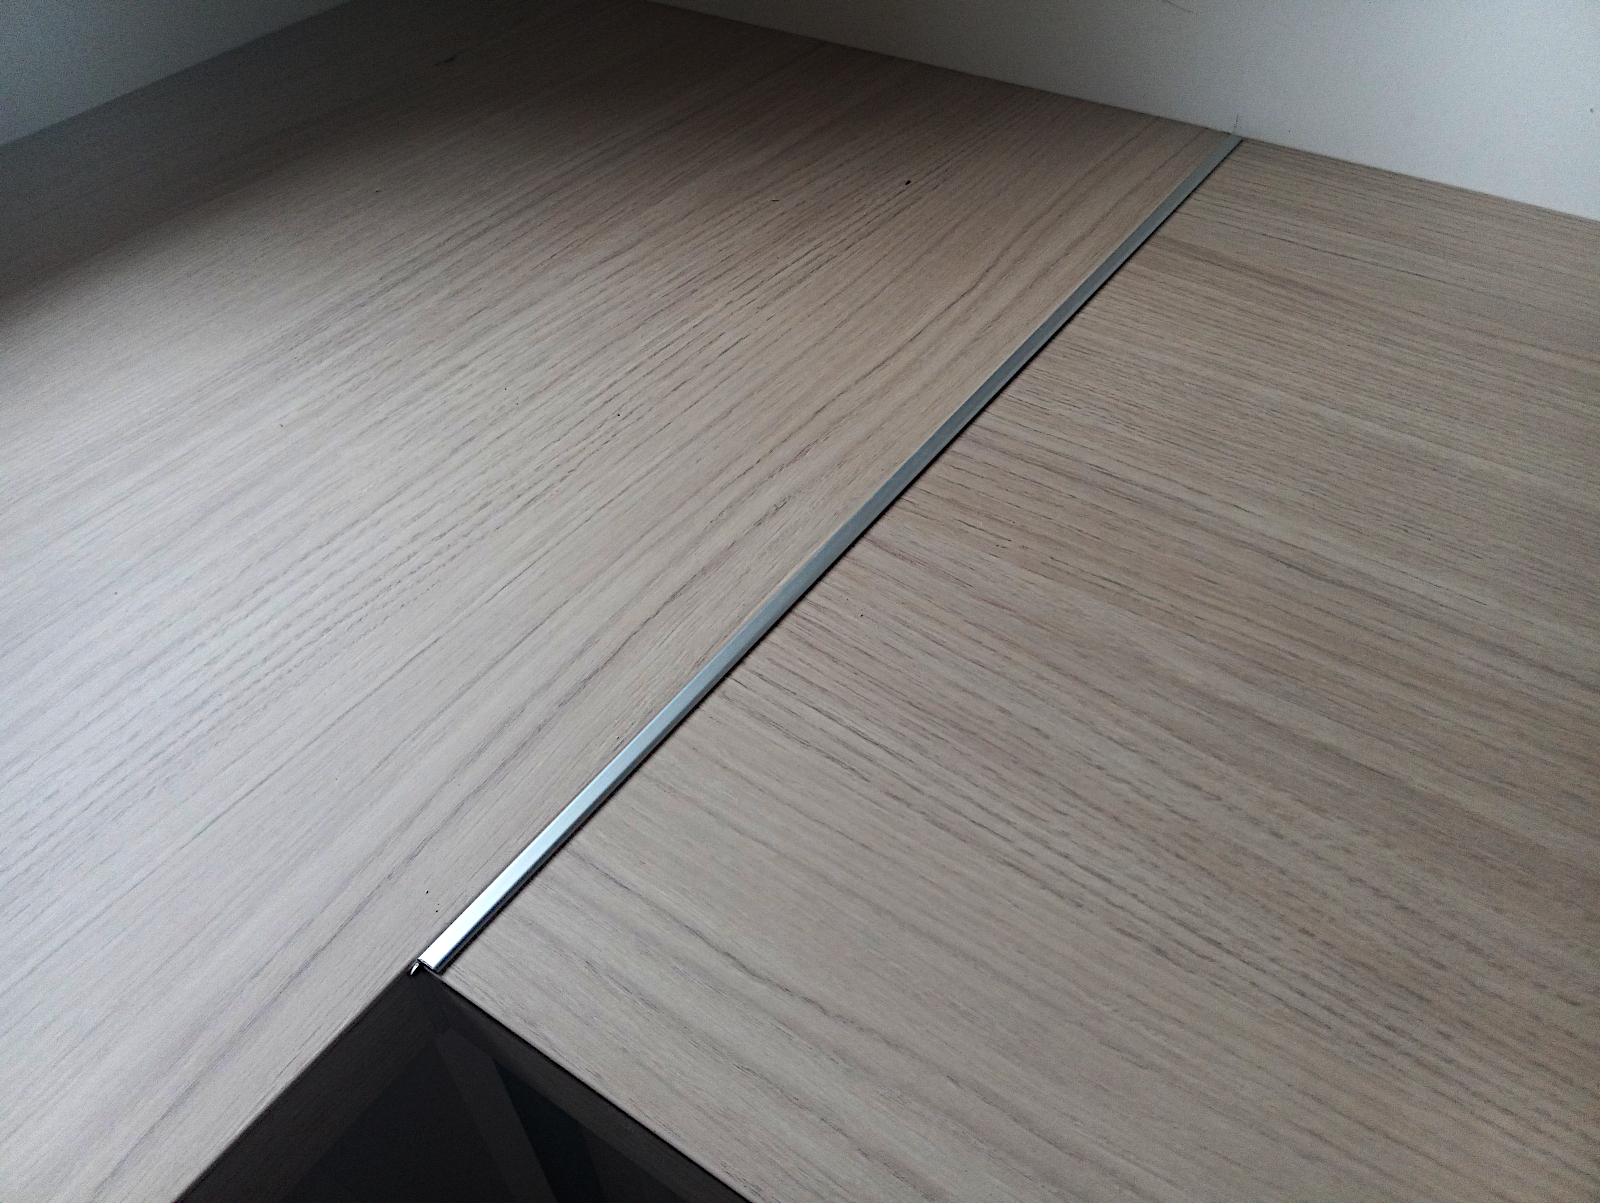
By this time my mind was already moving on to think about the worktop. It will comprise four pieces, two of which will be glue-joined on an angle. For this to work the cuts have to be clean and totally accurate. I did the same when I installed my friend Val’s Ikea kitchen in the Languedoc so I know it can be done using hand tools.

In her case I only had one shot at it. This time I’ve got a few centimetres to spare on each piece so as long as I use a good, sharp, fine blade on my circular saw, which I have to buy a replacement for as it’s currently ripping both of the worktop surfaces, top and bottom, I should be able to make any necessary adjustments to get the join just right.

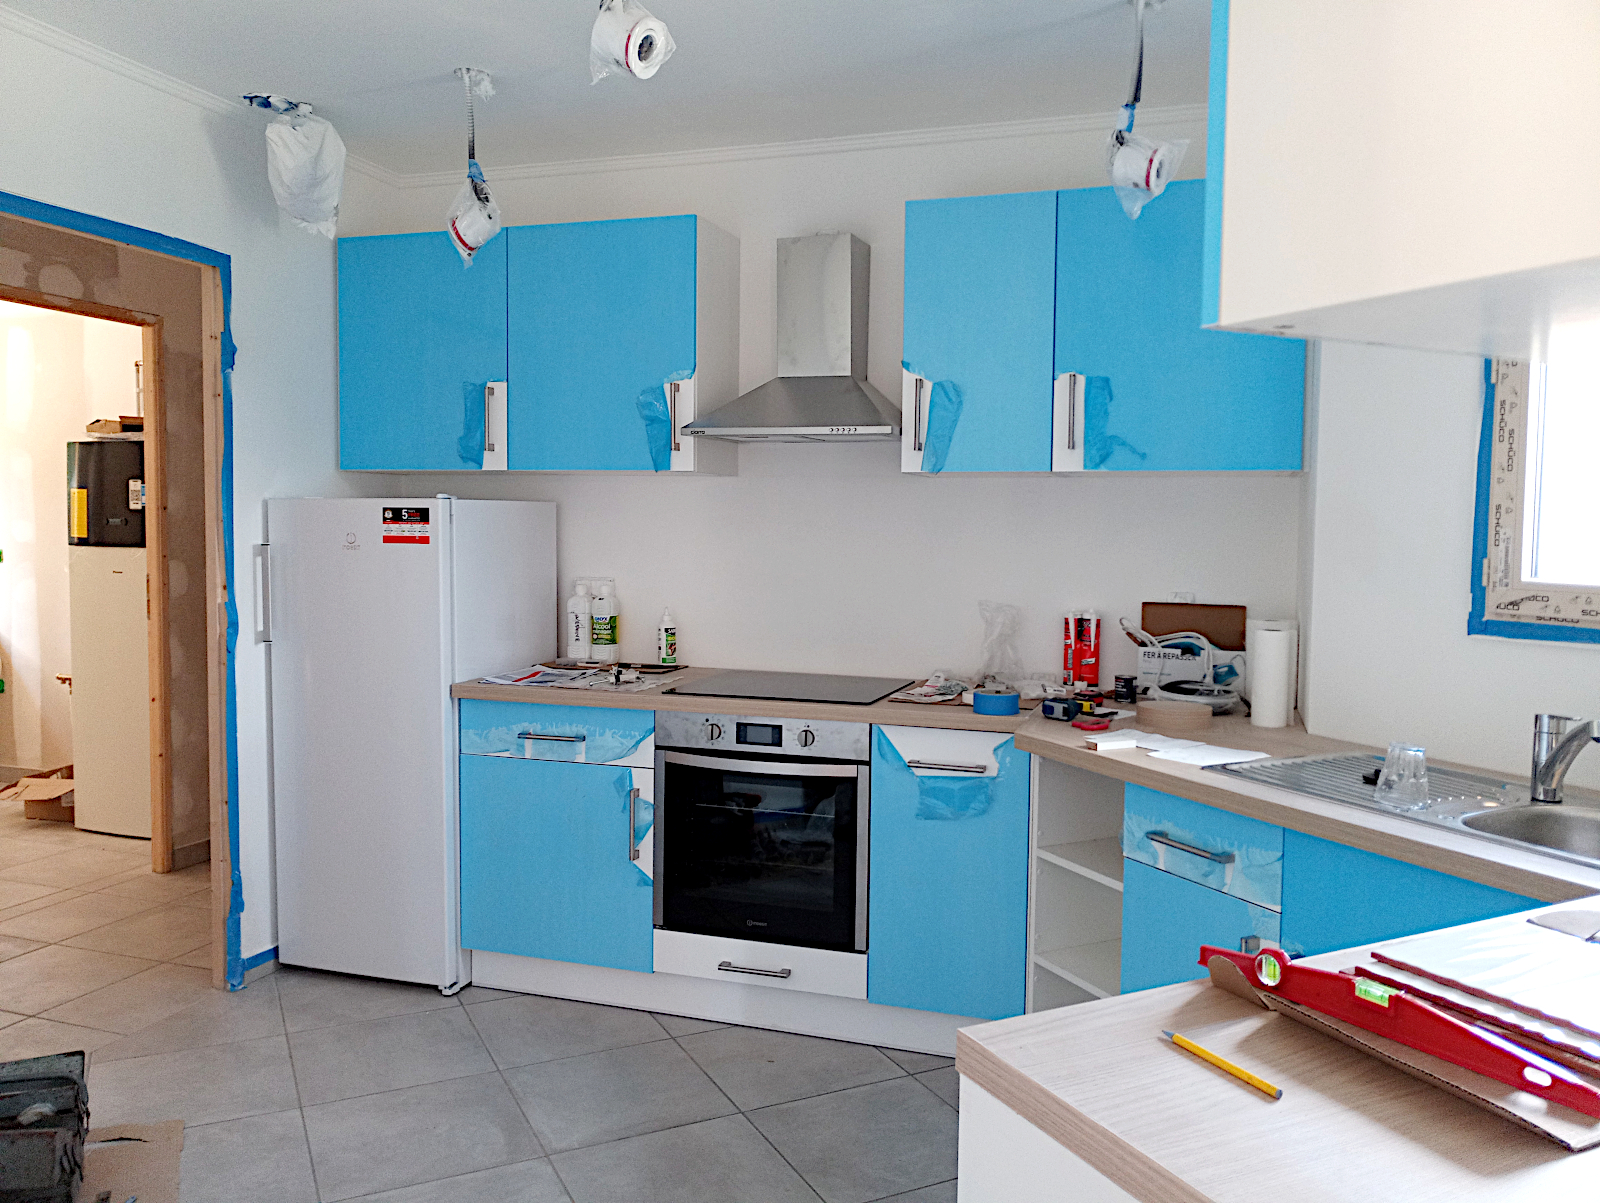
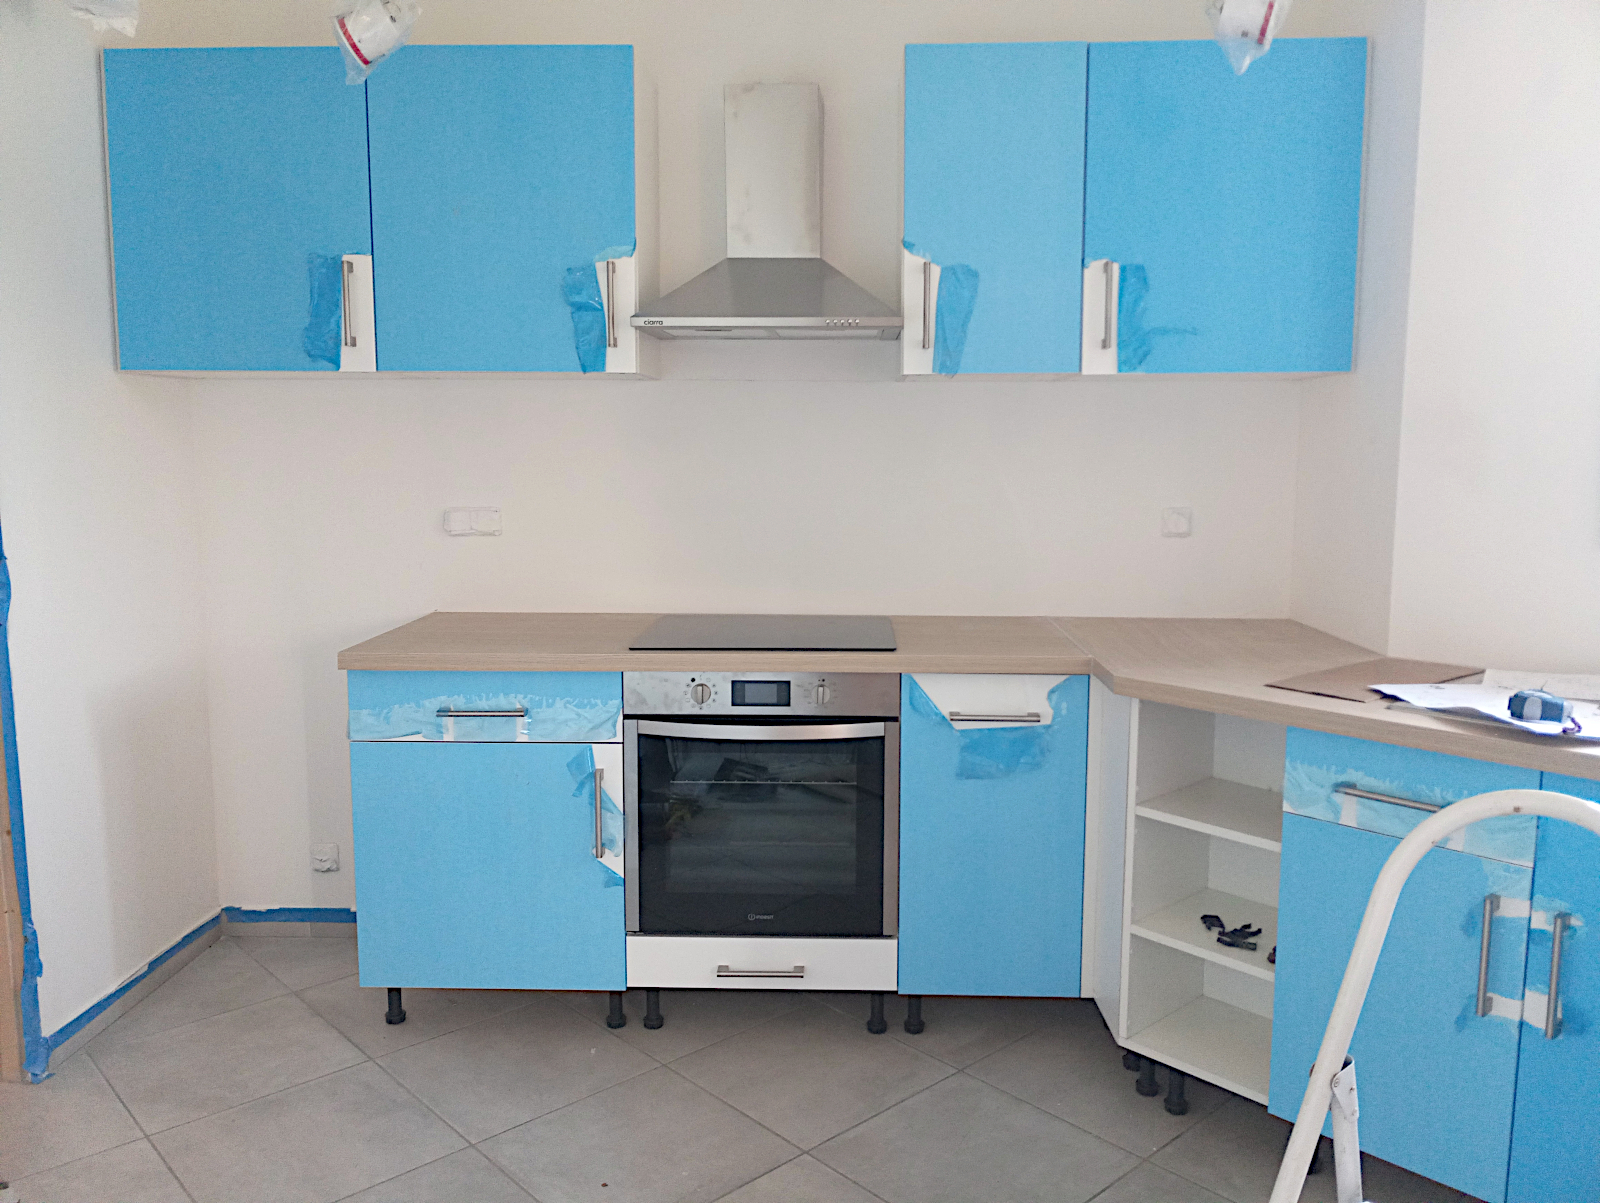
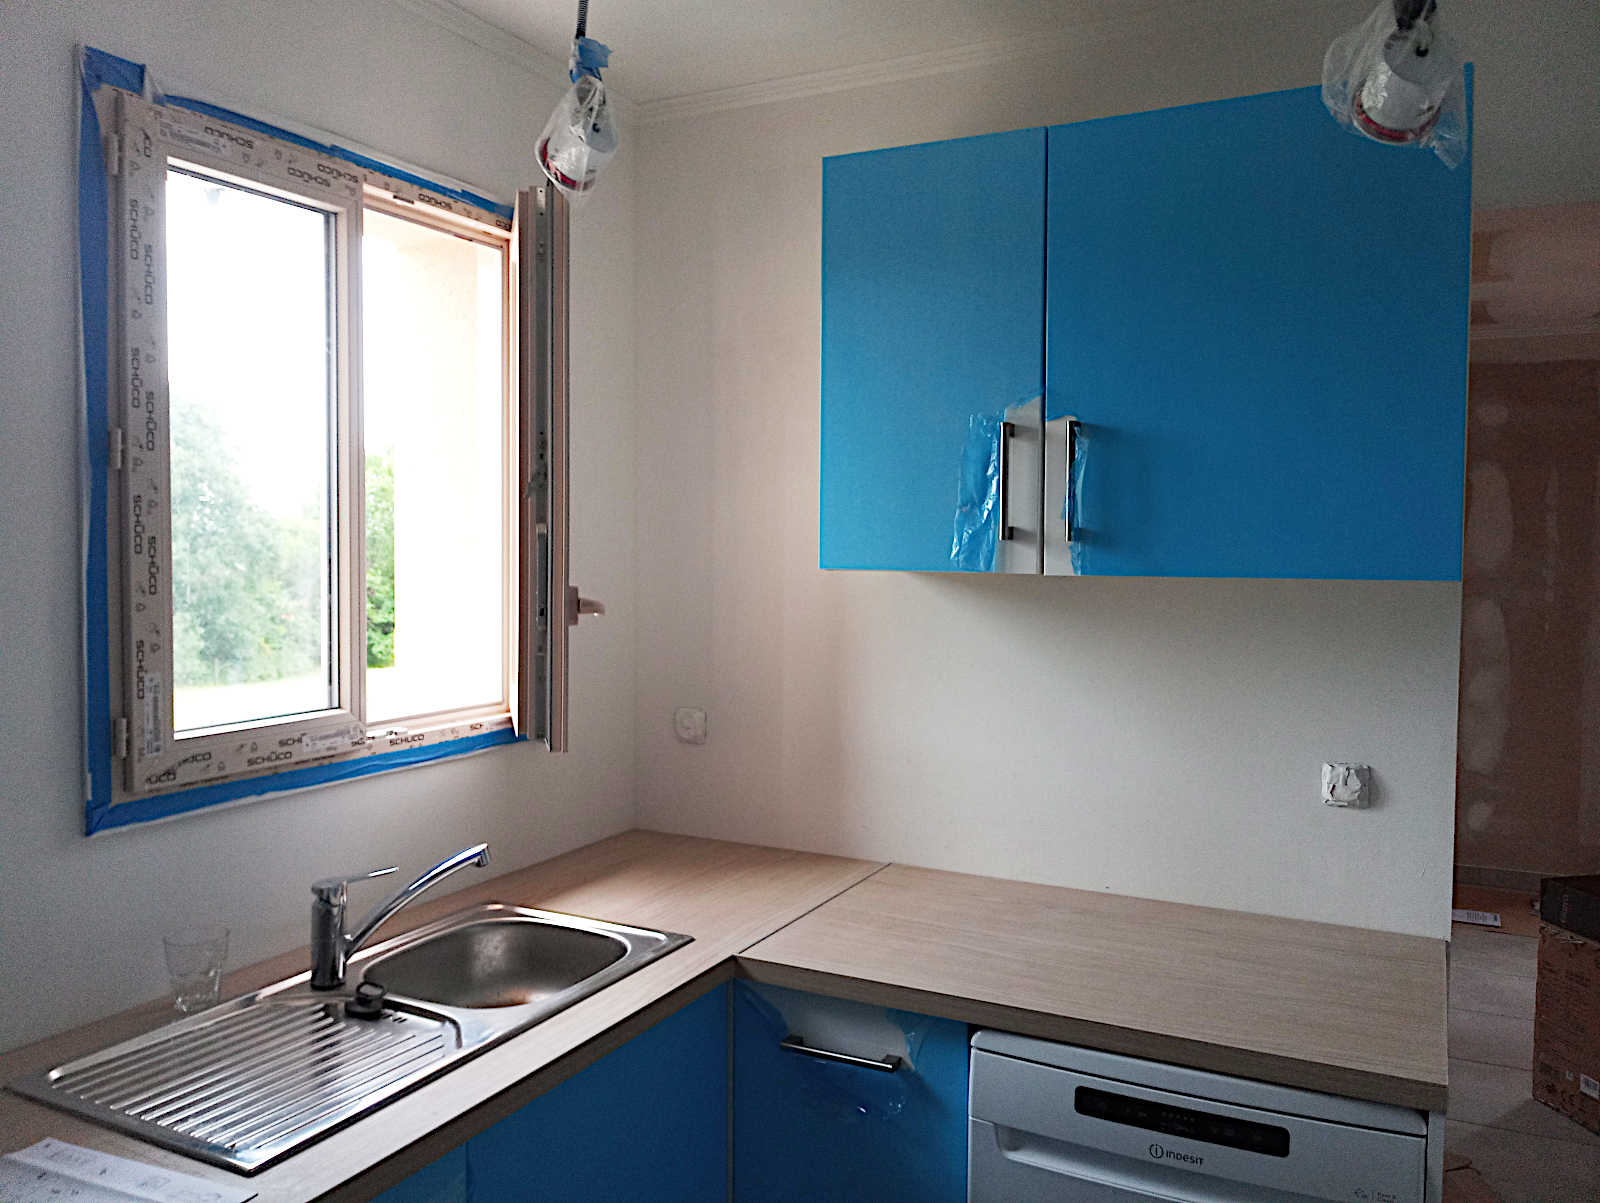
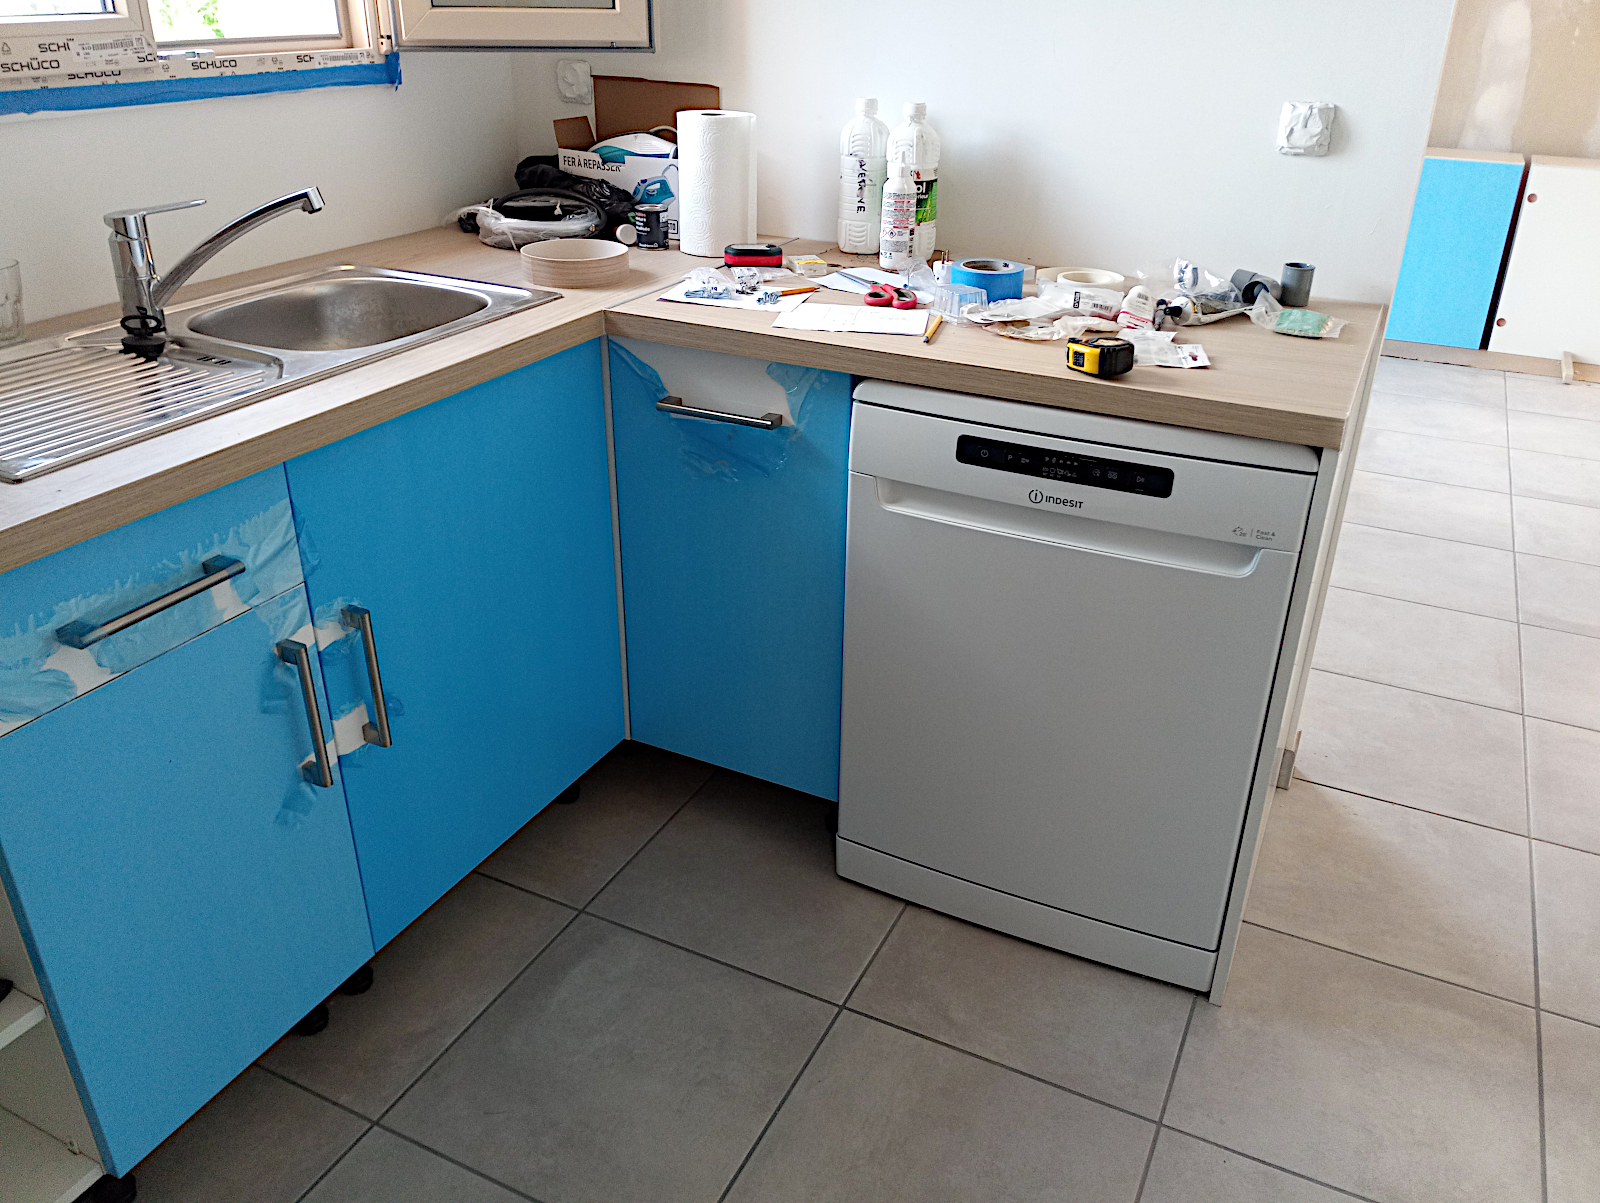
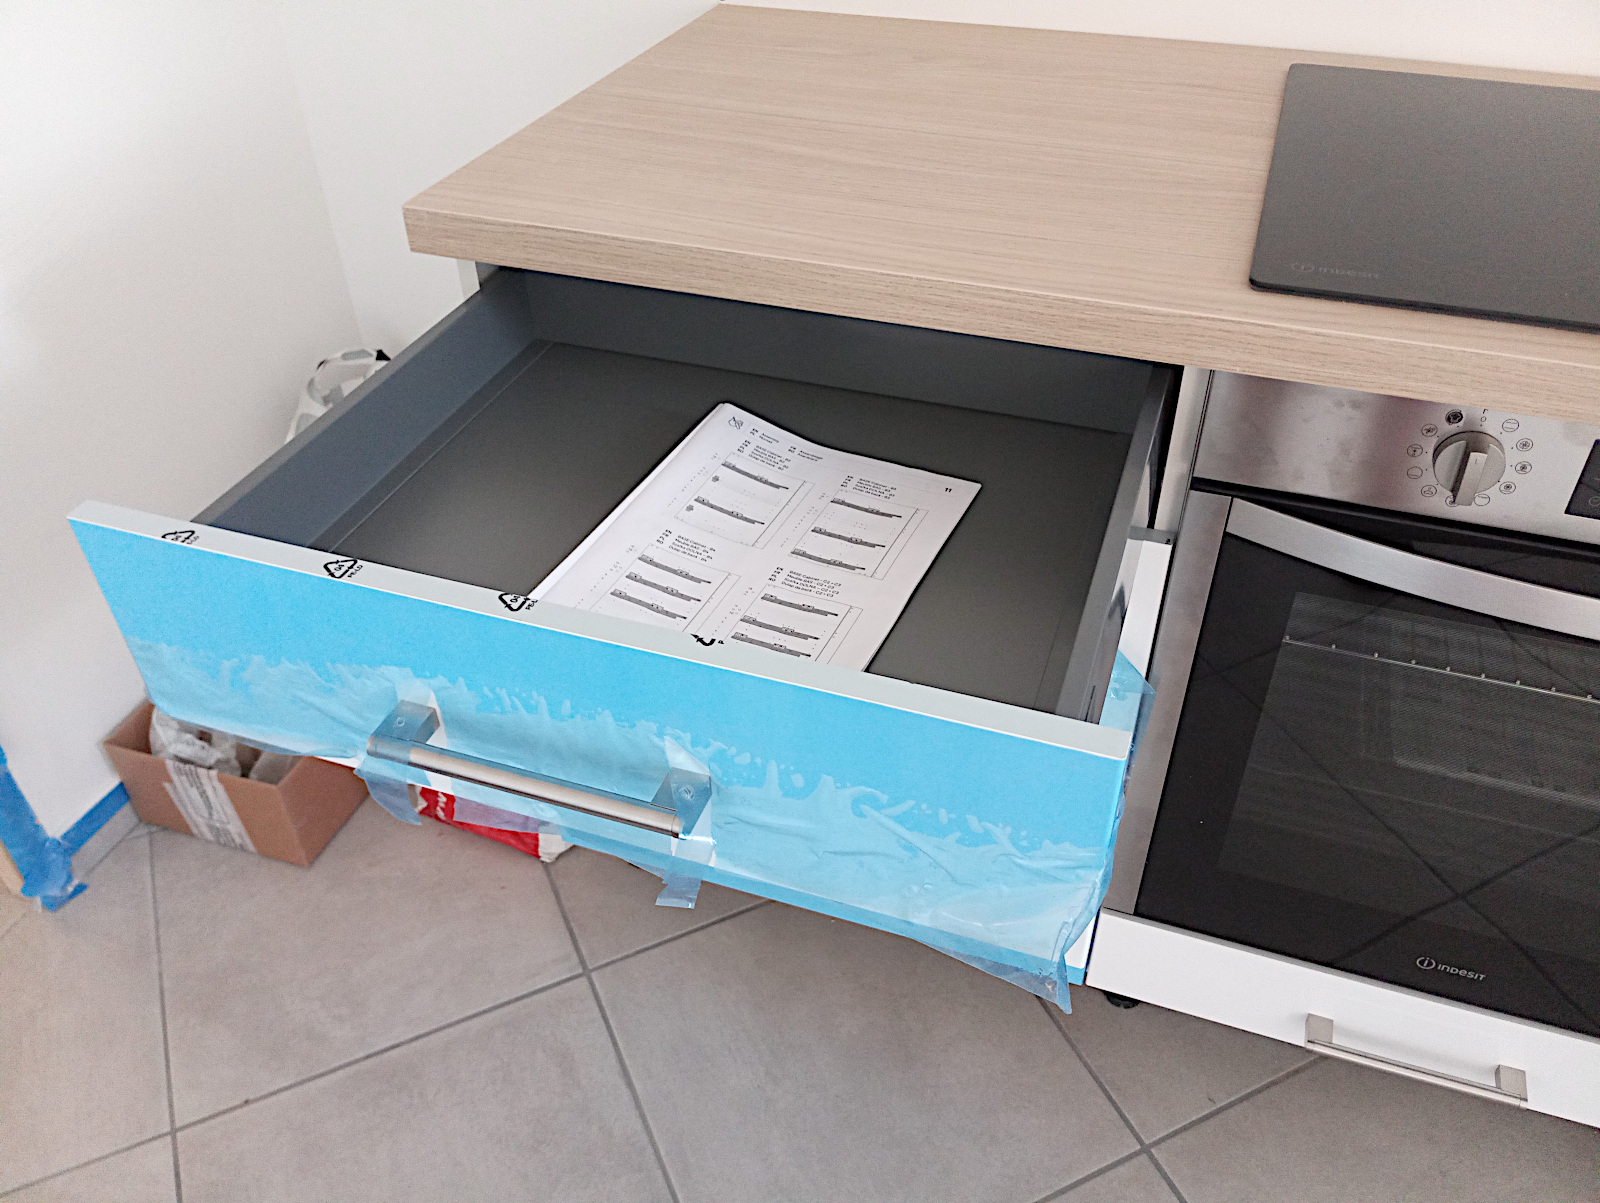
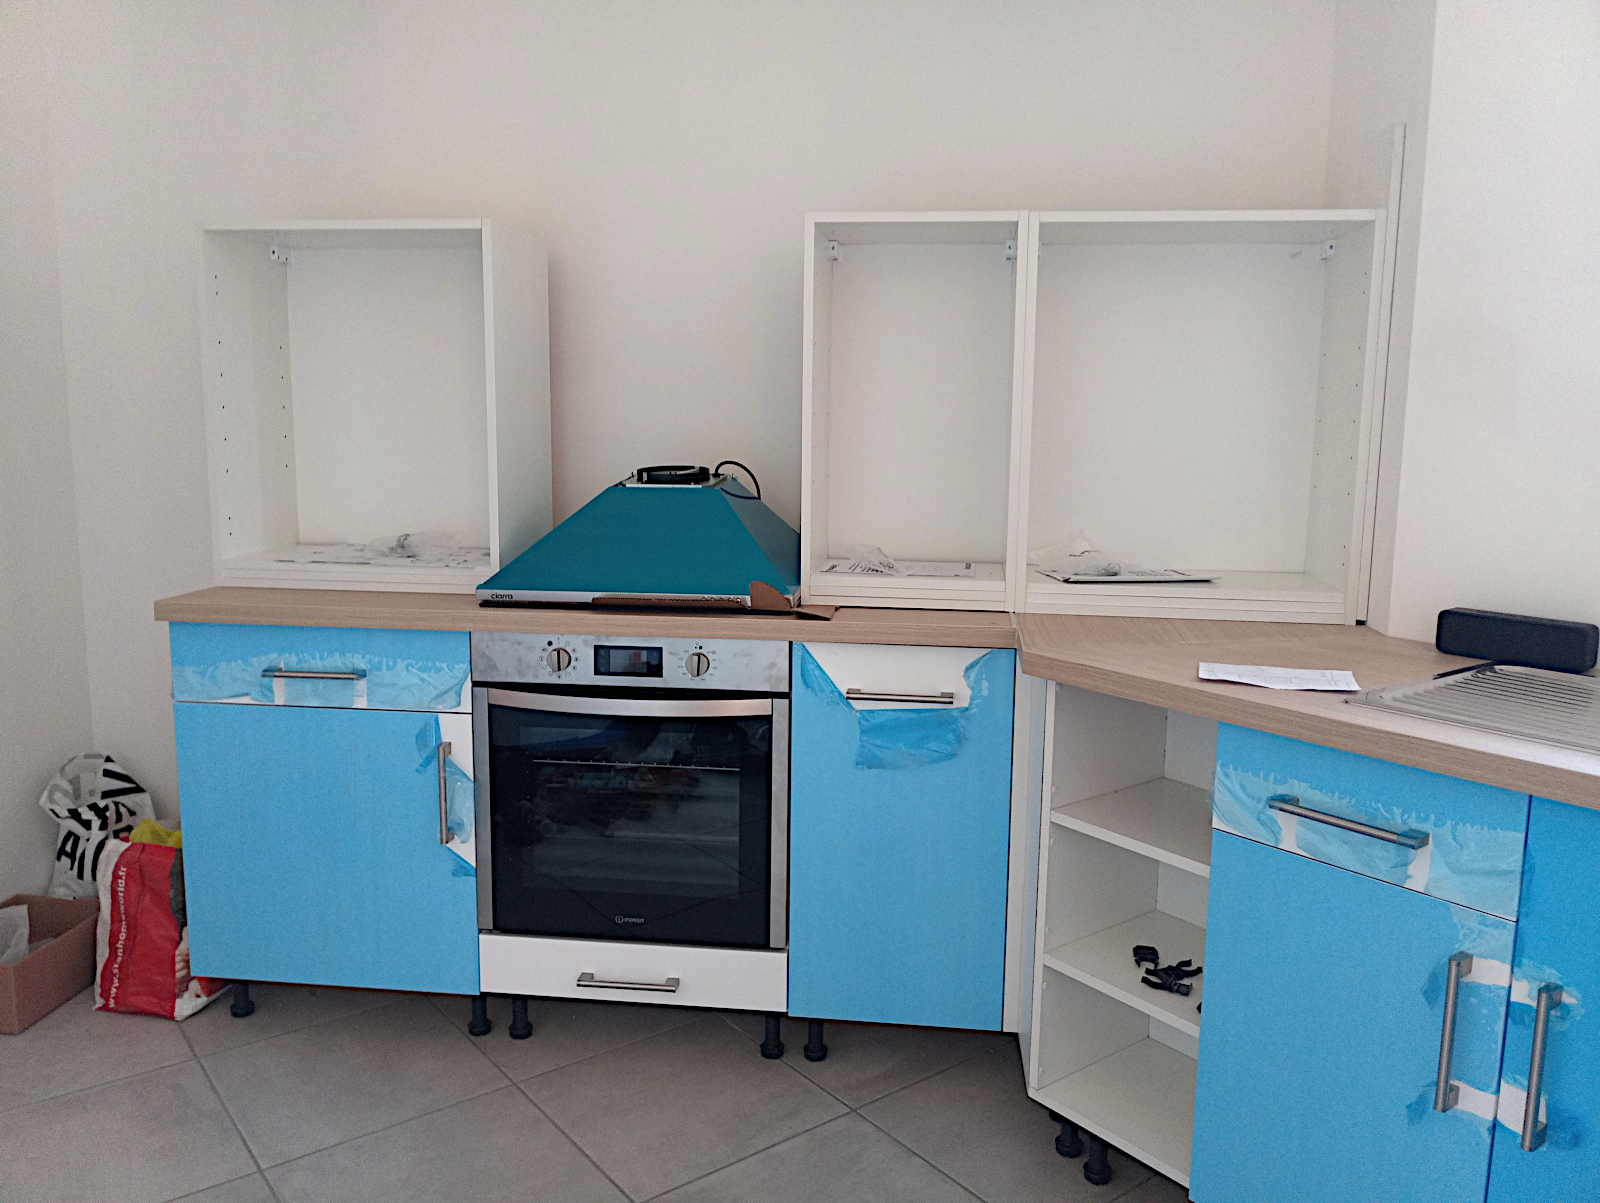
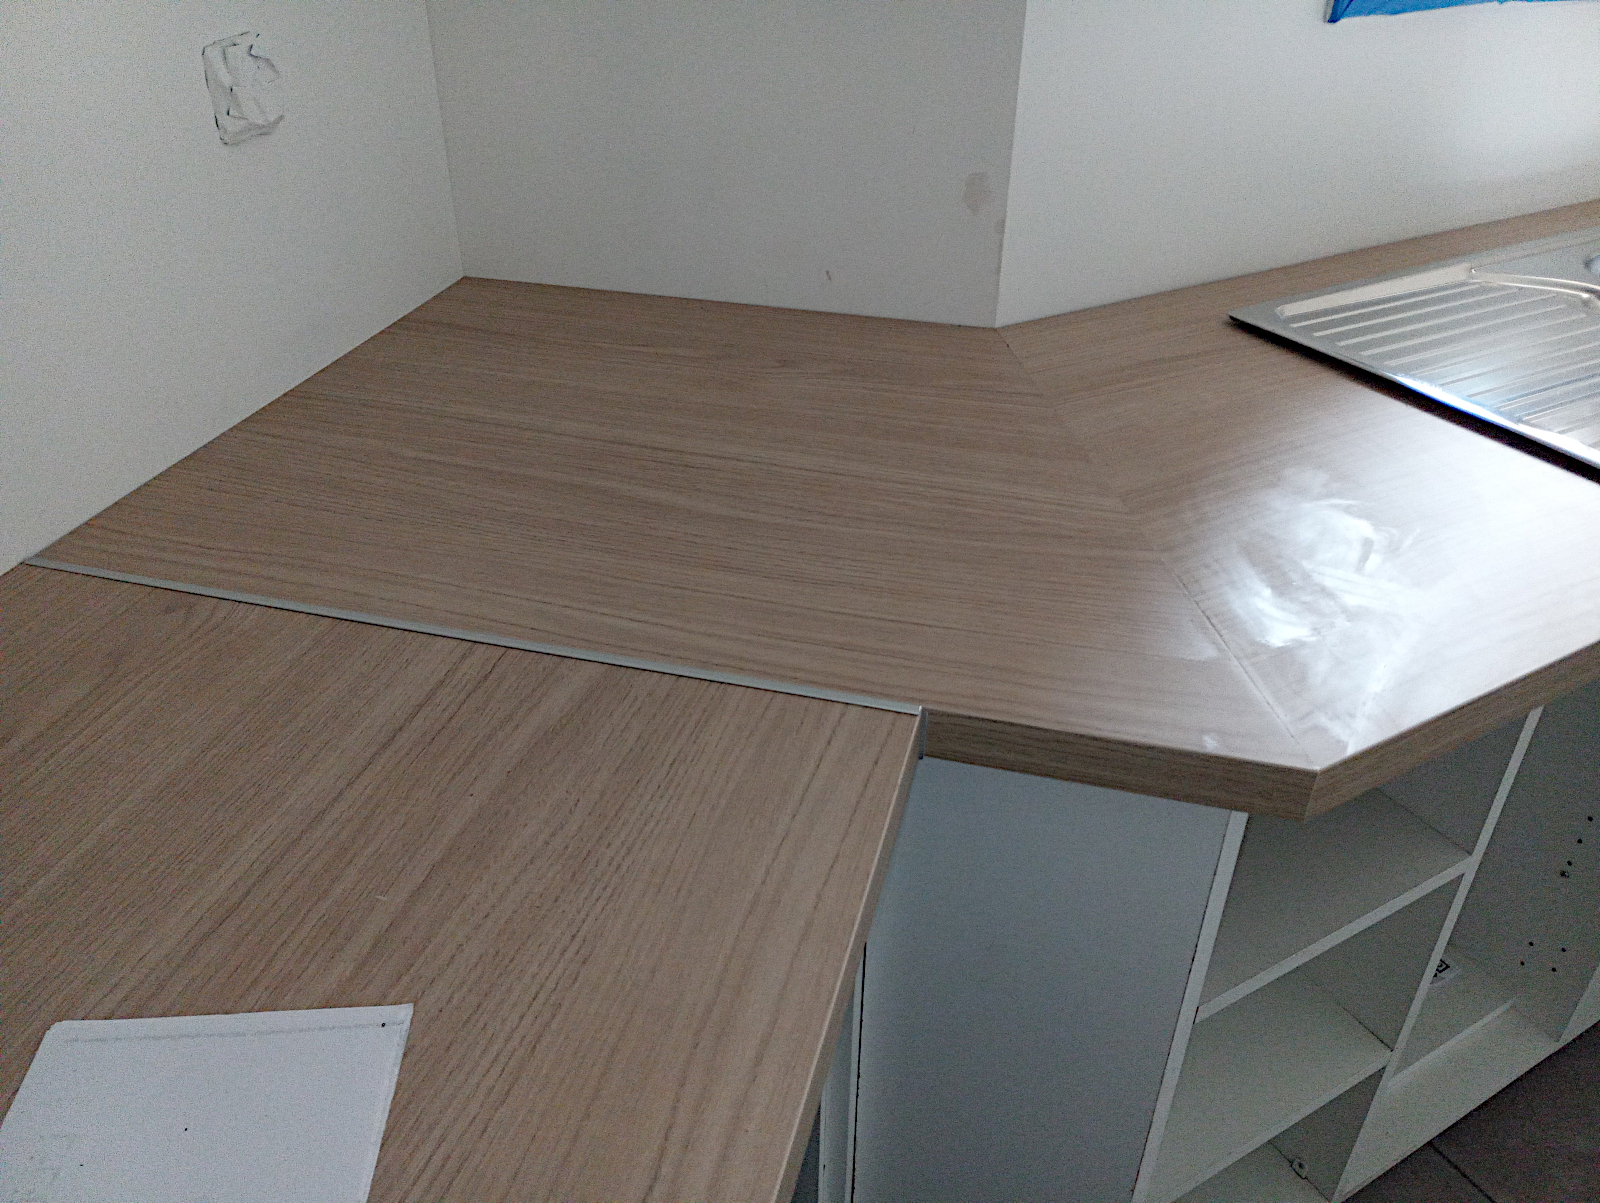
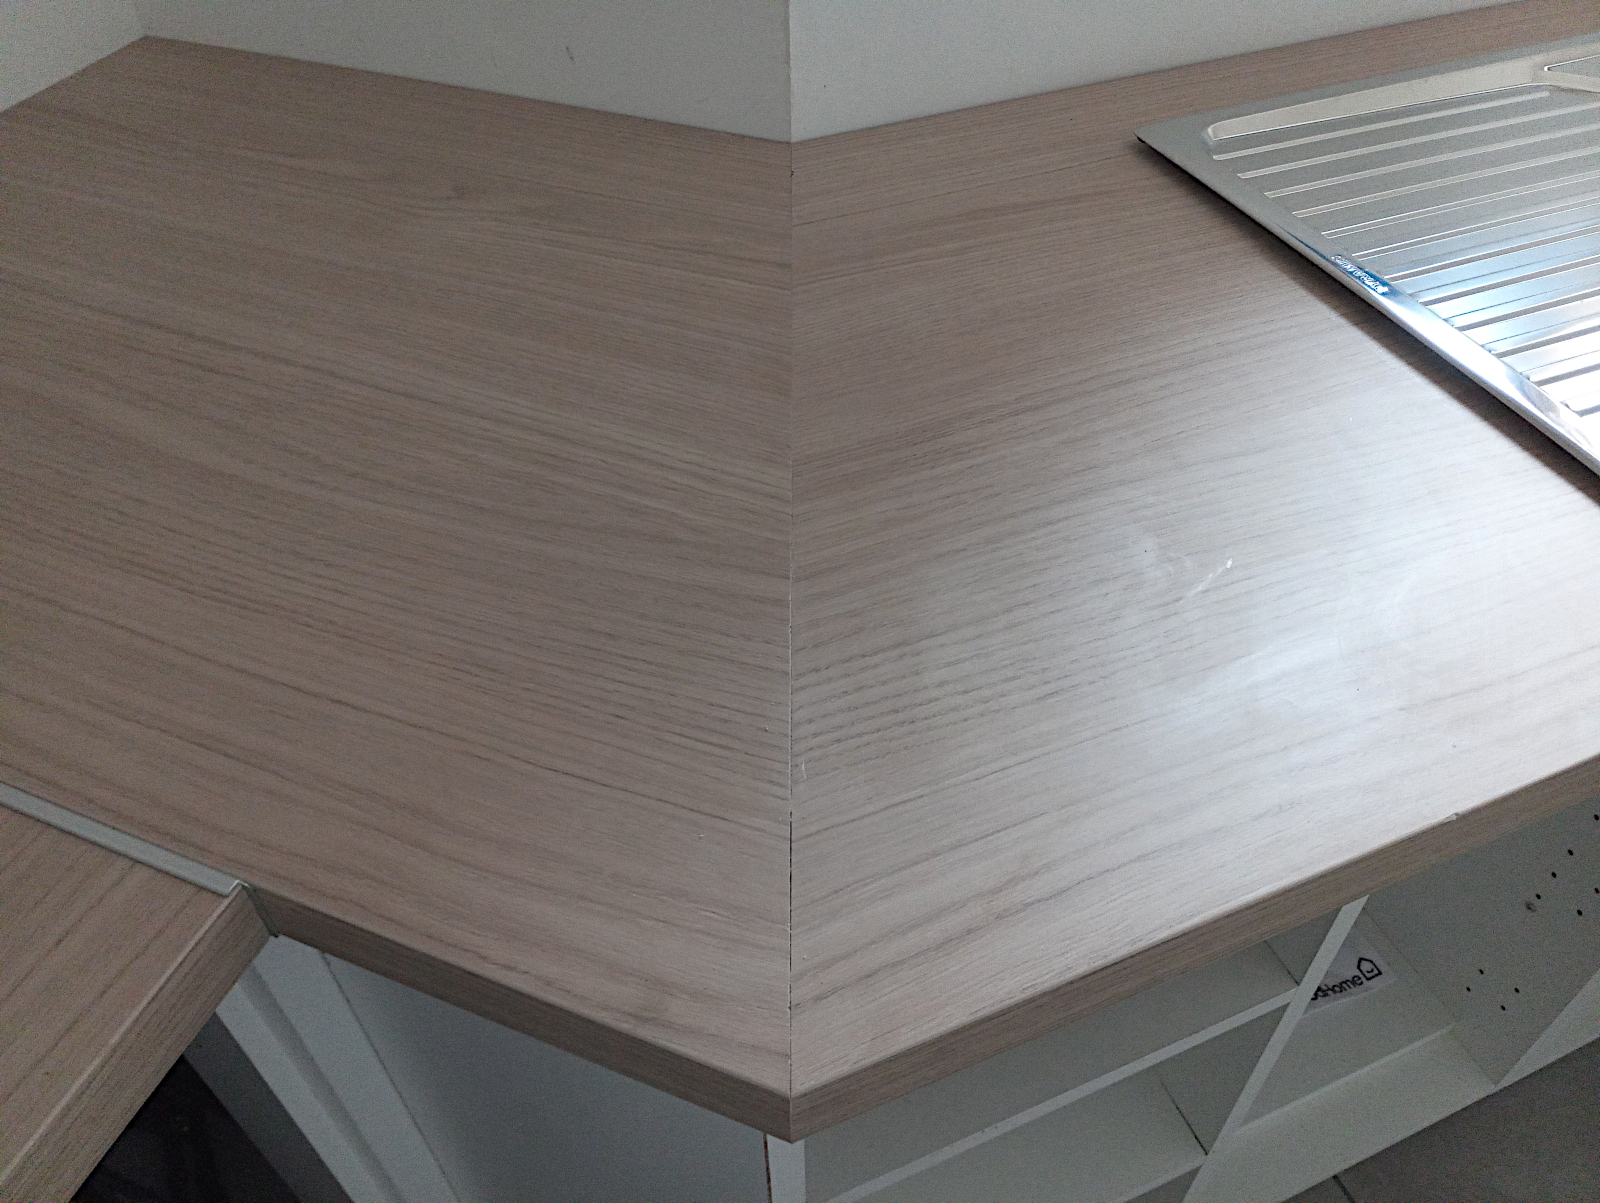
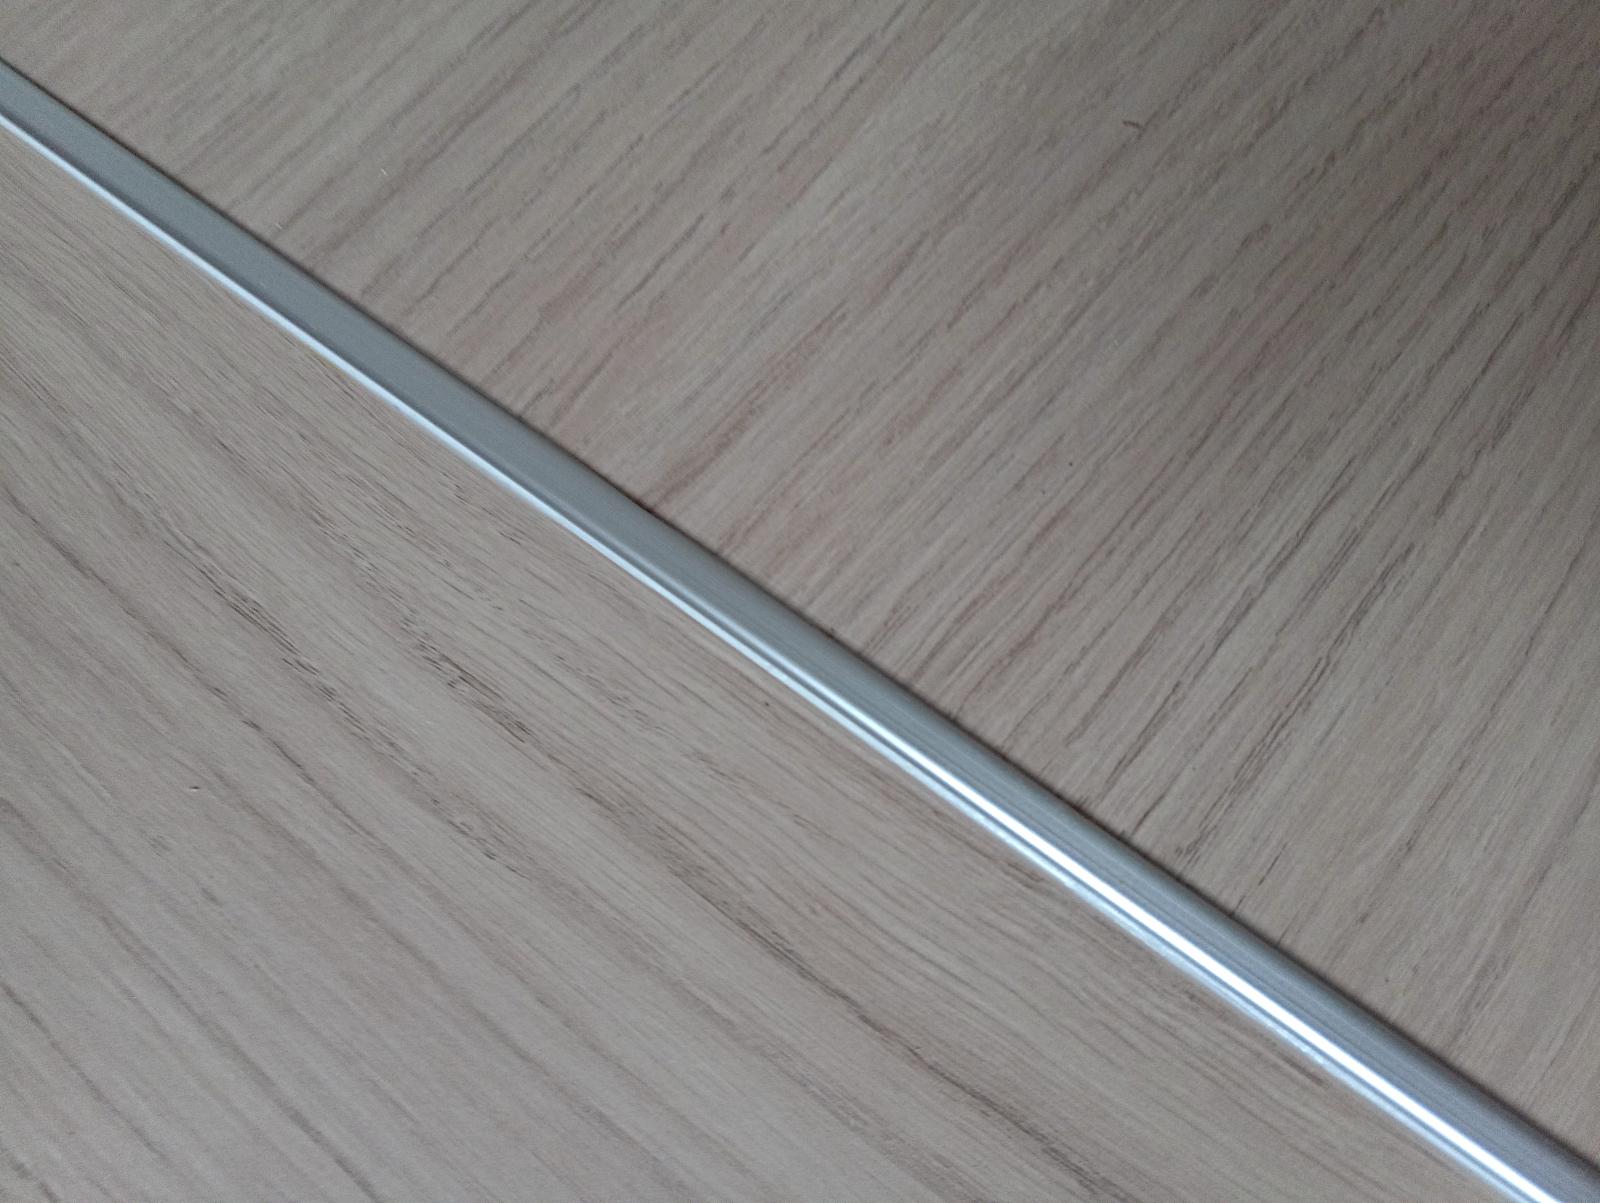
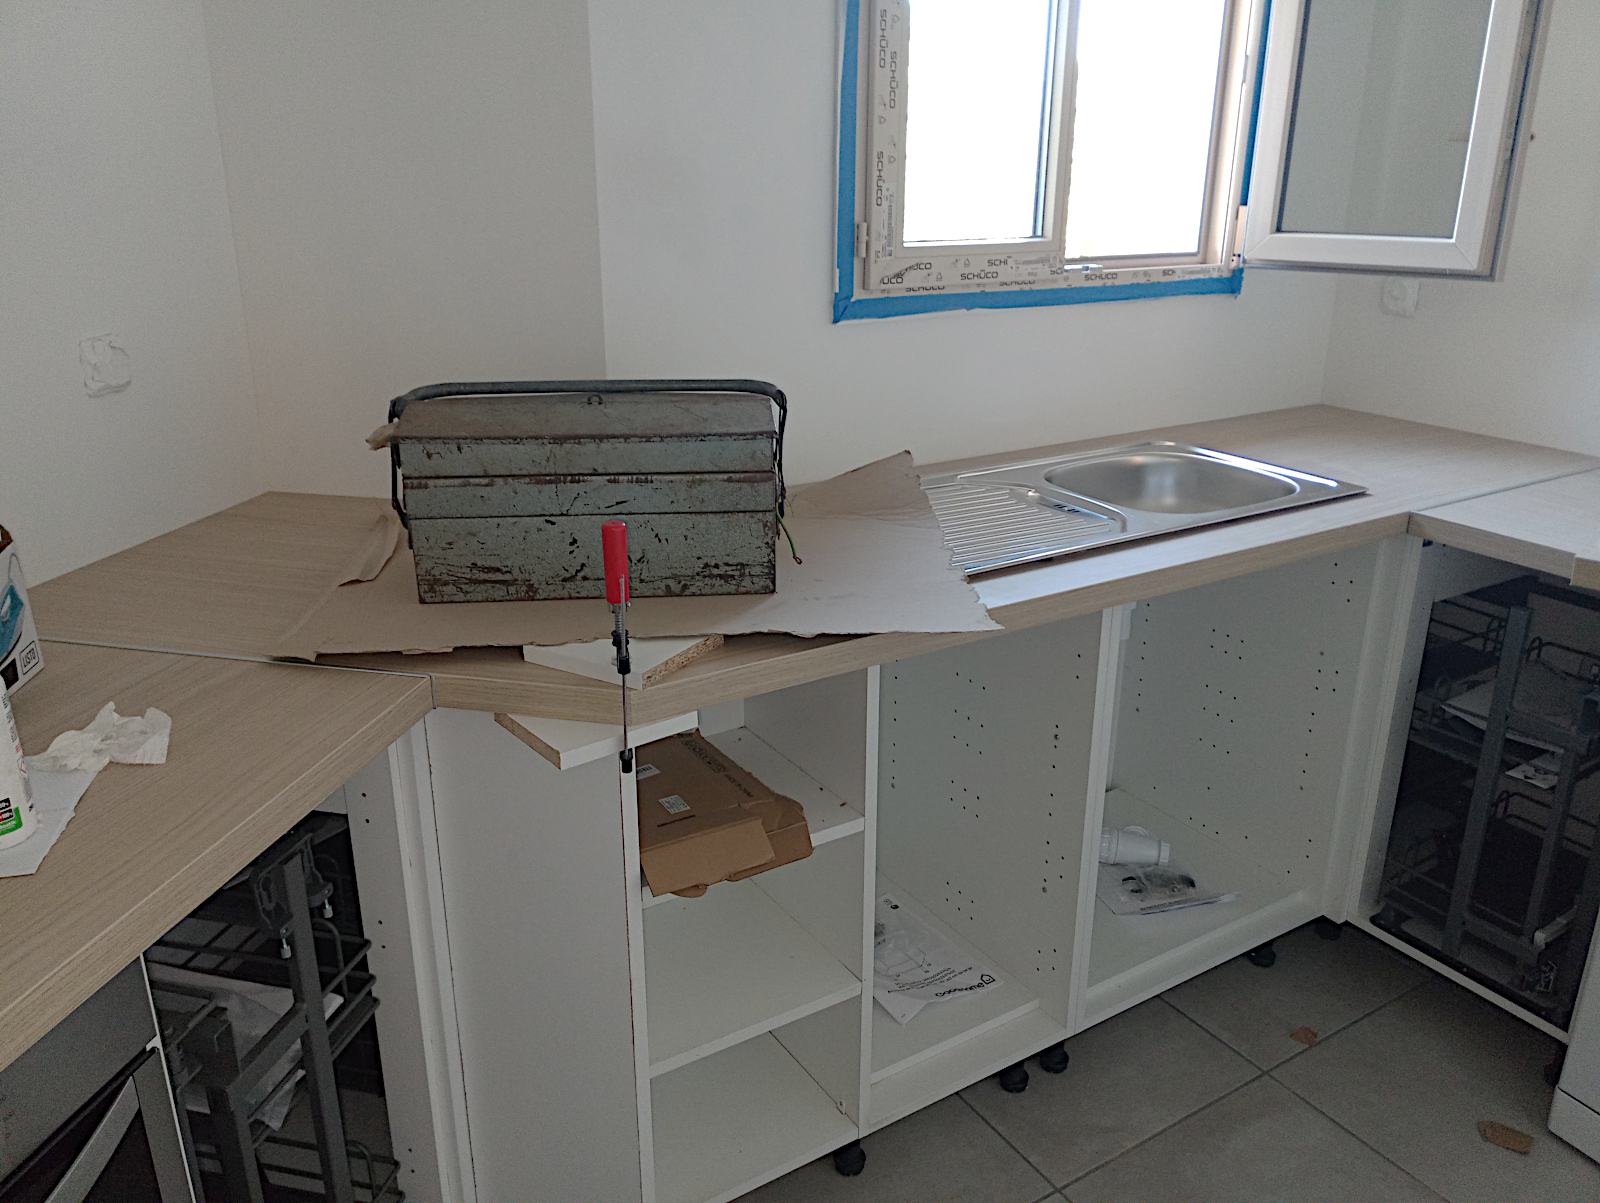
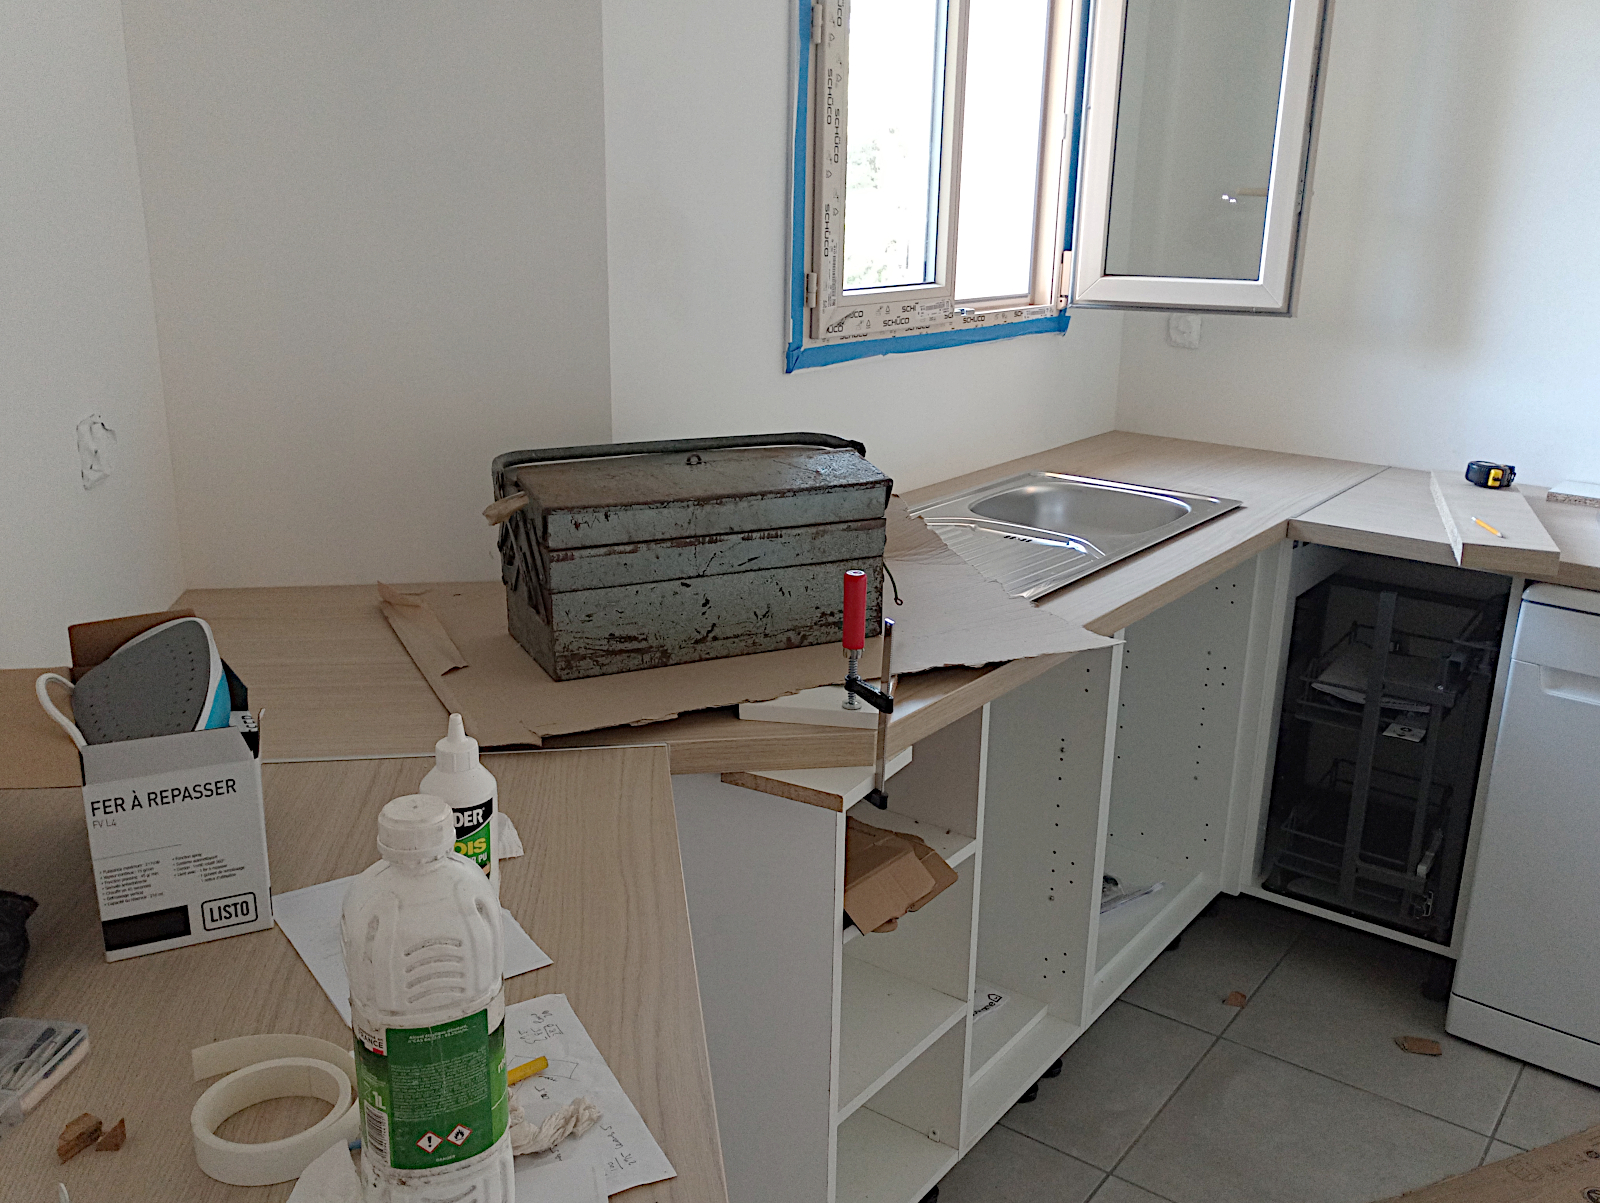
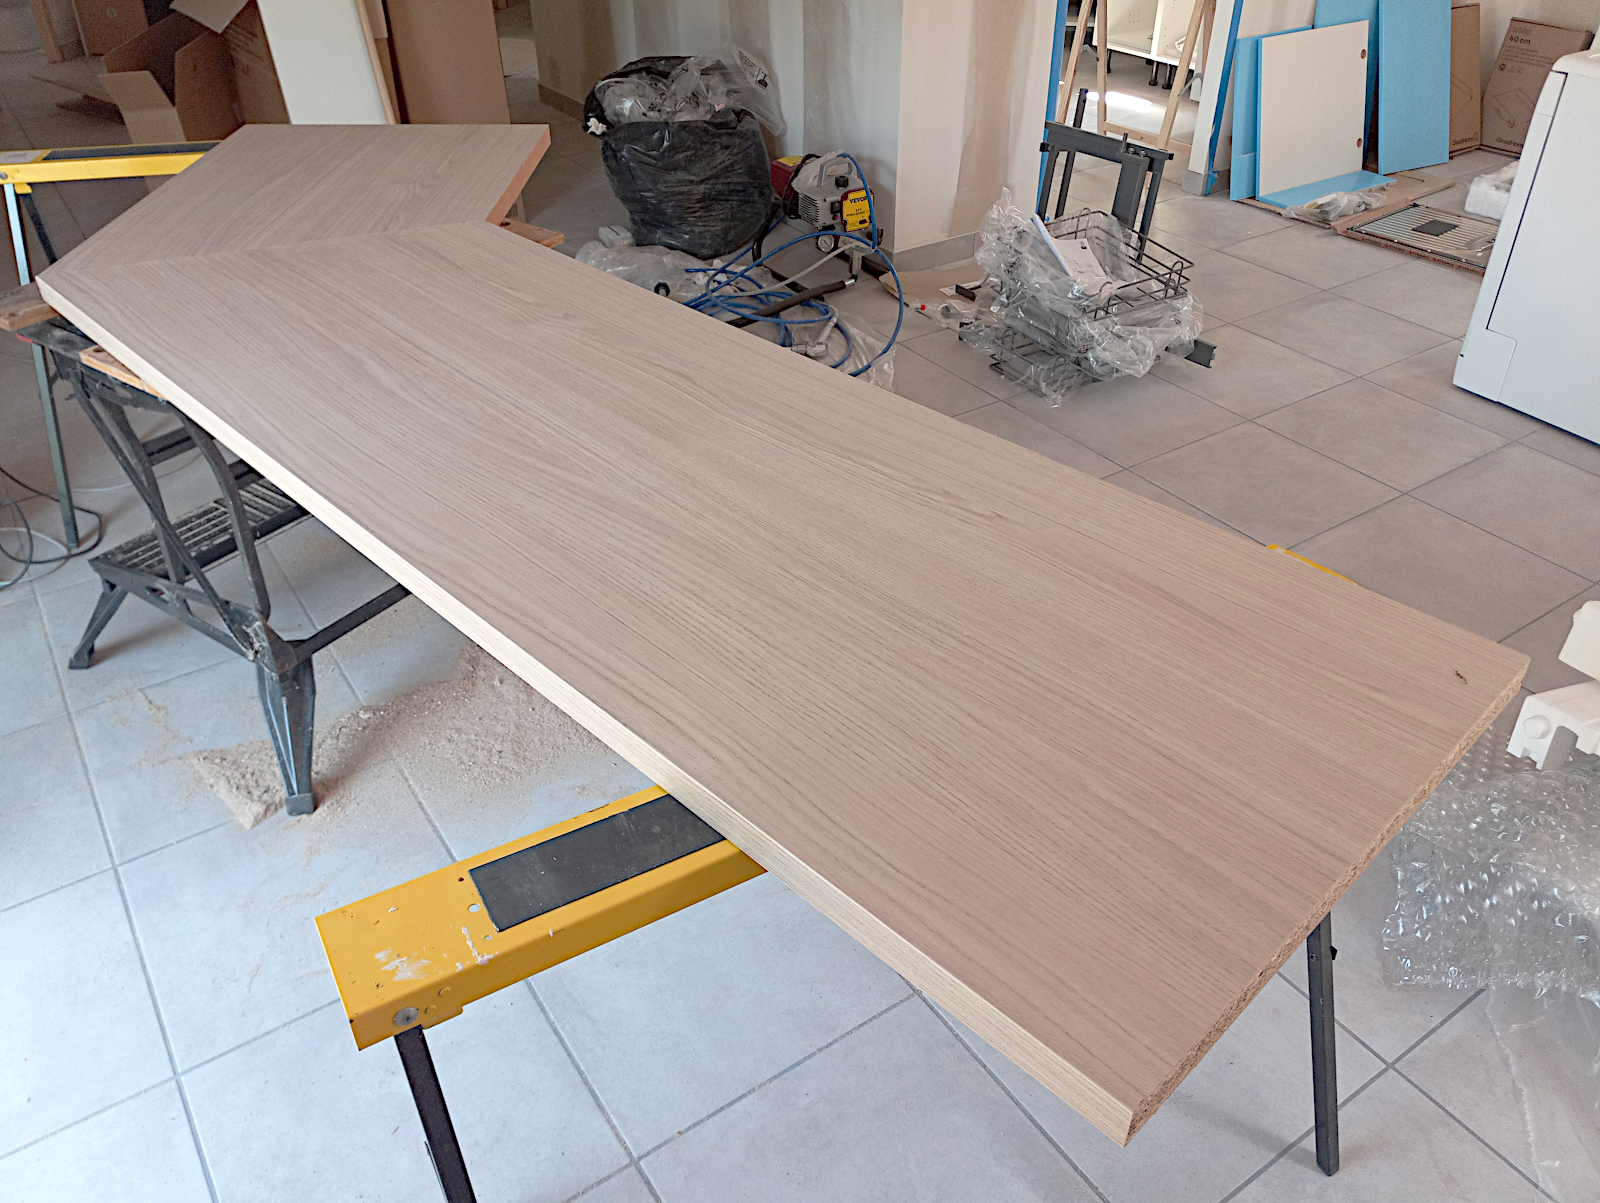
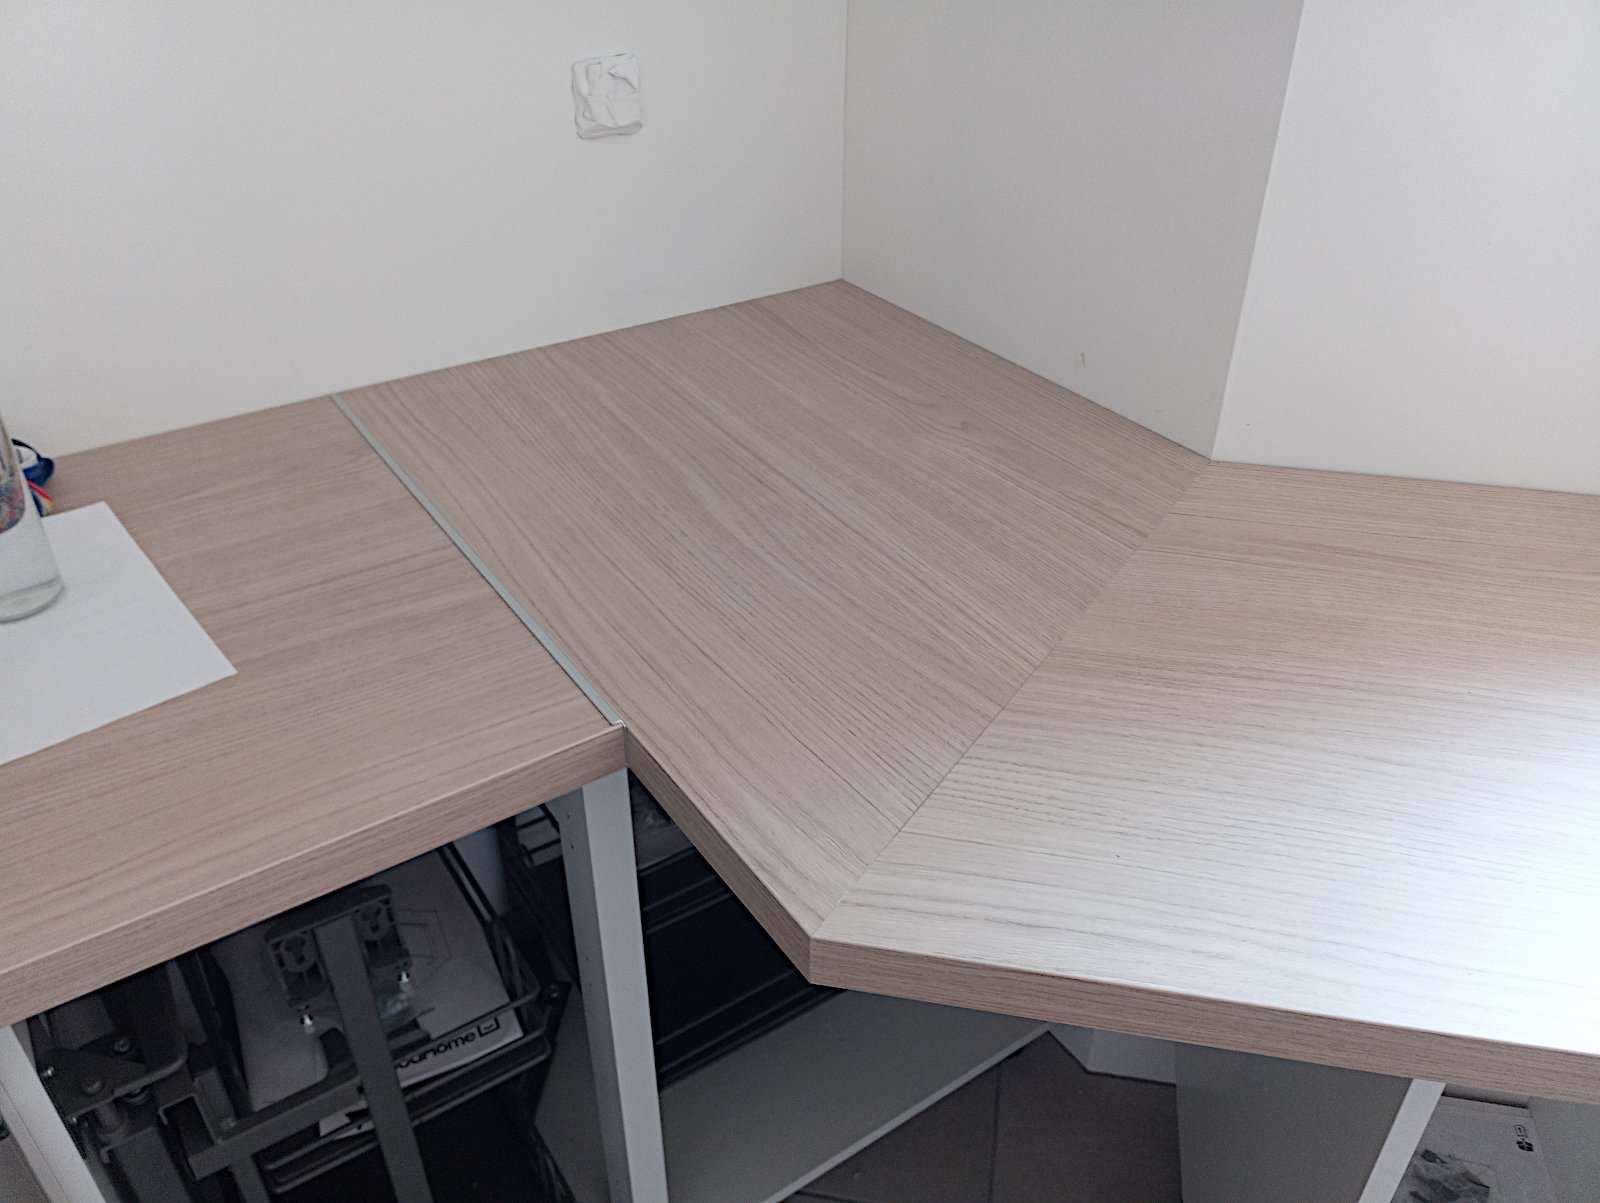
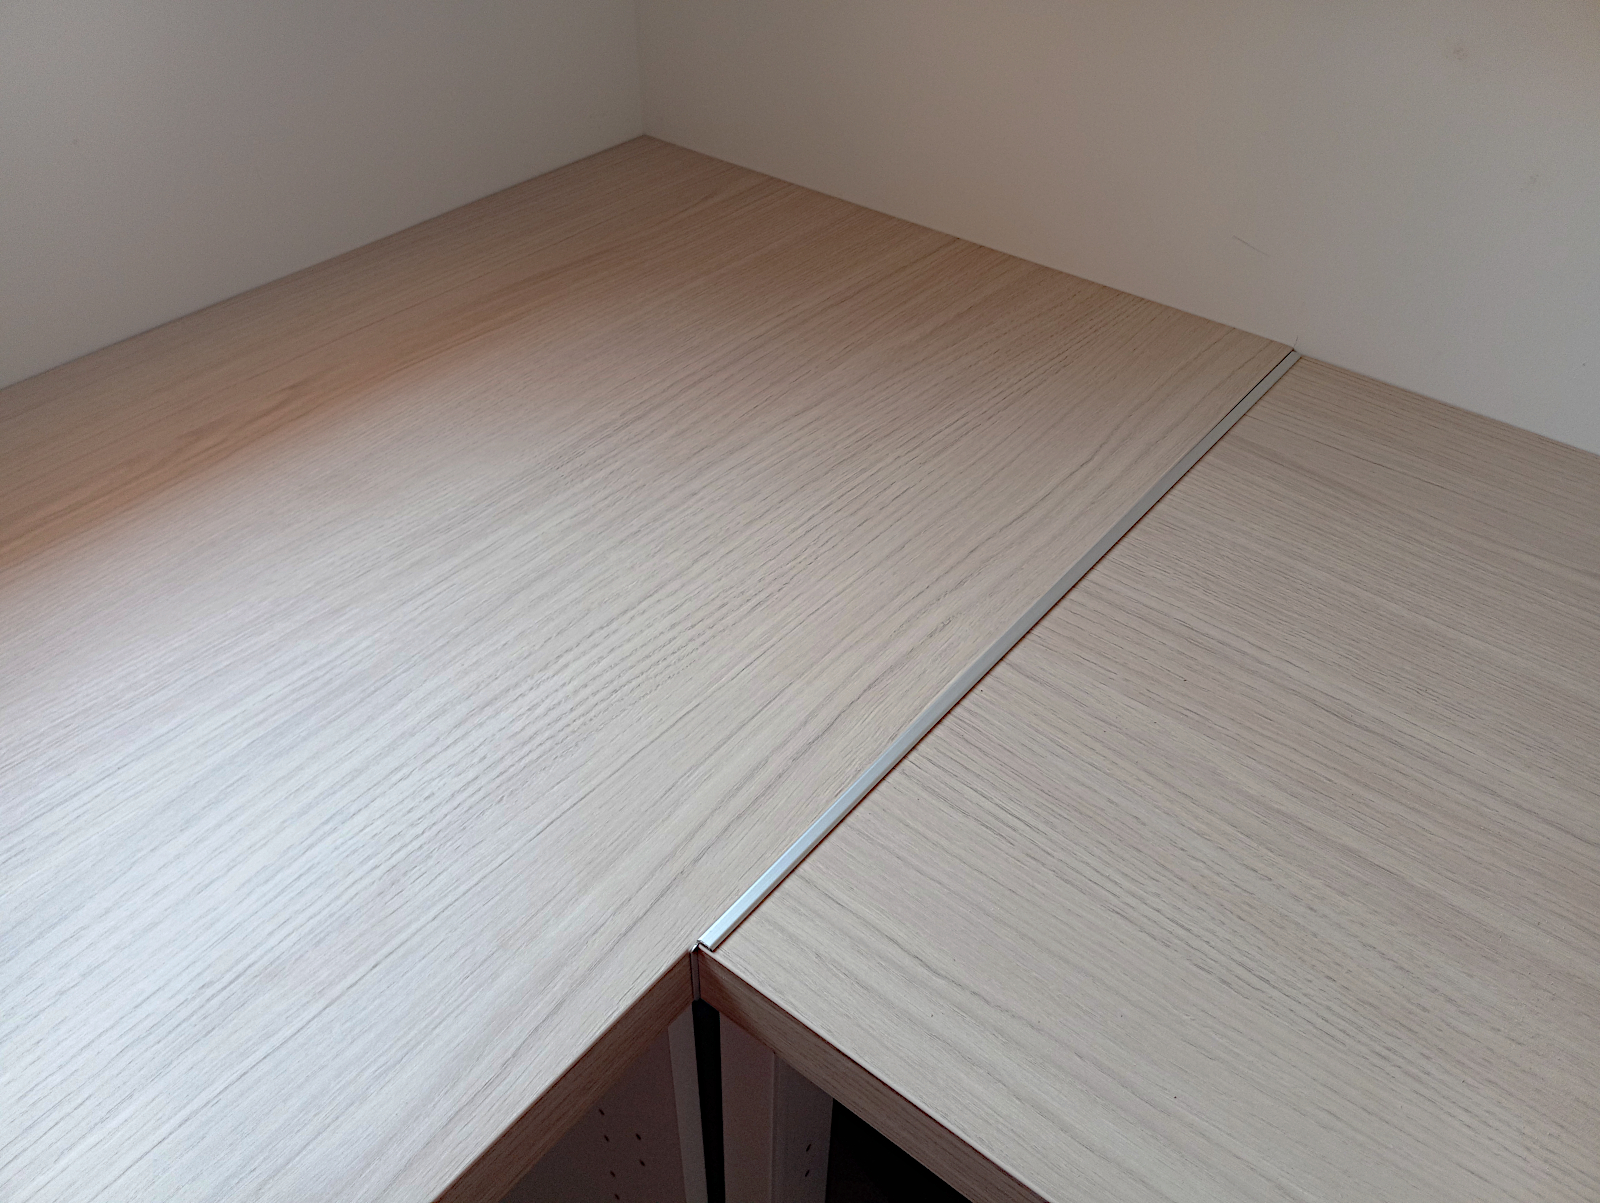
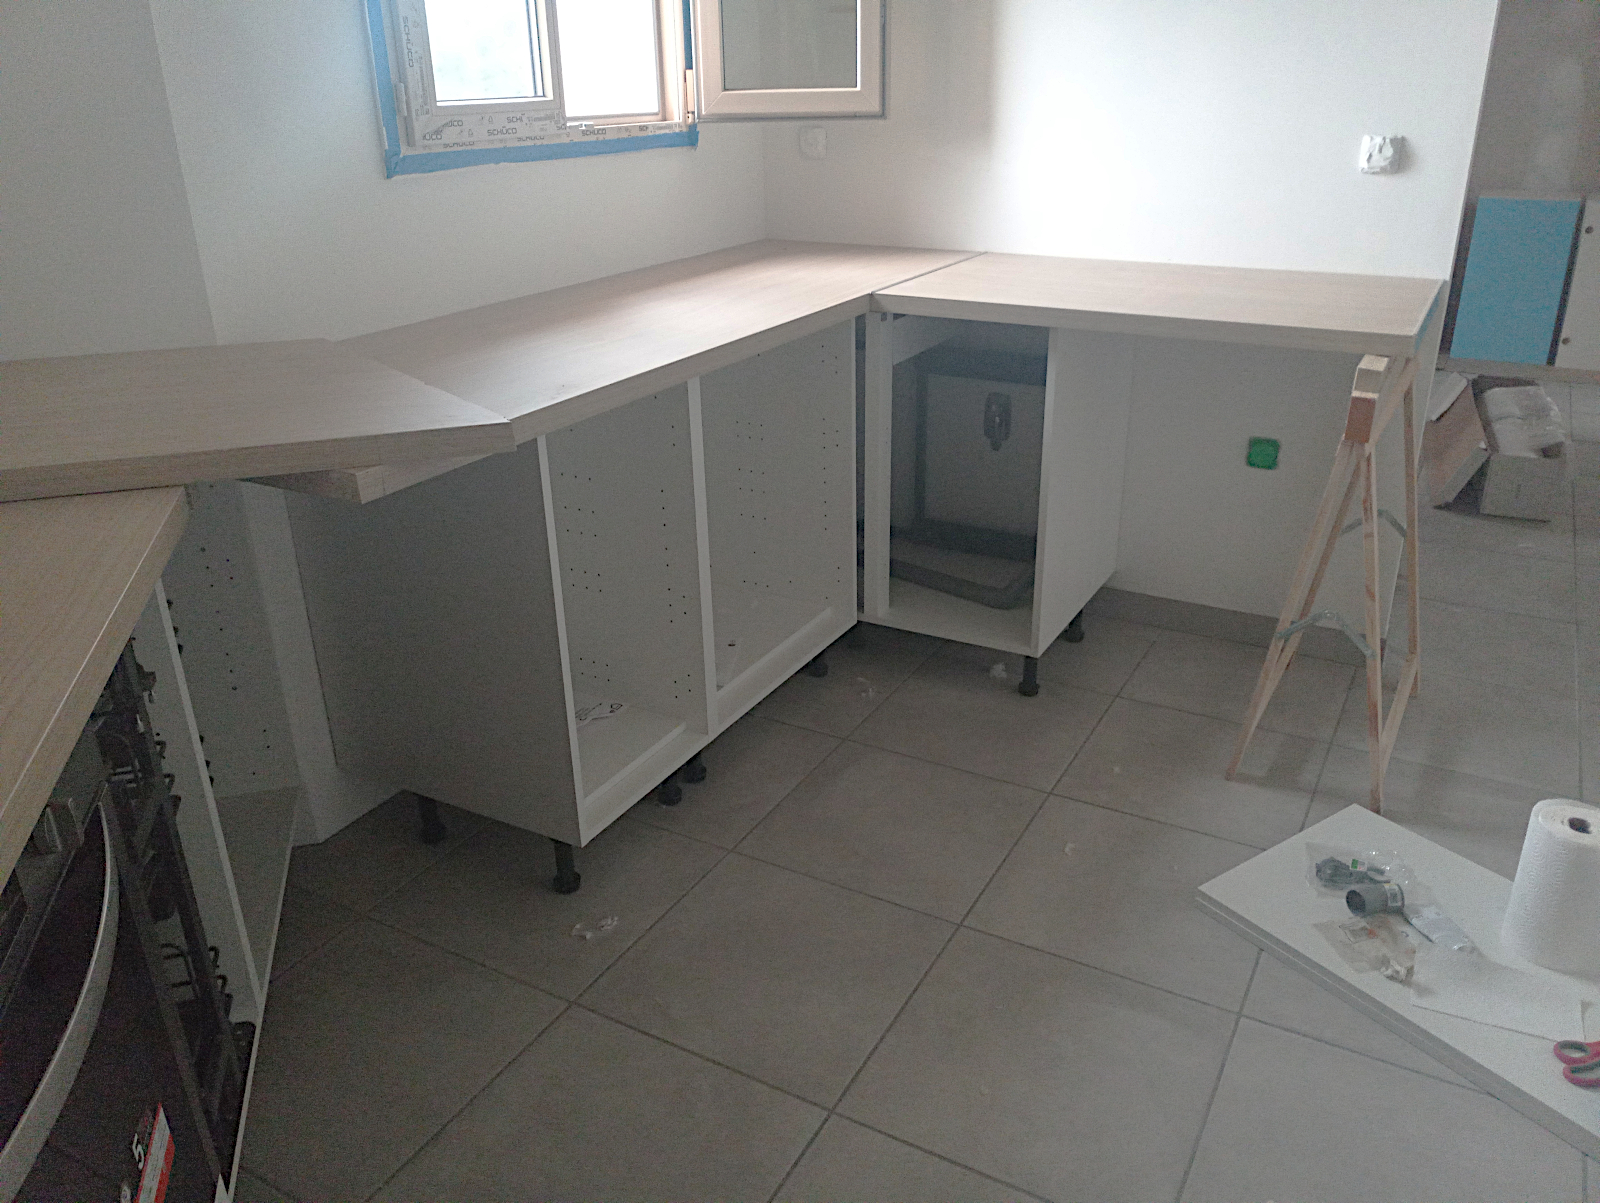
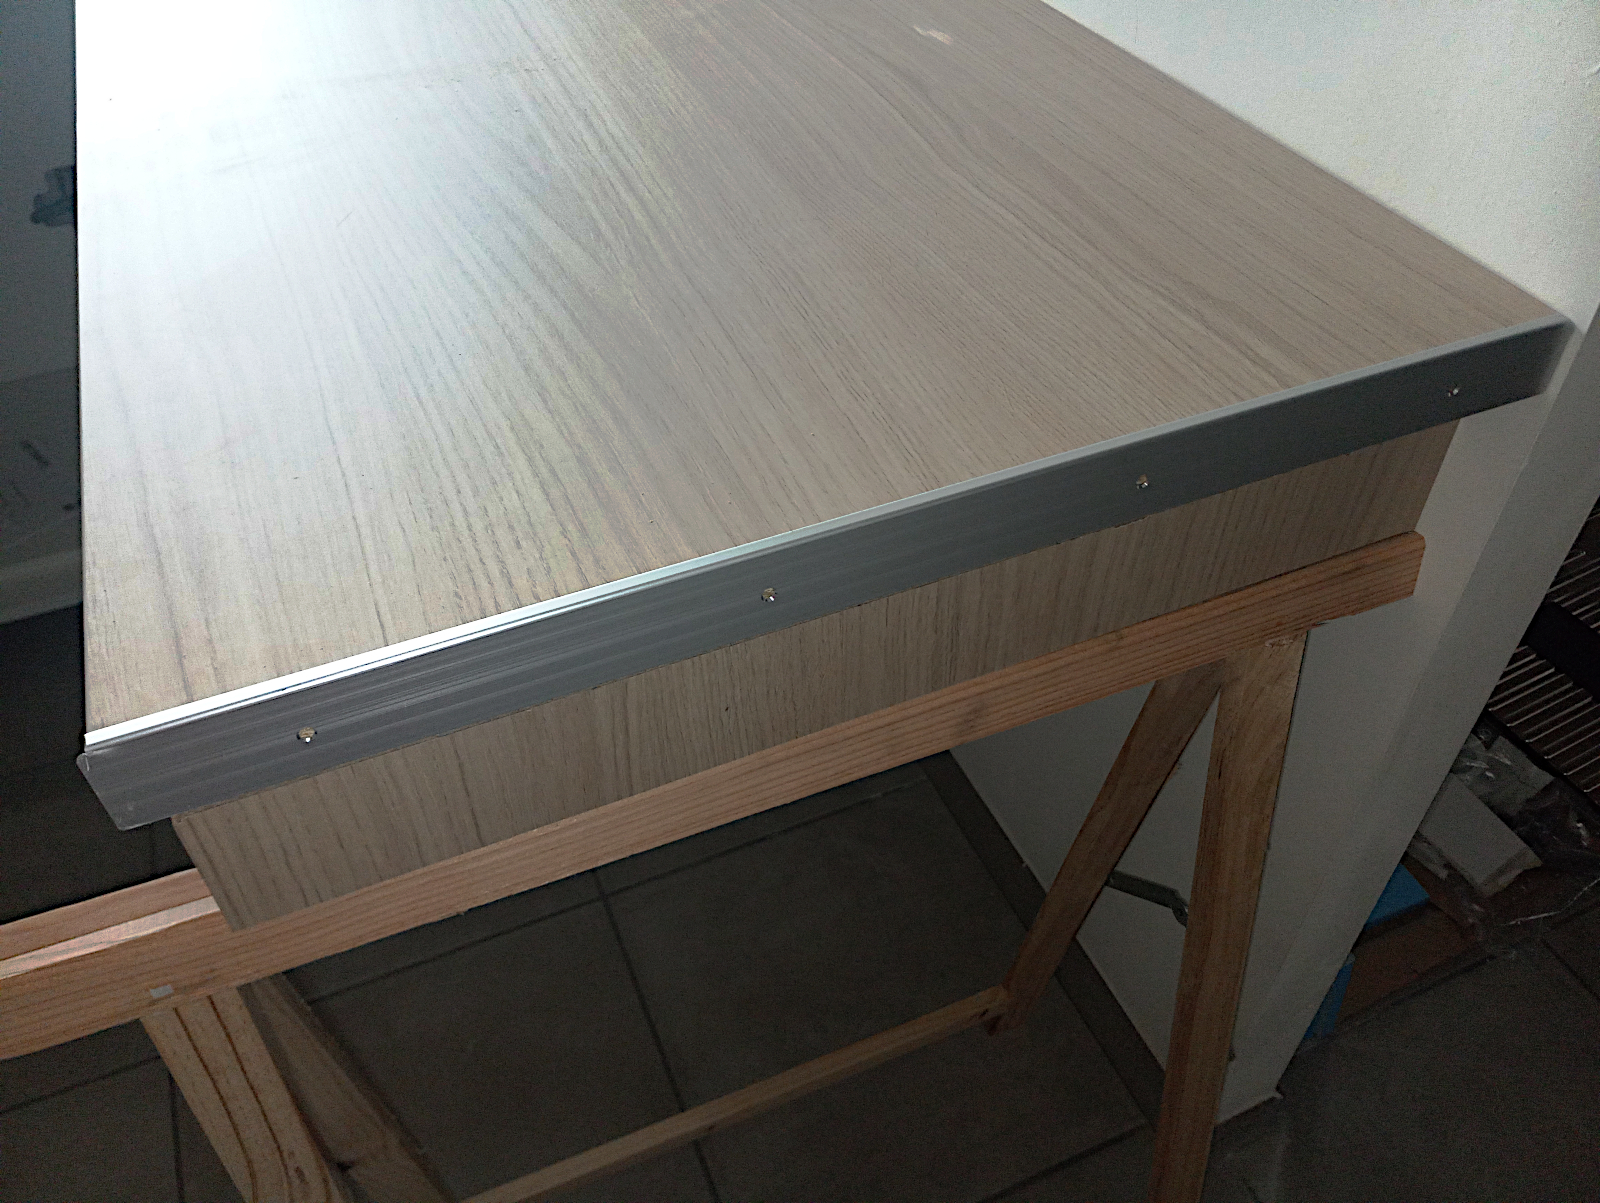
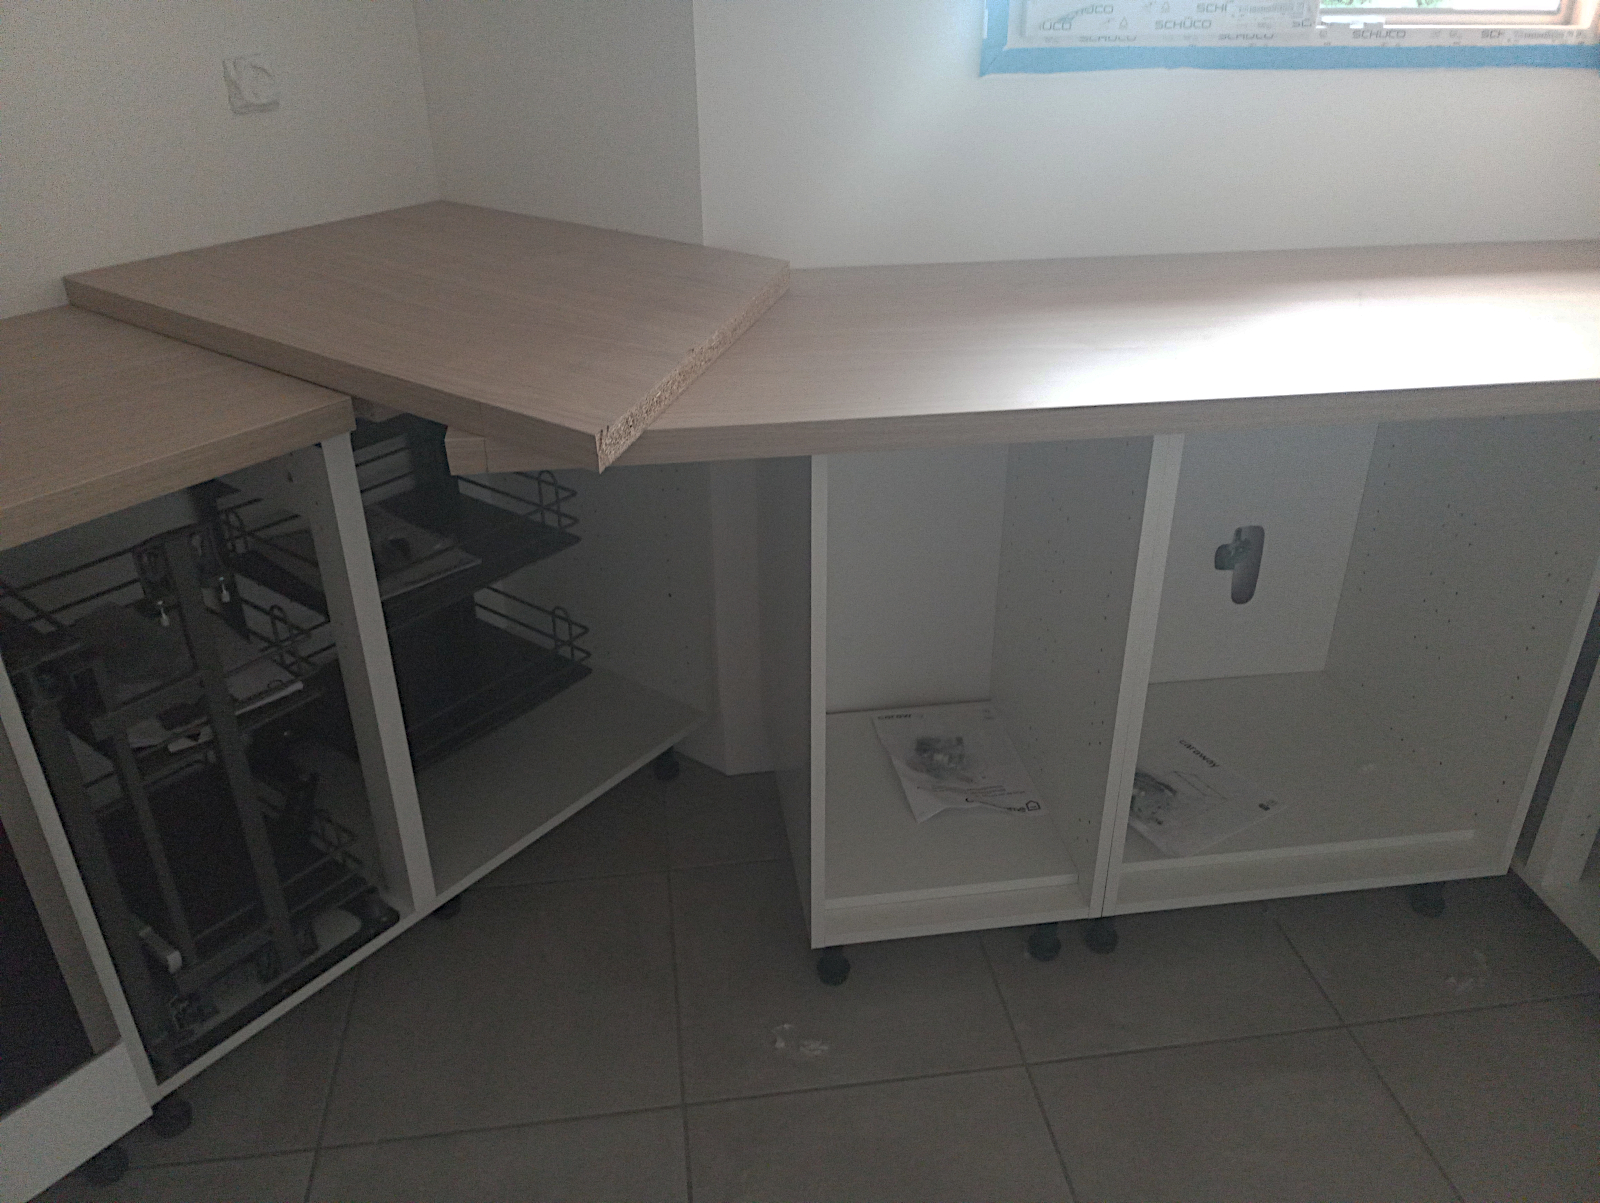
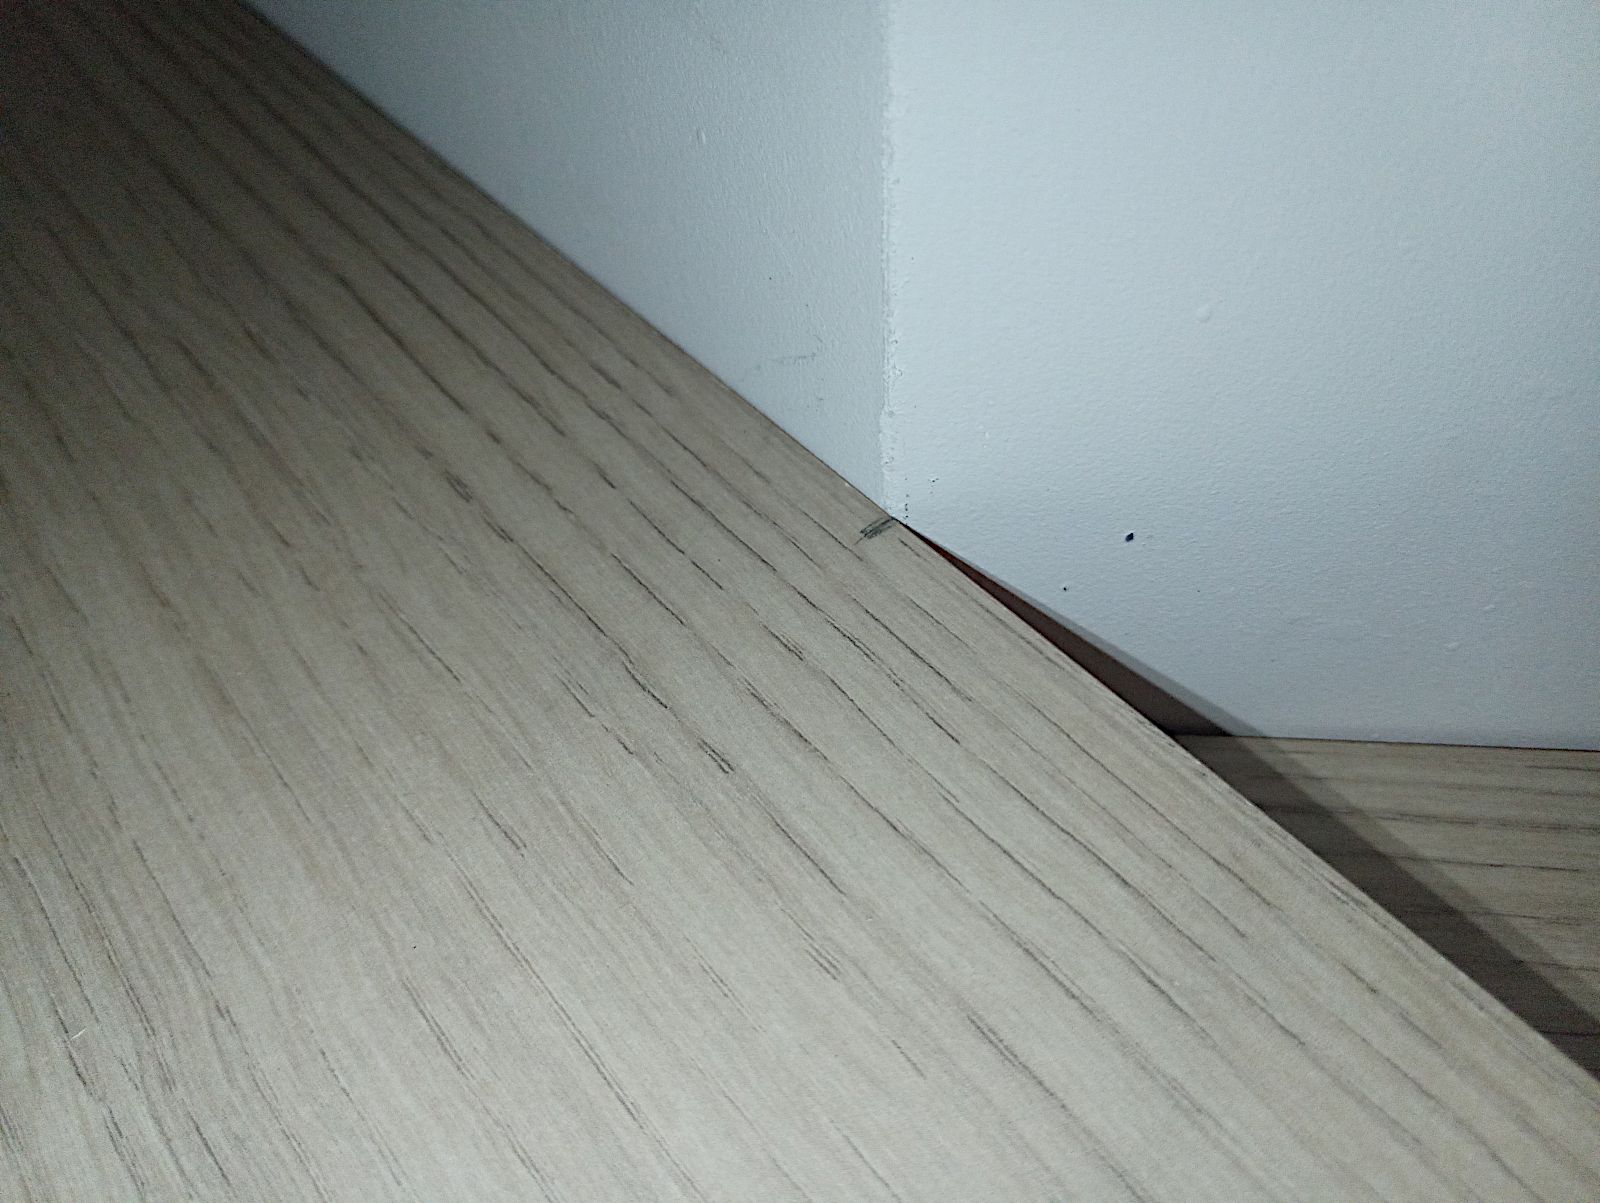
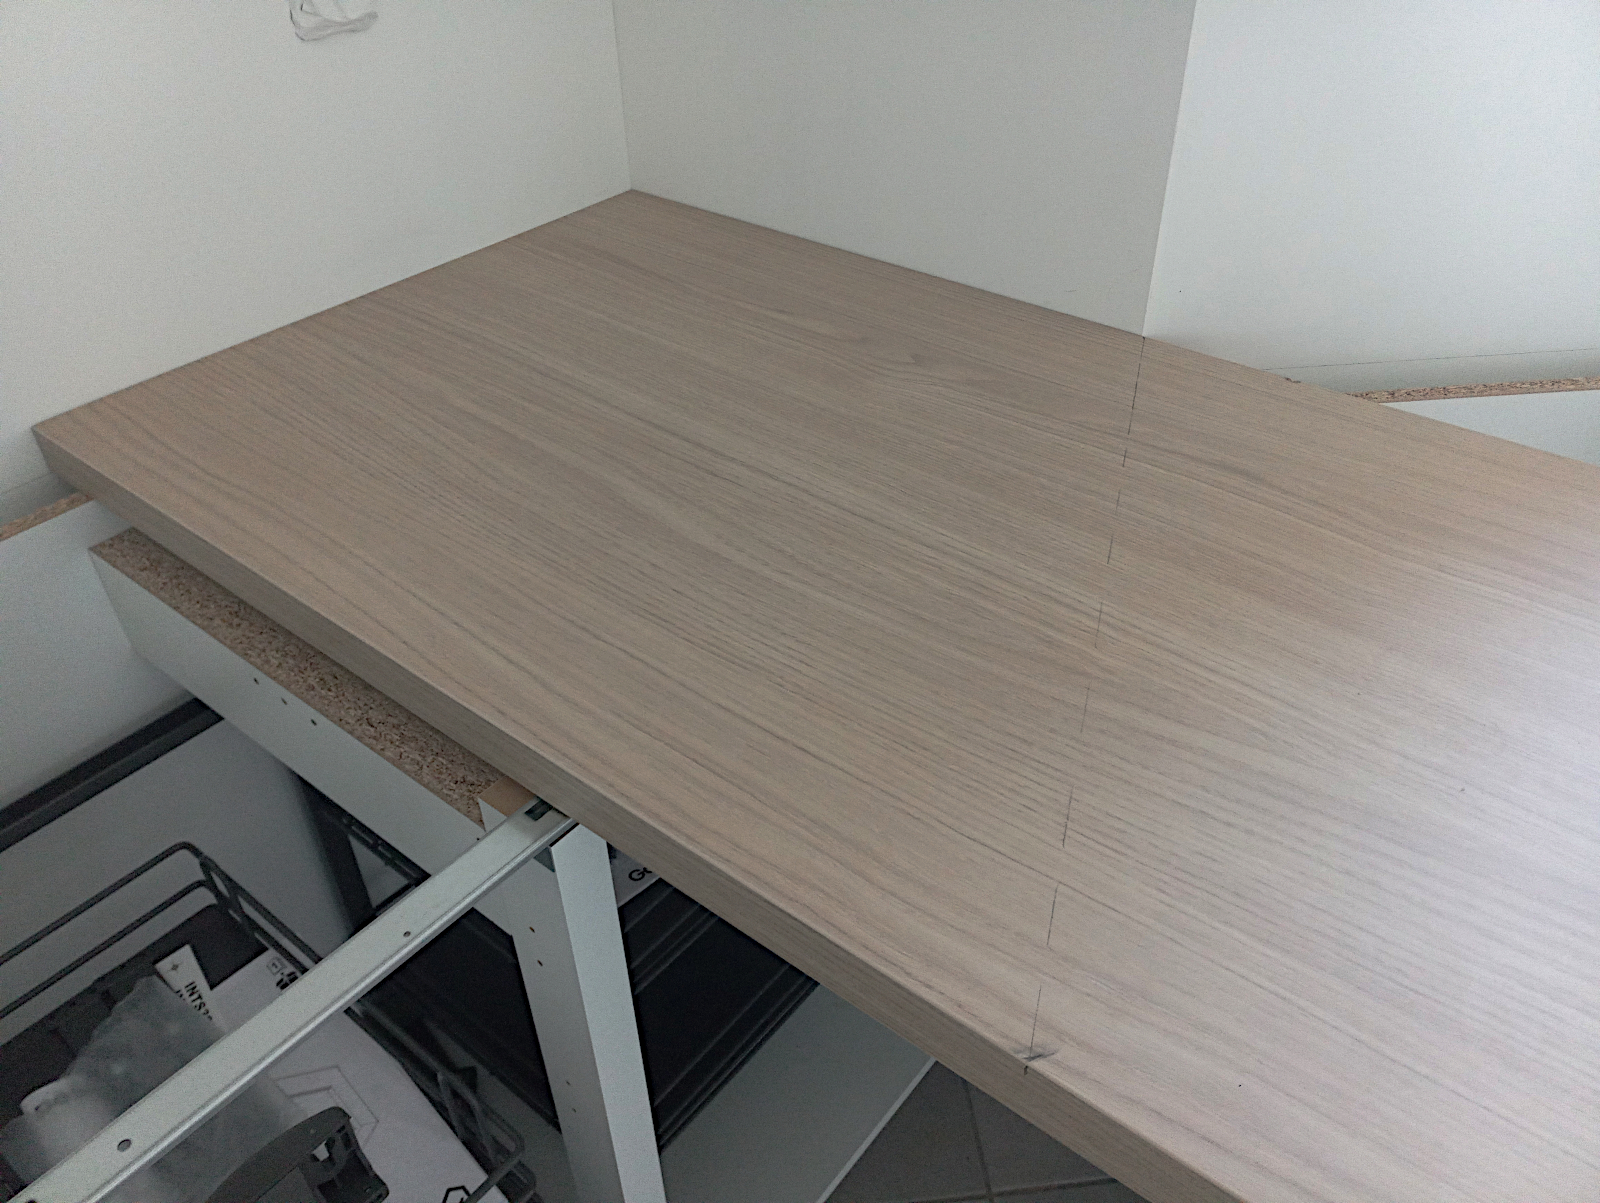
I managed to single-handedly get a length of worktop up onto trestles and my work bench to cut the two lengths which will eventually be cut to size and joined. Here’s the shorter piece in position in the left-hand corner of the kitchen.

null

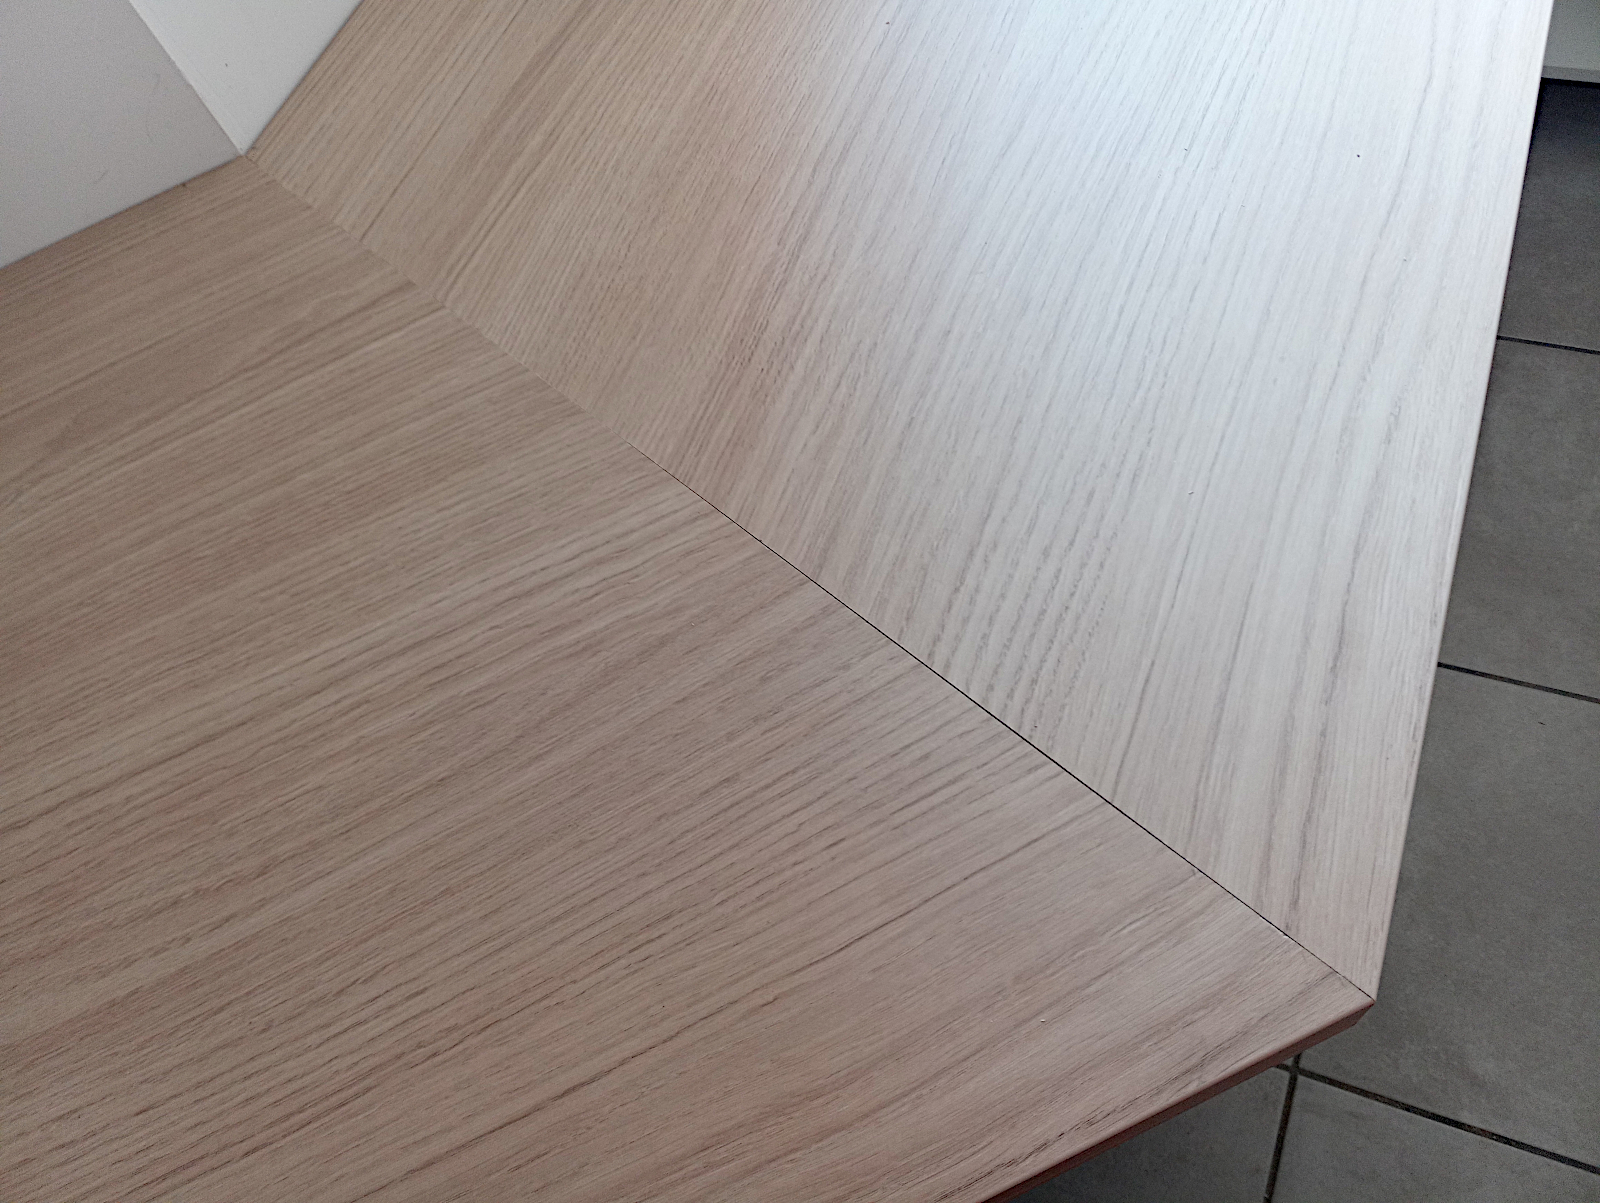
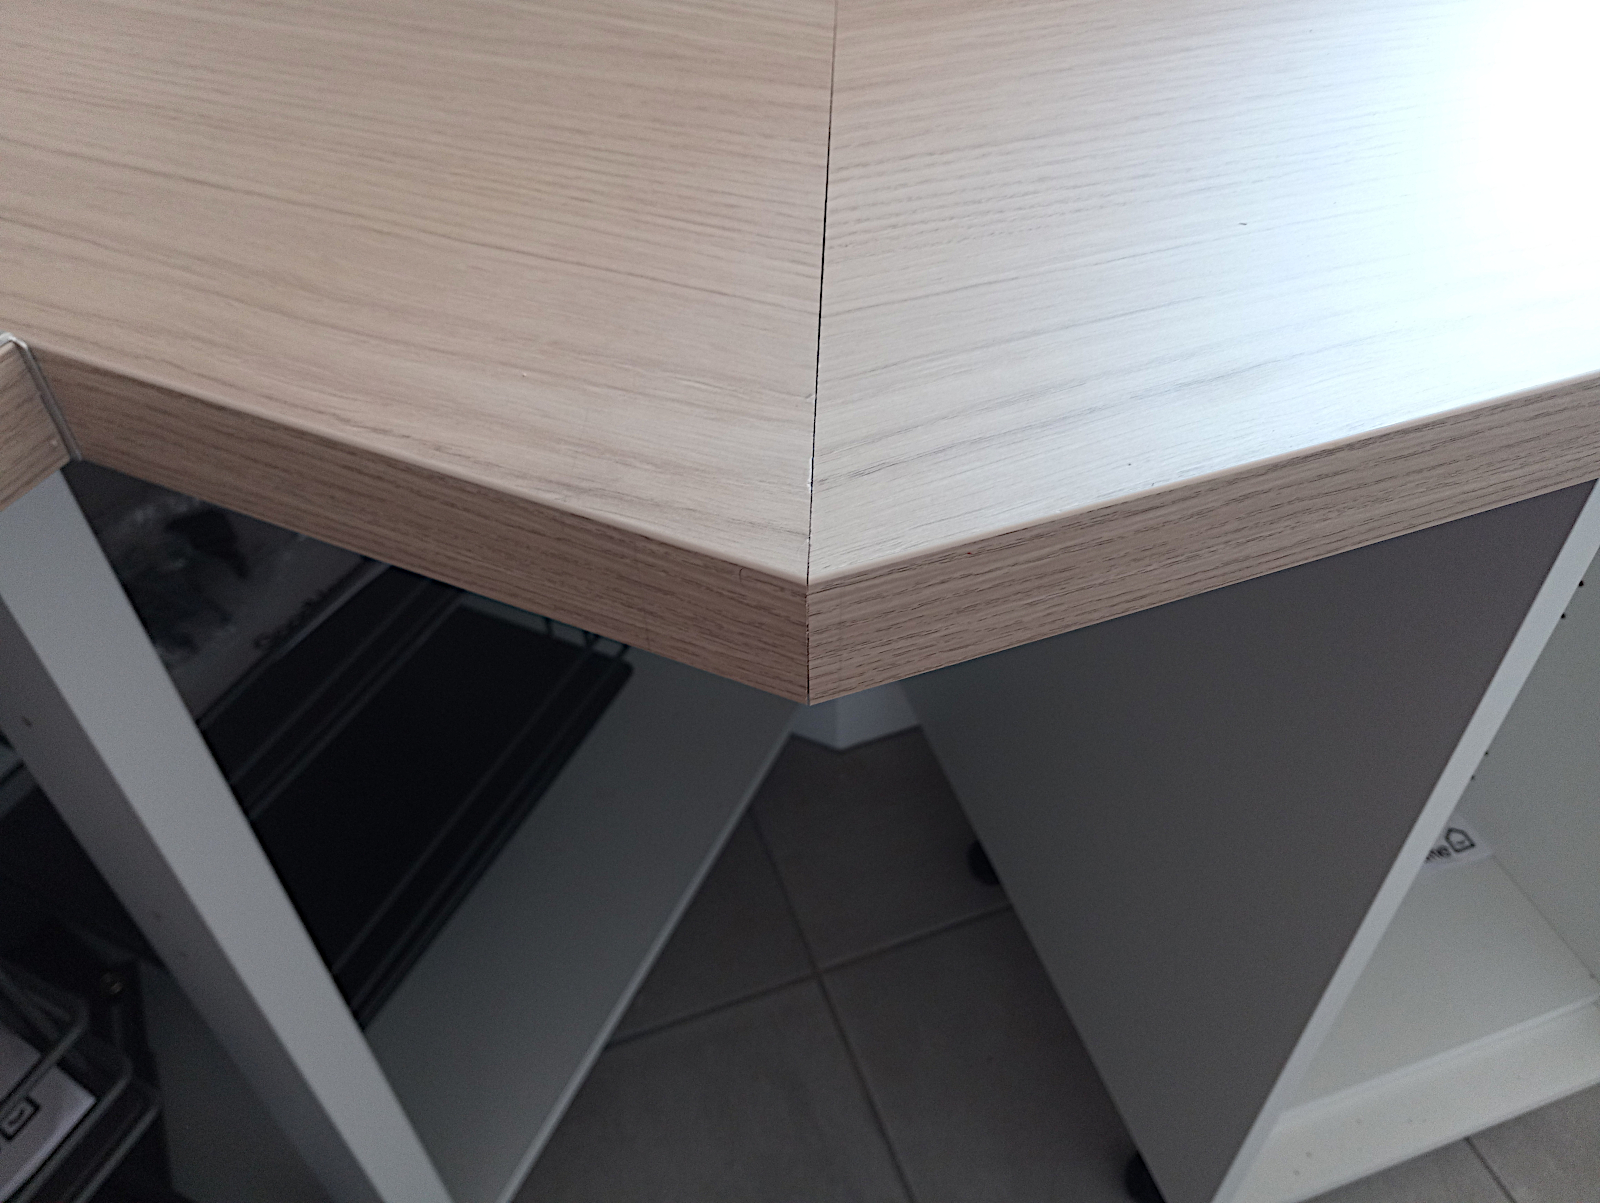
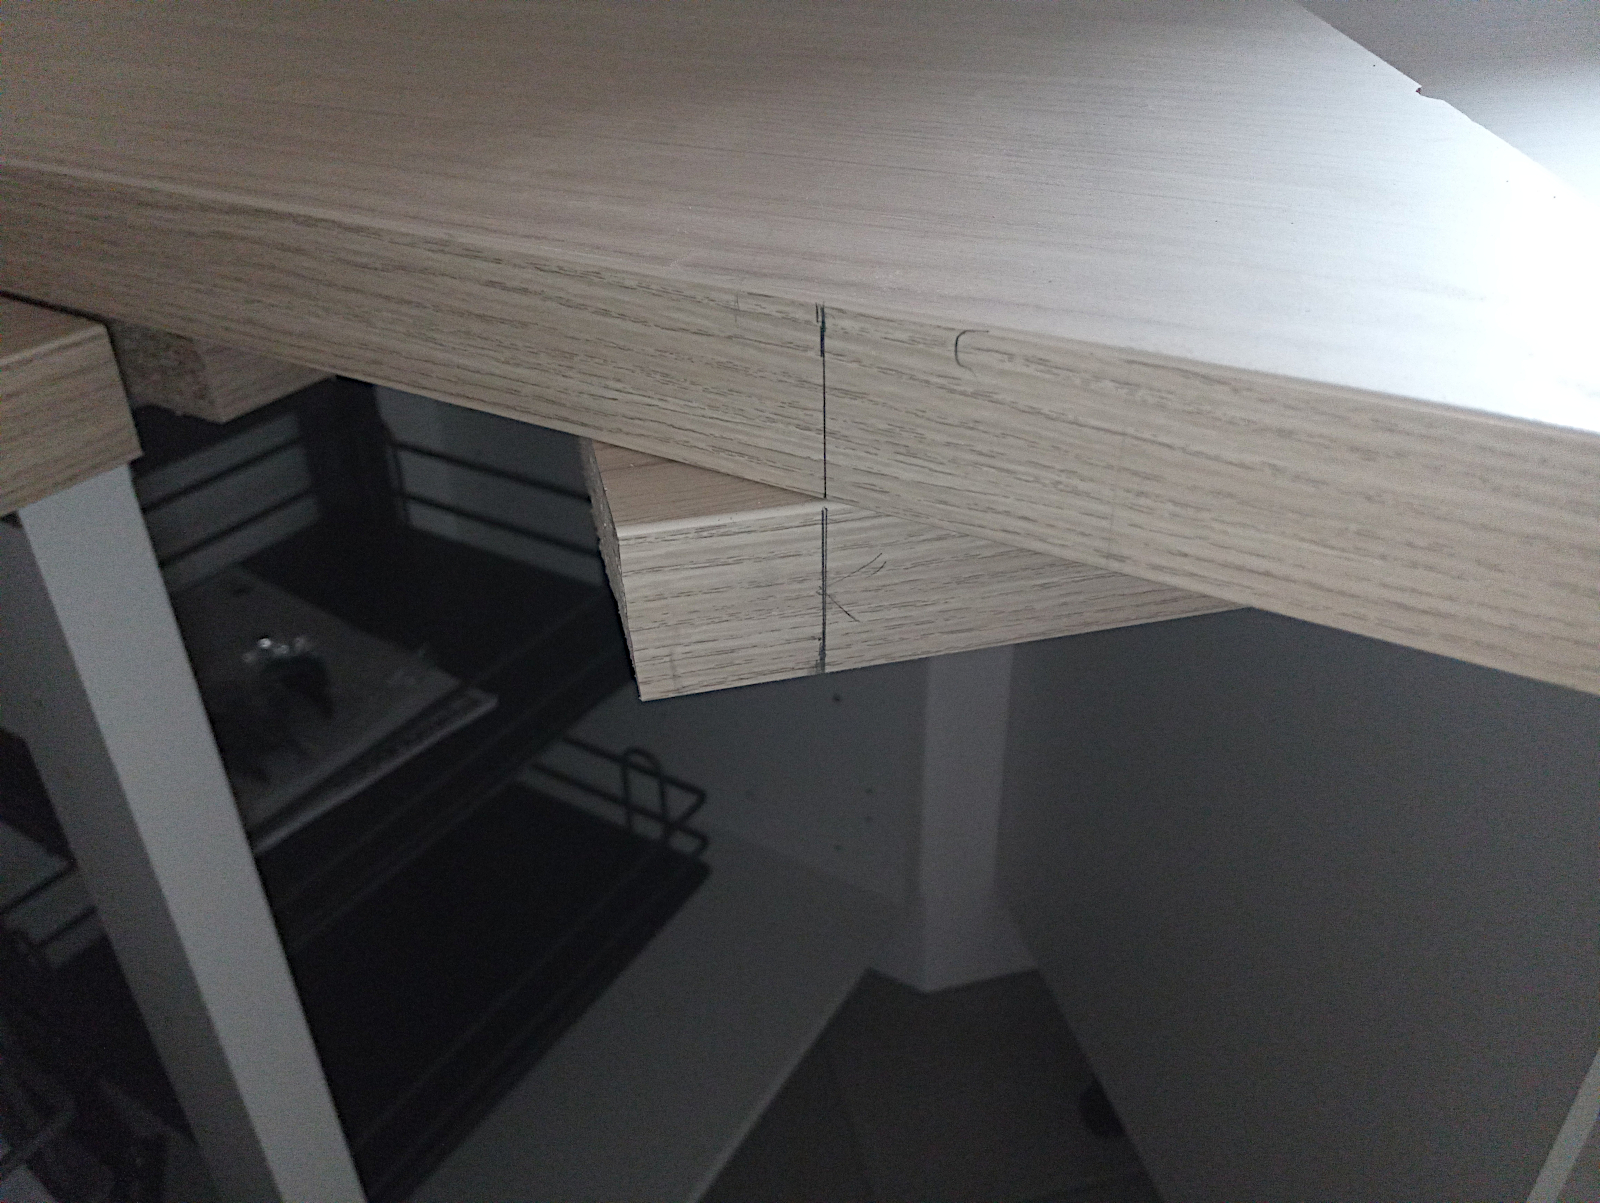
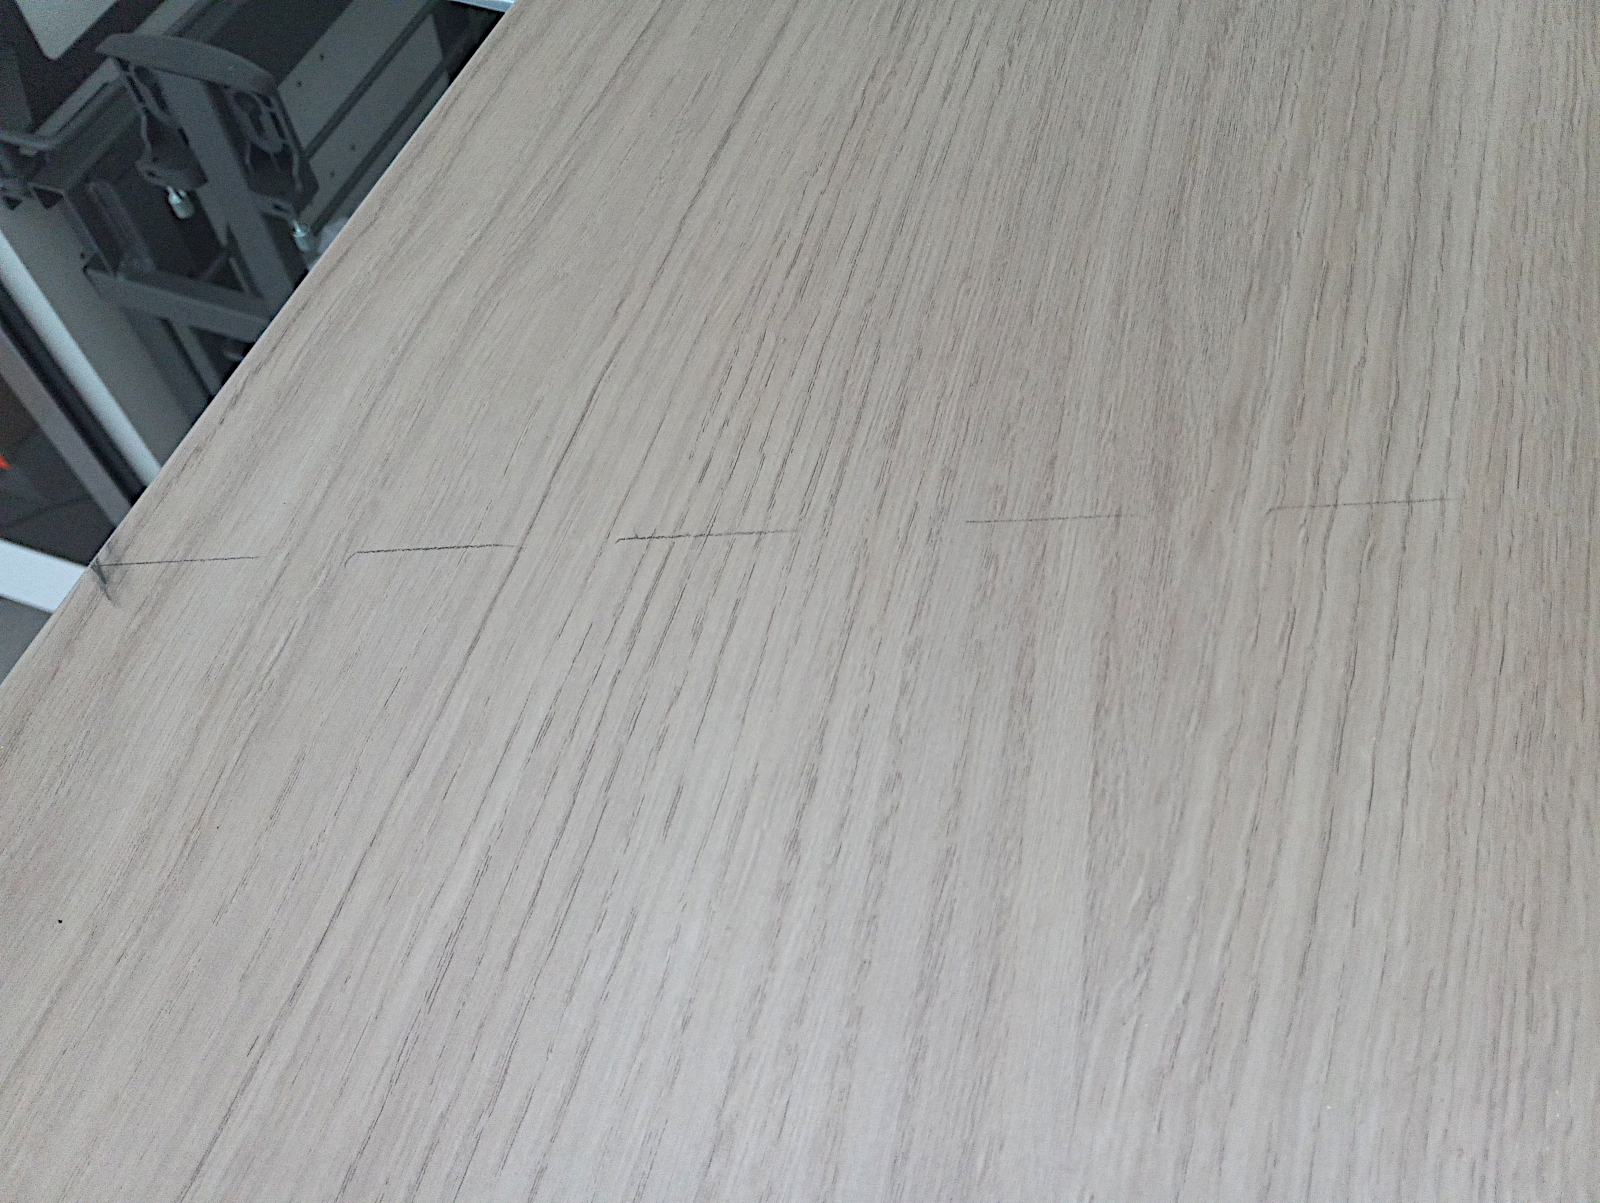
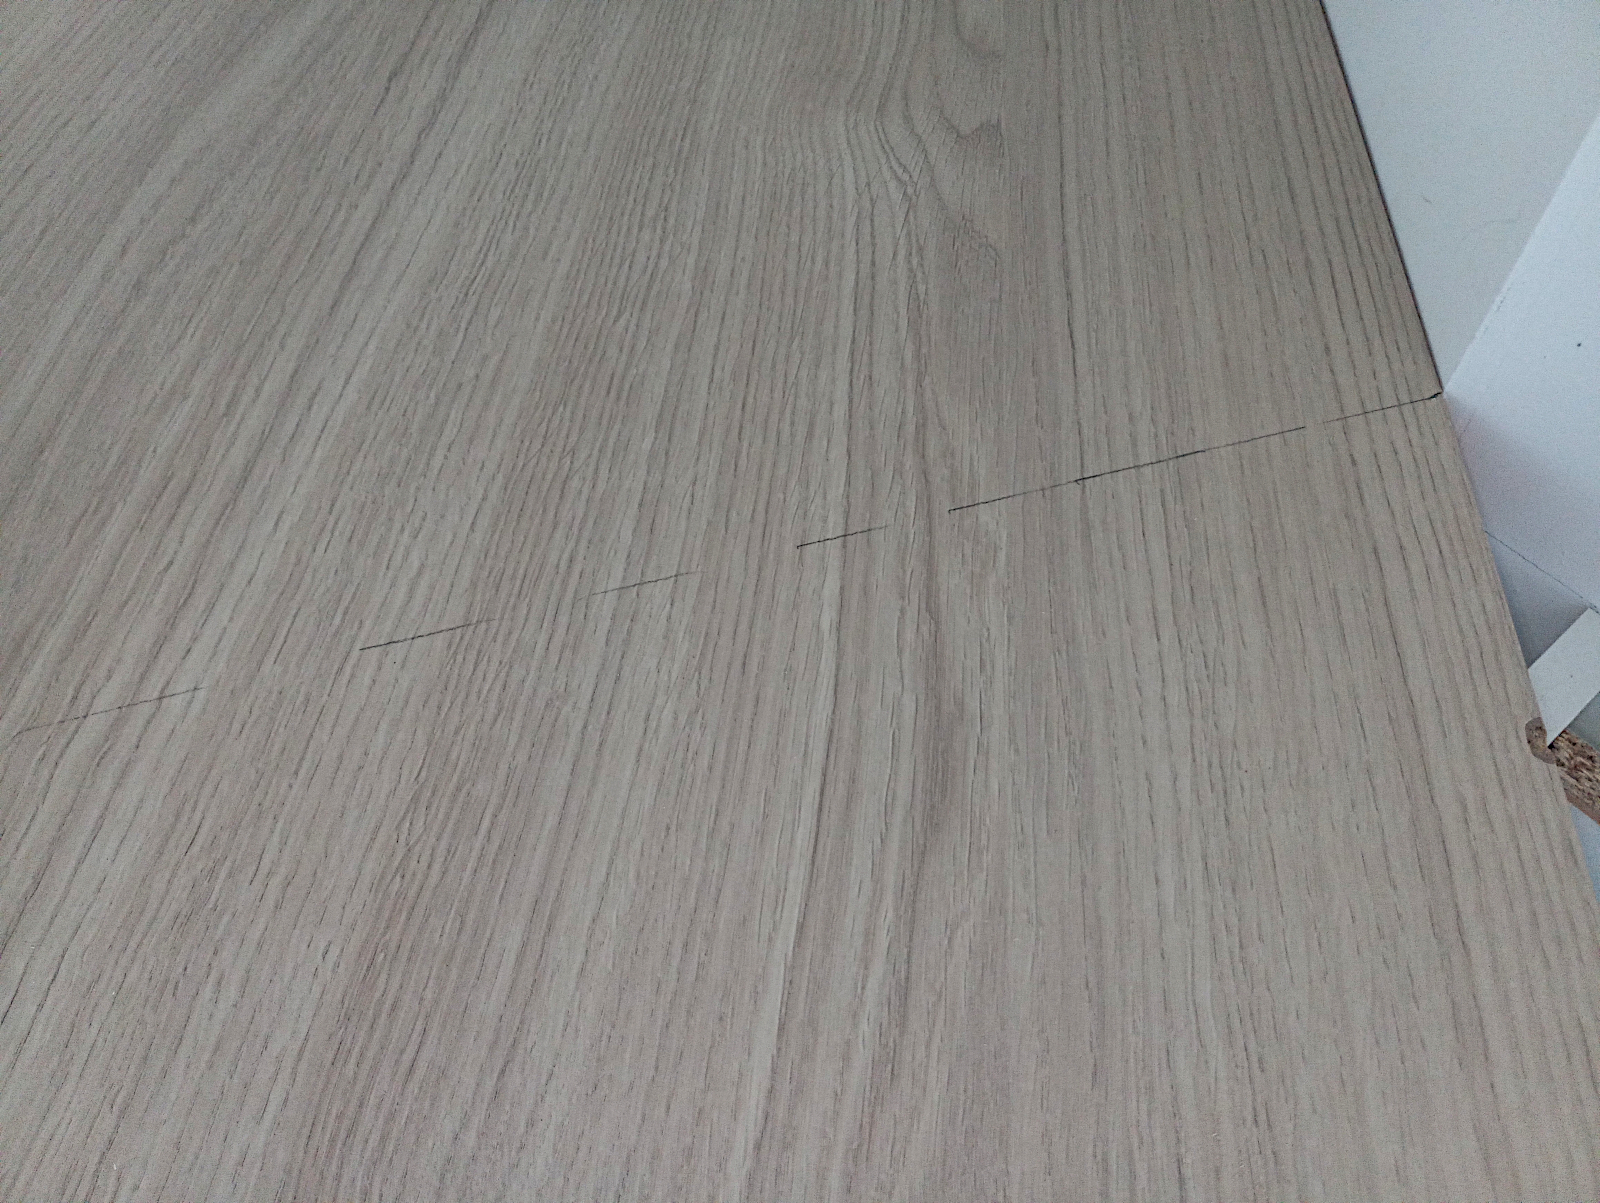
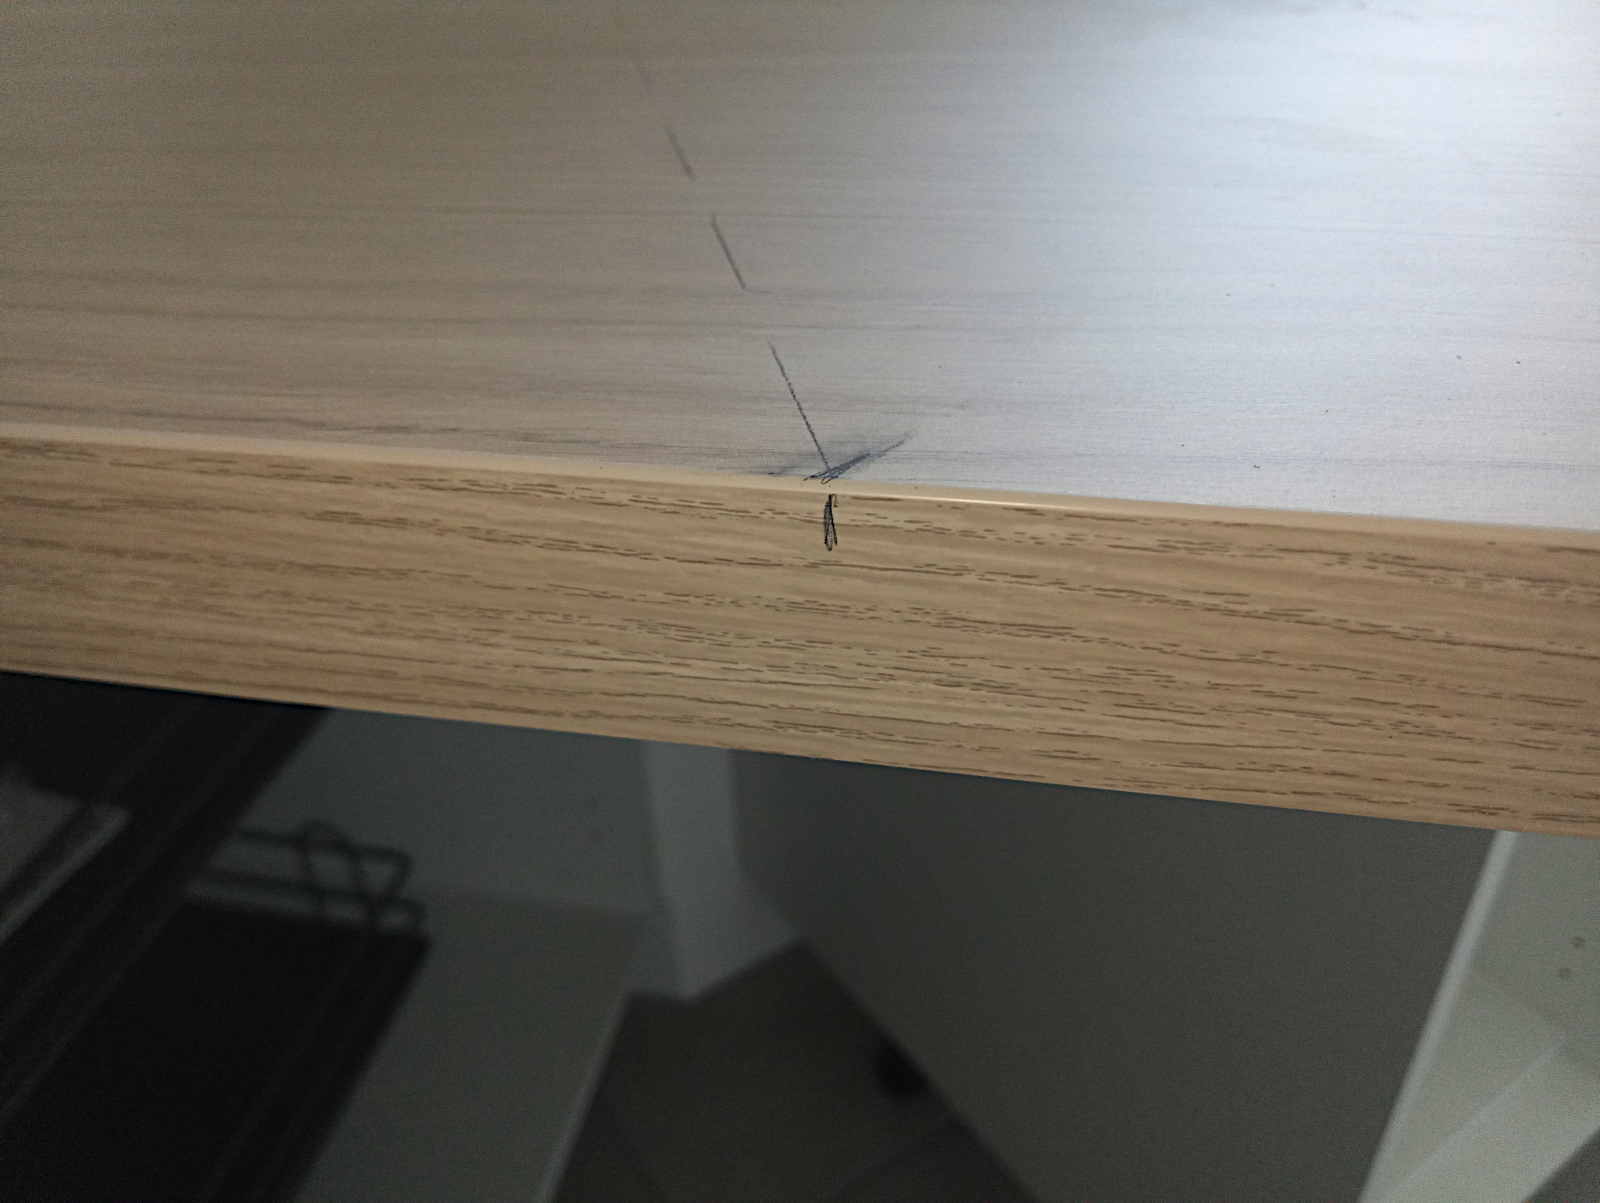
I’ve roughly drawn the angle line on it along which it will be cut. It’s only as a rough guide for now and I’ll be measuring, marking and cutting the worktop much more accurately when the time comes.

null

null

When I actually do the cuts it will be essential for the cut edges of both of the pieces to be joined to be totally vertical in order to get a good, strong joint.

null

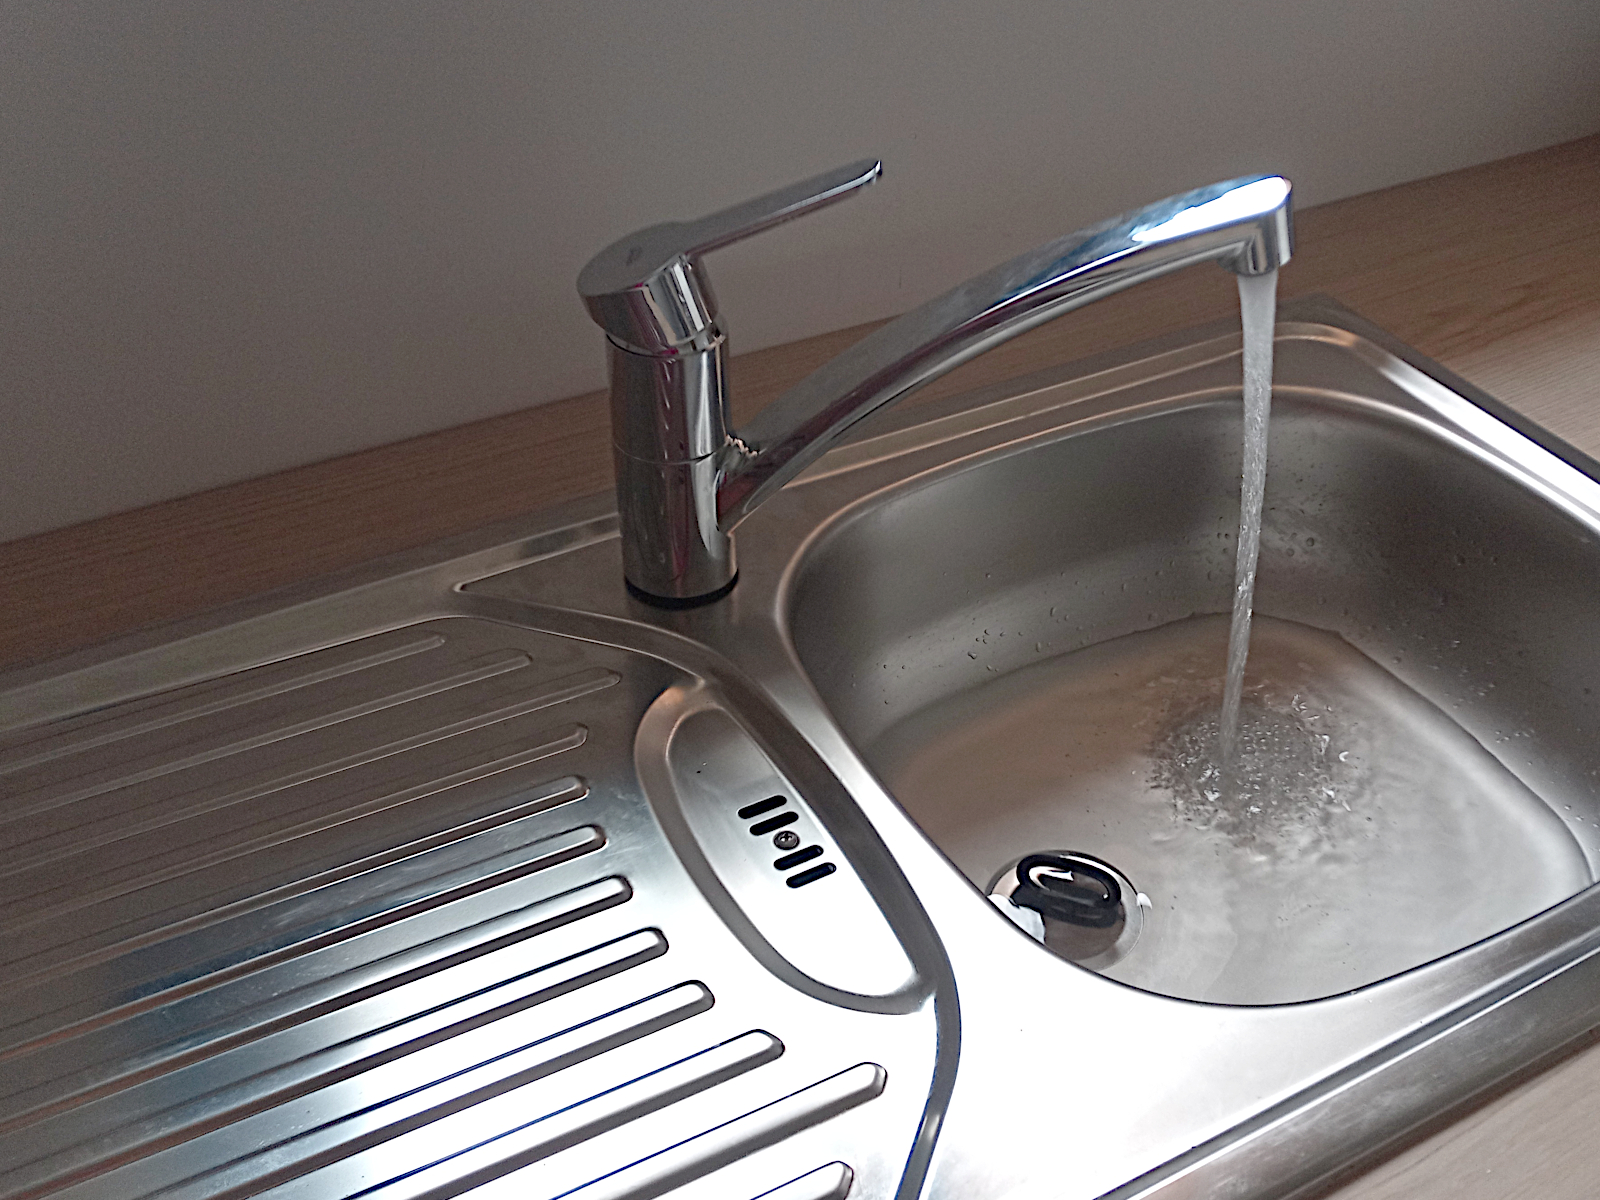
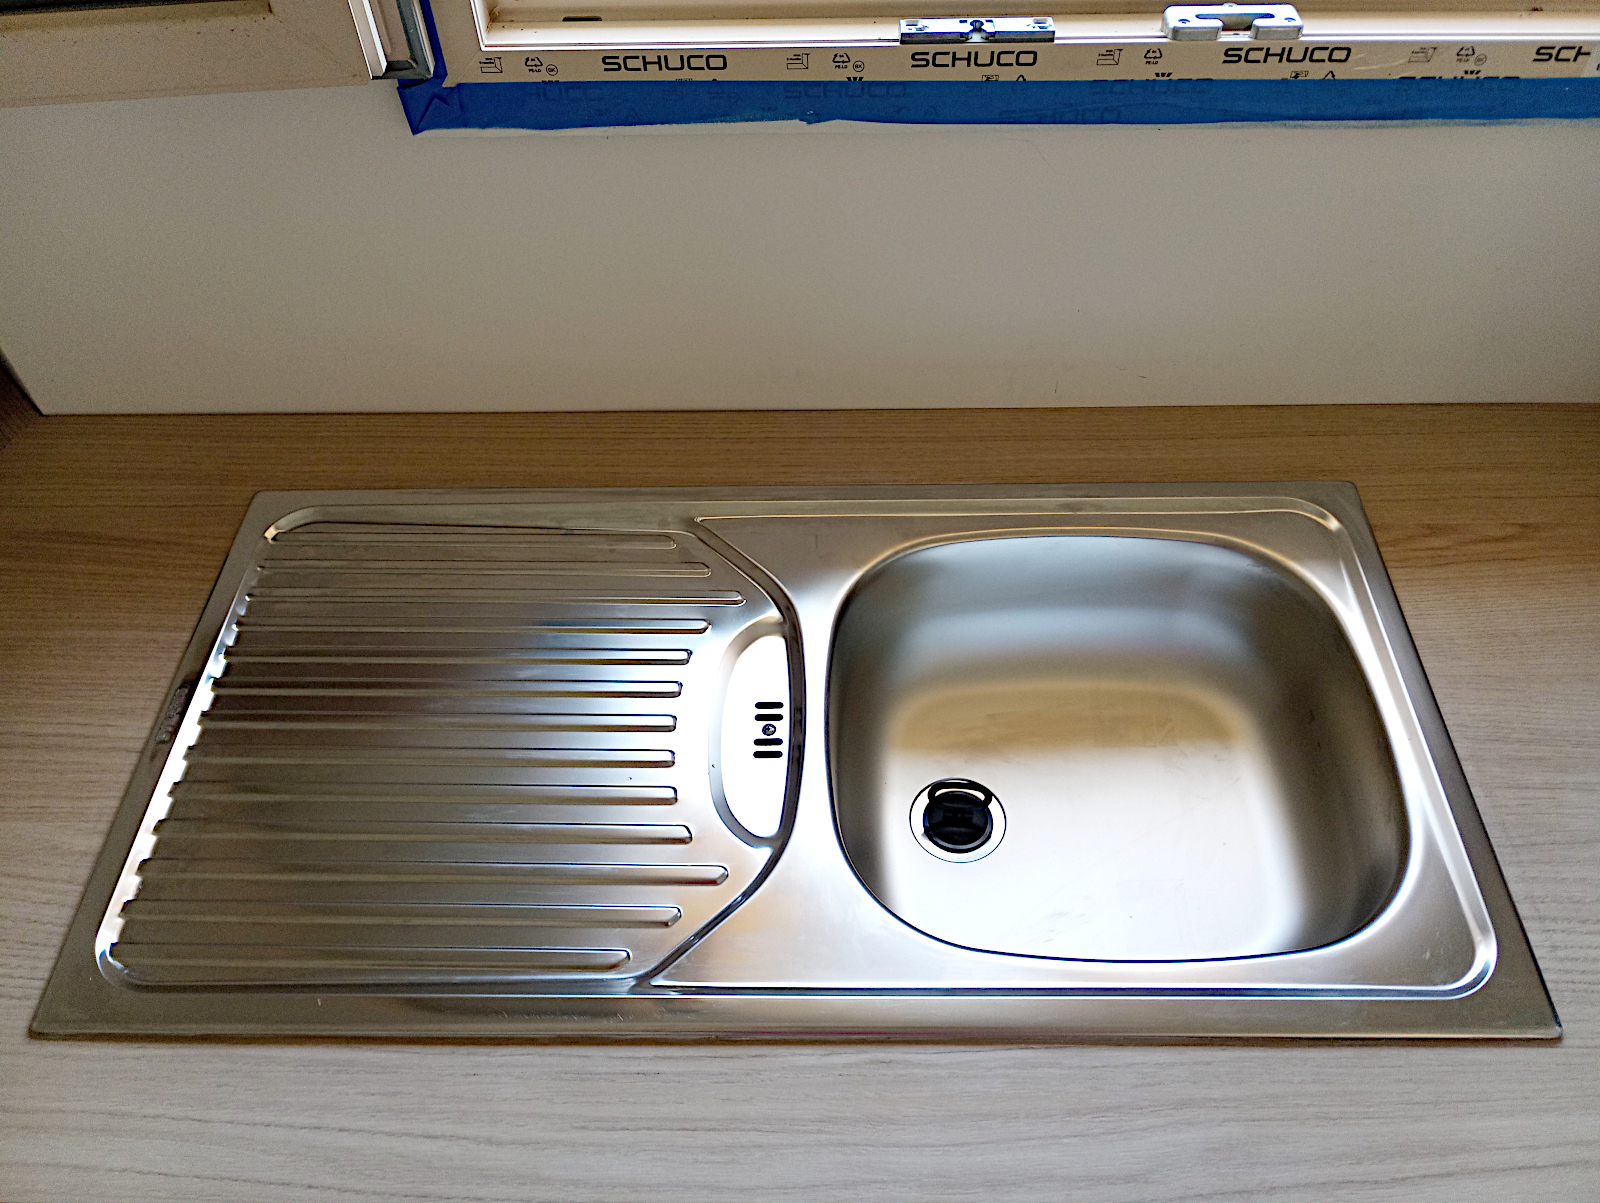
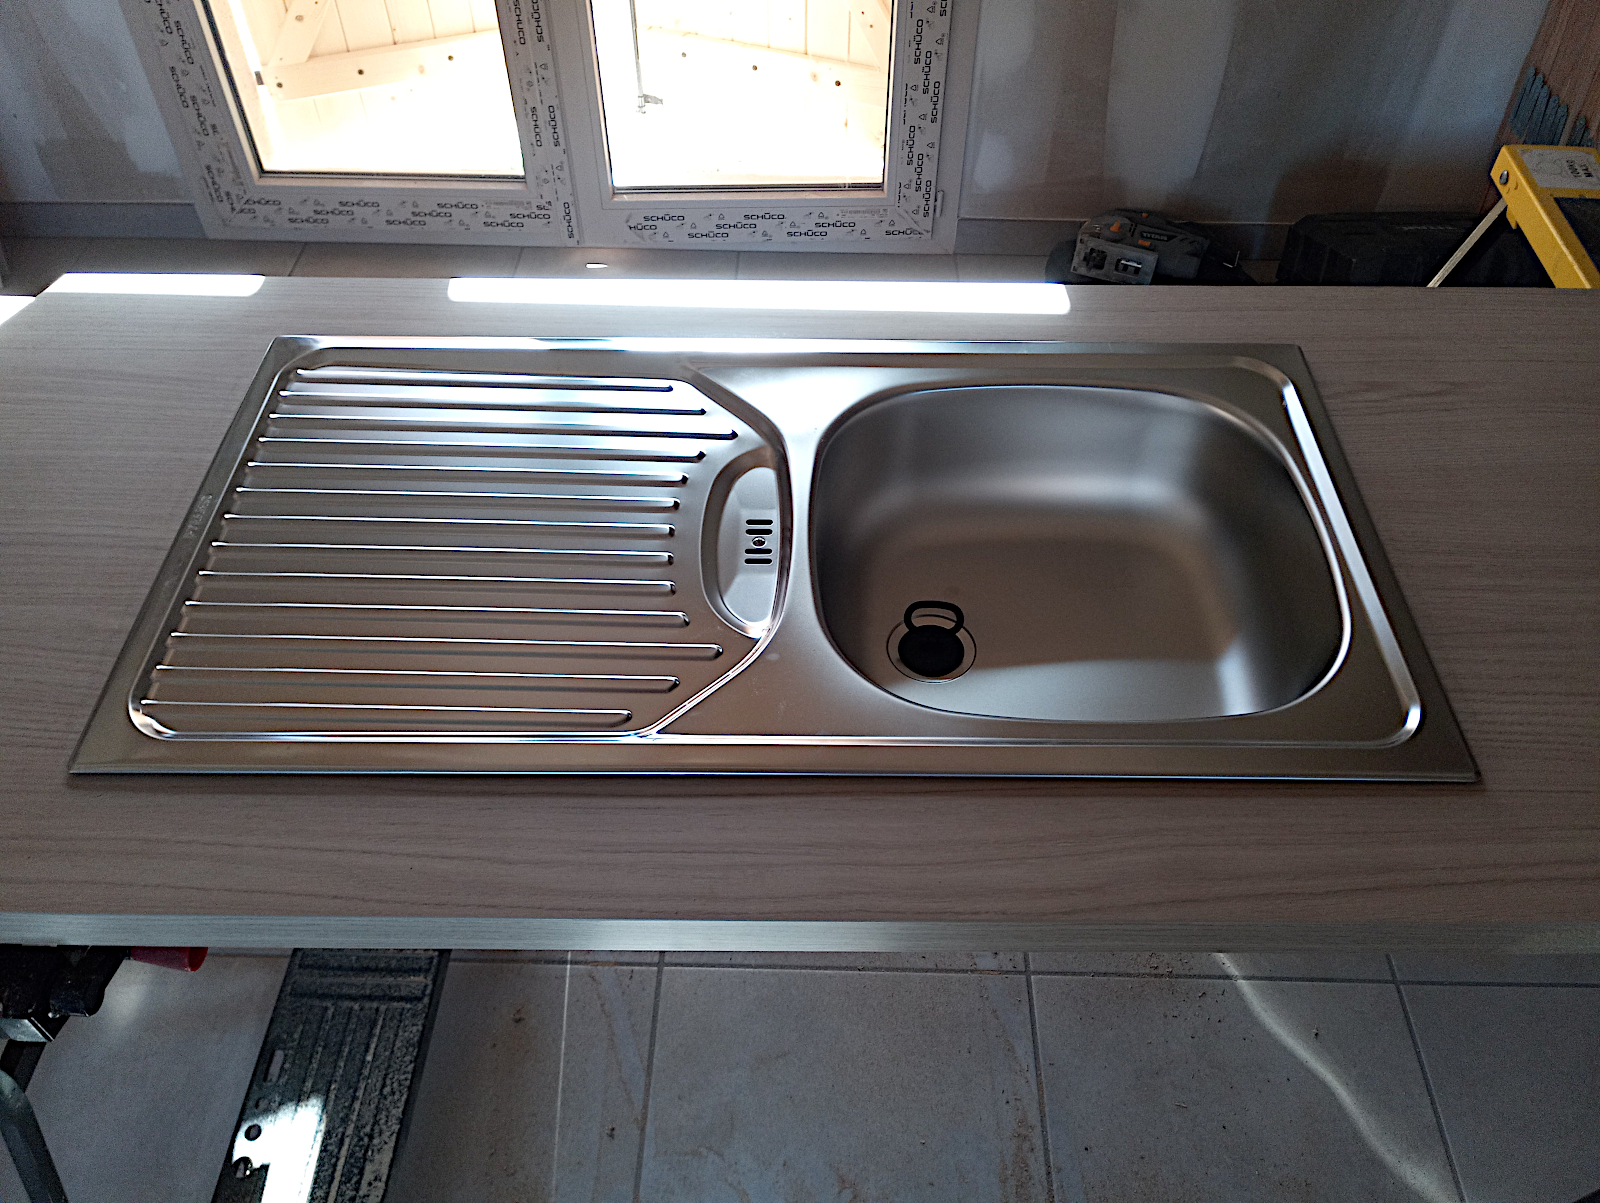
That’s as far as I got today. I need some more plumbing materials to plan for and eventually connect the sink, which arrived today together with the extractor hood. If it wasn’t for the fridge I’d now have everything for the kitchen to hand, except that the dishwasher is waiting to be picked up. I’ll do a rough cut on the second piece of worktop tomorrow and then go out to get what I need.

Things are moving more slowly than usual with this installation. I don’t know if it’s because it’s a bit ‘bitty’ or just that I’m now that much older (it was ten years ago when I did Val’s kitchen). I know for sure that I’m feeling more tired at the end of the day these days, so perhaps it is just old age creeping on 🙁

Another long day

With mixed results, as I’ll explain. I was up by 6.30 am and back working in the kitchen by 7.30 am as I’d received a message that my new fridge could be delivered any time from 7.00 am. It didn’t arrive until late morning, of course, but by then I’d managed to get well on the way to installing one of the swing out storage units in one of the corner cabinets. It didn’t help, though, that due to the instructions being unclear as to which unit was which (left and right) I’d begun installing the wrong one.

It was more frustrating than anything else as no great harm was done but not as frustrating as the events that transpired following the fridge delivery which I’ll go into a bit later on. I had to go back to the caravan and as I’d got up early and it was approaching midday I thought I might as well grab a bite to eat. Afterwards I could hear a strange noise and only when I exited the caravan did I realise that it was coming from the house.

The noise was mechanical and I thought for a moment that it was the tiler back grinding the bad tiles off in the bathroom, but it wasn’t. It turned out that the insulation men had arrived and were installing the insulation in the roof and the noise was the special truck-mounted pump that they were using to pump the fibre through a tube up into the roof space where a man was distributing it all around.

null

null

null

The fibre looks just like cotton wool and I was worried that it might come spraying out of the gaps around the LED lights, which are still awaiting installation, and be piling up on the floor. As it was I needn’t have worried as they knew what they were doing and although a small amount did come through it only amounted to very little.

null

null

Here are some shots of the finished corner storage unit. Each one is quite expensive at around 250€ but they are the only way to make effective use of the space in the corner cupboard, not that there’s still a lot left spare as the next (closed) shot shows. The cabinet door isn’t fitted yet, of course.

null

null

null

I learnt an unfortunate lesson from installing this storage unit, though. The cabinet on the other side is where the services for the dishwasher are located and as if it’s not bad enough that I have to cut holes in the cabinet back to accommodate them, I also found that quite by chance the plumber had installed the dishwasher shut-off valve at exactly the same height as the main frame of the storage unit.

null

I can’t wait for the plumber to return and lower it for me as that would mean that in the meantime my kitchen installation would come to a complete halt. I have to do the job myself which wouldn’t be a big problem in the normal run of things if copper tubing had been used. But it hasn’t. The plumber has used ‘multicouche’ tubing which is more or less a central band of aluminium sandwiched between an inner and an outer layer of PTFE.

It’s relatively inexpensive and quick and easy to install if you have the right tools, which is why they use it. But I don’t so I did a quick search on the internet to see if there’s any way around it. And there is, because as well as using fittings that crimp to the tube using a special (expensive) tool, you can also buy compression ‘multicouche’ fittings for small jobs – like this one.

I managed to get this information in time for me to get over to Leroy Merlin before they closed at 8.00 pm and was delighted to be able to get exactly what I needed in the form of a special tube cutting tool and a wall bracket that will accept a direct compression connection to the ‘multicouche’ tubing. And while I was at it, I also got hold of a sheet of hardboard with one white face to replace the cabinet back that I cut a large hole in for the dishwasher shut-off valve that will now be in totally the wrong position.

null

That means I’ll be able to cut the vertical tube to lower the height of the shut-off valve and reattach it to the wall using the new wall fitting. The latter will be a big improvement on the one the plumber fitted as it’s more compact and also silver rather than bare brass. More on this tomorrow.

null

So what about the fridge? Two youngish men dropped it off without any delivery paperwork and high-tailed it after dropping it inside the house before I had a chance to check it. And naturally when I did (immediately) it had a dent in the door.

null

I informed the supplier of this within 20 minutes of them dropping it off but they have already tried to quote some regulation or other to me to the effect that as I signed the delivery paperwork and accepted it they can do nothing about it. If they think they can get away with that they’ve got another think coming. There was no delivery paperwork and I therefore didn’t sign for and accept it so a new battle starts tomorrow. It’s something that I just don’t need right now but sadly this is how French ‘client service’ works. All they want is your money.

Pressing on

Today it was time to tackle the worst part of this whole install. There will be some other tricky bits still to do as will become evident as the installation proceeds but they will be nothing like as difficult as today’s job, which was to make cut-outs in the long right hand unit in various places to take the services for the dishwasher and the rear outside tap.

Here’s what was involved in cutting a groove in the end panel of the cabinet to accommodate the pipe for the latter.

null

null

It’s not pretty but it will not be visible once the cabinet is fully installed into position together with its internal swing-out storage unit.

null

I also swapped out the dishwasher tap that the plumber fitted. It was much too big and I changed it for one that I much prefer that I obtained on my last visit to Leroy Merlin.

null

I then made my first big mistake of the installation when I cut out the lower right hand corner of the cabinet to take the dishwasher waste pipe. I took much too much out of the floor – I don’t know what possessed me because I could see that it was only holding the cabinet 1/2 cm off the wall so that’s all that was needed to be removed. But never mind, it’s not in a place where it will be highly visible and it’ll be an easy thing to disguise as you’ll see later.

null

It took me all of five hours to do the work on the end cabinet and another hour to get the other two adjacent cabinets ready to be installed and clean the place up.

null

null

null

The vertical sheet of Contiboard that is between the two cabinets is there because I was deciding how to use it to join them. Brico Depot supplied two special joining pieces but they cannot be used as they require the right hand cabinet in the pictures to be stood 3cm off the wall. I can’t do that as I don’t have the space so I’ve now worked out how to make my own joiners and the two special ones can be returned for a refund.

The work is quite physical as I’m having to lift the cabinets and manhandle them by myself taking great care when I turn them over not to break the legs off in the process. So I was quite tired by that time and decided to call it a day. But I didn’t just stop work, far from it.

I needed to order the ‘hotte’ (extractor) from Leroy Merlin which I did and got a better price than when I looked originally. I also needed to order a sink (Amazon, price again reduced), a mixer tap (‘mitigeur’, Amazon price increased but I got a reduced price one with damaged packaging). I also need a sink waste trap so I ordered that at the same time and all of the above will be delivered on Thursday.

The dishwasher will also be delivered on Thursday which is a great relief as originally they quoted a 10 day delivery delay. I couldn’t finish off the cut-outs on the large cabinet today because I need to know how the inlet and outlet pipes are arranged on the back of the dishwasher in order to avoid the mistake the plumber made in the utility room and have them crossing over.

This means that I won’t be able to do very much tomorrow while waiting for these deliveries. I think it might be a good idea to clear the kitchen of tools etc, mask it up and paint the ceiling and coving. That would have the additional benefit of finally allowing the LED spots to be fitted in the ceiling instead of hanging there like roosting fruit bats 🙂

More kitchen

My main aim for today was to get all of the floor units on the left hand side of the kitchen permanently fitted in position and I did that in three hours before stopping for a light lunch.

null

null

null

In the photographs you can see that I used some of one of the items that I purchased yesterday from Brico Depot, a sheet of white Contiboard, to pack the cabinet on the far right 16mm or so off the wall. I did that because the length of the wall against which the cabinets are fixed is a few centimetres longer than in my plan and if I hadn’t added the packing, the gap at the other end would have been considerably wider than the 60cm needed for the fridge.

But not only that, the wall cabinets will be aligned with those mounted on the floor and therefore there would also have been a large gap between the wall cabinet on the left end and the wall which would then have needed filling in some way. As it is now, I will pack the wall cabinet on the right end away from the wall by the same amount as the floor cabinet and this will leave a similar gap between the left hand wall cabinet and the wall at that end which I’ll fill with an equal amount of packing, so the whole arrangement is balanced.

The installation of the floor mounted cabinets on the other walls of the kitchen will be much more complex because of the need to ‘build in’ the pipework and services. Apart from the appallingly large ball valve that the plumber has put under the sink, which seems to be completely unnecessary as all it does is shut off the rear outside tap, installing the sink taps and waste will be fairly straightforward.

Dealing with the dishwasher is not so and I’ve been thinking how to accommodate its supply and waste which will be behind the adjacent cabinet. And installing that cabinet will be further complicated by the need to cut a large notch or groove out of its end that abuts against the wall because the supply for the outside tap runs up it and will otherwise prevent the cabinet touching against the wall.

I’ve now decided how to do it and as I want to get all of the above installed tomorrow together with the cabinet that the sink will be mounted above I ended up going off to Leroy Merlin again to get what I’ll need. Better to use late afternoon time today than to waste half a day at least tomorrow when I can be cracking on doing the job with the whole day ahead of me.

Moving along

I didn’t quite know how to organise my time today because I was awaiting a delivery scheduled for between 1250-1350, wanted to get some more work done in the kitchen and also needed to get some materials from either Brico Depot or Leroy Merlin so I can continue working tomorrow. I thought that I might as well carry on working on finishing the floor mounted cabinets while I was waiting and lucky I did because the delivery was over an hour late and I got quite a bit done in that time.

I finished off the oven unit including the below-oven drawer and couldn’t wait to see how it all worked with the oven in place because the measurements that I’d worked to were a bit vague. In the event I needn’t have worried because it turned out to be perfect.

null

null

Here’s the item that I was waiting for after I’d removed its packaging so I could make sure that it wasn’t visibly damaged in any way. It’s the ceramic hot plate.

null

null

null

So it’s so far, so good. I had to go to both Brico Depot and Leroy Merlin to get the items I wanted so got back too late to do any more work. But it means that I’ll be able to make a flying start tomorrow and will hopefully be able to get quite a bit done 🙂