Stunning flying day

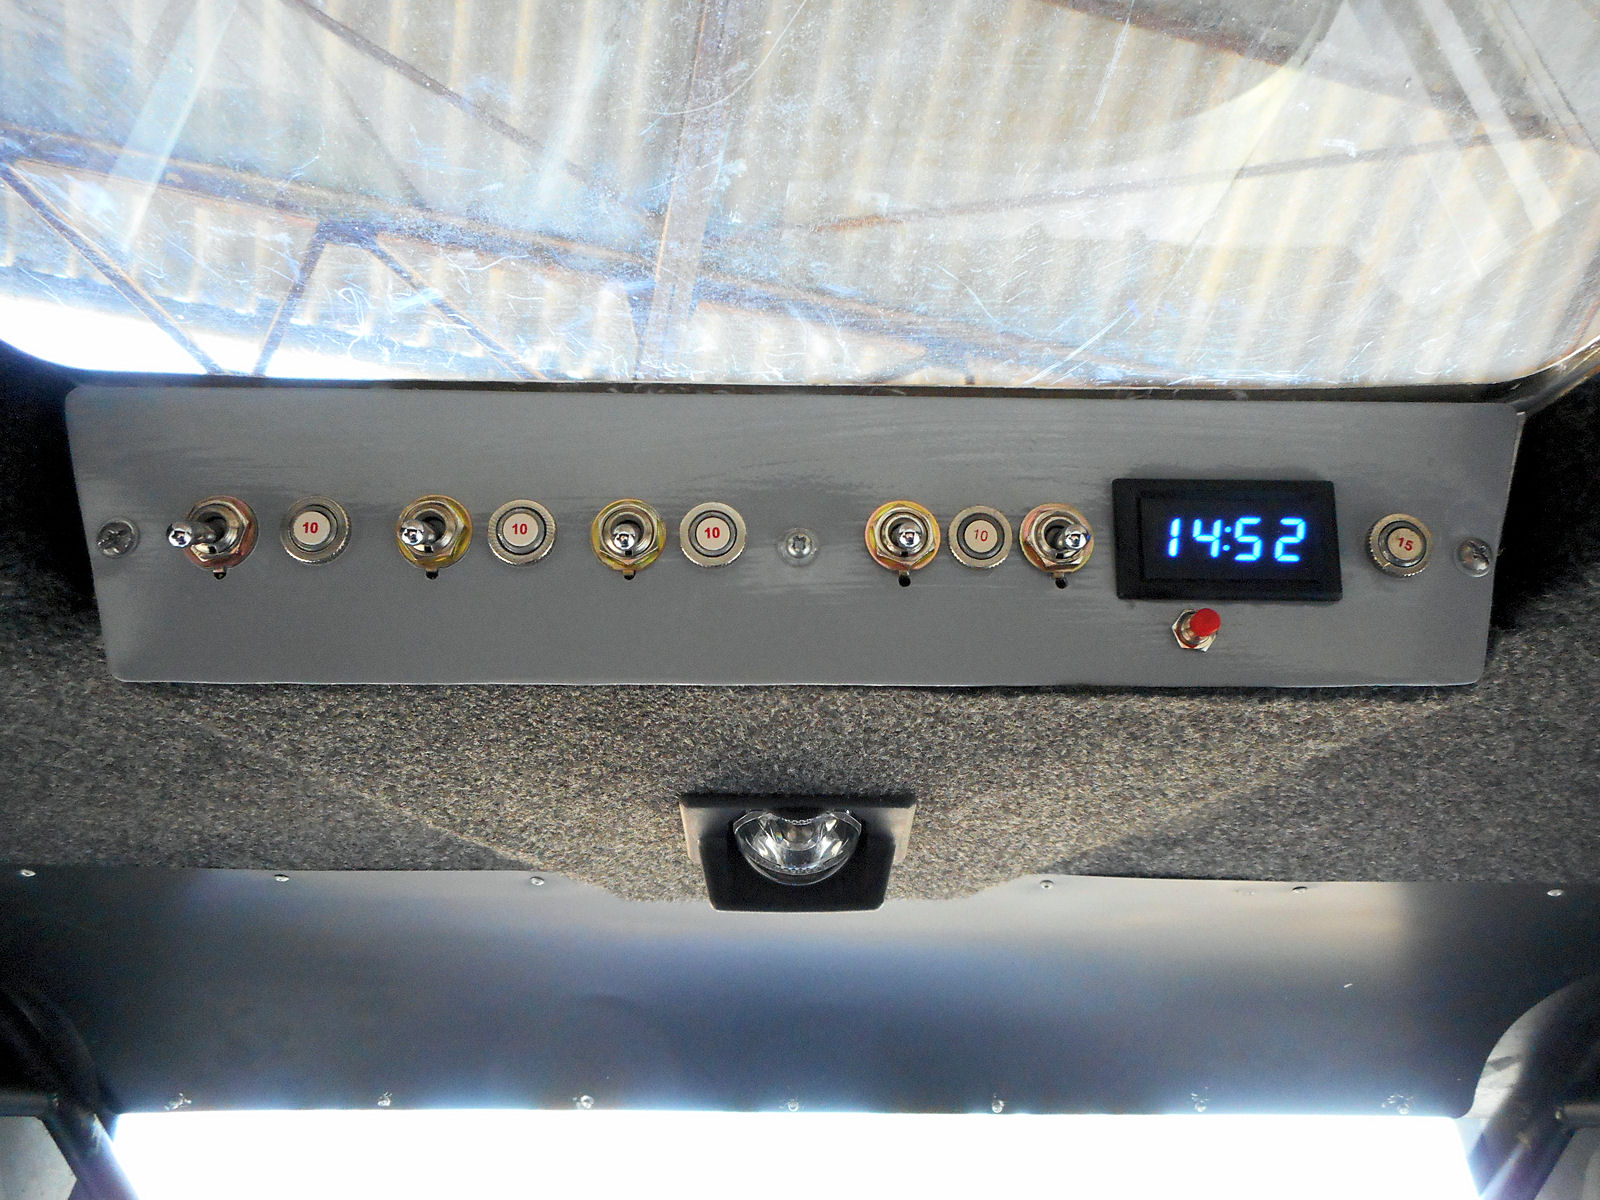
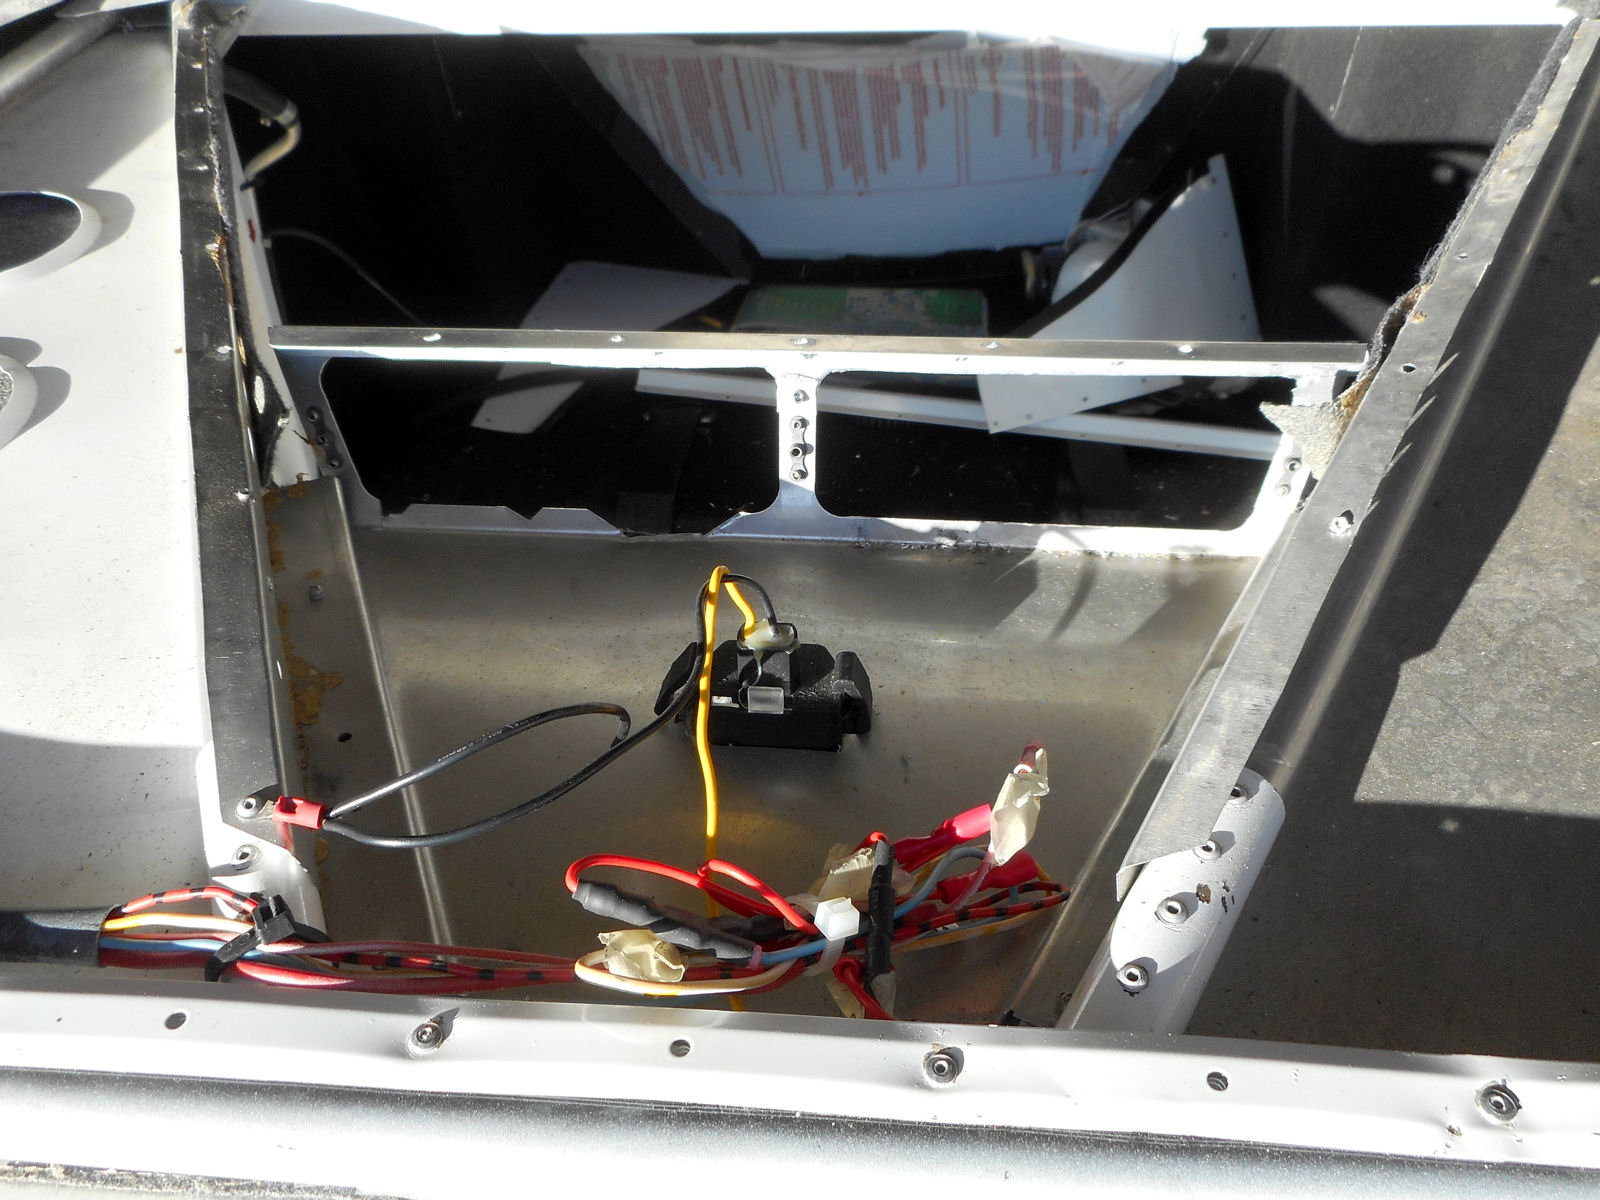
Afternoon actually. We had a high today as forecast of around 15 degrees Celsius, clear blue sky with bright sunshine and little or no wind, but a dirty little low level immersion as a result. But no matter. As yesterday I finished all of the work on the Savannah to do with fitting the replacement screen, changes to the electrics and installing new strobes (just the new landing light now left to do), as I haven’t flown it since August when the damage to the screen occurred and as Malbec, our home strip, is an ‘altiport’ (land up-hill, take off down) of only 160 metres, I thought that it’d be a good idea to get some landing practise in.

We are very lucky as we have a whole bunch of airfields of all types and dimensions within just a few minutes flying time but for the exercise today I chose the following:

Take off Malbec
Landing 1 – Belvès LFIB (conventional, 800m grass runway 11/29)
Landing 2 – Castillonnès LF4722 (conventional, 450m grass runway 15/33)
Landing 3 – Sarlat Domme LFDS (conventional, 747m tarmac runway 10/28)
Landing 4 – Galinat LF2461 (altiport, 450m grass runway 16/34)
Landing 5 – Condat sur Vézère LF2423 (altiport, 600m tarmac runway 17/35)
Landing 6 – Malbec LF2467 (altiport, 160m grass runway 02/20)

Here’s a shot of the route.

null

The total flying time was only 1 hour 52 minutes, the shortest leg was just 11 minutes and the longest only 32 but the enjoyment and satisfaction was out of all proportion to the time involved. And to top it all, I at last got my little camcorder working on a power pack and without vibration in its mount, so I got it all on video. Editing that should keep me occupied during the long winter evenings.

There were one or two interesting incidents along the way. For the first time since Wim and I have been landing there, there were other aircraft parked on the apron at Condat and the pilots of two of them were standing chatting together. I passed the time of day with them for a few minutes before they left, one in a Zenair 701 clone and the other in a rather odd looking little biplane.

While they were leaving, I noticed a gyro on the dead side, which you are not supposed to fly over because of houses, and before I taxied to take off myself, I failed to notice that he’d turned in tight and was going to land. I didn’t even see him on final and as I was about to enter the runway, the gyro shot past above and in front of the Savannah. So that was a lesson learned. I’m used to just looking out for other fixed wings, but gyros are much smaller and less noticeable, so from now on, I’ll take even more care looking up the final approach path.

It then became a bit like Piccadilly Circus with busy traffic. As I took off and climbed out, I kept a special look-out for the gyro just in case. I didn’t see it, but as I glanced to the right straight into the sun I caught a glimpse of another fixed-wing in the glare of the sun just beginning to turn onto base leg. That was enough for me. The Savannah climbs like a lift when asked, so I pulled up the nose and climbed out of there before any other unexpected traffic appeared. And of course, nobody was talking on 123.5 as they could have been…

But that wasn’t all. As I was heading west straight into the sun at about 1700 feet, suddenly I noticed another aircraft below me and to the right. It was a retractable flying on about the same heading and overtaking me at about 300 feet below. The sun being so low made it difficult to see very much and I was worried in case he was flying with a partner aircraft, but all I could do was pull right to place him on my left where I could see him better.

As I turned left towards Malbec overhead Wim’s field I watched as he slowly disappeared into the distance. I didn’t see any other aircraft, though, and shortly after I was very pleased to do a perfect landing at Malbec without further incident.

I now have family visitors arriving tomorrow for the next month, so this could be my last flight of 2016. If so, it was a really good one 😉

Awesome!

My son departed for home on Tuesday so I was straight back to work on the Savannah yesterday. The first thing I did was connect up the new strobes to make sure that they worked properly and the title of this post is my reaction when they burst into life! It’s a much over-used word these days, but I was extremely impressed when I wired them up on my kitchen table and ended up with blobs in front of my eyes for several minutes!

null

null

I connected them into the Savannah yesterday but apart from testing them, I couldn’t finish the job as the fixing screws that I needed were smaller than those that I had available. I couldn’t wait to finish the job off today and here are the shots of the new strobes mounted at last on the Savannah’s wingtips.

null

null

null

So with that job done, it was time to move on to completing the work on the panel. First a shot of the new high level switch panel, finished at last and mounted in position.

ICP Savannah switch panel

I love the little electric clock that I decided to fit and think that it was a very good decision. It only illuminates when the master switch is turned on and has an internal battery so as to retain its settings when the power is switched off. Here’s a close-up view of it.

null

The little red button is one that I’ve had in my box of electrical bits for over five years, since I was adapting the radio push-to-talk in my pal Ken’s X-Air back in the UK. It’s one that I rejected then as being too small for that application but has turned out to be perfect for this job.

It’s used to select the clock’s various functions: Time Hours/Minutes -> Time Seconds -> Date Year/Month -> Timer. It works like a charm and will save my having to use my watch for navigating by. And I also think that it’s great in blue 😉

And finally for today, the big one – sticking on the new screen top covering. I decided to use slow-curing (about 1½ hours) PVA glue in preference to contact adhesive because I wanted a glue that would allow me to move the covering around so I could get it correctly positioned and would also be easy to clean off any excess, smears etc when I was finished.

PVA satisfied both of those requirements and it seemed to work fine, although I’ll know better tomorrow when it’s had time to fully cure. I also attached one of the rubber trims that I had delivered a few days ago as an edging and also fitted the compass. Here’s how it turned out.

null

It has been hard work and a bit of a long haul, but I’m very pleased and think that all of the work has been worth it. The rubber edging isn’t quite right, but I can deal with that at any time in the future.

So all that’s left is to fit the new landing light. Apart from that, 77ASY is at last airworthy once again and who knows, with a bit of luck I might be able to get it back up in the air this week-end as on Saturday we’re expecting 15 degrees, a clear sky and light south-to-south-easterly winds. Should be more or less perfect 🙂

LED landing light

The Savannah’s landing light worked when I first acquired the aircraft but now it doesn’t. I’ve checked that there is current present, so the bulb has failed. It’s a pathetic little halogen (I think) lamp of the type used as downlights in kitchen and lounge ceilings. It’s only been fixed in using silicone sealant so changing it should be easy and I’ve been looking around for a suitable replacement.

High power LEDs are the thing nowadays and after looking around for something of about the right dimensions and brightness, I came across the following Chinese (naturally) item.

null

So for around 12€ including shipping to France I got myself in effect a pair of landing lights. They are 70mm in diameter with a depth of 45mm and should be quite easy to mount in the Savannah’s nose after slightly enlarging the existing hole. And with 9 LEDs and 27W power, they should be well up to the job, plus they don’t look too bad either.

So do they work? Take a look at the following and decide for yourself.

null

They are excellent. And with a projected life of over 5000 hours, this should be the last time that I have to replace one. But on the other hand, I do have a spare, don’t I 😉

I couldn’t resist it

It was such another lovely morning that I just had to get over to Malbec and sort out the Savannah’s new panel top covering. While I was at it, I also gave its cabin a good clean out to remove all the dust and mess that had fallen into it due to the work over the many weeks previous.

I knew that I wouldn’t have the time to complete the whole job but I just wanted to get the covering cut to shape and into position on the panel top, ready for sticking down. And that’s what I managed to do before calling it a day and dashing home for a quick bite to eat before starting on the work to get my house ready for my son’s arrival in a couple of days time.

Here are some shots of the results.

null

null

null

I’m very happy with the final outcome and think it’s a big improvement on what was there before. It won’t take much to stick it down, mount the compass and find some proper edging (what’s shown is the rubber moulding that was left over from what I put along the bottom of the new screen).

A few minutes ago, the postie beeped her horn and delivered the little clock/timer that I ordered from China to go into the cutout in the new switch panel, so that’s handy. And not only that, I’ve just received an email to say that my recently ordered new strobes that were on back-order have been despatched and are on their way. So life is looking up 😉

Yes, OK, I know…

I said that I’d have to stop work on the Savannah to start making preparations for my son’s visit in a few days time. However, with a high of 16 degrees Celsius forecast and the next stage involving a bit of painting and the use of silicone to seal the new screen, both benefiting from being done with a higher temperature, I couldn’t resist going back to Malbec today.

The first thing I did was clean up the area just forward of the new screen rubber and apply some bare metal paint. And while that was drying, I turned my attention to fitting the new high level switch panel. Here’s a shot of it – rather poor I’m afraid, because yet again I forgot my camera and had to use my phone.

null

I had to leave the strobes unconnected because the old ones are still installed and I don’t know what would happen if they were connected direct to power rather than through a control box as was originally intended. The wires emerging through the cut out will be used for the new digital clock/timer that I’m still waiting to arrive from China.

Then it was back onto the new screen and applying a bead of white sealant between the rubber and the fuselage. Despite the bit of a mess that I’d been left with by whoever had last fitted the screen, it didn’t come out too badly.

null

null

Now all that’s left to do is to fit the new panel top covering. That shouldn’t take very long but I’ll have to think very carefully before dashing to Malbec to do it tomorrow in case that won’t leave me with enough time to get ready for my son’s arrival. But it’s very tempting I have to admit… 🙂

Topless no more

I was furious last night because of what had happened earlier and because of a combination of that and a large pot of coffee that I consumed during the evening while watching the UK Championship snooker, when I went to bed at shortly after 1.00 am, I just couldn’t sleep. As a result, I was up at around 4.00 am cutting out the new roof plastic for the Savannah 😕

I managed to get to sleep when I went back to bed but still awoke at about 8.15 am, so not a very restful night. I finished off drilling the new roof plastic that I’d cut out earlier and left for Malbec after a delayed breakfast.

I went resolved to completely remove the roof panel that I’d all-but completely fitted yesterday as I knew that it would be very difficult fitting the roof window with it half-in because of the danger of geting everything smeared with silicone. I also reasoned that if I completely removed the panel and started again, it would give me a chance to re-touch the painted areas around the rivet holes that would inevitably get damaged when the rivets were drilled out.

It turned out to be a good move because although it was a long job, this time everything went smoothly and I got the roof and new window panel fitted by the end of the day. Here are the shots of the finished job.

null

null

null

null

I still haven’t fitted the new switch panel because Victor dropped by just as I was finishing attaching the roof and when I was done, I went off for a cup of tea with him and Madeleine. This now leaves just the screen seal and panel top covering to be done, so about another couple of days work. However, I will have to stop for now because my son is arriving for a long week-end later in the week and I have some preparations to make in advance of his visit.

So a bit frustrating but I’m glad to have the Savannah closed-up and weather-proof again, and much as I’d like to, it won’t be ready to fly until I’ve finished off the outstanding work. I’ll sleep better tonight, I think 😉

Disaster!

A classic case of seizing defeat from the jaws of victory. And it all started so well too.

The first job today was to lift the roof panel back off again and finish off sorting out all the wiring. Mainly that included the wiring for the strobes but there were also a few other bits and pieces, like extending the main live lead and making a connection for it and making sure that any existing cabling that I intended to re-use was in good shape.

Here’s a shot that I took of the back of the repair that I did to face of the tray that had been butchered previously on which the new switch panel will be mounted.

null

And here’s a shot after I’d finished all of the wiring including connecting the strobes.

null

I think that at least it’s a bit neater and tidier than what was there originally.

Anyway, it was after this point that the disaster occurred, although I didn’t realise that it had happened at the time. It was now time to refit the Savannah’s roof, a moment that I had been looking forward to for weeks. The roof contains a clear polycarbonate window that I was also replacing as part of the screen work.

The roof window is ‘the meat in the sandwich’ between the roof panel and the underlying roof framework and as the old one had been leaking, I thought that I’d mount the new one with a bead of silicone to prevent it from doing so. It was while I was delicately lining everything up at ground level and inserting the first row of pop rivets that I was distracted by someone turning up and engaging me in conversation.

What I didn’t realise was that in the process while I was talking, the window had moved. And I didn’t find out until the roof had been fully attached to the aircraft. It can’t stay the way it is and I’ve already drilled out the rivets holding in the window. The more I think about it, however, it’ll be easier to rectify the mistake by taking the whole roof panel off again and starting over.

That’ll unfortunately have to include cutting and drilling a new roof window, but luckily I still have enough plastic to do that. I’ve brought the old one home again to use as a pattern and I’m trying to decide whether to do that this evening or in the morning. As it’ll probably be a bit too cold to work over at Malbec first thing, I guess the morning will be the best time 🙁

New switch panel – first look

Using the Savannah’s old switch panel as a template, I cut out the shape from the left-over aluminium sheet that I thought would do the repair on the tray to which the panel is attached and which had been so badly butchered by someone in the past. As it happened, it turned out to be not too far off and after a bit of jiggery-pokery I managed to get the repair done. Here’s a shot of the finished item.

null

It was far from easy actually because not only did I have to get the dimensions about right and the three holes for the mounting screws to line up to accept the new switch panel, but I also had to attach the bracket on the rear surface of the tray front in exactly the right place so the holes in it lined up with the pop rivet holes in the roof panel. It ended up looking not very pretty but the important thing is that it’ll do the job and it’s also much better than the butchered state in which the last person left it.

But in any case, it’ll be almost totally covered by the switch panel itself, as the following ‘first look’ at it roughly in position shows.

null

It will eventually look much better when it’s fully installed because as the picture shows, there’s a big gap along its top that will disappear when the roof panel’s pop rivets are inserted. I had a couple of disappointments along the way, though.

Firstly I found that there’s a step that I hadn’t realised was there in each lower corner of the tray to which the panel is attached. Unfortunately, the 15A master circuit breaker on the right hand side just fouls the step on that side, meaning that it will have to be rotated very slightly. Not a disaster, but just bad luck for the sake of a few millimetres.

Also, while I was testing the mounting hole alignments, one of the screws popped out and landed on the seat beside me. For the life of me I’ve been unable to find it, despite taking out the seats and looking everywhere inside the cabin for it. The screw is ‘special’ as it’s part of the panel fittings but luckily Victor was able to help me out with a couple that don’t match the existing ones but will at least allow me to press on towards finishing the job tomorrow.

So tomorrow I’m hoping to get all of the wiring in place, including that for the new strobes that the supplier has told me are on 5-10 days back-order. Typical. And with a bit of luck I might at last be able to get 77ASY’s roof back on again too.

Wired-up and ready

I finished wiring-up the Savannah’s new high level switch panel today. I had to nip up to Boulazac, near Périgueux, to buy some more crimp-on spade connectors as I hadn’t realised how close I was to running out, but I got there in time before the store closed for lunch – just!

Here are some shots of the wiring from various different angles.

null

null

null

I’m pleased with the outcome and think that it’s a big improvement on what was there before. The trailing blue wire is the live to the clock/timer that’s on its way from China. All that now has to be done is to run the live to the main panel circuit breaker and connections to each of the systems that the switches connect to, so easy-peasy to connect up from now on in.

I’m now ready to go ahead and repair the tray on which it’s mounted and with a bit of luck, the Savannah will be finished by this week-end bar attaching the new strobes that I’ve ordered, as I’ll have already connected and run the new wing cables for them, and connecting the clock/timer when it arrives.

I was also very pleased to receive a ‘variomètre’ (vertical speed indicator) at lunch time when the post arrived that I recently bought off Le Bon Coin for 28AAD, my French Weedhopper. Here’s a shot of it.

null

It’s in excellent, new-looking condition. I was originally going to buy a new one from the Flylight web site in the UK but the delivery charge to France was too high and made it uneconomic. So this one for 135€ including postage from Marseilles fitted the bill nicely and with it the Weedhopper will be fully complete and airworthy 😉