Tooled up ready for business

No, I’m not off to wreak mayhem and start a brawl with a rival gang (for those who like to plumb the depths of East London slang). In fact I popped down to Toolstation this morning and bought myself a spray gun to use with my new compressor, so now I’m all prepared to get going on spraying the pod. I actually went into Screwfix who had a spray gun I fancied in their catalogue but as before when I went to buy a heat gun, they didn’t have it in stock. So on two recent occasions Toolstation have got my business instead, for both the heat gun and the spray gun, and Screwfix have missed out.

And both times I’ve ended up buying modestly priced items from Silverline and both times I’ve turned out very surprised by just how good they are, let alone for what they have cost! For example, the spray gun cost only £17.72 including VAT and having tried it out, it seems to do everything I need it to. The Screwfix one I wanted was a bit more expensive but I’m very happy with the one I ended up buying, for less money. After all, I’m not exactly a professional sprayer and the results I’ll get from a £20 gun will probably be no worse than if I paid £100 for one 😕

Here’s a shot of it.

null

As you can see, it’s what is termed a gravity-fed model which has its paint pot mounted above the body of the gun. I mentioned previously that I already had a spray gun in my garage but that’s the old suction type with the pot below the body of the gun. I’ve found out that the gravity fed guns are much better for what I want to do. They are referred to as HVLP guns – high volume, low pressure – and as you might expect, they work at lower pressures than the suction type, some (but not mine) at very low pressures indeed, actually. And because of this, you get much less ‘bounce back’ from the item you’re spraying resulting in less paint mist floating in the air and more staying on the item. The difference is of the order of 2 times as I recall (2/3 of the sprayed paint from the HVLP gun ends up on the sprayed item compared to only 1/3 for a conventional gun), so the saving in paint can be quite considerable on a big job!

My new gun matches the output of my compressor very nicely and when I first looked, I was concerned that the connector it came with didn’t match the air line on my compressor. It was only when I switched over the connector from the tyre inflator that came with my compressor and went to pop the spray gun’s original connector back in its box that I realised that another, correct connector was in there already and had come with the gun! So I was doubly pleased. So the next time I use it will be ‘in anger’ (but not literally I hope) when I come to spray the pod. I’m looking forward to it 😉

Just came back to add a quick PS. Looks like the more expensive Screwfix spray gun is (wait for it….) also the Silverline, or is the same as, anyway. So I saved myself a few pounds there. Makes a nice change 😀 Mind you, that’s as far as my luck goes today. Today has been duller and cooler than recently with a little more wind, so not the best day for me to either start spraying the pod or attempt the panel repair which is something I have to do before I can start the repair work proper on MYRO. So I thought in that case, best to spend the time rubbing the outside of the pod down ready for spraying (the interior is finished, of course) and then get it masked up so when there is a suitable weather window, I can get onto the spraying straight away. Well, I got the rubbing down done OK and – yes, you’ve guessed – it’s now raining.

Thinking of last August when I lost over a fortnight through the weather waiting to ferry MYRO across for its check flight, I just hope that this won’t be deja-vu all over again, Rodney 🙁
All good news

You have to make the most of it while it lasts 😀

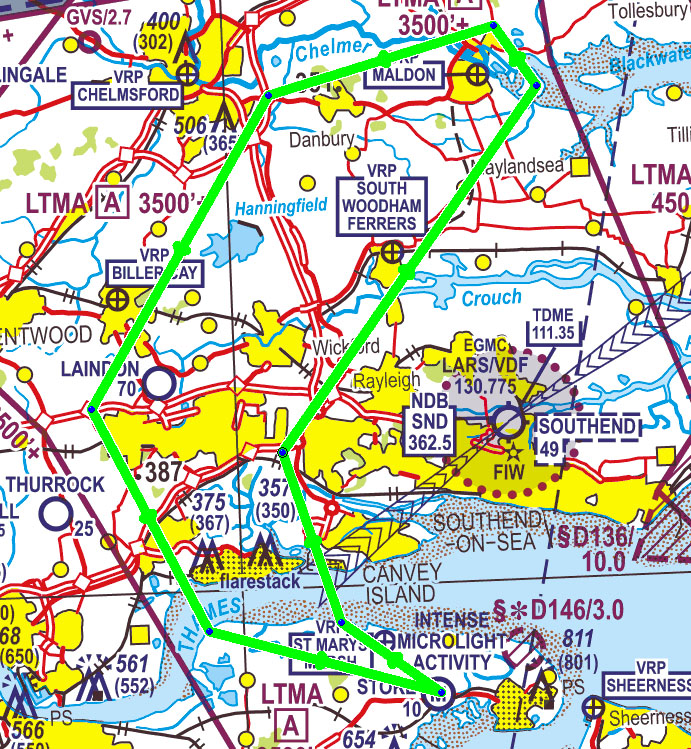
Ken and I had a super flight in the X’air yesterday. We crossed over the Thames and headed north-east up into Essex, up to Maldon and the Blackwater. It was more or less the next flight I’d planned for MYRO but the accident put the kybosh on that, of course. It was just excellent! Here is the route I’d planned.

null

The whole flight lasted for 1 hr 20 mins and except for the take off and landing which I did, Ken flew the whole lot. Apart from quite a bit of haze, which made it not worth my while taking any pictures, conditions were just right for him to get some stick time in – low wind, no gusts and not too many bumpy bits! Even so, I think he was quite surprised how tired he felt at the end of it and this is one of the things I found when I restarted my training after my long break away. You think that you could easily cope with a couple of hours every day, but it takes more out of you than you think 😯

I’d wanted to try out my satnav positioned over in front of me on the pilot’s side but as usual, you invariably forget something and that was it. Without it, of course, we had to do the whole flight visually and as Ken was flying, I had that job. I enjoyed it very much, actually, as even though I’d not flown over the area for many years, the features I’d chosen for our turning points were unmissable, even with the bit of haze we had. And fortunately I’d also fully planned the whole flight beforehand, so we had the headings and times for each leg already worked out.

Now onto today. More good news – my new compressor arrived today and thanks again to the Ebay seller for shipping it off promptly. A bit of oil had sloshed out in transit but I’ve already checked it over and run it. Here’s what it looks like.

null

It’s made by Wolf Power Tools so it should be of reasonable quality. It’s ‘new’ and unused and I understand that this model was sold as a ‘special’ in Lidl some two or three years ago, but I don’t know for sure. It doesn’t have the whole kit that it was originally sold with and just came with an air hose and a tyre inflater kit, which is fine by me as I have no need to do any airbrushing and already have a spray gun. I can’t wait to give it a go.

So things are moving forward quite quickly now. Chris approved my fuselage tubes and forks for use yesterday so I can now go ahead and fit them this week-end when I’ve sorted out the panel repair. That’s if I get the parts I ordered over the phone today from P & M. Unfortunately they phoned back with the total cost figure while I was on the phone, so I didn’t get the message until it was too late for them to get them out today. But hopefully they’ll still arrive in time for the week-end. And as soon as I’ve got my paint which I also ordered today I can get going on respraying the pod. That will definitely arrive by Friday so I hope that the good weather we’re currently enjoying holds up because then even if I don’t have the stuff from P & M, I’ll be able to do my panel repair and also make a good start on the pod. That will leave just the screen and wing and the engine to pick up from Mark, so with a fair wind I will hit my target of having MYRO flyable again in August. Here’s keeping my fingers crossed 😉

Every little helps

As forecast, it’s been a lovely warm day today. It didn’t look as though it was going to be because it started out rather dull, but when the cloud burnt off it became a bit of a minor scorcher. I had an important email to write this morning so when I’d done that and had some lunch, I thought I’d do the last remaining little job leaving the pod repaint as the next task. I had noticed that although the rudder pedals themselves were undamaged in the accident, the base plate on which they and the heel brake lever are mounted had suffered a little split on the pilot’s side. It wasn’t too serious and hadn’t even gone right through, but I decided that as the weather was so good, I might as well take the chance to repair it.

It’s a joy doing this sort of work in conditions like these. To start off with, I gouged the split out to make it a bit wider and deeper than it actually was and filled it with epoxy resin, which cured in double quick time. Then I skimmed a little fibreglass resin over the surface which also went off like lightning! Then some primer followed by some top coat and the job was done, in no time at all really 🙂

null

So all I need to do now is give it a rub over with T-Cut tomorrow when it’s had a chance to harden and that will be that. Not bad, I’m pleased with the way it’s come up and it will make the repair look little different to the way MYRO was before the accident. I made a list earlier today of the bolts etc that I need to order from P & M to replace the ones that were damaged and I’ll phone the order through tomorrow. I’ll then be nicely placed to move forward this week-end and who knows, I might even have the airframe repairs completed at the end of it with just the pod and screen to finish and fit.

And the cherry on the cake is that Ken goes on holiday for a few weeks shortly and wants to fly the X’air tomorrow as the weather forecast is so good. I suppose I’ll just have to make time for it 😉

Useful day

Another gorgeous flying day, but no flying for me again. The aim for today was to get all of the metal fuselage parts finished so I can get Chris to inspect them. I have to do this as a condition of the repair – they must be inspected by a BMAA inspector before they are fitted and as I’m going to the August club meeting on Tuesday and Chris will be there, I’ll be able to pop them in the back of my car and take them along with me. I had a few silly setbacks along the way eg the golden colour nose wheel spindle brackets are ‘handed’ (left and right) because of the way they have worn – having noticed this, I then proceeded to build the complete fork assembly before realising that I’d fitted them the wrong way round 😯

Despite this and chipping a couple of bits of paint off in the process, they came up pretty well – at least as good as MYRO’s originals that were damaged, I think.

null

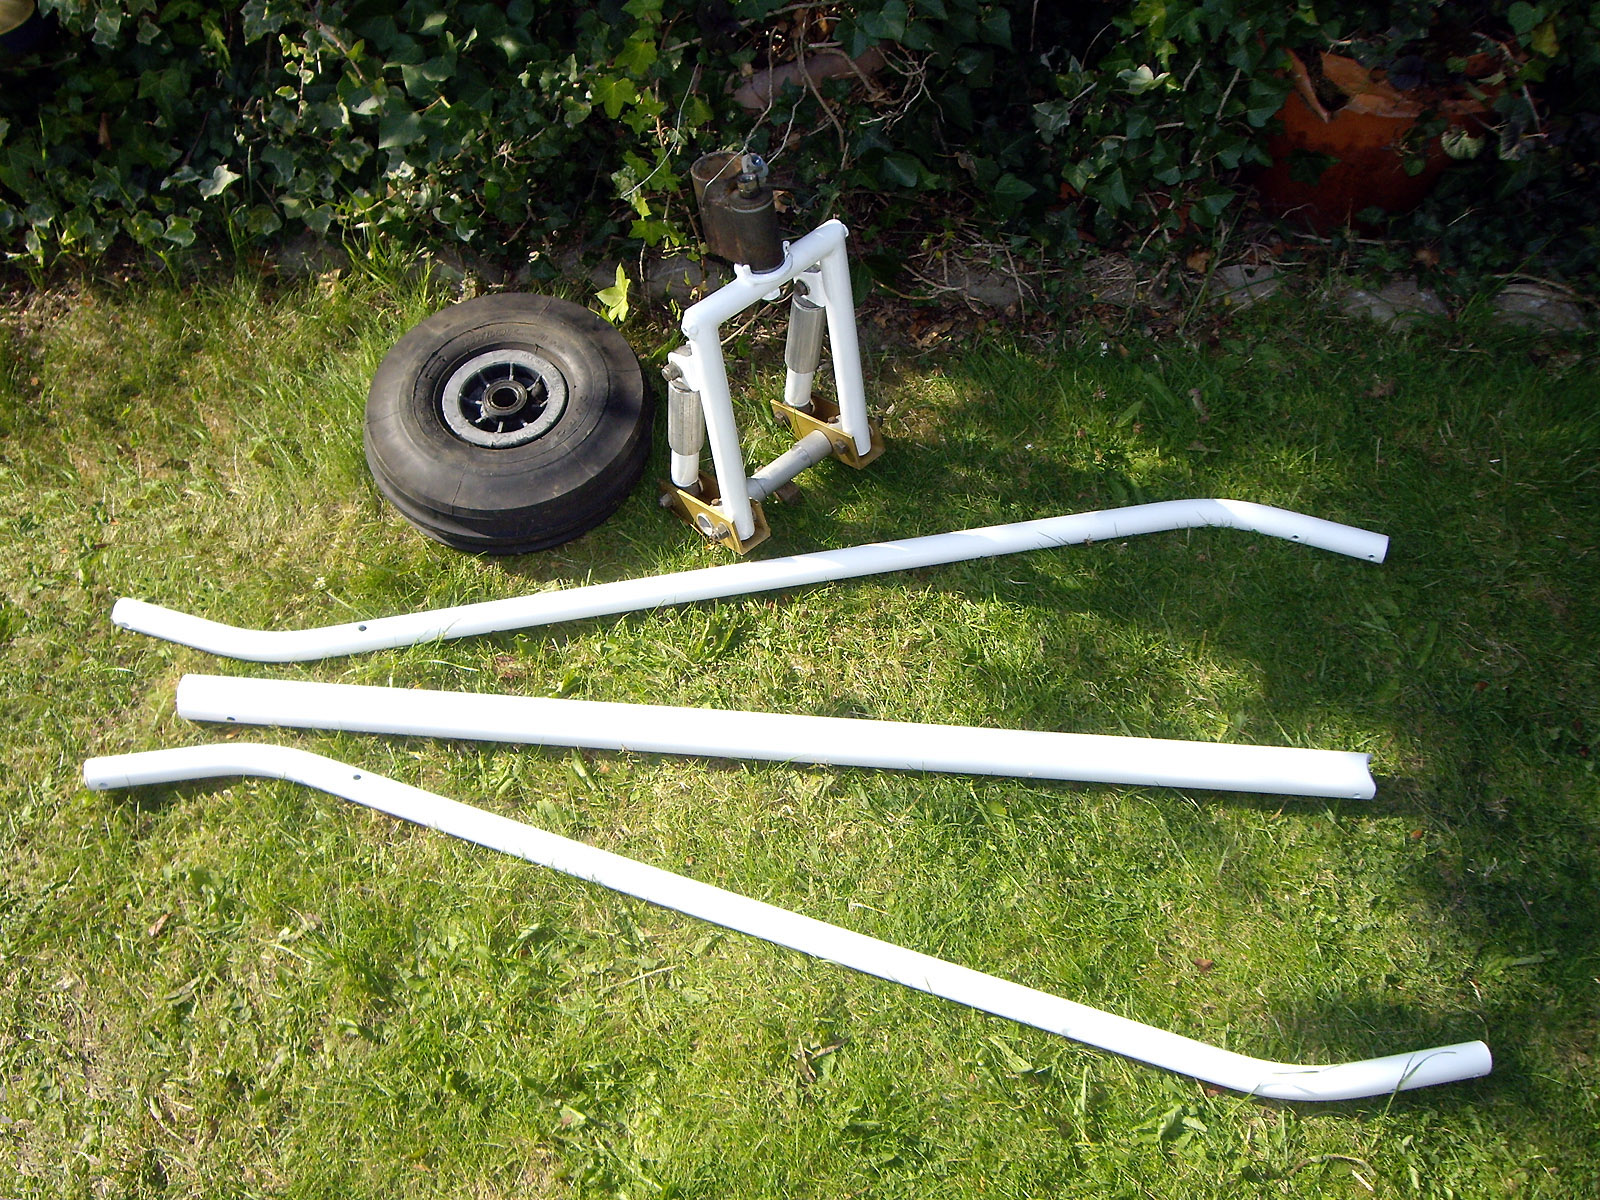
By cherry picking bits from MYRO and bits that came with the new forks, I ended up with a very nice fork assembly. I was able to use all MYRO’s nuts and bolts and both of MYRO’s suspension dampers which were undamaged, but I took the opportunity nevertheless to touch the paint up that I put on last year. I also finished off the nose strut, as I’d hoped I would, so here’s a shot of all the parts ready for inspection and eventual fitting.

null

I was very pleased with the progress I made today. I can’t believe how long it’s taken to get to this point, although in fairness I have spent most of my time working on the pod. Once Chris has given the parts his seal of approval, I can press on with fitting them. The first thing will be to remove MYRO’s screen so I can get unhindered access to the back of the panel to repair it. I’m still a bit concerned because having checked MYRO’s old panel in my garage, it looks as though the one in the aircraft could be a bit distorted following the accident. I won’t know for sure until I’ve separated it from the panel top so I’m keeping my fingers crossed until then, as I really don’t want to do a complete reinstall of all of the gauges and wiring if I can avoid it 😐

Time to get cracking

It was a glorious flying day today but I was on a different mission entirely. It was time to get started on MYRO’s repair – the weather is forecast to be good for both days this week-end and it looks as though we might get away without any rain this coming week too. So there will be probably be no better time to start stripping all the damaged stuff off the front of MYRO.

When I arrived MYRO was still nicely covered up, mainly because Peter had kindly checked the tarpaulin for me and placed some large blocks around the edges to stop the wind getting under it. Sure enough,when I pulled the cover back, MYRO was just as I’d left it.

null

The damage doesn’t look too bad from the right – it’s when you look from the other side you get an idea of the extent of the problem.

null

You can see inside how the main force was taken by just three tubes – the nose strut and the two bottom tubes that you can see in the cabin floor. I had to cut them and the pod as there turned out to be absolutely no chance of saving and repairing that, but I was able to unbolt the nose strut at the top and remove it in one piece so I could recover the swivel bracket on the bottom that holds the forks.

null

You can see in the above pic how the floor tubes were very badly distorted and it turned out that both of them were very nearly fractured right through. But what I find remarkable is that even with the severity of the impact, the effects were limited to what is really only a small section of the airframe and also to such a small number of tubes. It just shows how incredibly strong these little beauties are. I found that nearly all the bolts in the affected tubes were bent, again an indication of how the forces involved were absorbed and limited to just this small area. The nose strut was bent like a banana as was the large bolt passing through it that holds the forks swivel bracket on and secures the two cabin floor tubes to it. You can see the bolt in question in the next pic.

null

See how the forks have bent sideways and folded right under, snapping one of the steering track rods. Luckily I found that the rudder pedals themselves were not damaged and in fact the paint that I put on them last year is hardly even scratched! Unfortunately I can’t say the same about the panel. I knew that the bottom of the panel had suffered some damage and I was originally going to have a go at repairing it today if I’d had time. However, I found that there’s a bit more damage on it than I originally realised. Ideally I would like to replace the whole panel front but if I did that, I’d then have the problem of refitting all the gauges and wiring and in effect completely remaking the whole panel all over again. That’s something I’d like to avoid doing if possible, so I’m going to check MYRO’s old panel front that I still have in my garage and see if the one currently in MYRO has been distorted in comparison in the accident. If not, I’ll have to have a go at repairing it in situ. I will be able to do it although I’d prefer to be doing it at home in my garage rather than in the open at Ken’s, but there’s no easy way to get it out because of all the wiring and tubes that are connected to it.

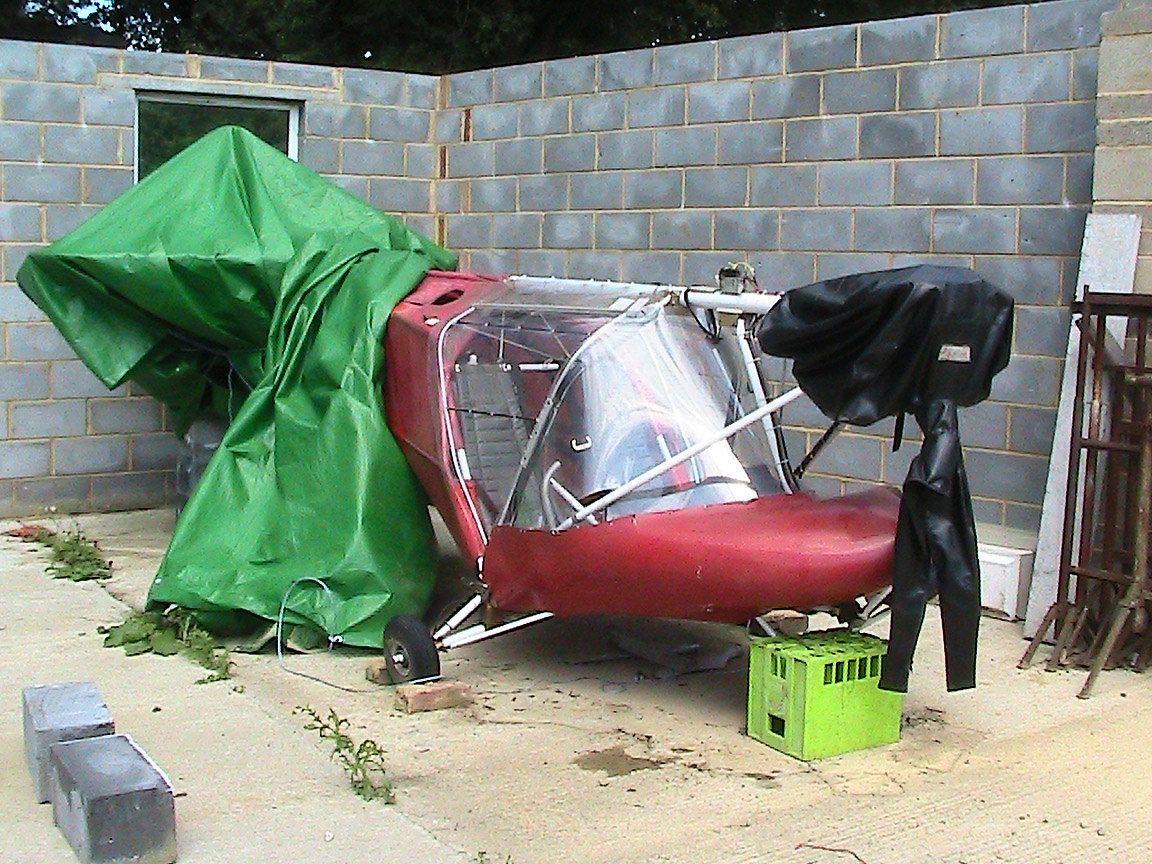
By the time I’d finished today, MYRO was looking a bit forlorn with its nose missing, but it’s just the same as when a dentist drills your teeth before putting in a filling – it has to be done and it’s worth it in the end. Mind you, MYRO really did look a bit sad as you can see below …

null

What did surprise me, though, was how little damage the screen had sustained. There is one split about 2 inches long running upwards from the top of the hole that the nose strut passes through but no other damage apart from a crease on the left hand side in front of the pilot. Many of the cable ties that secured it had snapped and some of the plastic bolts around the panel too, but the holes in the screen that they passed through had remained intact. Really strong stuff this polycarbonate! So it was time to cover MYRO back up again and head for home. I’ve left the engine cover on because with the engine off, the carburettors are inside it for protection wrapped in polythene.

After I’d done my chores this evening, I managed to get some more useful stuff done. First I primed the new nose strut which I could do now that I know that the forks bracket will go on even when the tube has been painted. In fact, the original nose strut was a single length of thick aluminium tube whereas the new one is the same thickness and diameter but made from two lengths of tube, one inside the other held in place by pop rivets top and bottom. I guess that’s been necessary because the original spec tubing is no longer available. I also stripped the old damaged forks and the rudder pedal assembly and tried the new forks in the swivel bracket for the first time. I’m glad to say they fit well. Then I recovered MYRO’s nose wheel suspension dampers both of which were undamaged and are better than the ones that came on the new forks, and all of the nuts and bolts that hold them on and secure the nose wheel. I’ll try and see if I can get the whole nose wheel assembly together tomorrow, and if I can get the nose strut top coated ready for use, that will be a nice bonus. I can’t see why I shouldn’t either 😉

Bit more done

Well, the two cans of paint that I found on Ebay arrived this morning so thanks to the seller for getting them to me so quickly. That doesn’t always happen on Ebay I can tell you, even for things bought from sellers in the UK 😯

After I’d got a couple of business things done in late morning, it took hardly any time at all to get the inside of the pod sprayed up. Here’s how it looked when I’d finished.

null

I have to say, it doesn’t look quite as good as when I did MYRO’s original pod. The reason is that the manufacturing quality isn’t quite as high – there are several dangly bits from the fibreglass matting that were left there from when the pod was originally made, for example – but I can live with it and once it’s fitted with all the tubes, the seats and the panel in place I doubt that the ‘imperfections’ will really be noticeable.

Any other news today? Er well, yes…. I bought myself a compressor off Ebay. I found it quite by chance because I’d been looking at several others that were all going up and up in price and hadn’t noticed this one that was ‘Buy It Now’ or ‘Best Offer’. Well, I made an offer which the seller accepted, so the deal has been done. And the best bit of it is that although the item is a couple of years old (I think), it’s ‘brand new and unused’. It’s also quite high power, so that’s another advantage as it will be suitable for ‘general purpose’ use as well as the bit of spraying I’ve got in mind. And if I decide to sell it on when I’ve finished the job, I don’t think I’ll have a lot of problems getting my money back, based on what the ‘used’ ones are selling for 😉

Ebay to the rescue…

Again! Last night I found two cans of Grey 03 on Ebay so I bought ’em. Will have to see whether I get them by the week-end but whether I do or not, I’m thinking I might start removing bits from MYRO anyway. I need the nose wheel spindle bracket from the damaged nose strut (assuming it’s undamaged, which I’m pretty sure it is) as until I’ve fitted it to the new strut and then sprayed it, I can’t begin the airframe repair work.

I’ve also been watching 5″ satnavs on Ebay and noting the prices. I’m thinking that as the 7″ model I’ve now got appeared a bit dim when I tried it in the X’air, a 5″ one might possibly be better as it’s nearer the size of my old MyGuide (4.3″) that got damaged in MYRO’s accident and which I found perfectly OK. Anyway, the best price that some lucky soul got was £26 with free delivery from Hong Kong, but that was exceptional. Mainly they’ve ranged in price from £36 right up to over £50 yesterday, so when I put in a bid of £31, I didn’t really expect to get one. But I did 😀

It’ll take a week or so to come and then I’ll be able to load my Memory Map software on it and see how it performs. If it works well Ken has said he might have one as well rather than go the conventional GPS route as, quite frankly, a GPS is rather hard work for the kind of flying we want to do. The other thing I’m watching out for right now is a small compressor. Yes, I admit it, I’m thinking of spraying the new pod red myself, rather than give it to someone else to do. I may be daft, but years ago I sprayed a Mini myself and did a pretty good job and I’ve still got a super spray gun from an engineering business I had a few years back that used to manufacture products that were sprayed, a few of which I did. Anyway, I’m only watching for now … 😉

Grrrrrr

I was hoping to be able to post that I’d finished spraying the inside of the new pod this evening, but I can’t. That’s because the new can of Carplan Grey-03 spray paint that I bought last week-end ran out of pressure with between 1/3 and 1/4 of the paint still in the can. So I’ve now got a large unfinished area which will have dry edges when I eventually get back to the job.

I’m so annoyed that I’ve already sent an email off to the Tetrosyl customer service department but that won’t help me this evening, will it. And I have to say that this isn’t the first time this has happened with paint I’ve bought before from the same manufacturer. Market leader indeed. Looks as though they could do with a bit of competition. With this kind of quality they wouldn’t stand a chance against another supplier with a half-decent product 😡

I should be working…

… but you know how it is 🙂 As it’s warmish and there’s little wind, I thought it would be a good time to spray the inside of the new pod. I’d also been thinking about strengthening a couple of holes in the pod floor that take the main suspension bolts. I didn’t do it when I did the other work, so as this would be the last chance, I thought it would be a good idea to epoxy in a bit of fibreglass mat as backing to each one.

I then cast my eye over a large sheet of glass fibre that someone had stuck inside the nose of the pod to ‘strengthen’ it, that you can see here. It was a bit tatty around the edges and I thought I might as well grind them down a bit to improve the appearance. And lucky I did. As soon as the abrasive pad touched it, it was obvious that the sheet hadn’t been properly fixed in at all and when I shoved a chisel under its edge, it began to lift off. Turns out that it had been stuck on over paint – you can get away with it with epoxy if you abrade the surface first but it’s a definite no-no with polyester, and especially if you try to lay it onto shiny paint 😯

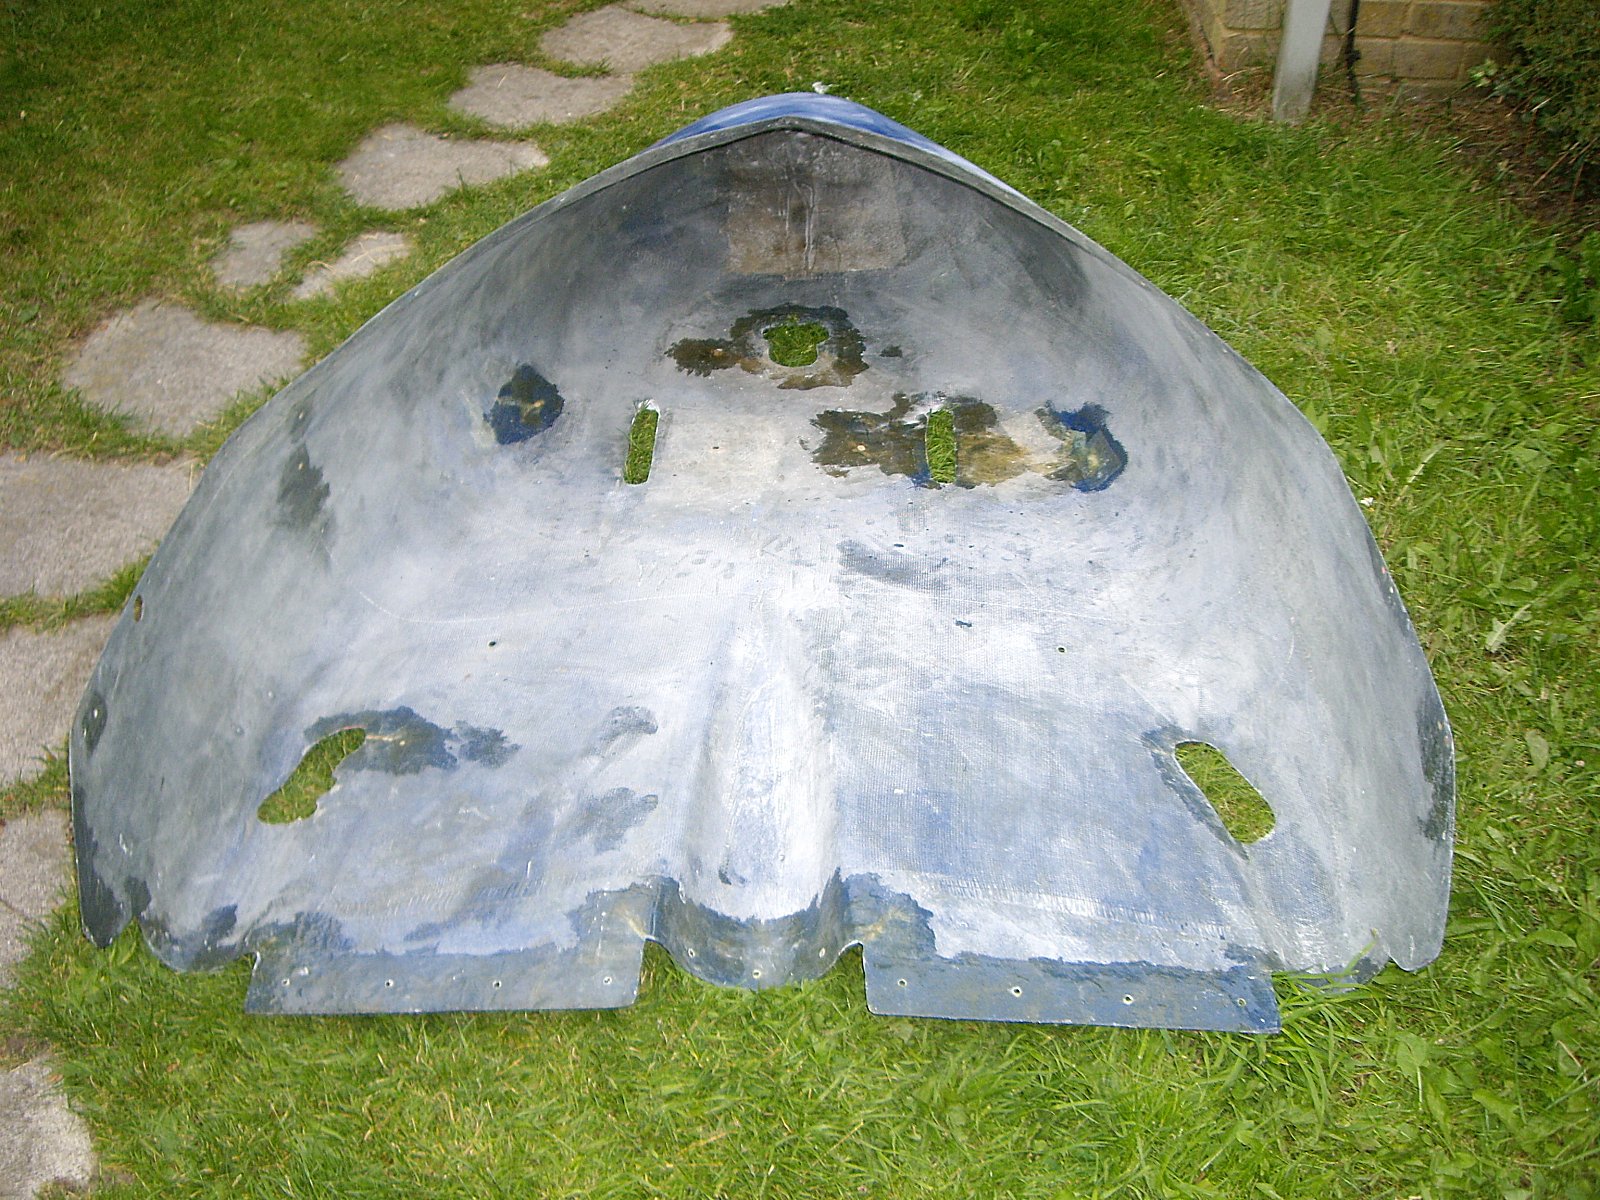
In the end the whole sheet just came straight out and with a bit of cleaning up using a rotary wire brush, the appearance of the inside of the pod nose was greatly improved. And as the sheet was effectively doing very little or nothing, there was definitely no loss in ‘strength’. After adding the backing pieces to the holes that I mentioned previously, I then gave the nose section a light coat of epoxy resin. This will stabilise it and will also give it a better look, not that you will be able to see very much once the pod is fitted with the panel in place. So the time wasn’t wasted and when I eventually do get around to spraying it (sigh…), it will end up a much better looking job. Here’s how the pod ended up.

null

The resin I used has already hardened but I doubt that I’ll get much more done today as the wind looks like it’s picking up a bit. Have to wait and see. But the good bit is that while I’ve been typing this, I’ve taken a nice little order over the phone as well. Good stuff eh 😀

An evening footnote to finish this post off. Late this afternoon when I turned the pod over, I found that the chisel I’d used to prise the tatty old sheet of fibreglass from inside the pod’s nose had pierced the fibreglass in a small area. Not to worry – it didn’t take long to epoxy a small patch of fibreglass mat on the inside and then do a repair on the outside. After I’d checked that it had cured and rubbed it down, I decided that as the wind was still pretty calm, I’d prime the interior of the pod. It came up OK but I thought it better to leave the top coat until tomorrow so the primer can harden before I give it a light rub down to key the surface. So not a bad way to the end the day.

Small steps

That’s what you have to do before you can take the great leaps forward. After Saturday’s flying I was looking forward to getting some more done on MYRO’s new pod on Sunday. I’d hoped to get to the point where the inside was primed at least, if not sprayed with finishing coat, but that wasn’t possible. The reason was that it’s getting increasingly more difficult to get hold of a normal grey spray paint in a can that isn’t metallic! Having to tour round trying to find some, without success, slowed me down and I ended up just getting the pod rubbed down, ready for painting but didn’t have the time to get any fresh painting done at all, not even priming. Here’s how it looked when I was done.

null

I have high hopes that the pod will end up looking pretty smart with a fresh new coat of shiny red paint, but we will see. I found a shop locally today that had one can (yep, just the one!) of the grey I need for the inside, which is the paint I used to spray the generator, so I snapped it up. I didn’t have time to do any more on the pod, though and it’s too late and too cool now anyway.

What I do know is that I’ve now got to start pressing on a bit quicker. It’s all very well being able to fly someone else’s aircraft, but it’s not the same as having your own and being able to fly whenever you want and that’s what I’m now really missing. We keep getting some lovely flying days between the periods of poor weather and I’m stuck on the ground and not able to fly because of this situation. Anyway, all things must end, as they say, and this will too. But I’ve got a bit to do before it does, unfortunately 😕

Nice day

Today Ken and Peter planned to treat a few nuts that have gone a bit rusty on the X’air, so I went over too a bit later in the morning. I’d made a bracket for my new 7″ satnav that I never had a chance to try out in MYRO and was hoping for a chance to test it in the X’air. I’ve always found it on the dim side in the car and I suspect that it’ll be the same in the aircraft but you don’t know until you try it out properly. While the other two were busying themselves with their jobs, I dropped the bracket in and was pleased to see that my idea of bending it twice to lower the satnav worked great and despite there being not a great deal of height between the top of the panel and the screen, the satnav fitted in nicely. Then I took a few shots of the new PTT buttons and here’s the best one of them.

null

Peter had to leave early so despite there being a cross wind blowing at 90 degrees to the runway, Ken and I decided to have an hour or so’s flying to give Ken a bit of stick time. The cross wind wasn’t actually that much of a problem because it was within the limit of approx 15mph and was fairly steady and not gusting too much. And it was a very useful flight actually. We got in a couple of practise approaches into Ken’s field and they went pretty well. We also found that where I’d sited the satnav over on the right of the panel was pretty useless as it was too far from the pilot and impossible to see because as expected, the satnav is not very bright. I’d put it over on the right because I thought that if sited in front of the pilot, it would obscure the tops of a couple of instruments. We found that actually this would not be so, so the next thing is to make up another bracket and move it over. Then we’ll be able to see if it’s bright enough in that position or whether I’ll have to revert to a slightly smaller model. My old MyGuide that got damaged in MYRO’s accident was only a 4 1/2″ model and that was bright enough, so maybe one between that and the size of the new one will be the answer.

The last thing we did was revert the satnav to car mode while in the air to get some idea of the speed we were flying at compared to the figure shown on the ASI because I’ve always suspected that the gauge is reading about 5mph slow. Sure enough, the satnav showed that the gauge is more like 7 mph out! To do a proper comparison, you’d need to take several measurements flying in directions that are exactly 180 degrees to each other and then take the average but this was good enough for now. So only a flight of 1 hr 5 mins, but a useful one and the culmination of a nice day at the airfield 🙂

The generator game (loadsa fun!)

When I worked on MYRO originally, it was in my garage where I had cover and electricity, but now MYRO is under a tarpaulin in the open at Ken’s place and that’s where I will have to do the repair work. As I’m about to start on it very soon, I thought it would be a good idea to get hold of a generator off Ebay so I’ll have power for a drill and any other power tools that I might need. I spotted a likely one for only £90 that seemed a good buy because it has an output of 2kVA which is quite a lot it seems (I don’t know much about generators as you can see), so that’s what I went for.

When I turned up to collect it I could hardly believe how big and heavy it was, much more so than I’d appreciated from the pictures on Ebay! In fact the seller threw in a wooden trolley with wheels on that makes it easier to push around. Apart from a crack and a bit of damage on the plastic front panel that didn’t affect its performance it actually looked pretty good. The seller wasn’t there so I started it up the best I could without knowing how really, and the deal was done. It was dusk by the time I got it home so I couldn’t do much with it until the next morning, which was yesterday. Then when I went to start it, the throttle control lever came off in my hand!

‘OK, that’s it’, I thought, ‘It’s going back’, so I phoned the seller and said I’d be back with it shortly. When I got there he turned out to be a young Polish chap. He was very helpful and fixed the lever back on in a trice (I’d been fiddling with it previously for about half an hour and still couldn’t see how it went back) but I said I still wasn’t happy with it. ‘Alright,’ he said, ‘I’ll give you your money back but you can still keep it, because I’m going back to Poland in 2 days time and have to clear my flat. If I take it back I’ll just have to dump it in a skip.’ Well, as you can imagine, that made me feel really guilty. How could I take my money back and still keep the generator? After all, it worked even if you had to be a bit careful with the throttle lever, so I said I’d take half my money back. He handed me back £40, so that was that, except he then decided to throw in a circular saw that was in his shed that he didn’t know what to do with and will probably just end up going from his shed to my garage, because I don’t really have a use for it. And then I set off for home.

Well, it was a bit quiet yesterday so with my recently honed plastic repair skills, I thought I’d sort out the damaged front panel. Out came the epoxy resin and fibreglass mat again and with careful use of my newly acquired heat gun, I had the ‘missing bits’ back again quite quickly. Then a couple of applications of fibreglass paste (heat gun again), a rub down and a spray of grey paint that I happened to have in my garage and which was a perfect match and – job done! Not bad, even though I say so myself… here are a couple of pics I took after I’d fixed the front panel 😉

null

null

I even managed to tweek the metal tab that holds the throttle lever in place so I’ve ended up with a now quite nice looking generator for not too much money, with an output large enough to power a small town. Although it’ll be OK for the work I have planned, it’ll be a bit too large, for example, to routinely take down to the airfield if I need to do a job on the aircraft that needs power. So I’ll have to decide what to do with it when I’ve done the work on MYRO, but with its now-repaired front panel, I think I’ll have no problem getting my money back.

Just one thing though. When I told Ken that I’d got hold of a generator, he told me he’s got one already that I could have borrowed anyway. How typical is that, eh 😕

Job done

And it turned out well, too. Ken and I fitted the new push-button PTT switches in the X’air today, between the showers that kept rattling through every half hour or so. It turned out when I put the meter on one of the original ones that what I had surmised about the terminals and connections was spot on, so we pressed on with the pilot’s side switch first. I could see absolutely no reason why the person who originally fitted them needed to install the bridge in what I think is the ‘earthing’ circuit so when I wired up the first push-button switch, I left it out. And when we tested it, the new switch worked perfectly I’m pleased to say 😉

When we’d finished the first one we decided to break for something to eat as Clare had opened up the cafe and with the weather being so bad there was no need for us to keep her too long as it was pretty obvious that nobody else was going to turn up. As it turned out, we had a really good time, chatting while we ate with her and ChrisD who owns and runs Medway Microlights and is always good for a few laughs, who came into the cafe looking rather drowned.

Afterwards we did the second switch and that tested well too, so we finished off and cleared up with the sky darkening as we did so. There was no time to take any pictures and I’ll leave those to some other time because just in time we got everything cleared away, the X’air covered and the hangar locked up, as the first few enormous drops of rain began to fall as we dashed back to the cars. So that was that, but we’d got done what we wanted to. The new switches look and work a treat and I’m pleased and relieved how they turned out in the end, after last week’s initial false start. As the rain came down in sheets during the drive home, I was thinking how nice it’ll be to be able to try them out for the first time in the air … whenever that will be with this ‘glorious’ mid-Summer weather 😕

More MYRO pod work

I was out early this morning trimming and tidying some small fillings that I did on the pod yesterday, before they got too hard, and was pleased with the results. I had a bit of a busy day today including meeting up with an old friend for lunch, so I wasn’t able to do any more until this evening. I just wanted to finish a couple of bits up before calling the pod ready for rubbing down and respraying and here are a few pics of how it has turned out.

null

null

null

The pod really wasn’t in as bad condition as MYRO’s original pod was before I repaired it. As I mentioned in an earlier post, someone had done a rather poor repair round this pod’s fork opening and as you can see in the pics, I’ve now redone it and made it much better. I’ve also repaired all the little splits and holes that shouldn’t have been there and strengthened the back edge the same as I did before. The reason is that I want to use cable ties to attach the fuselage rear cover to the back of the pod rather than cord as I think it makes a nicer job of it and I want to make sure the pod is strong enough to take them. And my strengthening also allowed me to repair a few small splits that were in the back edge, mainly I think from handling with the pod off the aircraft, but whatever the reason, they shouldn’t give any more problems.

So all in all, the pod is coming along pretty well and I think there’s a very good chance that it will look better than MYRO’s original one when it’s finished. Hope so anyway. And I’ll tell you something else – when I kept the epoxy resin that was left over from doing MYRO’s pod the last time, I never for one minute imagined that two years later almost to the very day, I’d be using it to do a similar job all over again on another one… 😯

Brilliant service!

The two little push-button switches arrived today from CPC-Farnell and that is what I call brilliant service! They are excellent and if I’m right about the present PTT wiring in the X’air, they will do the job perfectly. I’m looking forward to Saturday to see how they work in the aircraft.

I’ve just come in from doing a little bit more on MYRO. I glossed the forks and now they look really terrific, so it was well worth rubbing them down and painting them over again. In fact they now look better than MYRO’s originals, I think. I also did a bit more on the pod and with a bit of luck I’ll now be able to press on with rubbing it down ready for spraying. So slow but steady progress again today 🙂

I think I’ve done it…

I was going to wait until the week-end to check the pin-outs on the X’air PTT switches before looking for push-button replacements but I’m pretty sure that my understanding of what’s going on with the connections is correct. I did an Internet search the other day and found some switches being sold by Apem that I thought might be suitable so today I gave them a ring. Their Technical/Sales guy was very helpful and confirmed that both their 8000 and 10000 series double poles would do the job but when I asked how much a couple of switches would cost, he told me that they have a £50 minimum order. However, he said that RS Components stocked them as indeed I found that they did.

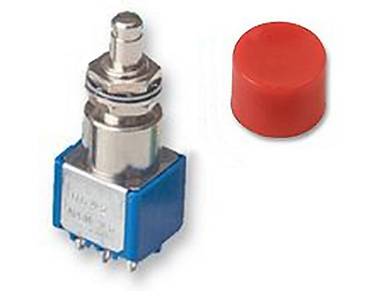
In fact after talking with Ken, I ended up buying a couple but from CPC-Farnell who also had them (for only £4.79 + VAT each), the reason being that whereas RS only had black buttons, Farnell had the red which I prefer. 😀 So here’s what I ordered.

New PTT Switches

So if everything goes well, we should have these in and working this Saturday. There’ll be no flying at all this week-end if the weather forecast is correct so at least it’ll be a useful way to spend the time and with a bit of luck I might also be able to get a bit more done on MYRO. I took a bit of time out this afternoon and made some good progress. I re-primed the new forks and this time they came out very well. I also more or less finished all the little fibreglass repairs on the new pod, rubbed them down and primed them in, and the pod is now looking pretty good. So all in all a highly satisfying outcome for the day 😉

PTTs sorted? Maybe…

I’ve been thinking about the X’air PTT connections and I think I’ve worked out what’s going on. I found some information somewhere that the way the PTT system works on these old Icom radios is a bit weird. As well as completing the PTT circuit, the button also has to earth another circuit at the same time and that’s why there are 4 wires in the X’air switches. The yellow and red pair are (I think) the PTT wires and the black and white are the pair that need to be earthed.

But there’s an added complication. Whoever wired in the X’air PTTs appears to have used the wrong switches for the job! Instead of using simple on/off momentary switches that separately ‘make’ two 2-wire pairs and then ‘break’ them again when released and that would need 4 connections to work, they have used another weird type of switch that has 6 connections, 2 of which aren’t really used, and 3 positions.

So in the picture I posted previously (that I’ve now modified by adding labels to the terminals), the red PTT wire and the black ‘earthing’ wire are connected conventionally to two terminals in the centre position of the switch – labelled terminals 0/1 and 0/2 with the PTT wire on terminal 0/1 and the earthing wire on 0/2. The white wire is on one of the 2 terminals that are in the ‘unused’ switch position – labelled terminals 1/1 and 1/2 with the white connected to 1/2. Terminals 2/1 and 2/2 are on the other side of the switch. The yellow PTT wire is on terminal 2/1 and when the switch is operated, the PTT circuit is completed when connections are ‘made’ between terminals 0/1 and 2/1. The earthing circuit is completed when connections are ‘made’ between terminals 0/2 and 2/2. The black earthing wire is on terminal 0/2 and to complete the circuit between the black and white wires, there is a bridge between terminals 1/2 to which the white lead is connected and 2/2.

So when the switch is fully back, it makes contact with the white wire that connects to nothing. When the switch is central, it makes separate contacts with the red and black wires that also connect to nothing else in that position. And finally, when the switch is fully forward, it makes separate connections between the red and yellow wires and the black and white. Simples!

Now all we need to do is to find two double pole, single throw push-button switches. Hmmmmmm…… 😕

Damian Radice

Every now and again something or someone touches us and reminds us only too well of our own mortality. Such a person was Damian, a long term contributor to a forum of which I am a member. Damian passed away on Friday 8th July after a long battle with leukaemia. He would have been 44 years old on the 17th of this month.

It is rare that we come across someone in our lives who seems to have a knack of seeing the best in everyone and finding a way to get on well with them. Such a person was Damian. He was also blessed with a rare and keen artistic talent. All of us on the forum, where Damian went by the name ‘Windrunner’, only know each other across the distance of the Internet but we all regarded him as a true friend and will miss him greatly. The words posted there by Tom Constantine perfectly put my thoughts into words and I reproduce them below.

Damian was a good soul and an important part of the Old Hangar. I will miss him. I am sad for us in losing a friend, but happy for Damian. His suffering is over and he has attained his reward.

Today’s lesson is: Live now, don’t wait. You never know when you will be done, only that it will be too soon.

Rest in peace, Windrunner!

Rest in peace Damian.

Didn’t get very much done

No flying today because of the wind. It’ll be flyable tomorrow but neither Ken nor Peter will be around so for me, this will be a ‘no-fly’ week-end. Not to worry, though, because tomorrow I’ll be able to crack on with MYRO work and today we had the two little jobs to get out of the way on the X’air. I arrived at Stoke around 11.00 am and Ken and Peter were already partaking of the culinary delights on offer in the airfield cafe. What a difference compared to Linton!

After having some refreshment myself 😉 we got going on putting the power supply into the X’air. It didn’t take long – all I had to do was cut the now redundant GPS lead off that was hanging down from behind the panel, check the polarity of the two wires inside, add a couple of crimp-on spade connectors and connect the new car cigar lighter socket. Then Peter enlarged the existing hole in the panel to take it and the job was done. It’ll be very useful because now we can connect a GPS or Satnav like I use in MYRO, it’ll be possible to take the X’air further afield without having to be preoccupied with navigation. Great! 🙂

Then I turned my attention to the PTT (push-to-talk) switches in the the tops of the joysticks. I’d got hold of two very nice little push-button switches that I wanted to replace them with but when I removed the existing switches, I was due for a surprise. I expected to find just a pair of wires connected to each switch but instead I found four!

null

Now I had a problem because they clearly don’t operate in the obvious way and my little push-button switches only have connections for two wires anyway. So that was that. I took a few reference pictures to send to Paul in SA who knows about these things, but until I know what to do we’re stuck with the existing switches.

So that was that. Ken had to go off early but Peter and I hung around for a while longer just chewing the fat, drinking cold drinks in the cafe and generally enjoying being on the airfield, which is great. Despite the wind, Chris the CFI did a couple of trial flights (the passengers both said they really enjoyed them) and there was a gyro buzzing around the whole time too. Also quite a few non-flying guests turned up during the day just to visit, which is nice I think. I hope we’ll be able to change the PTT switches – I’m sure we’ll be able to when we know how – but it wasn’t for today. As I type this it’s Saturday evening and the winds have already dropped considerably so it’s a pity that I won’t be able to fly tomorrow. I can’t wait to get MYRO back in the air again so I’ll be back to flying when I choose to and when it suits me. Tomorrow morning I have to take my son and his girlfriend to Gatwick to get them off on holiday and hopefully when I get back I’ll be able to get a good bit done on MYRO stuff. Hopefully more than I managed to get done today on the X’air – but never mind, it was still a good day. Most days spent at the airfield with other microlight people usually are 😉

Last Sunday – a little video

While Peter was flying PW, I took a couple of opportunities to take some very brief shots with my new little camcorder. It was hand-held and not connected to the intercom or anything, just to see how they would turn out. If you click on the pic below, you can see the video that came out.

null

It’s nothing much – but it was good just being back in the air again and able to do the shots 😉

What a day!

Absolutely brilliant! Arrived at Stoke at about 9.15am and it all seemed rather quiet. Ken was already there loading a couple of jerry cans and a few other bits and pieces onto his trolley to take across to the aircraft but there seemed to be few other signs of activity. Then a gyro started up and while we were getting the X’air, ‘Papa Whiskey’ or ‘PW’ for short, ready to go, it took off from runway 24 and started to fly a number of tight circuits with some incredible, almost hovering approaches. They are amazing things those gyros!

It took us a little while to get the covers off and pull PW across to the parking area at the top end of the runway. In the meantime things began to bustle and a few now familiar faces began to turn up, all getting ready for whatever flying exploits they had planned for today. This is such a big part of the flying club atmosphere and it’s what was so missing at Linton. Add to that Bob’s temperamental outbursts and you soon see why Linton is such a lovely but dead location to fly from and why Ken, Peter and I decided to make the move to Stoke. I don’t regret it and now they see the difference, I’m sure they don’t either.

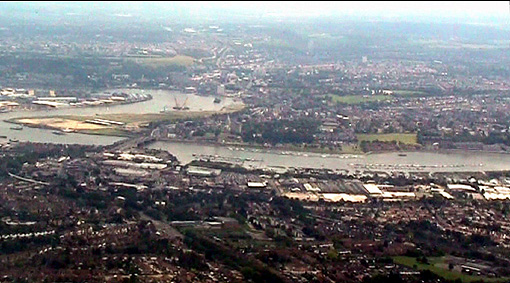
I hadn’t told Ken exactly what I’d got planned for us but as he said he’d like to do up to 1 hour 45 minutes, I’d put together a flight taking us over the Thames to Essex, around past the Dartford Bridge and then on a roughly southerly heading down past Sevenoaks and Tonbridge and then back to Stoke via Linton. Here’s a pic of the route which, as we wouldn’t have a GPS on board, I’d chosen because I was already familiar with it having flown all of it at various times in MYRO, and because it could be flown without a chart (proven in practice actually when we did it) on account of the really strong visual indicators and landmarks incorporated in it.

null

Despite having stood outside under covers for over 5 weeks, PW started on the button. It’s radio, an old Icom A3 with Comunica interface and headsets, is a bit temperamental and it took a little bit of fiddling with volume and squelch controls to get it performing reasonably well. We also got a response of ‘readability 3’ when we requested a radio check and we’ve decided that if possible, next week-end we’ll do a reinstall of the comms set up and fit the power socket for the GPS in an attempt to kill two birds with one stone. Just before we started to taxi, Rosie’s Icarus, G-OROS, came into land, but not with her on board unfortunately. Anyway, we took off at around 10.30am and while we were climbing out, I handed over to Ken because the idea is for him to get a few hours in and become familiar with PW before pushing on with Chris, the CFI at Stoke, to get his licence.

Ken did a good job and with him at the controls, I was able to take a few still shots while we were flying along the northern legs of our route. The first one was taken as we approached the Lakeside Shopping Centre with the Thames and the Dartford Bridge in the background.

null

The next shot is the view south towards the Dartford Bridge with Kent over on the other side of the river.

null

Next is a view of the Dartford Bridge taken as we crossed back over the Thames with the Bluewater Shopping Centre up towards the top right.

null

And finally, here’s a shot of the Dartford Bridge Toll Plazas that are located on the south side of the river.

null

As planned, we flew around past Sevenoaks and Tonbridge just by following landmarks (no chart needed at all) and then back up towards Linton. We easily spotted the field and flew around it but as usual, nobody was flying there. Sad, but no surprises there then 🙁

Then it was time to head back north to Stoke. Having taken off from runway 24 we fully expected to land in the same direction but while heading to join downwind, we heard someone in the circuit call downwind 06. That meant a change of plan, so I took over the controls and we then also joined downwind for 06. The approach was too high not helped by a bit of extra lift on final and even with a hefty side-slip, I couldn’t get enough height off. I also noticed that just before we would have touched down, the windsock indicated a slight tail wind, so when we called a go-around, I also said we’d be going for runway 24. Tony on the ground came back and advised against it, saying that the wind was very variable at that time but mainly favoured 06. He also said he’d keep me advised of the wind direction while in the circuit. I was really grateful for that and the next time we landed with almost zero wind on 06 and taxied in. The flight had taken 1 hour 40 minutes, so about right, and Peter was waiting for us. After parking up it was time for a cuppa and a bacon roll before Peter’s turn in the aircraft.

I’d remarked to Ken while we were heading back towards Stoke, how much cloud had come in since we had taken off. Peter and I took off from runway 24 shortly after 1.10pm and it was immediately noticeable how much the vis had deteriorated because of haze since we had landed an hour or so before. I handed the controls over to Peter shortly after we’d taken off and we decided to fly round the north of Rochester to Ken’s place to try out a couple of experimental approaches into his field. Peter was doing well until we began to experience a few thermic bumps and as he began to feel a bit uncomfortable with them, I took over again. It’s not surprising, because Peter is more used to flying Group A single engine aircraft and just as I found when I first took to microlights, the difference in inertia between the two types is surprising and the skills needed to fly microlights do not just come naturally. They have to be learnt over several hours and from my own experiences, acquiring them can be both challenging and frustrating at times, especially when you already view yourself as being an accomplished pilot and expect to be able just to ‘do it’ 😀

We found Ken’s place without too many problems and I set myself up for an initial approach. You should always approach a previously unknown landing area at a greater height than normal, so that’s what I did. Even so, it appeared that a landing would be feasible so after opening the throttle and climbing out, we decided to go far a ‘proper’ one. Just at that moment, we spotted another light aircraft flying straight towards us at almost the same height, so we had to let him clear the area first, but after a circuit of sorts, we were soon back on final to land. This time we were much lower and after deciding that we ‘were in’, I opened the throttle and climbed away again to head back to Stoke. On the way, the bumpy conditions seemed to have died down so Peter took over again. Sure enough, it was much smoother and he was able to fly PW the whole way to join overhead for runway 24 back at Stoke. The flight lasted for 50 minutes and after we’d moved PW back to its tie-down spot and refitted its covers, it was time to head for home.

What a great day’s flying! Both Ken and Peter had a chance to get a bit of stick time in PW under their belts and along the way, we’d also shown that it’ll be possible to get PW in and out of Ken’s field in the future. Good height and speed control will be essential, though, so it’ll be some time yet before they’re both doing it. But it’ll come, I’m sure, it’ll come 😉

Two good flying days

Yup, high pressure in charge and both today and tomorrow will be good flying days. Bright, sunny, bit of cloud now and then – but the important thing is, very light winds.

2 Good Flying Days

I’m typing this while having a short lunch-time break having taken the opportunity to give MYRO’s new cabin floor tubes a coat of gloss paint. Bit tricky, not helped by being a bit too impatient, so I got a couple of runs, but I don’t think I’m going to lose too much sleep over them 😕

I’m going to spend the rest of the afternoon tackling the back garden which is now like a mini-jungle. All the rain we’ve had lately followed by a few warm, sunny days have made for excellent growing conditions, so I recently got hold of a couple of large garden rubbish bags off Ebay and now it’s time to make use of them. But tomorrow is going to be different 😀

Tomorrow both Ken and Peter want to go flying in the X’air – Ken in the morning and Peter in the afternoon. I’ve already got a flight planned for Ken which should take about 1 hour 30/45 mins. As we won’t have a GPS fitted (we need to install a power supply when we re-do the radio installation) I’ve made sure we will be tracking highly visible main roads (eg the M25) and keeping to areas that I’ve covered a lot in MYRO. But it’s a great route and I think Ken will enjoy it and I also hope that I’ll be able to take a few shots with my still camera and camcorder while Ken’s on the controls. Peter and I will play it a bit by ear but Ken has suggested we try a few missed approaches at his field, as at some time he’d like to be able to fly the X’air in and out of there. Should be fun and it’ll be a great day if we get it all done 😉

Good day’s work

Yup, I managed to get everything done that I wanted to. As it was so warm, I thought it’d be a good idea to press on with the pod repairs. First I nipped down to the local shops to see if I could buy a metal sanding disk to fit into the electric drill. I couldn’t without going a lot farther afield so I settled for a rubber disc version and a pack of assorted round abrasive papers. In fact, although I went through papers at a fair old rate, it did the job and it wasn’t long before I was able to start on a few of the little repairs with some of the fibreglass mat and epoxy resin that had been left over from when I did MYRO’s pod last time. There are still one or two to do but I’ll come back to those later.

Then I sorted out the forks. They needed a good rub down to get rid of most of the brush marks from yesterday and after I’d cleaned them, it was so warm that I was able to give them a coat of white primer followed soon after by the gloss. Not a good thing to do, but they’ll have plenty of time to harden off before I need to fit them and it doesn’t matter if a little bit of the gloss is lost by spraying it a bit too soon onto the primer coat.

The final job this afternoon was the cabin floor tubes. I rubbed those down too and was able to spot white prime them in before hanging them up in the garage to harden off. The reason is that I want to give them a rub down before spraying the gloss coat so I want the primer to have a chance to harden.

So that was it. A good day’s work well done and I can begin to see the job coming together now. With a bit of luck, in a couple of week-ends time, I should be able to start stripping the damaged items off MYRO. I don’t know what I’ll find, of course, until I get into it but if the weather plays ball, who knows, I might have MYRO back together by end July/early August. Now that would be nice – in time to get some Summer flying in 😉

Best flying day of the year so far

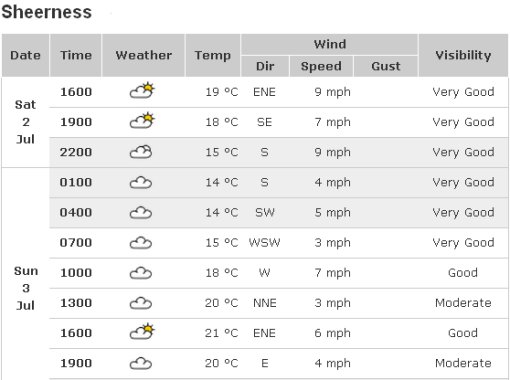
And I’m going to miss it, of course. Here’s the weather for the rest of the day for Sheerness, which is just over the Medway estuary from Stoke.

Sheerness Weather

It’s already a scorcher today, with very light winds. So a good day for flying but maybe not so good for working out in the open, which is what I’ll be doing! I seem to remember that this is a bit like what happened last year when I was finishing MYRO off ready for inspection and permitting at Linton. Beautiful, scorching Summer days (I got a bit of sunstroke I recall) which turned to grey skies, low cloud and wind through almost the whole of August. Let’s hope that doesn’t happen this time around 🙁

The forecasters say that we’ve only got a day or so of this before it turns back to what it was like before so best make the most of it. Must get cracking!

Made a good start

After my earlier post today, before I started on the forks I thought I’d just see how much work the pod will need to get it prepped for spraying. The answer, I’m very pleased to say, is not too much. I had a go at the more messy (only my opinion – they actually aren’t that bad) internal repairs with the rotary wire brush and ground a few chunks away. The wire brush will work but I think tomorrow I might see about getting hold of a solid grinding disc which, with care, should remove the excess fibre glass a bit more quickly.

Then I turned my attention to the outside of the pod. I started with a medium sheet on the electric sander but soon found that the coarsest one I’ve got does a quicker job and still leaves a very nice smooth finish. So that was very encouraging.

I then put the pod to one side and removed the nose wheel from the forks and stripped them for cleaning and painting. Unfortunately, I found that due to poor maintenance, one of the bearings in the nose wheel had seized (for ‘poor’ read ‘no’) and the hub had therefore been spinning on the bearing. I’ll have to see when the time comes whether this means that actually the wheel, which is made of nylon, will be unusable because the bearing is not now being retained in the hub due to wear of the nylon. It may be that when I replace the bearing with one of MYRO’s that I will be able to retain it enough by using silicone sealer, for example, but if not it looks as though I will have to get hold of another wheel. Mark at Galaxy had at least one, but the one he showed me had too small a spindle hole to fit on the AX3.

The rest of the afternoon went well and I made excellent progress. The forks cleaned up a treat and I gave them a good coat of anti-rust grey primer. In fact, because it turned really hot, the paint was going off so rapidly that it was staying a bit too thick with a lot of deep brush marks. Still, they will come out well enough when I give them a bit of a rub down before I give the forks a coat of white as I did with MYRO’s. I also had time to clean up the two cabin floor tubes and spot prime where they have been a bit worn and scratched, before giving them a dash of white too to freshen them up.

So all in all, a good day with positive results and some of the more nasty little jobs out of the way 🙂

Been here before

So familiar territory. I needed to strip all the paint from the inside of the new pod before I could do the small repairs that are needed and having done it previously with MYRO’s pod, I knew it would be messy and not very nice. So best just to get stuck in and do it 😯

I used the same solvent-based paint stripper as before, let it sit for a while and then just attacked it with a largish diameter circular wire brush in the electric drill. Previously I did it manually but this time it was much quicker and it turned out pretty good! Take a look at the pics below.

null

null

I got covered with a light spray of thick, damp grey paint stripper (grey from the paint it contained) but it was worth it I think. The inside is easily clean enough now to take the epoxy I will use for the repairs, as I did previously with MYRO, without any fear of it not sticking. The small repairs done previously by someone else are also now exposed. They aren’t as pretty as the ones I did on MYRO’s pod but now I can see them, I can clean them up a bit and improve them. In the end, once I’ve finished and the pod has been repainted inside (and out!) you’ll never know that they are there 😉

I’ve just finished a quick lunch, so I think I’ll leave the pod for now and crack on and make a start on the forks. Been there before too 🙂

In the eye of the beholder

The following pics aren’t much to write home about – just pictures of a bunch of old microlight bits really. But to me they are very special because they show all the parts I need to repair the front end of MYRO – the pod, the cabin floor tubes, the down-strut, the forks and the nose wheel.

null

null

This morning I nipped out and bought a heat gun – quite an inexpensive one because I’ve never used one before and I didn’t know what I’d be doing with it once I’d done the job I bought it for, which was to remove the Cyclone AX3 transfers from the pod I got hold of. Well, as you can see from the pics, it worked a treat and it only took about 45 minutes to get all the lettering and stuff off the pod. Here’s a shot of the AX3 that the pod and the other stuff shown in the above pics came from.

null

Yes, it’s MYFI, the old Medway Airsports AX3. What a coincidence that I was supposed to be moving MYRO to Stoke before the accident happened, and will do when I’ve finished the repairs, and how fitting that although MYFI is no more, some parts of it will be moving back to its old home, in MYRO. Because MYFI’s pod was blue, I’ll have to have it repainted of course. When I originally repaired MYRO’s pod, I tried to avoid painting it to save weight, but this time I’ll have no choice. The up-side is that the pod will end up looking much better than last time, because instead of just having bare gel coat, this time it’ll be finished in glorious glossy red! It also means that I’ll be able to apply my pod graphic straight away, and this is how I expect MYRO to look with it on.

null

Ironically, MYRO could end up looking better after the repairs than when I did the job the first time. I hope that is the case, because at least then all of the work will have been worth it. I’ve shown MYRO without any prop at all. In fact, the one I’m looking to acquire is actually the same type as is shown fitted to MYFI in the pic above.

To finish off, here’s a final shot of that collection of old microlight bits on my back lawn – sorry about the state of the grass, by the way.

null

And that reminds me – must get the mower out and beat the dandelions into submission again before they take everything over 😉

Parts – almost there!

I’m truly indebted to the incredibly kind person who’s helping me out with parts for MYRO. This week just about all the remaining parts that I need to repair MYRO were delivered by courier and after laying them out on the ground I’m now raring to get started. Just one small tube missing (wrong one sent in error) but although I may be mistaken, I think that MYRO’s one may not have been damaged after all. I’ll have to see when I begin to strip off the damaged items.

At present I can’t do any work during the day because I have a back-log of work for my business which must take priority so I’m hoping to be able to make a start this coming week-end. The first thing will be to get cracking on the pod – do the small repairs that are needed, strip off the Cyclone AX3 transfers and get it prepped for respraying – then clean and repaint the replacement forks and tubes so they’re ready to go on when I have the pod back. That way the panel and all its instruments and wiring will not be exposed to the open air for any longer than absolutely necessary as unlike the last time, MYRO’s out in the open and not under cover in my garage.

I know that once I can get started and get some momentum going, I’ll soon have MYRO back in the air where it belongs 😉

Some day!

Yesterday the weather forecast was for heavy rain to move in from the south-west eventually covering the whole country. And the forecast was dead right.

So I decided to make the best of a bad day, drop the parts off that I picked up last week-end from Sandy and take my engine to Galaxy Microlights in Wiltshire for Mark to shock-load check it. Well, the weather was atrocious for driving – rain the whole way down, while I was there and the whole way back. But I achieved what I wanted to do and brought back with me the aileron and trailing edge tube that I need for MYRO. So slowly but surely the parts are coming together for the repair.

I’ve had a nice surprise today as well. I placed an ad in the ‘Wanted’ section of the AFORS web site for a prop being as MYRO’s lovely Arplast that I was so lucky to have got in the beginning, was totally smashed in the accident. I received a call today from someone who has a low hours 3-blade IvoProp for sale that’s currently fitted on a Sluka single seater. My initial search shows that both aircraft, the Sluka with a 447 Rotax and the AX3 with a 503, both use the same 62″ diameter prop, so I’ve already left a message on the caller’s phone saying that it looks as though I’ll definitely have it. That’s something to look forward to – both the IvoProp and the Arplast are modern, high performance propellers that are much quieter than the original GSC 2-blade wooden unit so the Ivo will be a good replacement for the Arplast. With the constant demand for props, I didn’t think that I’d be lucky enough to get hold of another one as good as the Arplast, but it looks as though I might after all. So a bit more good news eh 🙂

Another little bit of good news

I was talking to Rob in the BMAA Tech Office about MYRO’s repair when an interesting point came up. Because no ‘fabrication’ such as welding is involved and as the repair only comprises bolting on parts to replace the ones that have been damaged, in fact an Approved Repair Scheme isn’t necessary at all, and neither do I have to have a letter of no objection from P & M, stuff like that. I can just go ahead and do the repairs as all the parts I’ll be using will be automatically ‘approved’ as they will have come from another AX3. All I need to do is keep a record of the provenance of each part ie a note of the registration of the aircraft it came from, preferably provided by the previous registered owner, and have each part inspected before I actually use it. This is great news because it means I’ll be able to get cracking on the work much sooner than I originally expected, so the sooner I can get my engine down for shock load checking and pick up the other bits I need, the better.

Slowly but surely the light at the end of tunnel is getting bigger and brighter. I just hope that it isn’t the proverbial train hurtling down the line towards me 😆