Good news and bad news

Although not forecast, there was a sprinkling of light drizzle this morning, so I thought I’d make a quick visit to Ken’s to check on a few things and put a cover over the gap between MYRO’s wings. The first thing I did, of course, was check the electrics against my original reference photographs and my wiring diagram. I couldn’t see anything wrong so because I’d had to re-make a connection in the wire between the starter switch and starter solenoid, I thought I might as well do it again in case the new join was bad. After I’d done it, I turned the key and the starter kicked, so that was good. However, the prop cover was still on and after I’d removed it and tried again, the system was dead as before.

The obvious thought was that the battery was dead but with a small quantity of fuel in the tanks (I had been hoping to start the engine), the fuel pump appeared to be running at full speed. I then checked the starter motor by making a direct connection to the battery and it appeared to be dead, so I ended up removing it and bringing it home so I can test it on a battery here. I’m hoping in a way that it is MYRO’s battery that’s the problem because otherwise I’ll end up having to test all the connections under the panel. Without being negative, it always seems that whenever there’s a problem, I think of the worst-case scenario and that’s what it turns out to be, so I’m not over-optimistic about it, but whatever the problem is, I cannot now see me being all finished this coming week-end. I can see at least a week’s delay looming here.

I then spent a half hour or so getting some tension in the wing coverings and tightening the straps as much as I could. The result wasn’t bad and I put MYRO’s centre wing cover on just for now so there’s no open gap, followed by the outdoor top cover that I made. That’ll keep any rain off if we do get some, which I think we might tomorrow at least.

The last thing I did was check the steering rods. MYRO’s original ones were destroyed in the accident and I stripped all the usable bits off them yesterday. When I got my engine off MYME, I also bought the steering arms which were in superb condition but found them to be too long for MYRO. I’d hoped to be able to reduce them in length but found yesterday that they cannot be cut down but only adjusted slightly at each end. Even so, they couldn’t be made as short as MYRO’s originals, so I was resigned to using the ones I got with the new forks which were not very pretty and a bit rusty as well. I took both sets with me today to make sure that the latter were the right length before refurbing them only to find that they are too short! The good news though is that the newer ‘long’ ones off MYME look to be the right length, although for the life of me I can’t understand how, as they weren’t before. Quite honestly, I can’t be bothered thinking about it given the electrics problem. I’ll just go ahead and fit them next time and be thankful 😉

By the way – since typing the above, I’ve tested the starter motor on a car battery and it’s working fine, so maybe because I couldn’t make it work earlier with a direct connection to it, the problem is with MYRO’s battery. Possibly it didn’t like the charger I’ve been using since the accident to keep it topped up and it’s been ‘fried’. Of all the possibilities, I hope so and I’m keeping my fingers crossed because I really can’t face the prospect of tracing circuits under MYRO’s panel… 😐

Almost but not quite

I was so glad that I tackled the engine fettling and exhaust work yesterday because I started today with such a long list of niggly little jobs that needed doing before I could get on to re-fitting MYRO’s wings that if I’d had those two extra largish jobs on the list as well, it would have made it very difficult to make the progress today that I did. As it was, there was one setback which I’ll come onto later which I hope will not take too long to resolve.

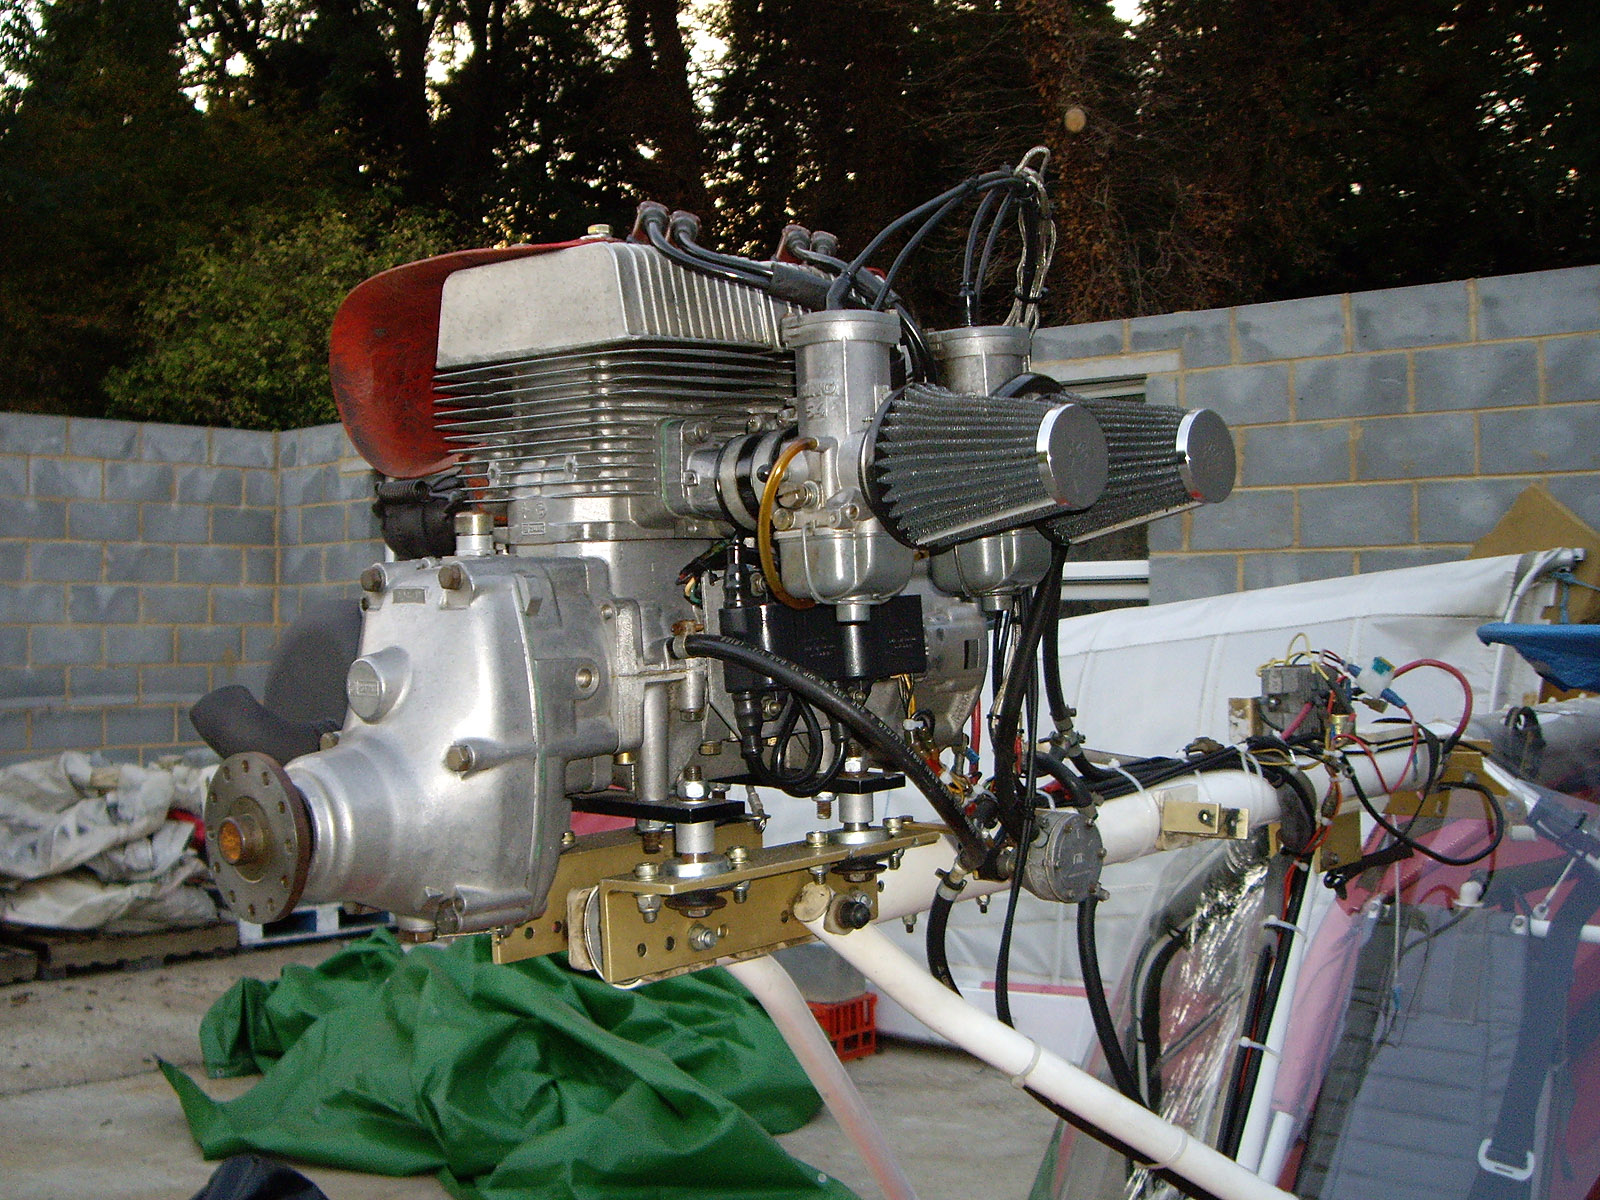
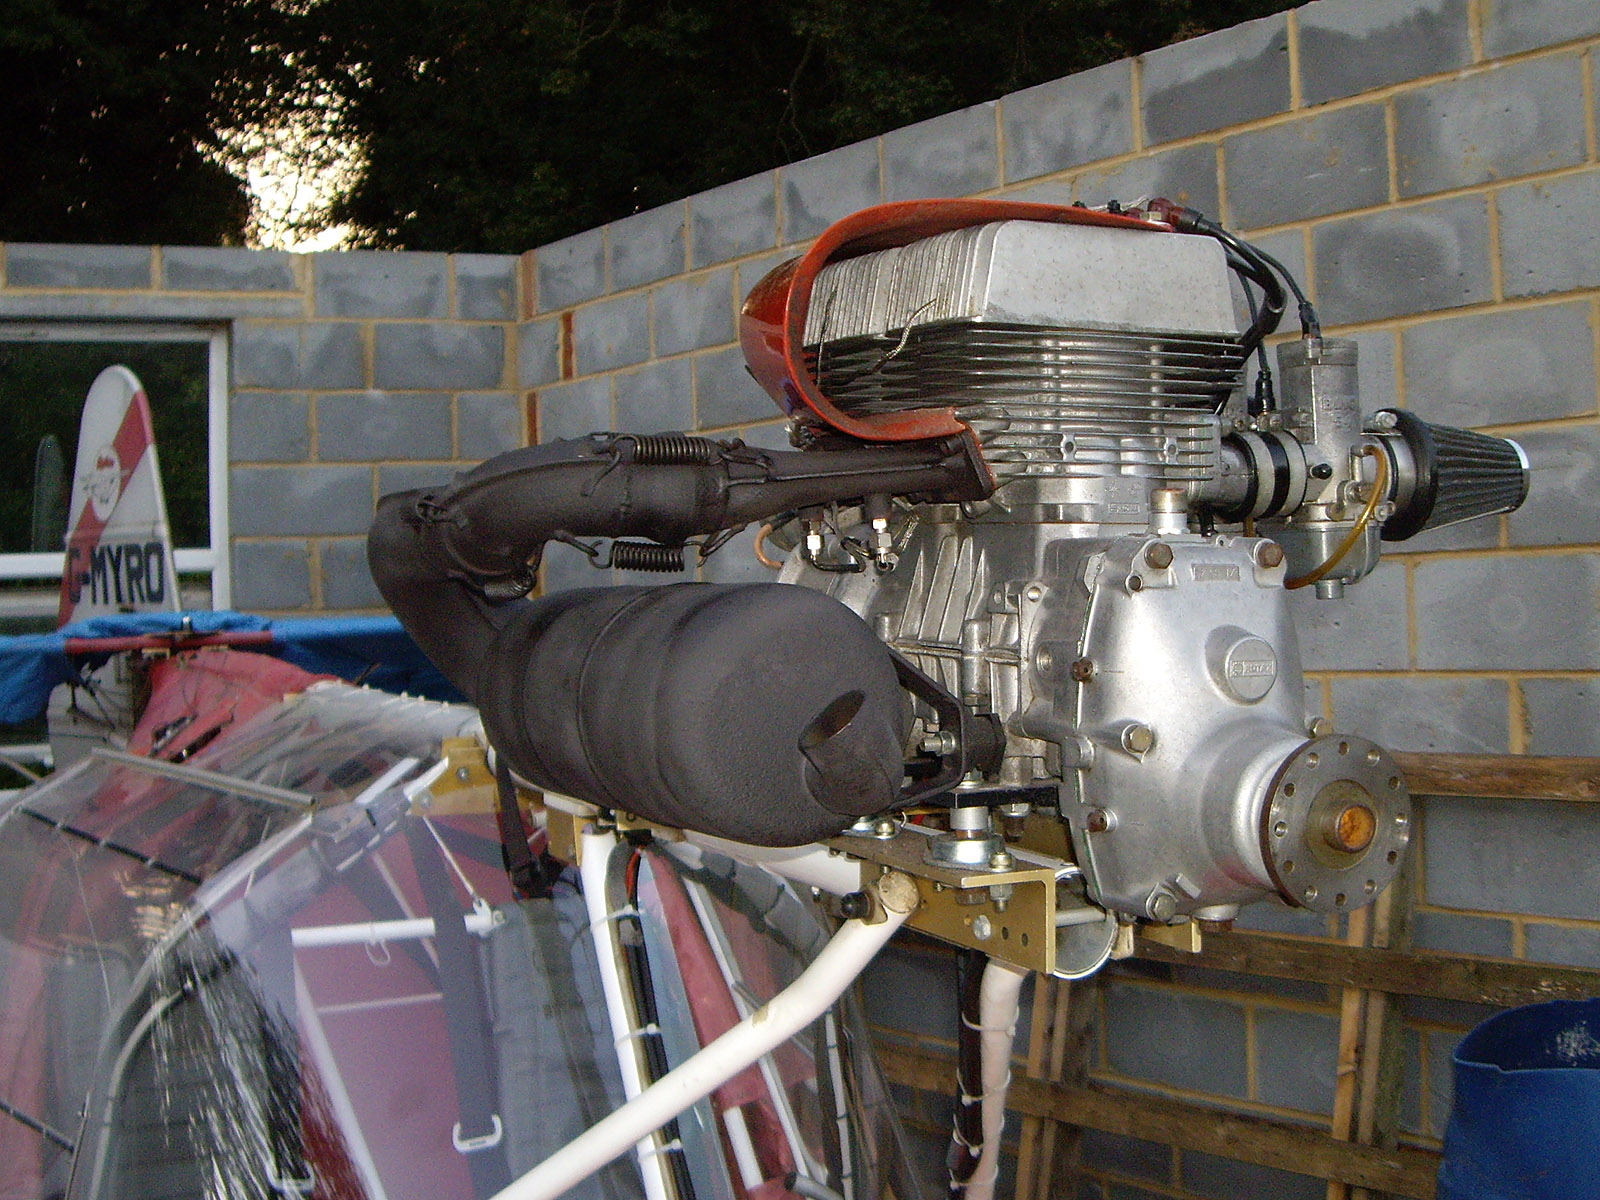
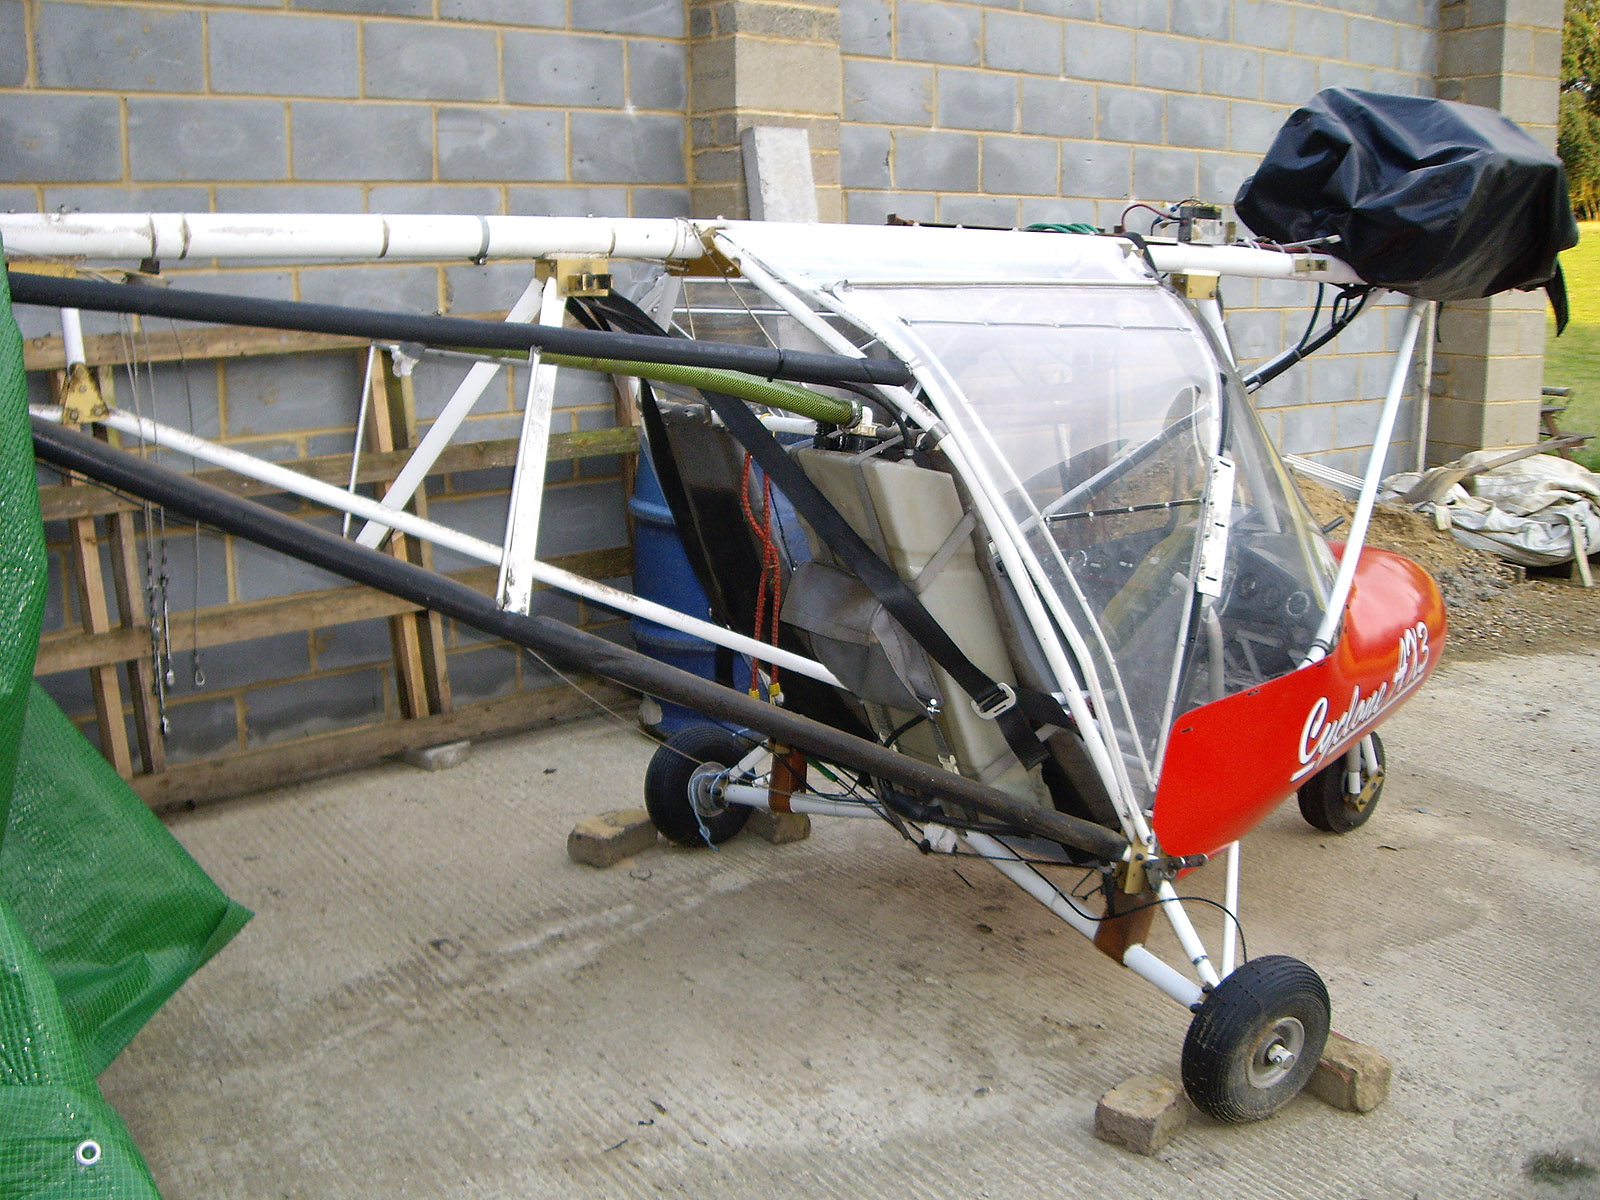
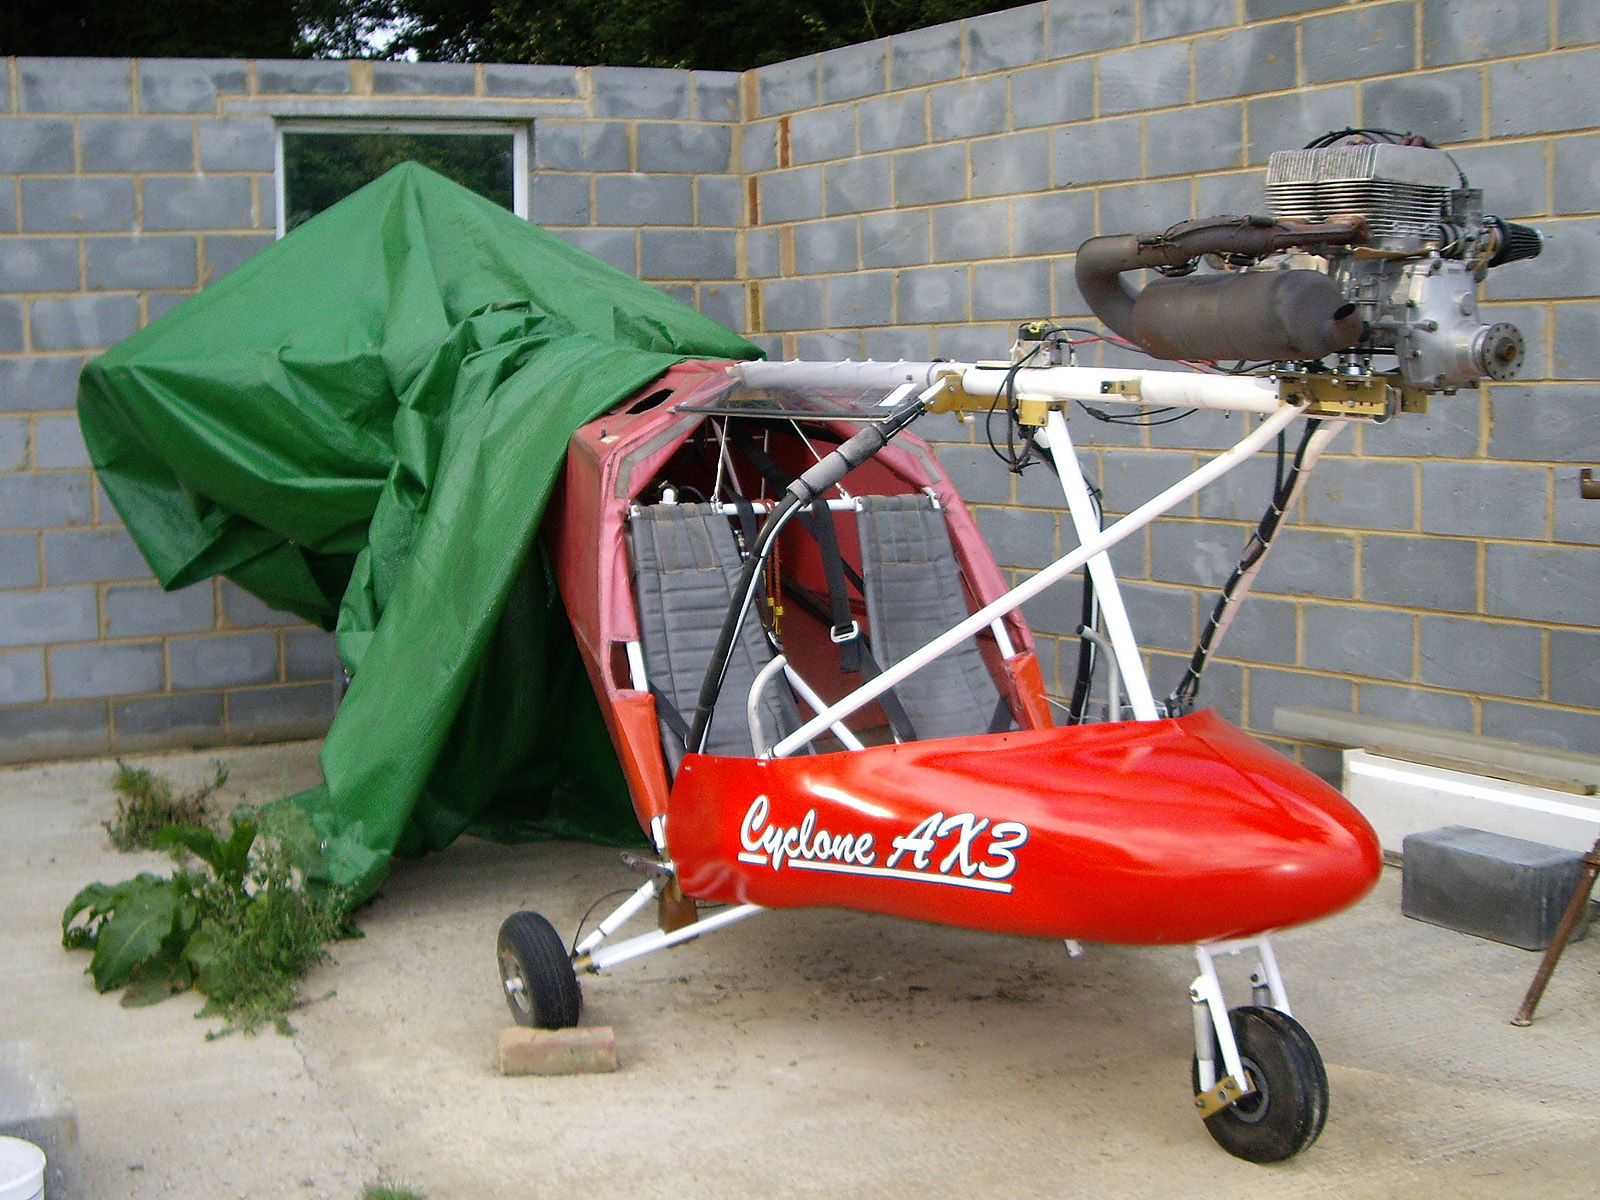
So the day began with lots of cable tying and tidying things up, stuff like that. I also had to add oil to the gearbox and wire lock the gearbox plugs and exhaust springs before turning my attention to the prop. The propeller I got hold of is a 3-blade Ivo Prop and it only took me half an hour or so to attach it to the prop flange and torque the 6 fixing bolts up to 200 in/lb. I don’t like the centre nut as much as I did the hub on the now-gone Arplast but I think I prefer the black of the Ivo to the grey of the Arplast. I think it just goes better with MYRO’s general colour scheme and looks a bit more striking. Here are a couple of pics to show what I mean.

null

null

Then on to the battery. It’s easier to fit the battery with the wings off because to make it nice and secure, you need to use some large cable ties to hold it on and give them a really good tug. It all went very smoothly and ended up as a nice neat job. So with bated breath I reached into the cabin and flicked on the master switch and was pleased to see the master neon start glowing brightly. Then the fuel pump – same again and it burst into life for a second or so until I turned it off almost immediately as it would have been running dry. Then the big one. I turned the ignition key past the left and right mag positions to activate the starter and …. nothing. Dead as a doornail 😐

This is what I was worried about because when I removed MYRO’s panel and wiring loom, even though I was extremely careful, a couple of wires close to the rectifier end detached. I thought I’d re-attached them correctly but it seems possibly not. When I was working in my garage, it was a simple matter to go indoors and check wires and connections on the many reference photographs I’ve taken whenever I’ve done any kind of work on MYRO, but I can’t do that working over at Ken’s. So I’m resigned to having to get my wiring diagram out and physically check where the error is and I just hope that I don’t end up upside down in the cabin with my head under MYRO’s panel tracing circuits. I’ve just about had enough of that kind of thing 😕

I then sorted out the wing struts ready for re-fitting the wings and shortly after, Peter arrived. He and Ken gave me a hand and having done the job before and knowing what to look out for, pretty soon MYRO had its wings back on for the first time since the accident happened in May. It was a sight that gave me enormous pleasure and even though only the main struts were fitted at the time, here are a couple of pics to mark the event.

null

null

Some time ago, Ken and I had been thinking ahead to the day when I fly MYRO out for its check flight. The field I’ll be using which you can see in many of the pics suffers from good old Kentish flints that seem to rise to the surface over time and either remain embedded with sharp edges pointing upwards or even come right out and lie there fully exposed. They can’t be left and as it was late afternoon by now and there was a bit of a crowd present, we thought we’d have a group flint picking-up session. It was very effective and in an hour and a half or so, we cleared a good runway’s length. The others then all had to go and before leaving I thought I’d attach MYRO’s wing jury struts to more or less finish the job off. By the time I’d finished, it was getting quite late and a bit dark and here are two final shots, taken after I’d moved MYRO into the centre of the concrete standing before leaving. As I had them in the car already, you can see that I’d put the seat cushions and head rests in the cabin as there’s no more work to do in there (unless I have to start tracing circuits, as I mentioned previously).

null

null

So that was it. It was great to see MYRO back looking like a proper aircraft again and a pity that I’d had the setback with the electrics for the starter. Hopefully I’ll be able to sort that out pretty quickly and with luck, it won’t be too long now before I’ll be calling Chris up to come and do the permit inspection. Let’s hope so, anyway.

Another very long, hard day…

But MYRO’s repair work is now more or less all over bar the shouting! The main job today was to get the fuselage rear cover back on, so that’s what I started with. It turned out to be an incredibly tricky and time-consuming job because I didn’t know how to approach it and it took several false starts and several metres of wasted nylon cord before I got it about right. But although it took me most of the day, I got there in the end and was happy with the way the job turned out. The cover ended up nice and taught without being over-tight and parts of it in the cabin door openings ended up better than they were to begin with.

Today turned out to be a new record for the highest recorded temperature in October at 29.9C (85.8F) in Gravesend – which, of course, is more or less where I am doing the work on MYRO! The day was very reminiscent of when I was putting the finishing touches to MYRO last time, except that was in July on the open airfield at Linton where I ended up getting a touch of sunstroke. This time it was a bit better though, because I had some shade to retreat into and during the afternoon the sun went behind a wall of the unfinished building in which I’m working. Even so, I made sure I took a large flask of iced orange squash with me, and I’m glad I did 🙂

After finishing the rear cover I also re-attached the rudder cables and was going to leave it there because by then I was very hot and tired. But I figured that if I could do the fettling and clean up of the engine that I wanted to do and also repaint the exhaust with heat resistant paint, then I’d only have a few odd jobs left to do tomorrow and once the wings were on, I might even be able to do some taxying and ground runs. So I decided to press on and although it was early evening, but still glorious, by the time I’d finished, I got the engine and exhaust work completed and even got the engine cowl re-fitted too. Here are the end-of-day pics.

null

null

null

null

null

null

So I arrived home tired but very happy with how the day had gone and I can’t wait now to see exactly what tomorrow might bring 😉

Twin tank problem cracked!

Last time I found that the main problem causing the slow transfer between the tanks was the collapse of the plastic outlet on the main tank when the fastener connecting the fuel tubing to it was tightened. I thought I might have solved it by moving the connector closer in towards the tank body where collapse would be less likely but I found when I added more fuel today that the transfer rate was better but still not good enough. When I removed the tubing I found that this was due to ‘memory’ in the plastic and even though the section of the outlet was beyond the fastener, it was still collapsing but not by quite as much.

I then decided it was time to move to ‘Plan B’ and went off to buy some small-bore copper tubing to insert into the tank outlet and work in the same way as a stent does for heart patients. I got two diameters and was delighted when I got back to find that the larger of the two did the job. The result was that when I added fuel, the transfer from the main to the second tank was not instantaneous, but was hugely improved to the extent that it will be very workable. Also, when I drained the tanks afterwards (remember that MYRO will have to be re-weighed for permitting and the tanks should therefore be empty for that), both tanks drained at the same rate. Here’s how the set-up looked at the end of the job – I am very pleased with it, I must say.

null

null

This is a real result because it means that when MYRO takes to the air next time, it will have a duration with full tanks of over 3 1/2 hours! Full tanks will only be possible when flying solo (legally you must trade fuel for weight to remain within the maximum permitted total) but I can hardly wait 😀

Two tanks now

It was ‘end of month’ quiet today so I decided to take the afternoon off as ‘personal time’ and do a bit more on MYRO. The reason is that I would like to get the wings back on by the week-end at latest as both Ken and Peter will be there to give me a hand whereas after that, only Peter will be available and then only at certain more limited times. So I scooted round to get what I needed – I got some large bore fuel tubing on Sunday but I was worried that it wouldn’t be quite enough (and I was right too) plus although I bought a ‘T’ piece yesterday, I also needed some more hose clips. Then I got myself over to Ken’s and started work.

First I had to drain what little fuel was left in the tank and while that was happening, I gave MYRO’s rear fuselage framework a good clean. I also did the seat backs too and afterwards it looked a great improvement. Then I got to work installing the second tank. It was so much easier working from the rear and at the end of it, the job looked much better and neater than before. I also found out why the transfer rate between the tanks was so slow. It was because the stub to which the tubing is attached on the main tank is an extension of the tank itself and is, of course, made of plastic. When the hose clip had been tightened, it had collapsed in on itself reducing its bore to a fraction of what it was supposed to be, so the problem had nothing at all to do with the connecting tubing. This time when I connected the tanks I moved the clip up tight against the tank body where, in theory, the outlet can’t collapse. I won’t know whether the current arrangement works any better until I add some fuel so I’ll need to do that before I re-fit the rear fuselage cover.

Even so, I’m toying with the idea anyway of doing a similar thing to what I did previously when the tube collapsed on the second tank outlet which is to insert a short length of copper tube where the collapse happens. It will slightly reduce the bore of the tube at that point but the amount of reduction may be less than if the outlet itself is allowed to collapse, even slightly. The only way I will be able to find out will be to add some fuel and see how quickly it transfers and then I’ll be able to make a decision. What is heartening, though, is that at least it looks as though the flow problem is solvable

So it was a good afternoon’s work. If I can get the rear cover back on tomorrow, the wings can then be re-fitted immediately after. I seem to have lost one of the large clevis pins that attach the wing roots to the fuselage but rather than order one from P & M straight away, I’ll phone and see if Medway Microlights has one. If they do, it’ll save me time and I’ll know that I have it in my hand and it’s not in the post somewhere. So that’s my first little job tomorrow, and here’s hoping that when I check the tank flow (also tomorrow maybe?) it is fast enough to make the current set-up permanent. Pics next time which will (hopefully) show both the tank arrangement and the rear fuselage cover going back on. And the wings? Not next time, but probably the time after I would think 😉

Useful stuff today

I got several fiddly things done today so when I get over to Ken’s next time I should be able to make some good progress. The main thing was that I did the stitching on the cover and it turned out pretty well. It means that I can now get rid of two rather unsightly plastic patches – two, because although the stitching had only gone on one side, I put a patch on the other side too to match them up 🙂

Then I turned my attention to the second tank which I want to fit while the fuselage cover is off because it makes access so easy. The first thing was to sort out some large bore connecting tube but by the time I’d finished the work on the cover, our local car spares shop had closed. After trying Halfords without luck, I remembered one that was ‘open 7 days a week’ when I was much younger and used to mess about with cars. I drove there and sure enough, it was open and I was able to buy what I’m hoping will be the perfect plastic tube for the job. When I attached it to the second tank it was ‘just right’ which is always a good sign. It occurred to me that I should also have bought a ‘T’ piece of the same diameter while I was at it because if I can get that to fit nicely to the main tank’s outlet, then I’ll have a job that’s probably as good as it could possibly be without doing work to modify the tanks. Anyway, I’ll have to see about that tomorrow.

I then turned my attention back to the fuselage cover to finish off the afternoon. I’ve always had to put plastic patches on the outside under the fuel inlet where people in the past have allowed the fuel to overflow and it has damaged the Mylar surface. With the cover off and clean(ish!) I was able to replace some nasty black tape on the inside that someone in the past had applied as backing and with that done, I was able to re-do the lower patch on the outside. I bought some extra red exterior vinyl from the people who did my pod graphics and I’m hoping that this will stay on and last longer than the more light-weight stuff I’ve used up to now. Only time will tell though… 😐

So that was that. I’m now ready to fit the second tank (more or less) and re-fit the fuselage cover. The next stage after that will be re-fitting the wings and that really will be a day to celebrate when it happens, hopefully one evening this coming week 😉

All targets achieved today

I had to scoot around before I left for Ken’s this morning trying to remember everything I needed to take with me. My aims for today were to get MYRO’s left wing full assembled ready for fitting back on again and remove the rear fuselage cover so I can do the little bit of stitching that’s needed on it. In the event, I managed to get everything done but it was a long, tiring day and I seemed to do everything twice because of the little cock-ups and setbacks that kept happening. It took me the best part of four hours to get the wing assembled and its cover on which I think was even worse than the first time I did it down at Linton. Admittedly that time I hadn’t completely disassembled the wing whereas this time I had to do the whole thing from scratch. But I did it and it ended up looking just as it did before the accident which was the most I could hope for really. I’ll save any pic-taking until both wings go back on again 😉

It was quite late in the afternoon when I’d finished and I debated with myself whether I ought to tackle the rear fuselage cover or leave it until tomorrow. In the event I decided to crack on and here are some pics of MYRO when I’d finished taking the cover off.

null

null

null

In the pics you can see just a little of how filthy it was up in the the back of MYRO. Before it got dark I spread the cover out at home and gave it a scrub with warm detergent using a brush and it was incredible how much muck came off. Hopefully I’ll now be able to do the stitching tomorrow before I return to Ken’s. The weather forecast is for a pretty calm next couple of days and I hope its right because I’ve had to leave MYRO’s wings and ailerons leaning up against a wall outside. If I get the stitching done early enough, I might be able to get the second tank fitted tomorrow and the rear cover back on again and if I did, I’d then be ready to re-fit MYRO’s wings. If I did, how great would that be 😀

Just to finish off, a couple of pics showing what point was reached after last week-end’s work as I didn’t have my camera at the time.

null

null

Another small step

But a big one in terms of getting MYRO back flying. I took the aileron and wing trailing edge over to Stoke this morning for Chris to cast his eye over them and he gave them the go-ahead. Chris is definitely no push-over, so it was good news when he gave them the nod. I took a little bit of time out this afternoon and as a result I was able to get the little tear in the aileron cover caused by the accident patched and the cover back on. Here’s a pic I grabbed just before the sun went down this evening.

null

You can see the little repair, on the top surface adjacent to the hinge (the hangar rash on the tip was there already but I thought I might as well do that at the same time while I was about it). The aileron is therefore complete and ready for service. If the weather is fine tomorrow afternoon and it’s not too busy, I’m thinking about going over to Ken’s and re-assembling MYRO’s left wing. If I was able to do that and bring the rear fuselage cover back with me I could well have MYRO all back together again this coming week-end. As always, it all depends on how the weather turns out this week and it’s forecast to be fine every day but quite breezy . It’s a nice target to aim for though 🙂

Perfick!

As Pop Larkin used to say and it’s as good a way as any to describe the outcome of my day today. When I had a good look at the replacement aileron after picking it up from Ken’s the other day, I unfortunately found an area at the inboard end which had been rubbing on the aircraft on which it had been fitted. It had been worn so badly that for a length of about 1/2″ from the end, the metal had been worn right through. The rest of it, the trailing edge and all of the connecting cross struts, was all in good condition though, with the exception of the three hinge points which were also all quite well worn. On the other hand, the leading edge tube of MYRO’s damaged aileron, including the hinges, was still in excellent condition and it was only the tip tube, which is connected to the trailing edge, and several of the rivets connecting the cross struts that were broken.

So the obvious conclusion, which I came to the other day, was to make one perfect aileron out of the two naff ones and that was why I ordered the items I needed for the job off Ebay on Thursday. However, they didn’t arrive in time for the week-end, so I went out today and bought the same things locally. The good thing, of course, was that I was able to see what I was getting in advance and the amount of money involved was pretty trivial compared to the importance of getting the job done.

The job was tougher than I originally expected because not only must the trailing edge of the aileron end up straight when you look along it but it also mustn’t ripple from side to side (or up and down if you can imagine it fitted in its proper position). I started by stripping everything off both ailerons’ leading edge tubes and then tried mating up the trailing edge tube and cross struts from the replacement aileron to MYRO’s aileron’s leading edge tube. It was a case of almost but not quite so then I had to swap some of MYRO’s original cross struts over (none were actually damaged, although I didn’t need any from the outer-most end which had taken the biggest knock) and I even made one up myself by shortening an old longer one that was no longer required using the existing one as a pattern. In the end the job came out perfectly and I was very pleased and also very relieved at the same time because this was more or less the last ‘tricky’ job still outstanding. Here are a couple of shots of the new aileron mated up with the replacement wing trailing edge tube.

null

null

I phoned Chris during the afternoon to see if he could inspect both items today so I can press on with the re-assembly but due to a family bereavement he couldn’t. However, I’m hoping to get them over to Stoke first thing in the morning while things are still quiet so I’ll be able to press on if I can find a bit more time during the week. Not long now, hopefully, before I’ll be thinking about getting MYRO inspected for re-permitting. I can’t wait and to be honest, I’m finding the job pretty tiring now and I’m looking forward to having a rest at the end of it 😉

So frustrating and annoying

Yet again I have a list of jobs to do to move MYRO forward and I’m sitting indoors watching the rain lashing down outside. I picked up the ailerons and trailing edge tubes from Ken’s a couple of days ago and I was all set to do what I have to do before getting them over to Stoke for Chris to inspect them. I then planned to get the wing reassembly work done, ready for them both to be re-fitted. I also now have the prop bolts so that can be fitted as soon as I’m ready to. I’m so close to getting finished now but at this rate I could lose yet another week. I’m getting so fed up with how this keeps happening, time after time 😡

I just came back to add a bit more to this post. The day turned out not to be a total loss after all. Once the rain stopped I got across to Ken’s and got cracking doing what I could despite the horrendous wind that was still blowing after the rain had passed through. I forgot to take the hole cutters with me last time so couldn’t fit the lower Mikuni that needs a hole cut through the screen to match the one that’s in the side of the pod, so as well as doing that and fitting the Mikuni, I also drilled the two holes for the electric fuel pump and fitted that too. I had to get a short length of fuel pipe to connect the pump to the Mikuni because the stuff that was fitted was cracked and perished even though I only fitted it in 2009. It was made by Trelleborg and there was an official bulletin about it and as I’d had to inspect it every month and make a note in my engine log book that it was still in serviceable condition, I was glad of the chance to get rid of it for good.

I then had to lie on my back in the cabin with my legs in the air and my head under the panel to tighten up the fuel pressure gauge. This had to be done after the panel was fitted so I had no choice but I just hope that it’s the last time I’ll have to do it. I’d also fitted a replacement engine hours gauge while the panel was out. It was a cheap and cheerful Chinese unit and unfortunately its fixing system leaves a bit to be desired. I’d hoped to tighten that up too but I’ll have to find another way of doing so – probably just wrap the body of the gauge in a bit of black insulating tape and push it tightly into the panel hole which should be sufficient.

So that was it. I had hoped that some items I’d ordered from Ebay during the week to do the work needed on the aileron would arrive in the post today but they didn’t. Ruddy nuisance but it was lucky I didn’t wait in for them. I’ll probably have to resign myself to buying them locally tomorrow and then seeing them arrive too late on Monday. Trouble is, if I don’t do the work this week-end, I might end up losing a whole week which I’d really like to avoid now I’m this close to finishing. It’s yet another inconvenience – as I say, frustrating and annoying… 😕

Did it!

It’s been a long and tiring couple of days but I’ve just about managed to achieve everything I set out to do this week-end. Things went more or less smoothly today and although there were a couple of minor hic-cups, they weren’t too serious. I was a bit concerned about how well the doors would go on as they and the screen were based on a different pod, but I needn’t have worried. The screen doesn’t extend quite as far back on the passenger side as MYRO’s original did and if anyone makes another new screen in the future, it should be extended back a bit on that side. But luckily, because I’d made the door such a nice tight fit, everything fitted together nice and snugly. Also, although it took a bit of time and care to pull all the panel tubes and wiring through, fitting the panel top first did turn out to be the best way to do it. I’ll let the pics speak for themselves.

null

null

null

null

null

null

The doors are a bit dirtier than they appear in the pic and I might need to get hold of some Plexus to polish out a couple of minor scuffs on the passenger one. But the best thing is they fit nicely. The exhaust is now also a little bit rusty and could do with a coat of heat-resistant paint. It’s very satisfying to see the interior shots of the panel after seeing the depressing images of the damage to the cabin floor tubes and panel after the accident. It didn’t take that long to re-connect all the wiring and after cable-tying everything into place, it now looks little different to how it was before the accident. And that’s what I’m aiming for – except I want MYRO to look better than before because then at least some good will have come out of it 😉

Coming together

My aim for this week-end is to get the screen fitted, the panel installed and all of the electrical connections to the engine etc made. And if I can get the doors on too, that will be a bonus.

I wasted a bit of time because I had to return home from Ken’s to get the old screen so I could check on a couple of things before making some important cuts in the new one. Then I had to leave again to buy some superglue to repair a small split that appeared for some reason in the tube padding on the passenger side which if left would have held me up and stopped me fitting the screen and door. Even so, and despite the showers that kept coming through making me stop work and cover my tools and MYRO up so they didn’t get soaked, with a bit of help from Ken who helped me with the drilling for the plastic bolts and cable ties that secure the screen in place, by the end of the afternoon I’d got the new screen and the panel top fitted.

null

null

null

null

This time round, I’ve tried fitting the panel top first which gives easier access to all of the securing plastic bolts and I hope that it will then be a relatively simple job to feed all of the panel cabling and tubes back up through and then pop the top fixings into place to secure the panel. Time will tell if I’m right or not. And the adjustments that I made to the sizes and positions of the nose and side strut slots have also worked perfectly and now for the first time more or less since I’ve known MYRO there is a nice even gap all around the struts and the panel isn’t able to chafe on the tubes.

As I was clearing up it began to shower quite hard and instead of putting the doors inside MYRO, I placed both of them in position and attached both their bungees to hold them in place. MYRO then looked even more as it should and things are certainly coming together now, as you’d expect given the time I’ve been working on it again. Who knows what next week-end might bring if I achieve my target for this one … 😉

Some hope! Some weather…

So much for getting my new screen on MYRO today. It’s stopped raining now but too late. I ended up cutting out the screen on my lounge floor including the slots for the nose strut and side tubes. What a mess! I laid a sheet out over the carpet but it’s amazing how much stuff still ends up over the edge. The new screen is now ready for fitting but it’s far too late to do anything now. I just hope I get the time to do it during the week.

Anyway, clicking on the image below will show a short video of the progress of the repair to date.

null

The weather caused the accident in the first place and it’s doing its darndest to stop me doing the repair as well. What a lousy Summer we’ve had this year – even worse than last year, and that’s saying something 🙁

Big leap forward

It was a lovely flying day again today. Bit of wind, but not too much, around mid-day, but it died down later and conditions were excellent with bright sunshine and good vis. But no flying for me again today. Today’s mission was far more important – to get MYRO’s pod back on so I can move on to the screen and panel. First job, though, was cleaning all of the tubes and nooks and crannies as far as the back of the cabin. I know that I haven’t cleaned MYRO properly since last Summer but I’m amazed how much grime is now coating everything. It seemed to happen while MYRO was just standing out at Linton and not as a result of flying so I think when the time comes, I shall need to think about improving my covers so the whole pod and cabin are enclosed when MYRO isn’t being flown.

Anyway, the job didn’t take too long because everything is so accessible with the pod and screen off, and then it was time to re-fit the pod. Very little to say about it really – after my dummy run a few weeks ago, it went on very easily and with no damage. I was absolutely delighted to find that all the holes lined up perfectly, including the two for the cross tube which I was worried about after spending a bit of time a week or so ago straightening and re-shaping the brackets to get them back into shape again. Here’s how the interior of the pod ended up looking.

null

After all the work I’ve put in, actually I think it looks better than MYRO did originally. So now I was able to (temporarily) re-fit the lower Mikuni fuel pump and the crankcase vacuum tube and it was great to see MYRO beginning to take proper shape again. I also re-fitted the trailing links for the main undercarriage and was relieved to find that they went on pretty easily. That’s good because it means that there’s been no distortion of the main undercarriage or underside of the fuselage as a result of the accident which was a slight concern up until that point.

null

Although it was unlikely that they were damaged in the accident (highly unlikely according to Mark at Galaxy) I then replaced the engine mounts with the new ones that I got from P & M. In fact, the four engine mounts were one of the largest single repair items costing the best part of £150! It was at this point that I began to think about the engine itself, which was still in the back of my car after picking it up from Mark the other day while my phone and broadband were down and I couldn’t think of anything better to do with my time! Ideally, I wanted someone to give me a hand to lift it up onto MYRO’s nose, but Ken was away today and there was no-one else around. I toyed with the idea of seeing if I could do my Charles Atlas bit and just hoist it up by myself but soon realised that that would be impossible. I then found a couple of old trestles and placed them in front of MYRO with a short board across them and that got the engine nearly half way up. I then tried placing the engine on a concrete block on the board and that got it about half-way. I experimented with climbing onto the board to see if I could then lift the engine but it was all too rickety and I had visions of the engine wobbling until it fell onto the pod, smashing it and taking me back to square one, or beyond even if the engine was also then damaged.

As the pics show, MYRO is in the corner of an unfinished building and I had the idea of taking a large scaffold board, placing one end on the top of the adjacent wall, tying the engine in a sling arrangement about three feet or so from the other end and then lifting the other end to raise the engine in a kind of lever arrangement. In fact it worked like a charm 😀

I soon had the engine in position located by the two rear bolts that can’t fall out on account of the two nose support tubes on each side. It was then just a simple matter of tightening all the engine mounts, re-fitting the carburettors which have been kept on a polythene bag all this time and re-fitting the exhaust. Here’s how MYRO looked by the end of the day.

null

null

null

I was absolutely over the moon. MYRO is beginning to look like a proper microlight again now and today was a really big leap forward. Tomorrow I’ll be able to fabricate the new screen and who knows – maybe I’ll even be able to get it fitted. I’m keeping my fingers crossed 🙂

Pod graphics

Everyone in our area lost our phones and internet for the last 3 days so this is my first chance to mention my new pod graphics. I stuck ’em on a couple of days ago and it was quite a tricky job I have to say as I’ve never done anything like it before. I’m very pleased with the overall look – see what you think.

null

null

What made it difficult was that the pod surface curves in both directions – horizontally and vertically – and the graphic starts off flat, of course. The second side came out better than the first as having done it once, I found it easier to do the second one, with fewer little creases in it. But the thing about vinyl graphics is that once they’re on, they’re on, so too bad if you mess it up as you only get one chance! I don’t think I did too badly overall 😉

Ready for the pod

At last! I finished off painting the trailing link and left it hanging up in my garage before dashing off over to Ken’s place. It was still a little bit breezy but the sun was quite warm when it came out through the gaps in the clouds, so I really couldn’t miss the opportunity to do the painting on the side tube.

And it all went well so when I left, MYRO was at last ready to have its pod put back on. I also took the opportunity to give the top plastic a bit of a clean and remove all of the rubbish that has built up under and around MYRO, so this is where I now am with the repair.

null

null

null

I should have the pod graphics by tomorrow and when I’ve put them on, the pod will be finished. This pod doesn’t have as many holes around its top to hold the panel and screen as MYRO’s original pod had and I want to make it more or less the same. I haven’t decided yet whether to temporarily fit the panel top before or after fitting the pod, so I can drill the extra holes. It’ll probably be best to do it with the pod fitted because then it will be held more rigidly than if it was just placed on the ground or my patio table. But in any case, before the pod goes on, I will need to do a lot of detail cleaning of tubes and nooks and crannies which are now filthy. I knew they were, but I especially noticed it today when I cleaned the top plastic which was thick with grime and came up sparkling again afterwards. Well, almost … 😉

Sometimes you wonder

Too cold, breezy and showery to do the little bit of painting but I may nip over to Ken’s later on to (temporarily) fit the rudder pedals and bring the trailing link back home for spraying. I thought I might as well see about cutting out the new screen but as soon as I got everything out to make a start, the sun disappeared and we had a torrential shower of rain. Luckily I saw it coming and managed to put everything away again in time.

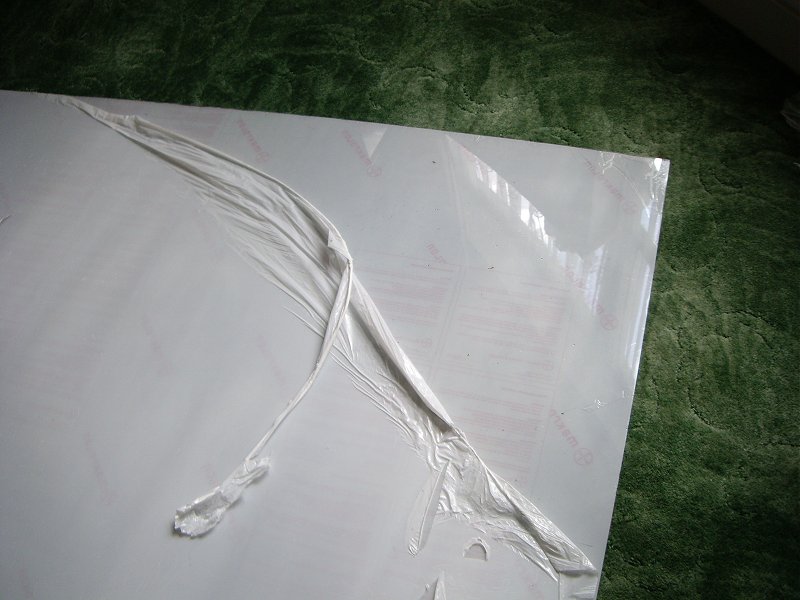
So I thought I might as well revert to Plan B, which was to do the screen on my lounge floor. I’ve had the plastic since Tuesday and as it scratches easily, it’s best to leave it packaged up until you need it. As soon as I unpacked it I was astonished to find that whoever had packed it at the supplier’s end was obviously trying to pull a fast one. Sheets of polycarbonate come with protective plastic film on both sides which you leave on until you’ve finished working on it. When I received plastic from the same supplier last time the film was all all intact and in place but this time not only was most of it hanging off but the sheet had also been scuffed as a result. Here are the shots I took which I’ve already sent off to the supplier.

null

null

null

Apart from ruining my plans for this week-end because I’d hoped to get the pod and screen fitted by the end of the Bank-Holiday, I’ve now got all the hassle involved with getting rid of this sheet and getting hold of a replacement. The damage to the sheet was so obvious that whoever packed it must have been fully aware of it. You have to wonder what motivates some people sometimes 😡

Just like last August

I’m waiting for a weather window so I can move on 🙁

Every day since I sprayed the pod and left it hanging outside, we’ve had nothing but rain and more rain. And it’s been very cool as well. Yesterday we had several absolutely torrential downpours and today, would you believe, we have a weather warning her in the South-East because of the risk of prolonged periods of heavy rain and possible local flooding. Not where I live because my house is on the top of a hill, but if it keeps raining the way it is while I’m typing this, home-owners on lower lying land will begin to sweat a bit, I’m sure.

I’m ready to fit the new pod, except I can’t because there are two fuselage tubes that I need to spray paint first, and that’s impossible all the while the weather stays as it is. I have no choice but to do the work in the open at Ken’s and all I need is one nice, warm sunny day like you expect in August and that would be it, but that won’t be today or possibly tomorrow, even. It’s very frustrating and I’m sitting here beginning to stew a bit 😕

One thing that has occurred to me though, is that if I put a clean sheet down on my lounge floor, I could use the time to cut the new screen out. From my experience last time, it won’t take that long to do and at least the time then won’t be totally wasted. Yup, I think I’ll do that …

Paint crazy

The new darker grey arrived from the paint company today. Hopeless again – still too light. If only I’d made them match the original colour sample I sent them. The trouble is that the colour references I have to work with are very small and in reality it’s impossible to see which grey is the closest match to MYRO’s panel as I’m now proving.

But not to be deterred, as I’m not going to try again (I’m already over £22 down on paint all for the sake of a couple of relatively tiny panel repairs) I thought I’d see what I could do to make my own match that I could then brush on. All I did was spray some black gloss into an aerosol lid followed by increasing amounts of the latest grey until I got a grey that I judged was about right. I started off by doing the filled holes in the panel top that won’t be seen actually and after deciding they looked OK, I then did the main panel repairs this evening. It’s too late now to do any pictures, but I’m absolutely delighted with the results 😀

All I’ve done is T-Cut them in and as my old granny might have said, a blind man would be pleased to see them. You’ll hardly be able to see the main repair on the pilot’s side anyway as it’s underneath the front, but in fact it’s come up very well. And the repairs on the panel feet are hardly noticeable at all in the light in my conservatory, so I just hope they look as good tomorrow in daylight.

So after being driven a bit crazy by this paint matching lark, it looks as though I may at last have come out on top. I left a couple of holes in the panel top which I thought lined up with their counterparts in the pod but now I’m not so sure. Tomorrow I’ll check and if either or both don’t, then I’ll fill them and paint them in too, effectively starting panel fitting from scratch. The panel top came from MYRO and the pod holes are a legacy from MYFI so in the long run, it’ll probably be the best way.

Just returned to add a couple of shots of the repaired screen.

null

null

I’m satisfied with the results. They are not perfect by any means but it’s a compromise between time and finish in this situation – if you had time to fill, rub down, fill and rub down again, try a coat of paint, fine fill and rub down again and so on, you could get results that would be much better. But in any case, it’s a well-used panel now and there are quite a few other marks on it, so I don’t think that the most recent repairs stand out too much 😉

More small steps

I was hoping that I’d be able to get across to Ken’s later on yesterday and do a little bit of painting. The old screen had scratched the right hand riser tube and that needs to be done. Also, I scratched one of the main fuselage trailing links when I stripped the old pod off and I thought that I’d bring that back for painting at home rather than do it in the open at Ken’s. As it happened, though, the weather was too poor and I didn’t get over there.

What I did do, though, was order the plastic sheet for the new screen and also some different dark grey for the panel repairs. I established with the paint company that the RAL grey reference that I’d quoted for the colour I’d bought is actually a lot lighter than what I thought it was, so no wonder what I received was wrong. I just wish I’d asked them to stick with matching the MYRO-grey.JPG that I’d sent up to them in the beginning 😕

Today it’s rainy and miserable (typical August some might say…) and the pod is still hanging outside, soaking wet. However, earlier on the car roof bars arrived that I need to transport the wing and aileron tubes for Chris to inspect before I fit them, and a few minutes ago the screen plastic was also delivered. So I’ve now got more or less everything lined up. The only bits left to buy now that I can think of are the propeller bolts, which I need to order from GS Aviation, but they can wait for now until I’m almost ready to fit the prop.

So another few small steps nearer to getting there 🙂

Now I really am seeing red!

Because I finished spraying MYRO’s new pod today 😀

I checked the weather forecast last night and light winds were forecast for this morning, so I was up early and raring to go. Got the pod out, wiped it down and then wiped it again with a cloth with some turps on. Then wiped it yet again with a tack rag and I was ready to go.

The red looked delicious in the can – almost good enough to eat – and I mixed up two jars so I didn’t have to stop for too long when the gun ran out. I found it amazingly easy to spray and it went on much easier than I thought it would do. Within an hour or so and another four or five jars later I was finished – and it took me the same again, maybe more, just cleaning everything up because it’s amazing how a colour like bright red travels everywhere 😕

It was only after I’d given it a quick inspection and pulled all the masking off that I noticed that since I’d finished, a few small bubbles had appeared. By that time it was getting on for lunch time and I thought, what the heck, worry about them when I come back and nip down to the flying club and grab something to eat. So that’s what I did. I’ve been a bit cut off at home doing the work on MYRO so it was great seeing a few of the guys again. And it was worth leaving the little bubbles until after I’d got back, because if I’d tried to do anything with them before, I know I’d have ended up messing the pod up and spraying it again. As it was, by the time I got back, the ‘bubbles’ were hard and I was able to lightly rub them with ultra fine wet-and-dry paper and T-Cut them in. In the end, I could hardly see them and the job ended up much better than I’d dared hope before I started. Here are a couple of pics of the finished pod.

null

null

I’ve decided that rather than put it back in the garage where it might get scratched, I’ll leave it where it is for a day or so for the paint to harden off. It will eventually be standing outside and I can’t see what harm it can come to. I think the ‘new’ pod now looks much better than MYRO’s old one did after I’d repaired it because the last time I’d avoided respraying it. This time, it’s the respray that ‘makes’ it and looking at it now, it’s hard to believe that MYRO’s lovely shiny new red pod started out as MYFI’s tatty old blue one. I’m very satisfied with it 😉

How things can change…

… from one day to the next. I obviously tempted fate a little bit too much by my comments yesterday about things going like clockwork because today it has been completely the opposite. Mind you, things started well… it’s just that they then went downhill fast.

The weather forecast was good for today so I was up with the lark to get going. I started by rubbing the pod down to flat the primer coat that I put on yesterday and I was really pleased with how well it came up. There were a couple of little bobbly bits that I’d sprayed over and when I rubbed over those, I went through to the blue of course. My fault, I should have got rid of all of the bits like that before I did the priming. I tried brushing a bit of primer on after I’d flattened them but the trouble with that is because what you put on by hand is thicker than what you spayed, when you rub it down you then go through in the area surrounding the bit you hand painted. No harm done, just a nuisance, so I decided to bite the bullet and get the spray gun going, but before I did it began to lightly spit with rain. I just couldn’t believe it – here we are, August, no rain forecast, not much wind and I can’t spray!

I then thought I’d turn my attention to the panel so I could at least get something done today. Starting with the top in which I’d previously filled the bolt holes, I thought I’d see how good a match the grey I’d had mixed was before I used it on the repair I did. SHOCK HORROR!!!!!!! What came out wasn’t dark grey at all – it was more like grey primer! So I was stymied again! I’ve emailed the paint company but nothing can happen now until Monday, of course.

As I type this it’s mid-afternoon and the rain has started to fall quite heavily and I’m now beginning to wonder just how much progress I’m going to be able to make this week-end, after all 😕

Just came back to say that shortly after I typed the above, the rain stopped and almost in an instant, the sky cleared and we had scorching sun for a short while. I took the chance to get everything back out of my garage and get the spray gun going. I managed to spray the patches in that I needed to and also do a little bit more stopping of one or two more small blemishes that I had found. By the end of it all, the pod was beautifully smooth and ready for its finishing coat. Incidentally, I don’t know what I did differently, but this time the patches I sprayed in came out lovely and smooth with hardly any overspray and I don’t know whether it was due to the mix of the paint, the gun setting (which I changed very slightly) or my technique. I just hope that the same happens with the red finishing coat when I eventually do it!

Singin’ the blues (not)

Because at last the new pod is no longer blue! It’s a delicate shade of grey. The weather forecast was for a warmer day than yesterday but with a little bit of wind, but I couldn’t let that worry me. I had to get the pod primed!

What can I say? Everything went like clockwork for a change. My idea was to mount the pod nose upwards (of course) on our fold-up clothes line and it worked like a charm. The actual spraying I found a complete doddle – didn’t get even one run or anything like it. The only problem is that working outside, there’s an awful lot of tack flying around in the air and even though I gave the pod a good wipe before starting, the paint has a lot of light ‘fluff’ on it. That shouldn’t be a problem with this primer coat because I’ve made it nice and thick and I’m going to give it a careful rub down all over, to flatten it. But it will matter when I do the finishing coat, so I may have to have a rethink of how, and where, I’ll spray that.

Here are a couple of shots taken shortly after I finished.

null

null

I was even surprised at how quick and easy it was to clean the gun up afterwards. My aerosol can of grey for the panel also arrived today as well as the two new bolts for the rudder panel base plate, so now I’m ready to make some really great strides forward. Just hope that the weather keeps holding and I might still make my August target to get MYRO back together again.

Absolutely typical

I worked yesterday evening and cleared my (business) decks so I could spend the whole of today between phone calls on MYRO work. But as usual the weather has had the last laugh. It’s turned out to be a dull, cold, windy day, a bit like last August when I was waiting two weeks for a weather window for MYRO’s check flight, so I’ve managed to do almost nothing. If today had been like yesterday, as I’d hoped it would be, my plan was to get the pod primed up and ready for top coat. As it is, all I’ve been able to do is spray the cabin floor cross tube in gloss white finish.

Compared to when I was working on MYRO last time, my garage has managed to become full up with stuff again, a lot of it off MYRO I should add, so there’s no chance of working in there. I have to have a warm, fairly calm day so I can mount the pod and spray it outside. I just hope I don’t have too long to wait but on today’s showing I’m not too optimistic. Saturday is forecast to be dry and warm with low winds but with occasional strong gusts and I just hope that they are wrong about the gusts. If I’m lucky, it might even be possible to get the priming done tomorrow evening which is also forecast to be warmer and less windy once the weather we currently have clears away, so yet again I’m keeping my fingers crossed and hoping 😐

Engine – great news!

I just phoned Mark at Galaxy Microlights about my engine. If you have a propeller strike, you must have the engine shock load tested in case it has suffered internal damage. For example, a few teeth might have been stripped in the gearbox, the woodruff key attaching the heavy flywheel to the crankshaft may have been bent or even sheared off and worst of all, the crankshaft itself might have been damaged. The one bright hope for me was that although I lost my lovely Arplast prop in the accident, its lightweight construction means that in theory, the force required to shear off its blades is less than the force required to do damage to the engine. I’d hoped that this was the case because after the accident, the engine was still running quite sweetly, albeit a bit out of balance because the prop blades had not all sheared off at exactly equal lengths.

Well, the great news this morning is that my highest hopes have been realised and the shock load tests that were carried out have come up with ‘no fault found’. I am really pleased about this because my Rotax 503 has been a great little engine and through all the hours flown it has never missed a beat. It was one of the reasons why I was so confident about doing my low level flights over the sea and I’m very pleased that once refitted, it will continue giving great service, just as before.

Anyway, I’m thinking I might nip across to Ken’s and fit my nose strut now I’ve drilled it out and pick up some more cable ties while I’m out. Then when I get back I can rub down the pod re-repair that I did yesterday so it’s back ready for spraying and also cut down the nose wheel spacers so the nose wheel will fit into the forks. And hopefully I’ll also be able to find time to fill the existing holes in my rudder pedal base plate so I can drill new ones at the new, correct spacing. If I can get all that done, it’ll end up being another very good day I reckon 😉

OK, it’s now just gone 8.30pm and I thought I’d come back and add an update to the above which I posted this morning. I can report that I got all of those things done, so the day worked out well. It only took a few moments to rub down the pod repair so I got that out of the way first. Then not only did I get the nose wheel spacers cut down but I also fitted the nose strut and the complete nose wheel forks assembly to MYRO this afternoon. When I eventually fit the pod, the nose wheel and forks will have to come off again, but it’s good to see MYRO back with 3 wheels again.

I also completed the work on the rudder pedal base plate – it was a nice warm day and the fibreglass filler and paint both cured very quickly, so I was able to do everything I needed to. When I positioned it on the fuselage base tubes, the new holes lined up beautifully as well. I couldn’t re-fit the rudder pedal assembly because I’d forgotten that there’s a metal plate that goes under the rudder pedal mountings that the bolts also pass through so its holes will also have to be elongated a bit. But the bolts are bent anyway, and I’d forgotten to order replacements so I couldn’t have fitted the unit anyway.

By the way – the man from Autopaint also phoned this afternoon. The grey JPG that I’d uploaded I’d called MYRO Grey and he asked what a MYRO was. Well, I told him and he said that it’s difficult to closely match an uploaded colour, although they’d do it if necessary, but did I have a colour reference? The pod colour I ordered was RAL3020, Traffic Red. I said that I’d check, and when I did, I found RAL7042, Traffic Grey that I think is so close to the panel colour (and also the JPG I created) that that’s what I’ve now ordered.

And yes, I also remembered to pick up another large pack of cable ties, so things are now getting really close to the point where I’ll soon need to re-fit the pod. So now I need a bit of warm, calm weather for me to get the spraying done and then things really will be looking very good indeed 🙂

Another useful day

I got the stuff out of my garage as soon as I could this morning and was pleased to find that all of the repairs I did yesterday had worked a treat. The main ones, of course, were on the panel. I found that the foot piece that had snapped off in the accident and that I replaced yesterday had moved a fraction after I’d put the panel back in the garage for the night. I thought at the time that the resin was hard but evidently it was still soft enough to move a bit. Anyway, no harm done because I was able to add a bit of filler to the front which tidied it all up and also made the repair thicker and even stronger.

I was delighted to find that when I removed the clamp that had been holding the main split together while the resin cured, absolutely nothing moved, so that meant that the panel front was now back in its proper shape. During the day I added some more fibreglass cloth to increase the thickness even further and with a little bit of judicious filling on the front, that repair also turned out very well. While I was doing the little bits of extra filling, I also filled up from the front the holes in the panel top that I filled from the back yesterday, and they also came out as well as they possibly could have. Incidentally, at times when I was working in the direct sunshine, the fibreglass filler I was using flashed off in minutes, so I had to make sure that I was as organised as possible and didn’t make up any more than I could use before it began to harden. So that was three out of three so far 😉

Next was the repair of the split in the back of the pod. I have to confess that it looked a bit ‘chunky’ compared to my other pod repairs because of the amount of cloth I’d used, but no chance at all that it will go again, I think! But after I’d rubbed it down a bit and painted it, it didn’t look too bad, and it’ll be under the seat where it will never be seen anyway. Four out of four and going strong!

Finally, I thought that I might as well start on the cabin floor cross tube while the weather was so fine. Well, to cut a long story short, I got the tube filled (the deep scratches caused by soles of boots), rubbed down and nicely primed with no runs before I finished for the day. So another successful job, making it a full house 😀

Here are a couple of pics showing the finished pod repair and the panel repairs with just primer on.

null

null

I’ve decided that because of the extent of the repairs, unlike last time when I just touched bits in by hand, this time I’ll have to spray paint them. The problem, of course, will be finding a reasonable colour match. The way I’ve tried to get round it is to take a photograph of the panel and then create a JPG image that’s as close to the colour as I can get it, by my judgement anyway. I’ve then uploaded the image to Autopaint at St Helens from where I bought my red for spraying the pod and primer. As well as supplying paint in cans for spraying, they can also mix any colour for you and put it in an aerosol. How handy is that! I should receive it in a day or so and one thing’s for sure. It must be much better than the match I knocked up last time I painted the bits on the panel – mustn’t it? 😯

All round good day

It’s not often that you get a day when everything more or less seems to go right so when you do, you need to make the most of it. I started off with the new nose strut. I decided that it wouldn’t be a good idea to drill out the top bolt hole ‘in-situ’, because for a start I’d need to take the generator over to Ken’s, so I thought I’d go over there first thing and bring it back home. Why I didn’t think about it yesterday I don’t know because it didn’t take that long to get it home and drill it out – job done!

The other jobs I wanted to tackle today all involved resin repairs because it was a nice warm day without too much wind. The main ones were the pod repair (the split I caused yesterday when I checked the positions of the bolt holes) and, of course, the panel repair. I thought for once I’d try some of the ‘corrosive’ paint stripper on the pod to remove my new paint so I could do the repair. It was a bit of an eye-opener. Nitromors paint stripper is described as ‘not suitable’ for fibreglass. In fact I found it worked very quickly, much quicker than the ‘eco friendly’ stuff I originally used, and by washing it off as soon as it had done its job, it caused no harm to the pod whatsoever.

Next I prepared the panel repair including the repair to the foot that had been snapped off when MYRO’s nose bent upwards with the impact and lastly, having checked the holes around the panel top and finding that practically none of them lined up with the holes in the new pod, I also prepared those for filling. The first batch of epoxy resin I made up I used to do the pod and the main panel repairs. I then started off on the panel top holes and I noticed that the resin was by then going off so quickly in the heat of the sun that it was smoking! That meant I had to throw a lot away together with the brush I was using because that also went hard. The next batch went off a bit slower and with it I was able to add a bit more strengthening to the main panel repair, do the repair on the panel feet and also fill all the holes in the panel top. So I was very pleased with the results.

Then I turned to the cabin floor cross strut. The first thing I found was that the brackets, as well as being slightly misshapen as a result of the accident, had also become stretched around the side tubes. I think this might explain why the bolt holes had moved outwards towards the side tubes making the brackets appear too short, so I reshaped them both and I hope that when I come to re-use them that I will get enough tension in the cabin cross tube as I mentioned in my previous posting without having to spring the outer tubes inwards excessively.

That just left the cross tube itself. I had tidied it up when I did MYRO the last time but it was already showing some signs of wear, and not surprisingly as you use it to put your foot on when you enter the cabin. I had a bit of time left at the end of the afternoon so I used it to start on a repaint of the tube. And that was it. I’ve left all the resin repairs alone to give them a chance to cure overnight and go hard and I’m optimistic that after today I’ve broken the back of them. The main ones are on the panel, of course, and I’m pleased with how they have turned out so far today. I’ve also got to finish off the pod repair but as it’s on the back edge and will be under the seat anyway, I’m sure that I won’t have any problems there. So like I said in the title, today was a pretty good day all round and although there’s not much to show in terms of final results, everything I managed to do was another step forward in getting MYRO back in the air 🙂

Now I really can press on

After finding that the holes on my rudder pedal base plate (that came out of MYRO) don’t line up with the holes in the fuselage base tubes (that came out of MYFI, I think), I was a bit worried that the holes in the pod floor wouldn’t line up either. So it was essential, already having painted the interior, that I checked before going any further with my pod exterior respray. So that was the main job today.

I’m grateful that I’ve got somewhere to keep and work on MYRO after the accident but there’s no doubt that having MYRO some way away does slow things down a lot and even small tasks like this can take so much longer than when I had MYRO in my garage like last time. Anyway, after padding out the back of my car I put the pod inside for the trip to Ken’s. I’m so glad that I bought this Little Astra Estate as it’s a god-send when it comes to transporting stuff like this around. I’d never have been able to do this kind of thing with my old Honda.

Suffice to say that I had to do a little bit of jiggery-pokery with bungee cords to support the pod and in the process split one of my small repairs on the pod back edge, but when I got it into place I was relieved to find that the holes all line up perfectly. And with the pod in place, although only temporarily, MYRO began to look like an AX3 again 🙂

null

null

null

The rudder pedal base plate is shown back-to-front in the last picture above. That was because I had it that way round when I was checking the line-up of the holes drilled in it with those in the fuselage base tubes. I also found another couple of strange, and slightly annoying things. Although the holes in the pod are drilled at the exact distance to match those in the horizontal cross-tube, you can see that the ends of the tube are some way away from the fuselage base tubes. This means that the brackets that join them all together are too short. It could mean that in MYFI that the pod came from, the cross-tube was set slightly further back or it could mean that the fuselage base tubes need to be sprung inwards so there’s always an element of tension in the cross-tube. I prefer the latter idea because it would mean that there would be a greater degree of stiffness in the floor structure, so when I come to fit the pod later, I’ll see if I can spring the fuselage base tubes inwards enough to use the existing brackets. I would have to make sure that the top holes where the rudder pedal base plate fits don’t move, though, as they line up perfectly with the holes in the pod.

The other thing I found when I came to fit the nose wheel within the forks for the first time is that the new wheel’s hub is obviously wider than MYRO’s was because the spacers that fit on the spindle each side of the wheel to centralise it between the fork legs wouldn’t both go in. How strange (and inconvenient) that ostensibly identical wheels can be so different. It means that I’ll have to measure the width of the hub and cut the spacers down so they fit snugly and hold the wheel central. Just another mild inconvenience I suppose, but at least I’ve now got all the information I need so I can really start pushing on and making some progress 😉

Pics from last time

Because I forgot my camera last week-end, I thought I’d take a couple of shots as a record because I do like to look back from time to time. And while I’m actually doing the work, I like to see how much progress was made day by day. Psychologically it works as a form of motivation or self-encouragement, helping you to keep pushing on while you’re in the middle of it all, because you can see things moving on each time. Anyway, here they are.

null

null

As you can see, the basic airframe structure is back in place and it’s still a wonder to me how little was damaged in the accident, actually. The ‘cost’ of the repair is not so much in the parts as the time in doing the work, not forgetting that Mark at Galaxy still has my engine and he’ll have to be paid for shock load testing it soon, too.

Awful day…

… but got lots done. Everything that I wanted to actually. There are no pictures as I forgot to take my camera – there’s so much to remember, working on MYRO at Ken’s instead of in my garage – and it was just as well because most of the time I was rolling around on the ground and my hands were filthy.

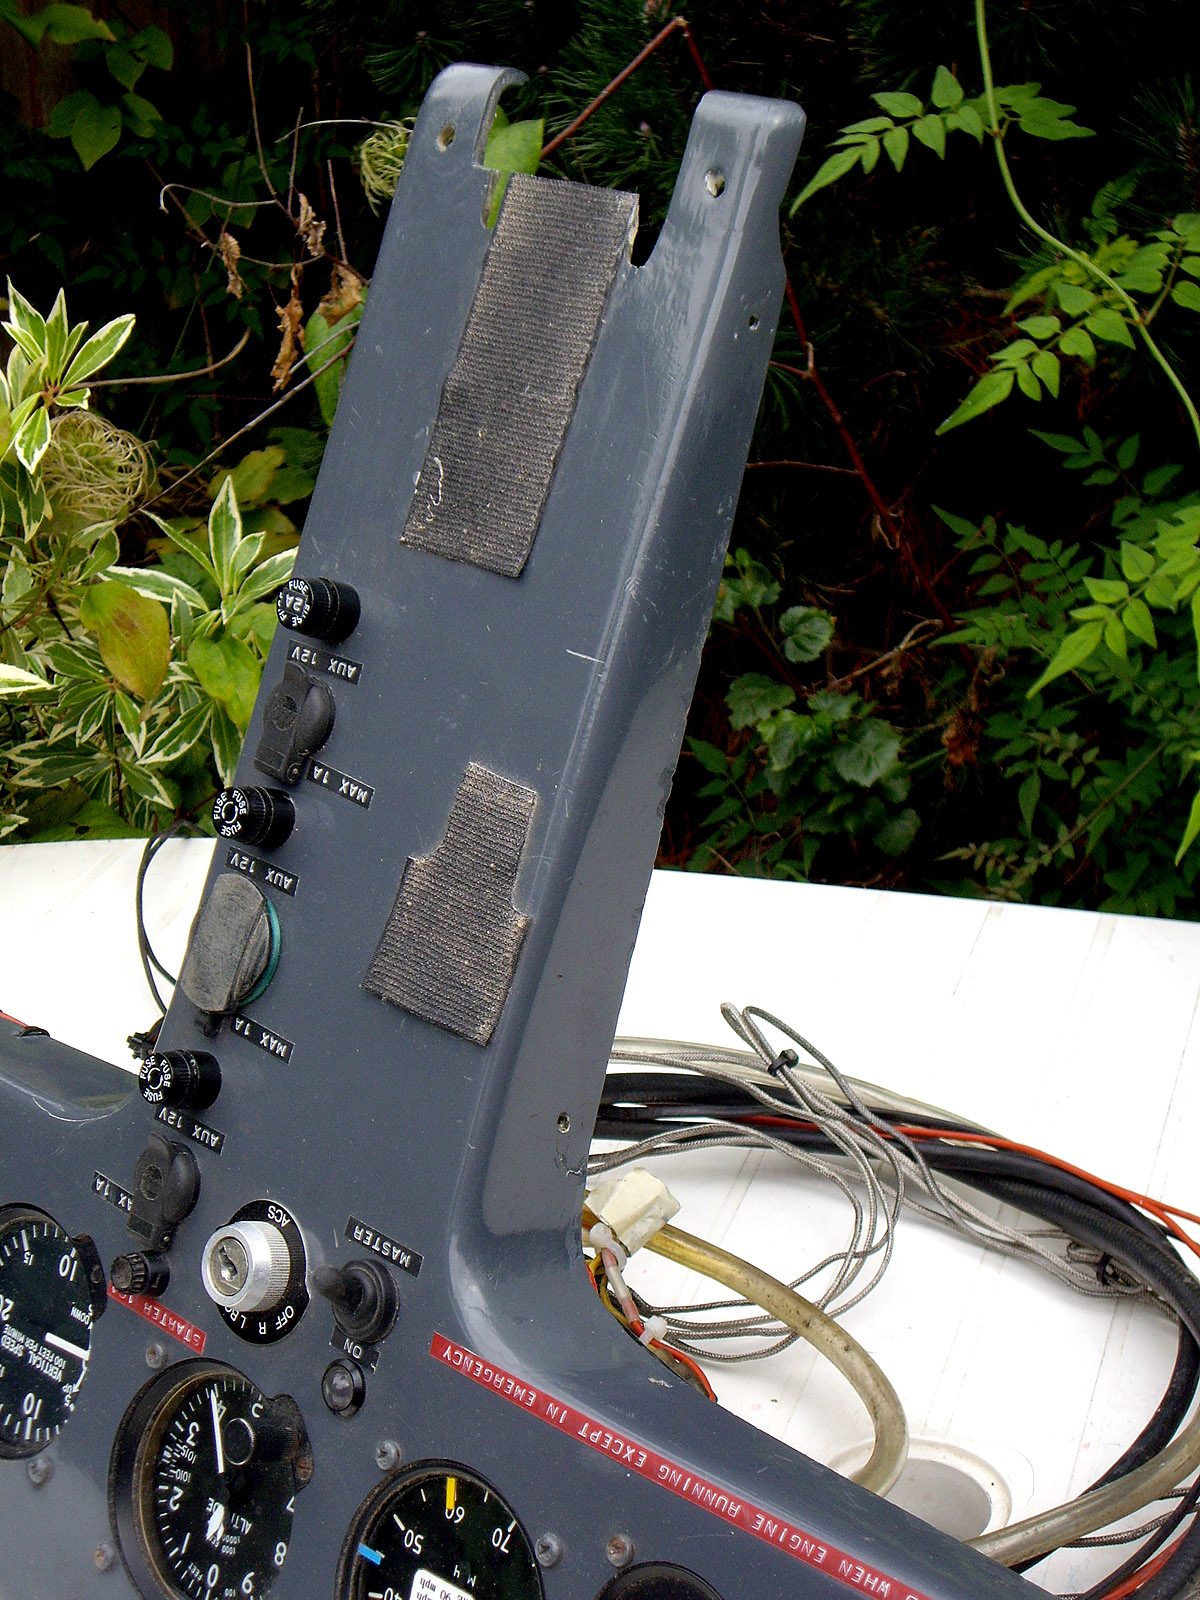
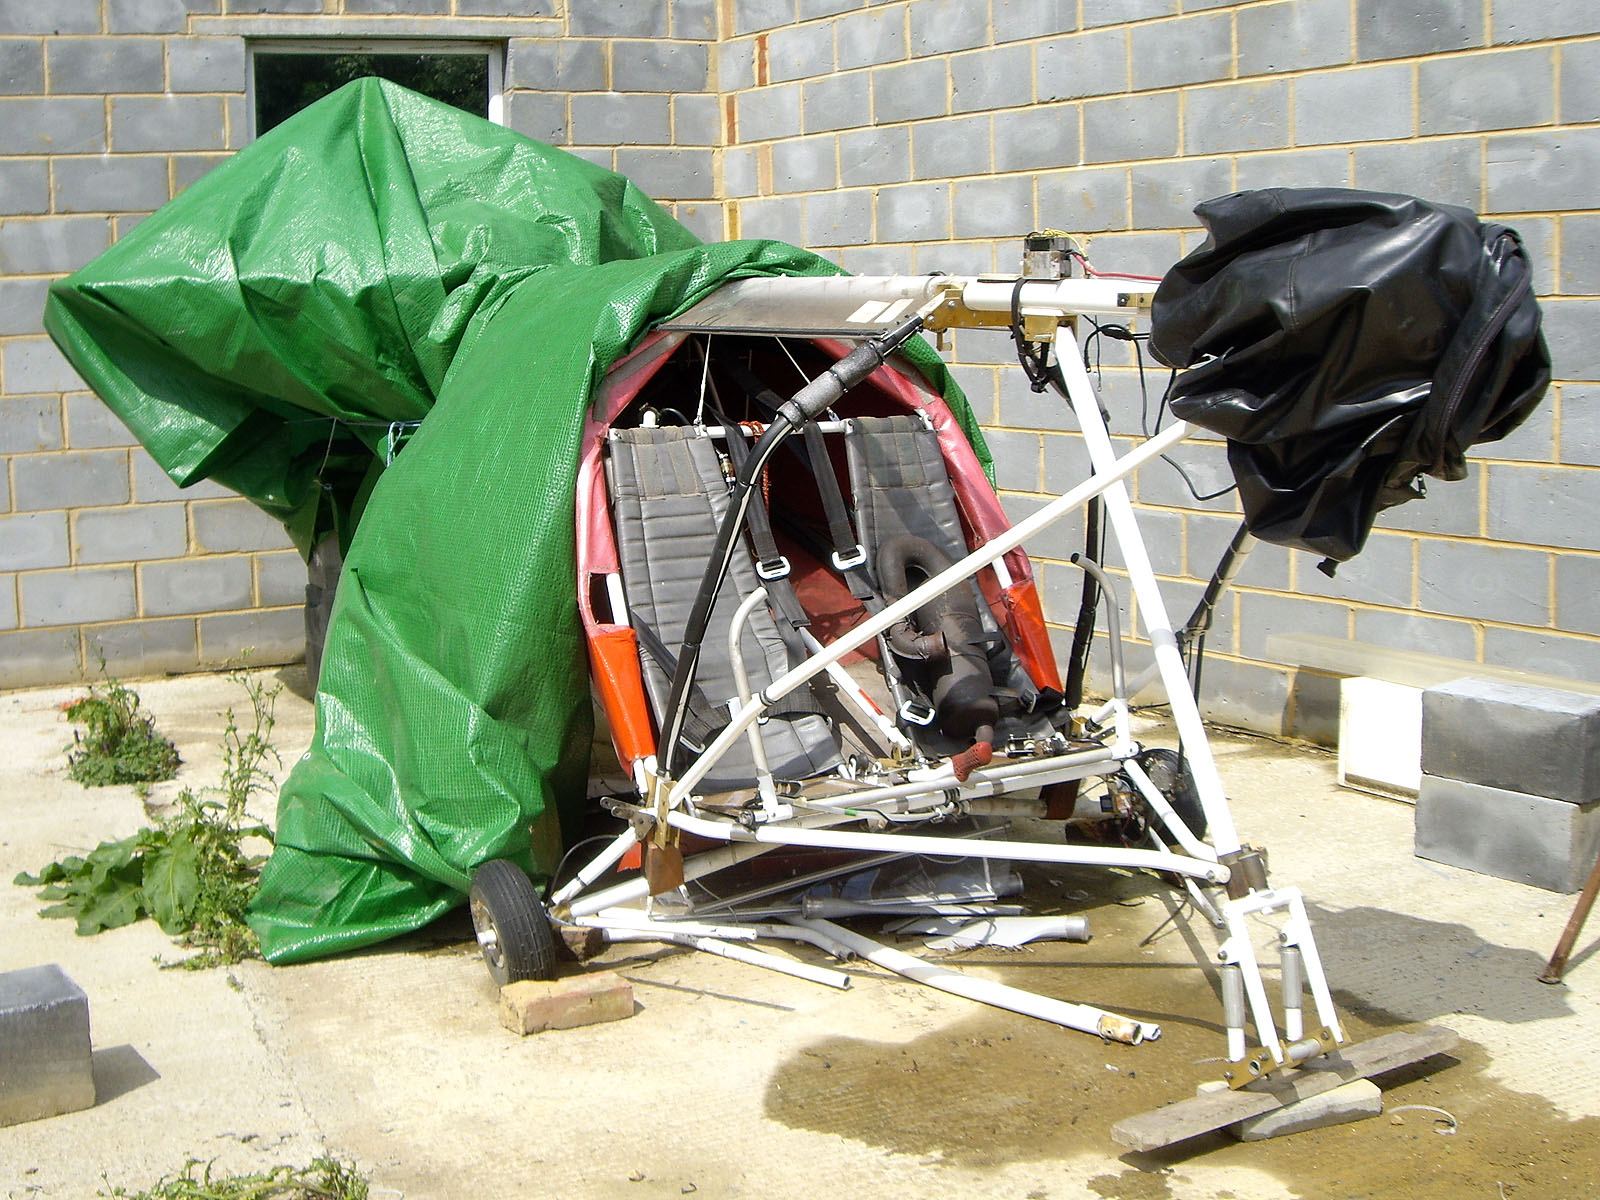
I started by snipping all the cable ties holding the wiring loom going from the main tube into the cabin and disconnecting the wires that I needed to, to get the panel out. I’ve decided that it’s crazy to even imagine that I can repair it properly in the open so I’ve brought it home to do a proper job indoors where it’s clean and warm. As I was doing it, naturally the heavens opened, so I had to hurriedly cover MYRO up again, put all my tools back in my car and wait the shower out. Luckily it only lasted 15 minutes or so and then I was able to get on with stripping the damaged parts. I started with the doors because I needed to remove the screen today now that the panel is out. It was very breezy after the shower had passed through and there were some huge gusts later in the afternoon that could have done some damage, especially to the doors, but luckily I’d put them to one side in a safe place.

Then came the screen and after that I could turn to the structural stuff. After placing a prop under the front of the main tube, I took away the support that I’d placed under what remained of MYRO’s front end. I needed to remove what was left of the cabin floor tubes after I’d cut their front ends away and to do that I had to rip off the rear part of the pod which was still attached, take out the seat bases, remove the trailing link brackets on each side and one other bracket on each side that supports the fronts of the seat bases and holds the throttle bar mountings. It doesn’t sound like much but it was quite a lot of work.

Having done that and removed the ends of the cabin floor tubes I was then able to start fitting the new ones. Just a bolt in the rear of each one and with the nose strut hanging in place, I was then able to attach the fronts also. This meant that the basic cabin structure was back in place. I found two things while I was doing it. The new nose strut has a smaller bolt hole at the top than the old one did so I’ll need to carefully drill it out, and the bolt that P & M had supplied for it was hopelessly wrong anyway – much too long. Incidentally, I also found that the ones they’d supplied that go through the cabin floor tubes and hold the pod up were hopelessly wrong too – much shorter than what I’d asked for, so a rather poor show from P & M on this occasion.

In order to attach the cabin floor tubes to the bottom of the nose strut, I also had to fit the bracket that takes the spindle for the forks and nose wheel assembly. With this on, I was then also able to temporarily fit the forks – but not the front wheel too, unfortunately, as this was another thing I’d forgotten. So things were beginning to look good. All I then had to do was refit the throttle tube mounting brackets, the throttle tube itself and the two seat bases, leaving the trailing links detached as these have to be removed anyway to fit the pod. But that’s when it all began to go pear shaped.

I remembered the problems I’d had refitting the seat bases the last time and although one side went back on easily enough, I just couldn’t get the holes to all line up in one of the brackets on the other side so the bolt would go right through. It was highly frustrating as it became the longest single job I did today, and it wasn’t even part of the repair work proper either. In the end it took me I would estimate at least two hours to do it, and along the way I ended up having to completely detach the bottoms of both seat back frames and loosen the throttle bar mounting bracket on that side. What was really annoying was that visually all the holes appeared to be in line but with metal-to-metal, you only need things to be a fraction of a millimetre out for the bolt to stick and not emerge.

However, I succeeded in the end so when I’d finished, MYRO’s front end was more or less back in place. In fact it’s at the same point I was at the last time, when I had the pod removed, so I’m now in known territory. I did have a small cause for concern along the way. I dropped my rudder pedal assembly into place in the hope that I’d be able to leave it on, but I found that the holes in my base pad, that I recently repaired, didn’t line up with the holes in the cabin floor tubes. I would have thought that the floor tubes would have been jig-drilled so the holes are always in the same position so maybe the rudder assembly was drilled ‘by eye’ when the AX3’s were originally assembled and each one is therefore slightly different. I can easily fill my one’s holes and re-drill them but I only hope that the pod holes will line up properly. I think maybe I ought to take the pod down and try it before I do the respraying as I’d hate to find that the holes don’t match and I have to drill new ones in the freshly painted pod!

So although I didn’t enjoy today at all, really, I managed to get a good bit done. I also rolled the screen up and bunged it in the back of my car so I’ll have that ready to use as a pattern for a new replacement when the time comes. So lots of progress and I am very pleased about that, at least, even if I had to go down a rather long and painful road to get there. But get there in the end I surely did 😉