Ready to go again

I now understand entirely why the whole of France goes on holiday in August. It’s just too hot to work, unless you’re in a fully air-conditioned building that is. We’ve had temperatures consistently over 35 degrees Celsius for the past several days and it’s become very hot inside the house. With all of the living room and corridor windows and doors being sealed and masked up it’s actually become quite stifling in there and just moving around doing light tasks brings you out into a sweat.

And to make it worse, while I was cleaning up after the disaster the other day, I had to go into the fringe of the trees near the house in order to remove paint from tools etc using the hosepipe. As soon as I did I was descended upon by a swarm of biting insects all persistent in their intent to eat me. The same problem is now becoming almost unbearable down near the caravan.

I think that it’s been superb breeding weather for mosquitoes and in the morning and early evening especially, I’m being plagued by Tiger mosquitoes. These are quite small with black and white striped legs and bodies. If you feel and see one biting you, you can often slap it and kill it. But usually blood (yours) then smears your arm or leg meaning it was too late and soon you come up in a large, itchy welt.

From what I read they are prolific breeders in any water that’s around – puddles, buckets, watering cans etc, even just small amounts. It also appears almost impossible to get rid of them once they’ve moved onto your patch, which is not very encouraging to say the least, and it’s another reason why I’m desperate to get out of the caravan.

Every day, by mid-afternoon, the caravan has become sweltering inside and it stays that way for almost the whole night even when it has cooled down outside. We’ve got temperatures in the 40s through to Thursday this week after which it is forecast to cool down so I have no choice but to grin and bear it for a few more days yet.

I went to bed quite early last night, slept badly and woke early so decided to make an early start. I was in the house by 8.00 am and the first thing I did was replace the area of masking film on the floor that I had to remove when the pipe of the high pressure paint sprayer burst.

null

null

Having done that I went around the walls and ceiling with a fine tooth comb and found areas of paint splashes that I’d originally missed when the disaster first happened. I then rubbed them all down with a new sheet of sandpaper so they’re now ready for painting again when the new high pressure tube arrives tomorrow.

It made quite a lot more dust and I picked up as much as I could with the dustpan and brush but would like to remove even more if I can. I’m expecting a new dust/liquid vacuum cleaner to arrive tomorrow so before I start painting again I’m going to run all round with that.

I might even quickly give all of the walls (and ceiling if necessary) another rub down as many areas have a feel like sandpaper which I can only think has come from dust blowing up into the spray during painting. But that will have to wait until early tomorrow morning when it’s cooler as it’s much, much too hot to do it now.

You could NOT make this up – Part 2

I bought my new Vevor high pressure airless spray machine to paint the interior of my new house. After assembling it with difficulty according to the cursory and inadequate instructions that came with it (I had to bend the circlip that secures the main paint pick-up tube to the machine to make it fit) I managed to undercoat the kitchen without too many problems. Frustratingly I did find though, that the volume emitted by the jet was very variable from insufficient to way too much causing runs.

I then started on my living room a few days ago which is very large and a prime candidate for such a machine but have had nothing but problems with it. The first time I switched the machine on after purchasing it it would not generate any pressure, needing to be switched off and on several times and this has continued to keep happening.

But worse still, while painting my living room I eventually had to give up because the jet kept continually blocking needing the pistol and jet to be disassembled and cleaned. Inevitably, as this meant venting and opening up the high pressure line, some paint found its way out meaning that not only was paint wasted every time but a terrible mess eventually resulted due to the leakage.

As it was impossible to continue, let alone achieve results that were anywhere near acceptable I ordered several new jets and threw away the one that Vevor supplied with the machine. After testing one of the new ones for several minutes with water as I was sick of the mess made by the old one and keeping losing so much paint I tried to resume painting my living room today.

null

Once again when I switched the machine on it did not develop any pressure. When it eventually did after switching it off and on several times and constantly raising and lowering the pressure setting, before I could start spraying there was a muffled ‘Whumph’ behind me and when I looked round I saw that the main paint delivery tube supplied by Vevor connecting the machine to the gun had exploded sending paint all over the ceiling and walls of my living room.

null

null

null

null

Before I could do anything about the huge pool of paint forming on my living room floor from the hole in the tube, first I had to dash round with steps and a paint brush to try to brush out the considerable number of paint droplets now on the walls and ceiling. Only after having done that could I try to clean up the huge mess on the floor.

null

Luckily it turned out that my floor masking was very effective. I cut out and lifted the area of film covered by the paint and miraculously none had gone through onto the tiles. I was even able to return much of the paint to the can and the bigger problem was walking around on the splatters of wet paint on the floor and transferring foot marks to areas which up to then had not been affected.

null

null

I find it incredible that the tube was apparently not rated to take the pressure generated by the machine (3500 psi) with a safety margin and that it should have failed so early on anyway. I can only surmise that the jet blocking problem was due to the pipe breaking down internally and constantly sending small pieces of debris down the line as it disintegrated. I also had problems getting the joints of the extension wand and pistol gun to stop leaking and my confidence in this machine is now extremely low.

As I must try to continue getting my house ready to move into I’ve had no choice but to order another tube which will be delivered on Tuesday when I will try to carry on. What worries me, however, is that since I’ve owned it the machine has succeeded in doing much more harm than good and that it might continue doing so.

Over many years I have purchased many different types of tools for many purposes but this Vevor airless sprayer is definitely the worst tool that I have ever been unfortunate enough to buy. I notified Vevor of the issues yesterday and I’m now waiting see what the outcome of this will be but I’ll be surprised if I’m not disappointed.

You could NOT make this up – Part 1

Welcome to the dystopian world of dealing with French bureaucracy. On Thursday August 17th I was on the phone the whole morning with EDF trying to sort out my house’s electrical connection problems. Initially I got Jerome in Poitiers. Jerome is not someone who likes challenges or dealing with anything out of the normal run of things that will disturb his easy routine. Jerome is both incompetent and lazy.

As such he’s a typical EDF customer service employee who will go far in an organisation where the most simple tasks are either impossible, done incorrectly or not done at all, mistakes are the order of the day and nobody is ever held accountable because there’s no way of making contact with the organisation except through them. It’s a carefully thought-through setup.

As I mentioned in previous posts, having had a temporary connection via EDF for over two years, I now merely need to convert that to a permanent one. You’d think that would be the simplest thing in the world to do, but no, in France it’s not. If it was done just with the click of a mouse button asking for an engineer to attend and switch the connection over (10 minutes) and making the necessary changes to the charging tariff, half the people in EDF and Enedis, it’s sister company and partner in crime, would be put out of work and the French state could never tolerate that.

So a completely new project and ‘dossier’ has to be created with all that that entails including the massive potential for cock-ups, which are inevitable. First there was the inevitable confusion over my address. When the temporary connection was set up there was no house number because there was no house so it was described as ‘the place know as…’.

Now I’d have thought that EDF would have been pretty used to that – it must be so for every new-build house that they connect – but the concept was a difficult one for EDF client services to grasp and it was challenging for them to set up a NEW account (yes, a new dossier means a new account even though the client ie me, and the supply address are the same as for the existing connection) with a minor change in the address details.

Just for information, although I’ve only had my old address at Plazac and my new address at Fleurac, I was told that at the time of my conversation with Jerome there were 4 ‘dossiers’ in my name – only God and EDF know why – and unbeknown to me, things were going to get worse.

So by now we were about 20 minutes in and we’d managed to resolve the address issue but that still left what for some reason has turned out to be the huge stumbling block of what’s called the PDL or ‘Point de Livraison’. Nobody has bothered to explain but I’ve found out myself that this is a unique code that’s applied to the meter that records the usage of electricity at the location, so quite simple really.

The meter in my temporary connection box has a PDL and it’s shown on every bill that I receive. Before they could go ahead and instruct Enedis to make the connection to my new house they needed to know the new PDL. Naturally I had no clue what they they were talking about, just as a lay French person wouldn’t either, and nobody was either willing, or more likely able, to tell me where to find it.

Way back on 1st August I had a telephone ‘rendez-vous’ with an ‘engineer’ from Enedis in order to progress my connection. He helpfully told me that I was already connected and that was it, before rudely ending the conversation without making any effort to deal with the issues that clearly existed. He was evidently another lazy, incompetent person who didn’t give a damn about the customers of the organisation for which he worked.

Almost two weeks prior to my conversation with EDF’s Jerome I’d also had a conversation with another EDF customer service agent who’d set me up with a new ‘permanent’ account. I’d then received an email from yet another EDF tosser called ‘Mallory’ who assured me of their fullest attention in getting my connection done but then proved incapable, apparently, of replying to emails.

Both of these parties were, however, useless and merely compounded the problems. When we’d hit the PDL stumbling block it appears that they’d used, or made up, a PDL to create the ‘new’ permananent contract. Sadly, the system, as it is, doesn’t work like that which I know but apparently they do not. When I emailed a helpful contact that I’d made in Enedis she told me that the PDL being used by EDF was for another temporary connection which, of course, is the last thing that I need and that only the real PDL would be acceptable to progress the connection.

At this point I decided to do my own research and it didn’t take long to establish that although it’s not live, the PDL can be obtained in seconds from the new Linky smart meter that’s installed in my house. Apparently the EDF buffoons either aren’t aware of this or can’t be bothered to share such information with you as with it the situation could have been well on the way to being resolved weeks ago.

I checked the Linky PDL with Enedis and my contact confirmed that it was correct, referred to an existing Enedis connection project which was ready to go with all fees paid and could be connected on the same day. I passed this information on to ‘Mallory’ in EDF by email but it apparently was totally ignored.

I found this out when I was in contact with Jerome who listened while I explained the whole saga for the umpteenth time, assured me that he understood what the problem was and after sorting out the address issue, said that he’d fix it. He said that all he’d need to do was update the PDL on my new contract and that the line would go quiet while he did so.

It did do alright, because after about five minutes the line went dead. This has happened to me so many times I now know what it means. Jerome found that he’d have to do some work for a change so just put the phone down.

I didn’t call back immediately but left it for a few minutes before redialling the EDF customer service number. I said that I’d been talking to Jerome but the young lady on the other end of the line said she didn’t know who that was and that she’d deal with my problem. And this young lady was like a shining star compared to her colleagues.

The first thing we established was that Jerome had done absolutely nothing, so she made the necessary amendments to my contract address and then went on to deal with the PDL problem. It didn’t take her long to find that the system wouldn’t allow her to do so (what happens if your meter breaks down?) and the quickest way to deal with it was to create yet another new contract for me.

There was an interesting result from doing this. The temporary connection I’ve had for 2 years is of 12kVA power (12 kilowatts) and when the contract for my new permanent connection was originally set up it was found that 9kVA would be sufficient making it a bit cheaper. This young lady went through the whole questionnaire yet again and said that 6kVA should do it, making it cheaper still and that if later this was found to be too low, it could be increased. See what I mean compared to Jerome?

She then said that she’d contact Enedis while I waited in order to expedite the connection and after several minutes she came back with the bad news that put the cherry on the top of the cake of this whole farce.

When she’d cross-checked the address of the connection with Enedis she found that there was a discrepancy that she came back to me to ask about. It turns out that yes, there is a live Enedis project with the correct PDL but not at my address. Despite having connected up my ‘branchement provisoire’ it’s shown as being at the address of a neighbour down the road who has been connected for many years and is definitely in no need of another.

Oh no, you think, just another cock-up. Yes it is, but this one has ramifications. It means that an Enedis engineer will have to come on site to make an ‘inspection’ and the earliest that one can do this is 31st August – another two weeks away. Then Enedis will have to arrange for the connection to be made and I’ll be surprised if this happens before the end of September.

And this is after I applied for it to be done on 11th July. This can’t be normal surely, you ask. Yes, a similar thing happened when I ordered my current temporary connection and also when I ordered my water connection from Veolia. So it is normal – and my French friends also agree.

Very happy

Only half a day today (Wednesday) because having done all of the making good I want to leave it to cure before continuing. I’m very happy with the way it turned out – and for me to be happy it means it’s perfect, or close to!

I also did a few more bits of making good that I wouldn’t have done if the ‘disaster’ hadn’t happened so in a way it was a blessing in disguise. That’s how I’m going to look at it, anyway 🙂

And no pictures with this post – after all that, there’s nothing to see!

Quick update

We had a huge thunderstorm two nights ago and one massive thunderclap seemed to be directly overhead and shook the whole caravan. We had another last night, so that’s two nights in a row of disturbed sleep, not to mention the nights when I’ve had difficulty sleeping due to the heat.

This morning I found that yet again the roof of one of the ‘tonnelles’ (gazebos) was damaged by the high winds and torrential rain so whereas I thought all of my problems in that area were over following the end of the winter it appears that things are just as bad as before, and possibly even worse, as the end of the project approaches.

So one way and another what with these things and the challenges I’m facing getting the inside of the house ready for occupation, I think I’m becoming tired and stressed both physically and mentally. As I’m becoming aware of the fact that nobody can keep working non-stop day in, day out as I’ve been trying to, I therefore took it easy yesterday and did nothing more for the rest of the day after collecting three more 12 litre cans of sealer-undercoat from Leroy Merlin.

That was appropriate anyway as yesterday was a public holiday here in France and it was unfortunate that my day of rest was ruined by last night’s storm. As it was, I didn’t re-wake until after 9.00 am having gone to bed at about 11.30 pm last night, so I must have derived some benefit from it.

The good news is that I’ve checked the paintwork in the lounge and corridor again this morning and it’ll be a piece of cake to make good the problem areas. Afterwards it’ll be impossible to see that they were ever there and work will be able to resume, possibly later today but more likely tomorrow, after the making-good has had time to cure and my spirit has also had time to recover a little bit more.

Then it’ll be ‘onwards and upwards’ once again. You mustn’t allow events to get you down when the rewards of renewed effort will be so great ?

A depressing sight

After all the work that I did prepping the living room and corridor for painting it was heart-breaking this morning to see the results of yesterday’s spray painting debacle. Some of the problems were of my own making. For example, as shown in some of the following images, spraying this kind of paint is not like spraying a car when the paint flashes surface dry very quickly and can be over-sprayed with a second coat soon after the first. This kind of paint stays wet for a long time – hours I’ve found on surfaces like the coving – and if you go back over it too soon it develops huge runs.

But the overriding problem was that the spray jet kept repeatedly blocking giving rise to two problems. Firstly, while it was in the process of blocking it created an uneven spray pattern making it impossible to get an even finish on the surface being painted. Secondly, every time the jet was removed for cleaning, which on many occasions took many attempts over several minutes, the machines delivery tube was wide open allowing paint to emerge. Every time it did so some found its way onto the floor until eventually I was almost paddling around in the stuff.

The machine blocked up so many times that eventually I think I began to lose control of the situation a bit, especially when the bucket of painty water was knocked over onto the floor. I was trying to get as much done as I could before both the paint and the light ran out and some of the run issues were due, I think, to there not being enough light for me to clearly see what was going on.

Here are some shots of the depressing sights that greeted me this morning starting with the view as I entered through the front door.

null

A closer look at the floor area around the paint cans. The heap of kitchen roll on the left was used to mop up the water from the overturned bucket and as I had to continue spraying for as long as I could while the jet was clear, there wasn’t enough time to clear it all up at the time.

null

null

Looking towards the corridor and the kitchen door. I eventually had to totally remove the masking around the kitchen door due to the need to constantly get to the sink during my many attempts to unblock the spray jet.

null

null

Looking back at the area around the paint cans. How could anyone work effectively in a mess like this? It was a truly awful experience.

null

null

null

Every time the jet needed unblocking the machine had to be de-pressurised. There’s a small diameter flexible plastic tube that allows the paint released to be returned to the can but this can happen quite violently. I didn’t notice at the time that on at least one occasion some huge splatters went onto a wall. They can’t be left like it and will have to be removed and the wall made good again later on.

null

But the worst things were the runs in several places at the base of the coving along the tops of the walls. This was due to paint overloading because unlike on the plaster wall surfaces, the paint remains wet on the non-absorbent polystyrene surface of the coving for much, much longer and cannot be over-sprayed once it has been given a coat of paint. This morning the paint on it was still as wet as though it had only just been painted.

null

null

null

null

I’ve had to remove all of these runs and will have to do my best to make the walls good again once the paint has dried, but I doubt that it’ll ever look any good. The problem was compounded at the corners because having already sprayed the ceiling at those points I then went back and sprayed the corners again from both directions, so with hindsight it’s not surprising that the paint build-up was so great as to cause the runs.

So a big part of the problem was my own lack of experience of the technology and in future I’ll hopefully be further along the learning curve and be able to avoid the runs problem, for example. But the main issue was jet blocking and it was that that set the series of disasters in motion. I don’t know whether the pros start with a new, clean jet on every paint job but I’ve ordered six more new ones that will be delivered on Thursday.

I’ll have to leave things be for a day or so anyway to allow the paint to dry and then I’ll have to make things good as best I can before re-sealing the affected areas. My guess is that yesterday’s experience has put me back several days but I’ve no choice but to bite the bullet and carry on 😕

A terrible, terrible day

I got going with the painting today. I’d like to say that everything went smoothly and the results were perfect, but I can’t because the reality was absolutely the reverse.

Everything that could go wrong did and it all started when shortly after starting the jet of the high pressure spray gun got blocked. This presents a tricky problem with the machine being full of paint at 3500 psi that needs to be vented off.

The jet has to be removed and this allows paint to drain out of the delivery pipe. Pretty soon some found its way onto the floor. It took ages to clear the jet by which time there was a pool of paint on the floor as the pistol that I’d propped up vertically had decided to fall over.

Things went rapidly downhill from there because the jet kept blocking up every few minutes and while it was doing so the gun kept spraying unevenly which made it impossible to get an even finish over the surfaces being painted. Then the gun began to leak from the nozzle joint and I only realised it after I found that my hand was covered in paint and it was running down my arm. But even worse was to come.

I’d kept a bucket of water handy in order to try to flush the system out and it had already become more like very thin paint than water. One time when I’d been trying to clear the jet from yet another blockage I’d propped the gun up against it and while I wasn’t looking it was just heavy enough to knock the bucket over sending the water it contained all over the floor.

I can’t go on as it’s too painful to recount the sequence of disasters that just kept coming. I had to remove the masking from two doors that I’d painstakingly put in place in order to get at tools that I needed to dismantle the spray handset and to the sink in the kitchen to try to clean the jet and I know that with paint on the soles of my shoes I walked some into the rooms in question.

I ended up emptying two 12 litre cans of sealer-undercoat and although the ceilings had been covered, unevenly, there were still large patches of wall where coverage was too thin as a result of the jet beginning to block up while still spraying at reduced volume. And although the corridor walls had been sprayed, complete with the odd run when the jet suddenly cleared itself and started working properly, half of the walls in the living room still hadn’t been painted.

It was pushing dark by the time I’d finished as cleaning everything up, or trying to, was a complete nightmare. This included myself and I ended up having a shower outside under the hosepipe because of the amount of paint that I had to remove from my face, arms, legs and body. I dread seeing what state the living room is in tomorrow 🙁

Just as I predicted

I got myself across fairly early this morning to Leroy Merlin to pick up another 12 litre can of sealer-undercoat plus three more rolls of 3M blue masking tape. I think the latter must be a big money-spinner for 3M because they’re far from cheap and can’t cost a lot to make. When I returned I finished my breakfast and than got going continuing masking ready for painting.

Today I was aiming to finish masking all of the doors and the whole of the floor in the living room and corridor. It was only as I was doing it that it became clear just how monumental a task this was. Because I’ll be spraying down to what we Brits call ‘skirting board’ level ie the tile plinths that go all around the walls, I have to be certain to prevent any paint blow-by onto the tiles. This is doubly important because the masking applied now will be used for both the undercoat and the coloured top coat later on so it must be securely applied with a good seal all round.

It was a back-breaking task, literally because my back was so painful every time I stood up from crouching down and working at floor level that I eventually had to call it a day in the early evening before I’d managed to complete the whole job. There’s just a small area of floor left where the living room joins the corridor and I still haven’t masked off the main front door yet as that will be the last thing I do before I start painting.

I did remove all of the protection from the front door though that prevented it being damaged while all the building work was going on and I’ve also not finally sealed the bathroom and kitchen doors as I’ll need access to those rooms right up to the time I start spraying.

null

null

The first sheet of floor-covering film that went down.

null

null

The main area of the living room ready for spraying with the floor in that section totally masked off.

null

null

Looking towards the small area of floor still left to do.

null

null

null

The underfloor heating manifold masked up. I’ll have to decide what to do about the wall area behind the pipes later, as I will also with the wall behind the mass of pipes in the ‘cellier’ (utility room).

null

The corridor ready for spraying with its floor all masked up.

null

I’m very confident that the living room and corridor ceiling and floors will all have a coat of sealer-undercoat by tomorrow. The ceiling and coving will not be top-coated though, as it’ll be necessary to top-coat the walls first, which will mean masking the ceilings off.

All the advice is that when spraying finishing coats of different colours, it’s easiest to paint and mask off the vertical wall surfaces and then paint the ceiling rather than the other way round and after thinking about it, that’s the way I’m going to do it 😉

As I type this I’m being eaten alive by tiny black mosquitoes as I am every evening at about this time. I think it’s because the caravan is under the trees at the bottom of my land and may also be because I leave a watering can with water close by. That’s for the little dog from Chateau Malbec who comes to visit me most days and loves to drink out of it and I’d hate to upset her by leaving it empty.

But whatever the reason it’s another big incentive for me to move out of the caravan and into the house as soon as possible 😕

Nearly there!

I made good progress today despite creating a whole lot more dust that I had to get rid of yet again. I’d noticed clumps of dust that had remained on the walls after rubbing the plaster down and wondered if the ceiling was the same. Of course it was! I couldn’t think about spraying knowing it was there so I had to go right around the living room and corridor walls and ceiling with a large broom removing it.

Then I had to wipe all the surfaces that would have masking tape applied to them with a damp sponge and only then could I continue masking things up that needed it. After applying masking tape all around the door frames I could start masking the doors up. This actually is the easy bit (if any masking could be described as easy) because I have a special 3M applicator that lets you apply film from a roller with its top edge stuck onto masking tape. You run this across the top of a door sticking it as you go and cut it to length with an inbuilt blade.

The film that the masking tape is attached to is in the form of a drop-down sheet so all you then then have to do once the film drops down and covers the door is apply tape to its edges. Regrettably the film is only 1.8 metres long so I’ll have to fill up the bottoms of the doors when I mask up the floor. I did all of the doors that I wanted to but left the bedroom and bathroom doors with the film left high so I can get in and out of them.

null

null

null

null

null

null

I intend to buy another 12 litres of sealer-undercoat tomorrow together with more rolls of masking tape that I’m using masses of and am about to run out of. And then, who knows, if everything runs smoothly I might get the living rooms and corridor walls and ceiling undercoated. If I can, that would be a HUGE leap forward 😀

But tonight is party night! After finishing this I’m off to Madeleine and Victor’s for a knees-up! Well, a discreet evening of convivial company anyway 😉

Overoptimistic or what!

There is no way that I’ll be able to get as much painting done by the end of this week-end as I first thought. In fact I think I’ll be lucky to get any done at all, actually. There’s much, much more prepping still to be done than I ever imagined. It’s well-known that spraying is quick and easy – once you start spraying – but getting there is what takes all the time and effort. And so it’s proving.

The first thing that I found this morning was that somehow I’d missed rubbing down the plaster on some quite large lower wall areas. Dust is the bane of prepping for spraying because it prevents masking tape sticking to surfaces and I’d already spent a considerable amount of time getting rid of as much in the house as I could. Now I had to create a whole lot more that would need removing all over again.

I already knew that the window and door frames were left in a messy state by the installers with lots of dried silicone around their edges. However when I checked more closely I found that their tops also had lots of dried plaster on them, so not only did I have to carefully remove the silicone, which took some time, but I also had to remove the plaster as well that created even more dust.

I then had to go all round and remove the over-smears of plaster left on all the door frames and then give them all a thorough wipe to ensure that when I get onto masking the doors the masking tape will stick on them too. It was then time for the first actual masking job, namely running tape all around the tiled plinth to which masking film will eventually be attached and by this time the clock was ticking into the early evening.

I decided that come hell or high water I’d mask up all the electrical sockets and switches today and that’s how I finally left things.

null

null

null

null

null

The work today was back-breaking needing me first to be working at very low level and then on the top of a set of steps. It made me appreciate once again just how big an area the walls and ceiling in the corridor are and I’m wondering if before I start spraying I might need to buy yet another large can (12 litres) of sealing undercoat so when I do start I’ll be able to finish without being interrupted.

I know that I applied far to much to the walls and ceiling in the kitchen – probably twice as much as was necessary – but with masking film draped all round it’ll be quite a complex job doing the living room and corridor and I’d like to have a straight run at it.

First lights up

Despite being dog-tired I had an awful night’s sleep last night, the reason being that it was so hot in the caravan. When it’s that hot it makes all your insect bites itch despite being treated with hydrocortisone cream, even the old ones from days before, and with the caravan being so close to the trees and my grass not being cut, I’ve got plenty on my legs, around the knee area especially.

So I started a bit later this morning but despite that, although I’d like to have done more, I still managed to achieve my main aim for today, which was to finish the ceilings in the bathroom and separate toilet. This meant that bar the woodwork in both rooms and the bathroom shower screen, which should arrive any day now, both rooms would be effectively finished.

First the bathroom.

null

null

null

null

Now the little separate toilet.

null

null

null

I love both rooms and am so happy to at last see some spots in place in the ceilings. Some needed a bit of enlargement of the holes that the electrician drilled but now I know what to expect it’s no big deal if I have to do the same for more of them when the time comes.

Whereas all of the others in the house are all white, the pair of spots in the little toilet have chrome bezels. I didn’t particularly want that, in fact I’d have preferred them all to be white, but when I found I’d under-counted and had to order more, the white ones were not available.

So a good result for the day which means that I can go straight onto masking up the living room and corridor ready for undercoat spraying of the walls and ceiling in those areas. When I’ve done that I’ll be able to top coat the living room and corridor ceiling and the kitchen ceiling and kitchen walls that will be painted rather than tiled. That will be a huge leap forward and with a fair wind, I reckon I might get there by the end of the week-end 😉

A successful day

It was scorching hot here today, not that I experienced much of it. I had a busy schedule.

7.30am – rubbish (Contiboard and worktop offcuts plus some cardboard) to ‘déchetterie’ in Rouffignac
8.00am – quick shop in Carrefour (first customer through door) on the way back
8.30am – finish breakfast (two cups of tea)
8.45am – get cracking on preparing for painting

I especially wanted to get the ceilings (and coving) in both the bathroom and separate toilet sealed and undercoated today and I intended to use a roller on each as the areas involved couldn’t justify firing up the pressure sprayer. My first task was masking both rooms up but if I’d intended to use the sprayer the masking would have had to be far more thorough.

As it was I intended to cover the floors and fittings in both rooms so I didn’t have to worry about paint splashes and although it wasn’t strictly necessary as its walls remained uncovered, I also masked the window in the bathroom. Both rooms had to have their ceilings rubbed down and the coverings also meant that I didn’t have to worry about the dust that would be created.

It was a long day and here are some shots of the bathroom after I’d finished.

null

null

null

null

And now the separate toilet. The room is so small that merely hanging sheets of plastic film around the walls covered the fittings and created a tent-like space in which to work.

null

null

null

The WC was hardly visible through the plastic film, as was also the small hand-basin and the sheet at that end also completely covered the window.

null

null

So, as I say, it was another long tiring day. The upside is that with the masking and covers in place, I’ll be able to continue straight on with top coat painting tomorrow and then I’ll be able for the first time to at last get some lighting fixed permanently in the ceiling (four spots in the bathroom, two in the toilet). That small step will in itself be a significant leap forward 😀

Getting ready for painting

I want to have painted a few walls and ceilings by the end of this week so I need to mask up the rooms and areas involved. To do so I need to clear them first by removing all of my tools, sundry materials that are laying around and rubbish and then cleaning right through to remove the huge amount of dust that was generated when I was installing the kitchen.

But first I wanted to remove another job from my ‘to-do’ list, namely replacing the clips that hold back the large shutters on the three sets of double doors that have been kicking around on the floor in one of the bedrooms since I removed them several weeks ago. I told the shutter fitters to fit them below the shutters but after several locals told me that this was incorrect and they should be on the edges, I removed them in order to fit them correctly myself.

And I think it was a good move because I don’t think that the fitters would have taken the trouble and made the adjustments that were necessary to make them work properly that I did. Fitting the clips for the right-hand shutters was very straightforward. It was just a matter of taking the measurements, drilling the walls in the right places and screwing them in.

null

But it was not so for the left-hand shutters. Firstly there’s a vertical metal locking bar that extends for the full height of each of the doors that interferes with the operation of the clips and secondly there’s a weather-board on the edge of each door to close the gap between the left and right-hand shutters when closed which makes the edge of the left-hand shutter twice as thick as that of the right-hand one.

So the gap between the piece of metal that flips over to secure the shutter and the wall had to be carefully adjusted and it also had to be beaten flat and oriented to pass behind the vertical locking bar. This took time and effort that I don’t think would have been forthcoming from the original fitters.

null

Here’s the final result which I’m now very happy with.

null

null

Then it was on to clearing the house of tools, rubbish and sundry materials. The first thing that I decided to do was fit all of the interior doors that have been stored on their edges taking up space in bedroom two. This will actually assist when I come to masking rooms up as it’s easier to mask up a doorway with a closed door using plastic film than it is an open doorway as with the latter, the movement of air constantly disrupts the film when you least want it to move. Here’s the first view of the kitchen door.

null

null

All of the doors are now in place with their handles temporarily fitted so they can be opened and closed. Surprisingly, even though each door was replaced in the frame from which it came, several were binding and one, the bathroom door, wouldn’t close at all. I’m hoping that this is because the doors and the frames have been kept in different conditions of temperature and humidity in different parts of the house and that matters might rectify themselves if left alone. If not, too bad, I’ll have to make a few adjustments, which won’t be the end of the world.

To finish off I swept right through the whole house and removed as much of the dust as I could. Before I mask up, let alone start painting, I’ll have to do a more thorough job as when I painted the kitchen I found that dust on surfaces prevented the masking tape from sticking allowing some small blow-pasts of paint. That’s for tomorrow though 😉

Another day gone

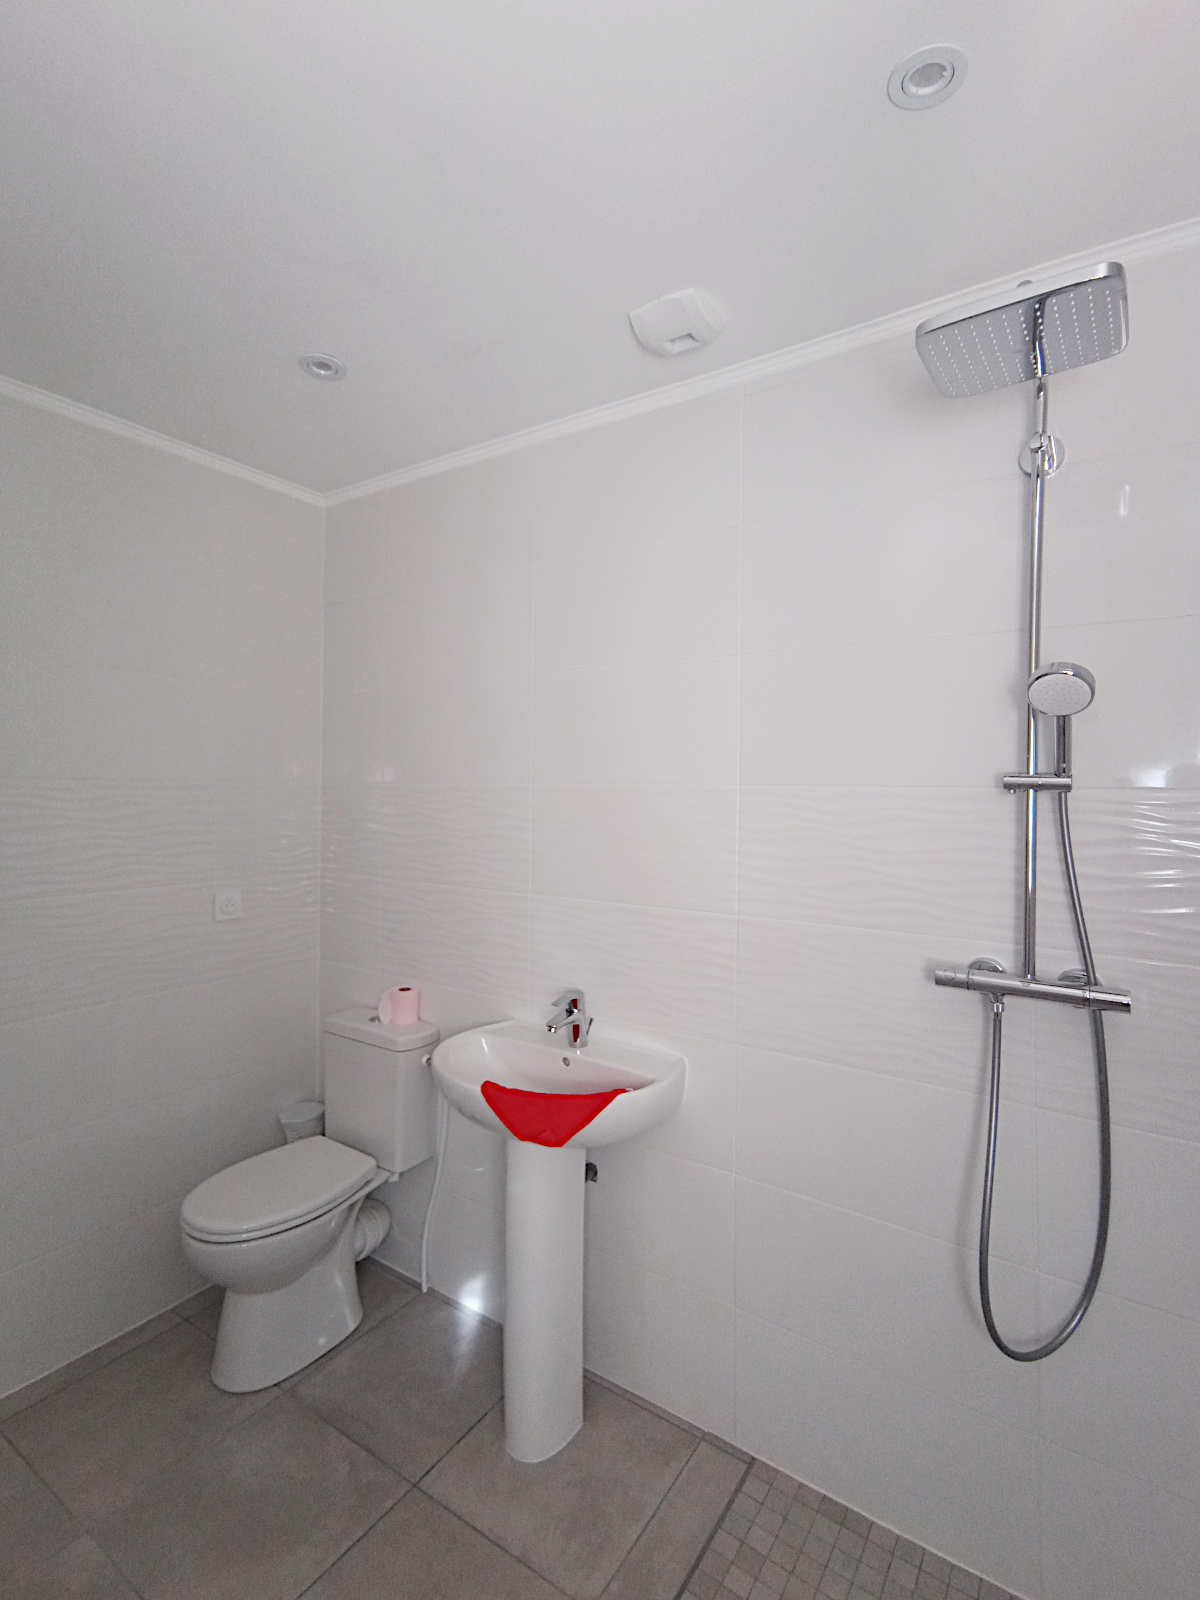
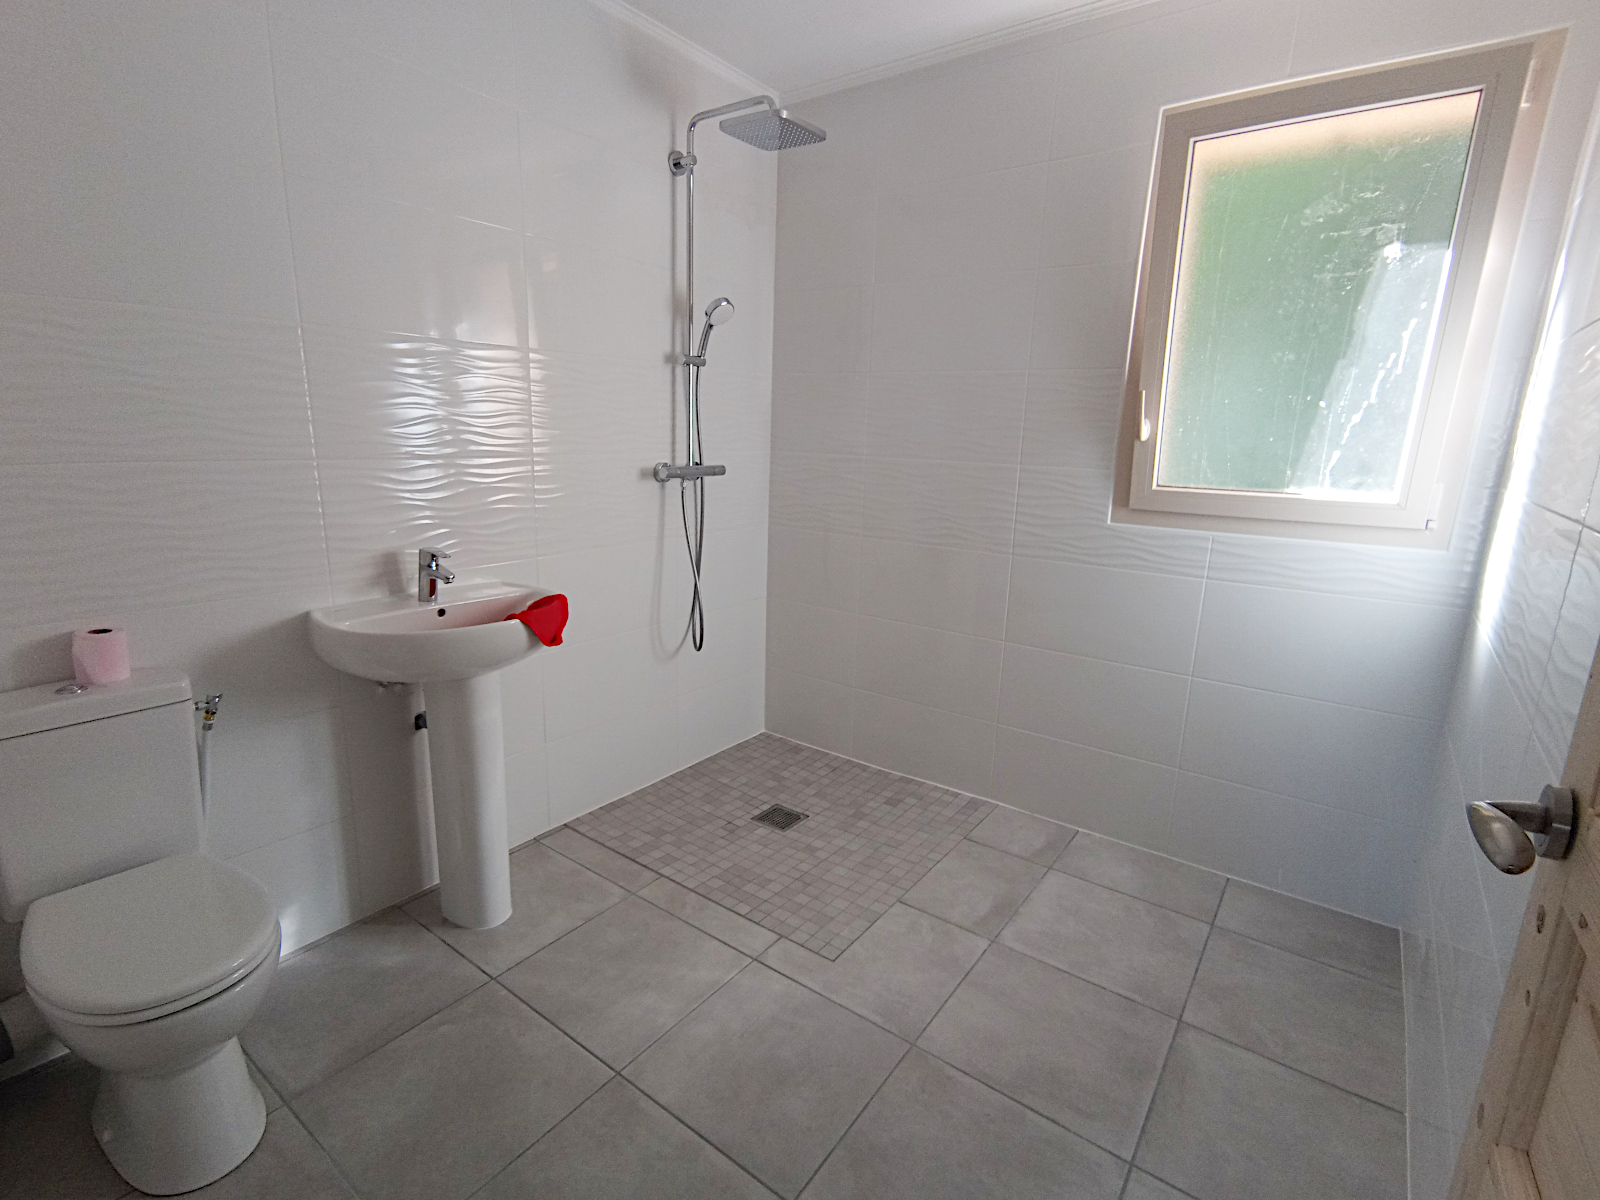
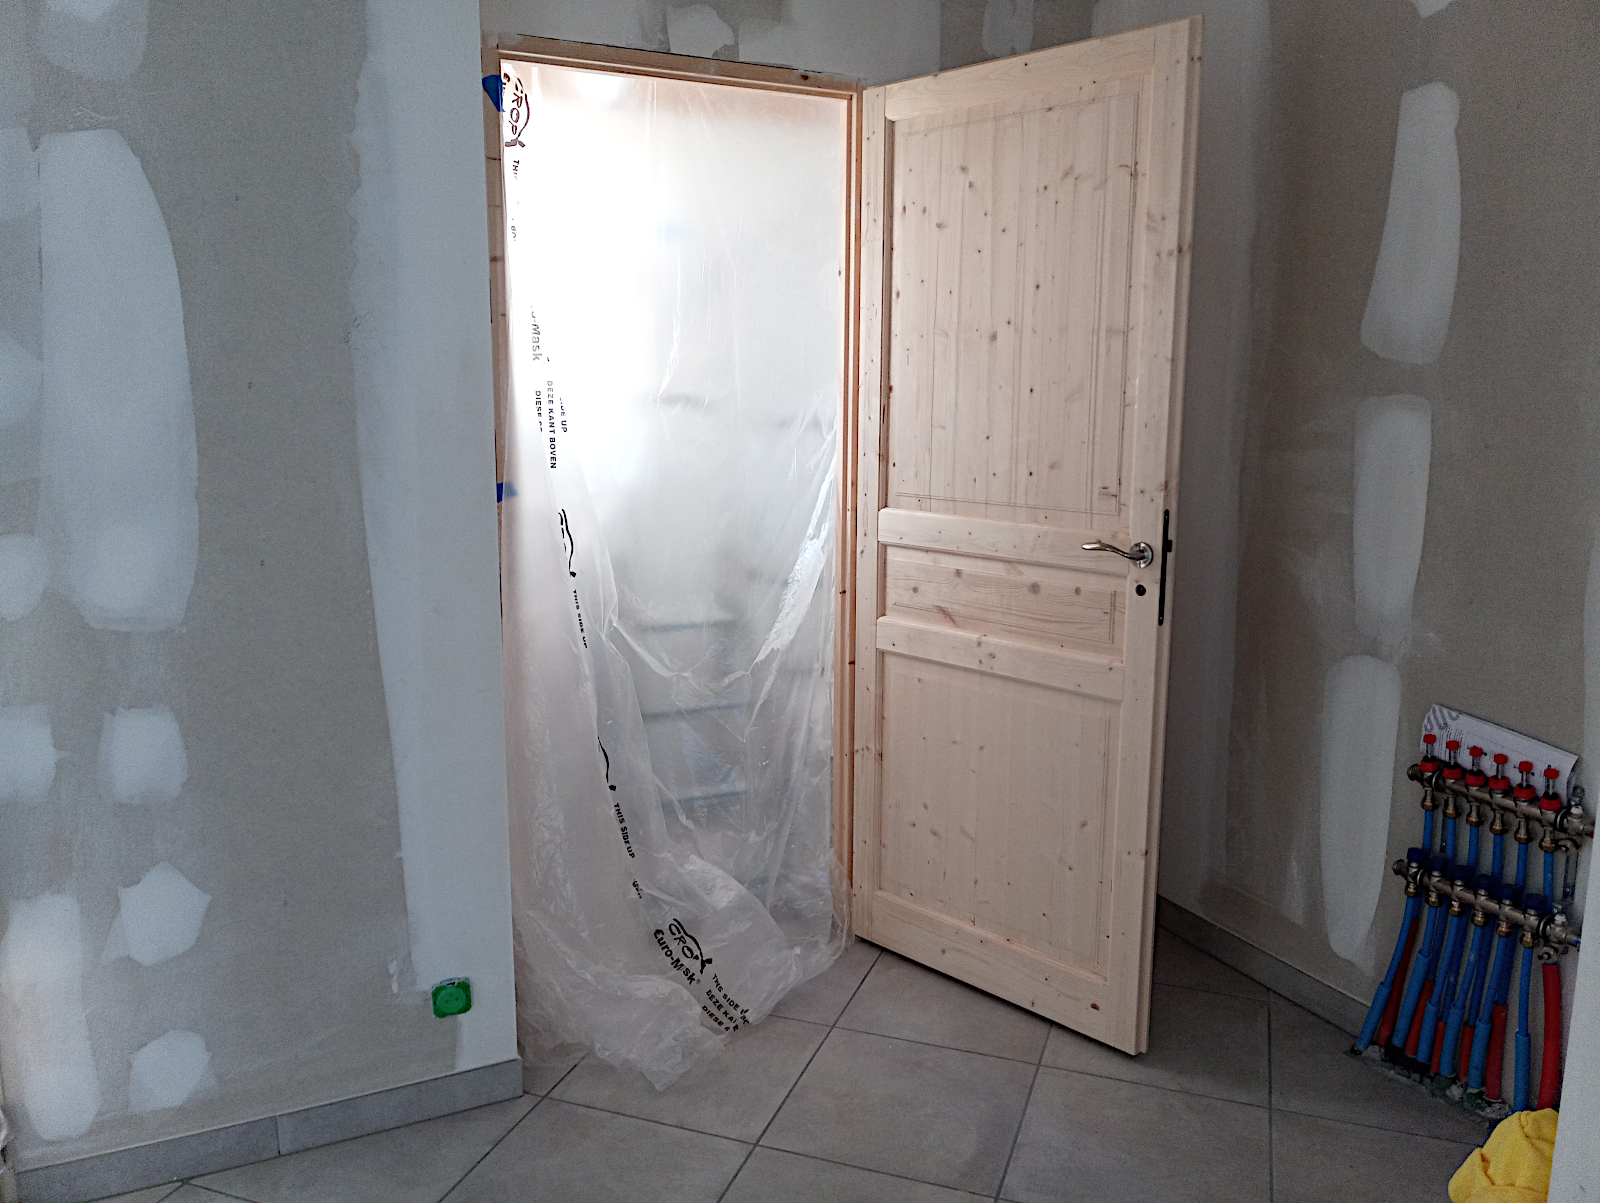
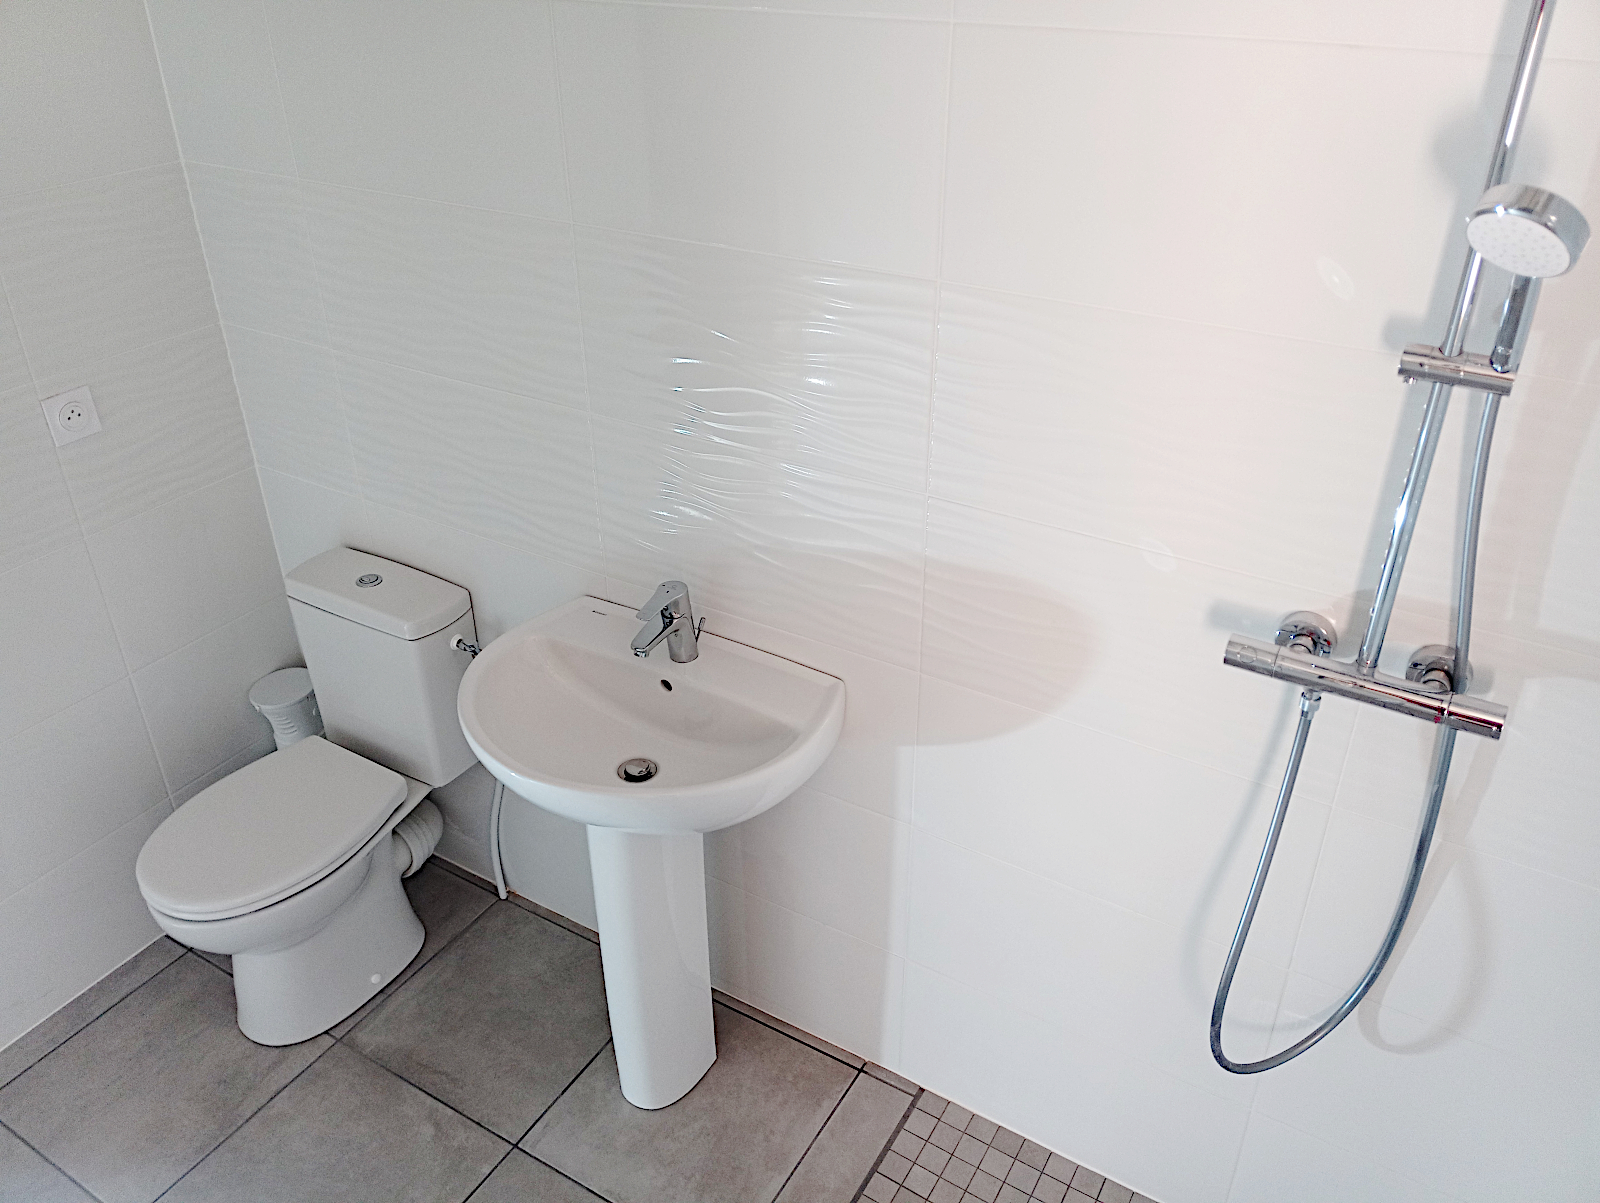
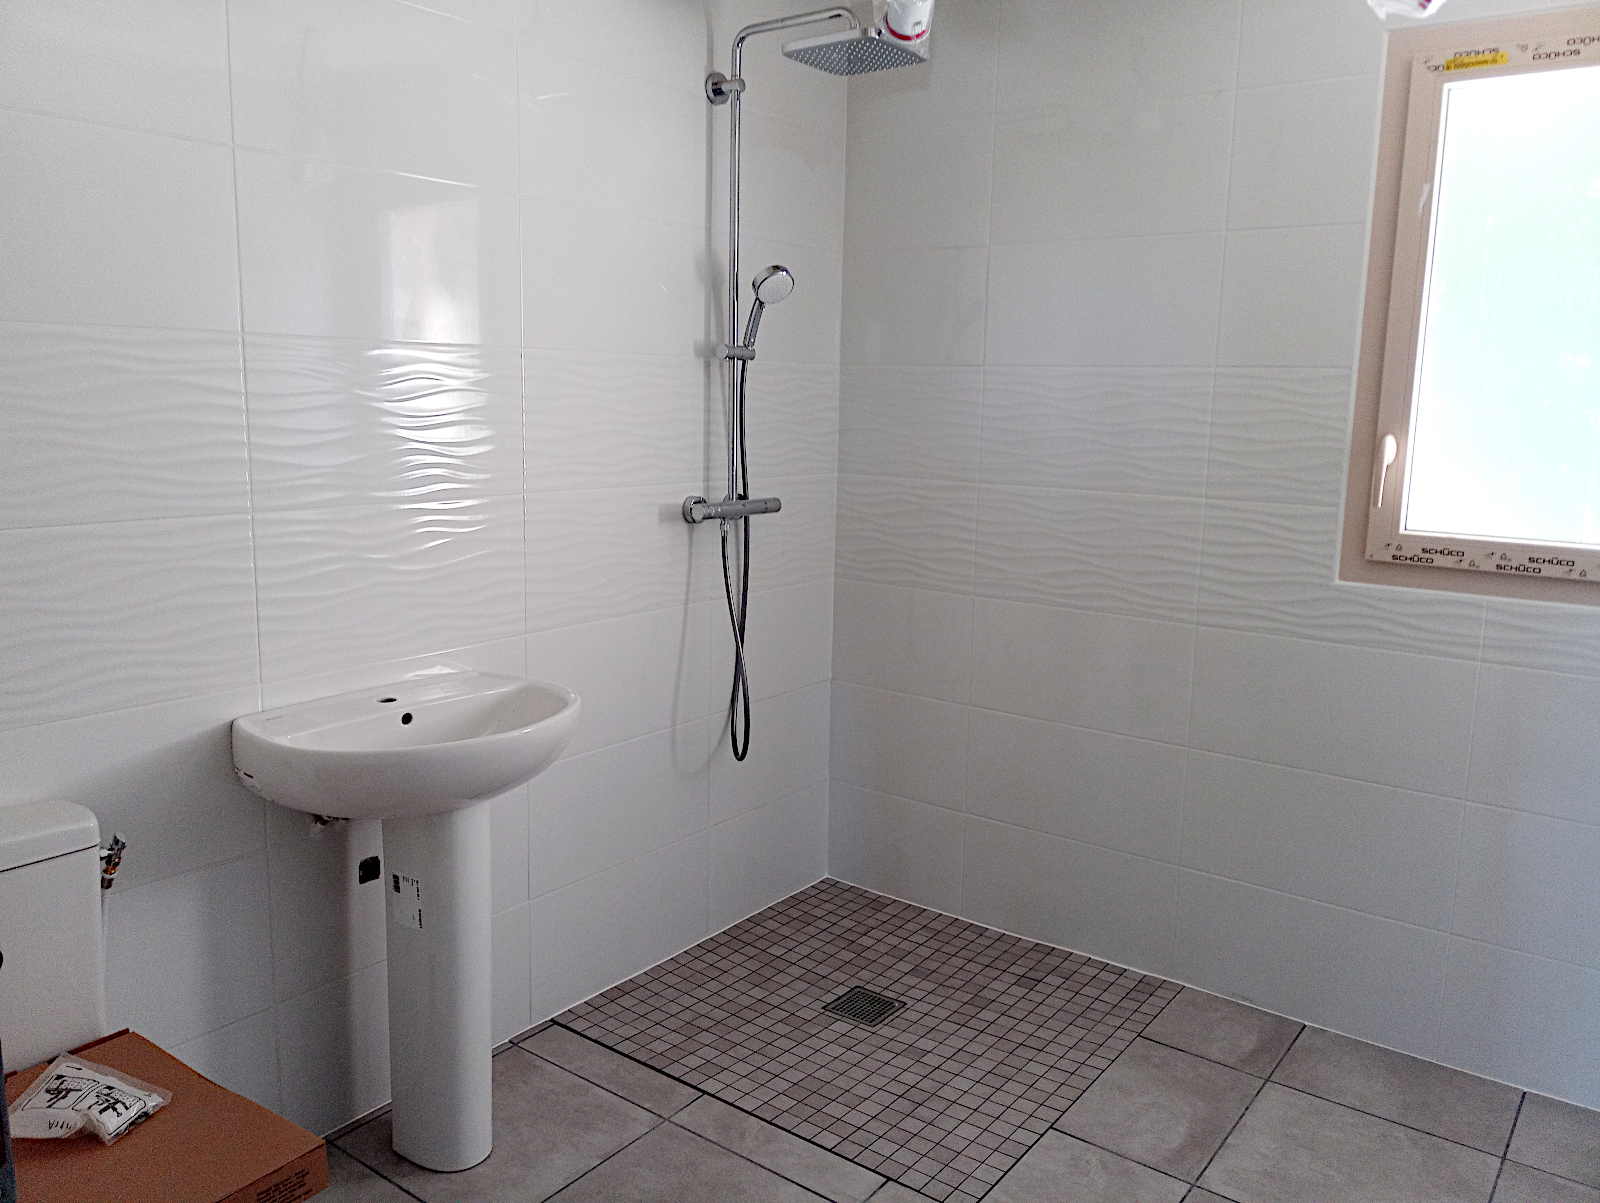
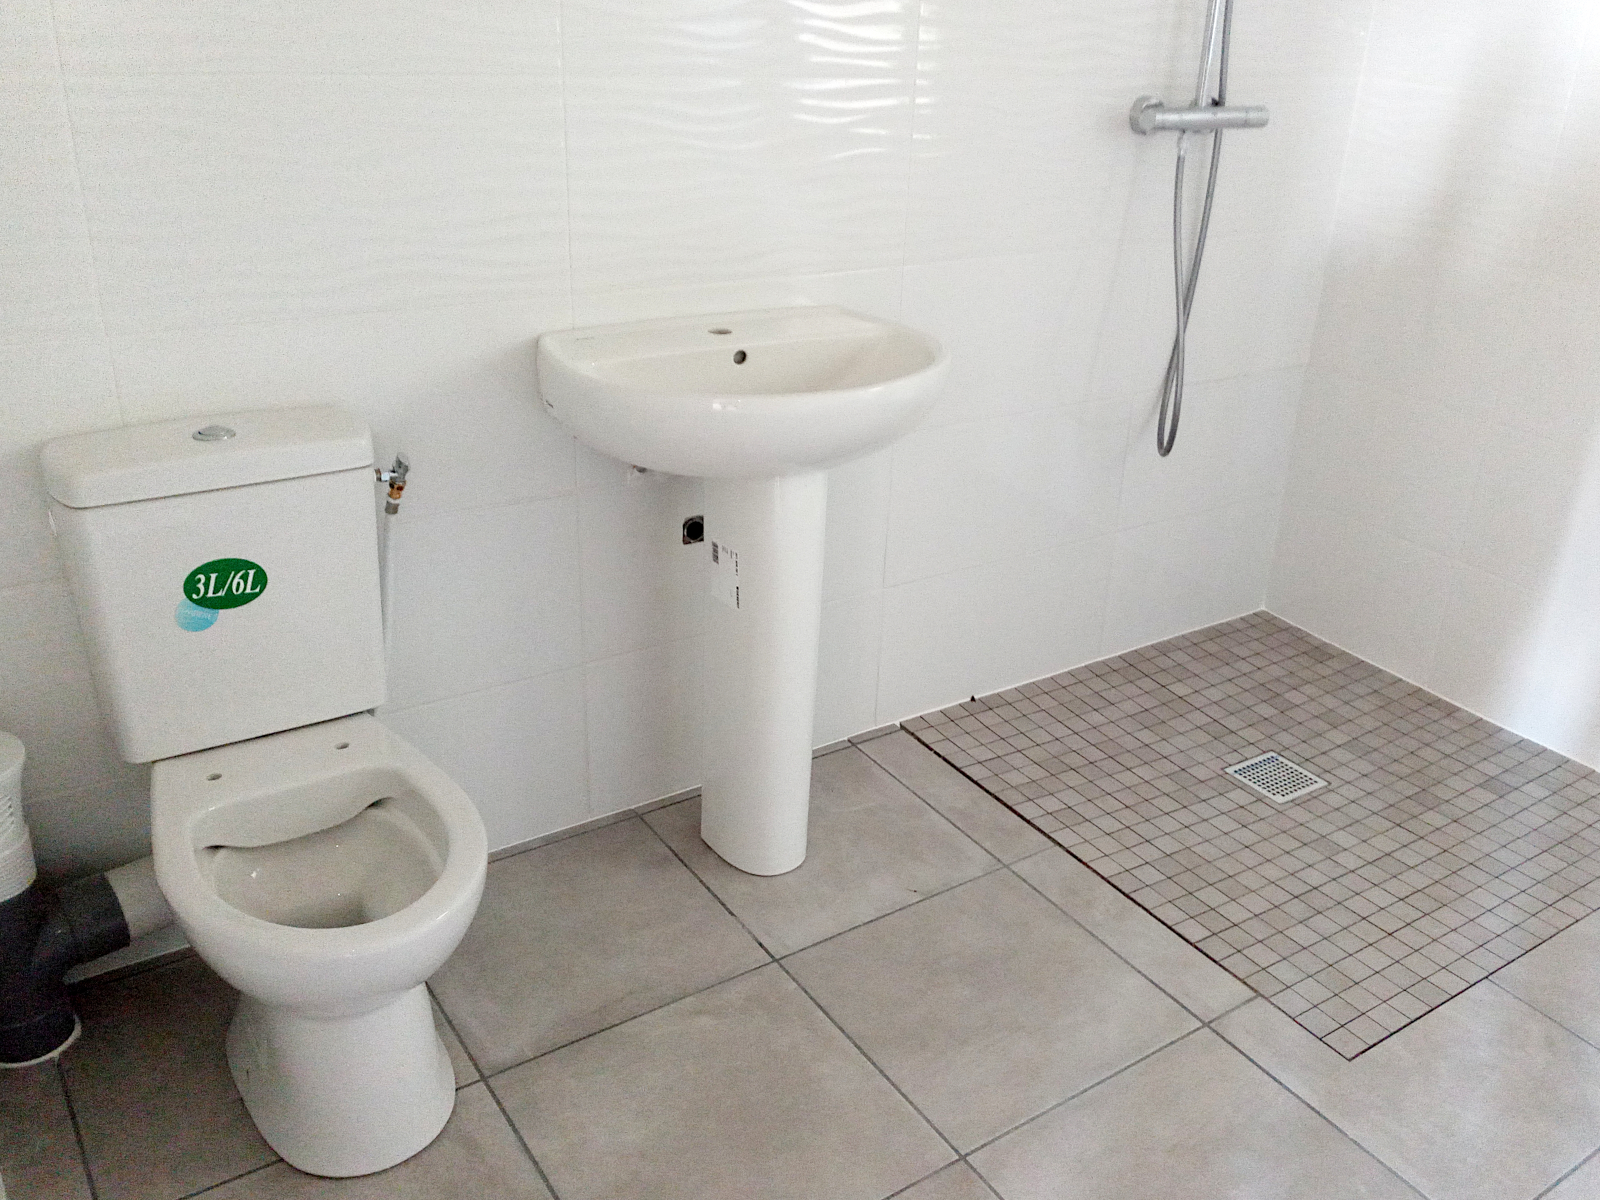
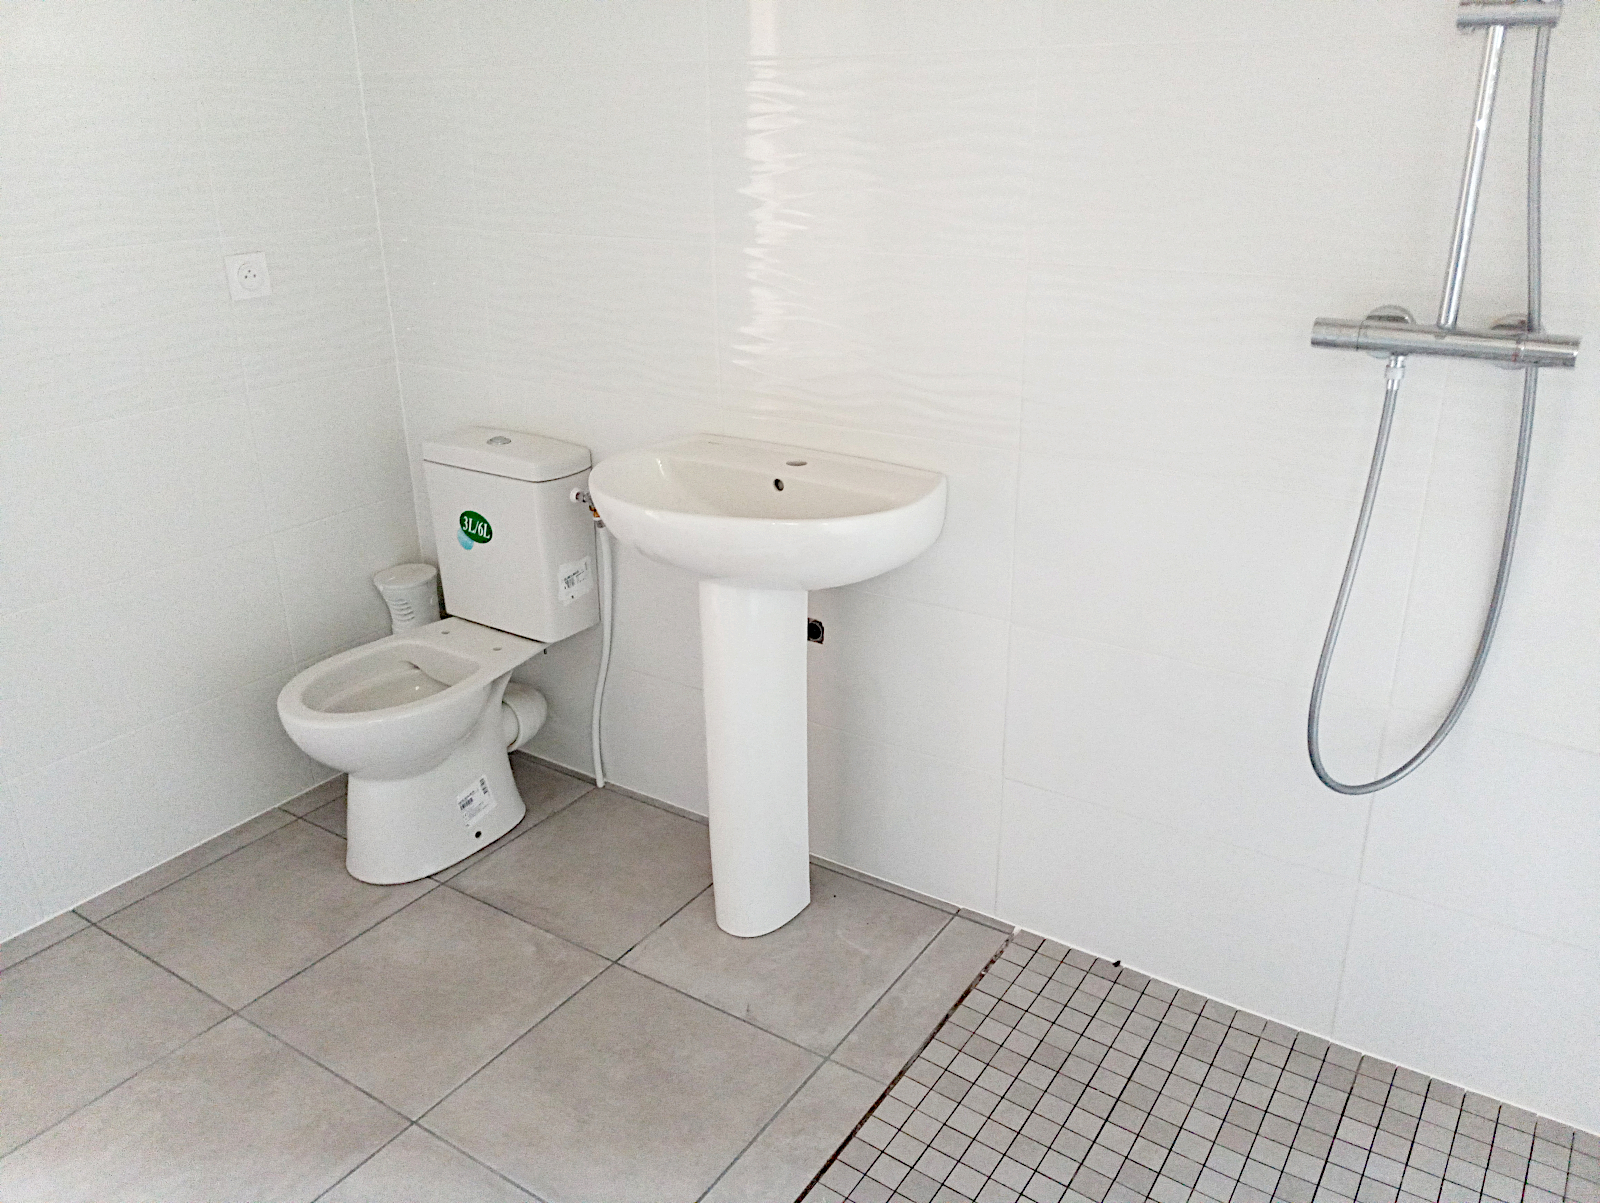
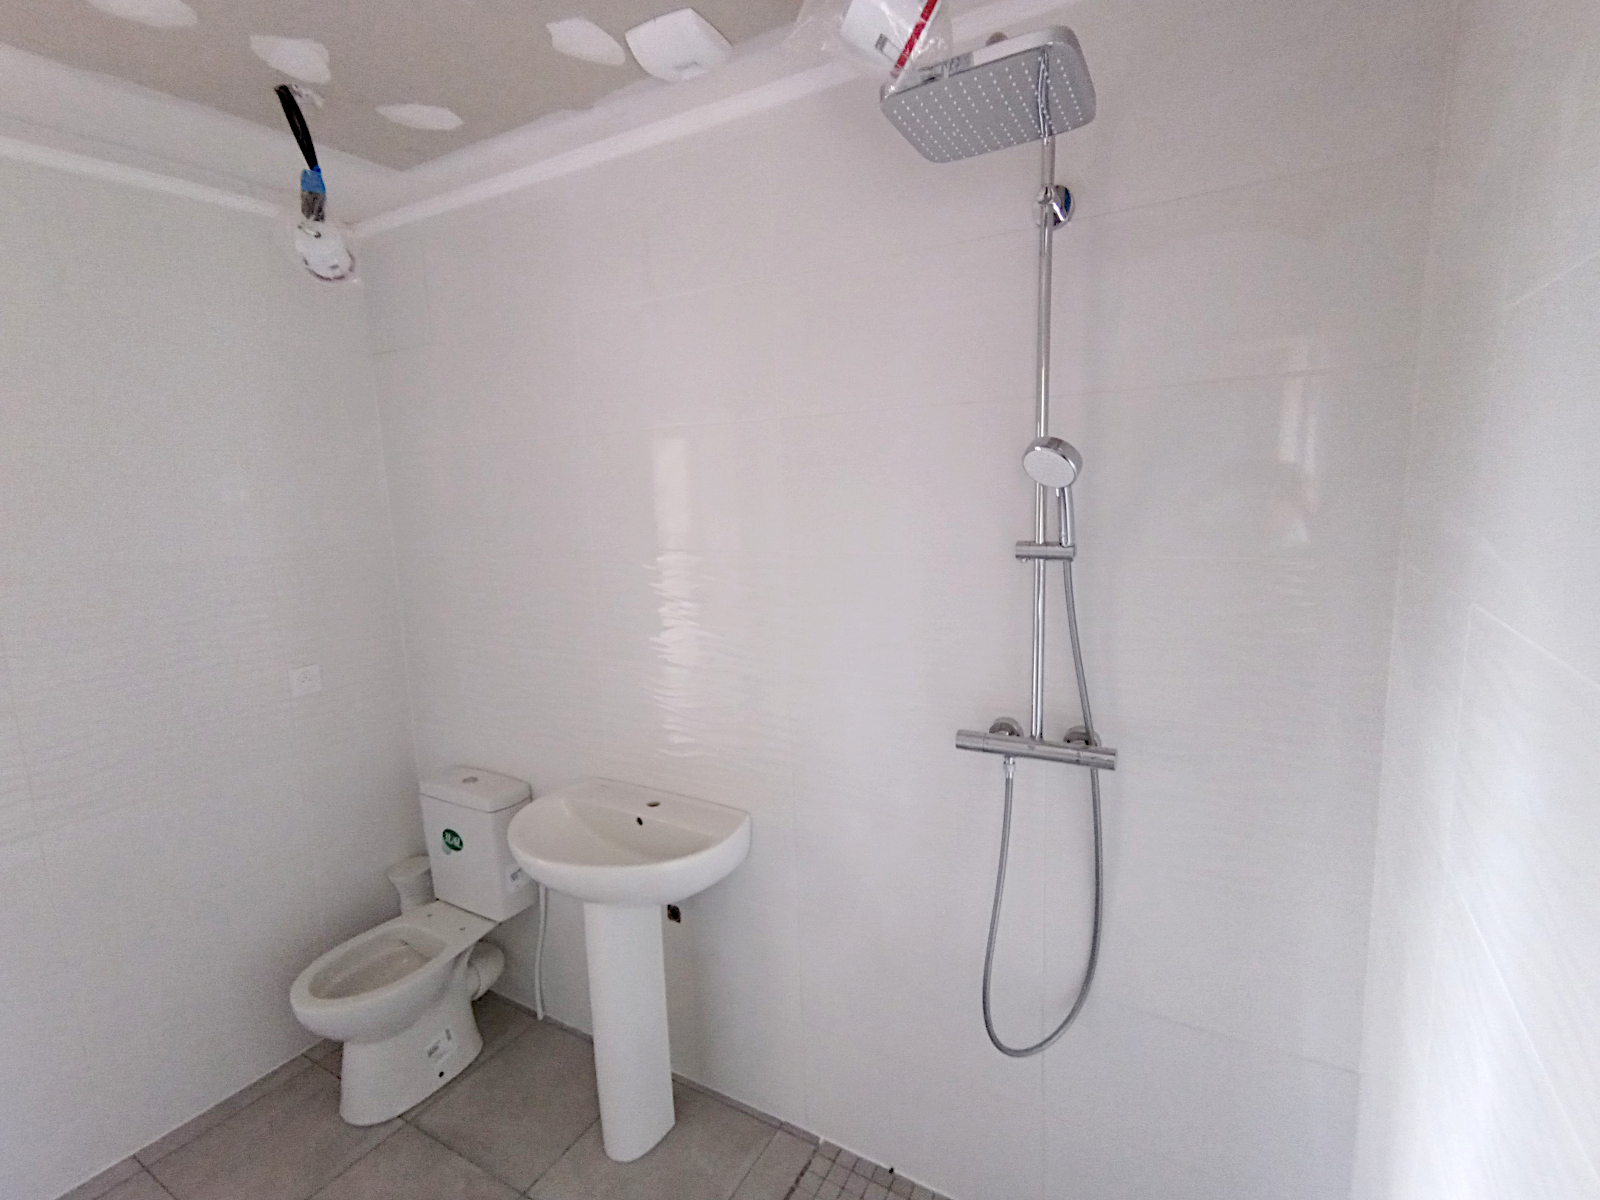
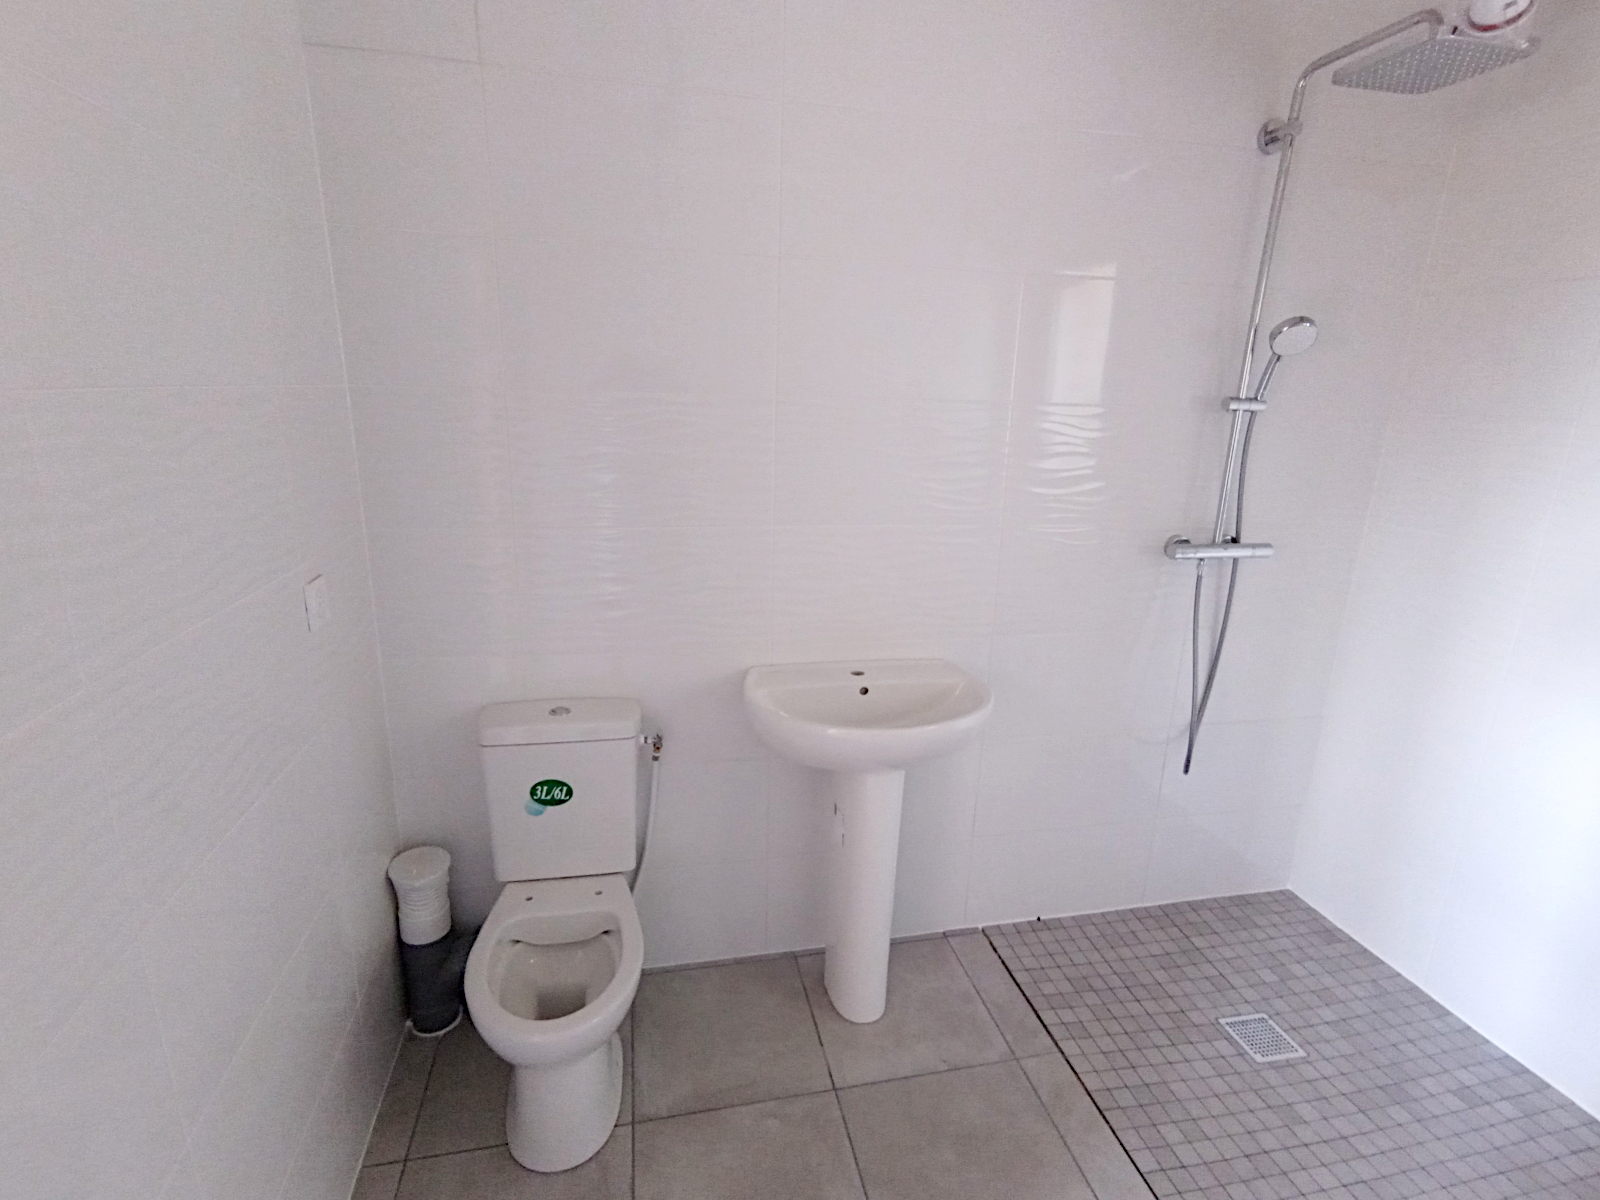
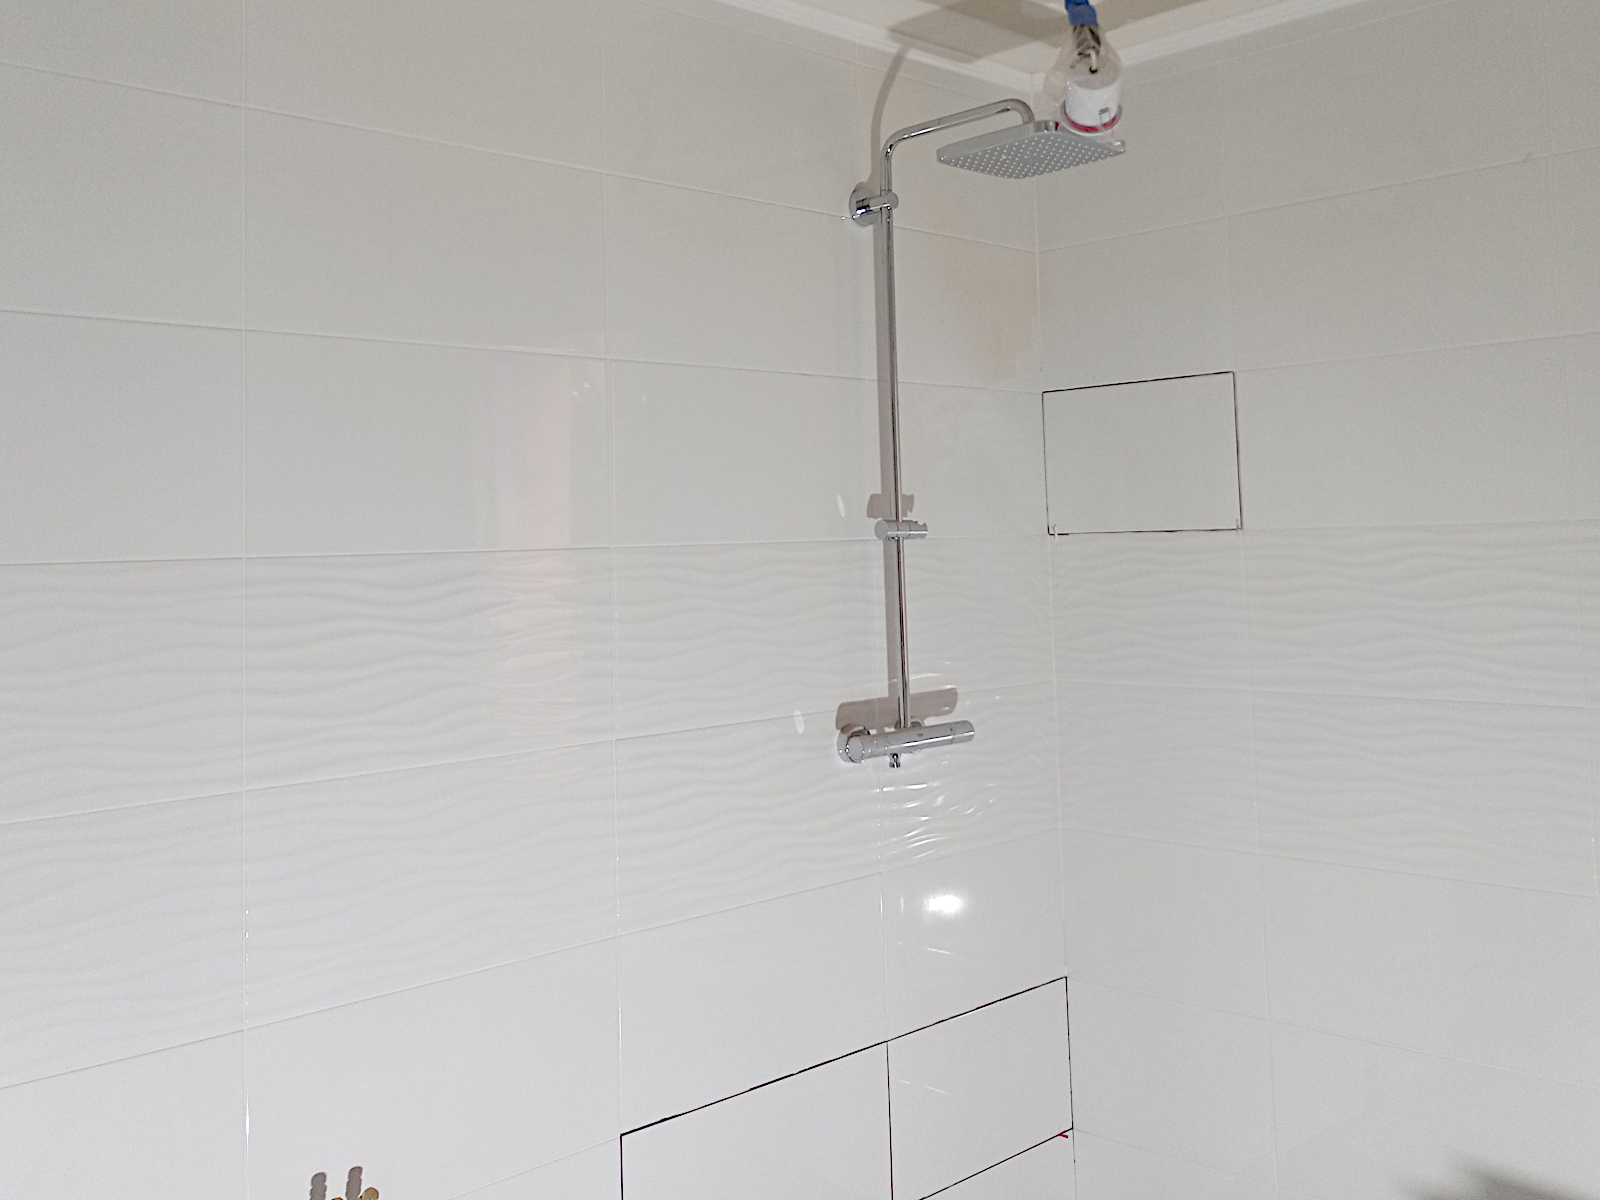
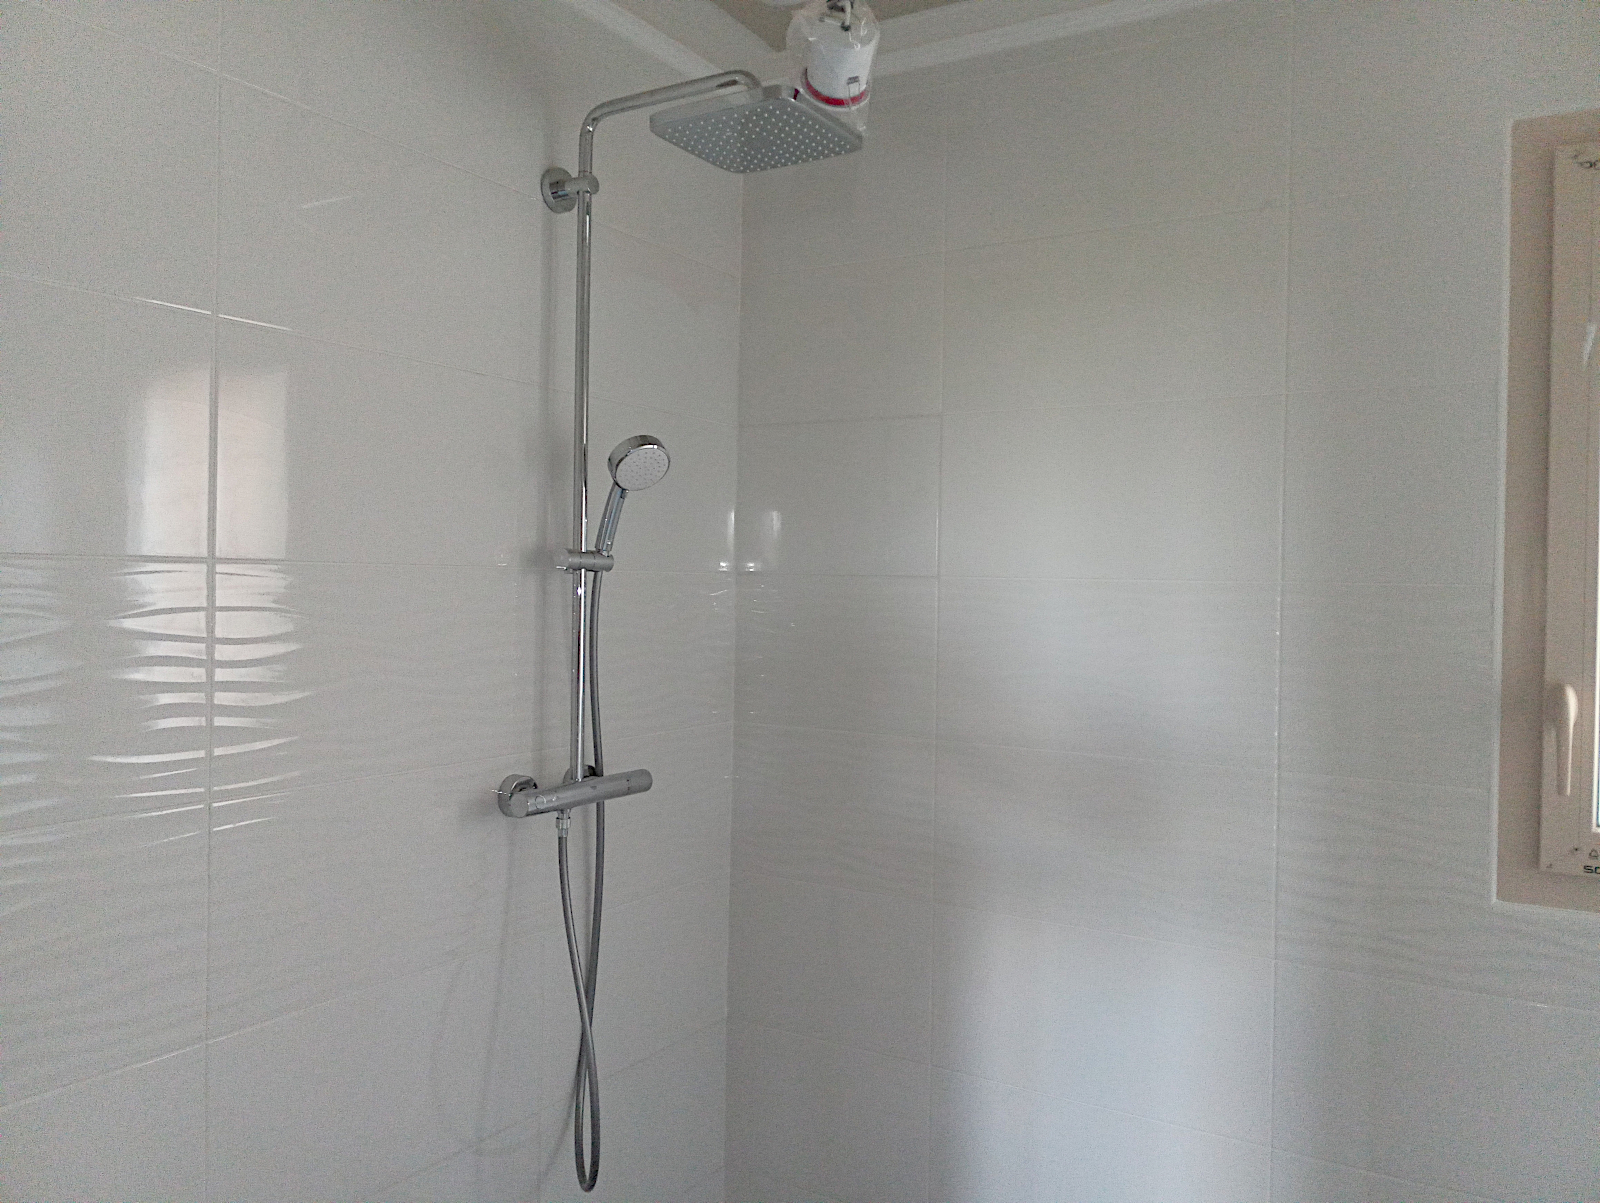
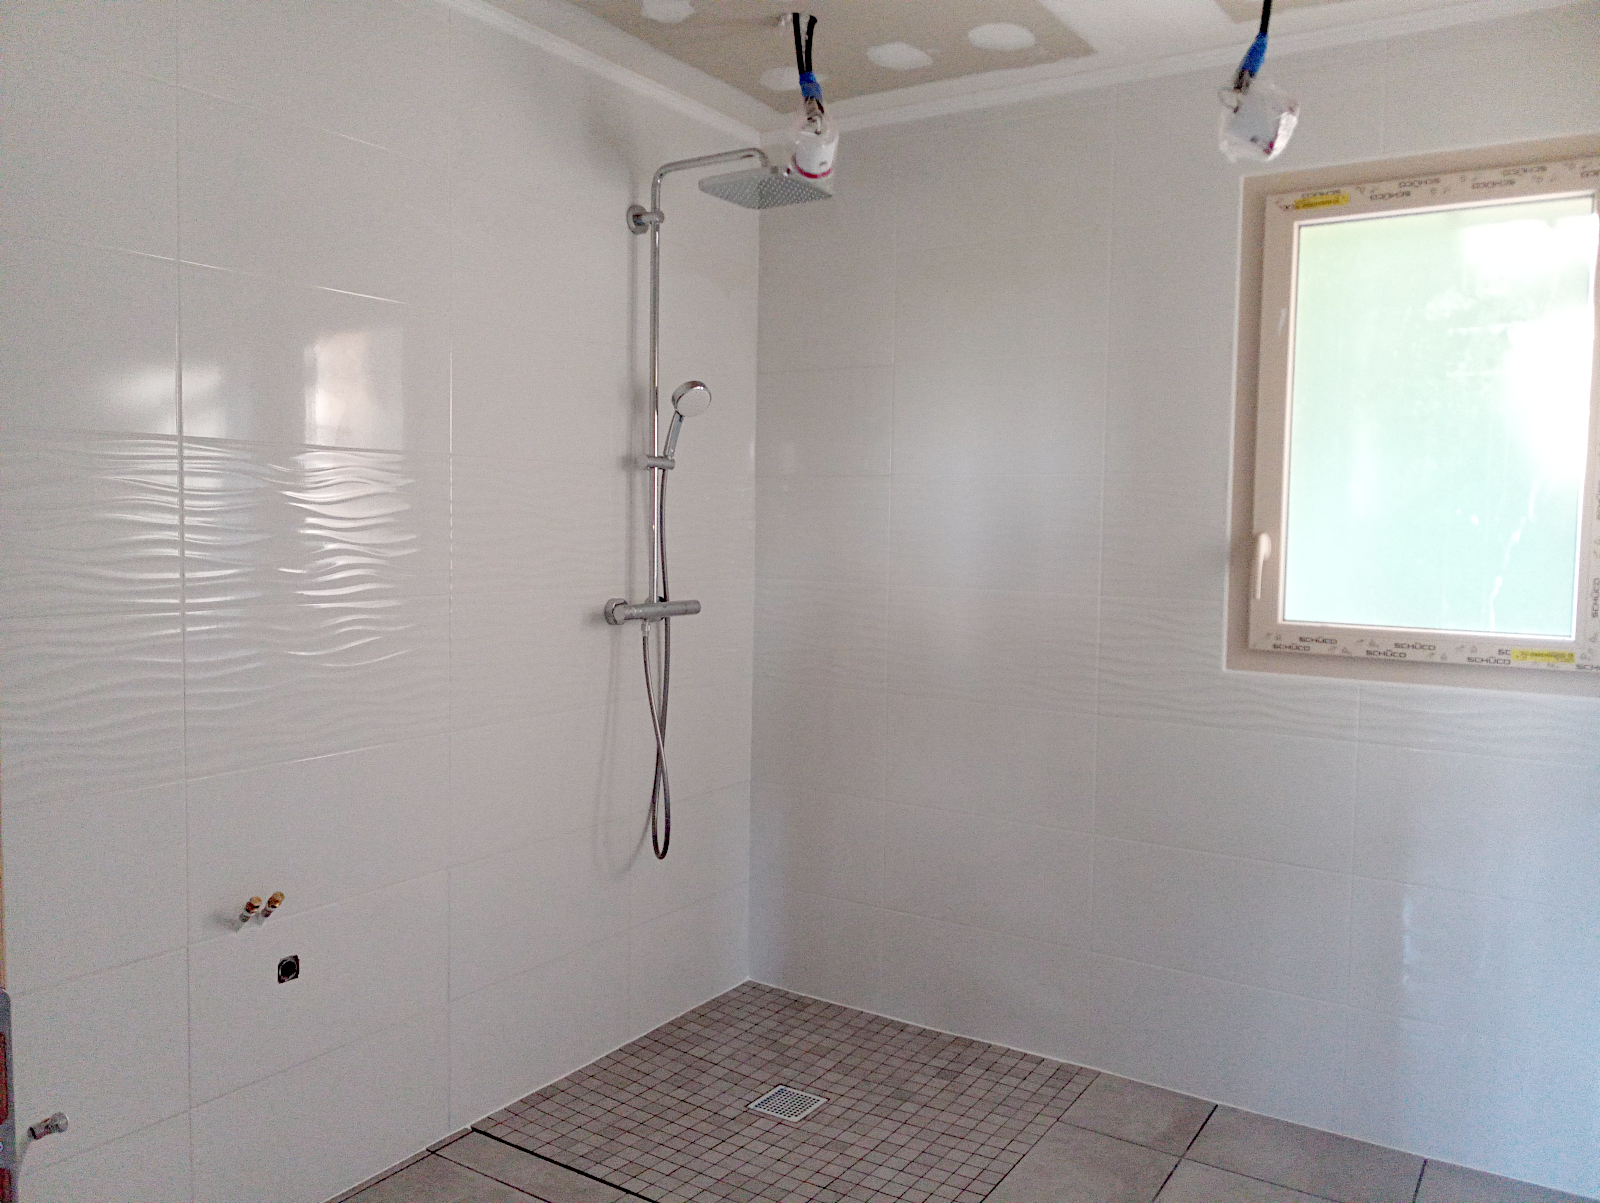
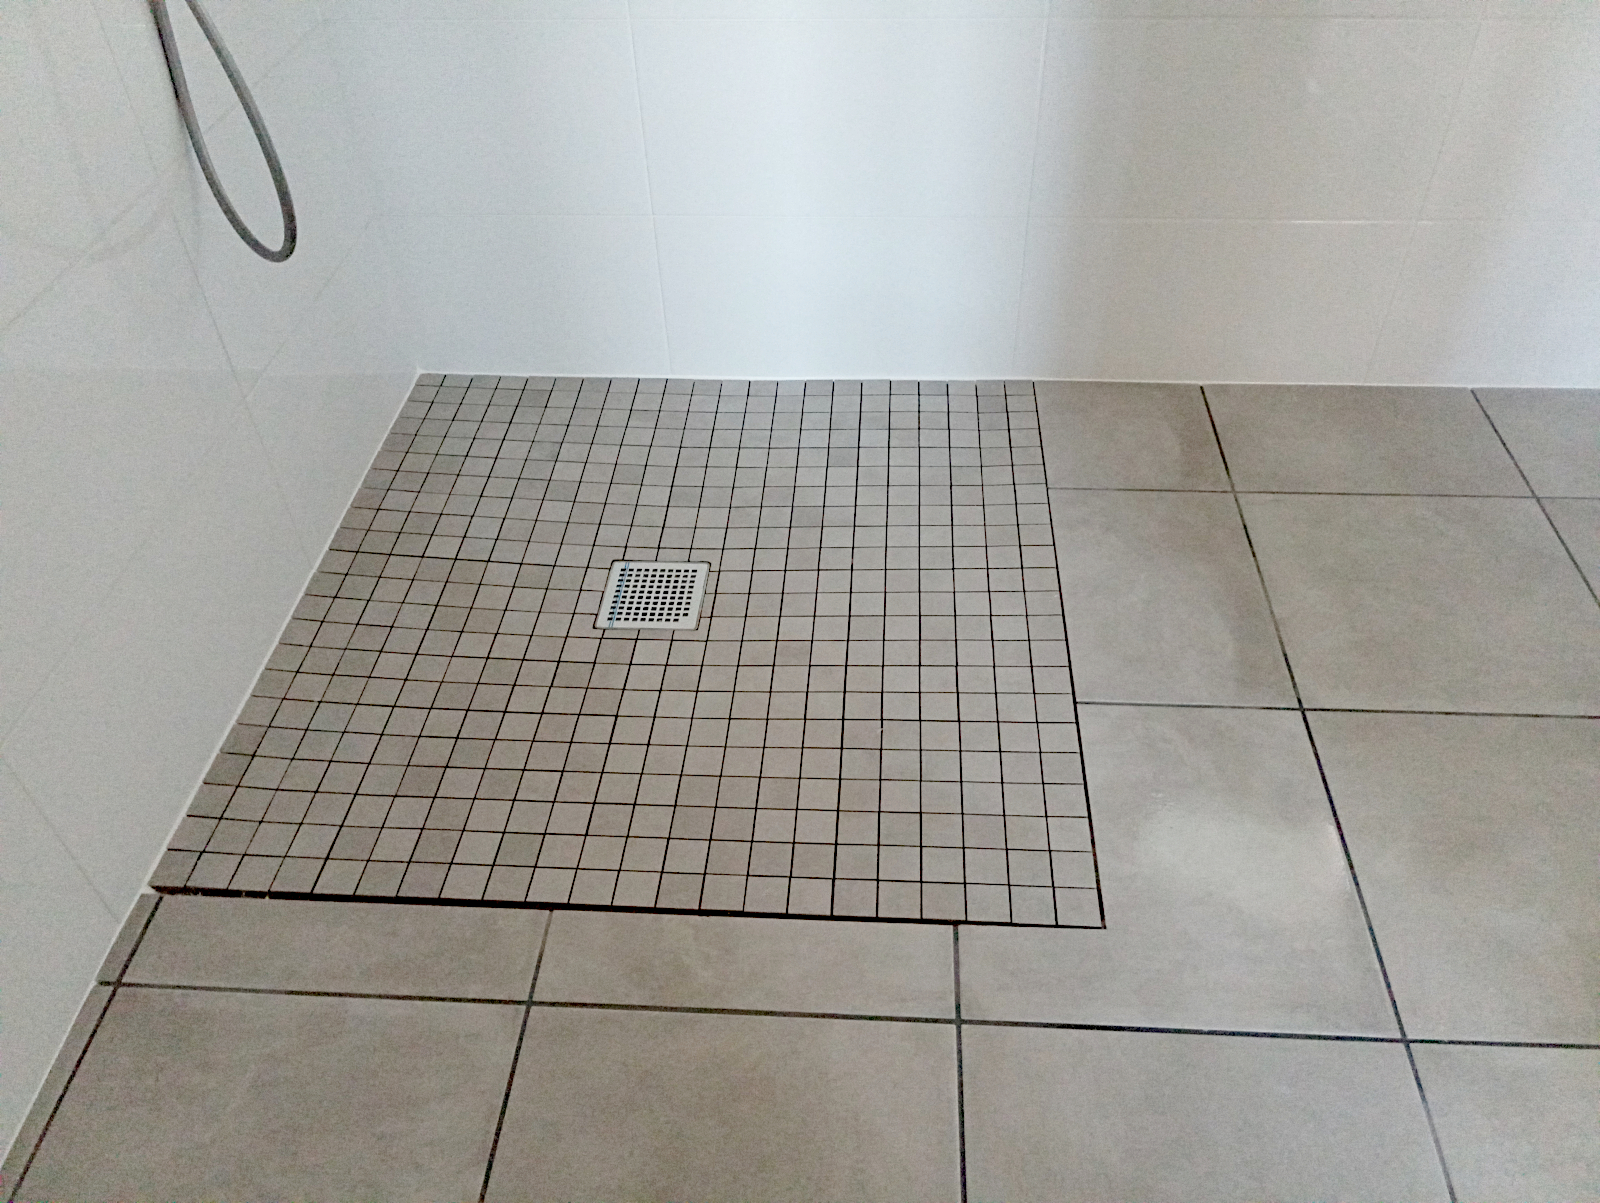
And (almost) nothing achieved. I say ‘almost’ because I did manage to order a shower screen for my ‘douche italienne’ but even that wasn’t straightforward. The model that I went for is on sale on Mano-Mano, one of those home-grown French web sites that try to emulate Amazon by acting as a shop window for lots of sellers and manufacturers.

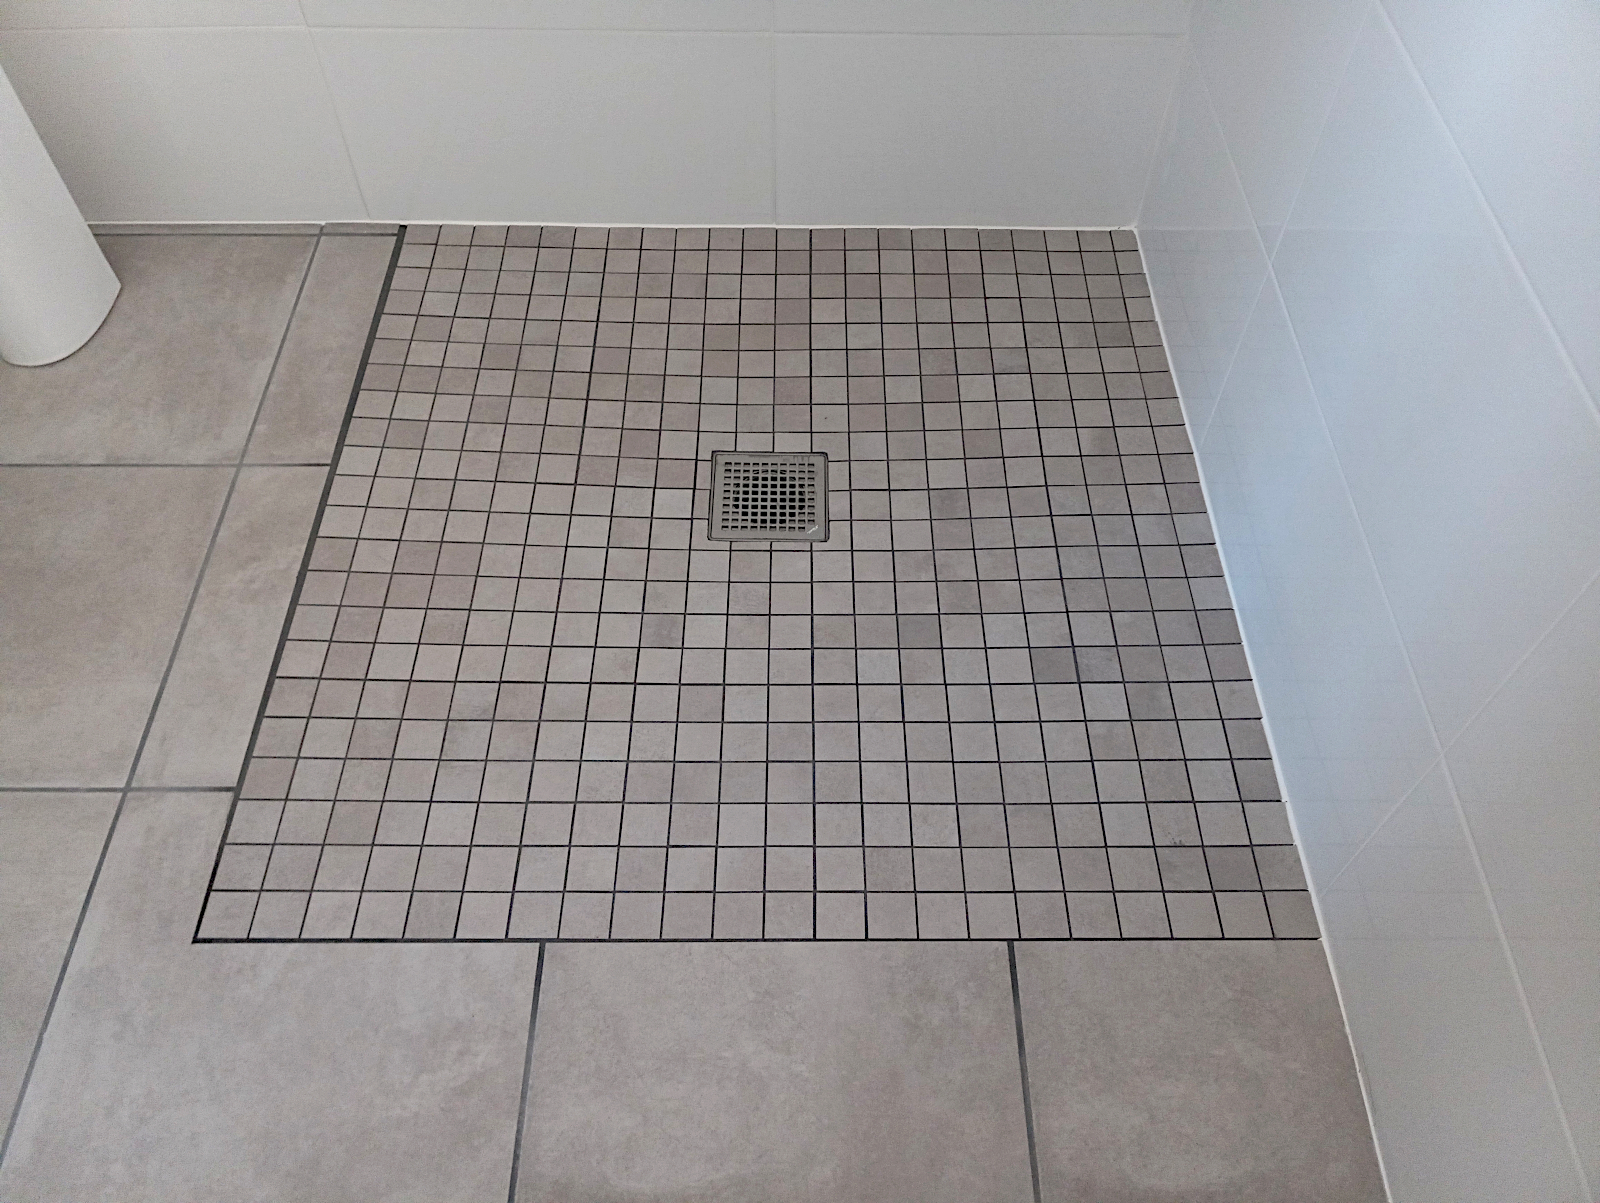
I need a 110 cm wide screen to go onto a 110 cm square floor area so the bar that secures its top to the wall needs to be the same length. The trouble was the model I wanted only comes with a 90 cm bar and when I asked if that could be swapped for a 110cm one I was told that it couldn’t.

So I looked around and even went onto the seller’s own web site where the model on sale on Mano-Mano was more expensive, so expensive in fact that it was worth buying it through Mano Mano and sourcing an additional bar from a different supplier. Go figure – you couldn’t make it up.

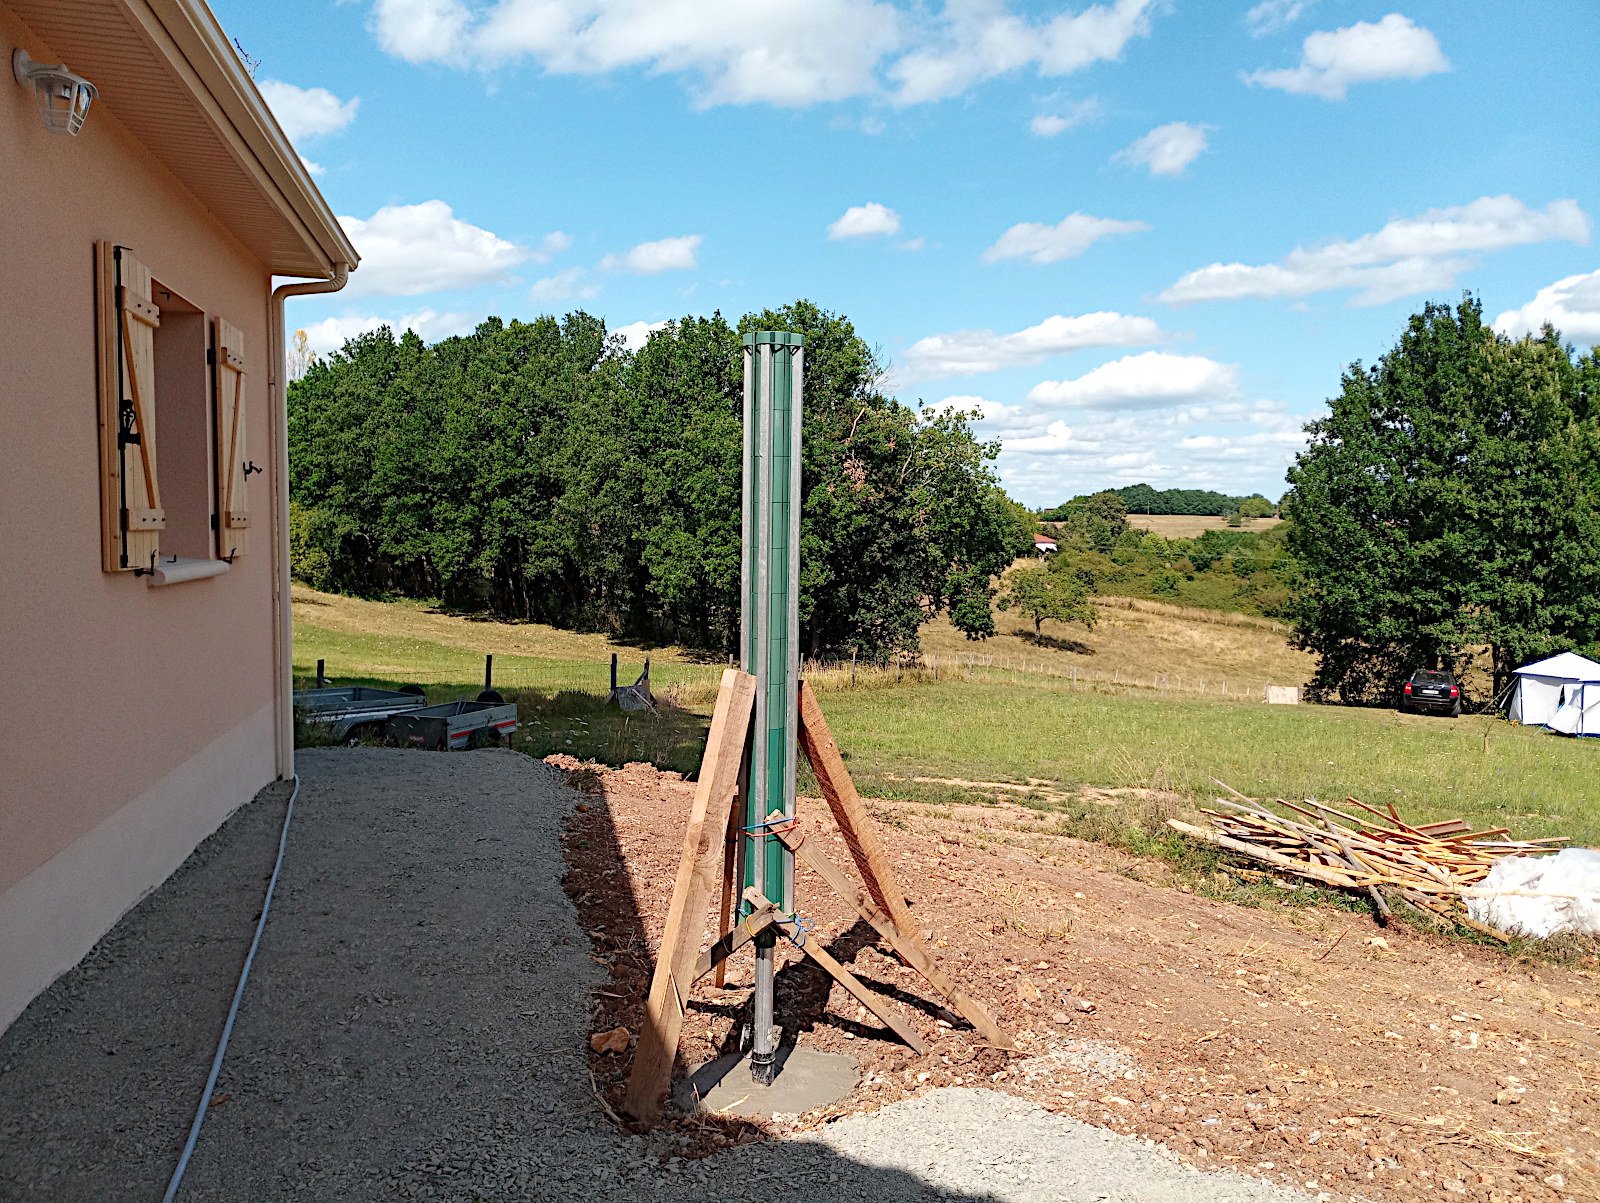
Progress on getting my house connected to electricity was, however, painfully absent. The barriers put in the way of doing so are considerable and almost impenetrable for the average French person, let alone a non-francophone foreigner like me.

Bear in mind that I made the initial request for connection on 11th July and progress to date has been zero. At the end of last week I’d made a desperate request to EDF to just get the house connected, as you would do in the UK, when it would be connected in a jiffy.

But not so in France. Here they are only concerned about their labyrinthine system and the needs of the customer take a very distant second place.

You’d think that as I’ve had a ‘temporary’ connection for about 2 years (called a ‘branchement provisoire’) that it would be the easiest thing in the world to say, ‘OK, the house is finished, now just make it permanent and make any changes to the tariff that are necessary’. Er, no.

I’ve been told that the two ‘systems’ are quite different (eh? why?) and that not only must you make a completely separate application but you also end up with a new contract and a new customer reference. And that, of course (hands being figuratively rubbed together on the other end of the telephone line) means, sir, that yet another new ‘dossier’ has to be created with all that that entails for information, involvement of engineers and inspectors, creation of new references and lord only knows what.

And that’s when you begin to hit brick walls because nobody tells you exactly what the information comprises and where to find it and, heavens above, there’s no way that Enedis who’s in charge of the network and responsible for actually connecting the wires, can possibly talk directly to EDF who’s in charge of accounts and billing. Sir, we are two separate companies!

So having made my plaintive plea to them at the end of the last week I was surprised this morning just as I was about to leave the caravan by a call from EDF. Despite my request for the caller to speak slowly and clearly, I gathered from their rapidly accelerating French that this was to do, unsurprisingly, with connecting my house.

Beyond that I understood about half, or a bit more, of the conversation and had to join the dots for the rest. I had to re-provide lots of information that I’ve already provided several times previously – address and floor area of the house, electrical equipment being used, number of people living there and so on.

At the end of it I was no wiser than I had been previously about what was then going to happen, if the house was going to be connected, if so when, if I had to do anything else… you know, crucial stuff like that. However, a stumbling block that had arisen just previously concerning a reference called a ‘PDL’ reared its head yet again and seemed to be what was blocking the system and bringing it to a halt.

Nobody had bothered to explain what a ‘PDL’ is. It’s short for ‘Pointe de Livraison’ and it’s a code found on your bills that is specific to the ‘point of delivery’ ie the electricity meter. I’d been asked several times what the new PDL was – how the heck was I supposed to know! I’m the ruddy customer, not an electrical engineer.

Incidentally, on the EDF (or is it Enedis, I’m losing the will to live) web site it asks, ‘Want to connect your new house? No problem! Just choose your supplier (in my case EDF), tell them and they’ll do the rest’. What a travesty of the truth!

But ‘Zut! Alors!’ A few minutes after my conversation with the man from EDF with whom our conversation was terminated rather brusquely, an email came through welcoming me as a new (hollow laugh, new after 11 years) customer and setting out details of my new contract. And among them was a new PDL.

I’d already found out that the PDL for my ‘branchement provisoire’ could not be re-used as it was for a temporary connection which is different, as I explained above, to a permanent one. I thought the PDL on the new contract was manna from heaven and the missing piece of the jigsaw that would at last get me connected.

So as soon as I spotted it I phoned the number for Enedis that the man from EDF had given to me earlier. But would you believe it (yes I know, I wasn’t really surprised either) my hopes were then soundly dashed. The young lady on the other end told me that the PDL that I’d just provided was for a ‘branchement provisoire’ – a temporary connection – and was no use to her. I had to give her the proper new PDL. But where should I get it from? My builder? The electrician who installed the system? Ah, that was my problem.

There was no mention of the PDL on the official inspector’s paperwork (that would be much too sensible) so after going around in circles for another 10 or 15 minutes I got sick of it, told the young lady that the system is crazy, too painfully complex and that I’d had enough. She said that that was a shame but I hung up anyway.

But being me I didn’t let it stop there. After a strong cup of tea I did a bit more research on the internet and to my complete surprise I uncovered the fact that if you have a Linky it’s a piece of cake to get the PDL off it. If you page through its display it comes up with a ‘Numéro de PRM’ and this, my friends, is the same as the PDL (which is why the French give it a different name).

I’ve told all of the people that I’ve been in contact with from both Enedis and EDF that the new system has been installed in my house together with a Linky. Why has nobody told me that I could get the PDL reference that they’ve all asked for from it in seconds? Are they all gormless, ignorant or just lazy? I suspect all of the above.

A few weeks ago I was in contact with another young lady from Enedis who had given me some very helpful advice. I decided to see if she could help and sent her an email telling her about my problems, providing all of the contract information that I had and giving her the PDL that I’d got minutes before from my Linky.

She came up trumps minutes later telling me that this was linked to an existing Enedis project, that all the work had been done, the fee had been paid and all that was necessary was for it to be put into service. For that I just had to complete a form F100 from EDF. At last! What a star!

I can’t find any link taking me to the F100 but I believe that the information requested by the EDF man from the first phone call this morning was relevant to it. In the hope that the blockages have been removed I sent a message to EDF client service (an oxymoron if ever there was one) with the new contract references and included the new PRM/PDL. Your guess is as good as mine, however, as to whether my house will be connected this time next week 😕

A long time coming

I’ve at last got the bathroom washbasin installed and connected up. It’s taken much longer to do than I expected, partly because I went back to the UK for my sister, Sandra’s, funeral that took three days out of my schedule. But also because, as usual, I’ve spent an inordinate amount of time driving backwards and forwards to Le Bugue (Brico Marché), Trelissac (Brico Depot) and Chancellade (Leroy Merlin) trying to get hold of the materials that I needed for the job.

The first things were large washers to hold the basin back against the wall. I went first to Brico Depot who sell such things ‘en vrac’ meaning that you can fill various sizes of small plastic envelopes up with any kind of ‘quincaillerie’ (screws, nuts, washers, bolts etc) at fixed prices. The sizes I wanted were out of stock but while I was there I bought a washbasin waste.

So the next day I went to Brico Marché who also sell items ‘en vrac’ and bought envelopes of screws and washers of various sizes. Unfortunately, when I went to use the washers they didn’t work and when I did the job today I ended up making the securing pieces that I needed myself by cutting and drilling some of the sheet metal that was left over from when I repaired my trailer.

I also found yesterday that the waste that I’d bought from Brico Depot was of very poor quality and after trying to modify it to fit, it was leaking like a sieve. So today I ended up making what seems to be becoming my regular Sunday drive to Leroy Merlin to buy another of better quality.

And all of this so far without doing any work on installing the washbasin. That happened today. It took longer than it normally would have because I’ve injured the main lower joint that connects my left thumb to my hand. Not only is it very painful but I also now have a much weakened grip in that hand to the extent that I keep dropping things.

But I got it done eventually (late afternoon) and was very pleased with the results. Since taking the following photographs I’ve siliconed around the top and sides of the basin and the foot of the column making the whole thing look even better.

null

null

null

null

I now need to silicone around the bases of both WCs (bathroom and separate toilet) and order a shower screen for my ‘douche italienne’. While that’s on order I can at last be getting on with masking up for painting. I think I’ll do the bathroom and toilet first as they will involve minimum disruption and will be quick to do allowing me to get the lighting in place in both. Then I’ll do the kitchen followed by the living room and corridor and hopefully all of the above will be completed by next week-end. Hopefully 😕

Know what today is?

It’s ‘end of contract’ day and construction of my house is now formally completed.

The plumber showed up early, around 8.00am, installed the WC in the bathroom and fixed the one in the separate toilet to the floor, so his job was done. He didn’t connect the heat pump because I think a specialist has to do that.

Shortly after he’d gone two workmen from the builder arrived in a small open back truck. Their job was to clear away all the rubbish that’s collected over the months and the wood that was left over from the roofing work. I originally planned to keep it but it’s become something of an eyesore and had to go.

They had to make two trips and returned in the afternoon to finish off. So that’s it! The builder’s work has been completed and as any problems have been dealt with as they’ve arisen, that should be the last time they need to come on site.

I think the electrician will probably have to return when the system is commissioned but that should be just a formality when the time comes. Now it’s all just down to me 😉

Get the idea?

Not much to see today but what I did do tired me out. I took the opportunity to hitch my large trailer to the car and get rid of all of the packaging material that’s been taking over the living room. All the new appliances have come packed in masses of expanded polystyrene and plastic and I carted it all off to the ‘décheterie’ in Rouffignac and disposed of it.

While the trailer was attached I had an idea. As I’ve mentioned previously, the stone that’s been laid around the house is more for effect than anything else as it’s not been tamped down enough to take any weight at all. Even walking on it leaves footmarks so there’s no chance that my outdoor furniture that I brought with me from my old house could be placed on it, let alone used.

However, I’d like to use the area at the rear to take a break on while I’m working in the house and it occurred to me that if I laid stone slabs out there they might disperse the weight enough to make the area usable. To get there you’d need to use the pathway on the south side of the house which also consists of soft stone so in order to avoid destroying that by walking up and back on it, stone slabs would have to be laid on that first.

So that’s what I got started on today, by taking my trailer over to Brico Depot and loading it up with the stone slabs that I want. To do all around the house I’ll need several hundred but initially I’ve calculated that for the side pathway and the terrace area at the back around 200 will do. I loaded my trailer up with the first 70 and my guess was that it was already then overloaded, but I got them all home and laid as the side pathway is fairly level and here’s how it looked afterwards.

null

null

Do you get the idea? I think that it’ll be a quick and effective way of getting a good looking result and it needs to be done before there’s too much foot traffic on the surfaces involved that will affect their levelness. And it’ll be nice to be able to sit outside and enjoy a cool beer under my large parasol. That’s if the mice haven’t got to it first 😕

What’s the next thing you need when you have a washing machine?

A clothes line, of course. Unlike when I left the UK to come to France, I brought my rotary clothes line with me from my old house at Plazac. I had to leave the plastic tube that it was inserted into in the ground but I found a replacement on Amazon a few weeks ago, so I was all ready to set it up again here. I even bought a sack of cement for the purpose from Brico Depot in Brive when I picked up my new washing machine yesterday.

The place I’ve chosen for it is outside the rear of the house in the angle of what will be the terrace.

null

The position is perfect for two reasons. Firstly, it receives uninterrupted sunshine from first thing in the morning until the early evening. Secondly, how many people have a view like the next shot when they’re hanging out their washing 🙂

null

I did the job properly, dug a hole for it, put hardcore in the bottom and then filled the hole with several buckets of concrete. It took me ages before I’d judged that I’d got it completely vertical!

null

I received a call from the tiler this morning saying that he wanted to come and completely finish the job off by doing all of the shower joints. He turned up with his whole family, his wife who gave him a hand getting water and mixing the mortar (despite my saying that I’d do it), and his three lovely little children, a son and two pretty little daughters who also decided to ‘help’ in their own way.

He told me that they were leaving for holiday tomorrow and you know how it is with kids. I guess they were so excited about going that anything to get them out of the house and occupy them was a useful diversion 🙂

null

null

The good news is that although I haven’t got my shower screen yet, which I plan to buy next month, I’ll be able to use the shower from tomorrow.

Coincidentally I collected my floor laminate from storage this morning and moved the fridge so I could get past it. The best place for it was where it will eventually be and when it was in position the kitchen finally took the shape that I intended it to have in my plans. I just need to turn its door round.

null

So it only remains for the plumber to finish installing the WCs in the bathroom and separate toilet and the builder to remove all the rubbish that’s accumulated outside, both of which I assume will happen next week before the August break. The electrician will have to come back when the power has been connected but that won’t stop me using the house in the meantime.

There’s also another upside. Several months ago I made the decision to concentrate 100% on the build to make sure that it continued moving along and I got the results that I wanted. As a result and also because I’ve been doing a lot of work myself inside, I’ve been missing out on the many nice things that come with living in this part of the world – things like eating out and socialising with friends. Now that the build is winding down and the demands being made on me are reducing I’m looking forward very much to rectifying those things in the coming weeks 🙂

A special day

I had a special event planned for this afternoon but the day started with me putting all of the bathroom furniture into place so I could get an idea of how it will look when it’s finished. The plumber needs to come back to install the WC and also the other one in the separate toilet because I found today that that one hasn’t been fixed to the floor either.

I still have to source the shower screen but when that’s in place, the tiler has filled all of the shower floor joints and I’ve painted the ceiling, the bathroom will be usable.

null

null

null

null

So what was the ‘special event’? It was picking up a new washer/dryer from Electro Depot in Brive from where I also sourced my oven.

null

Now I know that this wouldn’t be very ‘special’ for most people but bear in mind that I’ve been living in a caravan for over 2 years, that I’ve had to use the public machines in Rouffignac for the ‘bulk’ washing I’ve done and that other small items I’ve had to wash by hand.

It was very satisfying for me when I connected it up to the water supply in the ‘cellier’ and plugged it into my extension lead that’s connected to my electrical ‘branchement provisoire’.

null

My first (huge) load of washing is going through the machine as I type this and with the drying cycle that I’ve included to make sure that it’s working properly, it’ll be finished at around 2.15am.

null

What also makes this special is that it’s getting me even closer to being able to move in 😉

I have a house

Well, almost! As of today, all of the construction work has been completed. Yesterday I received a message from the tiler saying that he would be coming to my place today and sure enough he and a colleague arrived on site at about 8.45am.

When he saw the problem that I’d been complaining about and it was explained to him that all of the miscoloured tiles had to be removed he wasn’t very happy but I wouldn’t take ‘No’ for an answer and left them to the job of removing the tiles from the plasterboard backing as best they could. I knew it wouldn’t be easy.

Sure enough, when I went up a while later to see how things were going they looked pretty bad. The tiles wouldn’t come off the plasterboard without bringing the latter with them – and I mean the whole board. It soon became apparent that the only way to proceed was to cut the affected areas of the walls away completely, insert plasterboard patches and then tile the patches from scratch.

So while they continued with cutting out the affected sections of the wall I went off with my trailer to Brico Marché at Le Bugue to buy a sheet of waterproof plasterboard which the second man got cracking on straight away when I returned to cut the panels that would be needed. For the main area this meant 1 1/2 rows of tiles across almost the whole width of the wall. But it worked and turned out to be the most effective way of dealing with the problem.

Here are some shots of the job as the day progressed starting with the main problem area after the panel had been inserted and tiled.

null

Here are shots of the other two areas higher up that also had to be rectified.

null

null

The next shot shows preparations being made for laying the floor of the walk-in shower.

null

Here’s a shot of the other long wall that hadn’t been tiled at all previously, before it was grouted.

null

And finally, shots of the whole bathroom at the end of the day after all of the work had been completed.

null

null

null

null

null

null

The tiler said that he’ll have to return to fit the joints around the shower base (you can see the empty gaps in the photographs). I think he said that the shower could be used anyway after a day or so but I won’t, just to be sure that everything is perfect before being put into use.

It only remains for the plumber to return to install the toilet in the bathroom (and possibly the hand basin if I can persuade him), turn on the water to all areas (there’s no water going to the bathroom and front exterior tap) and for the heat pump to be connected. The house will then be complete according to contract and it will just be down to me to decorate it right through and paint the shutters.

It’s been a long haul, very stressful at times, but this close to the finishing line, I can’t wait to move in, which I’ll semi-do even before the electricity is connected. Camping in the house will I’m sure be more comfortable than camping in the caravan, which I can’t wait to see the back of. I can’t really complain about it though, because it’s saved me thousands of euros (literally) in rental fees and domestic taxes which I’d have to have paid if I’d rented a small house or apartment for the last 25 months 😉

This is what it’s all been about

I managed to do a lot of work in the kitchen today and it was a huge step towards being able to move in. It was all about getting the wall units up but it wasn’t as straightforward as all that as I’ll go on to explain.

Here’s a shot of the first one. Due to the length of run of the wall I had to pack the floor units away from the wall by 16mm so I had to do the same with the wall units to make all of the widths coincide.

null

The first tricky bit was building in the cooker extraction hood. Luckily it measured exactly 60cm in width, the same as the oven unit, so that was a good start. Nevertheless it had to be a specific height above the hob unit and exactly level so all measurements had to be precise.

null

I can’t fit the rest of its chimney until the kitchen ceiling has been painted but it’ll be easy to finish the job later. I’ll have to start off with it being recirculatory for the time being until I can get around to drilling the kitchen ceiling and connecting the extraction side to a roof vent.

null

The next challenge was installing the next wall unit exactly vertically and maintaining exactly the same height above the worktop as the ones that were installed previously. This will be very important when I come to the tiling as the gap between the worktop and the underside of the wall units is exactly two tiles plus joints.

null

Then came the ultimate challenge, which was fitting the final wall unit in the gap between the previous unit and the wall. Up to now I’d had no idea whether all of my measurements had been correct or not. But actually things could not have worked out better.

I had to go to Brico Depot before they closed at 1pm to pick up a length of 18mm Contiboard to pack out the final unit from the wall and after cutting it to size and fixing it in position the final unit went in accurately to the millimetre. I was both delighted and highly relieved 😀

null

null

Then it was time to fit the shelves and doors and press on with the final two wall units on the other side of the kitchen.

null

null

null

null

Today was another very long day. I started at around 9.00am and finished at around 9.00pm with a brief stop for lunch but the results speak for themselves. I haven’t aligned and adjusted the wall unit doors yet – that’ll be a job for tomorrow, as will be fitting the kick boards.

But I’m now close to being able to mask the kitchen up for painting its ceiling and its untiled walls. I’ll also try to do the ceiling of the separate toilet and that of the bathroom at the same time which will get me well along the road to having the house partially decorated.

More kitchen progress

While the two guys were working outside yesterday I was making slow but steady progress in the kitchen. It was a bit slow because everything involved a certain amount of precision eg drilling expensive facades for handles by measurement alone, without templates, and assembling the facades for the two swing-out corner units. I didn’t want to make any mistakes and by the late afternoon all of the floor-mounted units were complete bar the finishing touches (little bits of trim on the hinges, stuff like that).

null

null

null

null

null

null

null

I was really pleased as all of the openers have soft closing including the heavy swing-out corner units. The first one I did needed slamming and seemed to click shut and I thought that was how they worked. It was only when the second one wouldn’t close and I investigated why that I found it was because the soft close unit, which hadn’t been mentioned in the assembly instructions, was in the closed position. Merely flicking it open made it work perfectly, as did the other unit when I did the same with it. Oh for some detailed instructions!

The next job is to mount the wall-mounted units. I need to know exactly how much they will have to be packed out at each end so at the end of the afternoon I placed them all in position on the worktop to get an accurate measurement.

null

I don’t want to be too over-optimistic, but getting them all up onto the wall shouldn’t take too long. It’ll be great when they’re up because strictly between you and me, with all that storage space, running water in the kitchen and a working toilet I’ll run the electricity cable in through a window and move out of the caravan.

I think that camping in the house will be much more amenable and considerably more comfortable, especially as yesterday I ordered a gorgeous inflatable double bed which will function as a superb spare once I’ve furnished the house and have a proper bed of my own 😉

Builder back on the job

I was beginning to worry that the builder would be unable to complete the house by the end of this month but my fears were partially allayed today when the sound of large vehicles heralded the arrival of the earth-moving team for the final time. I was planning to continue working on the kitchen but before I’d started, while we were talking, a large tipper truck arrived and deposited a load of stone.

null

null

null

After the tipper had left the two men who remained got cracking ‘terrassing’ the ground all around the house to get the slopes and levels right before laying the stone to make a flat area on the top of the slope at the rear of the house, a level pathway all around it and a much more even drive-in. I’d hoped that the stone used would be the crushed white kind that I had at my old house but unfortunately they used more of the ‘blue’ stone that they’d used right at the start of work to create the drive-in.

null

null

null

null

null

null

null

This how the place looked after they’d finished and left for the last time. They’d had to move all the rubbish that had previously been in front of the house to one side and that will be picked up later, possibly tomorrow, by one of the builder’s trucks with a grab.

null

null

null

null

null

null

null

null

It all looks much more presentable but to be honest they only did the bare minimum that they could get away with. The stone around the house has not been well tamped down and the ‘terrace’ area will not be able to take the weight of my outdoor furniture and chairs. I think I’ll have to lay stone slabs there and on the pathway around the house to make the areas stronger and more stable as I’ll be unable to build a ‘proper’ terrace area this year given the amount I have to do myself inside.

But anyway, we’re getting there. They connected up the water supply while they were here so the main is now buried and my standpipe has gone, so my caravan is now connected to the rear outdoor tap. But the bathroom is still problematic. The shower tiles have arrived but there’s now a problem with the tiler. I’m hardly surprised given the mess he made of the main wall in the bathroom and it’s now up to the builder to find a way out as he came recommended by them 😕

So, so slow

I’d hoped to get all of the drawer and door fronts onto the kitchen floor units today so I could move on and start thinking about other things. But it didn’t happen.

I have two units with a drawer over a reduced height door, one is 60cm wide and the other 40cm. I got cracking on the 60cm one first and got the drawer assembled and fitted fairly quickly, taking trouble not to rush and make any mistakes. One thing that’s different this time around is that there’s no template for the handles – I’ve had to choose how to position them on each type of front then measure and drill for them myself.

The 60cm unit came out OK – the only reservation I do have is that I’d have liked the handles to be a bit smaller but these were the only ones of this type that Brico Depot had and although I don’t love them, they’re OK.

null

Then I moved on to the 40cm unit and that’s when the problems started. The first thing was that the drawer pack contained only one drawer slider, not two as shown in the next pic. So that meant yet another unscheduled trip to Brico Depot – and the best part of two hours of worktime lost.

null

The nice lady at Brico Depot, who I’m getting to know quite well, took a drawer slider from another drawer pack but I had to wait around for quite a while as she had a queue of kitchen customers waiting for her to deal with them. I then dashed for home so I could get going again on the smaller floor unit.

And my troubles didn’t end with the drawer slider. All of this kind of kitchen unit are computer designed and pre-drilled in multiple places for hinges, drawer sliders, shelves etc, you name it. Except my one wasn’t. I thought it was weird because usually the shelf heights of all floor units are the same, but my one was different.

When I looked more closely I could see that it hadn’t been pre-drilled for drawer-sliders and also the drillings for one door hinge are in the wrong place and I’ll have to measure and drill myself. I didn’t have time to get the door on – just getting the drawer slider positions and drillings right took long enough – so the door will be the first job tomorrow. Here’s the unit with its drawer in place.

null

I don’t think I’ve ever had a job like this one before. All these little errors and cock-ups are taking so much time going backwards and forwards to either Leroy Merlin or Brico Depot and they’re making the job so, so slow 🙁

Got that sink-in feeling

It took half a day but the kitchen sink is at last in and fully working.

null

null

Along the way I found another leak – the plumber had capped off the hot and cold supplies to the sink but just as with the valve fitting for the rear outside tap, had only made the cold supply cap finger-tight. No wonder water was seeping down the pipe and creating a damp patch on the floor below. I’m surprised more wasn’t letting by.

All of the fittings in the house (toilet hand-basin mixer, shower, bathroom basin mixer and this mixer on the kitchen sink) are high quality Grohe fittings from Germany so should give good service. The only downside, if it is a downside, is that they are all on the heavy side and this mixer especially moves from side to side due to the thickness, or lack of it, of the stainless steel from which the sink is made. I’ll probably make some kind of metal under-sink securing bracket to hold it firm.

In case anyone is interested, here’s a shot of the sink fixings I created using the plastic corner blocks.

null

In general I’m now becoming rather worried about how, yet again, time is slipping by with no activity by or word from the builder. They assured me that the house would be ready inside and out by the end of this month before France shuts down for August but it’s becoming harder by the day to see how this can possibly happen given the state of the bathroom and the amount of exterior ‘landscaping’ that needs to be done.

An elegant solution

I didn’t have to mess around with wooden dowels to install the kitchen sink after all. Before I started on the kitchen I made a small collection of fixings – brackets, stuff like that. I’ve been working my way through them as I knew from experience I would but so far had only used one plastic block-type corner fixing. And I’d had enough trouble even locating them. Brico Depot didn’t recognise the product at all (despite them being a ‘go-to’ fixing in the UK) but I found them at Leroy Merlin.

It had occurred to me that now I’d notched out for the sink’s securing brackets there might be sufficient clearance for them to pass these plastic fixings which, if carefully fitted for height, would then give the brackets a ‘step’ to bite on. And so it proved. Here’s what I’m talking about.

null

null

And sure enough all of the fixings got a grip and eventually the sink was installed. I say ‘eventually’ because in the process, after I’d forced a lot of white silicone all around under the edge of the sink to form a waterproof seal one of the fixing brackets fell apart. It had to be the most difficult one to get at, behind the sink bowl, so the whole thing had to come out again. However, after many magic cuss words that always seem to do the trick, the sink was finally in and looking good.

null

I thought twice about permanently installing the waste because it could make getting at the mixer tap connections more difficult than necessary. In the end I did and it both looked ‘right’ and worked fine with no leaks after I’d filled the sink with several litres of water and let it go.

null

The next job would then have been fitting the mixer tap. However, the sink has to be drilled with a hole 35mm in diameter to take it (I purposely chose an undrilled sink as I did in my old house rather than one with two holes in it to allow for the drainer to go either way, one of which then has to be plugged – yuck!) and drilling a hole that big ends up being a bit brutal. I decided therefore to leave that until tomorrow when the silicone seal around the sink top has had a chance to cure.

So I had an early finish at around 5.30pm which gave me a chance to have a clean up, fit the shelves, empty the cooker to which I’d fitted a plug earlier (cooker and hob are now both connected) and replace the shelves in the dishwasher which have been gathering dust in the living room for too long.

null

null

To finish off, an especially notable event happened today. Gerald, a neighbour with connections to the Mairie, turned up with my house number which I fitted before resuming work in the house.

null

This means that I’m officially now a proper ‘Fleuracois’ and my house is now officially on the record. The latter unfortunately also means that the tax authorities will now know precisely where to send their demands 🙁

Thwarted!

To be honest, I hadn’t much looked at the hob unit until yesterday and to my surprise (although it’s normal apparently) it didn’t come with any connection lead. So I had to go to Brico Depot yet again while they were open (Sunday hours) to pick up some of the correct gauge cable. I only needed a metre – I had to buy five for over 22€!

When I got back I checked Indesit’s fitting instructions and helpfully (so it seemed) there were the two dimensions I needed – overall and the size of the hole to cut in the worktop. The overall figures helped me to place the unit between the wall and the worktop’s front edge and I then used the second dimension to mark out and cut the hole to fit the hob into.

The only problem was that it didn’t. For some reason the second smaller set of dimensions were the bare size of the bottom tray of the unit into which the hob is built and by cutting a hole that size the tray can’t go through. The dimensions need to be at least a millimetre or so greater in each direction.

So then I was involved in another marathon as (a) it’s not easy trimming all around the edge of a hole in a 3.8cm thick worktop without damaging it and (b) I had to avoid taking too much out in case the securing clips that came with the hob unit (and are rather crude actually) then wouldn’t work.

But that wasn’t the end of it. When I managed to get the tray of the hob unit dropping into the hole in the worktop I then found that the four retaining clips wouldn’t also go through and needed further notches cut into the edges of the hole for them to do so. This again took quite a long time in order to avoid making a mistake.

In the end everything dropped in and as the retaining clips had little teeth rather than screws (which is why I had to be so careful not to remove too much material to accommodate them) that meant the hob was at last fitted as securely as it was ever going to be.

null

Then it was time to finally secure the worktop in place. This was a doddle compared to getting the hob unit into it but took a while as a couple of fixing screws were almost inaccessible inside the corner unit and I had to add some extra fixing brackets due to some fixing positions no longer being available.

Now all that was needed was to connect the hob to the special high-amps power point that the electrician had put in. Just a simple connection – but of 3 ultra-heavy duty 6mm2 cables while bent double in a small space under the worktop. By this time not only was I getting tired but it was also hot and sweaty down there, but it turned out OK.

null

I couldn’t connect the oven because I found that I didn’t have a spare plug, but that can easily be rectified. I think the cooker and hob make a fine pair and I’m very pleased with my choice.

null

null

Then it was on to the sink if I was going to stand any chance of having the hob unit fully installed and connected and a working sink by the end of the week-end, as I’d hoped. I already knew that, much like the hob unit, the sink’s fixing brackets were fouling the sides of the hole cut into the worktop for it. Once again, I was wary about cutting to much of the worktop away but eventually by trimming some of one end away slightly and cutting notches at each end, I got the sink to drop into position.

But the anti-kitchen installation gods were against me because I then found that the securing brackets were too short to work in a worktop of this thickness (3.8cm). So I had no choice but to call it a day, but all is not lost. What I’ll have to do is buy a length of small square section dowel and secure it all around the inside of the hole in the worktop 5mm or so above the bottom.

The sink should clear it and it’ll provide a step for the securing clips to bite into from below. That’s the theory anyway but I won’t know until tomorrow whether it’ll work in practice. Watch this space. What a tricky installation this is becoming – the most tricky of any I’ve ever done…

Yet more kitchen

I had a late start today because I had to pick up yet more stuff that I found I needed from Brico Depot. However, before I went I checked on the angle joint in the worktop that I glued yesterday.

null

null

null

null

It’s not perfect but I hope that it will stand the test of time when the kitchen gets into use. The main job today was screwing the worktop down, starting with the long joined length. The next piece that I fitted was the length over the dishwasher and here’s a shot of the join between it and the long length. It’s much neater and far less of a germ and dirt trap than the joins I had in the kitchen of my old house.

null

I’ve sealed all the cut surfaces including the ones that can’t be seen under the joins on both sides of the kitchen and also around the cut-out for the sink which is most vulnerable to damage by water.

null

null

I’ll do the same for the cut-out for the cooker hob which I started marking out before calling it a day.

null

Work moved on only very slowly today. Partly it was because I was dealing with things that were intricate and needed care but also because quite honestly I’m feeling pretty tired and when you’re tired, that’s when you make mistakes.

I’ll try to get an early night tonight and see how things go when I continue pressing on tomorrow but in any case I think I’ll meet my target of having both the hob and sink installed and the sink working by the end of the week-end.

Good progress today

The first job was to re-make the shelf unit to fit into the angle between the worktops. This time it went pretty well and it’ll look fine once it’s completely finished.

null

null

With that out of the way I could at last move on to getting the worktops ready for fitting, starting with cutting a hole for the sink unit. The manufacturer didn’t give the dimensions of the hole so I had to take careful measurements myself and trust to luck. Too small and all of the cutting would have to be re-done and too big the sink could end up fitting too loosely allowing water to seep under its edges that would end up destroying the worktop. I’m glad to say that my measurements were about right.

null

The hole also had to be correctly positioned as when I fitted the floor unit I had to weld the PVC tubing that will make up part of the waste. There will be a tiny bit of room to juggle a bit, but not much.

The sink can’t be installed until the worktops have been permanently fitted. The tricky bit was the glued joint and all the while I’ve been fixing floor units in position and even while I was making the shelving unit, I’ve had to be meticulous about levels as otherwise the glued edges would not exactly match. A difference in level of even half a millimetre can be easily felt to the touch and would eventually lead to the exposed edge being damaged over time as objects were slid over it when the worktop was in use.

I ummed and ahhed a bit about inserting a couple of dowels in the worktop ends to be joined. This is an easy process with proper woodworking machinery but less so with hand tools. I did it for the joint in my friend Val’s kitchen worktop so in the end decided to do it in mine too. Then it was time to bite the bullet, apply the glue and make the joint as best I could.

I’ve used good quality waterproof exterior wood glue. This makes a foam as the joint begins to cure filling up any gaps and actually oozing out of the joint as curing progresses. I think I’ve got the two surfaces dead level by clamping the free end and weighting the centre sections and the other end so both pieces are at exactly the same height throughout.

null

null

null

I won’t know until tomorrow how successful the process has been but it looks as though things will be fine. Once the end clamp and weight have been removed the cured glue that has oozed out of the joint will be visible and I’ll have to carefully remove it with a sharp chisel. That will then leave the way clear for the sink to be fully installed and connected up.

I’ve had water for the last two days – what luxury to be able to pee in a proper toilet! When I turned it on there was a huge leak coming from behind the cabinet where the sink water pipes are. I had a nightmare vision of having to rip the unit out again to fix it but then realised that the plumber hadn’t tightened a cone fitting on the shut-off valve for the outside tap.

How he didn’t find it when he tested the system I’ll never know but the panic was over when I managed to get an adjustable spanner in there and tighten it. I’m glad to say that the replacement shut-off valve that I fitted for the dishwasher was completely leak-free in comparison 😉

My kitchen installation continues

I’ve been quiet for the last few days for obvious reasons, but that doesn’t mean that things have come to a complete stop in the house. Firstly, I completed the housing for the dishwasher. This was a cause of some relief for me because although you try to measure and build everything accurately, you can never know until the appliance, on this occasion the dishwasher, is properly in place with all of its connections made. And it looks great too 🙂

null

null

null

For the last three days or so I’ve been working on building a custom shelving unit to go in the space created by the angle between the floor mounted cabinets. My original intention was just to box it in completely but it occurred to me that some kind of storage unit would be a much better use of the space. It’s been a tedious, painstaking process which would have been been easier if I had access to proper woodworking machinery, but I just have to do the best that I can with my basic hand tools.

Here’s a shot of the basic structure. It looks simple but believe me, it’s much more complex than it looks and every cut has had to be accurately done to measure.

null

Here’s where I got to by early this evening. Unfortunately I’ve got to remake the front panel because although I thought I’d judged them correctly, the securing screws I used were a fraction too long and have just blown through the front surface.

null

This may be a blessing in disguise actually because due to the poor quality of the board, its white surface has broken away very badly along its cut edges and when I remake it tomorrow I think I’ll be able to do a lot better.