The circle of life

We said goodbye to my sister Sandra yesterday. She suffered bravely with MS for most of her life and Mike, her husband of 60 years, dedicated himself to looking after her every need when lesser men might have thought about throwing in the towel.

In the end the disease was too much for her body to cope with any more and she passed away peacefully in the early hours of yesterday with Lesley her daughter there to hold her hand and say goodbye.

null

On the same day I missed a call from Brad, my son, just before Mike phoned me to tell me about Sandra. Brad’s call was to give me the wonderful news that Charlotte, his partner, is now expecting a baby. I’m overjoyed and delighted for them and can’t wait to become a granddad in January.

null

And so the circle of life turns in front of our eyes. It’ll be a joyful event when the new-born arrives but it doesn’t make losing the other any easier.

Sandra is now free. She’s escaped at last from her useless body and now she can fly and soar with the angels. Bless her.

Quite slow… but very accurate

I picked up my new dishwasher as arranged yesterday and although I wanted to go only a few kms further up the road to buy some more materials that I needed for the kitchen install I thought that a brand new dishwasher on an unlocked trailer might prove to be too big a temptation for someone. So I brought it straight home and unloaded it into the house.

null

null

That meant that I still had to go back to Périgueux to buy the stuff I needed and this is one of the main reasons why DIY jobs go so much more slowly here than back in the UK. Where I lived if I needed tools or materials I could be out and back in an hour or so. Here it takes half a day, or in my case yesterday, the whole day to pick up the dishwasher and get the items I needed.

My first port of call was Brico-Depot which is on the east side of Périgueux. I don’t know what’s happening to them because their store is becoming more disorganised every time I visit, they increasingly don’t have common items in stock and as I found yesterday, items like Contiboard are often on the racks for sale damaged. So I ended up having to go and get all of what I wanted from Leroy Merlin. The trouble is they are on the west side of Périgueux and there are lots of roadworks with roads blocked off on that side of the city at the moment and that’s where the rest of the day went.

As I mentioned previously, I’d planned for the first job of the day to be doing the angle cut in the worktop. As I’ve said several times, it’s essential for the cuts on both of the worktop sheets to be extremely accurate. They have to be vertical to get a good joint when they are glued and the cut angles on the sheets have to be complementary and also spot on so the sheets on both sides of the angle sit snugly against the wall.

I ended up adjusting my circular saw yet again because I still wasn’t happy with the verticality of the cut. I then went ahead and did the cuts on both worktops and quite honestly, after measuring, remeasuring and measuring again before cutting, things couldn’t have gone much better. Here’s the first view I had of the angled worktop on my Workmate and trestles before I checked it ‘in situ’ on top of the kitchen units.

null

null

And here’s the first view I had of it ‘in situ’. I was super pleased and also very relieved because quite honestly, the join couldn’t have been very much better.

null

null

null

null

With the pressure now off, I was then able to carry on with the next series of jobs. These included making the waste system for the dishwasher, permanently fitting the cabinet that has the dishwasher services behind it, assembling its pull out corner storage unit and making my ‘non-standard’ cabinet joiners as I can’t use the ones supplied by Brico-Depot as I don’t have the space. I made the two I need but only installed one of them before I called it a day.

null

null

null

From now on it’ll just be a matter of ‘knifing-and-forking’ it as the trade say ie just doing one task after another until the whole job’s done. There’s nothing really challenging left to do although I was rather concerned today by the plasterboard fixings I used, even good quality Rawlplug ones that came from the UK, tearing the plasterboard sheets and needing special care to get a good solid fixing. I think the quality of the sheeting that’s been used may have had something to do with it so I’ll have to pay special attention tomorrow.

Pure frustration

It’s been a very long day today. I was up at about 5.30 am after a fitful night’s sleep disturbed by a thunderstorm and took the opportunity to deal with a boring but essential sanitary function that nevertheless has to be done on a regular basis. I’ll say no more. Then after a clean and tidy up and a leisurely breakfast I decided to make an early trip to Leroy Merlin to buy some more stuff that I need for the kitchen installation.

That included some more plumbing items and also a high quality, fine cut circular saw blade. I bought a Bosch one that was quite expensive but when I tried it out after returning home it proved to be exactly what I wanted. After a couple of experiments I confirmed that by cutting a worktop from the underside it was possible to get a perfectly clean cut with no damage at all to the worktop surface.

But there was still a problem. When my circular saw was new and I’d used it for the installation of my friend Val’s kitchen I didn’t have to worry about the worktop cuts that I’d made. Every cut was clean and just as importantly, perfectly vertical. Since then I’ve used the saw for various jobs and also loaned it to someone who used it for a heavy job and now things were different.

Although the new Bosch blade was giving me a nice, clean cut it certainly wasn’t vertical and when doing thick cuts, like for worktops, it’s absolutely essential that it is. And even more so when you want to glue join two cut edges, as I do to accommodate the angle between my kitchen walls. Luckily I had enough spare worktop in order to cut overlong lengths for each worktop segment, checking the cut and then making adjustments to the saw and cutting again. But it took literally hours, and I mean hours, of frustration making cut after cut before I got anything approaching cuts that were vertical.

But get there I did and I got everything cut and ready to fix except for the cut angle.

null

null

The walls and floor of the kitchen are so true that I can do all of this work without the cabinets having to be permanently and rigidly installed.

null

null

On each side of the kitchen there’s a right angle join. The next shot shows how I’ll do them, based on an idea I got from looking at a kitchen display at Brico Depot. I think it looks very neat and tidy – much better than the awful big joints that I had in my old kitchen at Plazac which were unhygienic dirt traps.

null

I’m not sure yet whether to use the same type of strip to cover the worktop cut ends, as below, or to use the usual stick-on edge tape.

null

That just leaves the angle cuts to do which will be the first job tomorrow after I’ve picked up the dishwasher from Conforama. For the time being I’ve just roughly marked out where the cuts will be made on the two segments of worktop by placing one on top of the other and marking where the outside of the joint will be on each one.

null

null

By then marking each sheet where they overlap at the corner of the angle and joining the ends of the line on each one, voilà, there’s where you make your cuts.

null

You need to be very careful and accurate, which is why I left it for tomorrow. By around 7.00 pm when I called it a day I was much too tired to do such job. And anyway, although it was a very frustrating day, I was still pleased with the progress I managed to make 🙂

As a footnote, as I type this we’ve got a wild orange sky, thunder and storm force winds that are trying yet again to tear down my ‘tonnelles’. I’m just keeping my fingers crossed that they won’t succeed as I’ve really and truly got enough on my plate at the moment.

More done in the kitchen

I had a bit of a delayed start to the morning’s work because I had to write an email to the fridge supplier. I received a reply during the day which I’m considering so I’ll leave it there.

After that I got straight on to lowering the height of the dishwasher stop-valve. It took a few minutes to carefully measure the amount to cut down the tube by so I could use the screw hole to secure the wall connector that was being used for a pipe clip, followed by 10 seconds to cut the pipe and another minute to make the connection.

Here’s the result which I’m very pleased with and hopefully it will be leak-proof when the water is turned on and it’s connected to the dishwasher.

null

null

null

Here’s the bit that was left over showing the amount I reduced the height by.

null

As the access hole that I’d previously cut in the back panel of the cabinet was now in totally the wrong place it was then time to make a replacement. I purchased a suitable sheet of white faced hardboard yesterday from Leroy Merlin and it was in the living room ready to be used.

null

Apart from measuring and cutting it accurately it wasn’t a difficult job to do and using the old panel as a template it was much easier than before to get the cut-outs in exactly the right places. Here’s the result, which is much tidier than the original.

null

null

And now with the storage unit frame in position showing how well it now works.

null

I can’t now do much more with this cabinet until the dishwasher is available. It’s actually waiting for me to pick it up at Conforama in Boulazac but as I was expecting quite a few deliveries over the days prior, including today, I made an appointment to do so for Saturday morning as I knew then I’d be free. I wish now that I’d made it for tomorrow.

As it was I could now move on to the next cabinet which is the one over which the sink will be positioned and which therefore has the services for it at its rear. Although the cabinet can’t yet be fitted I could go on to make the necessary cut-outs in its back panel. Despite being complicated by the presence of the much over-specified (by the plumber) ball valve that only controls the rear outside tap, it came out OK.

null

By this time my mind was already moving on to think about the worktop. It will comprise four pieces, two of which will be glue-joined on an angle. For this to work the cuts have to be clean and totally accurate. I did the same when I installed my friend Val’s Ikea kitchen in the Languedoc so I know it can be done using hand tools.

In her case I only had one shot at it. This time I’ve got a few centimetres to spare on each piece so as long as I use a good, sharp, fine blade on my circular saw, which I have to buy a replacement for as it’s currently ripping both of the worktop surfaces, top and bottom, I should be able to make any necessary adjustments to get the join just right.

I managed to single-handedly get a length of worktop up onto trestles and my work bench to cut the two lengths which will eventually be cut to size and joined. Here’s the shorter piece in position in the left-hand corner of the kitchen.

null

I’ve roughly drawn the angle line on it along which it will be cut. It’s only as a rough guide for now and I’ll be measuring, marking and cutting the worktop much more accurately when the time comes.

null

null

When I actually do the cuts it will be essential for the cut edges of both of the pieces to be joined to be totally vertical in order to get a good, strong joint.

null

That’s as far as I got today. I need some more plumbing materials to plan for and eventually connect the sink, which arrived today together with the extractor hood. If it wasn’t for the fridge I’d now have everything for the kitchen to hand, except that the dishwasher is waiting to be picked up. I’ll do a rough cut on the second piece of worktop tomorrow and then go out to get what I need.

Things are moving more slowly than usual with this installation. I don’t know if it’s because it’s a bit ‘bitty’ or just that I’m now that much older (it was ten years ago when I did Val’s kitchen). I know for sure that I’m feeling more tired at the end of the day these days, so perhaps it is just old age creeping on 🙁

Another long day

With mixed results, as I’ll explain. I was up by 6.30 am and back working in the kitchen by 7.30 am as I’d received a message that my new fridge could be delivered any time from 7.00 am. It didn’t arrive until late morning, of course, but by then I’d managed to get well on the way to installing one of the swing out storage units in one of the corner cabinets. It didn’t help, though, that due to the instructions being unclear as to which unit was which (left and right) I’d begun installing the wrong one.

It was more frustrating than anything else as no great harm was done but not as frustrating as the events that transpired following the fridge delivery which I’ll go into a bit later on. I had to go back to the caravan and as I’d got up early and it was approaching midday I thought I might as well grab a bite to eat. Afterwards I could hear a strange noise and only when I exited the caravan did I realise that it was coming from the house.

The noise was mechanical and I thought for a moment that it was the tiler back grinding the bad tiles off in the bathroom, but it wasn’t. It turned out that the insulation men had arrived and were installing the insulation in the roof and the noise was the special truck-mounted pump that they were using to pump the fibre through a tube up into the roof space where a man was distributing it all around.

null

null

null

The fibre looks just like cotton wool and I was worried that it might come spraying out of the gaps around the LED lights, which are still awaiting installation, and be piling up on the floor. As it was I needn’t have worried as they knew what they were doing and although a small amount did come through it only amounted to very little.

null

null

Here are some shots of the finished corner storage unit. Each one is quite expensive at around 250€ but they are the only way to make effective use of the space in the corner cupboard, not that there’s still a lot left spare as the next (closed) shot shows. The cabinet door isn’t fitted yet, of course.

null

null

null

I learnt an unfortunate lesson from installing this storage unit, though. The cabinet on the other side is where the services for the dishwasher are located and as if it’s not bad enough that I have to cut holes in the cabinet back to accommodate them, I also found that quite by chance the plumber had installed the dishwasher shut-off valve at exactly the same height as the main frame of the storage unit.

null

I can’t wait for the plumber to return and lower it for me as that would mean that in the meantime my kitchen installation would come to a complete halt. I have to do the job myself which wouldn’t be a big problem in the normal run of things if copper tubing had been used. But it hasn’t. The plumber has used ‘multicouche’ tubing which is more or less a central band of aluminium sandwiched between an inner and an outer layer of PTFE.

It’s relatively inexpensive and quick and easy to install if you have the right tools, which is why they use it. But I don’t so I did a quick search on the internet to see if there’s any way around it. And there is, because as well as using fittings that crimp to the tube using a special (expensive) tool, you can also buy compression ‘multicouche’ fittings for small jobs – like this one.

I managed to get this information in time for me to get over to Leroy Merlin before they closed at 8.00 pm and was delighted to be able to get exactly what I needed in the form of a special tube cutting tool and a wall bracket that will accept a direct compression connection to the ‘multicouche’ tubing. And while I was at it, I also got hold of a sheet of hardboard with one white face to replace the cabinet back that I cut a large hole in for the dishwasher shut-off valve that will now be in totally the wrong position.

null

That means I’ll be able to cut the vertical tube to lower the height of the shut-off valve and reattach it to the wall using the new wall fitting. The latter will be a big improvement on the one the plumber fitted as it’s more compact and also silver rather than bare brass. More on this tomorrow.

null

So what about the fridge? Two youngish men dropped it off without any delivery paperwork and high-tailed it after dropping it inside the house before I had a chance to check it. And naturally when I did (immediately) it had a dent in the door.

null

I informed the supplier of this within 20 minutes of them dropping it off but they have already tried to quote some regulation or other to me to the effect that as I signed the delivery paperwork and accepted it they can do nothing about it. If they think they can get away with that they’ve got another think coming. There was no delivery paperwork and I therefore didn’t sign for and accept it so a new battle starts tomorrow. It’s something that I just don’t need right now but sadly this is how French ‘client service’ works. All they want is your money.

Pressing on

Today it was time to tackle the worst part of this whole install. There will be some other tricky bits still to do as will become evident as the installation proceeds but they will be nothing like as difficult as today’s job, which was to make cut-outs in the long right hand unit in various places to take the services for the dishwasher and the rear outside tap.

Here’s what was involved in cutting a groove in the end panel of the cabinet to accommodate the pipe for the latter.

null

null

It’s not pretty but it will not be visible once the cabinet is fully installed into position together with its internal swing-out storage unit.

null

I also swapped out the dishwasher tap that the plumber fitted. It was much too big and I changed it for one that I much prefer that I obtained on my last visit to Leroy Merlin.

null

I then made my first big mistake of the installation when I cut out the lower right hand corner of the cabinet to take the dishwasher waste pipe. I took much too much out of the floor – I don’t know what possessed me because I could see that it was only holding the cabinet 1/2 cm off the wall so that’s all that was needed to be removed. But never mind, it’s not in a place where it will be highly visible and it’ll be an easy thing to disguise as you’ll see later.

null

It took me all of five hours to do the work on the end cabinet and another hour to get the other two adjacent cabinets ready to be installed and clean the place up.

null

null

null

The vertical sheet of Contiboard that is between the two cabinets is there because I was deciding how to use it to join them. Brico Depot supplied two special joining pieces but they cannot be used as they require the right hand cabinet in the pictures to be stood 3cm off the wall. I can’t do that as I don’t have the space so I’ve now worked out how to make my own joiners and the two special ones can be returned for a refund.

The work is quite physical as I’m having to lift the cabinets and manhandle them by myself taking great care when I turn them over not to break the legs off in the process. So I was quite tired by that time and decided to call it a day. But I didn’t just stop work, far from it.

I needed to order the ‘hotte’ (extractor) from Leroy Merlin which I did and got a better price than when I looked originally. I also needed to order a sink (Amazon, price again reduced), a mixer tap (‘mitigeur’, Amazon price increased but I got a reduced price one with damaged packaging). I also need a sink waste trap so I ordered that at the same time and all of the above will be delivered on Thursday.

The dishwasher will also be delivered on Thursday which is a great relief as originally they quoted a 10 day delivery delay. I couldn’t finish off the cut-outs on the large cabinet today because I need to know how the inlet and outlet pipes are arranged on the back of the dishwasher in order to avoid the mistake the plumber made in the utility room and have them crossing over.

This means that I won’t be able to do very much tomorrow while waiting for these deliveries. I think it might be a good idea to clear the kitchen of tools etc, mask it up and paint the ceiling and coving. That would have the additional benefit of finally allowing the LED spots to be fitted in the ceiling instead of hanging there like roosting fruit bats 🙂

More kitchen

My main aim for today was to get all of the floor units on the left hand side of the kitchen permanently fitted in position and I did that in three hours before stopping for a light lunch.

null

null

null

In the photographs you can see that I used some of one of the items that I purchased yesterday from Brico Depot, a sheet of white Contiboard, to pack the cabinet on the far right 16mm or so off the wall. I did that because the length of the wall against which the cabinets are fixed is a few centimetres longer than in my plan and if I hadn’t added the packing, the gap at the other end would have been considerably wider than the 60cm needed for the fridge.

But not only that, the wall cabinets will be aligned with those mounted on the floor and therefore there would also have been a large gap between the wall cabinet on the left end and the wall which would then have needed filling in some way. As it is now, I will pack the wall cabinet on the right end away from the wall by the same amount as the floor cabinet and this will leave a similar gap between the left hand wall cabinet and the wall at that end which I’ll fill with an equal amount of packing, so the whole arrangement is balanced.

The installation of the floor mounted cabinets on the other walls of the kitchen will be much more complex because of the need to ‘build in’ the pipework and services. Apart from the appallingly large ball valve that the plumber has put under the sink, which seems to be completely unnecessary as all it does is shut off the rear outside tap, installing the sink taps and waste will be fairly straightforward.

Dealing with the dishwasher is not so and I’ve been thinking how to accommodate its supply and waste which will be behind the adjacent cabinet. And installing that cabinet will be further complicated by the need to cut a large notch or groove out of its end that abuts against the wall because the supply for the outside tap runs up it and will otherwise prevent the cabinet touching against the wall.

I’ve now decided how to do it and as I want to get all of the above installed tomorrow together with the cabinet that the sink will be mounted above I ended up going off to Leroy Merlin again to get what I’ll need. Better to use late afternoon time today than to waste half a day at least tomorrow when I can be cracking on doing the job with the whole day ahead of me.

Moving along

I didn’t quite know how to organise my time today because I was awaiting a delivery scheduled for between 1250-1350, wanted to get some more work done in the kitchen and also needed to get some materials from either Brico Depot or Leroy Merlin so I can continue working tomorrow. I thought that I might as well carry on working on finishing the floor mounted cabinets while I was waiting and lucky I did because the delivery was over an hour late and I got quite a bit done in that time.

I finished off the oven unit including the below-oven drawer and couldn’t wait to see how it all worked with the oven in place because the measurements that I’d worked to were a bit vague. In the event I needn’t have worried because it turned out to be perfect.

null

null

Here’s the item that I was waiting for after I’d removed its packaging so I could make sure that it wasn’t visibly damaged in any way. It’s the ceramic hot plate.

null

null

null

So it’s so far, so good. I had to go to both Brico Depot and Leroy Merlin to get the items I wanted so got back too late to do any more work. But it means that I’ll be able to make a flying start tomorrow and will hopefully be able to get quite a bit done 🙂

Plumber finished

For now at least. He didn’t connect the heat pump pipes either inside or outside and left the WC in the bathroom unconnected as that’s got to come out for the tiles to be rectified, but he did connect everything else up and also made a temporary connection to the mains supply to test the system out. Here’s the heat pump exterior heat exchanger. The water pipes are unconnected and for now the hole is still open in the wall.

null

null

null

Here’s the temporary mains connection. Unfortunately it means that for now there isn’t a connection for a hosepipe but I shouldn’t be needing one over the week-end as I’ll be working on installing the kitchen.

null

Here’s the little handbasin in the separate toilet. The mixer tap that the builder supplied was much larger than the one I bought for the bathroom washbasin and when I showed it to the plumber he said he’d swap them for me, which he has done.

null

null

I turned the tap on and water came out of it and the WC also flushed but before leaving the plumber had turned the main stopcock off and the flow stopped. I didn’t want to turn it back on again just in case there’s something to do with the heat pump supply that I don’t know about.

Here’s a general view of the utility room now all of the connections bar the ones for the heat pump have been made. I understand why the manifold has been used to connect up the hot and cold water system but I can’t say that I find it very pretty and I think it also takes up a lot of space.

null

This is the arrangement in the corner for a waste for the sink I intend to install in the future and a washer/dryer and the cold supply for the latter. When I get into the house and get the chance I’m going to try and find a way to modify it so it protrudes less from the wall.

null

This is the hot and cold water system manifold.

null

Here’s a final shot of the connections above the heat pump system unit. It’ll be a nightmare trying to paint the walls with that lot in the way. I wish I could have done it previously but I had no idea that the unit would be that big.

null

This is a shot of the heat pump pipes in the corner of the wardrobe alcove in bedroom 2. The plumber has boxed them in from floor to ceiling which was a good idea and makes for a neat job.

null

I did a reasonable amount of work myself today assembling all of the wall cabinets ready for when I can mount them on the kitchen walls.

null

null

I finished off by getting the first floor mounted cabinet ready to be installed and also drew the first line on the wall to align all of the floor cabinet tops to, but I’ll leave that until later.

More plumbing and kitchen

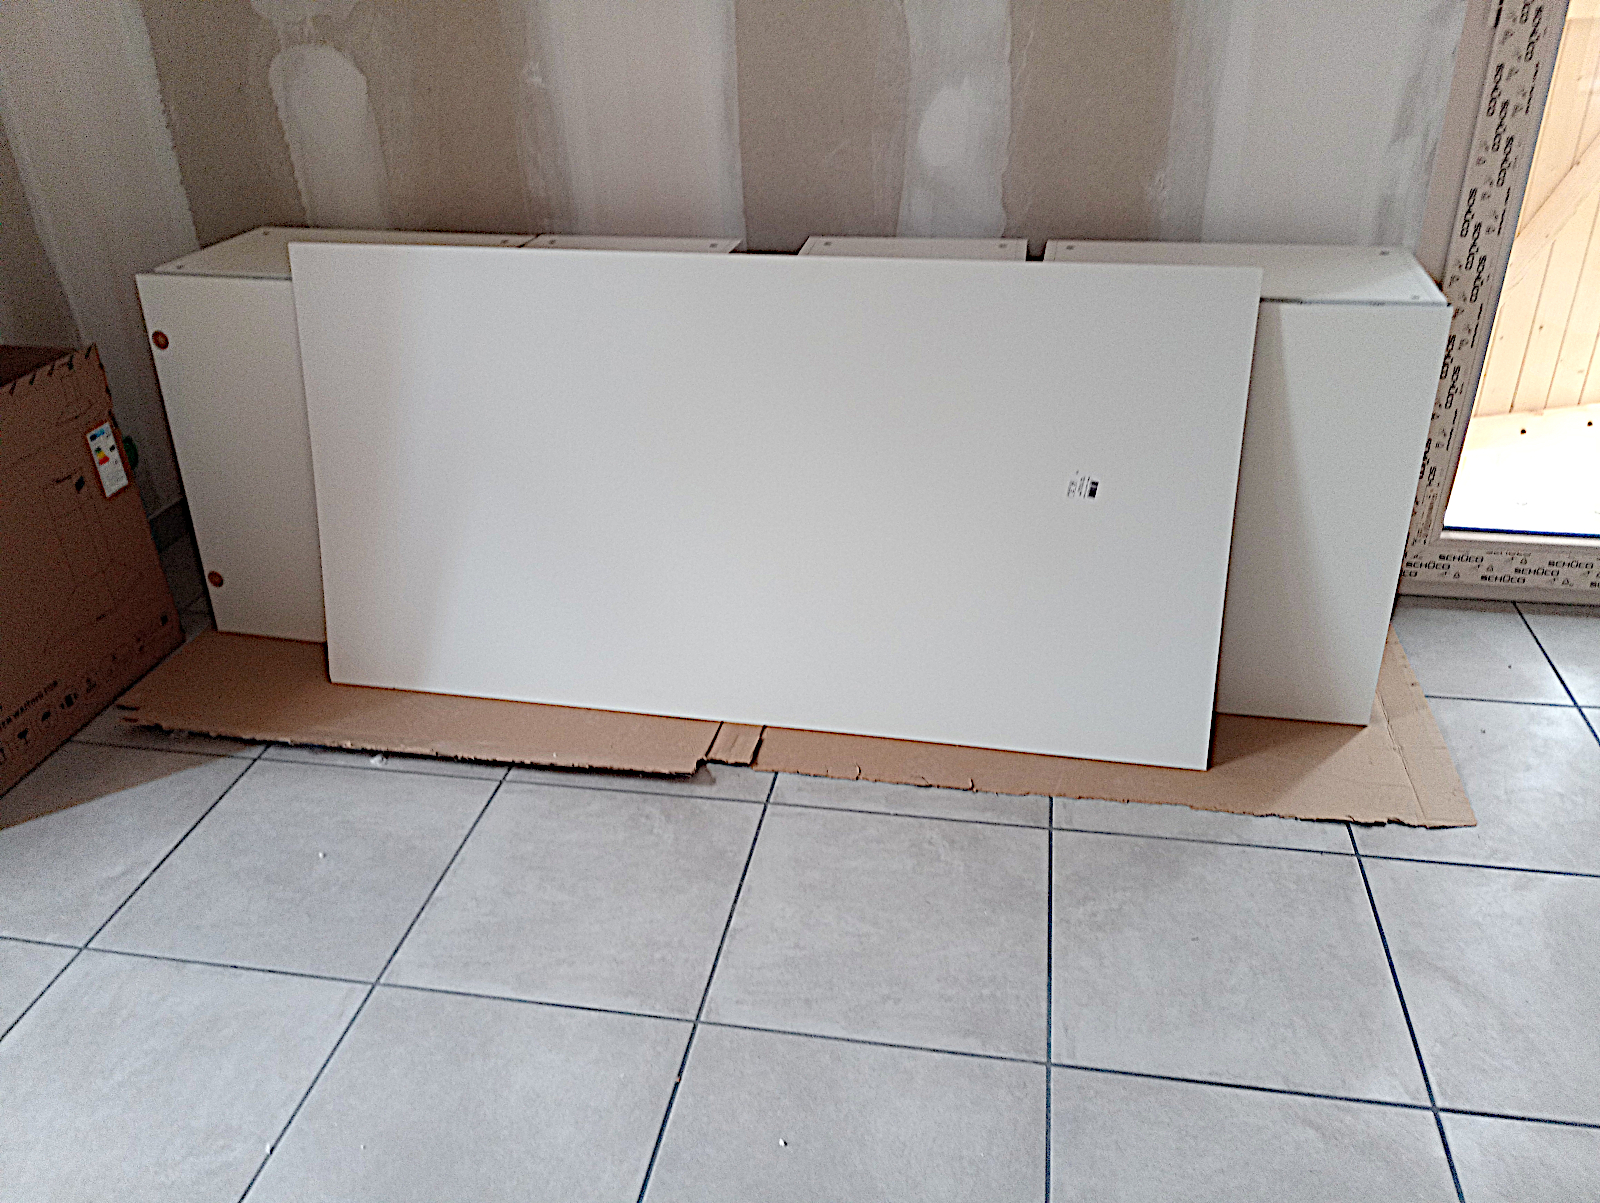
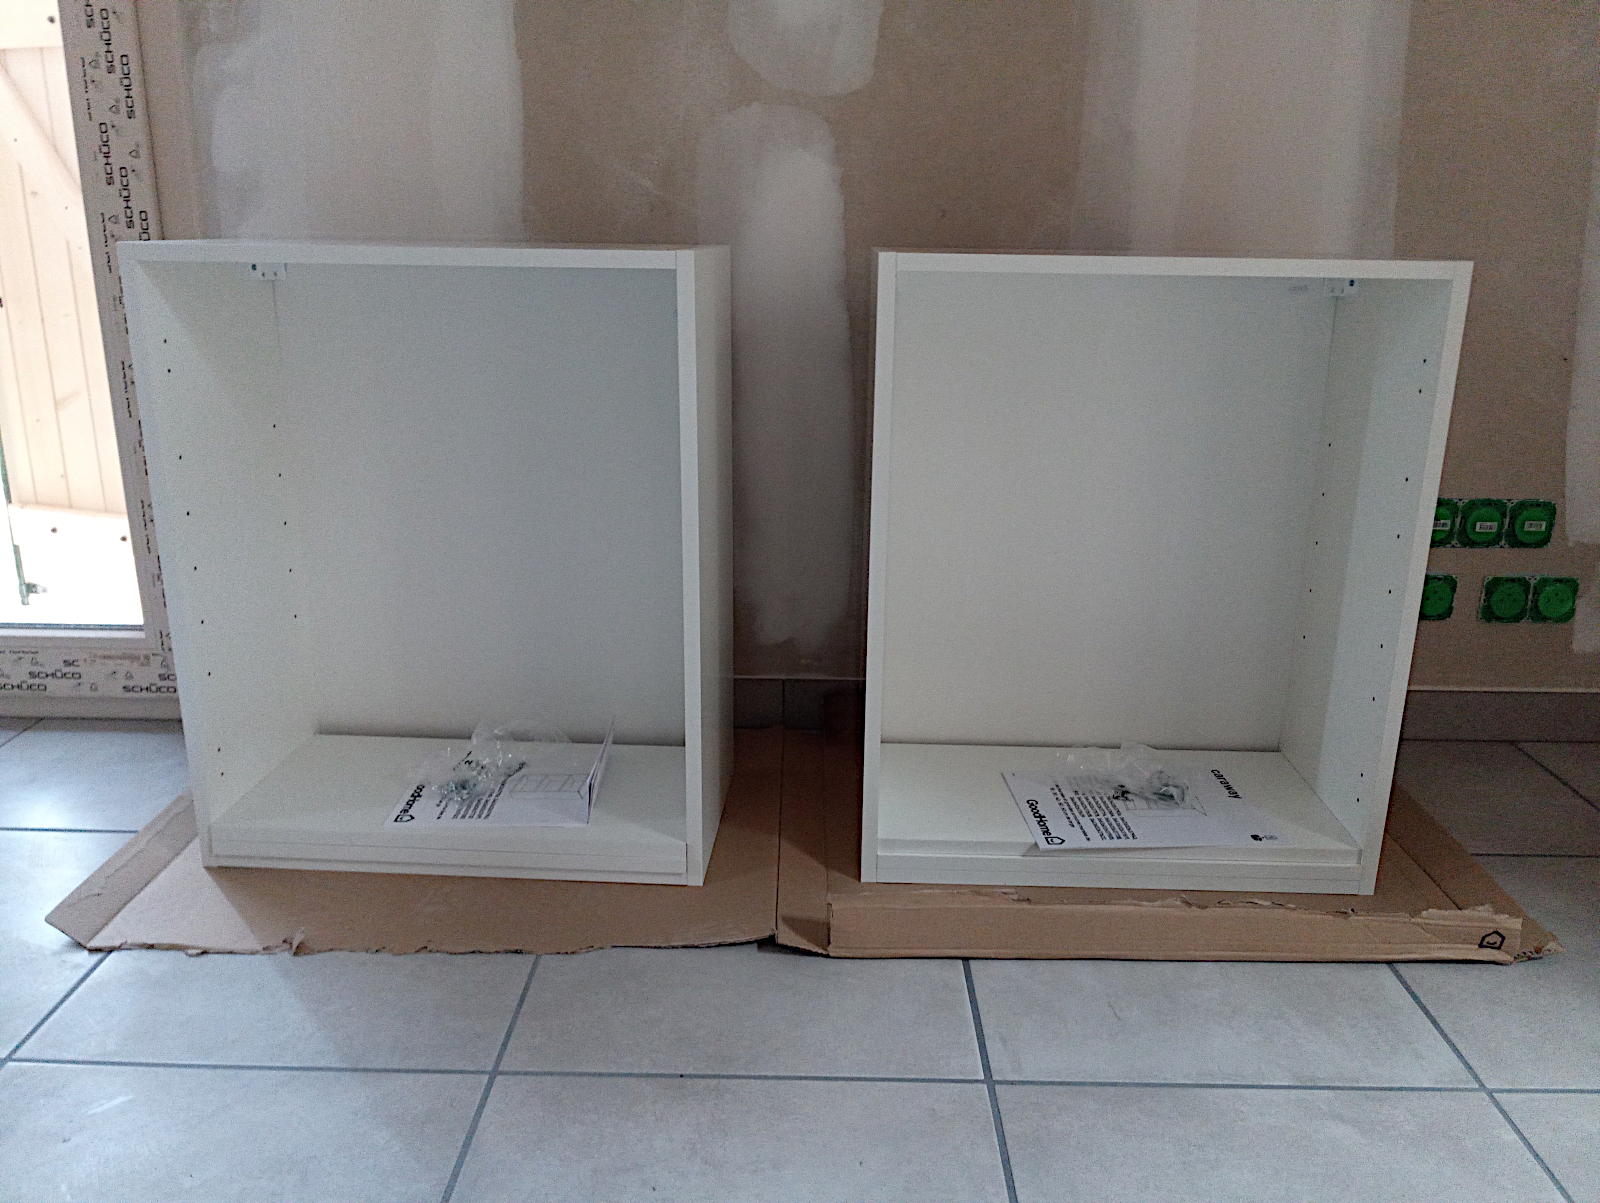
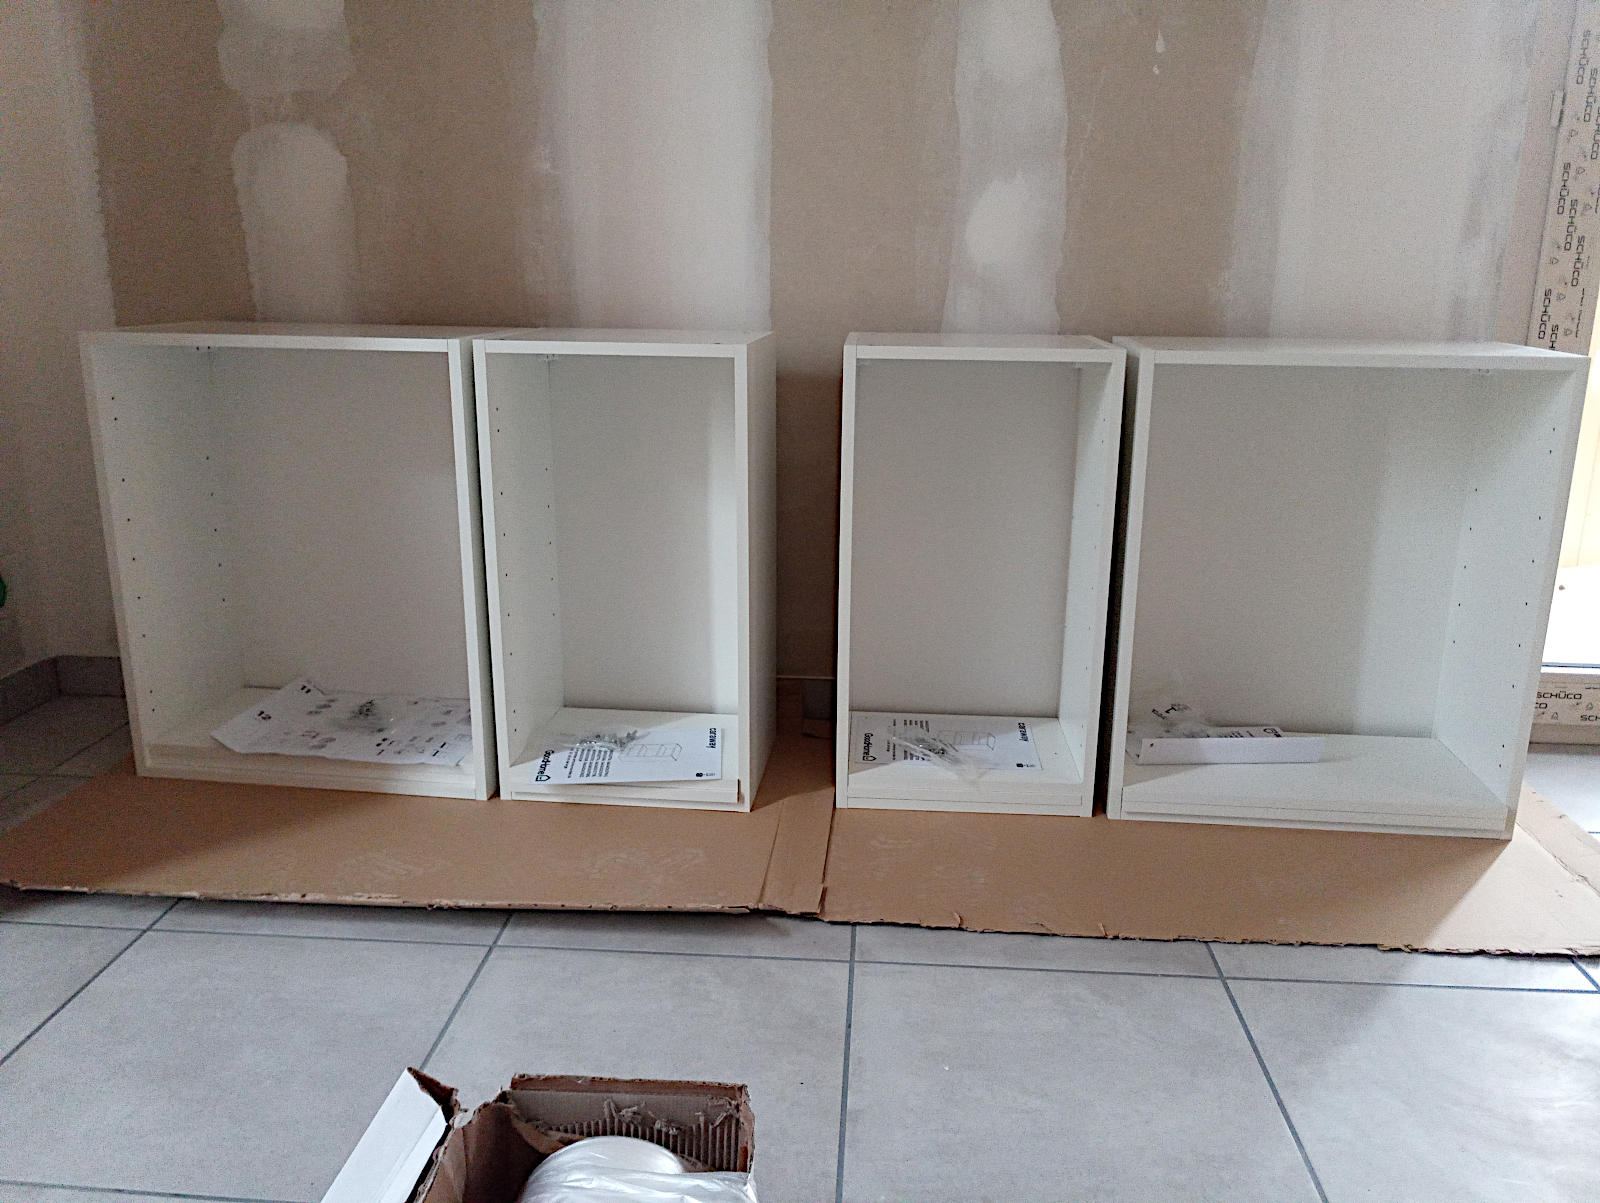
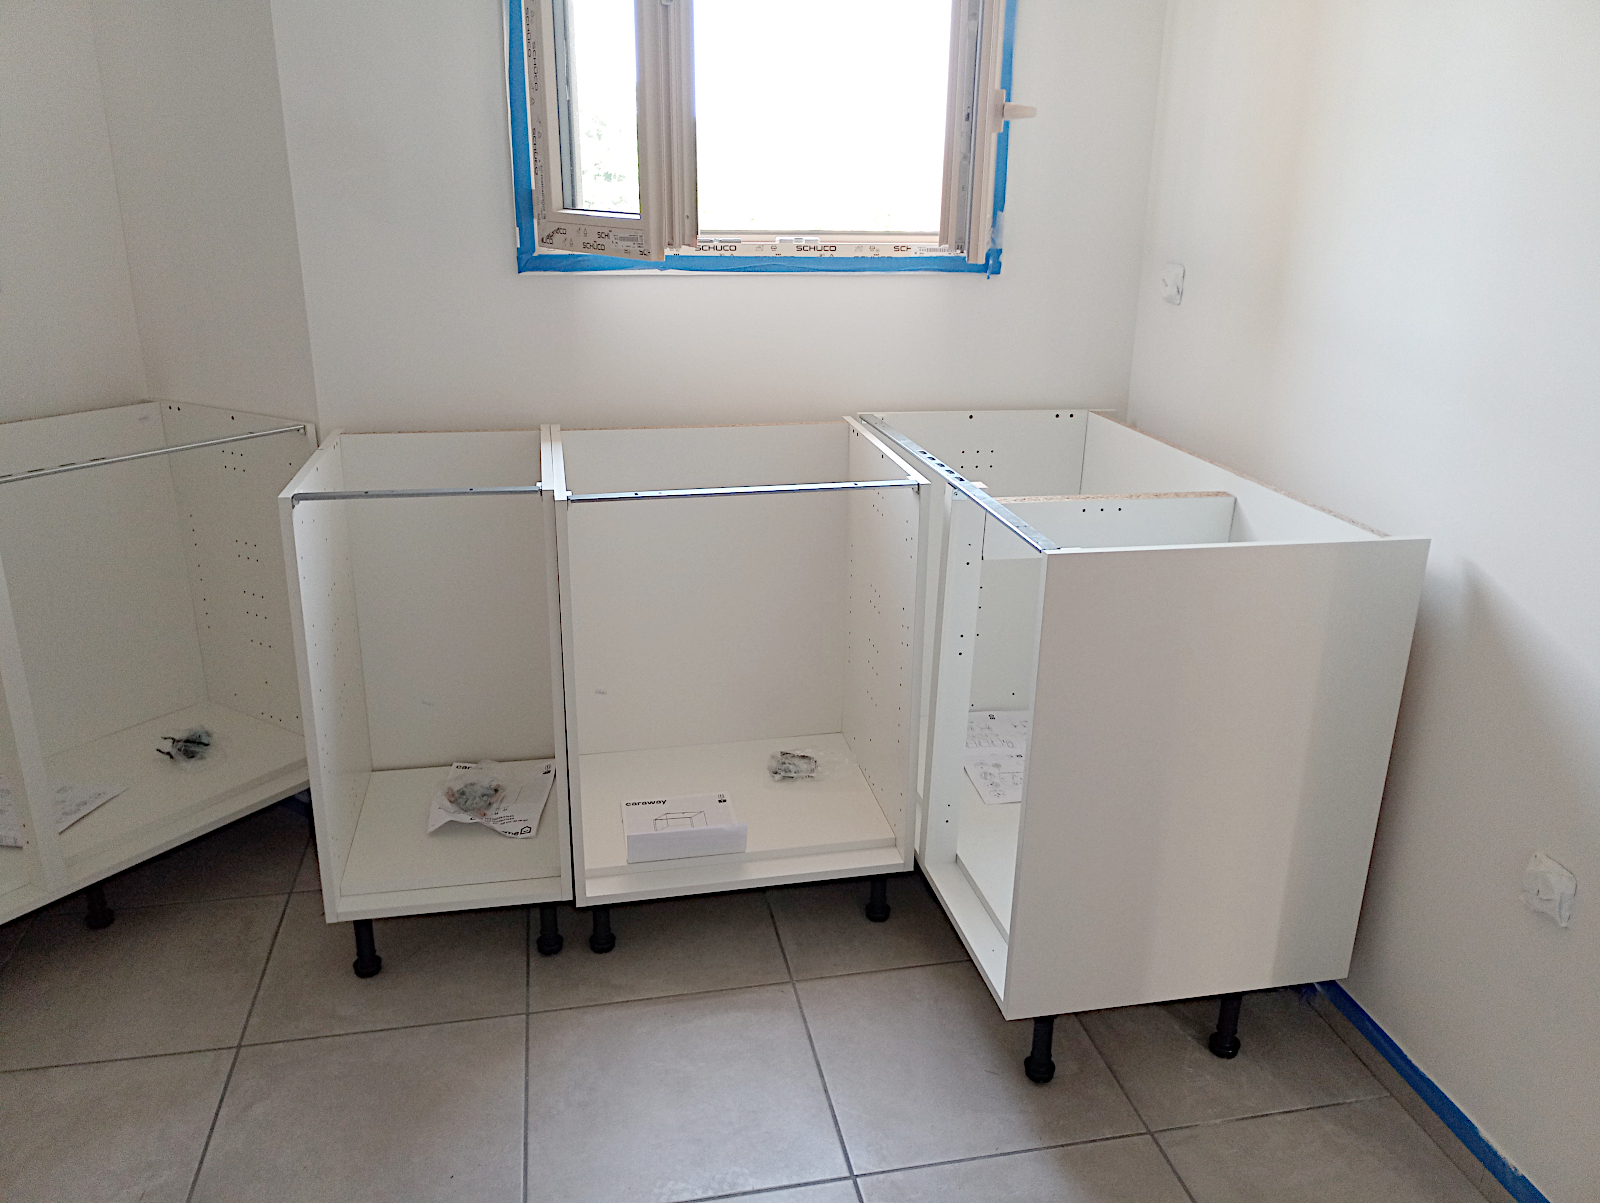
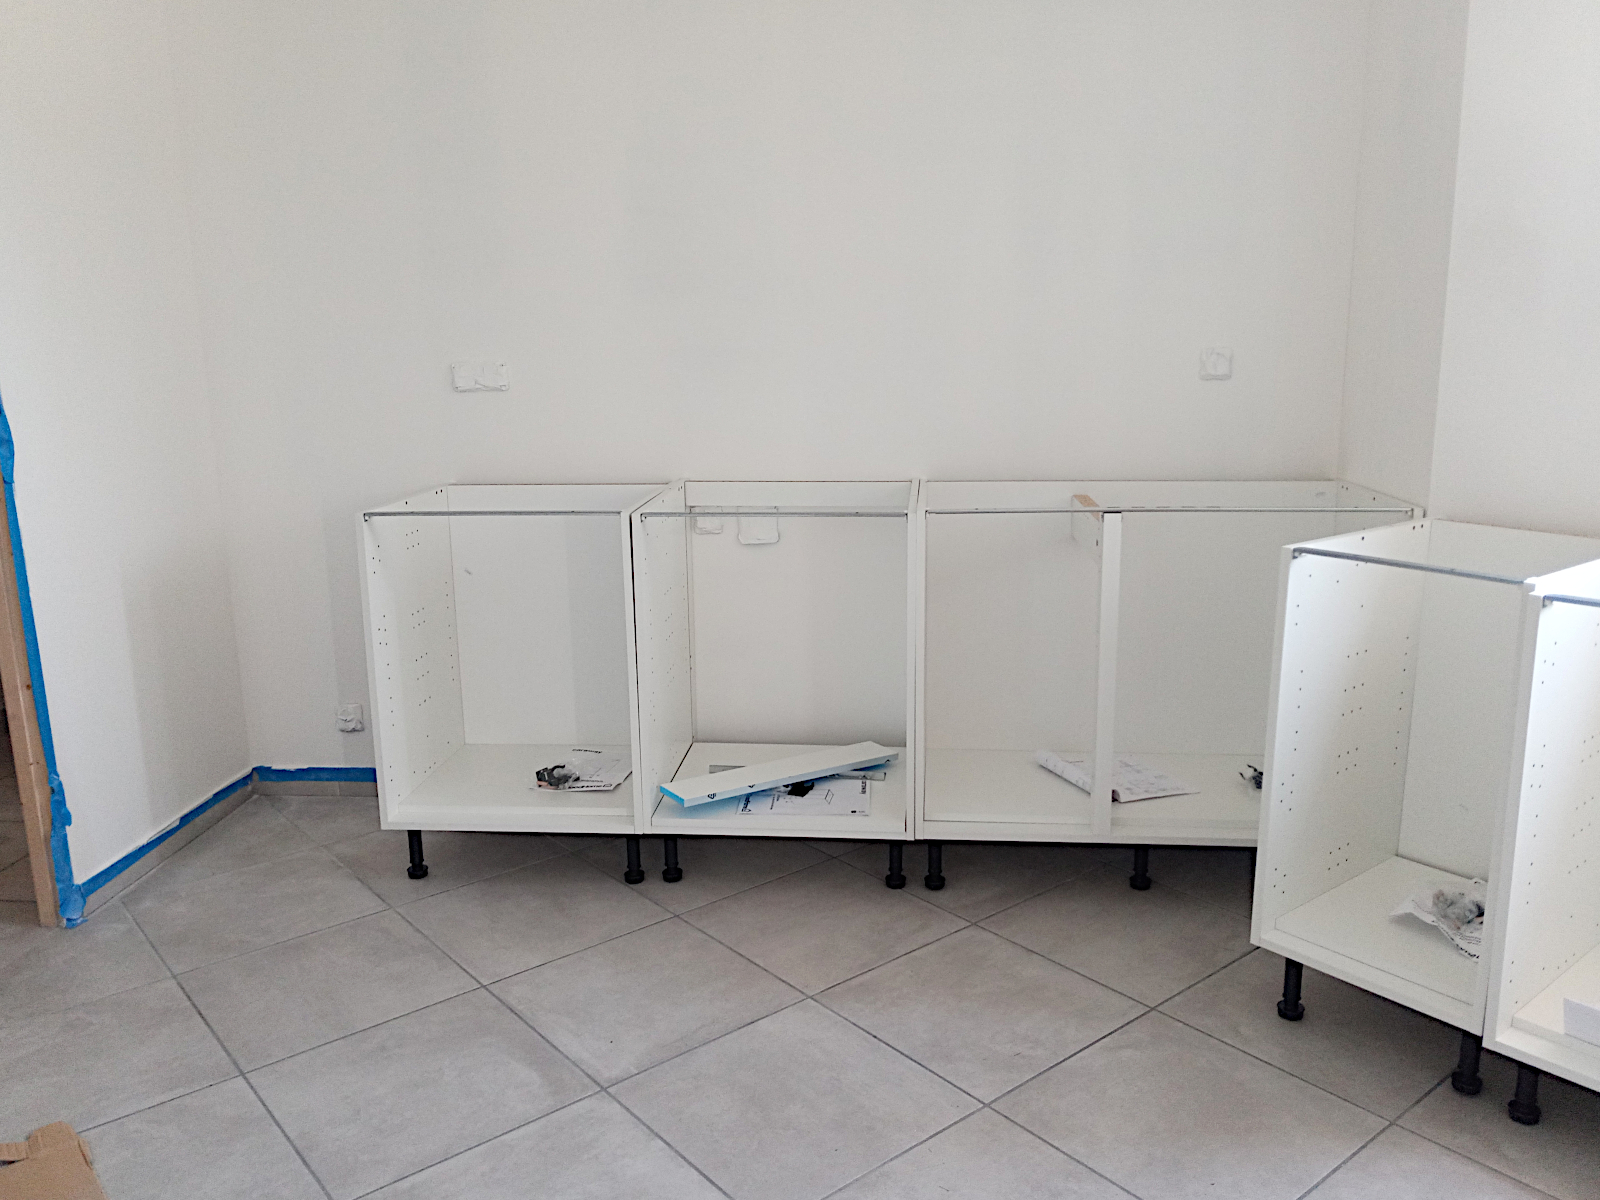
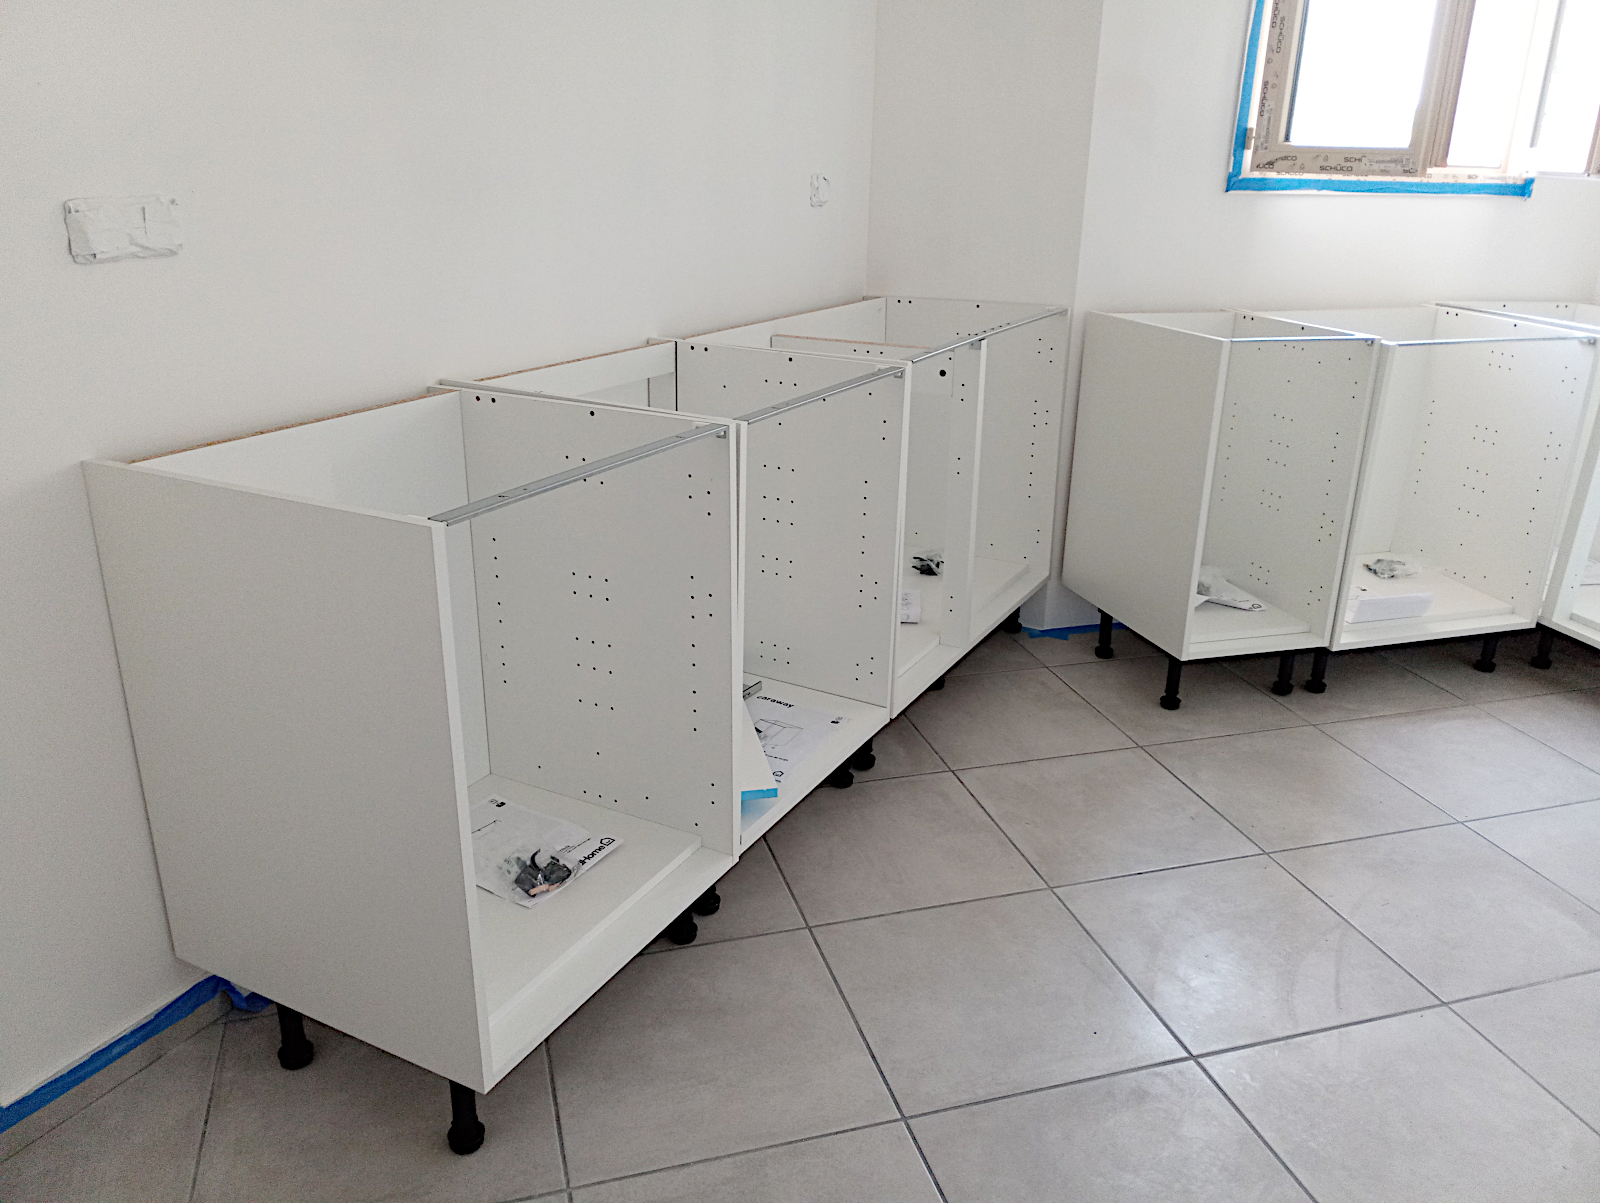
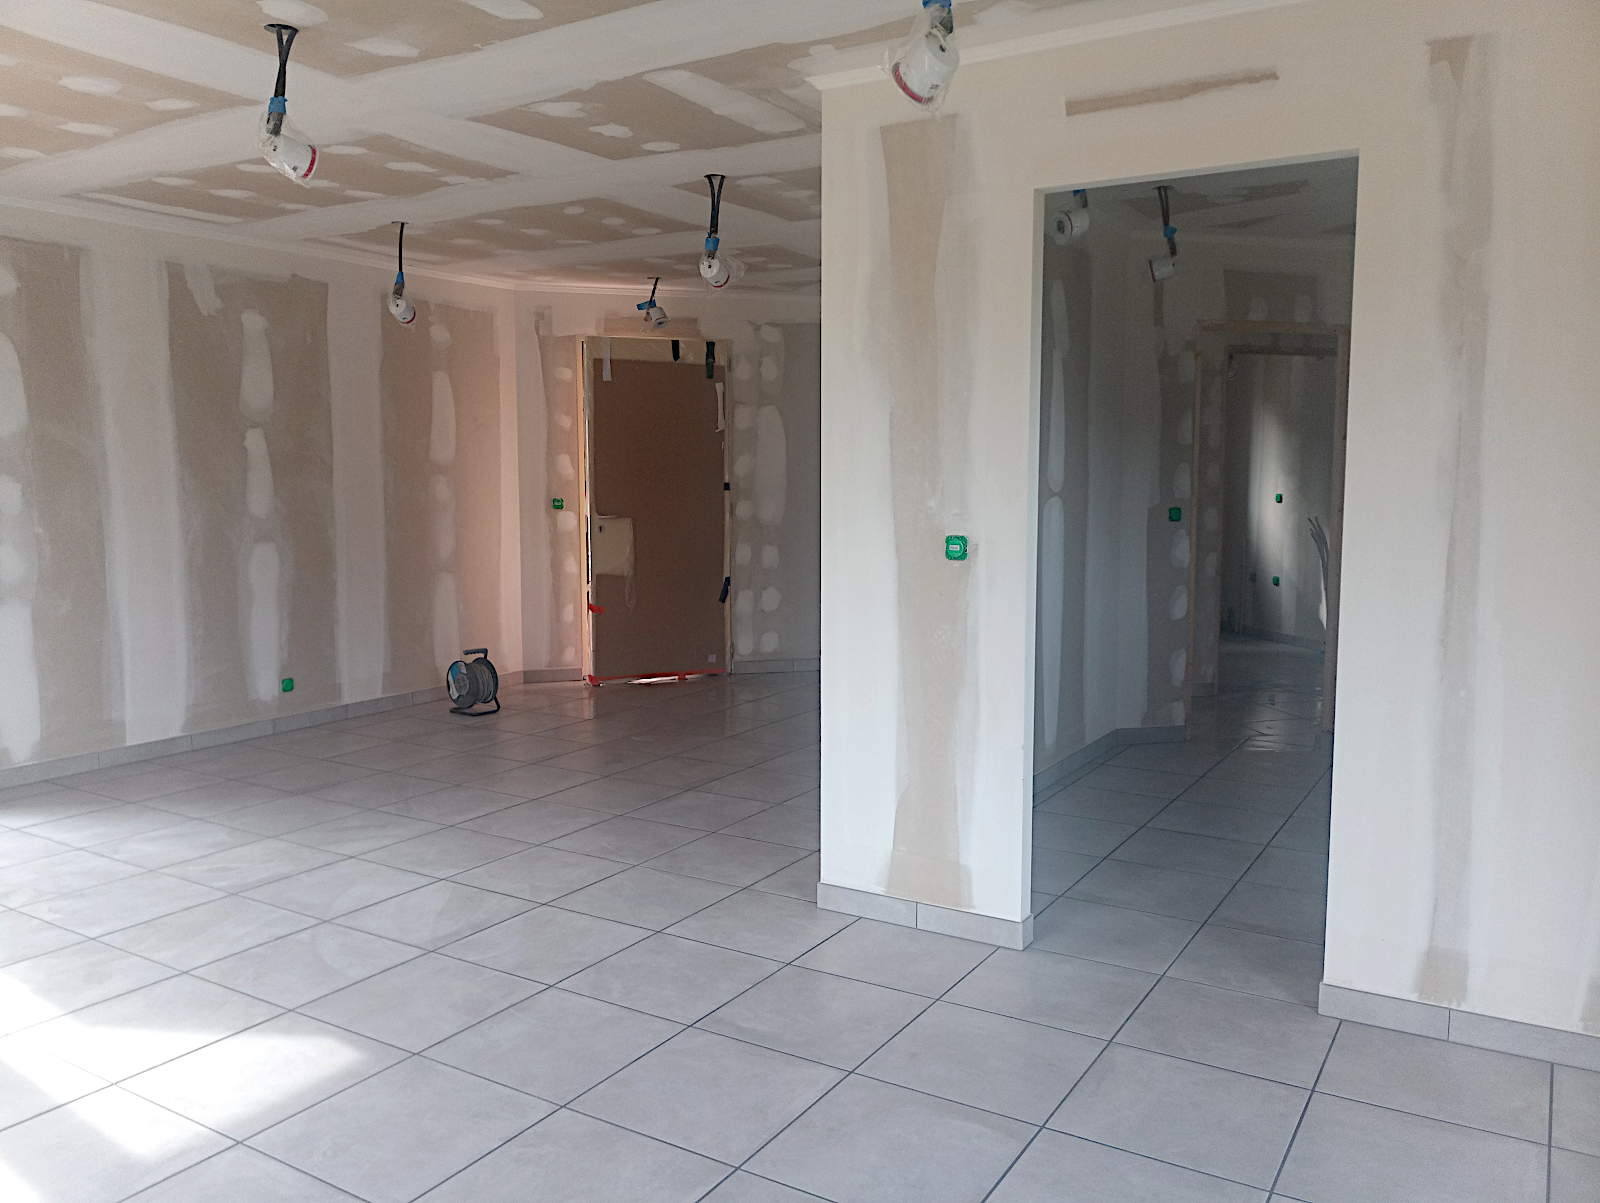
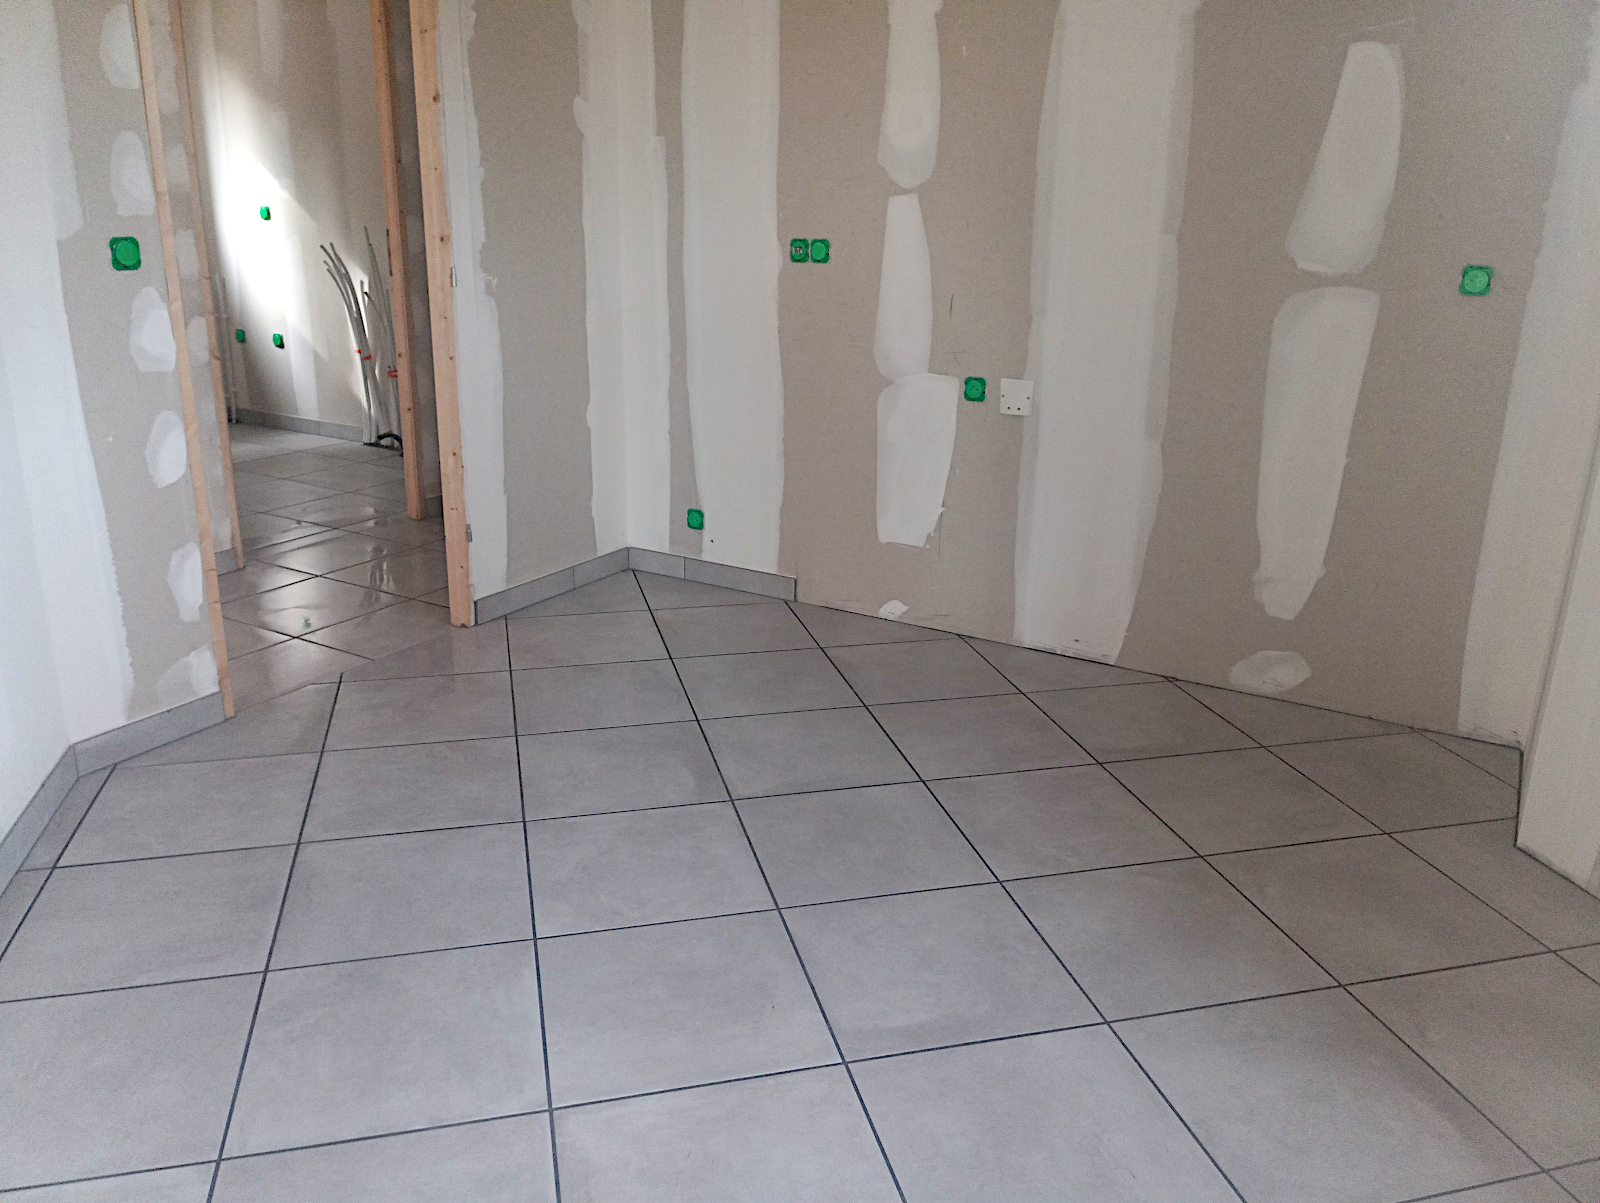
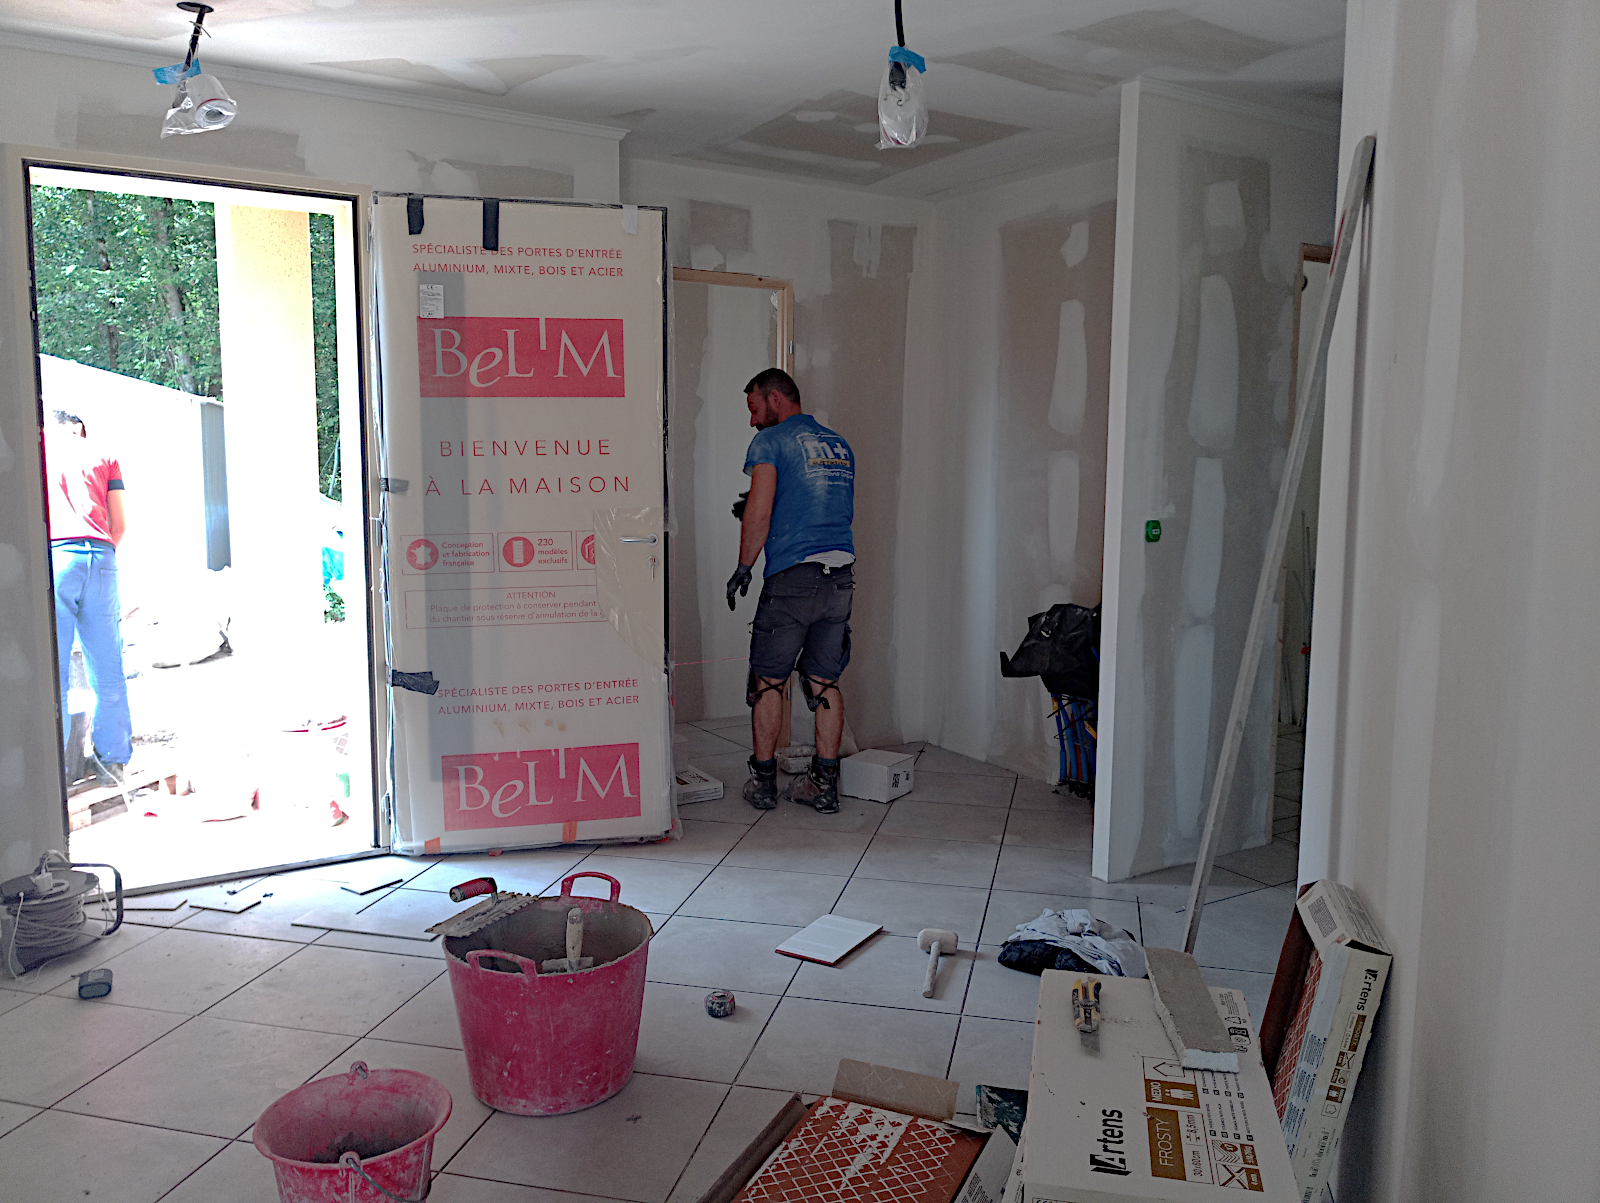
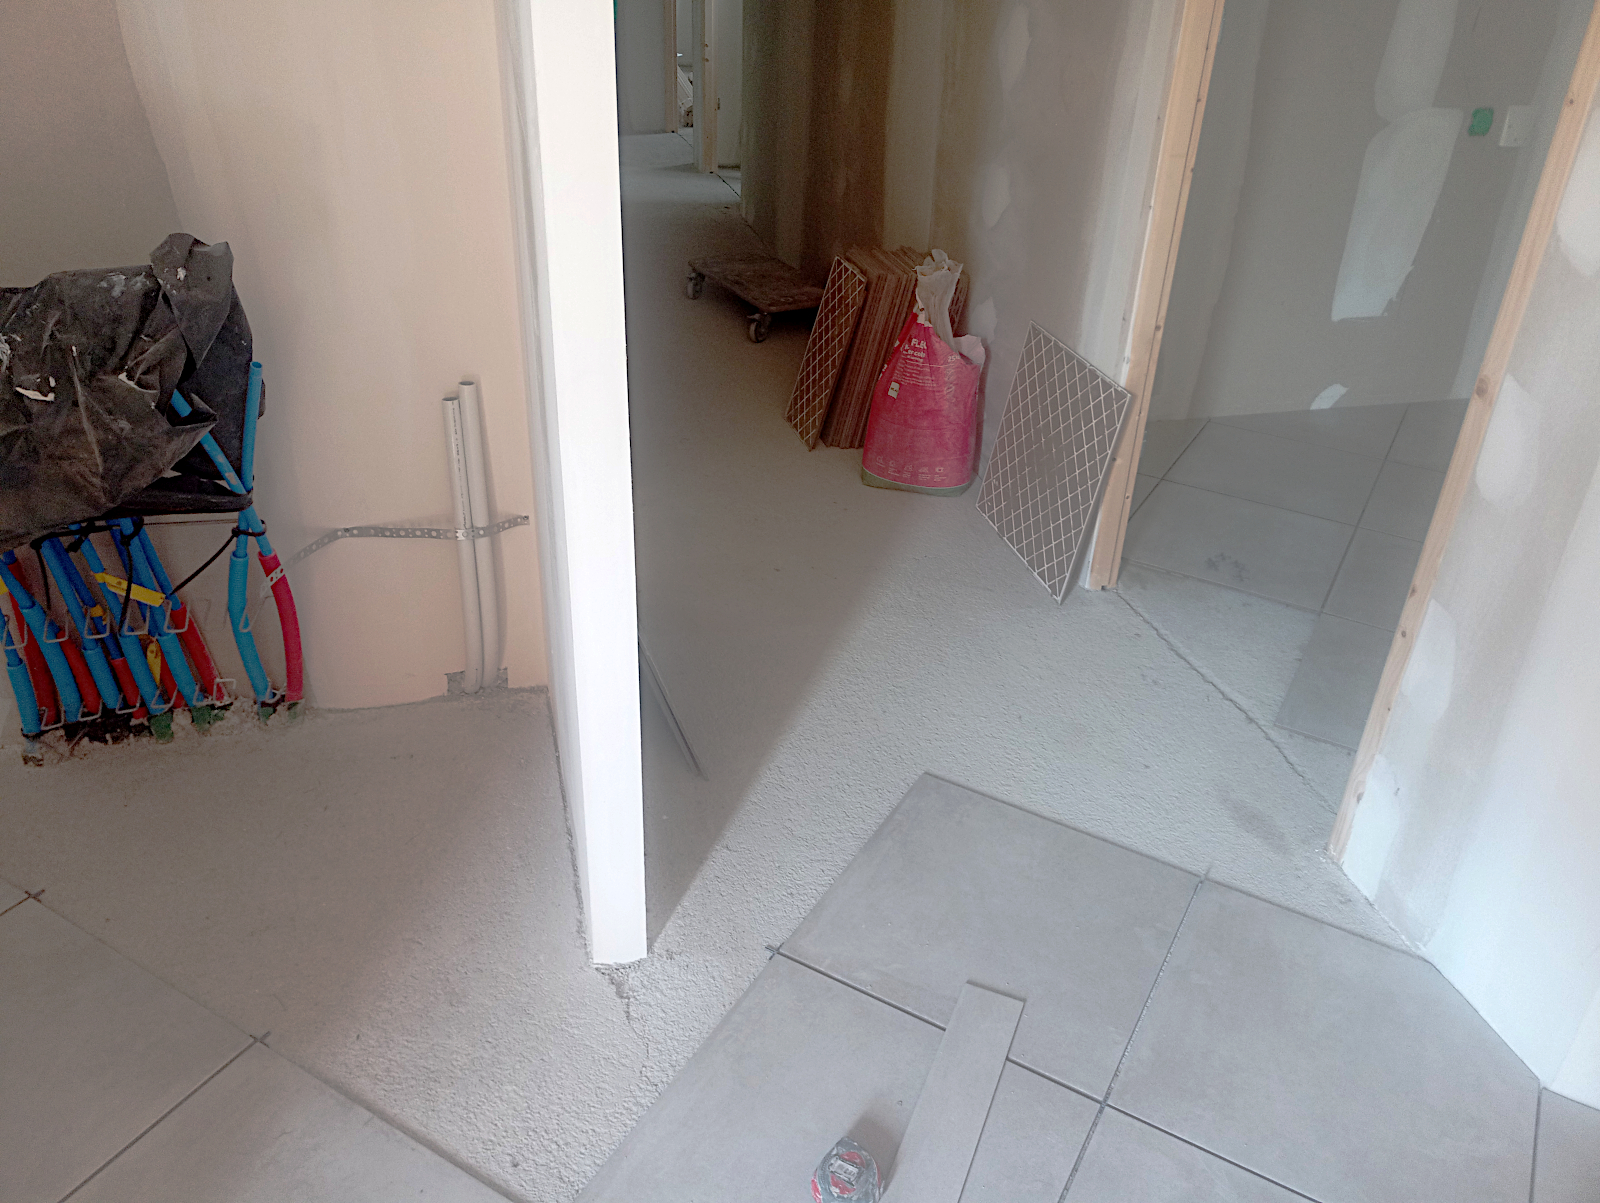
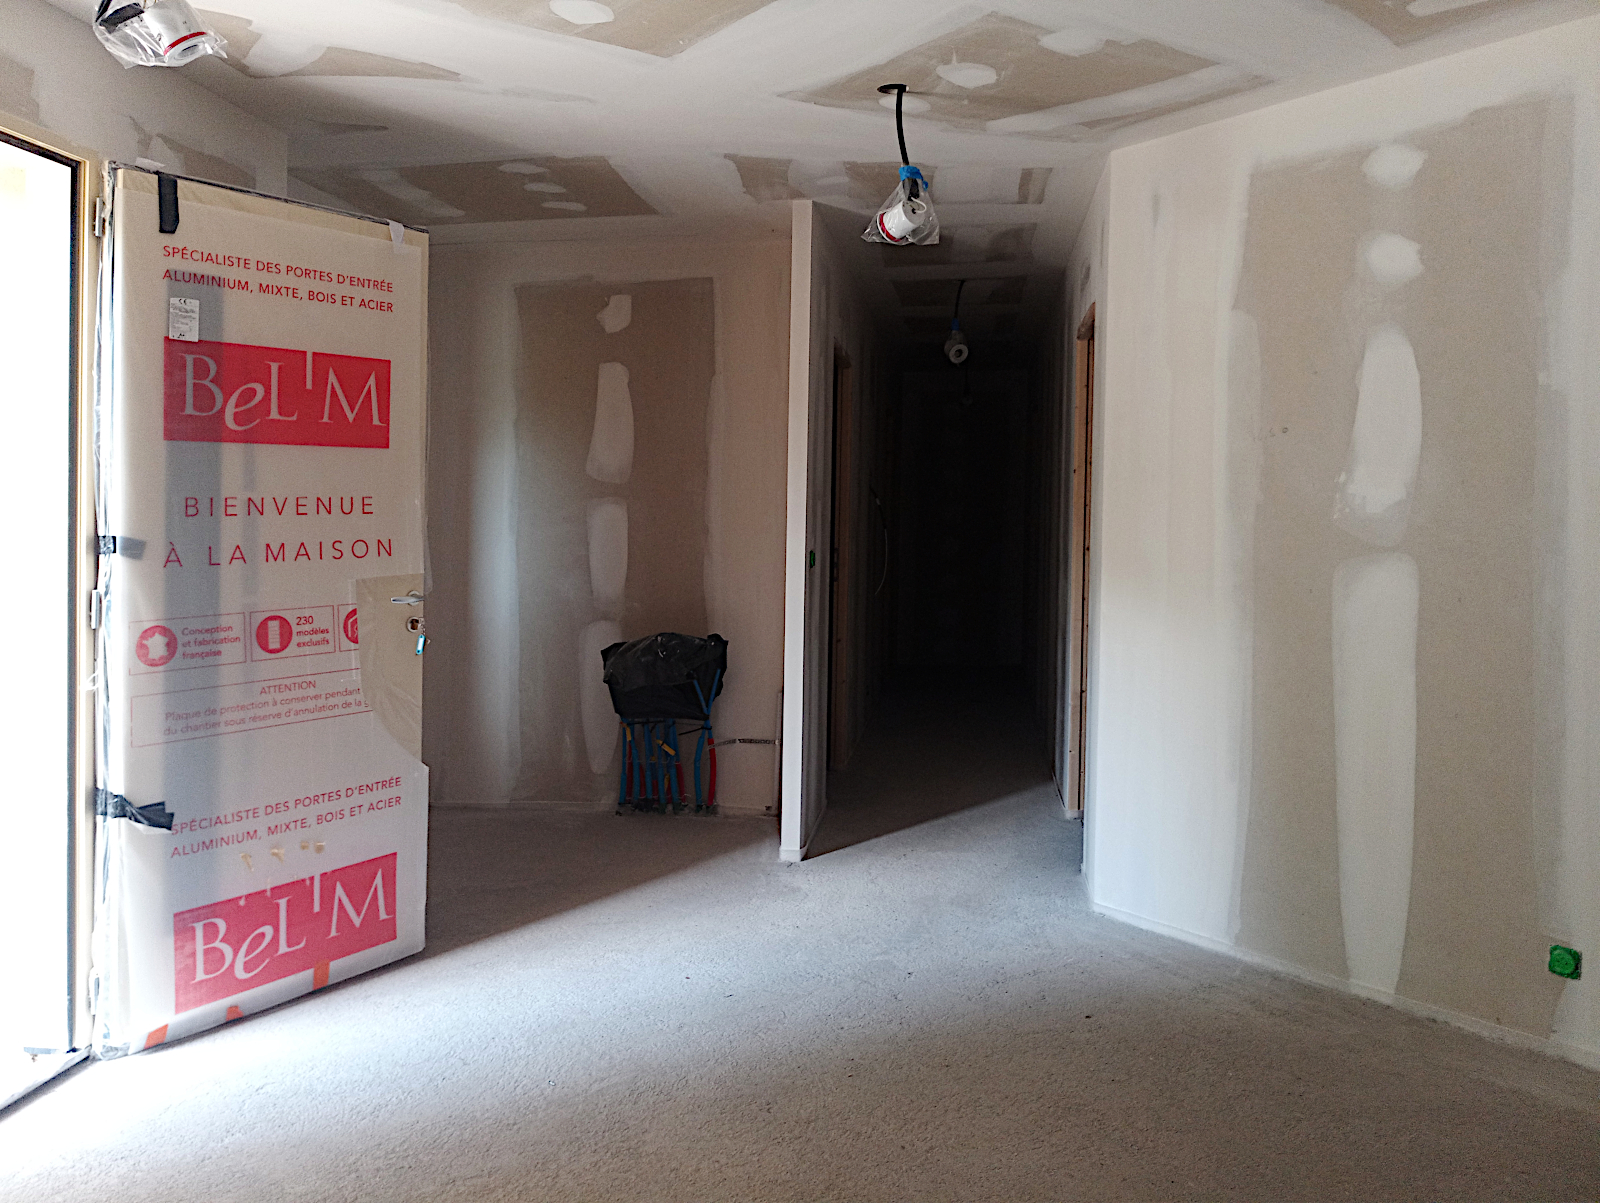
The plumber turned up again and when I said that he’d never get finished today, as was the original plan, he said that he’d be back again tomorrow. As I thought I might be continuing to work in the kitchen I moved all of the flat-packs out of the bedroom where I’d stored them into the living room and kitchen as I knew he’d be walking up and down the corridor connecting up the heat pump and I didn’t want to get in his way.

As it happens, I didn’t do any work at all in the house today because afterwards I decided to check the prices and availability of the kitchen equipment that I decided to go for a few weeks ago. I was shocked to find by how much many items had increased in price. I had originally spent ages looking for a range of the same brand to install in the kitchen and I didn’t much fancy doing the whole exercise again.

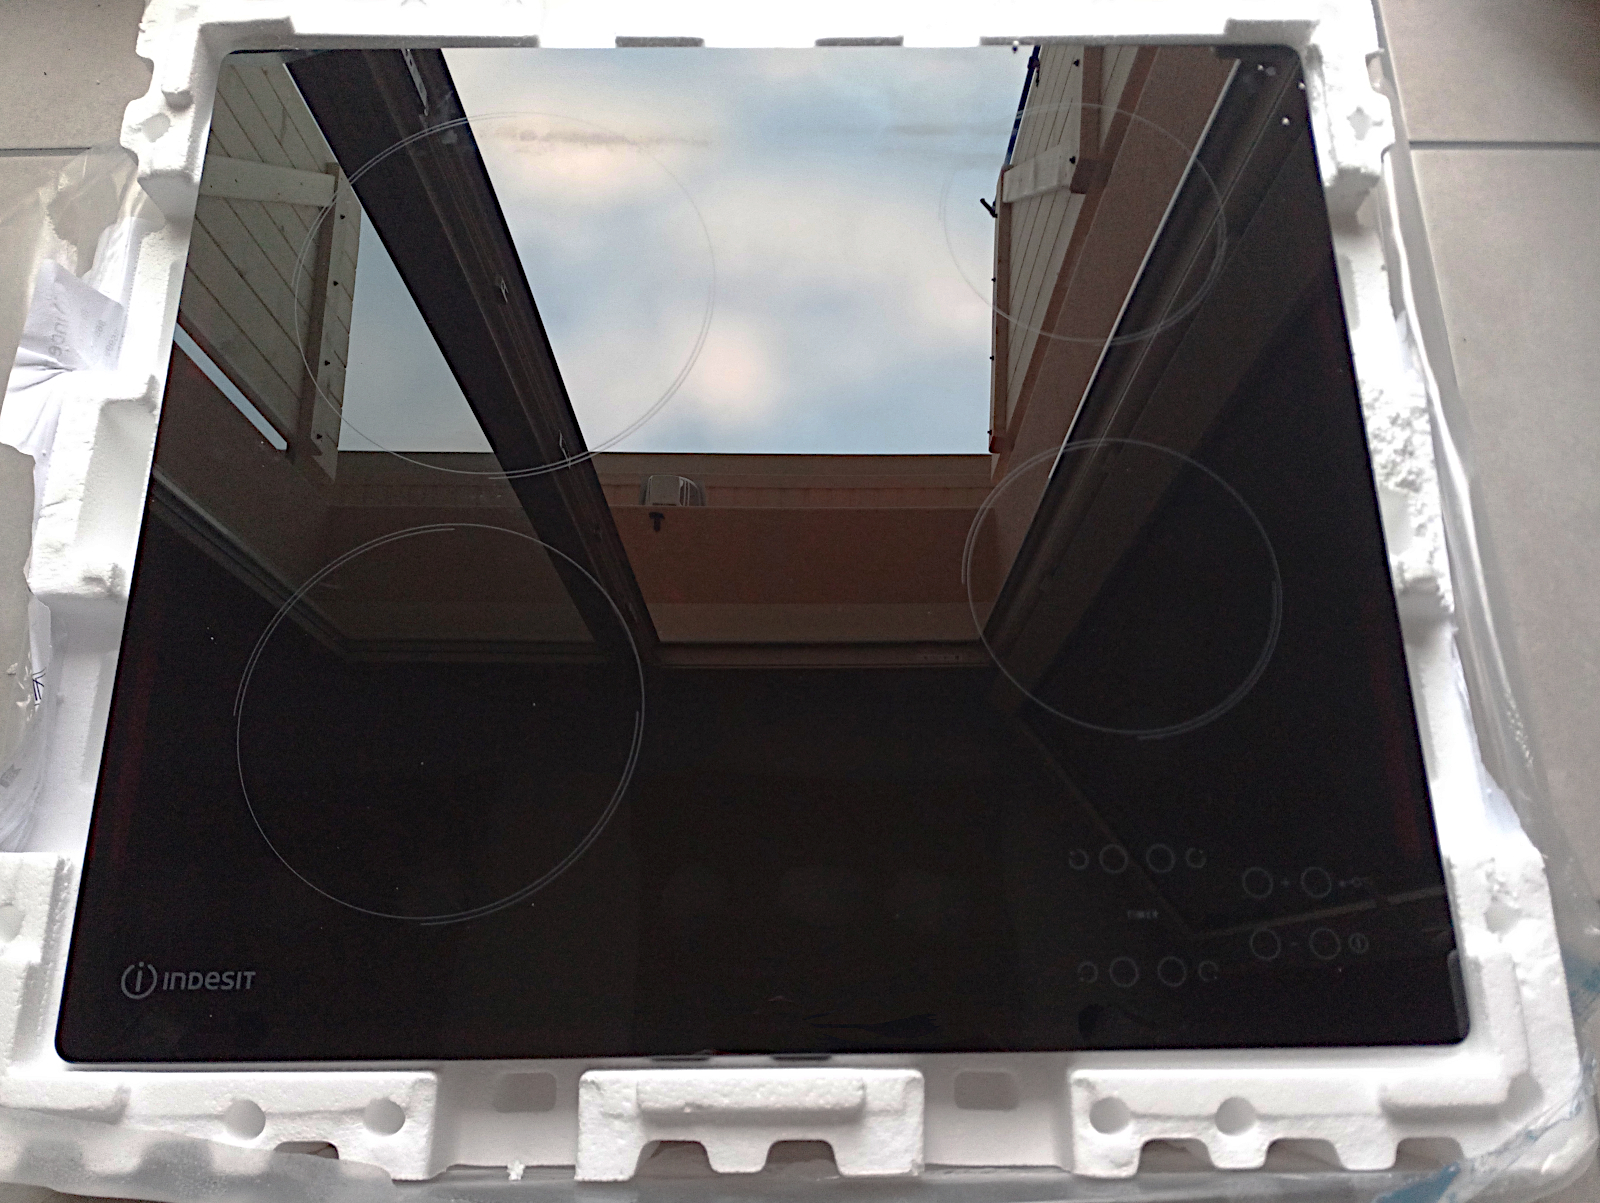
But I didn’t have to, because when I checked the prices of other manufacturers’ items they had also gone up in price by at least the same amount, and some by a lot more. I’d chosen to go for Indesit products, not because I’m an especially great fan but because they are the ONLY manufacturer offering a free-standing fridge of a suitable height for my kitchen layout – 142 centimetres. So the exercise became all about searching again for the most competitive suppliers of the items I want and biting the bullet when prices of some (most) of them had increased in the meantime.

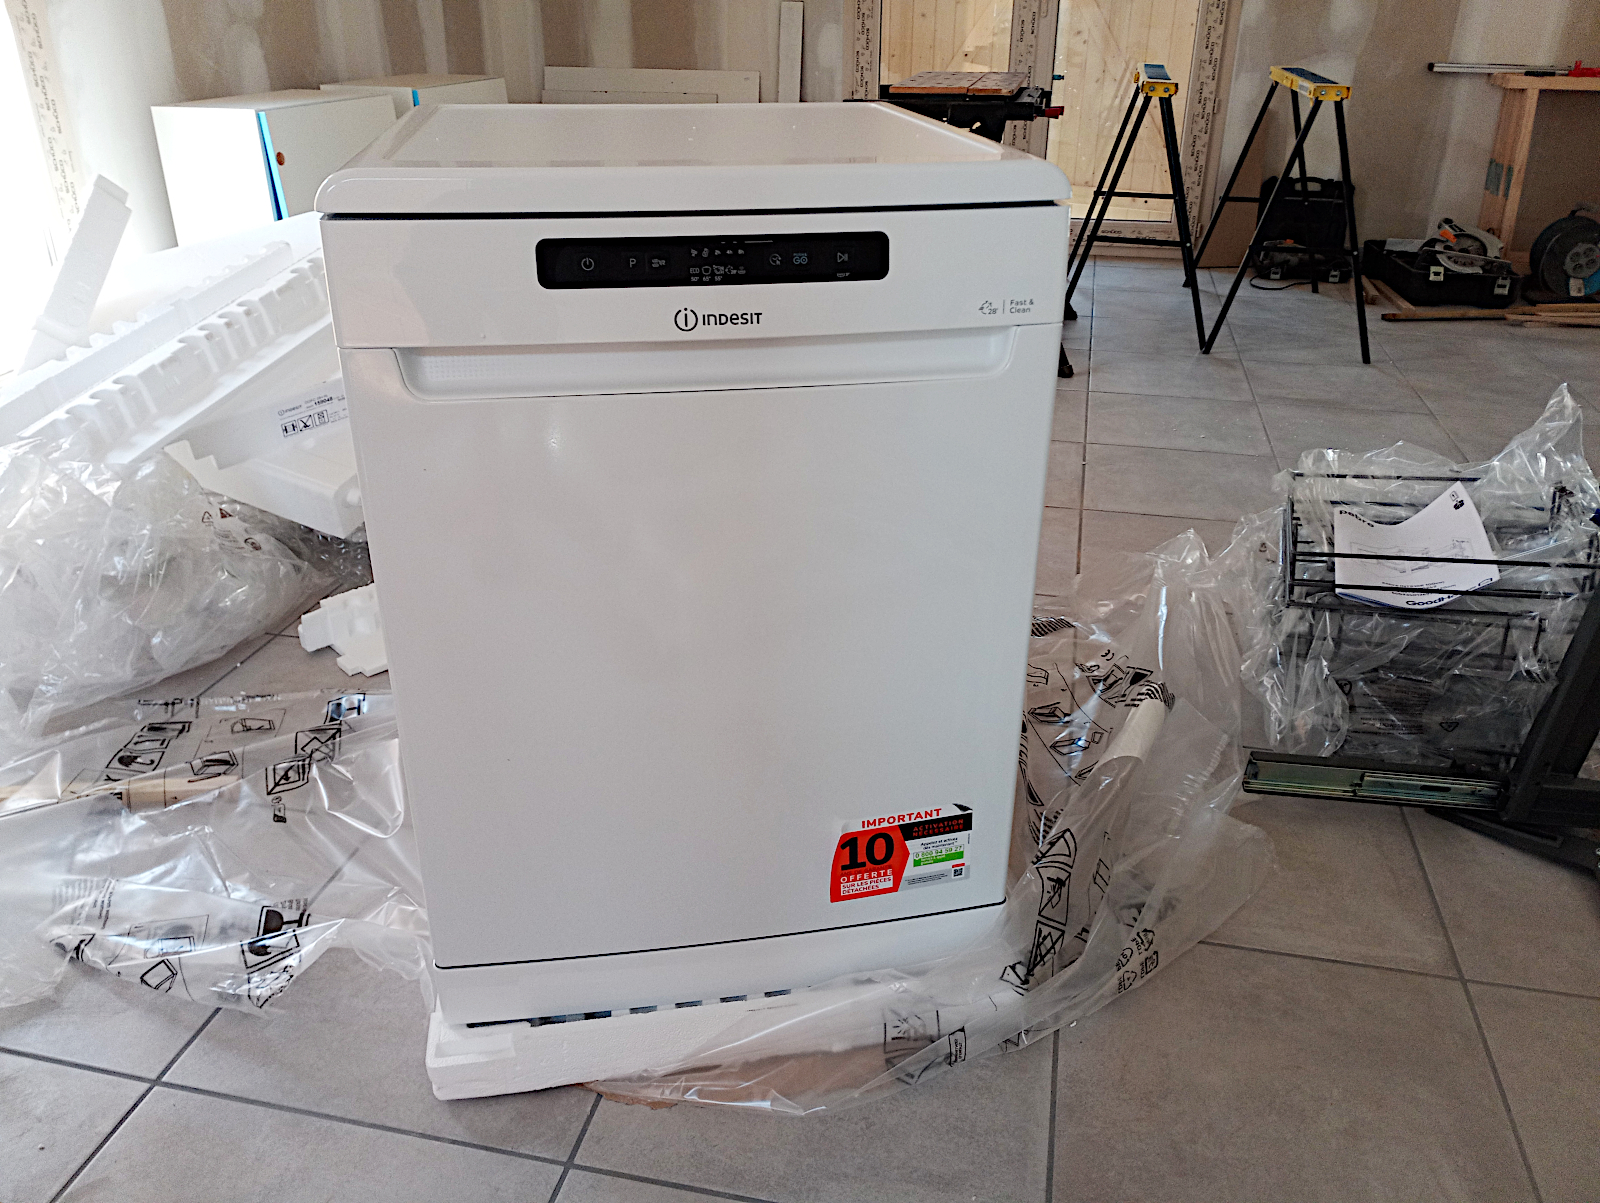
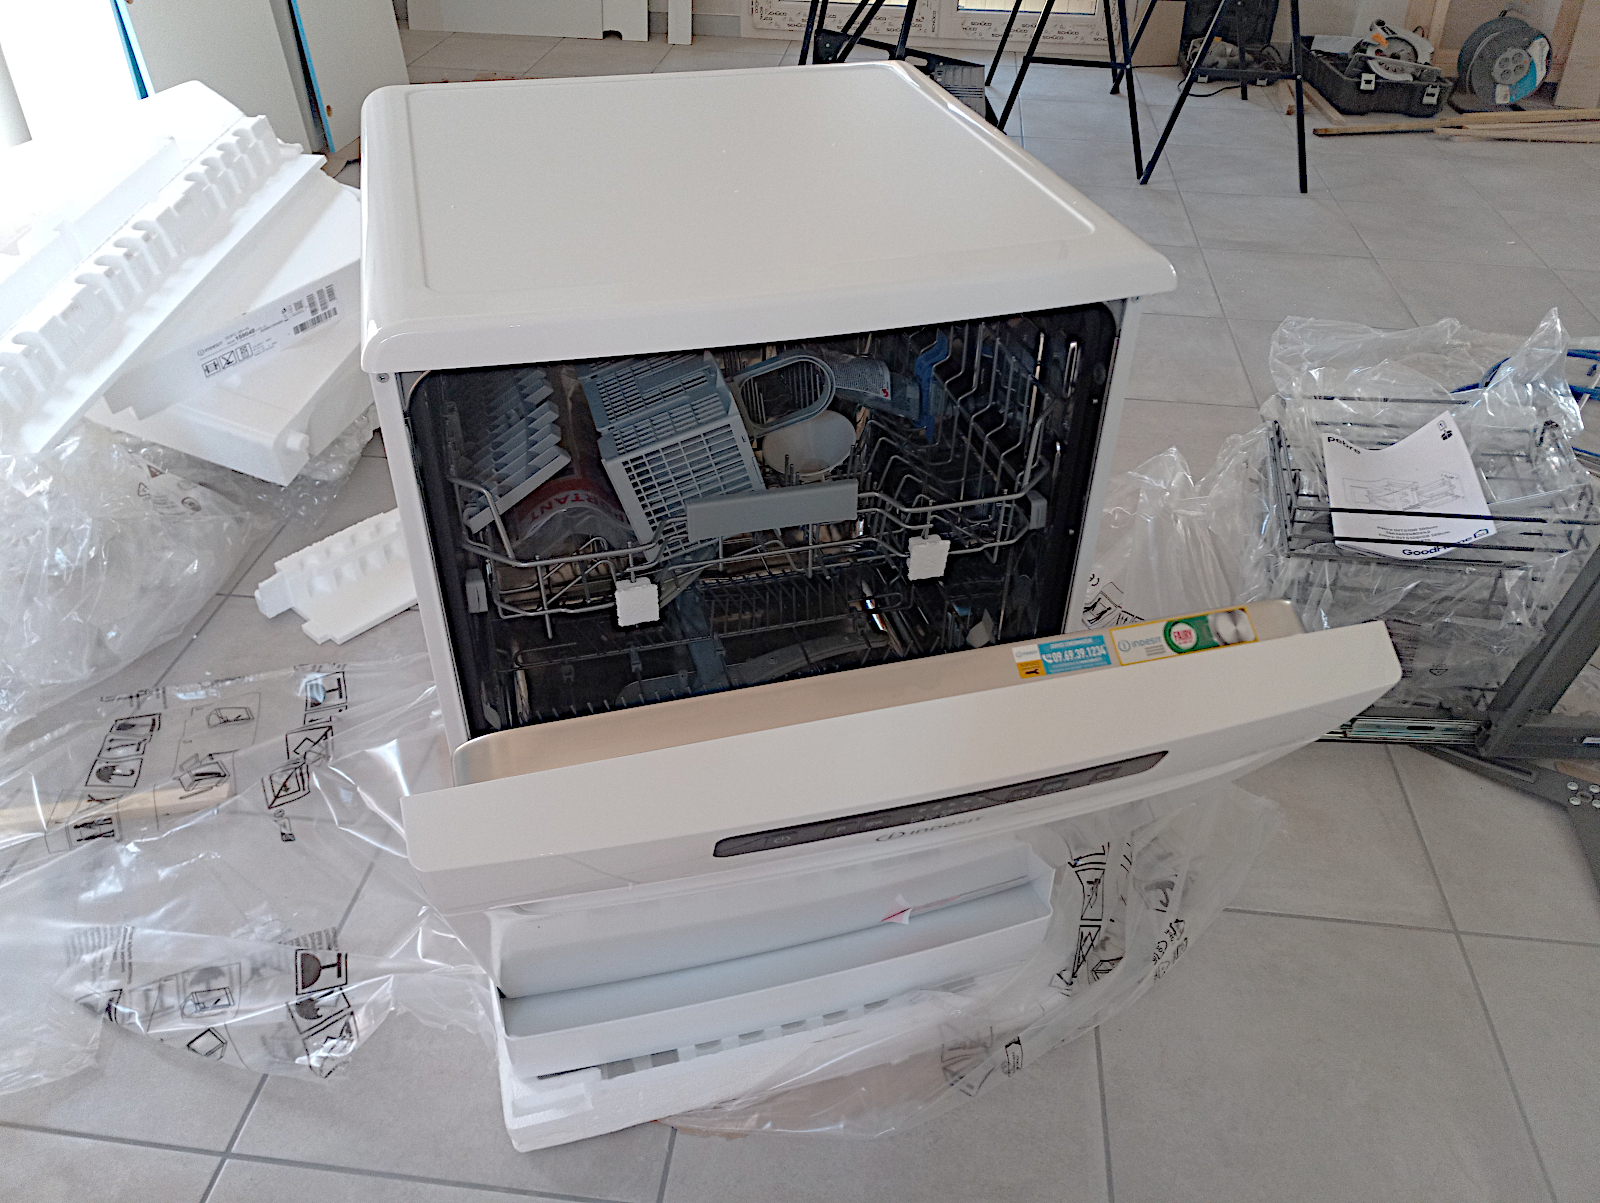
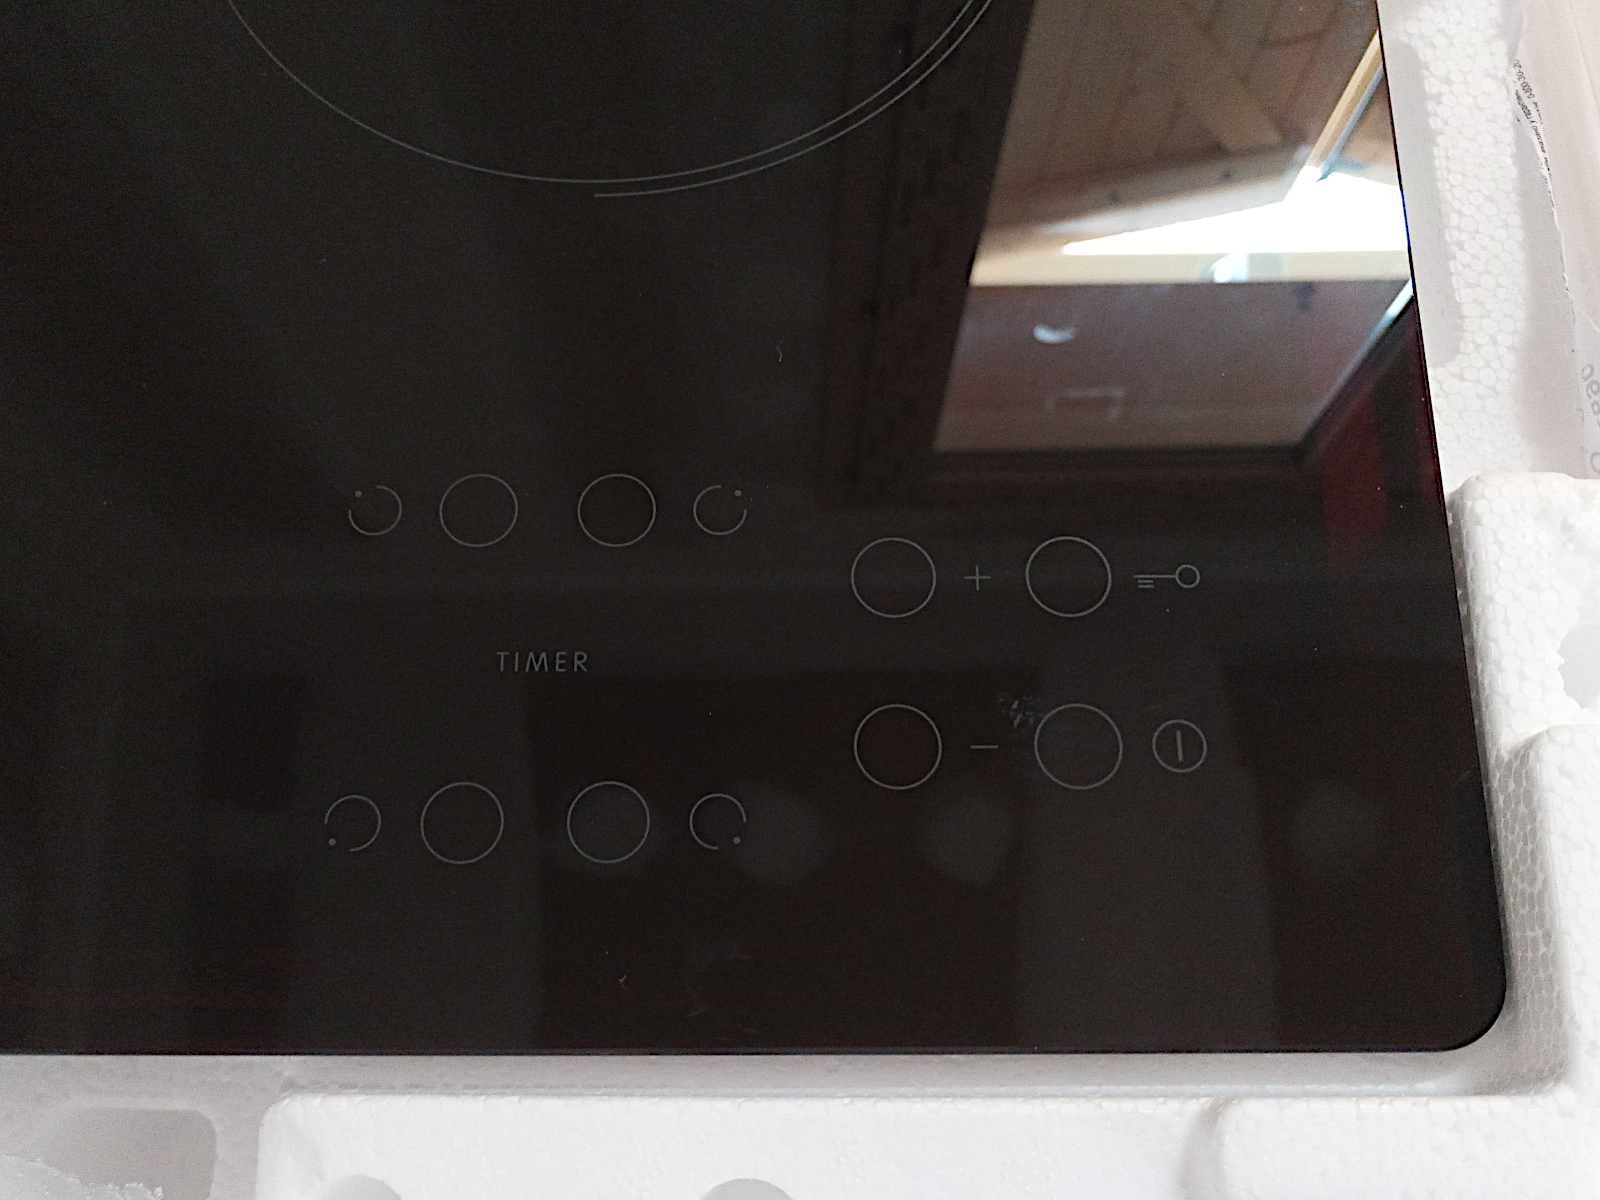
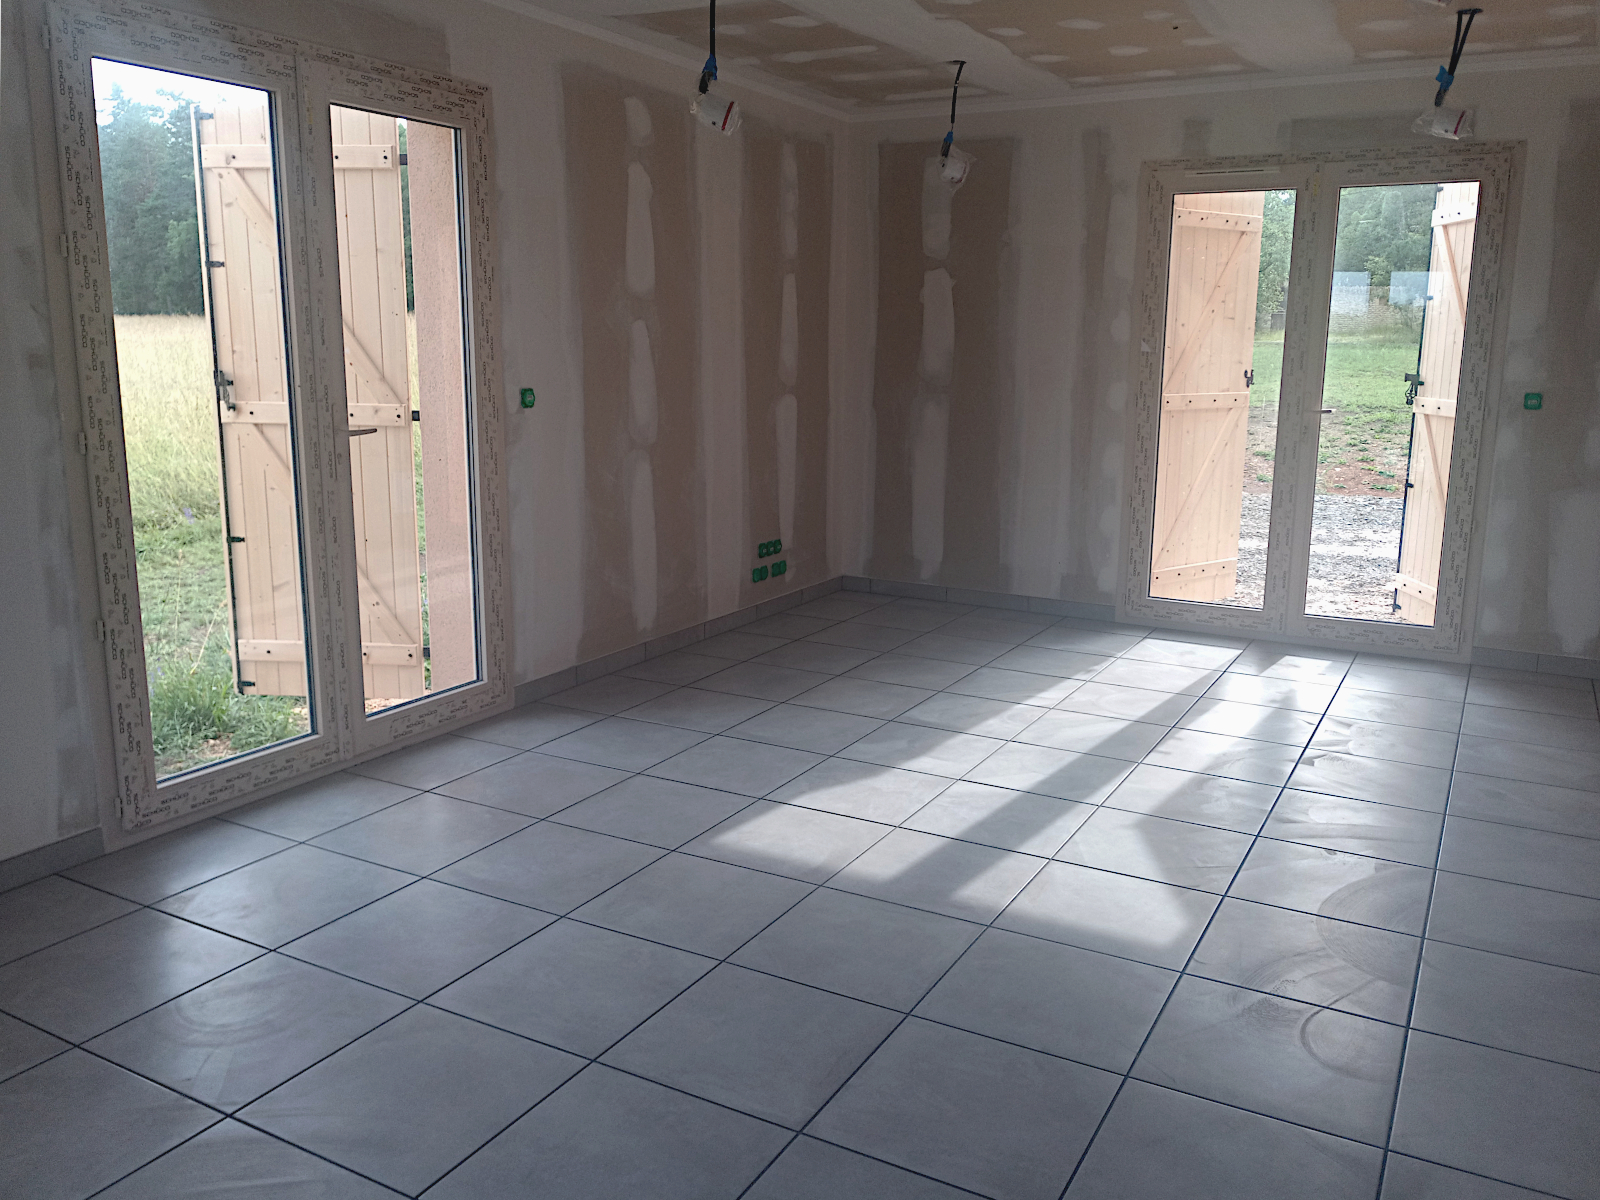
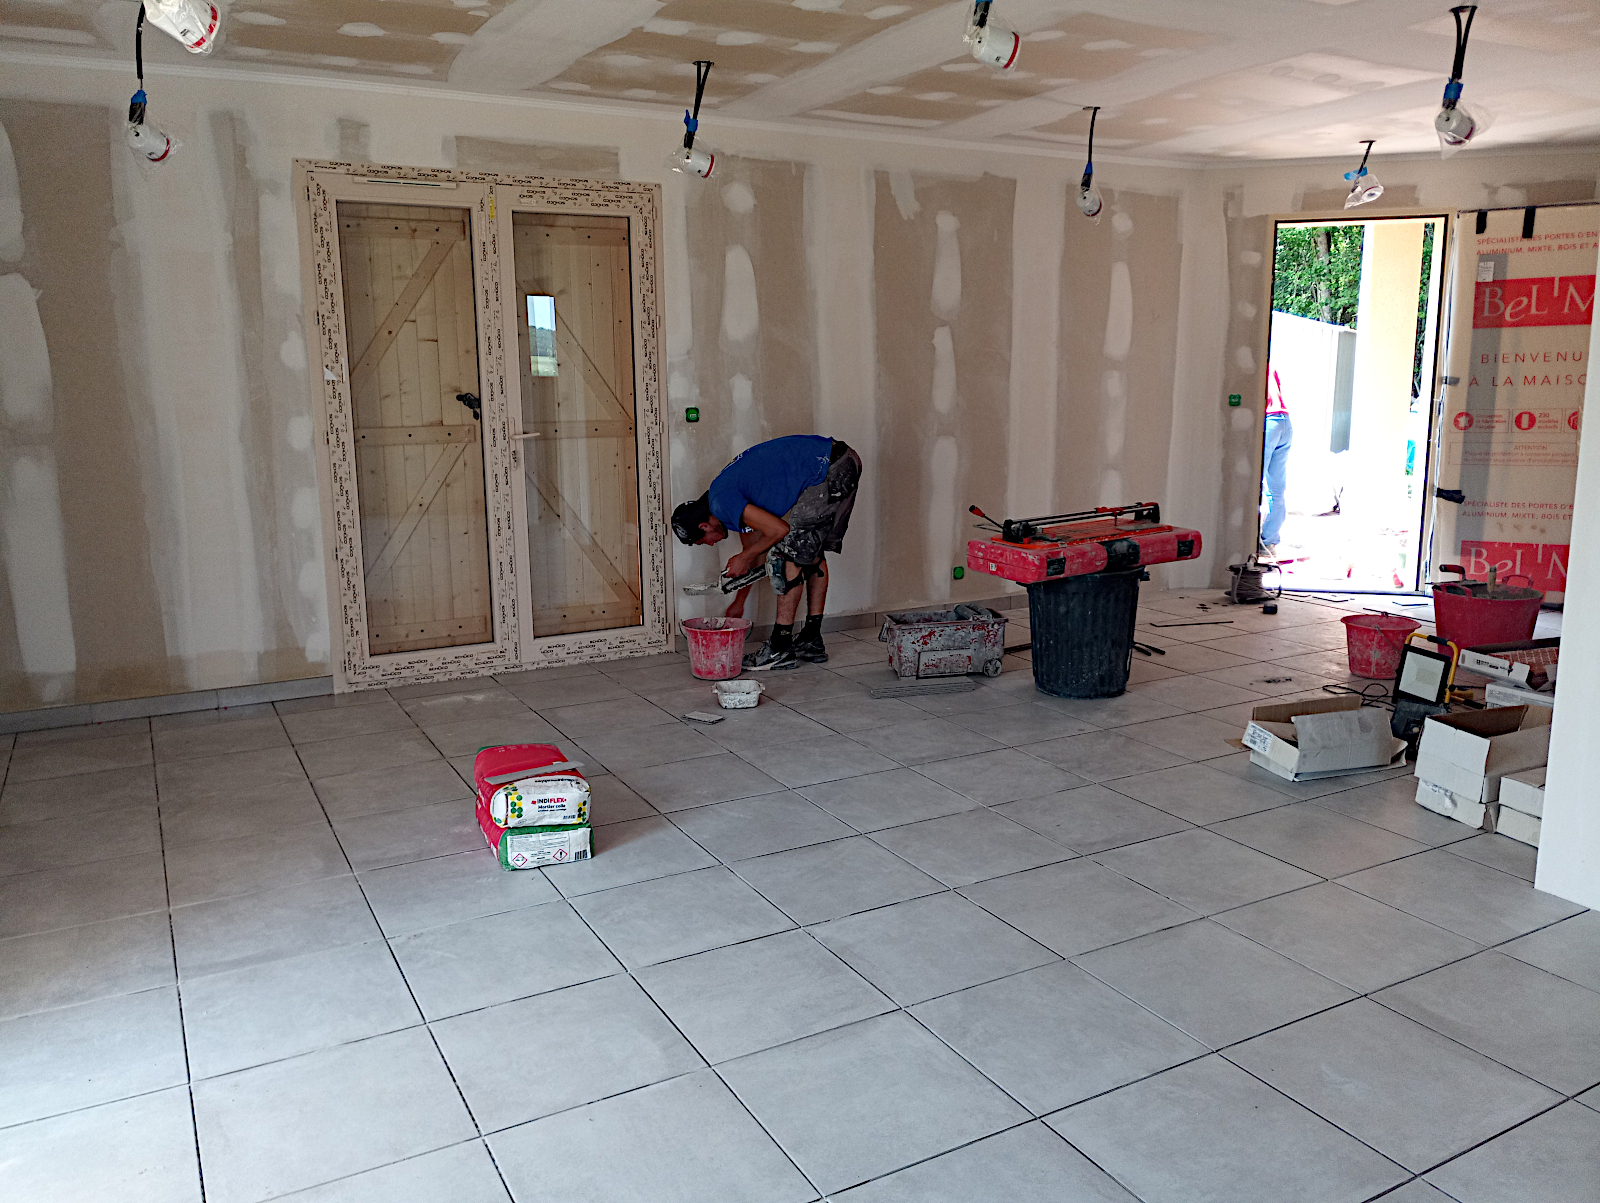
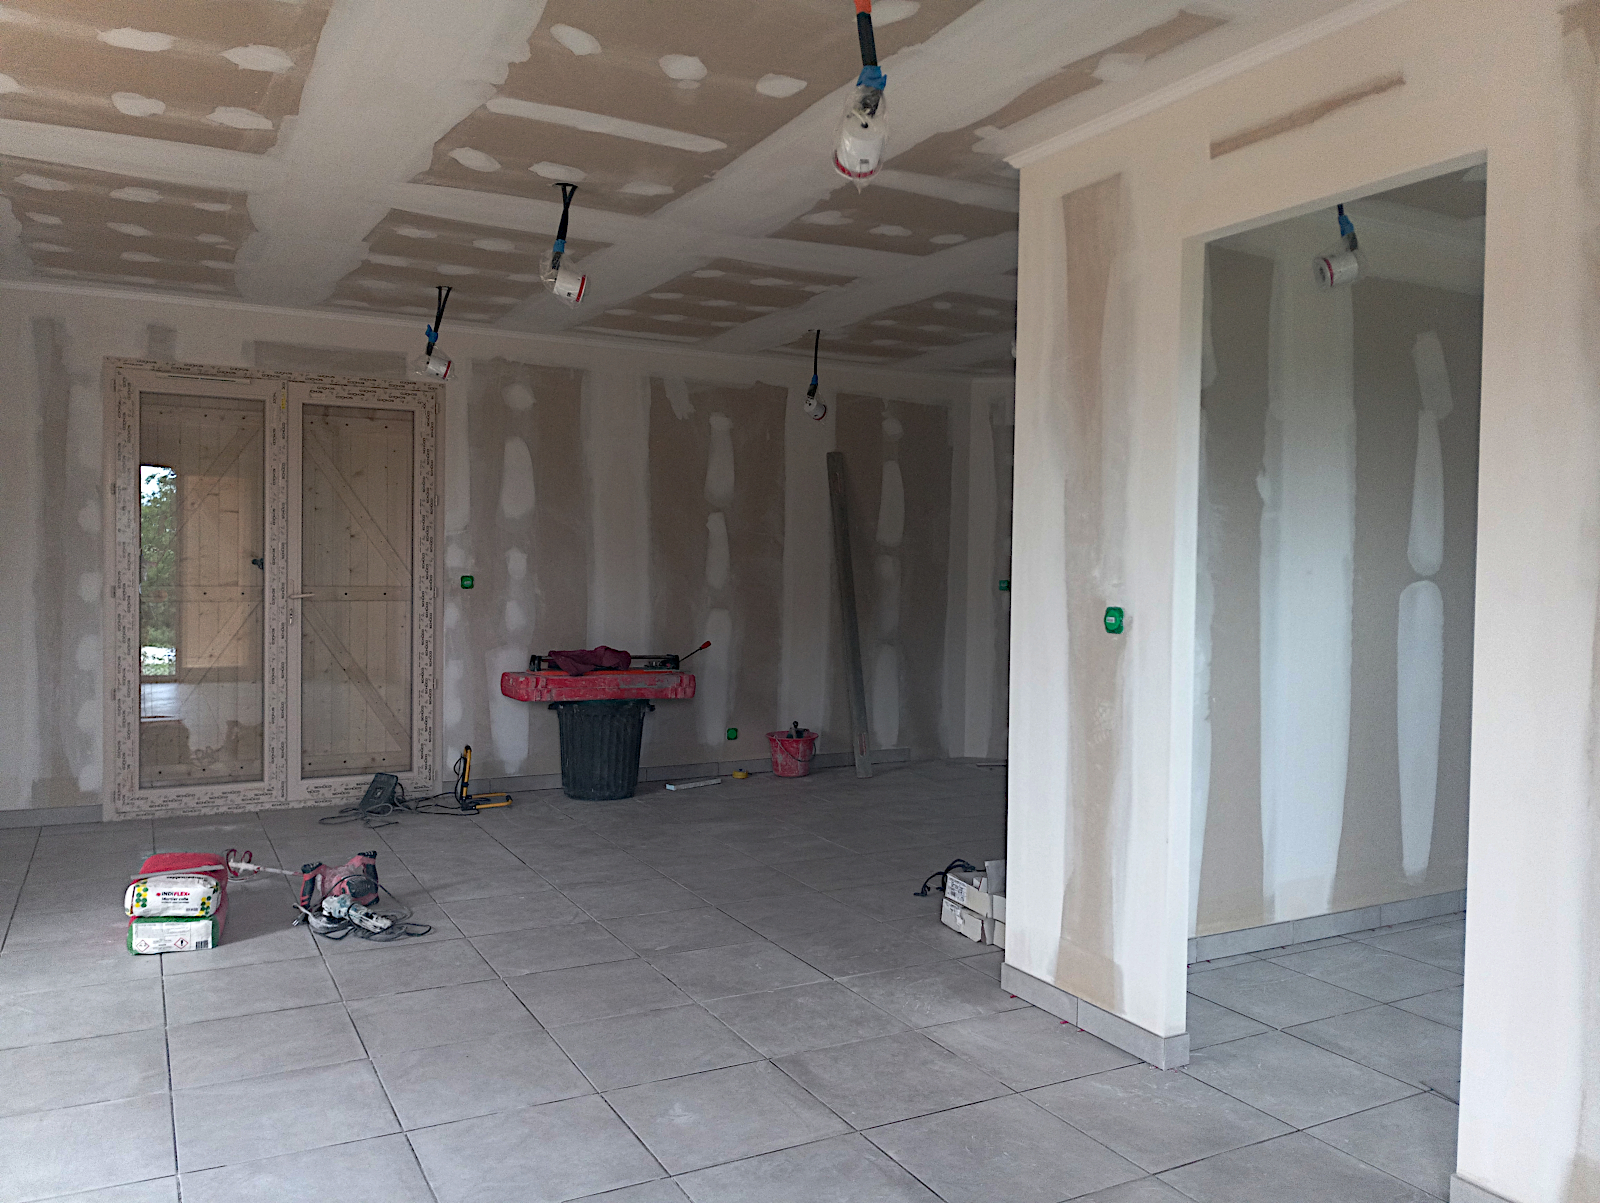
Given the upward price trend, there seemed to me to be no point in not buying the items that I need now, especially now the floor is down in the house and they can be stored in the living room when they arrive. So I ordered a hot plate, a dishwasher (ouch!), a fridge and an oven. The hot plate and the dishwasher will be delivered in a few days time but the fridge and the oven I ordered to be picked up from local stores, the fridge from Conforama in Périgueux and the oven from Electro Depot in Brive.

The fridge also will not be available for a few days but the oven was available for pick up today, so that’s what I decided to do come late afternoon after I’d got all of the purchases organised. I have to say, the Electro Depot ‘drive’ system worked incredibly well.

They sent a text message for me to confirm when I’d be arriving to pick the item up with a link for me to click on arrival adding which parking bay I’d be in. I then went to the door and within a minute or so a young lady arrived wheeling a parcel on a trolley. I asked her which bay she was going to and she told me ‘number 3’. That’s me I said and she gave me a hand to load it into my car. Great system.

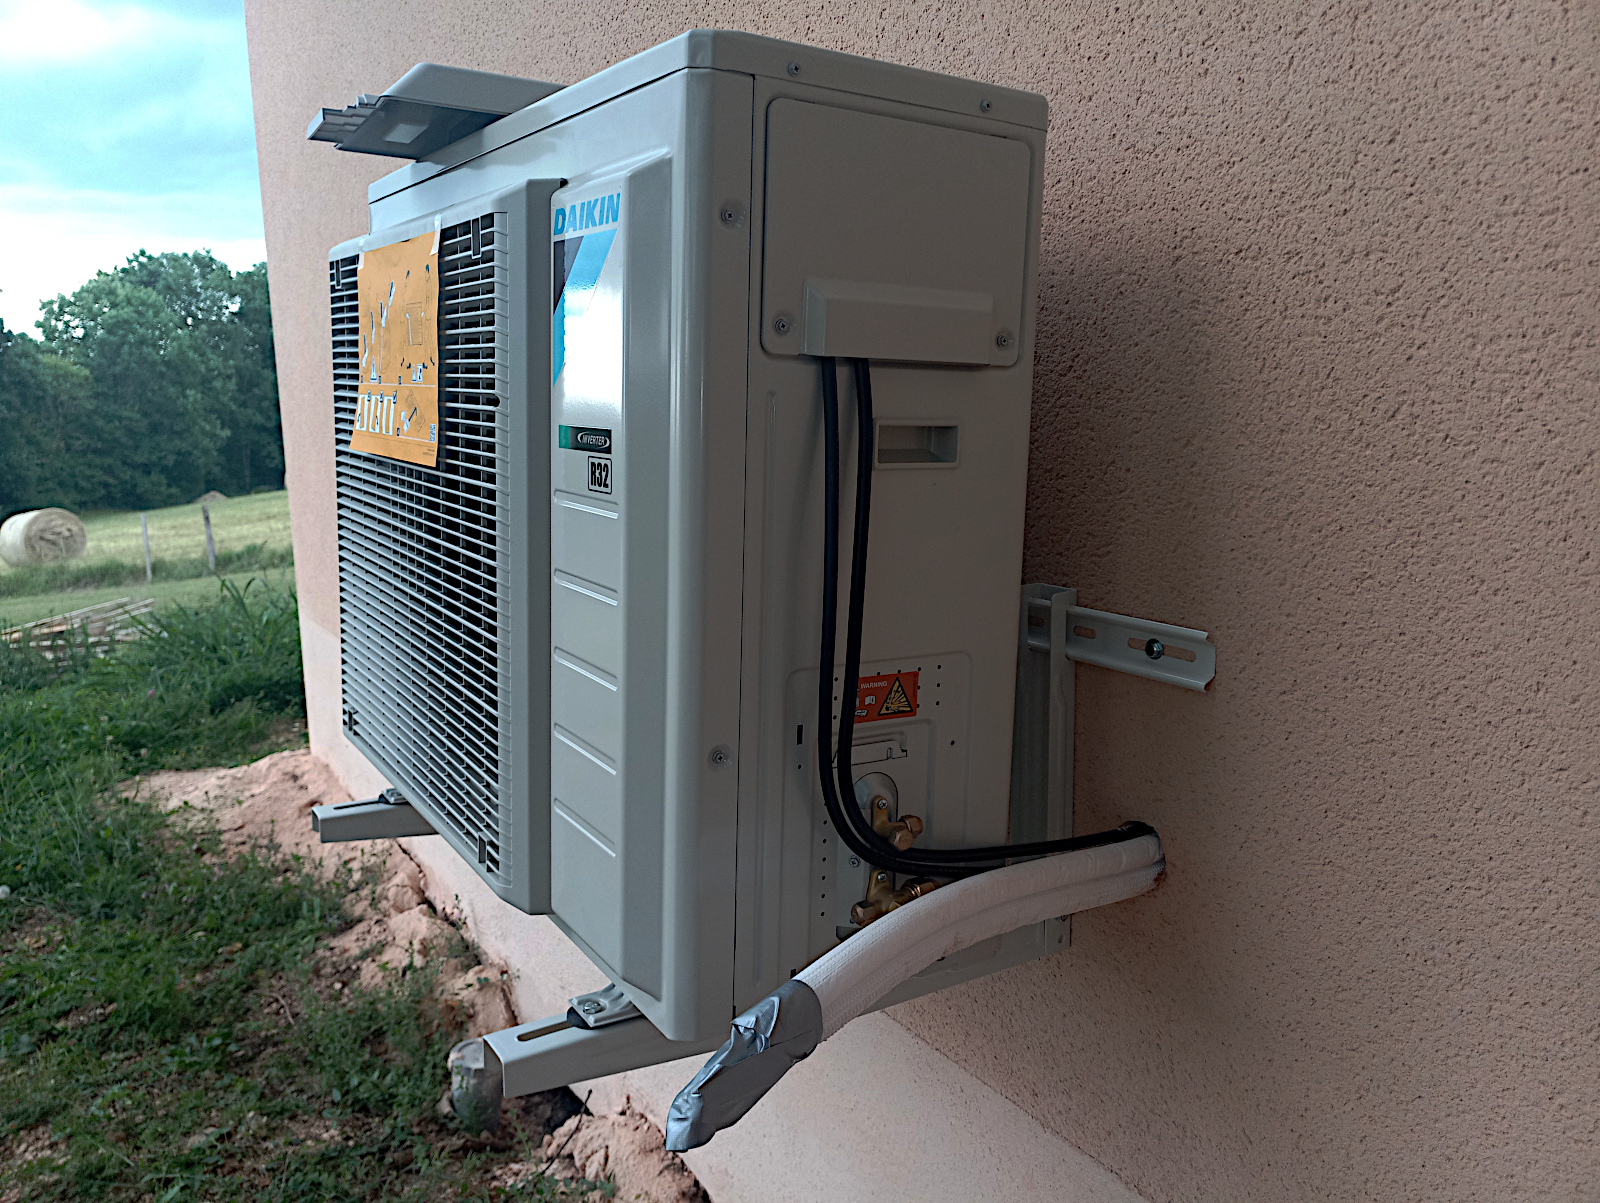
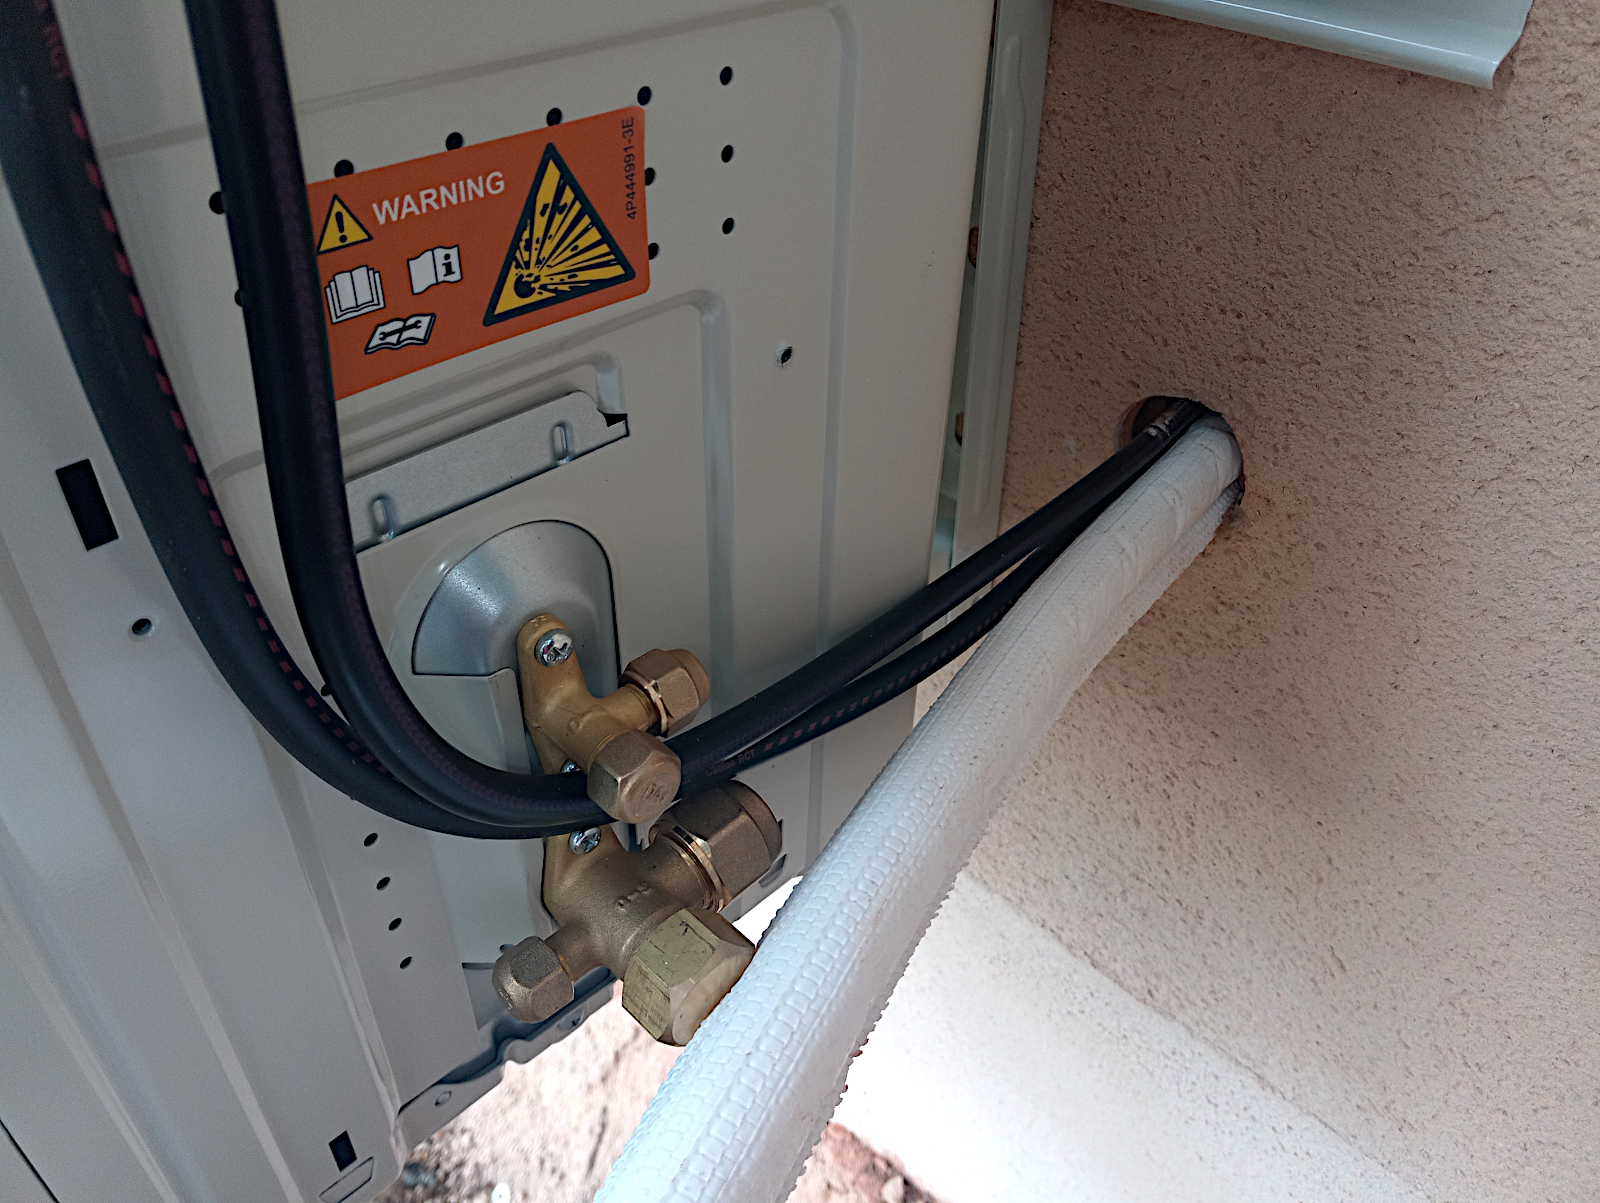
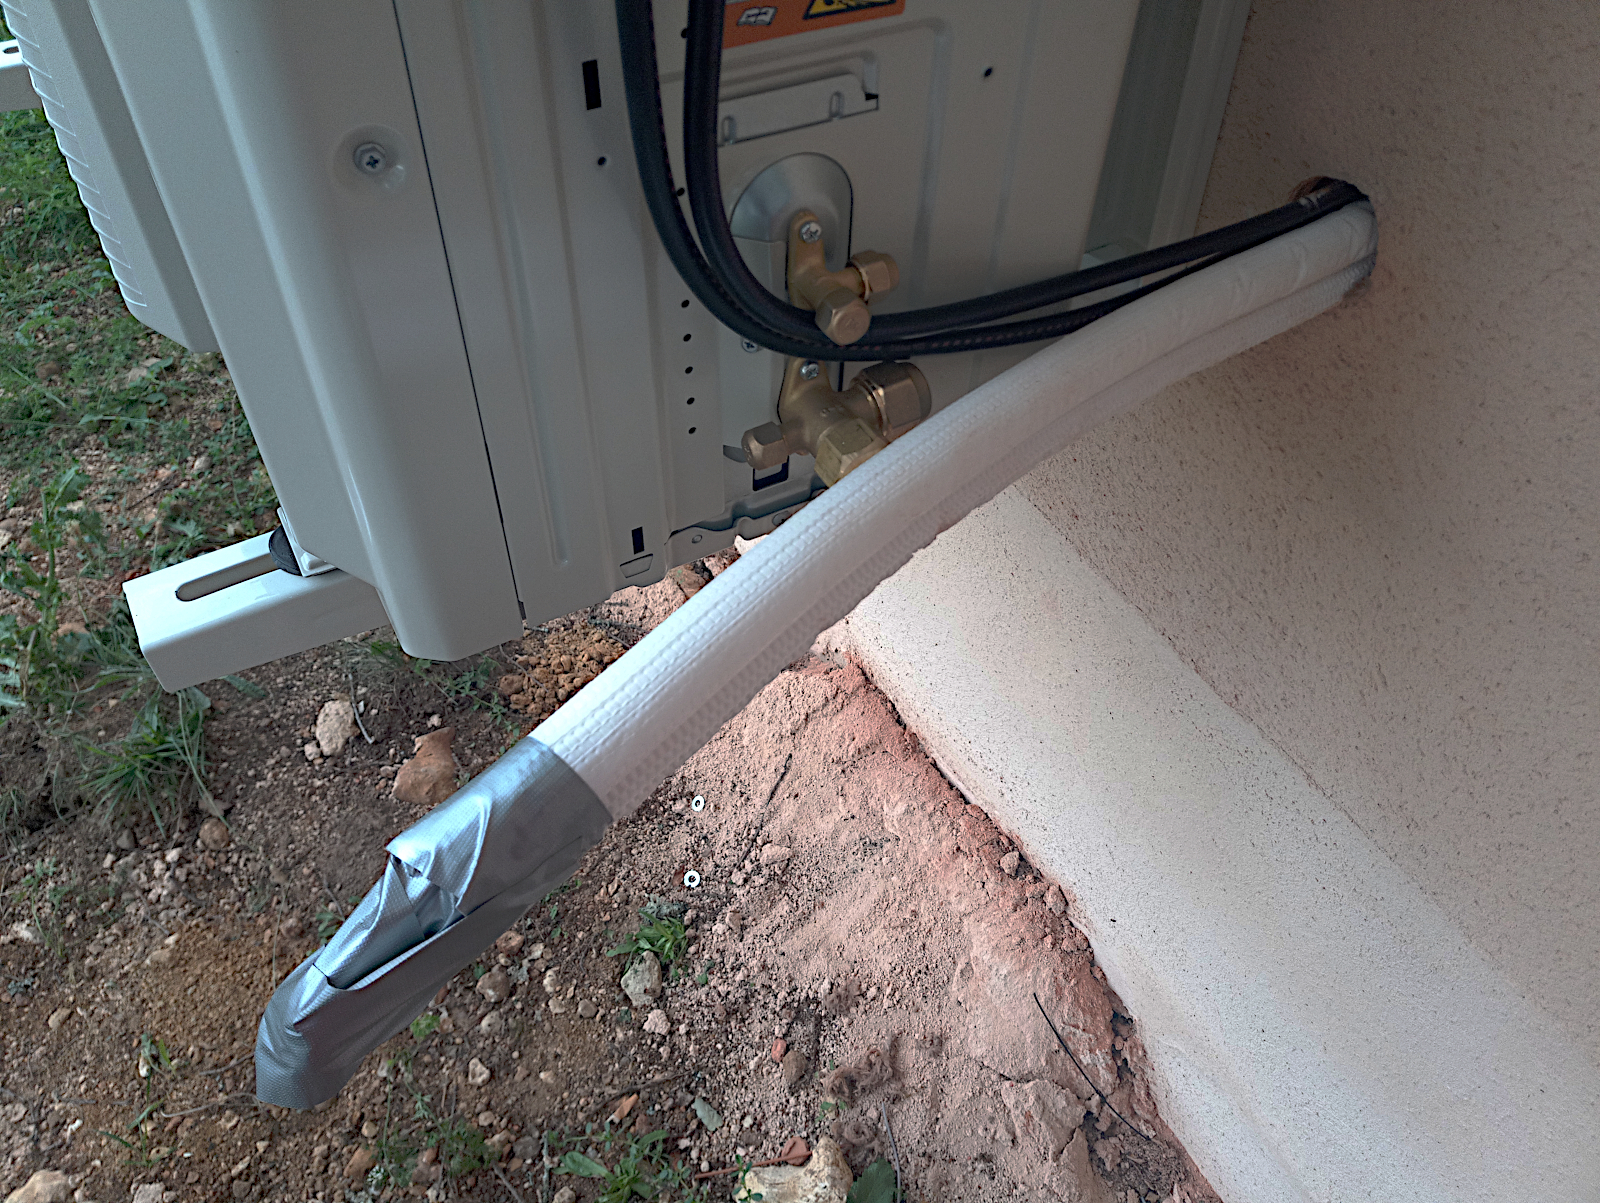
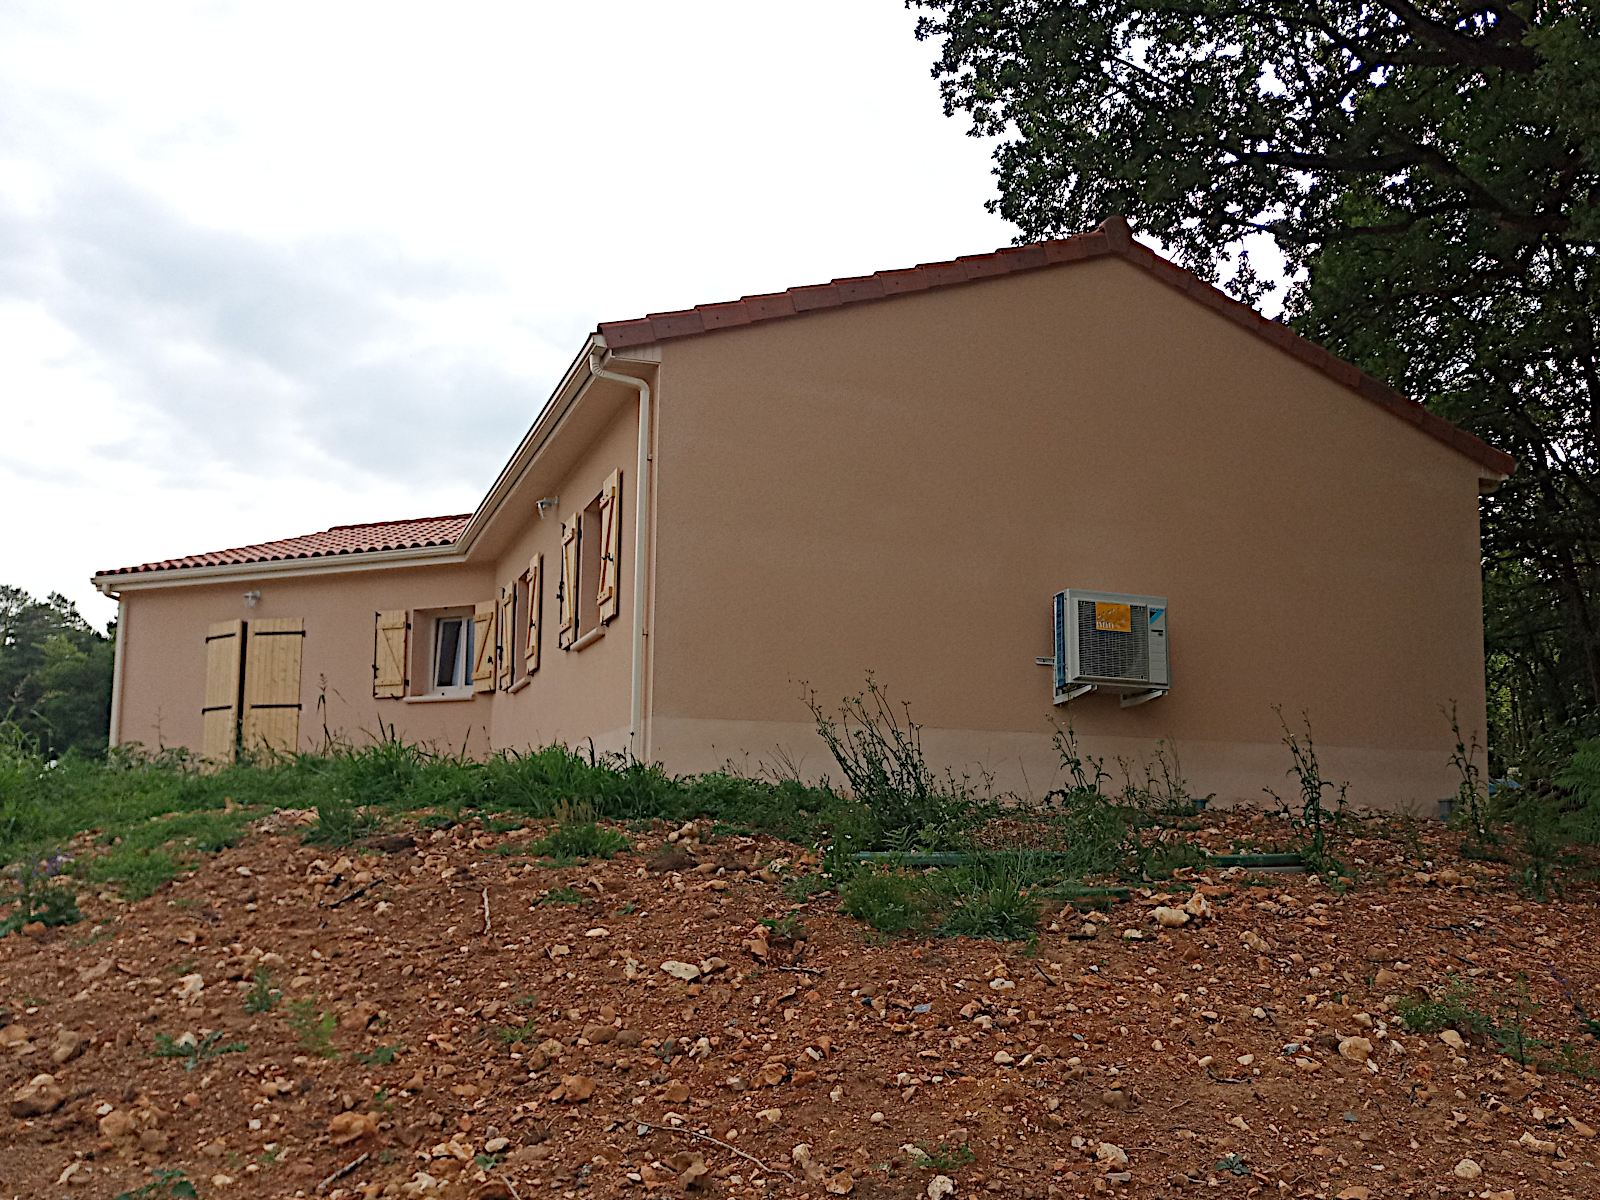
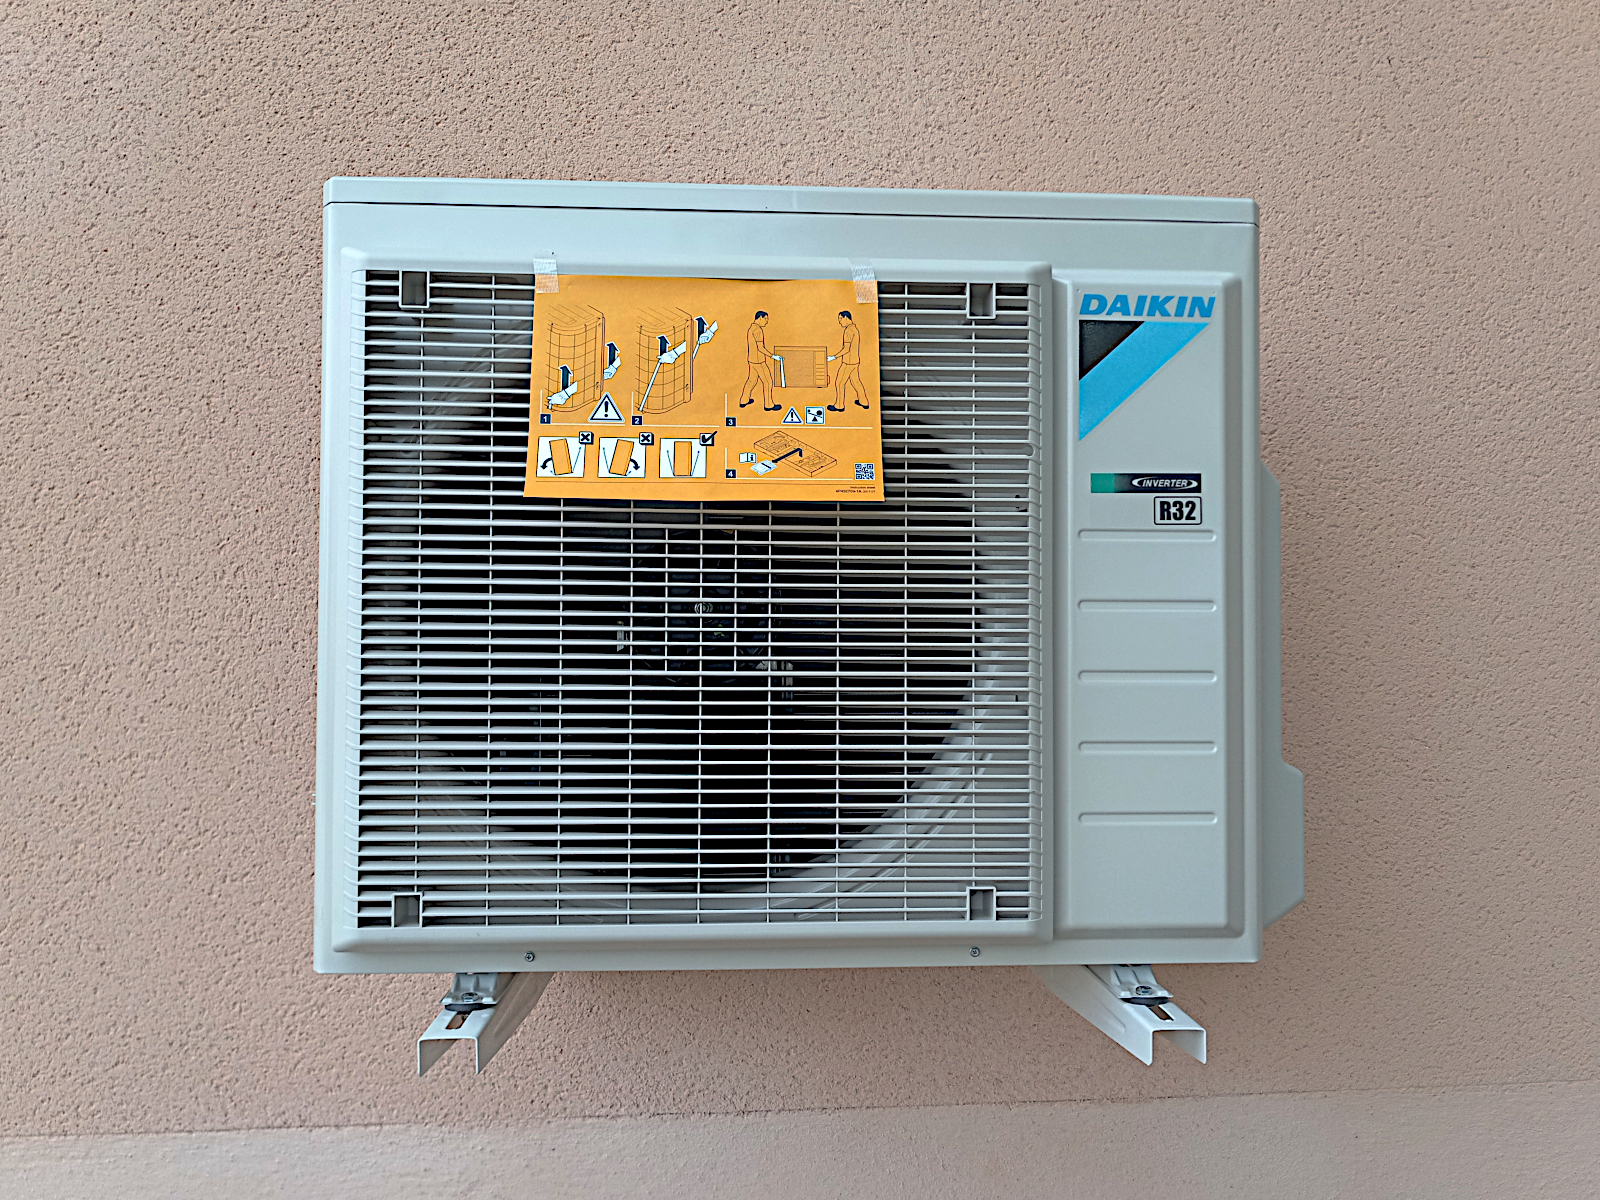
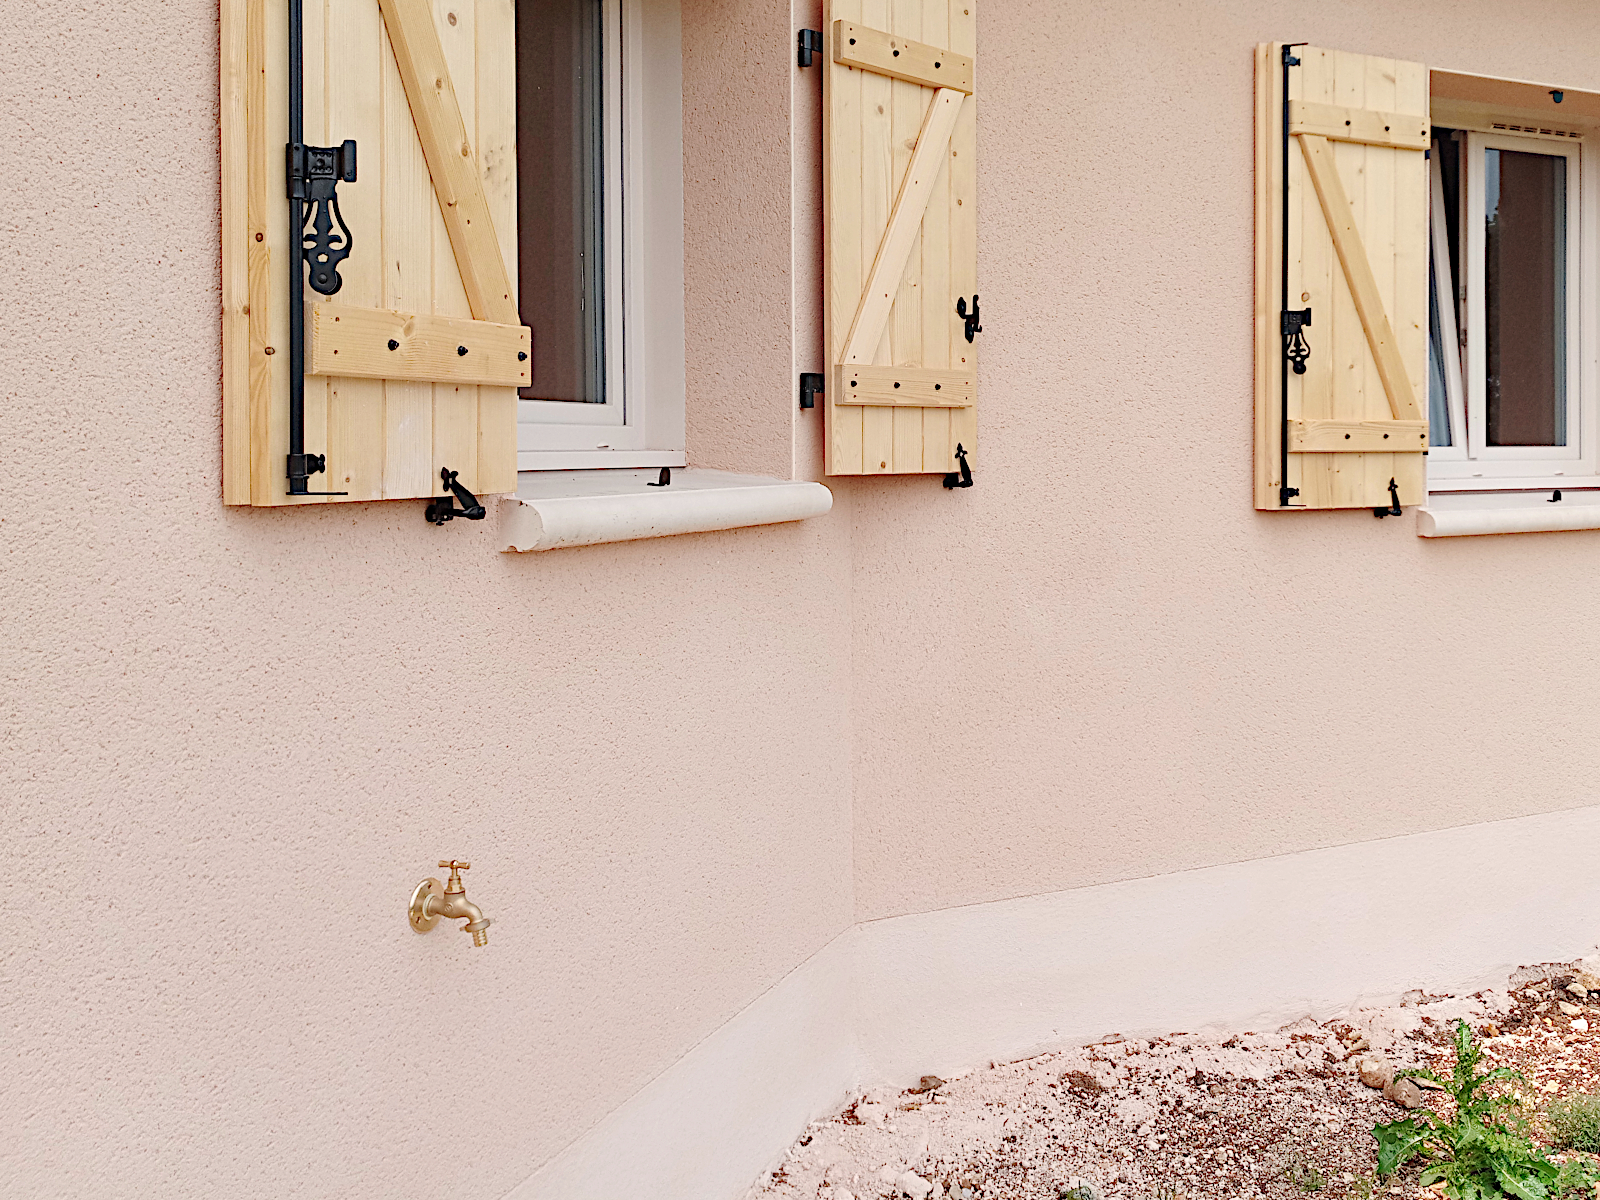
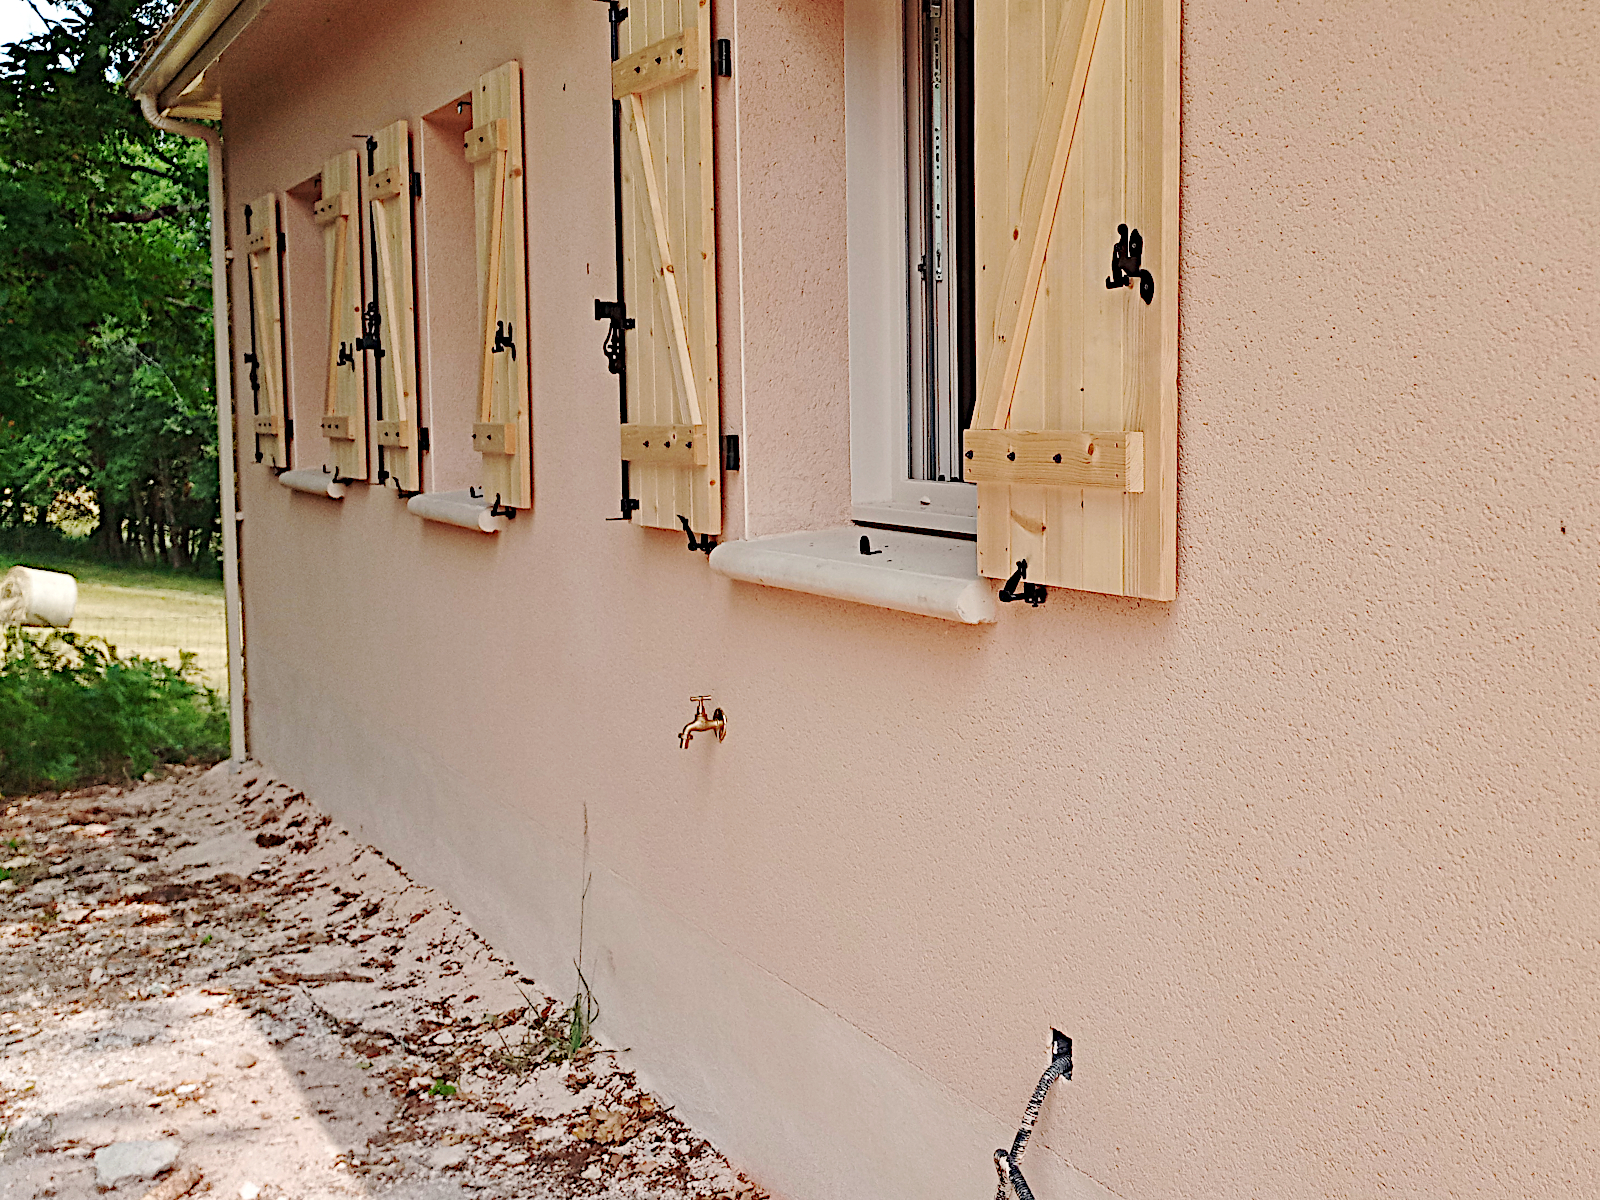
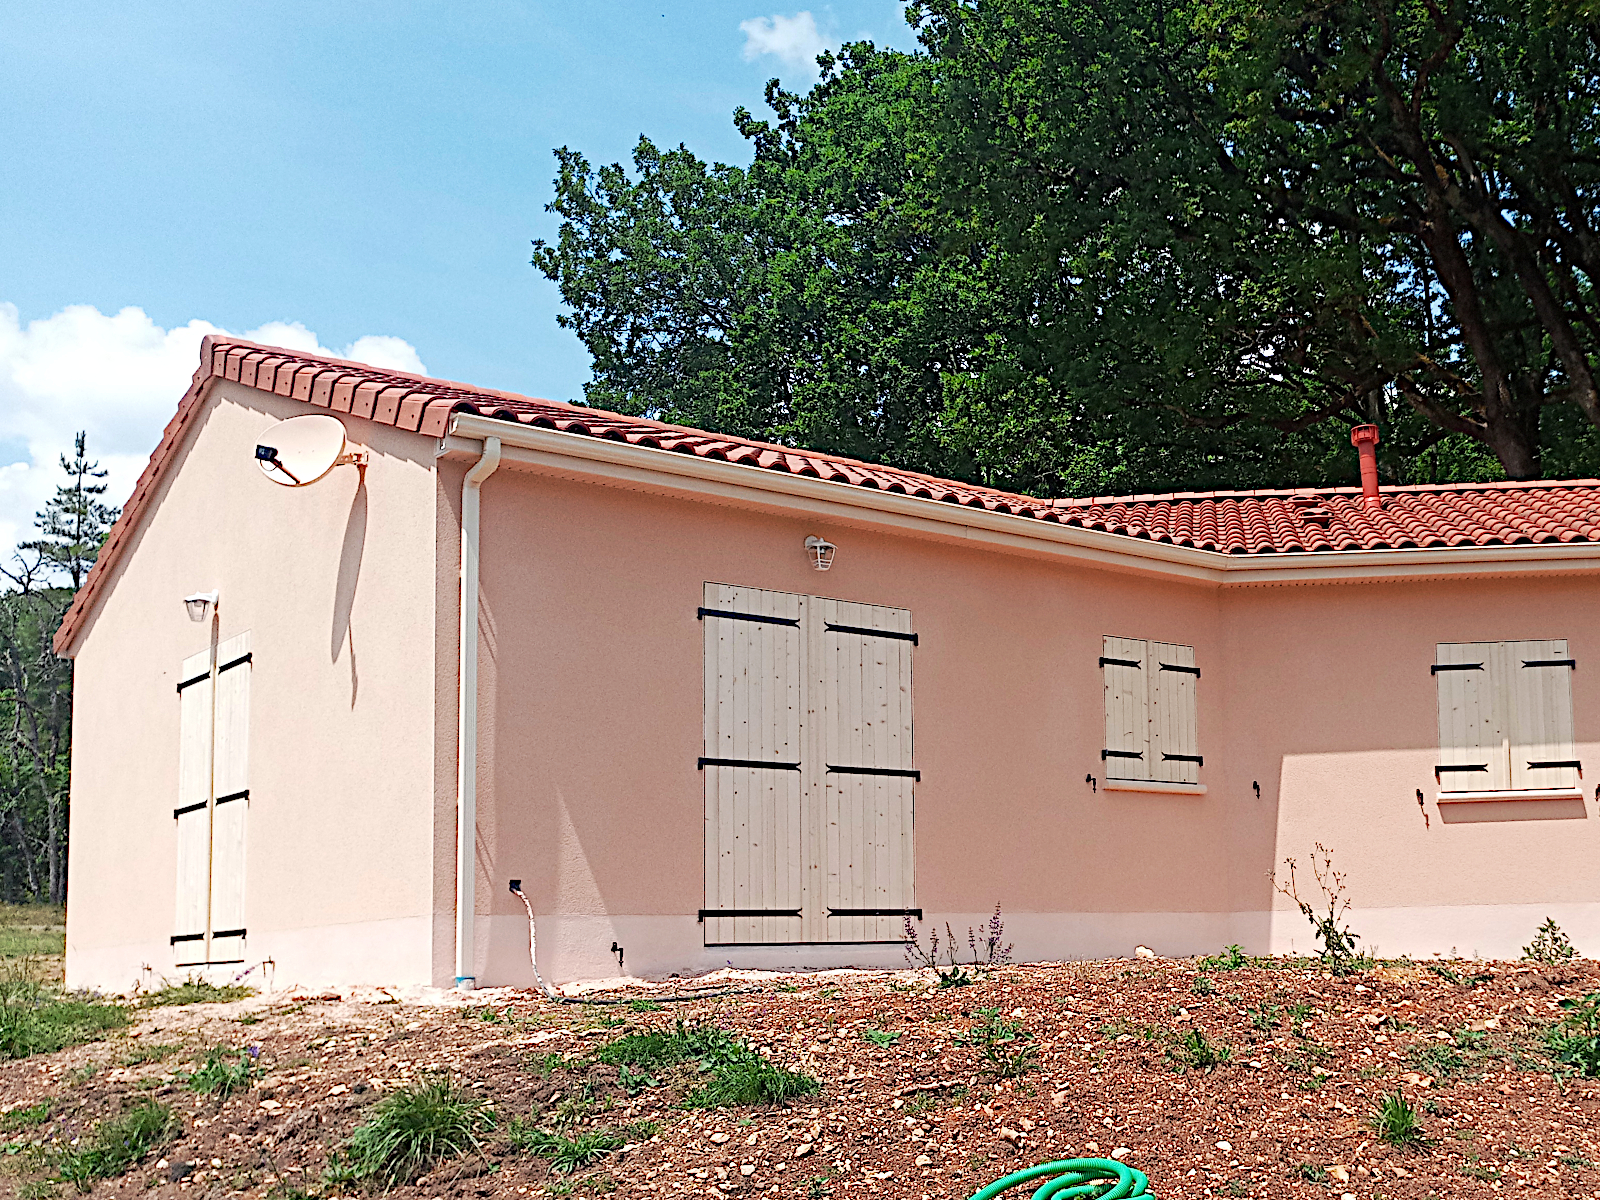
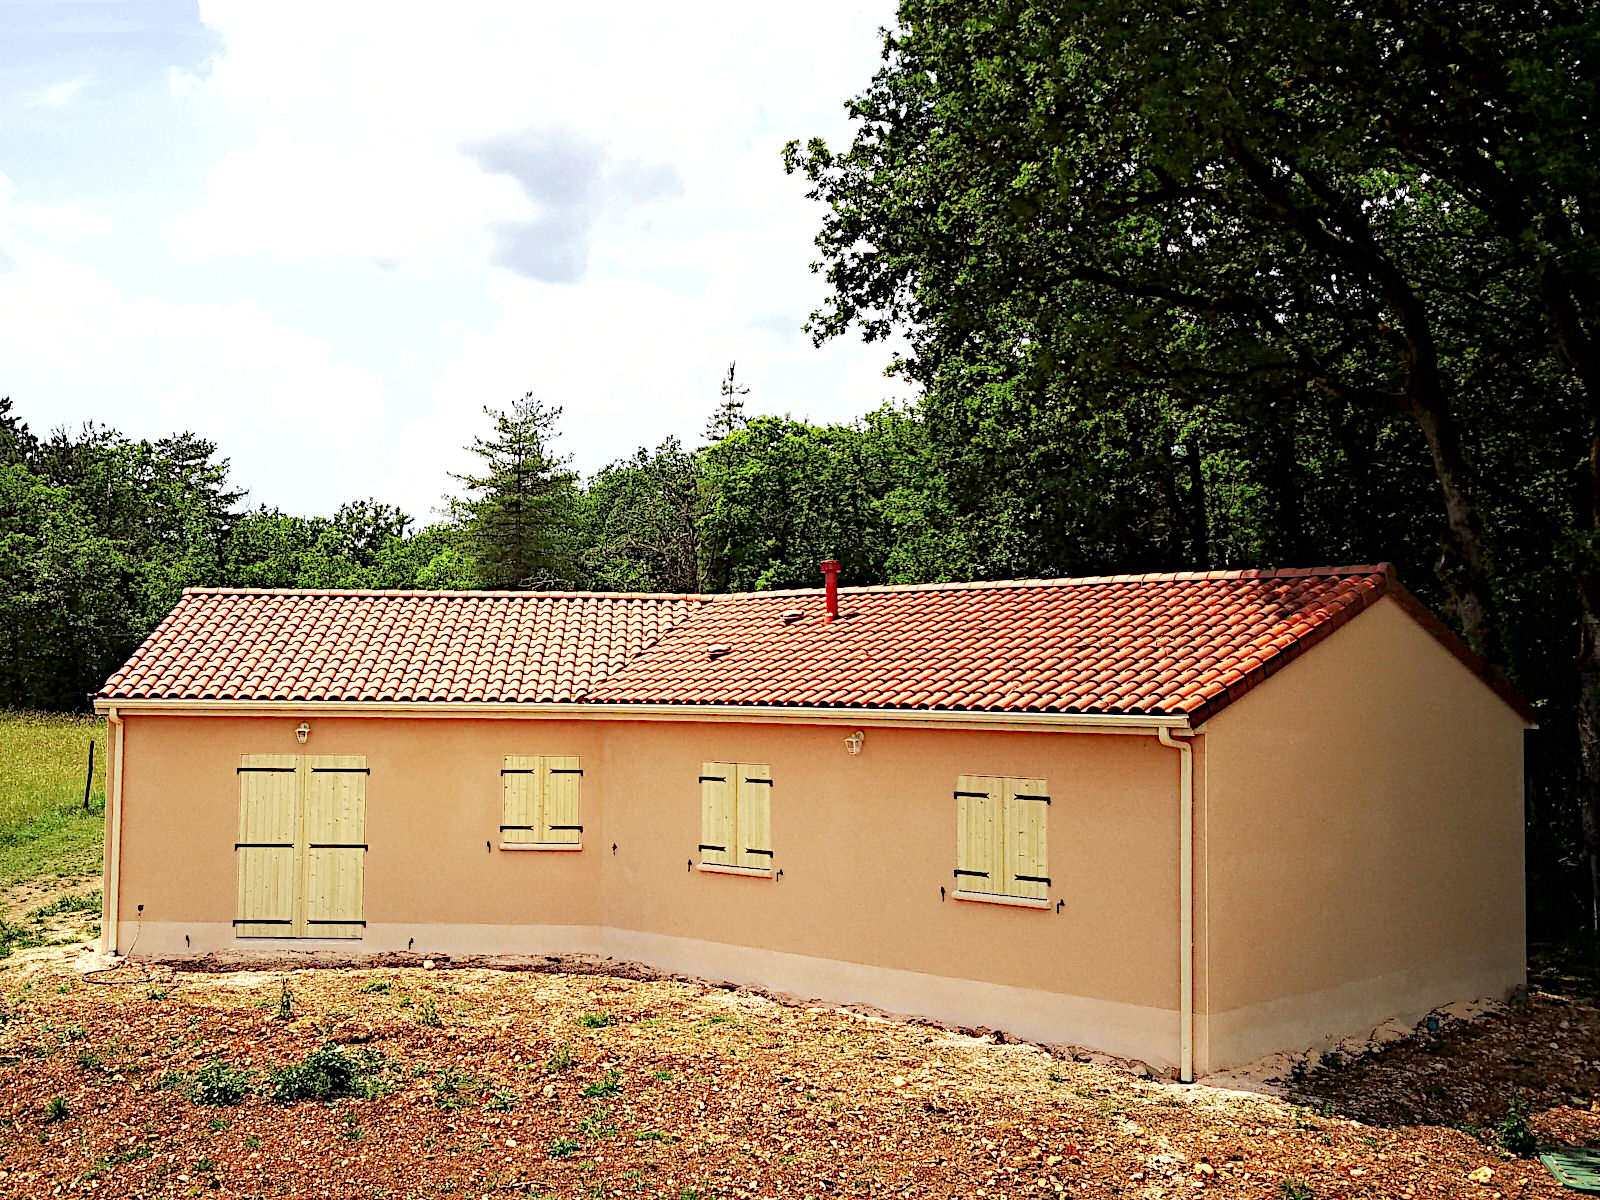
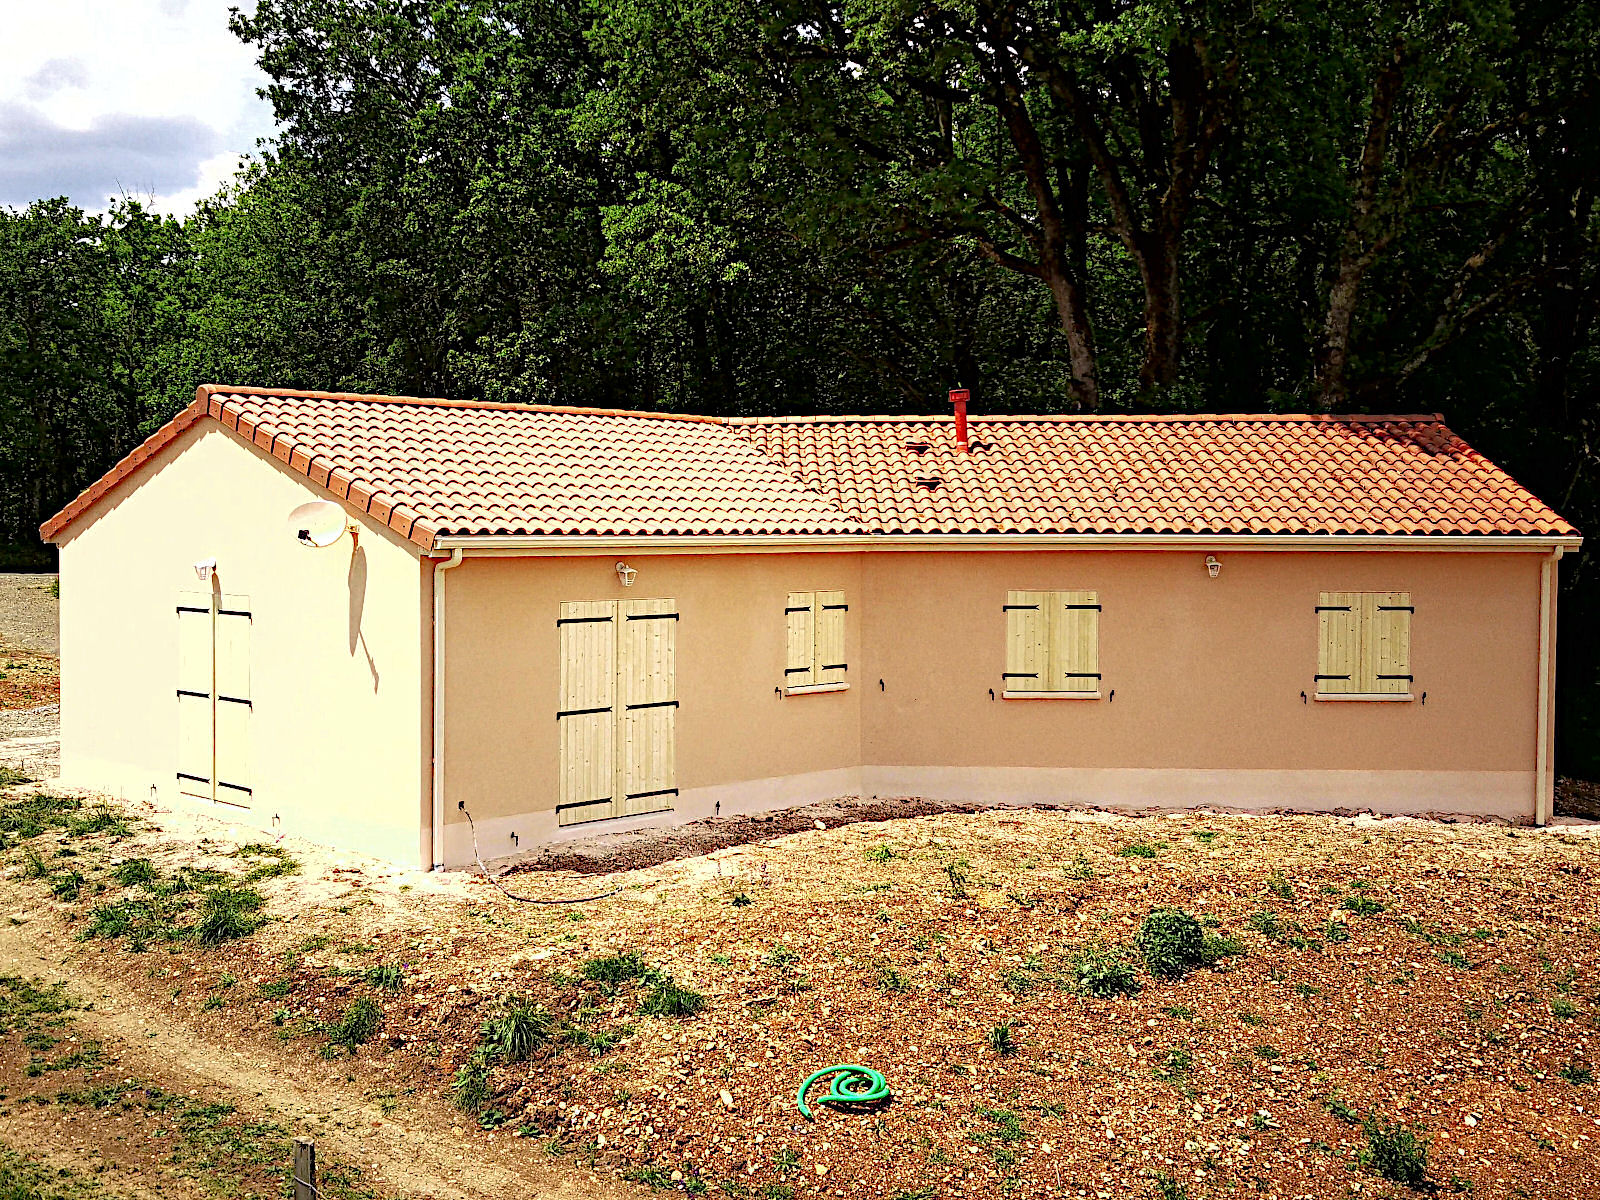
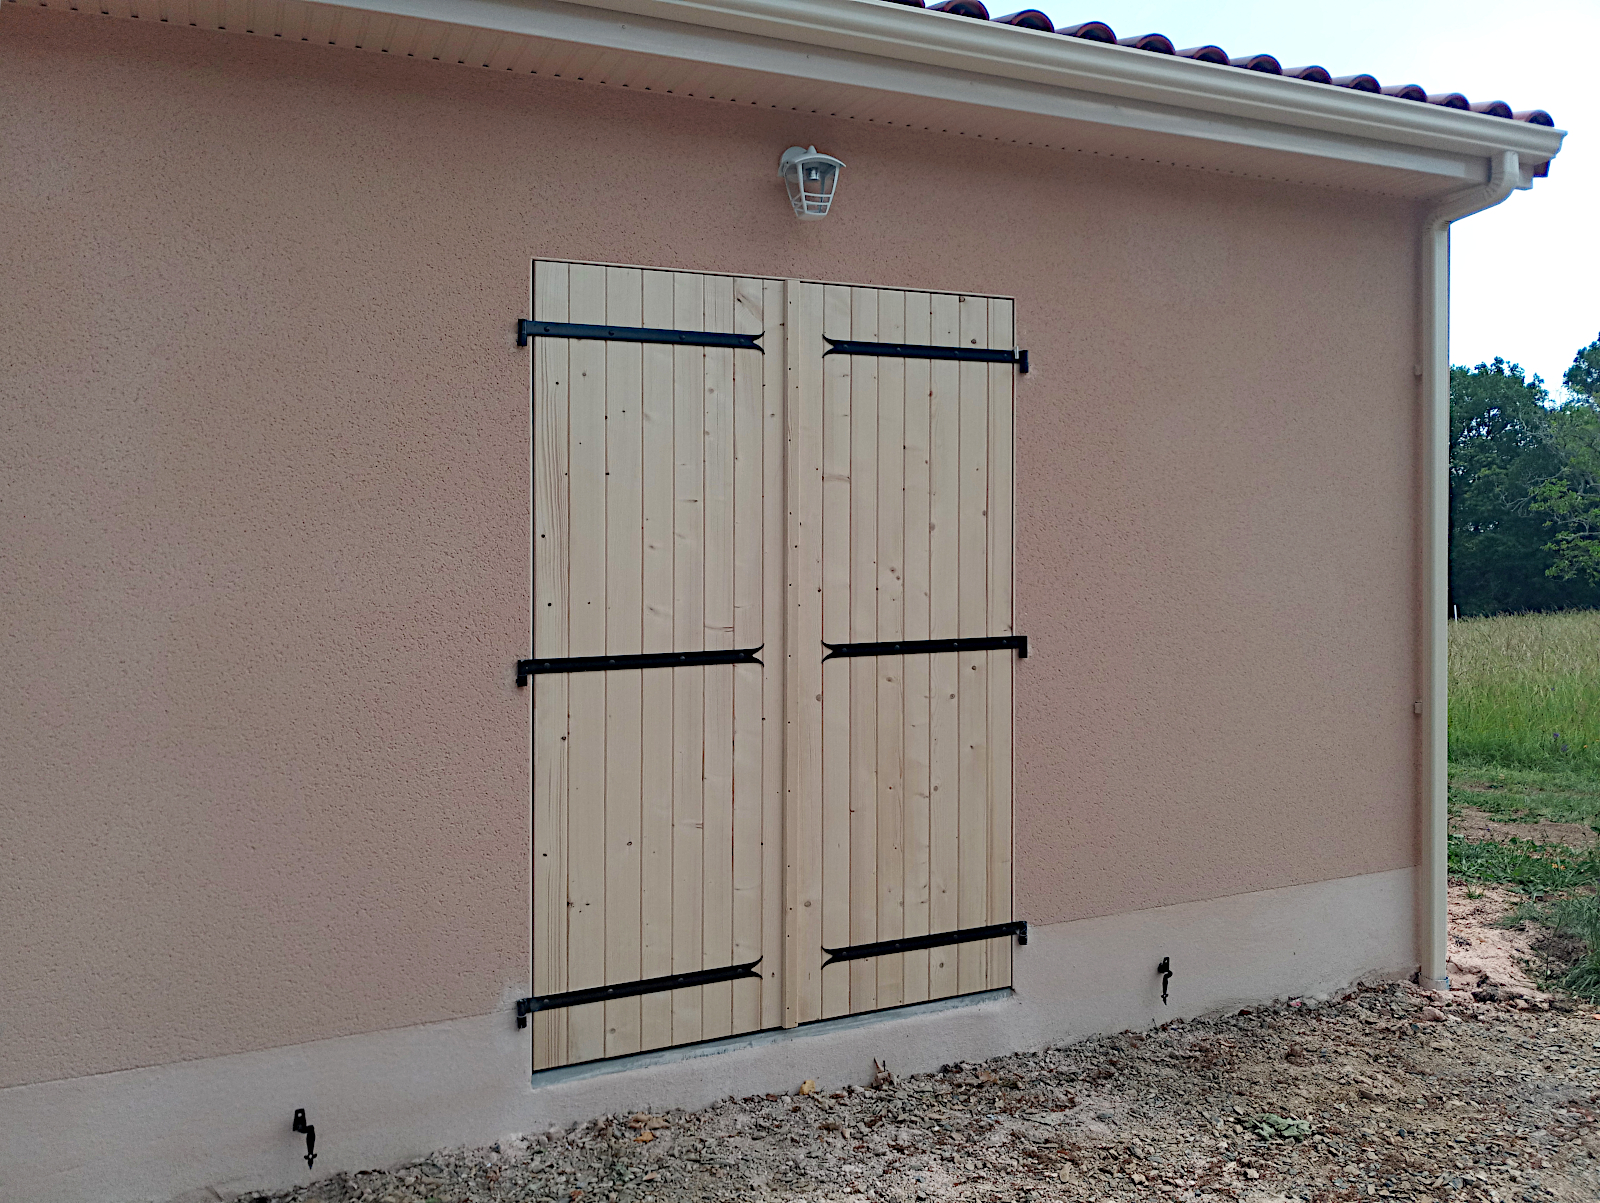
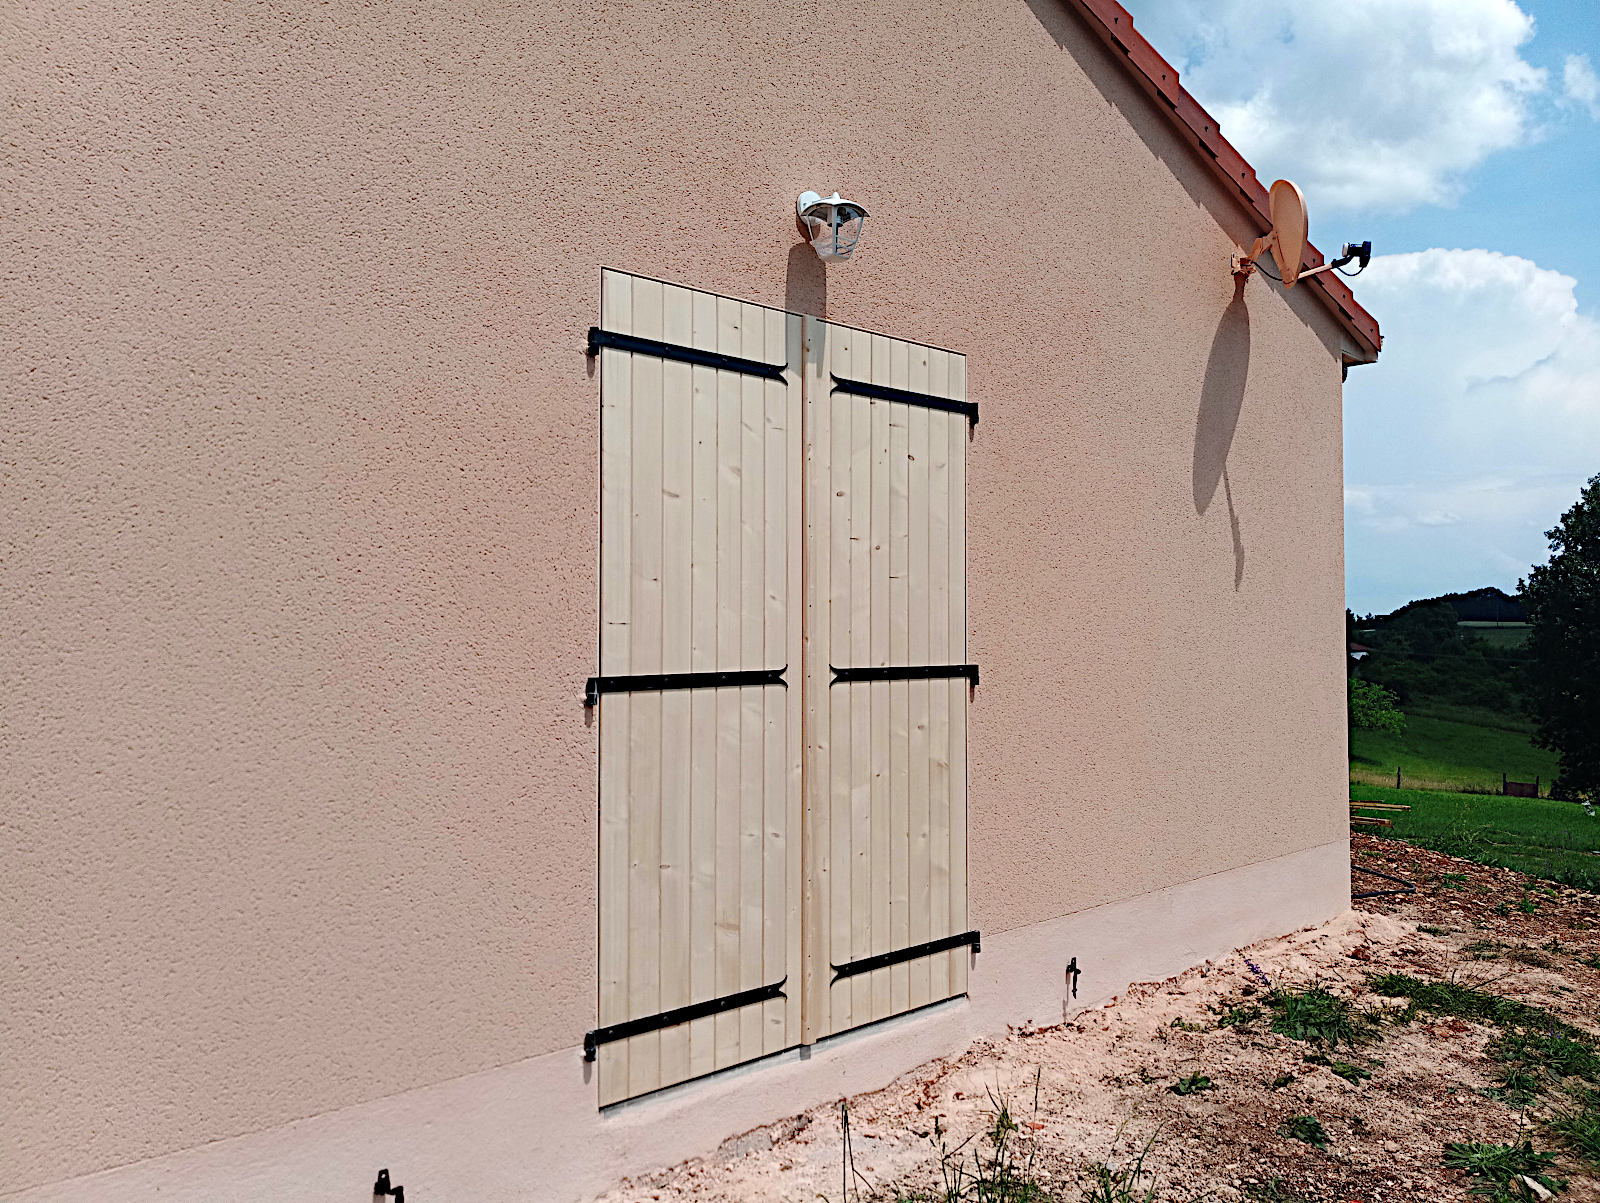
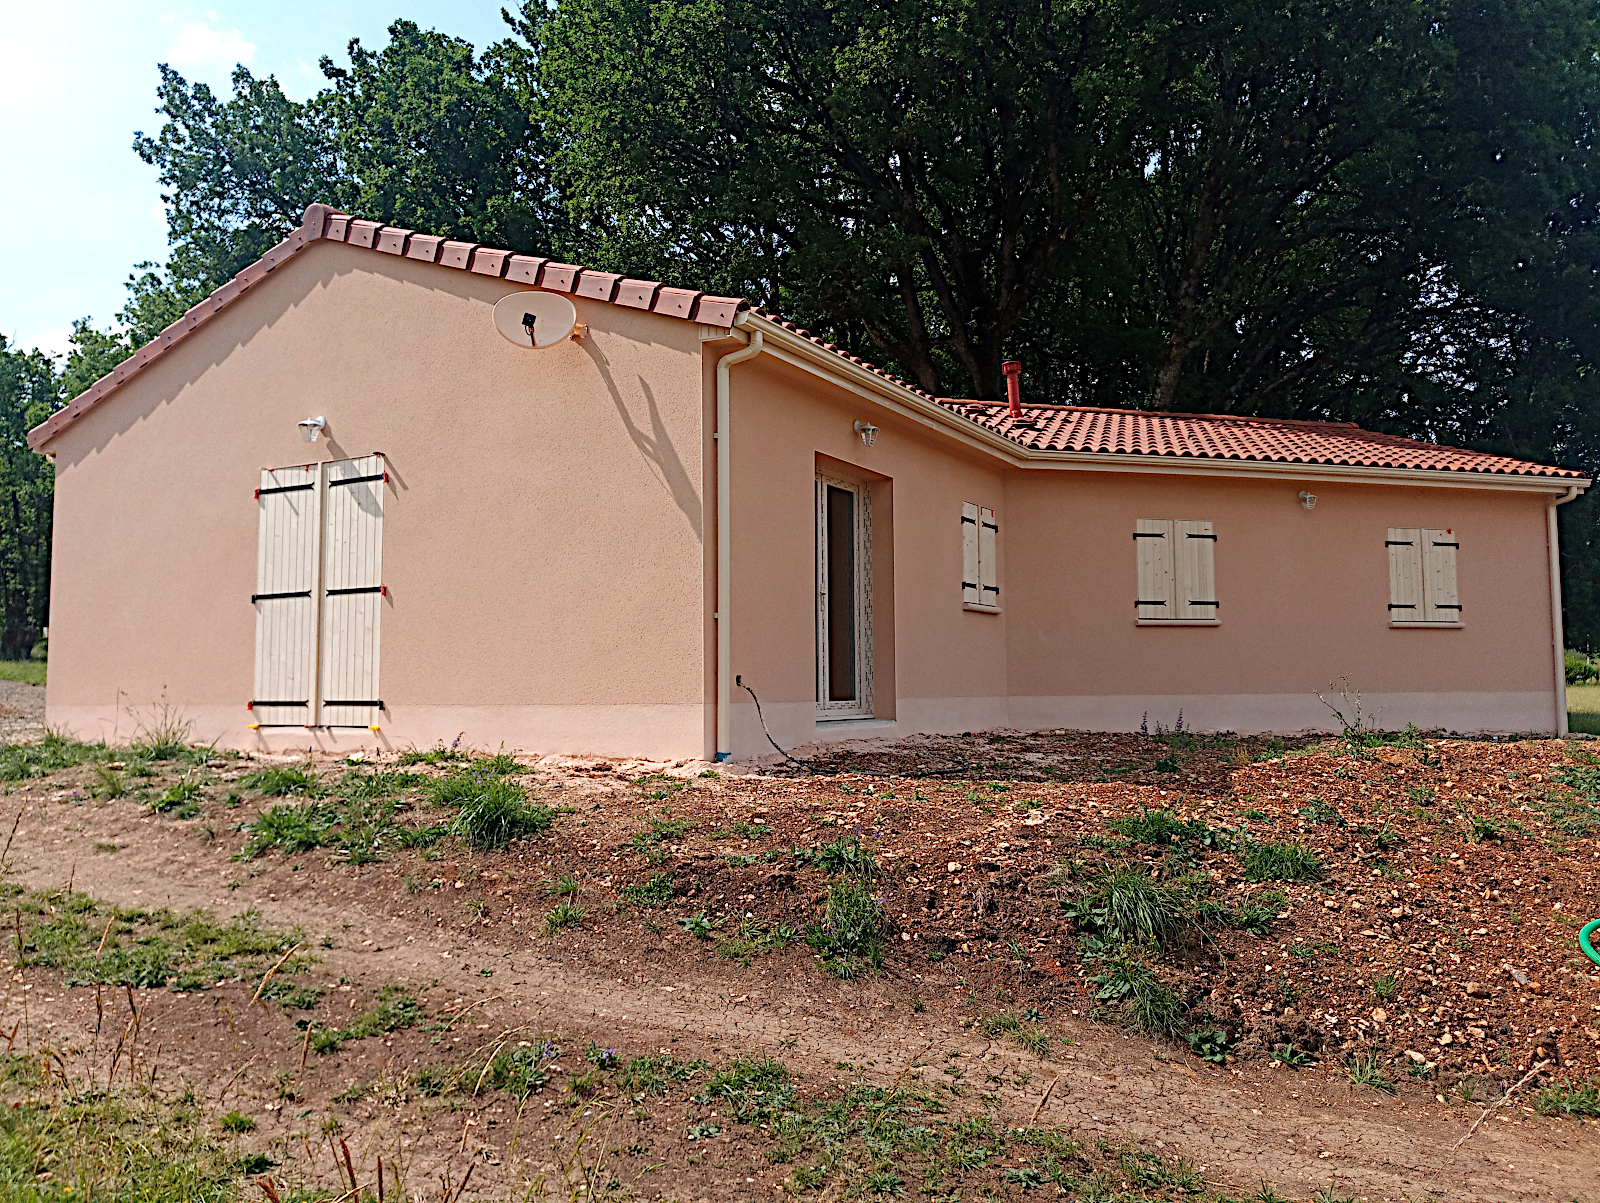
I checked what the plumber had been up to while I’d been gone, starting with the exterior heat pump unit that’s now attached, but not connected, on the house’s northern wall.

null

null

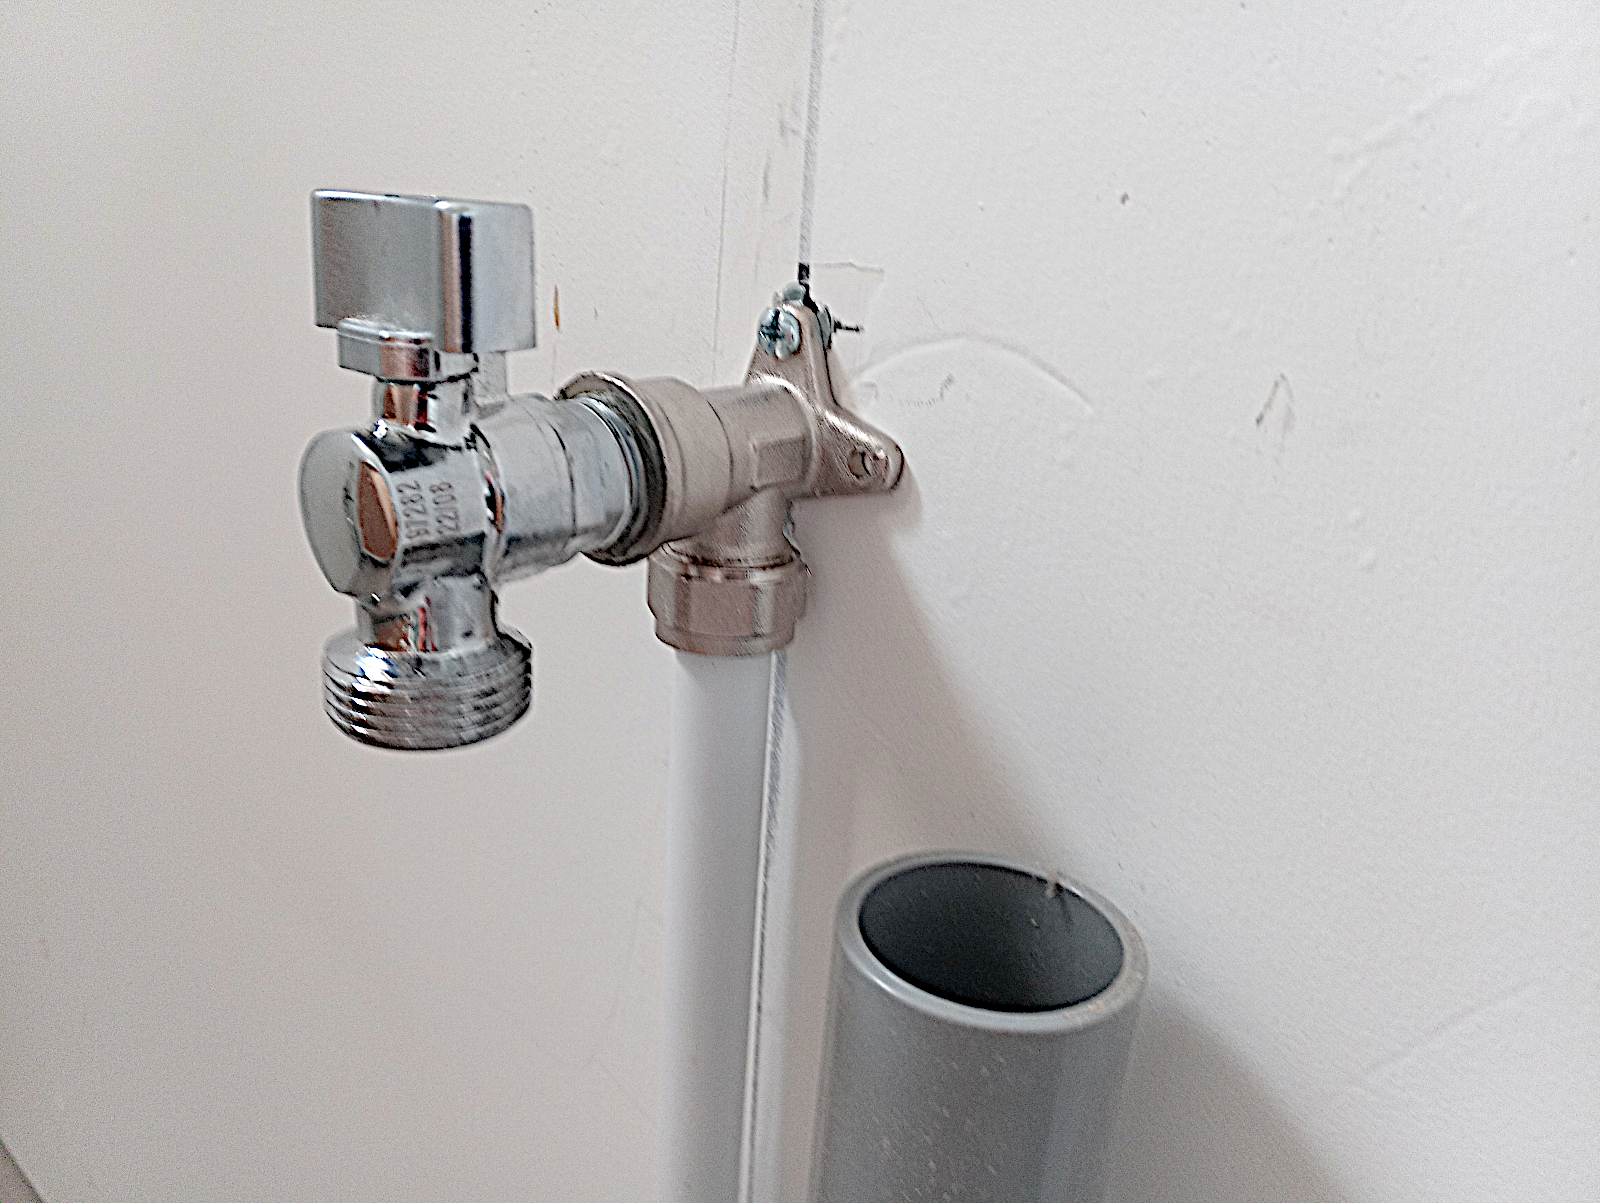
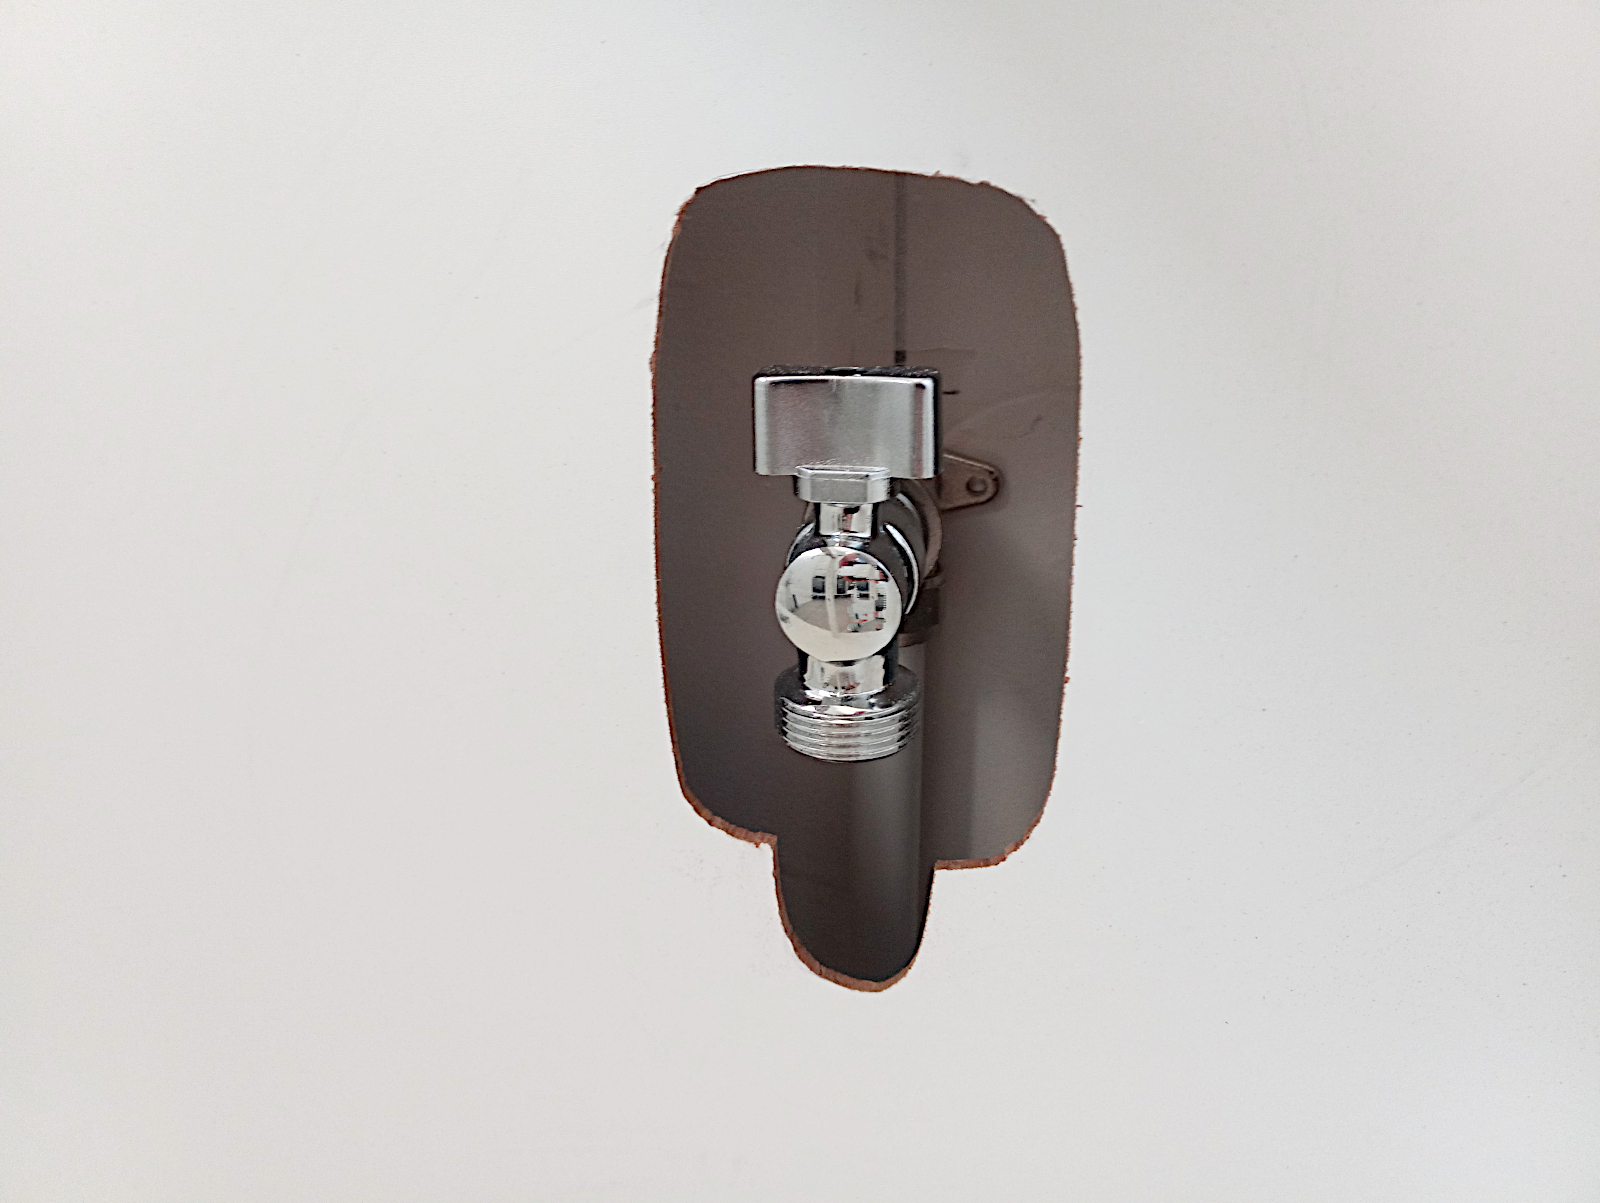
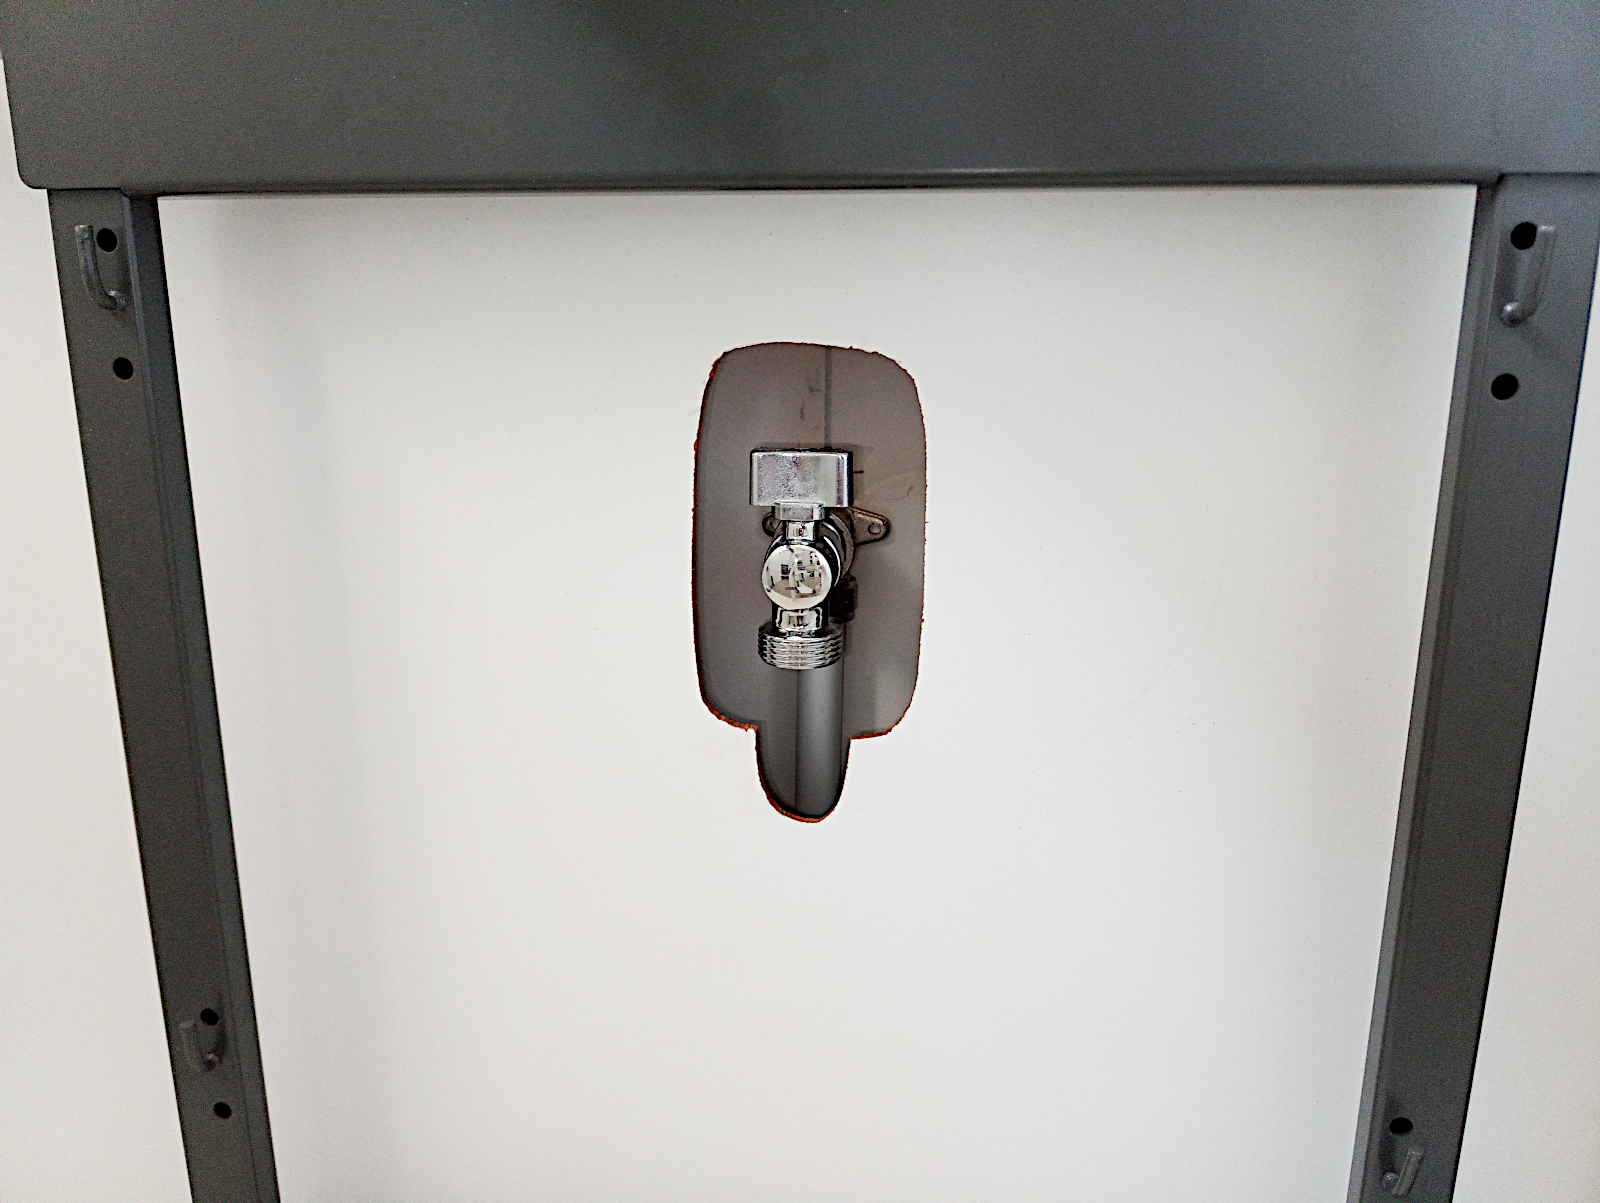
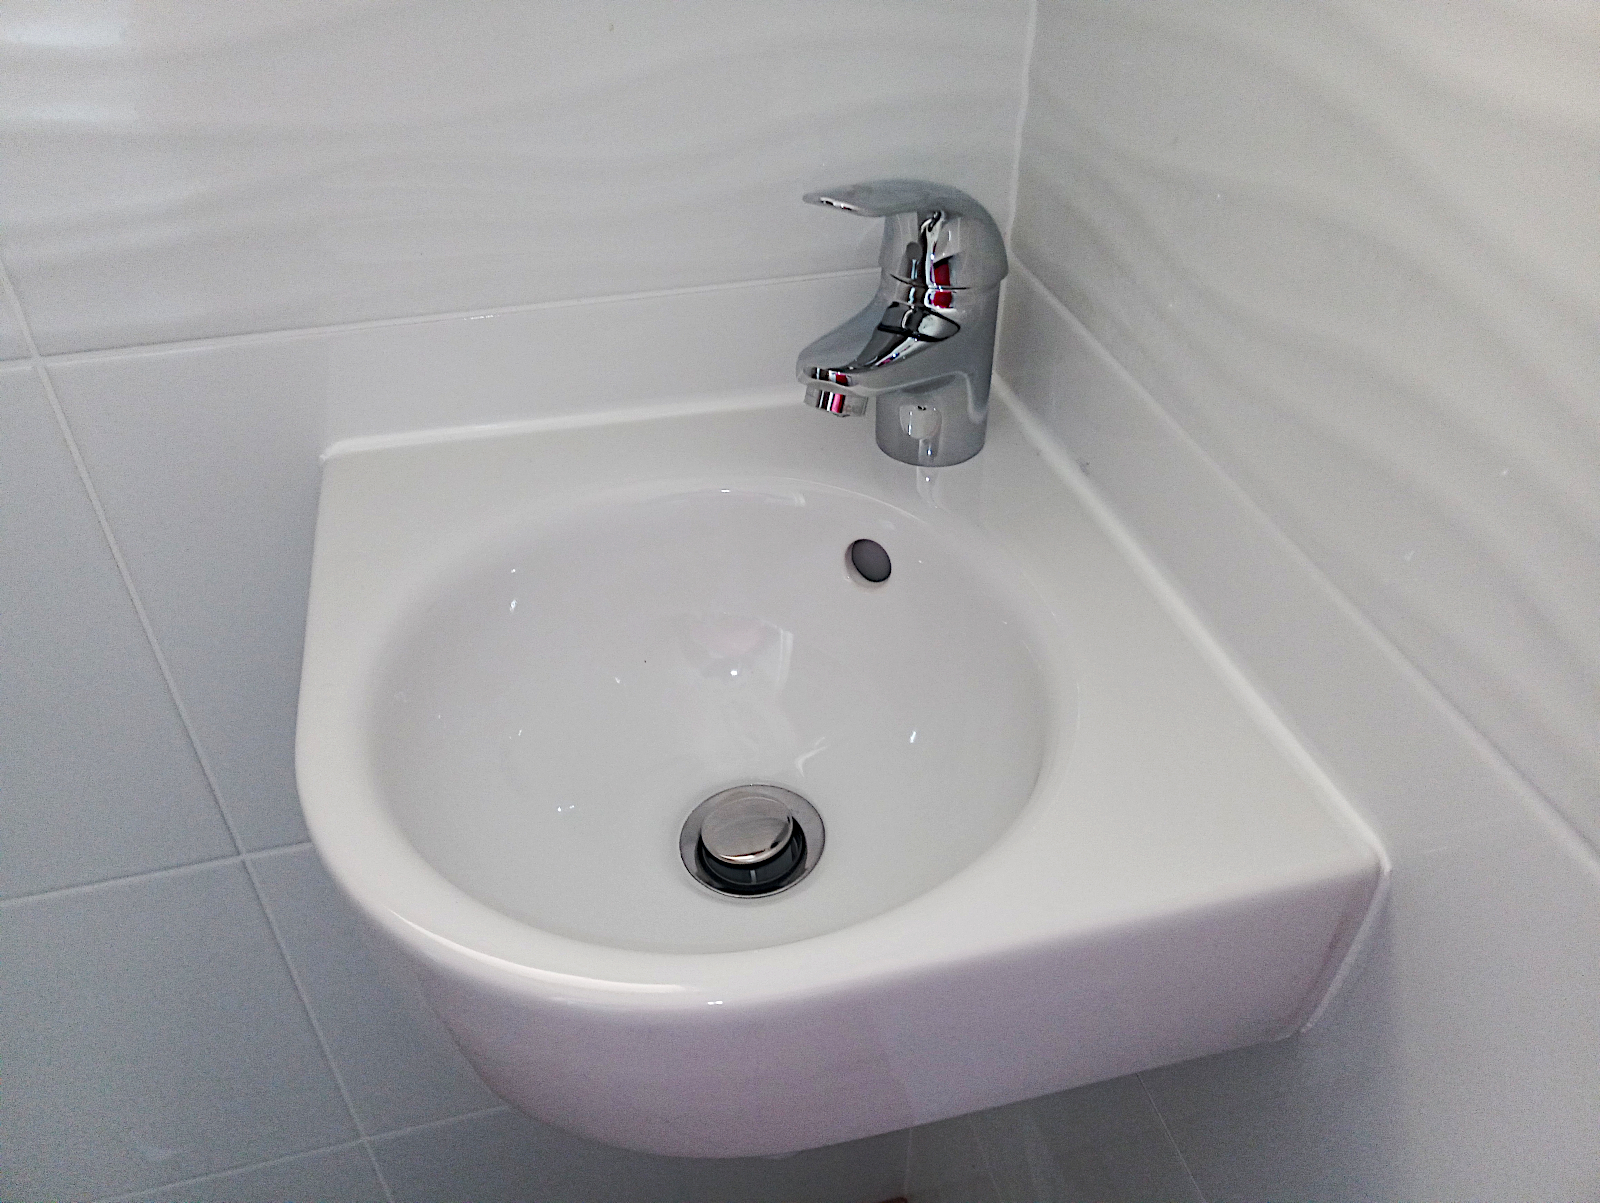
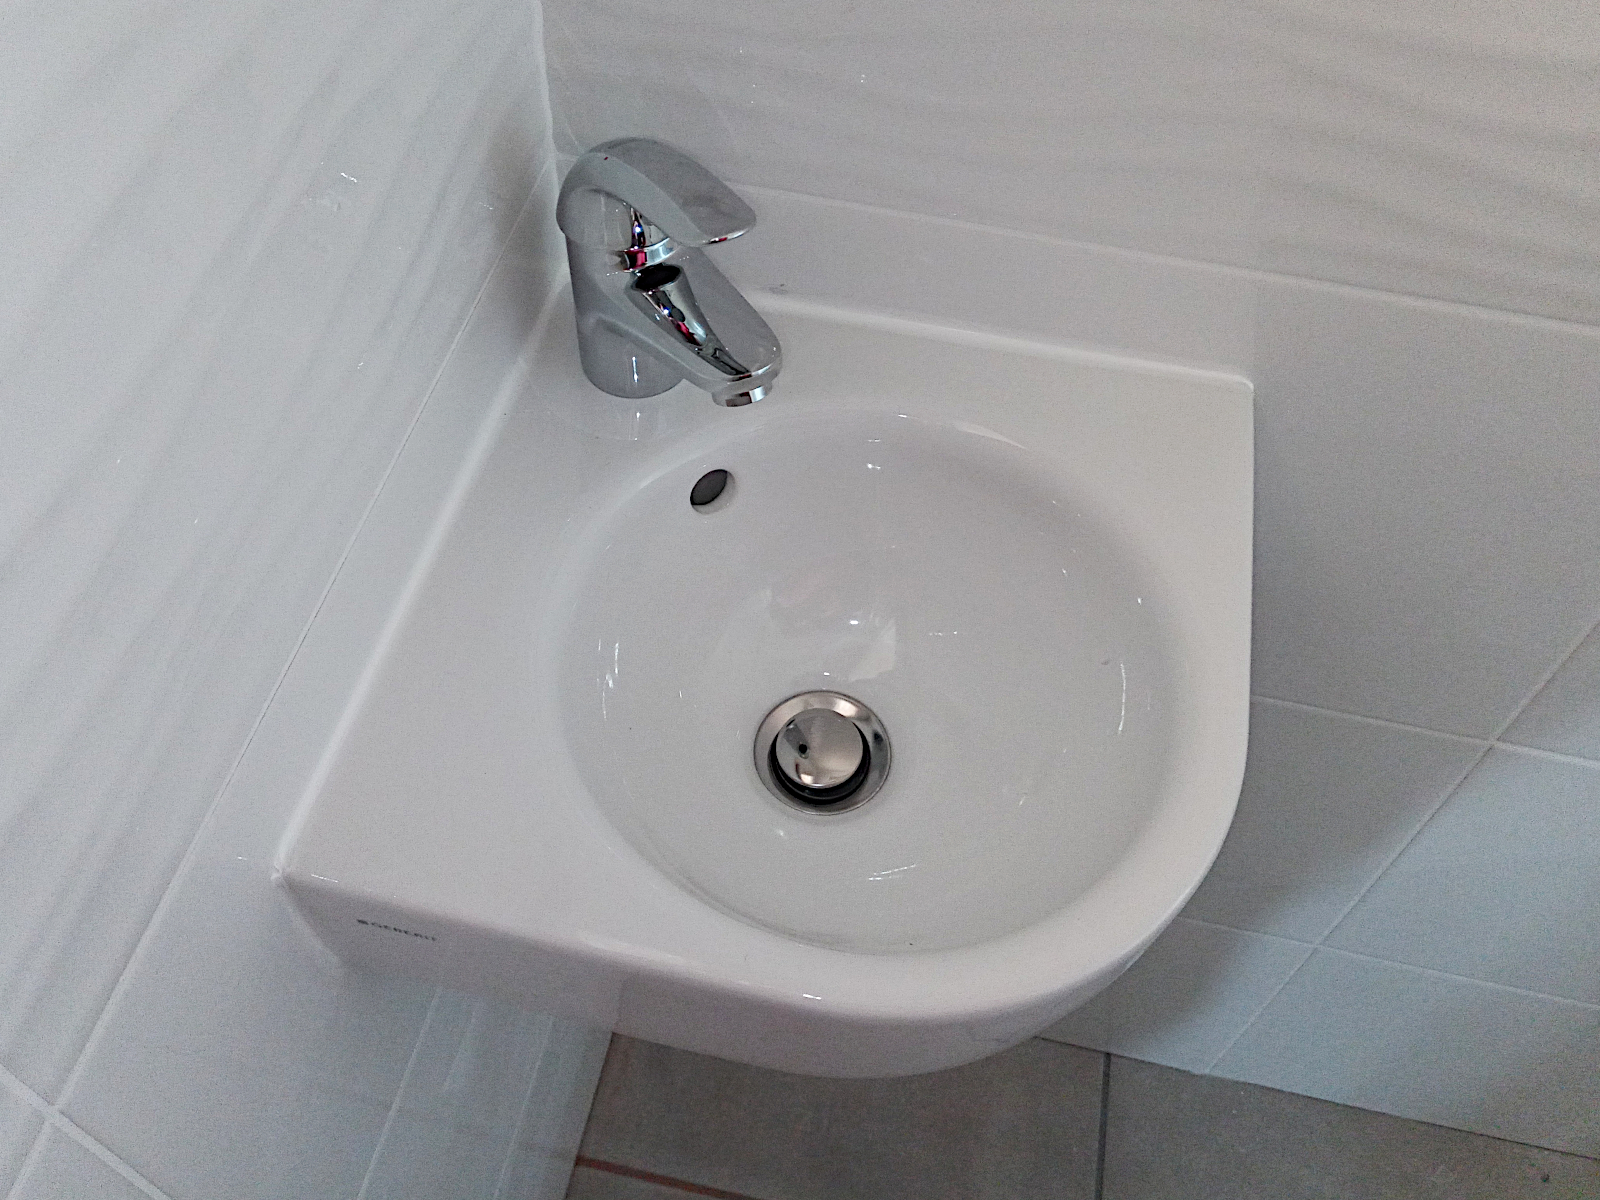
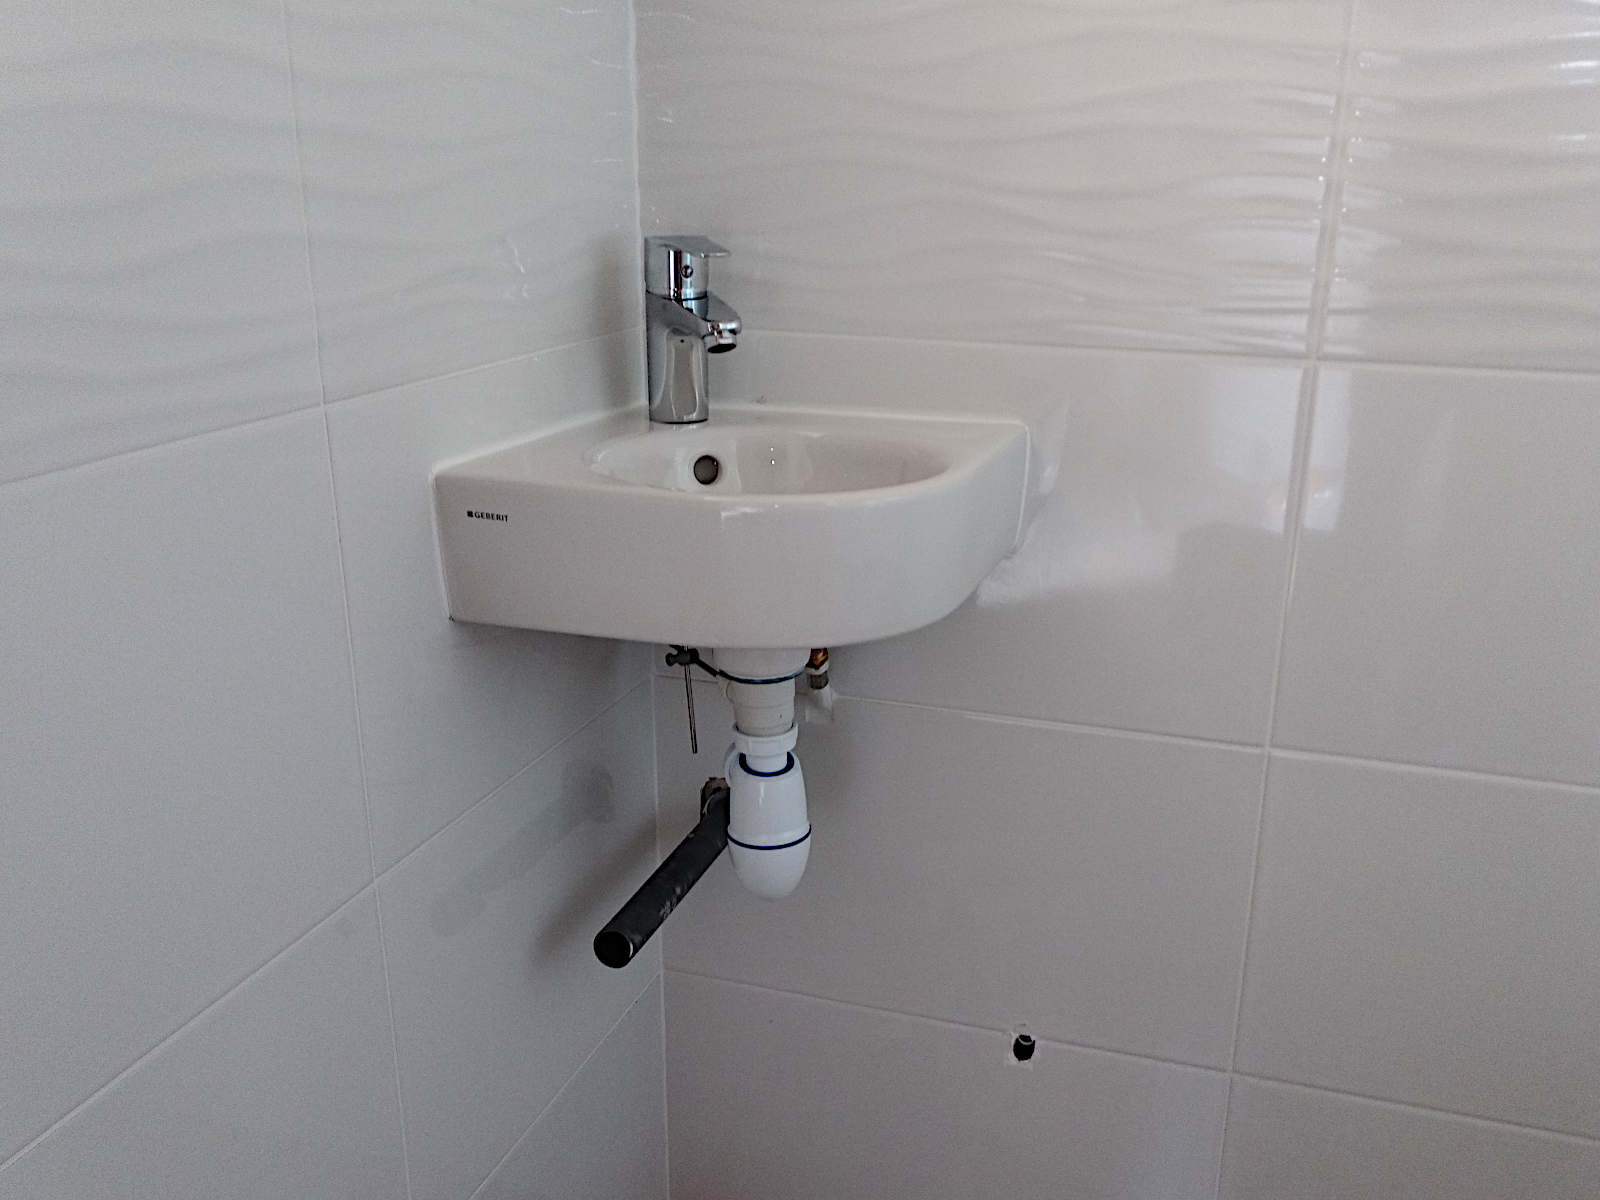
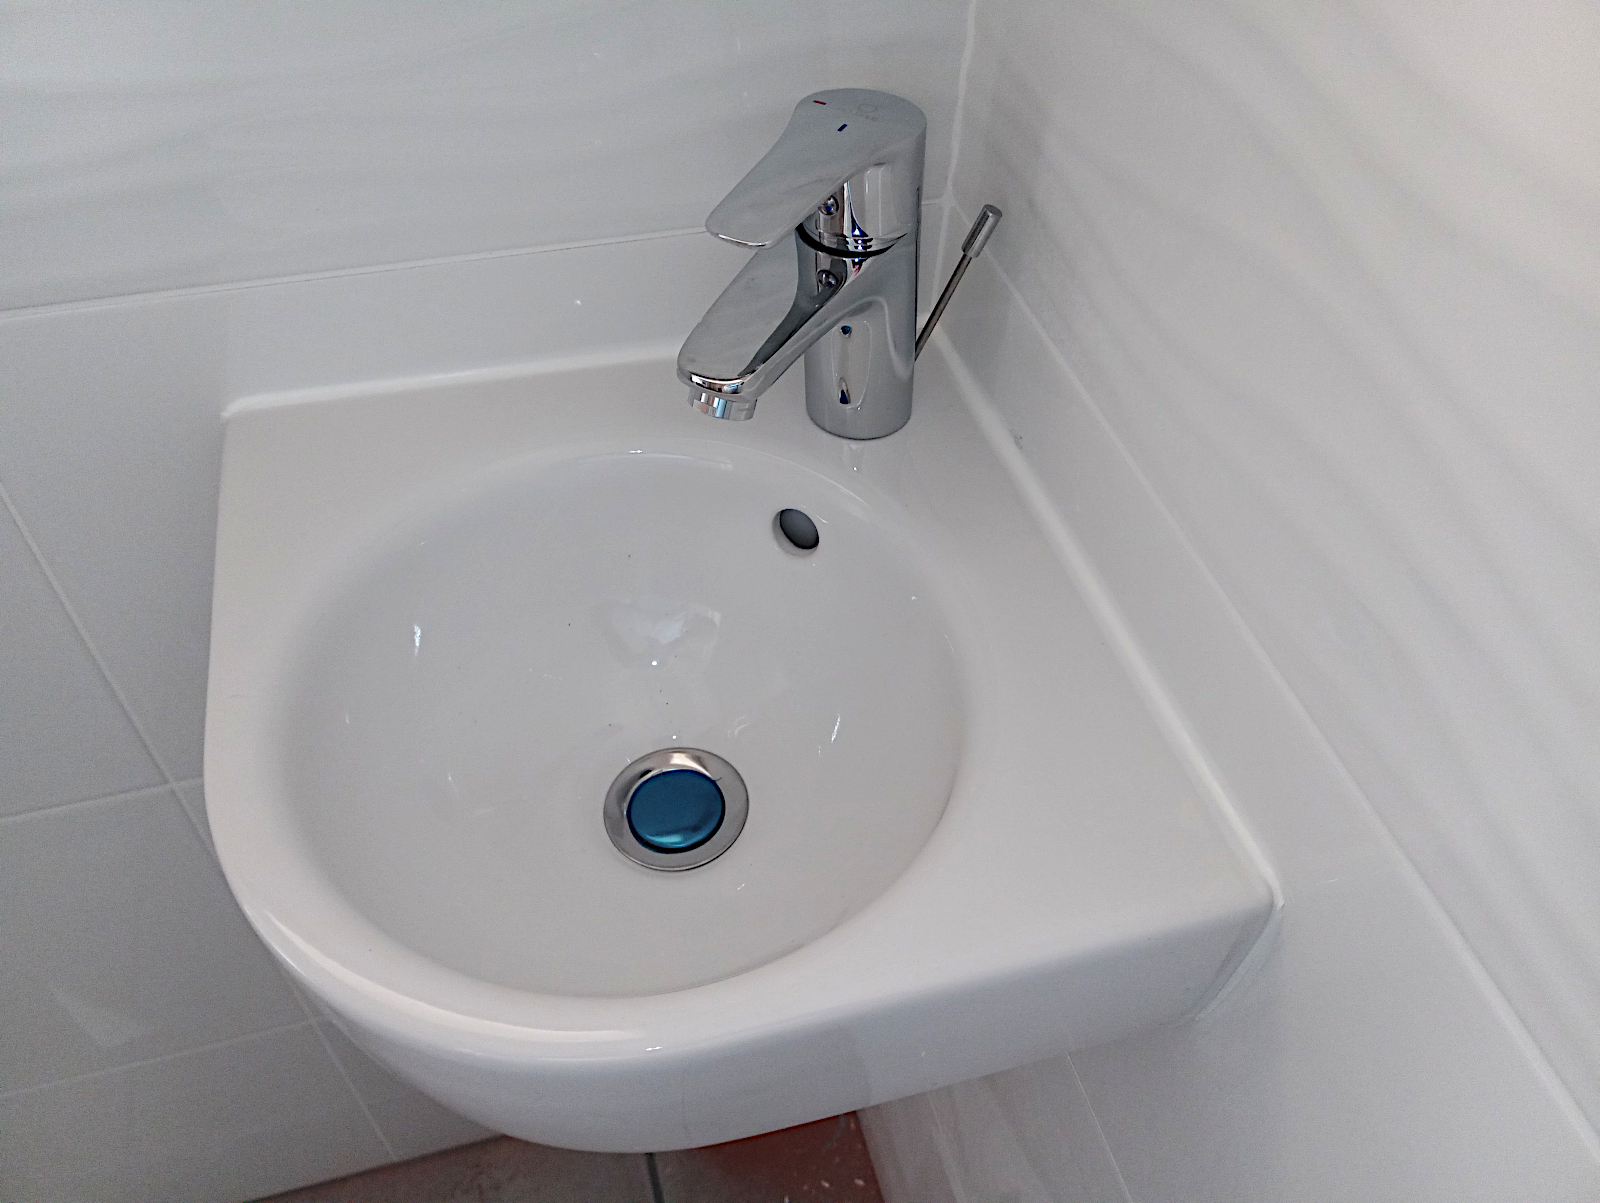
Next was the corner handbasin in the separate toilet. I think that the mixer tap that I bought from the same manufacturer for the main hand basin in the bathroom could be slightly smaller than the one the builder has supplied but I’ll have to check. If so, I’ll probably end up swapping them over as the mechanism for operating the plug on this one is a bit too tight against the wall.

null

null

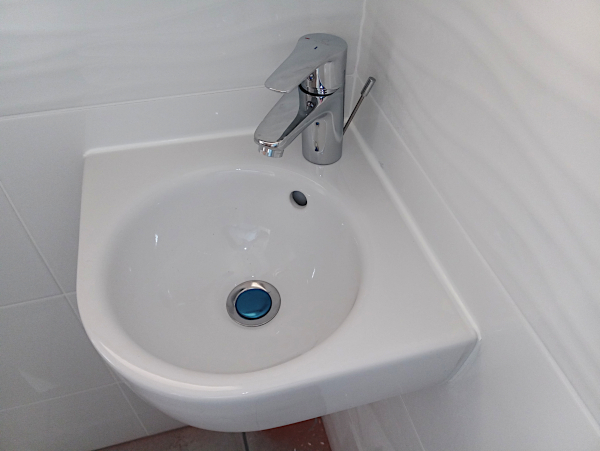
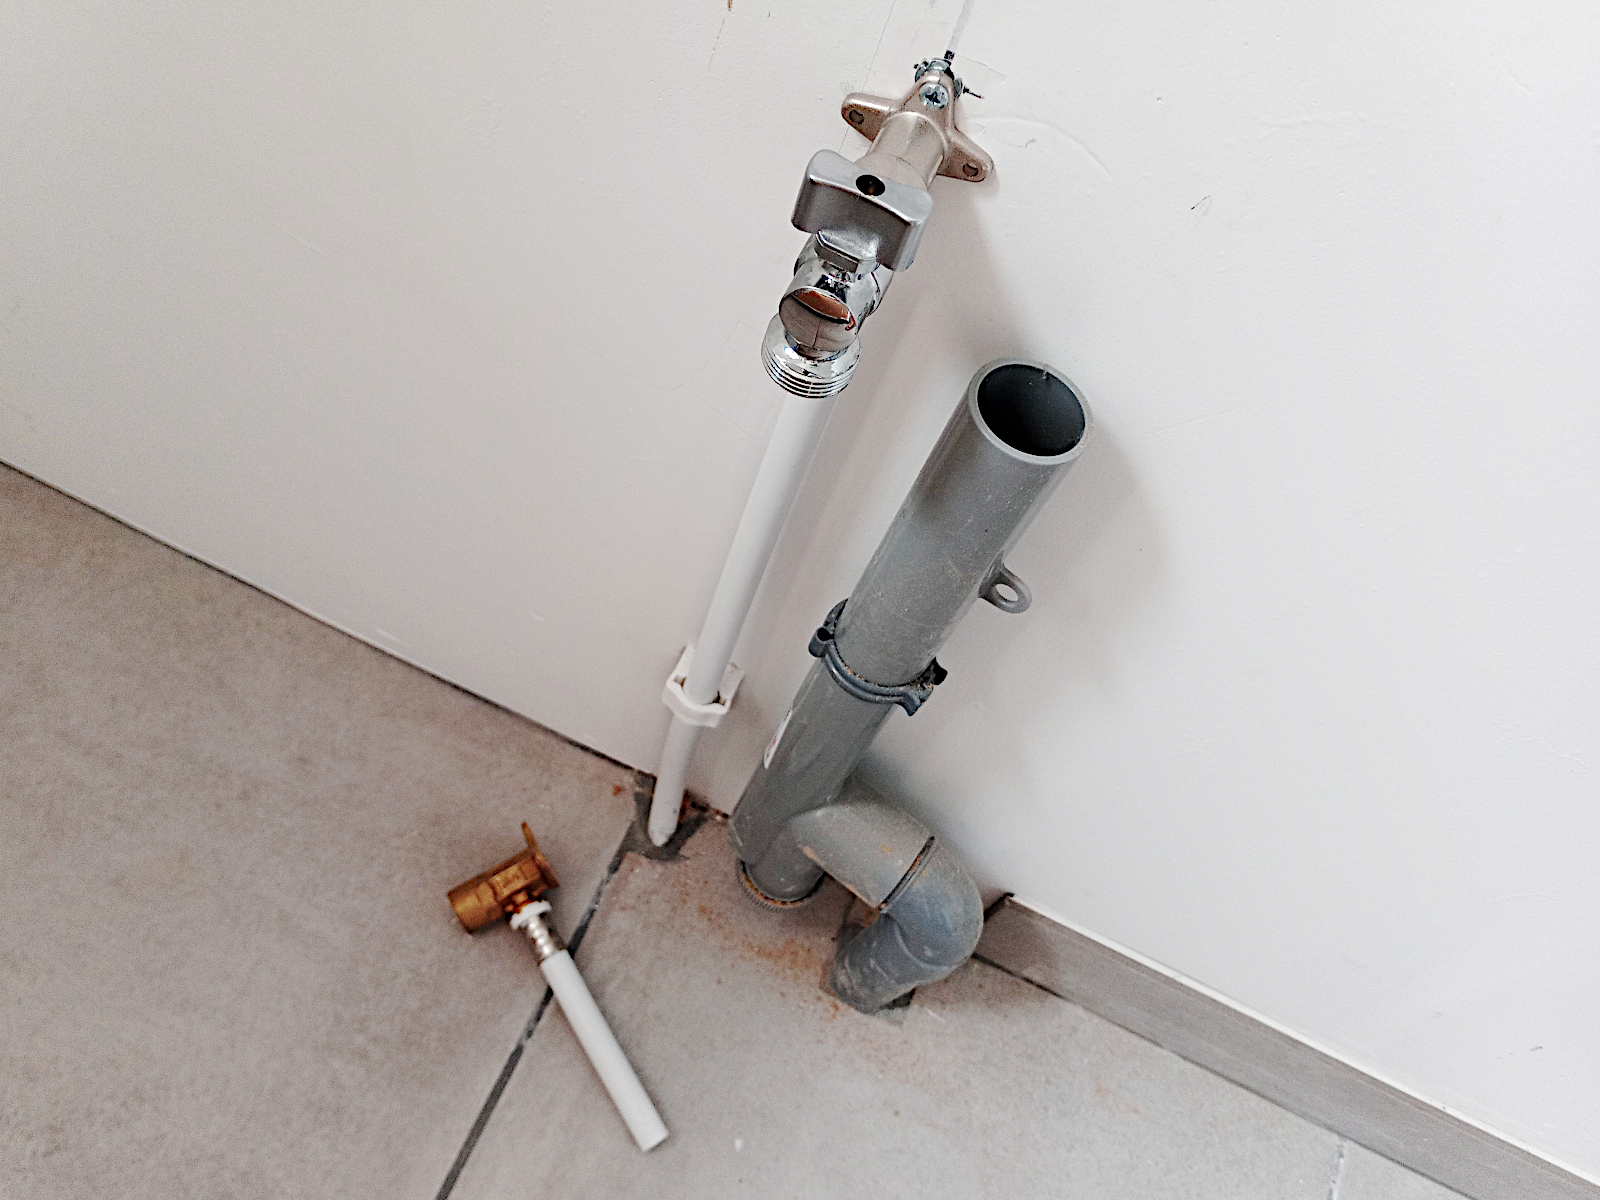
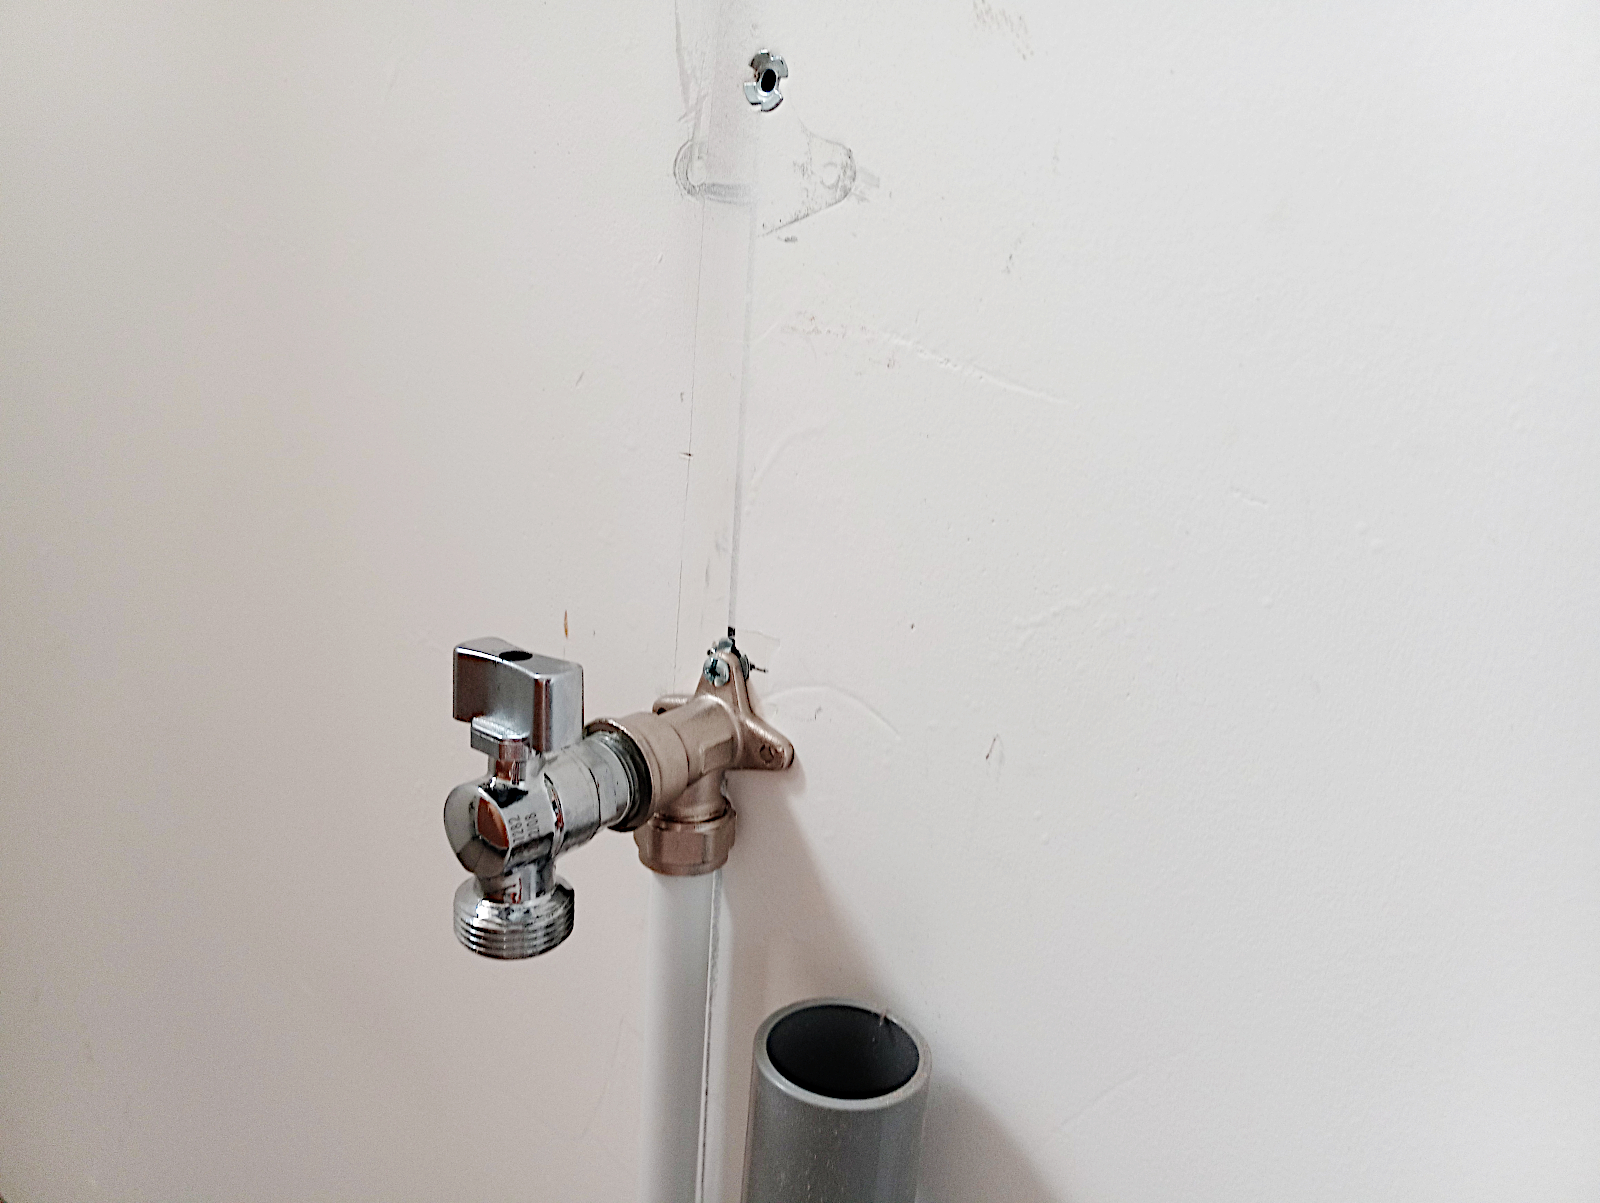
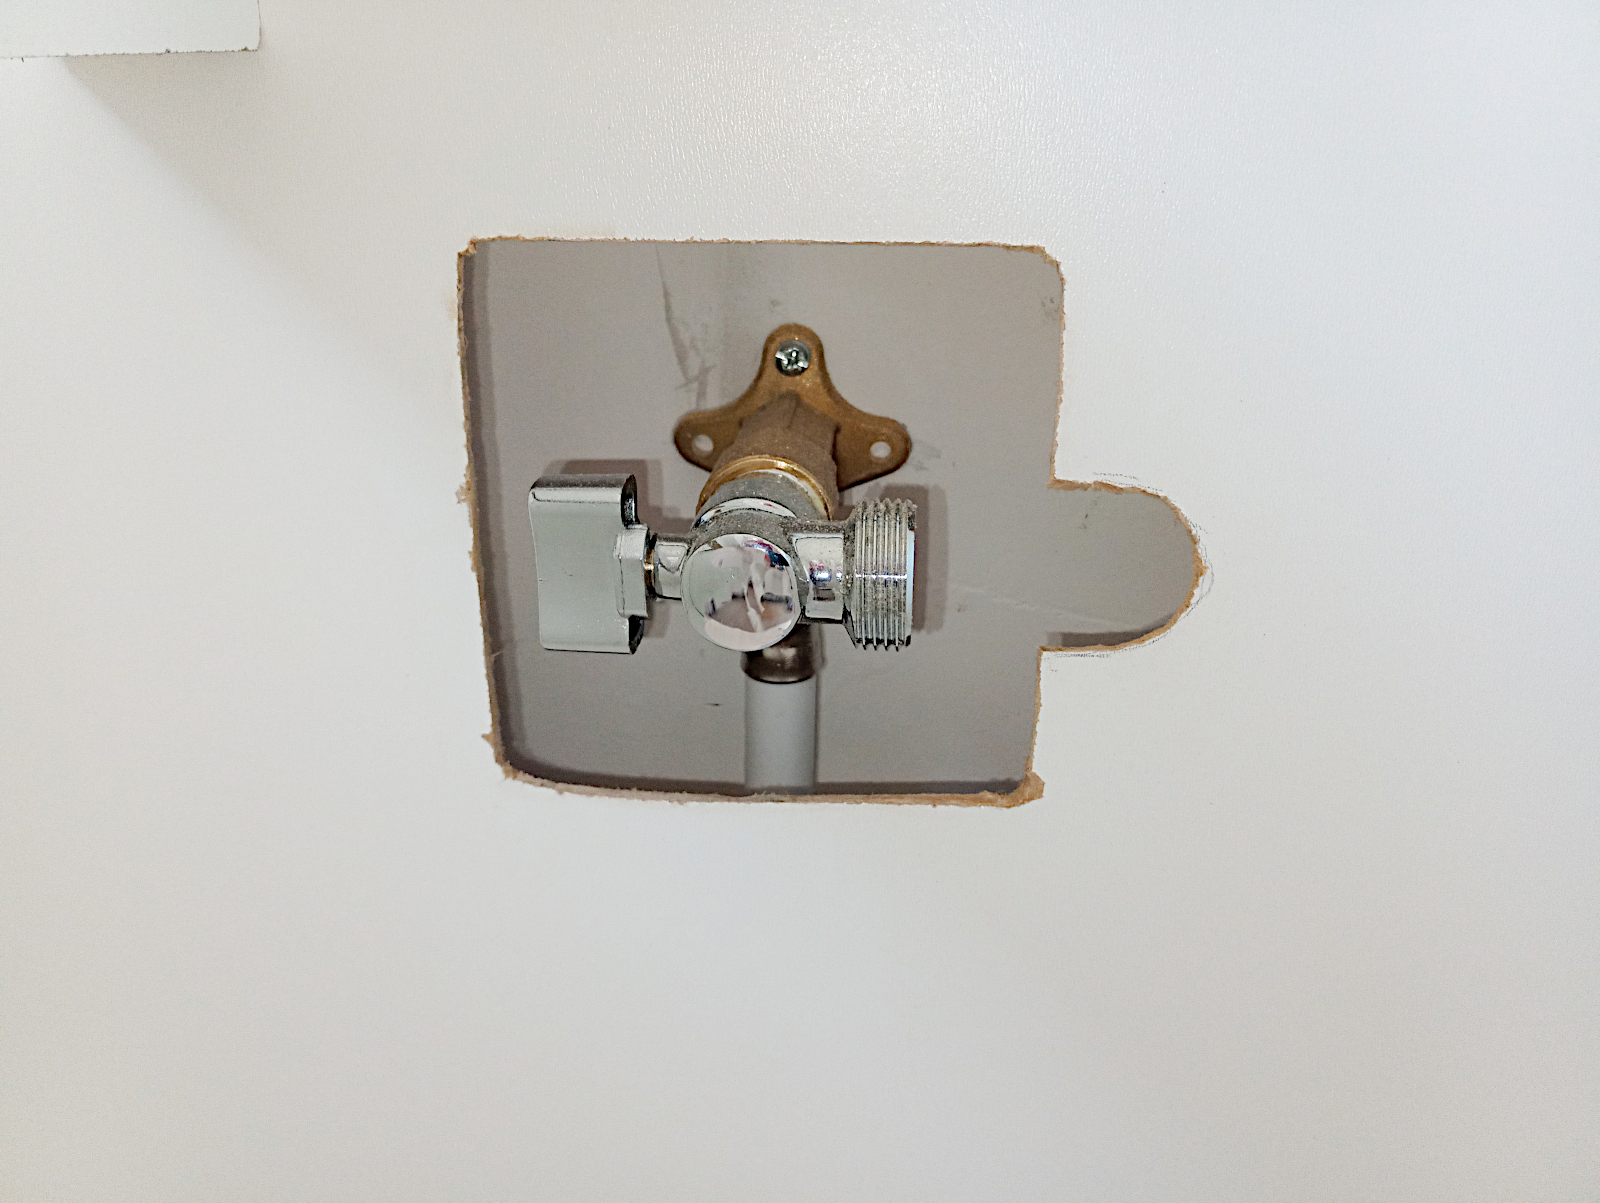
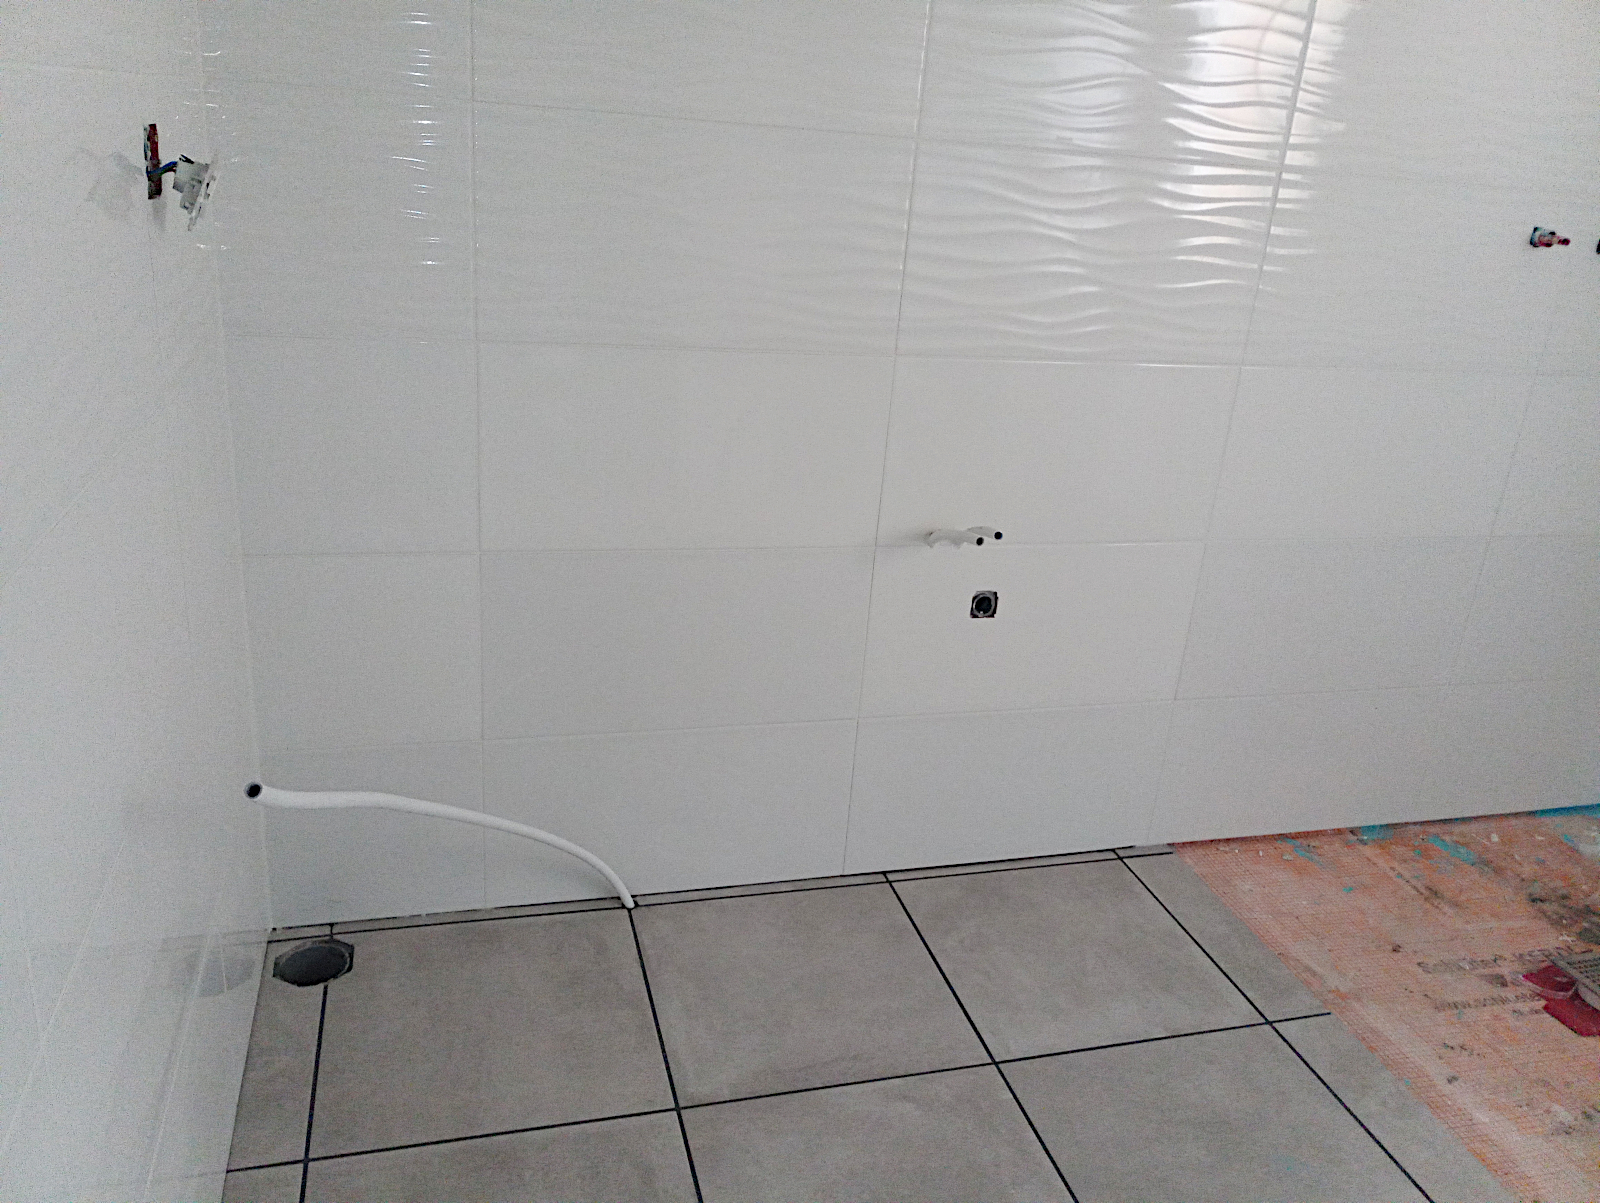
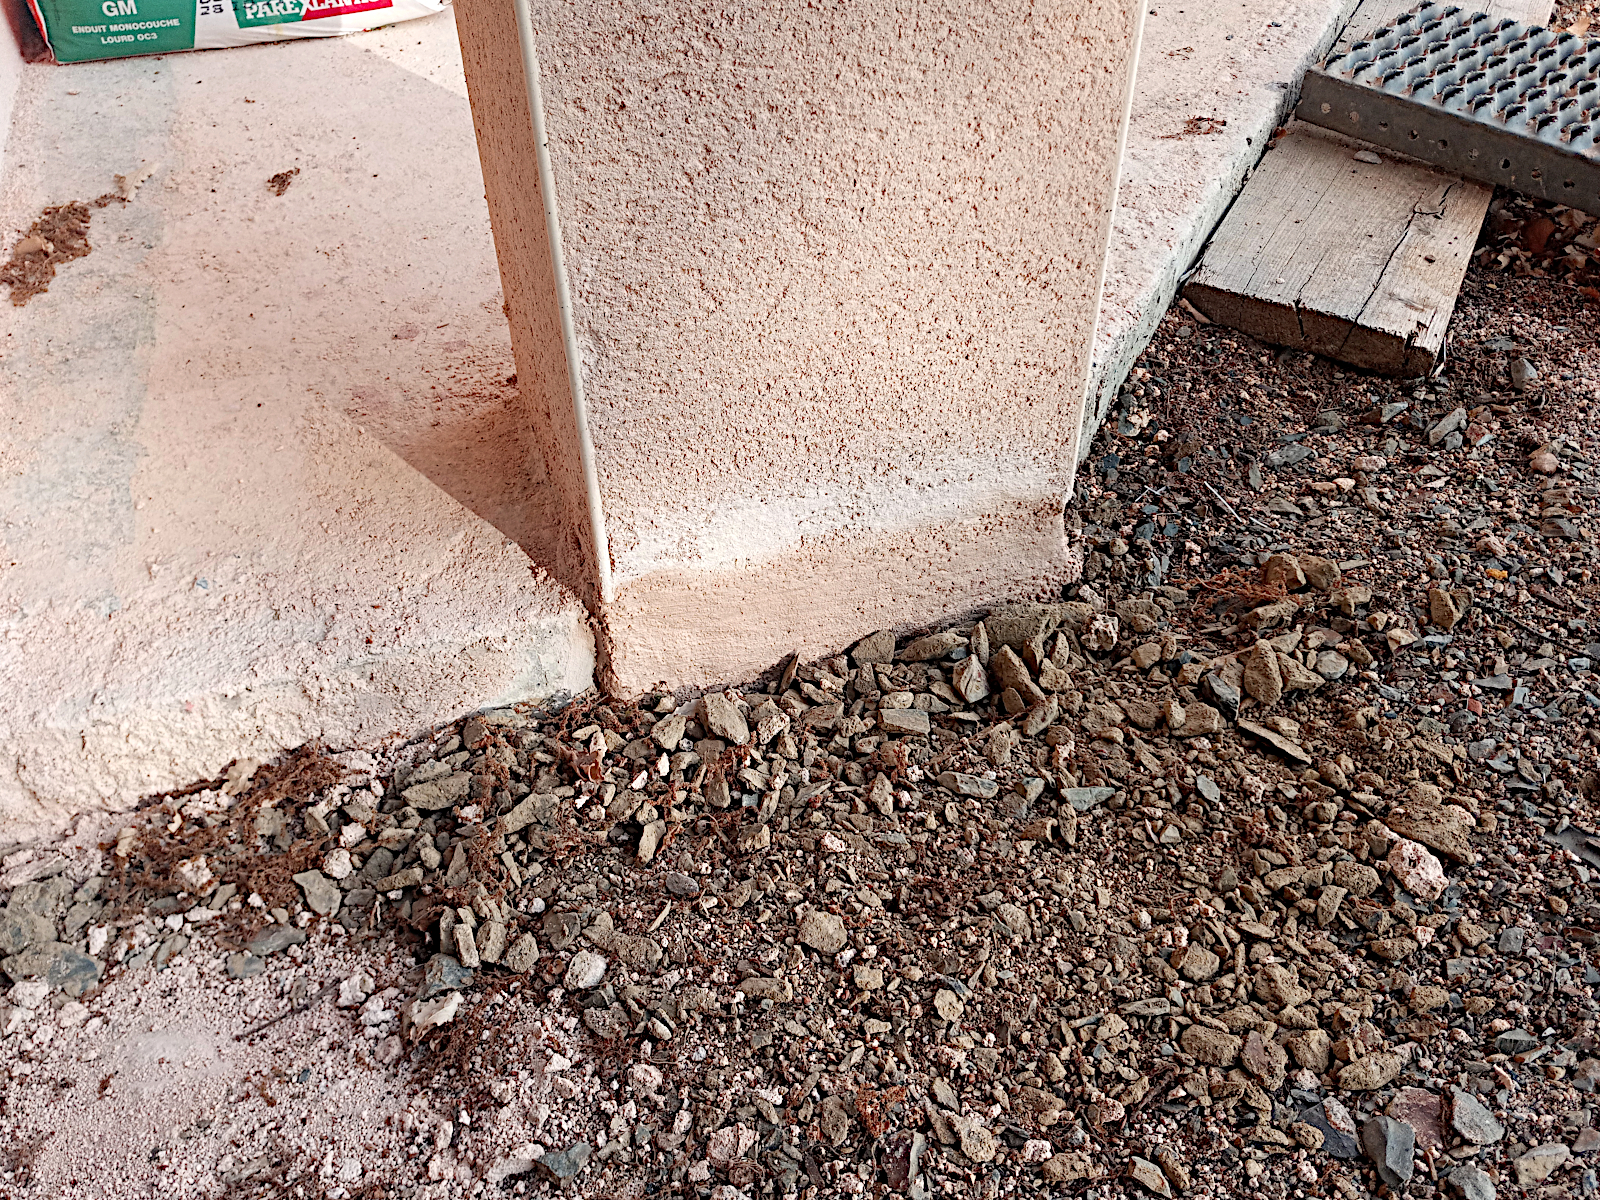
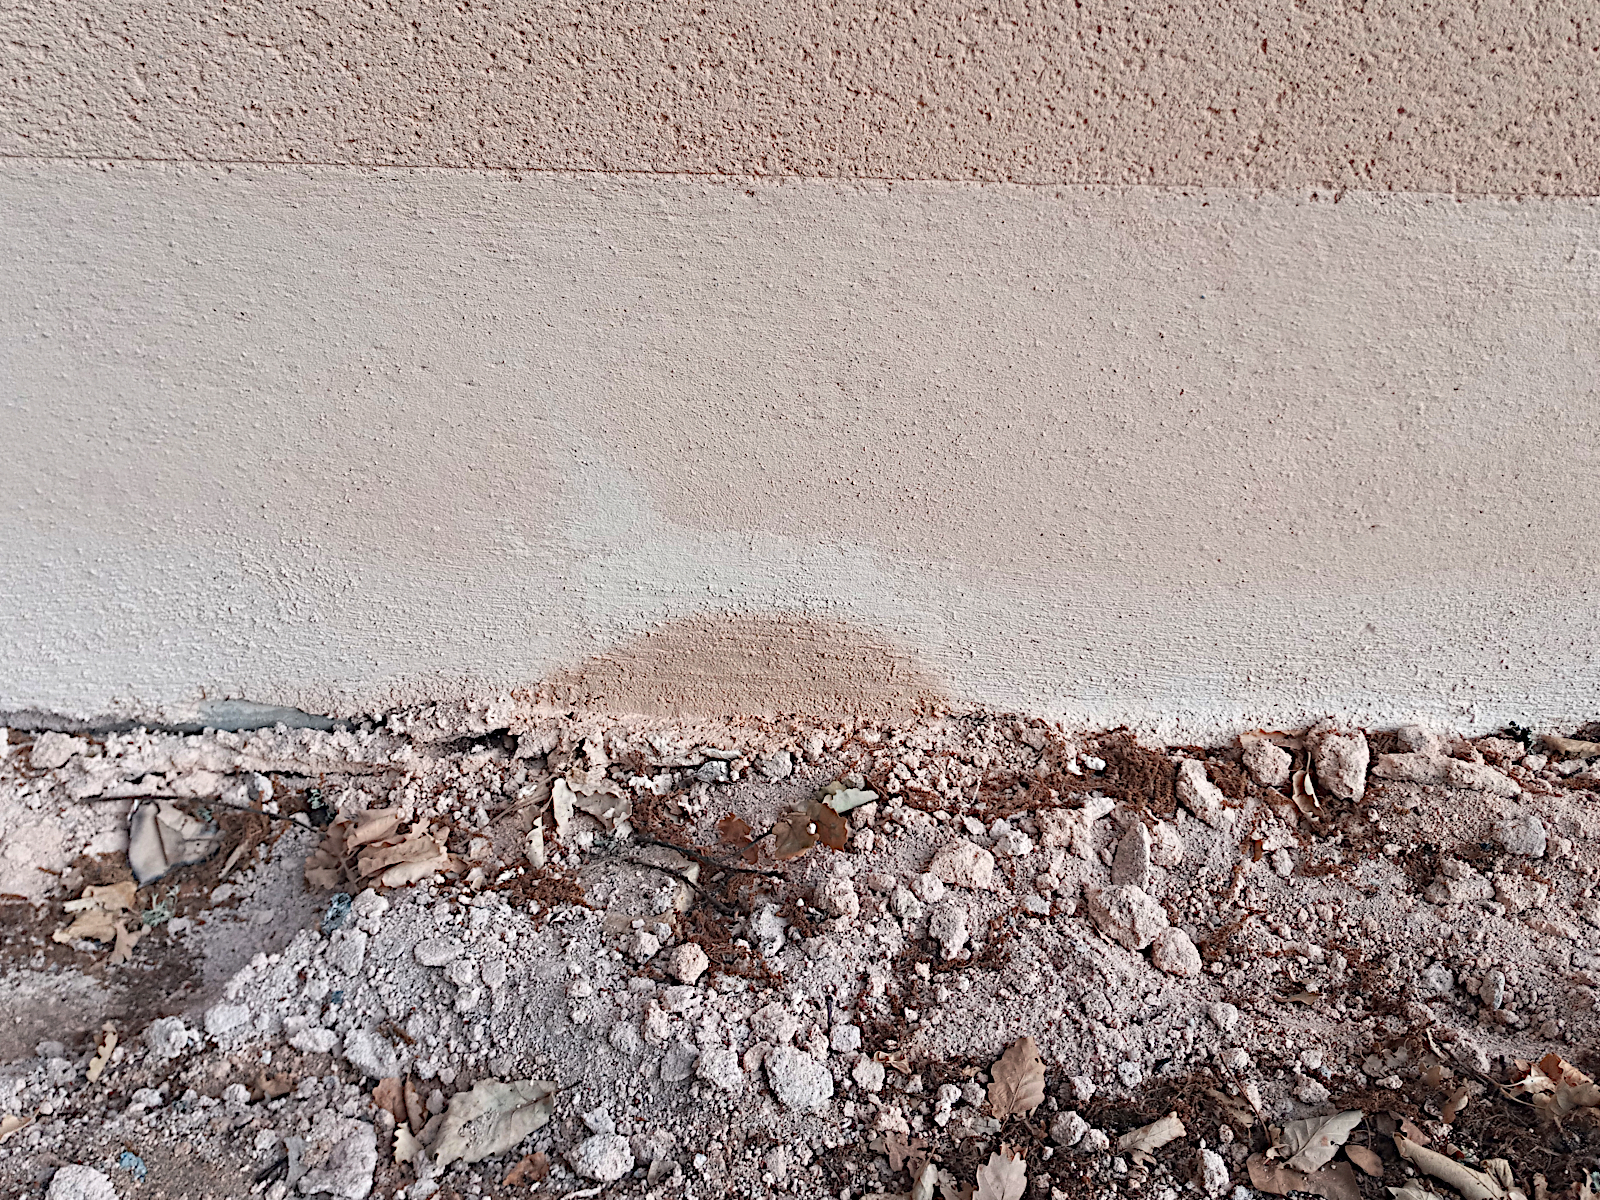
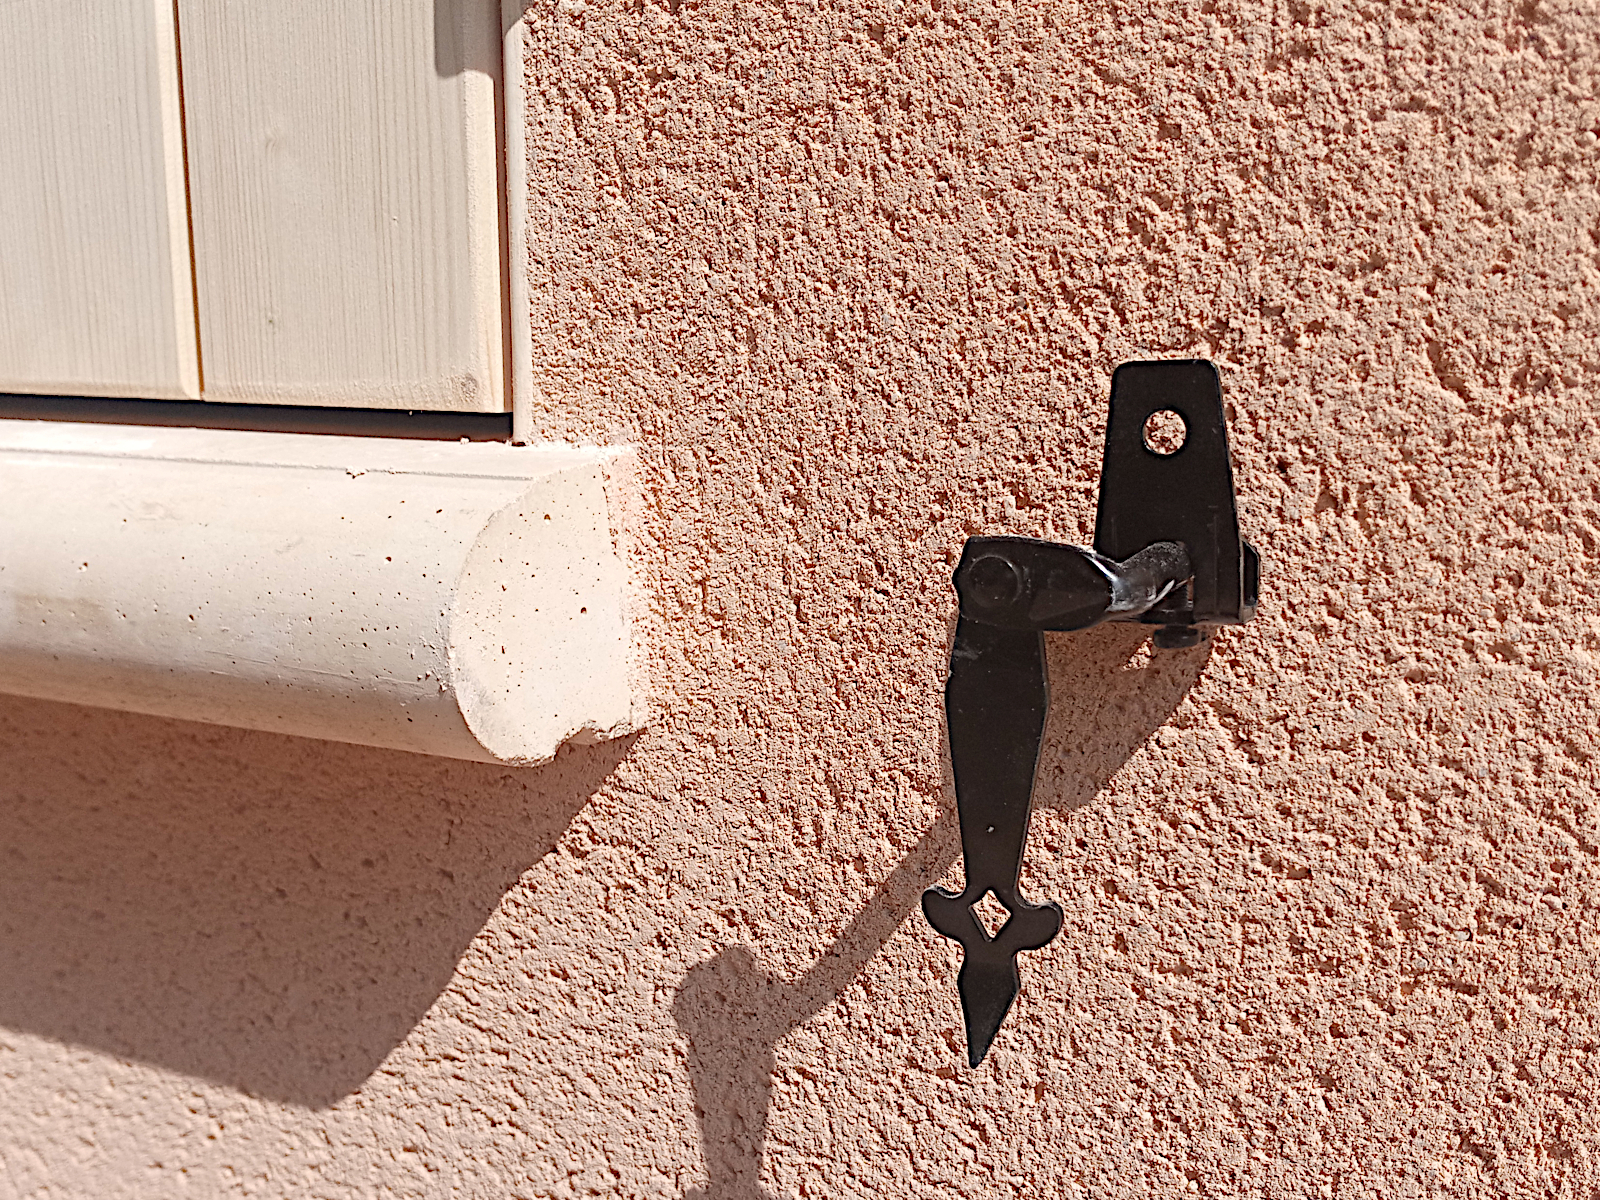
I notice that the plumber had cut the pipe off that’s now no longer needed for the external tap. It looks rather unsightly but it probably won’t look too bad when I’ve filled the hole and topped it off with brilliant white grout. I’ll know not to make the mistake again in my next lifetime when I decide to design and build another house…

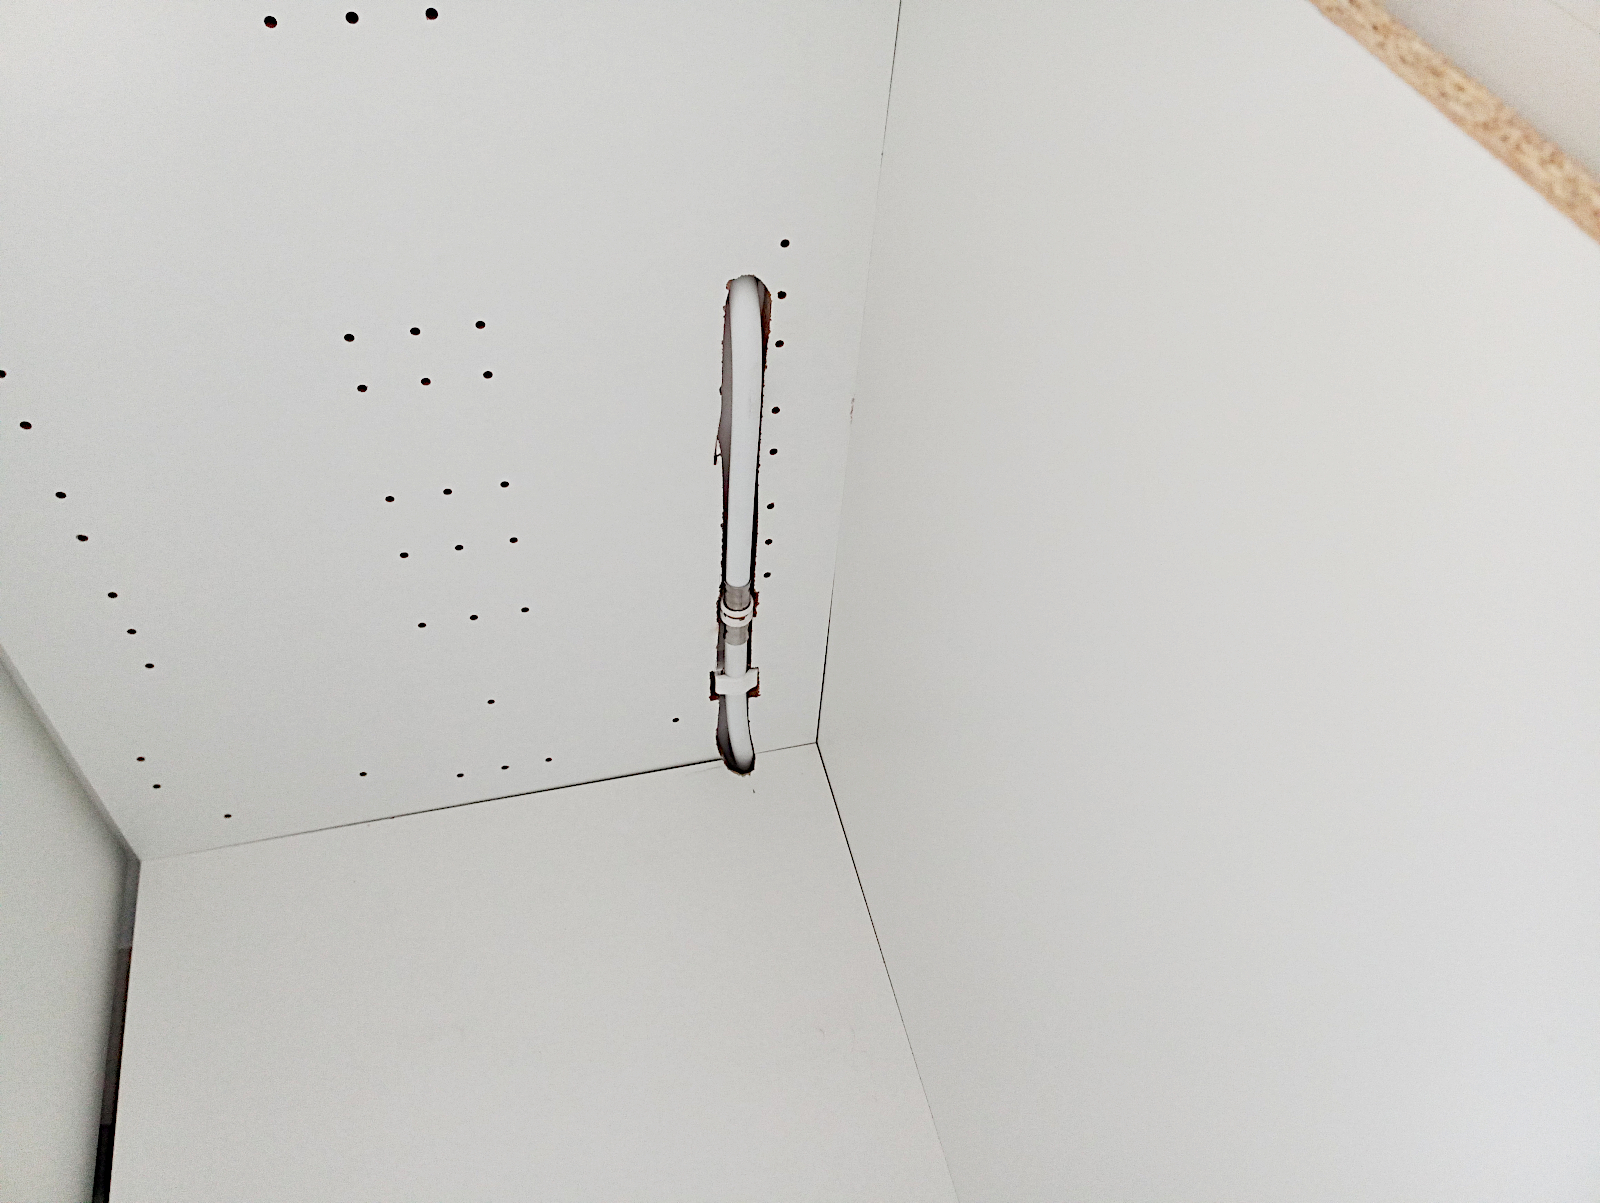
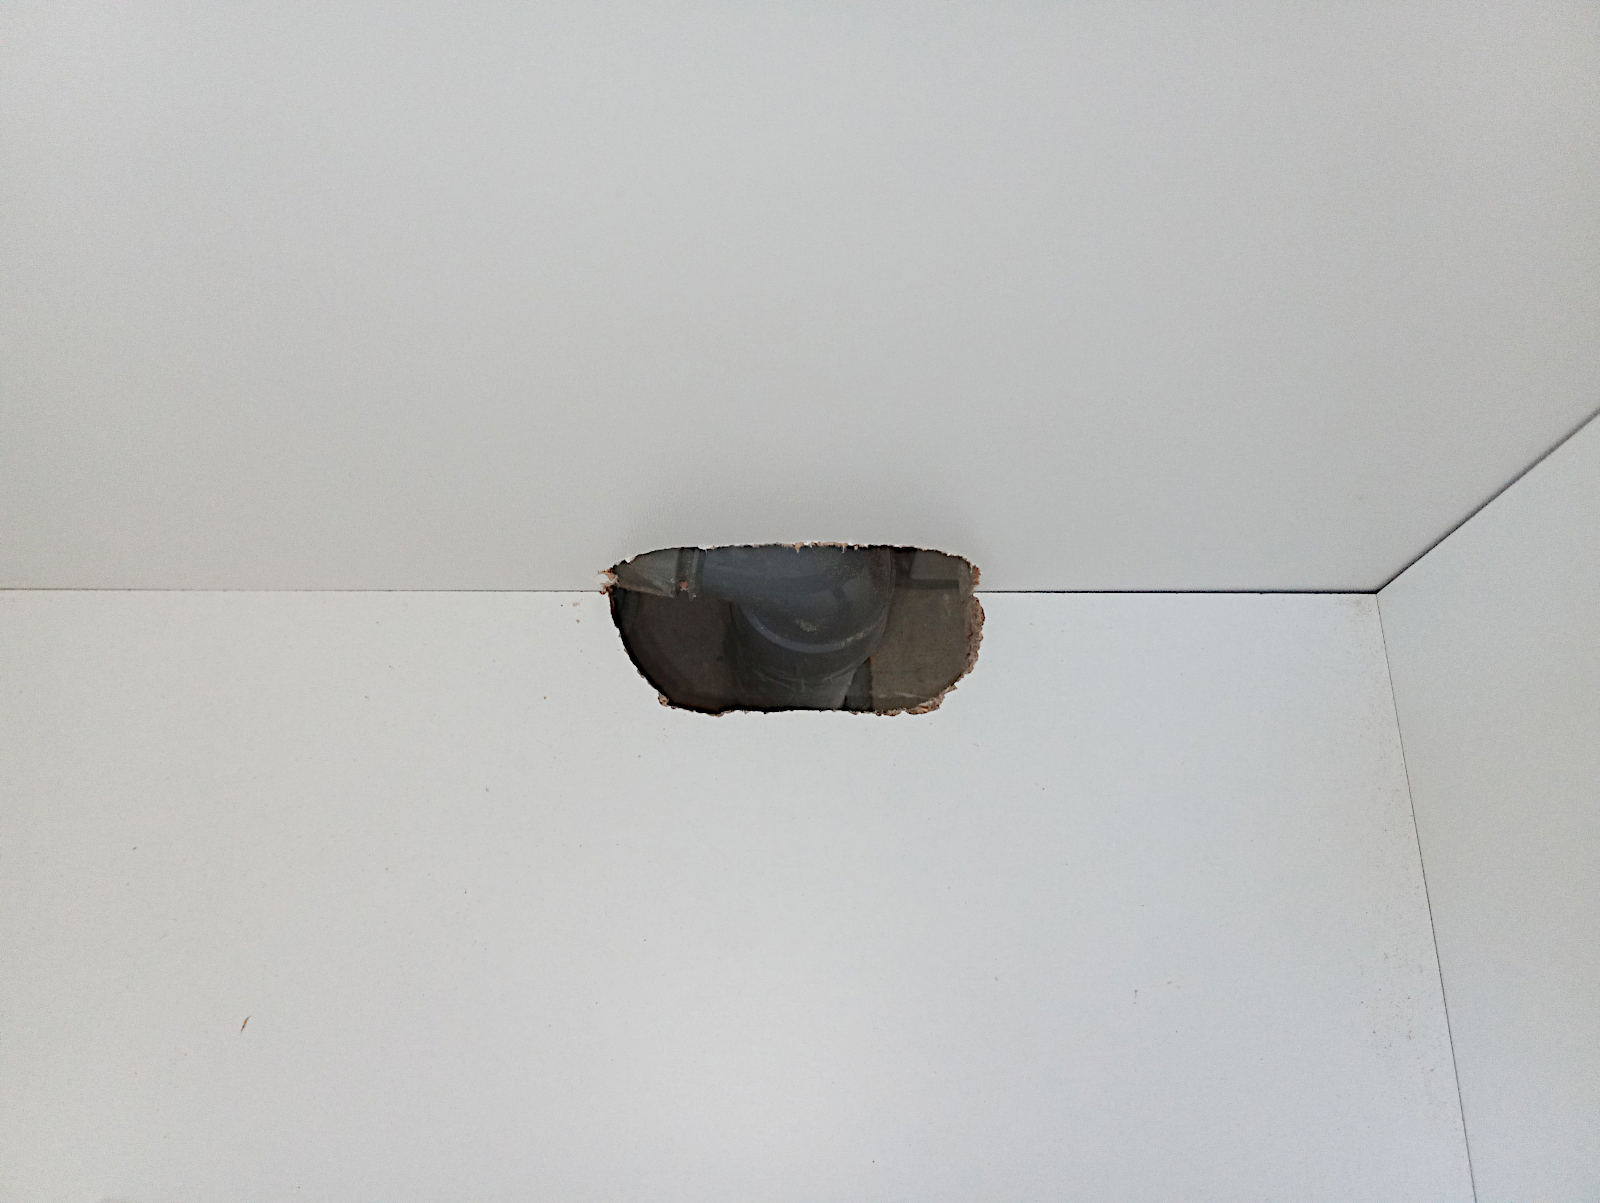
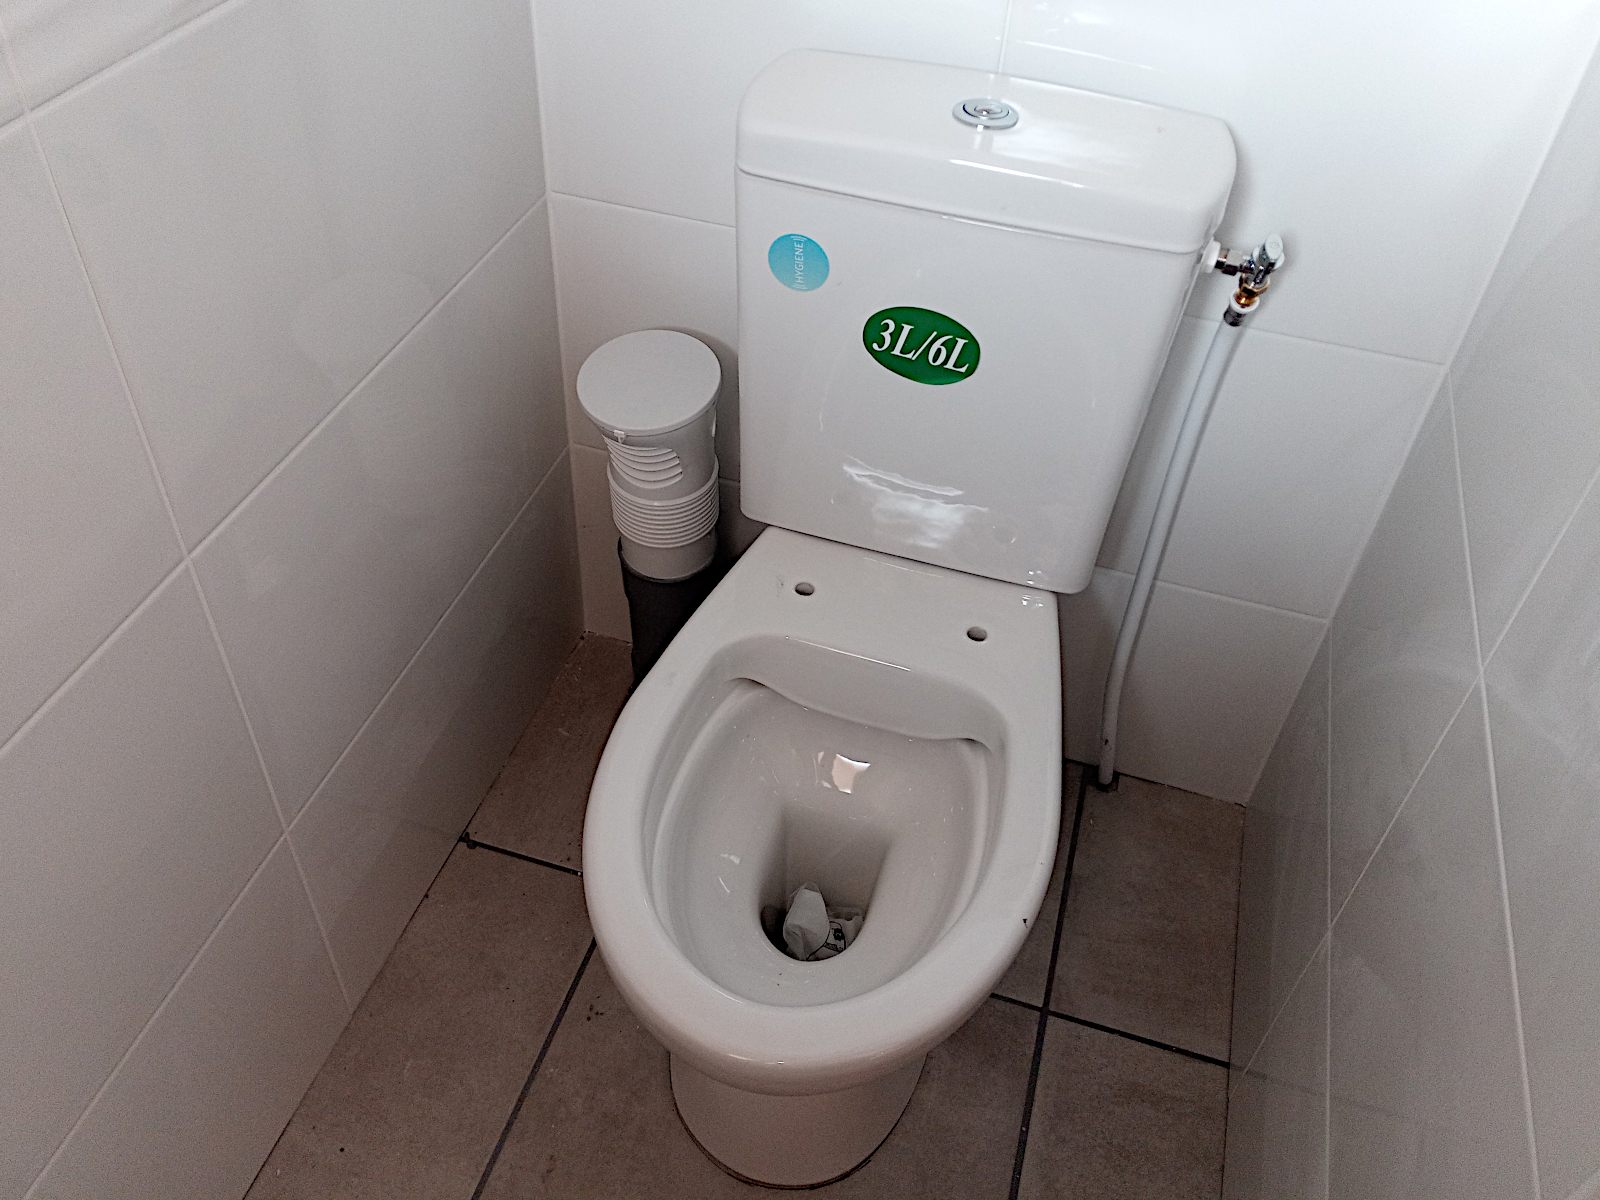
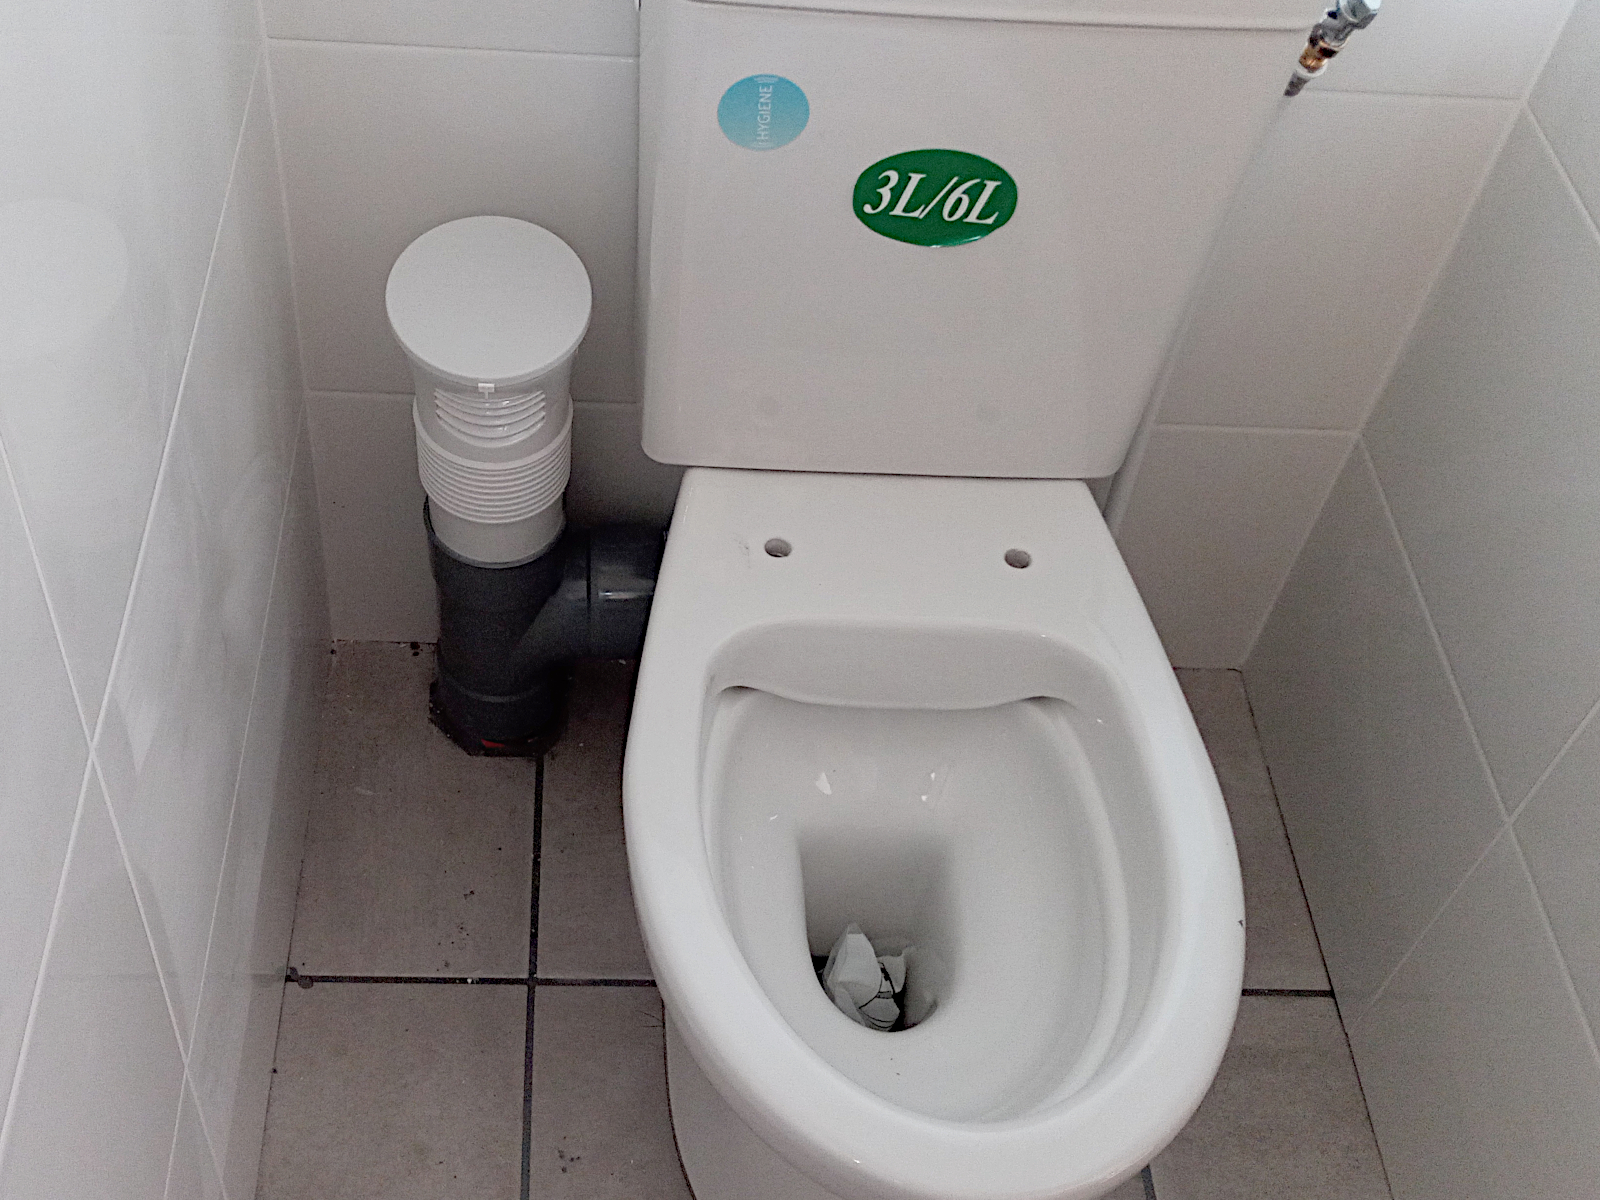
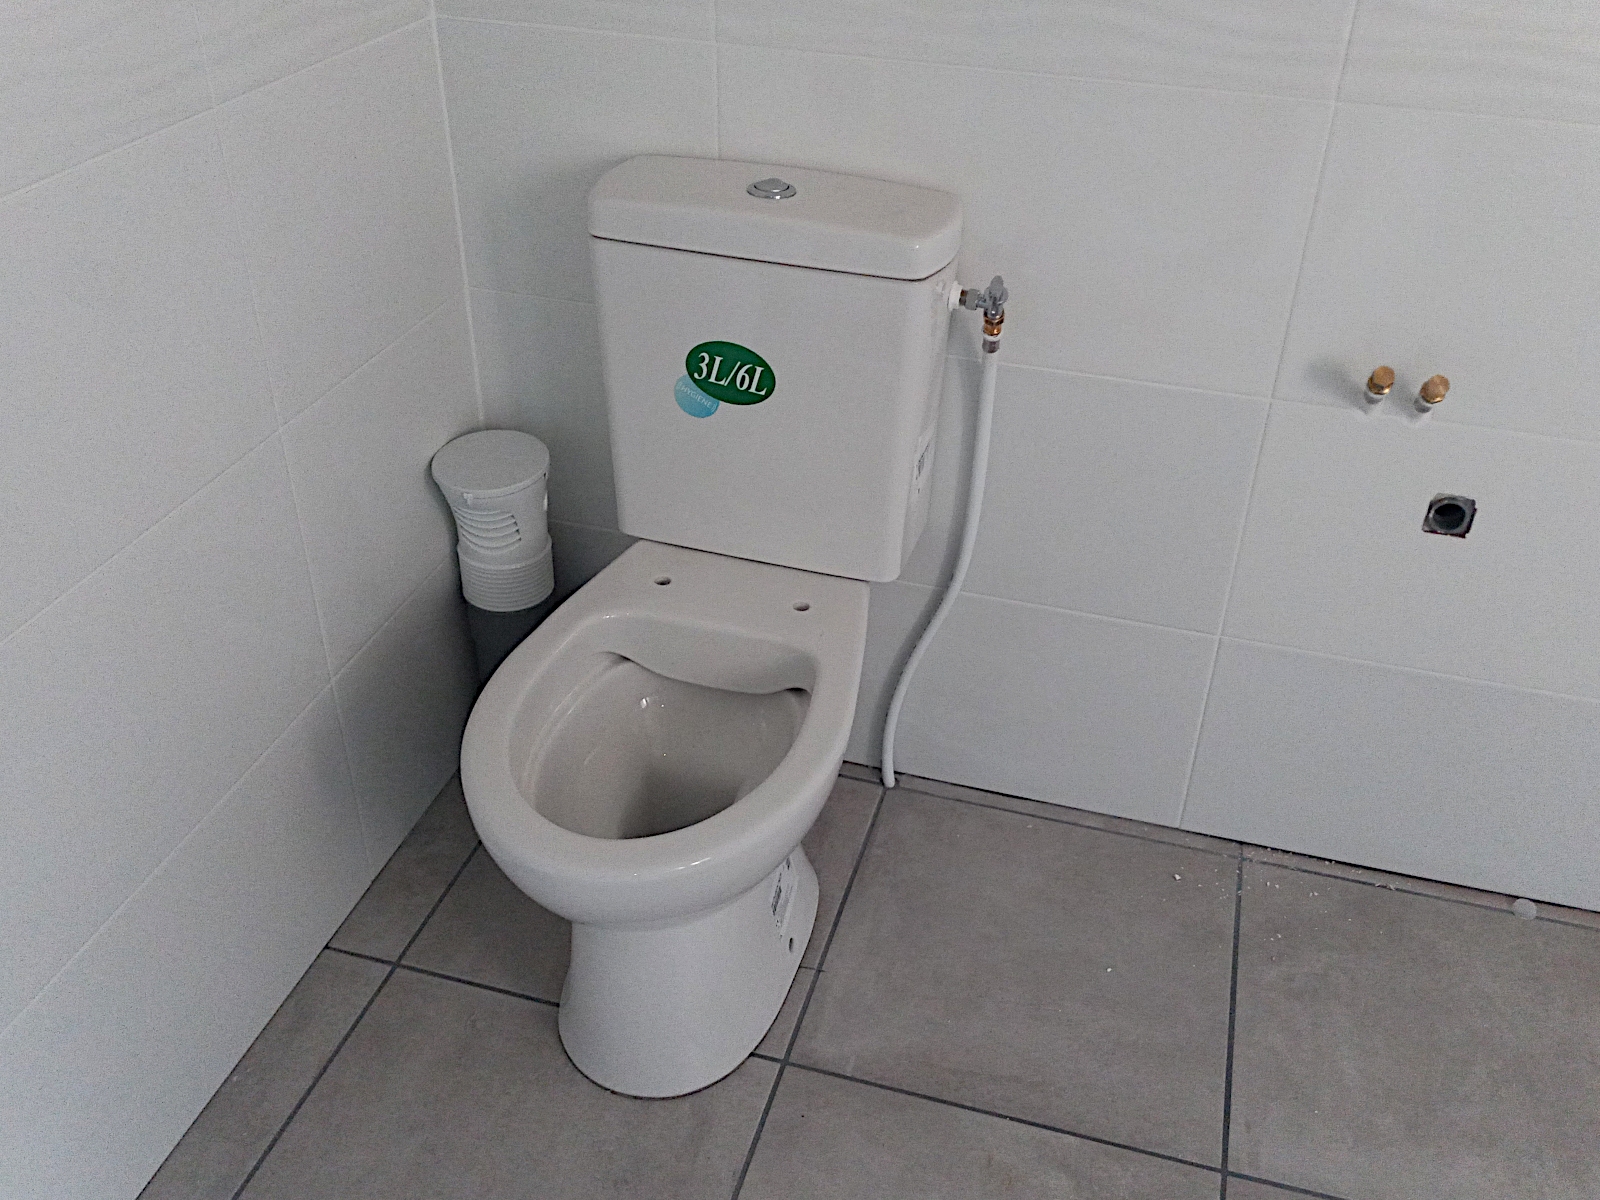
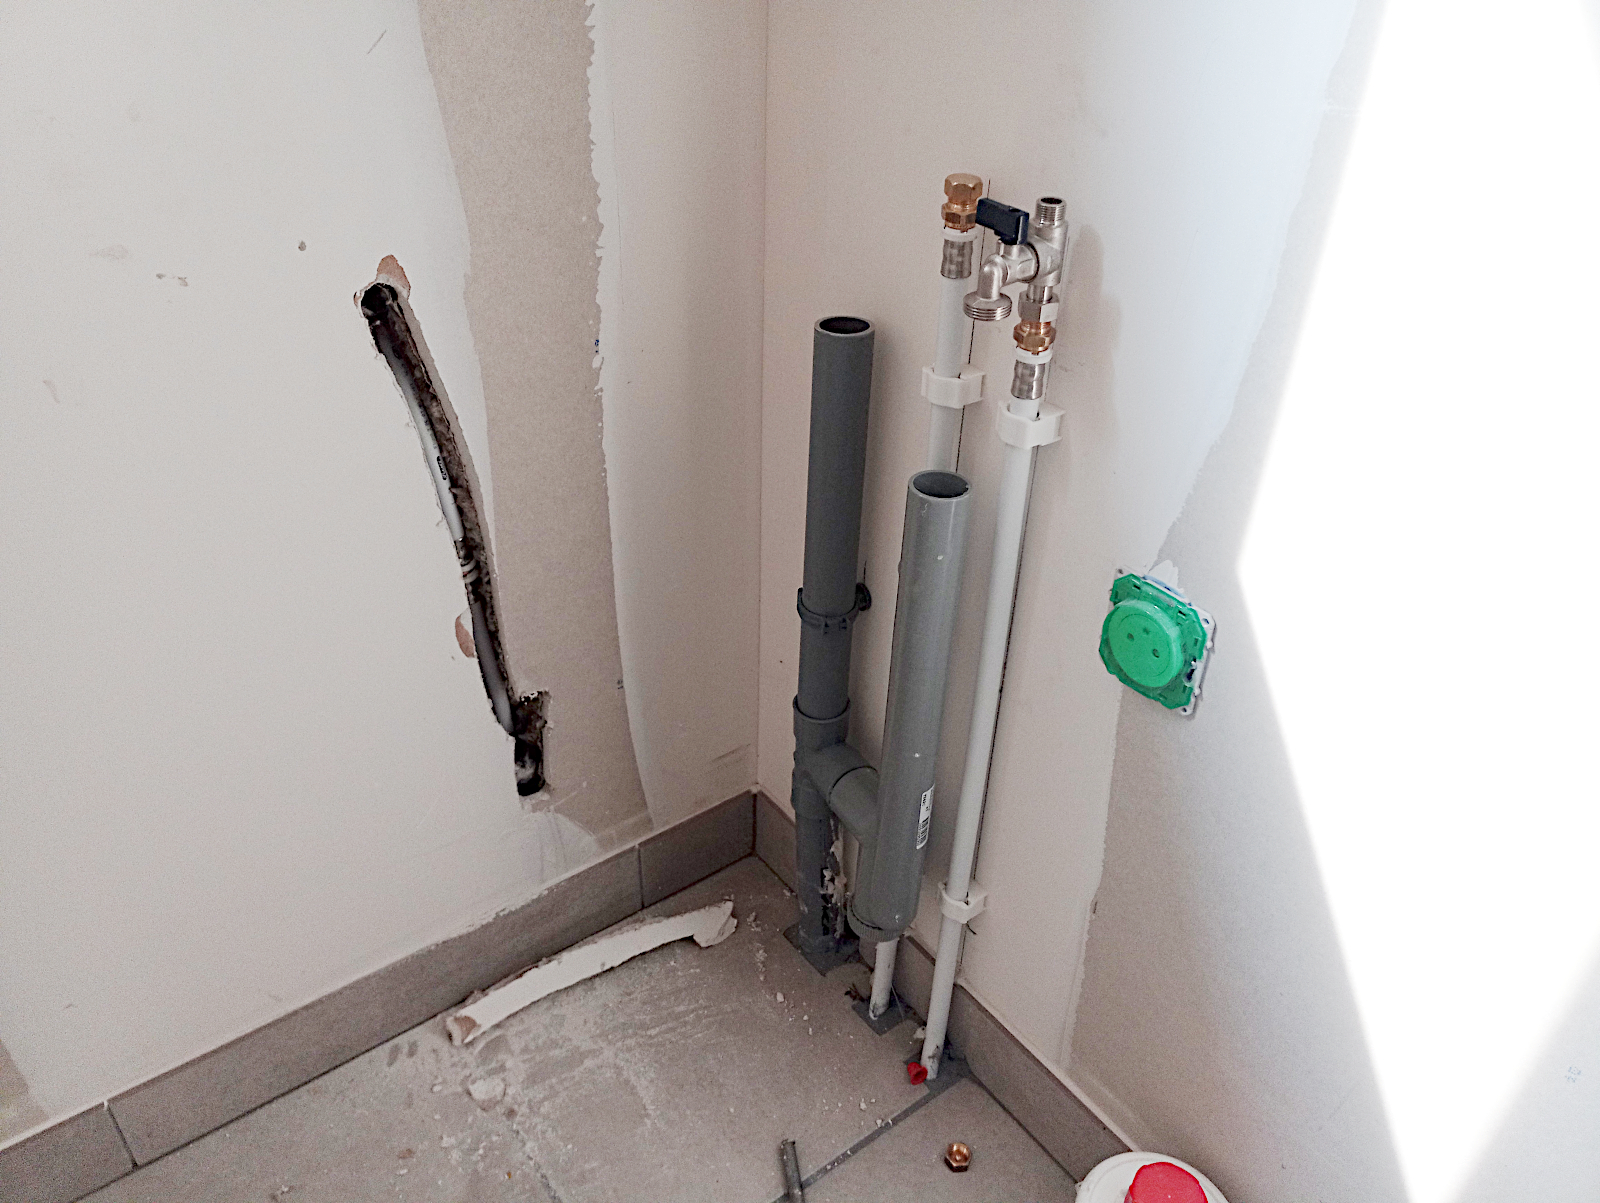
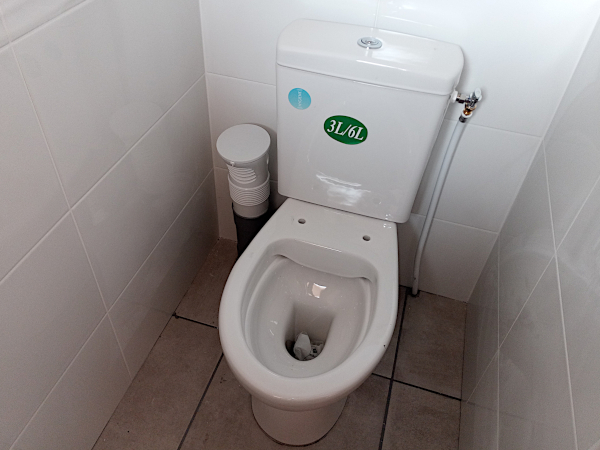
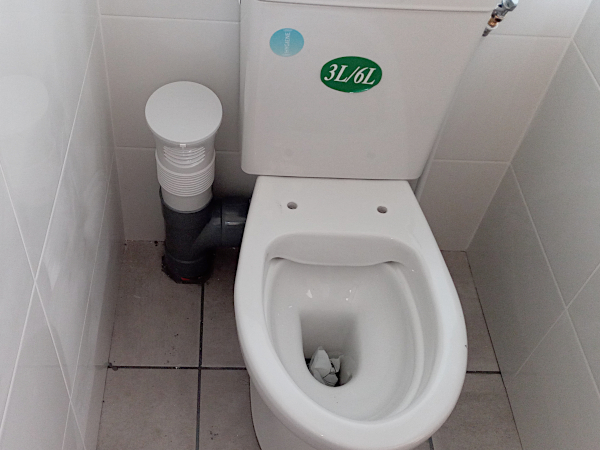
Now the WC in the little toilet. I’m appalled by the huge vent coming out of the floor next to the toilet itself but there’s nothing I can do about it. The current regulations say that you must have secondary air inlets for the waste pipes going into the ‘fosse septique’.

The alternative would have been to have huge pipes going right up the wall, out through the ceiling and joining in the roof space to connect to an external roof air inlet, which would have looked even worse than it does now. I just wish that white plastic tubing had been used though rather than the hideous dark grey stuff that is now in full view 🙁

null

null

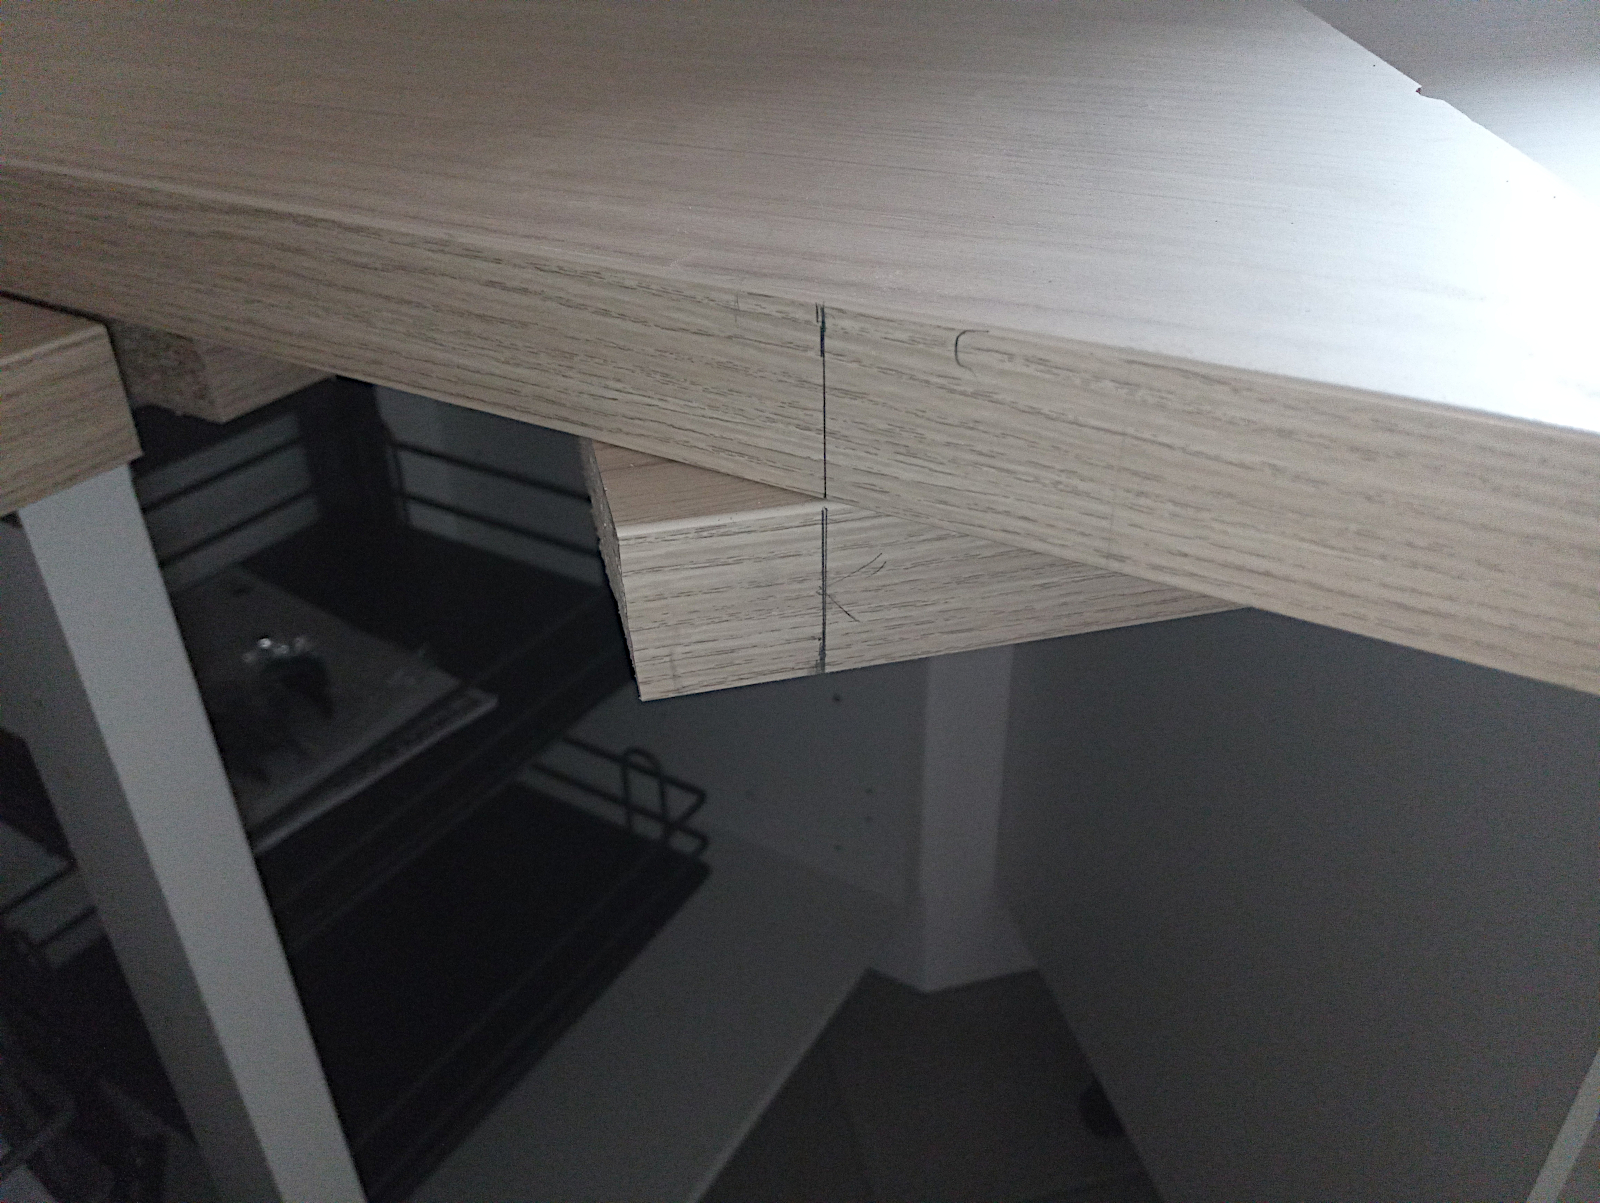
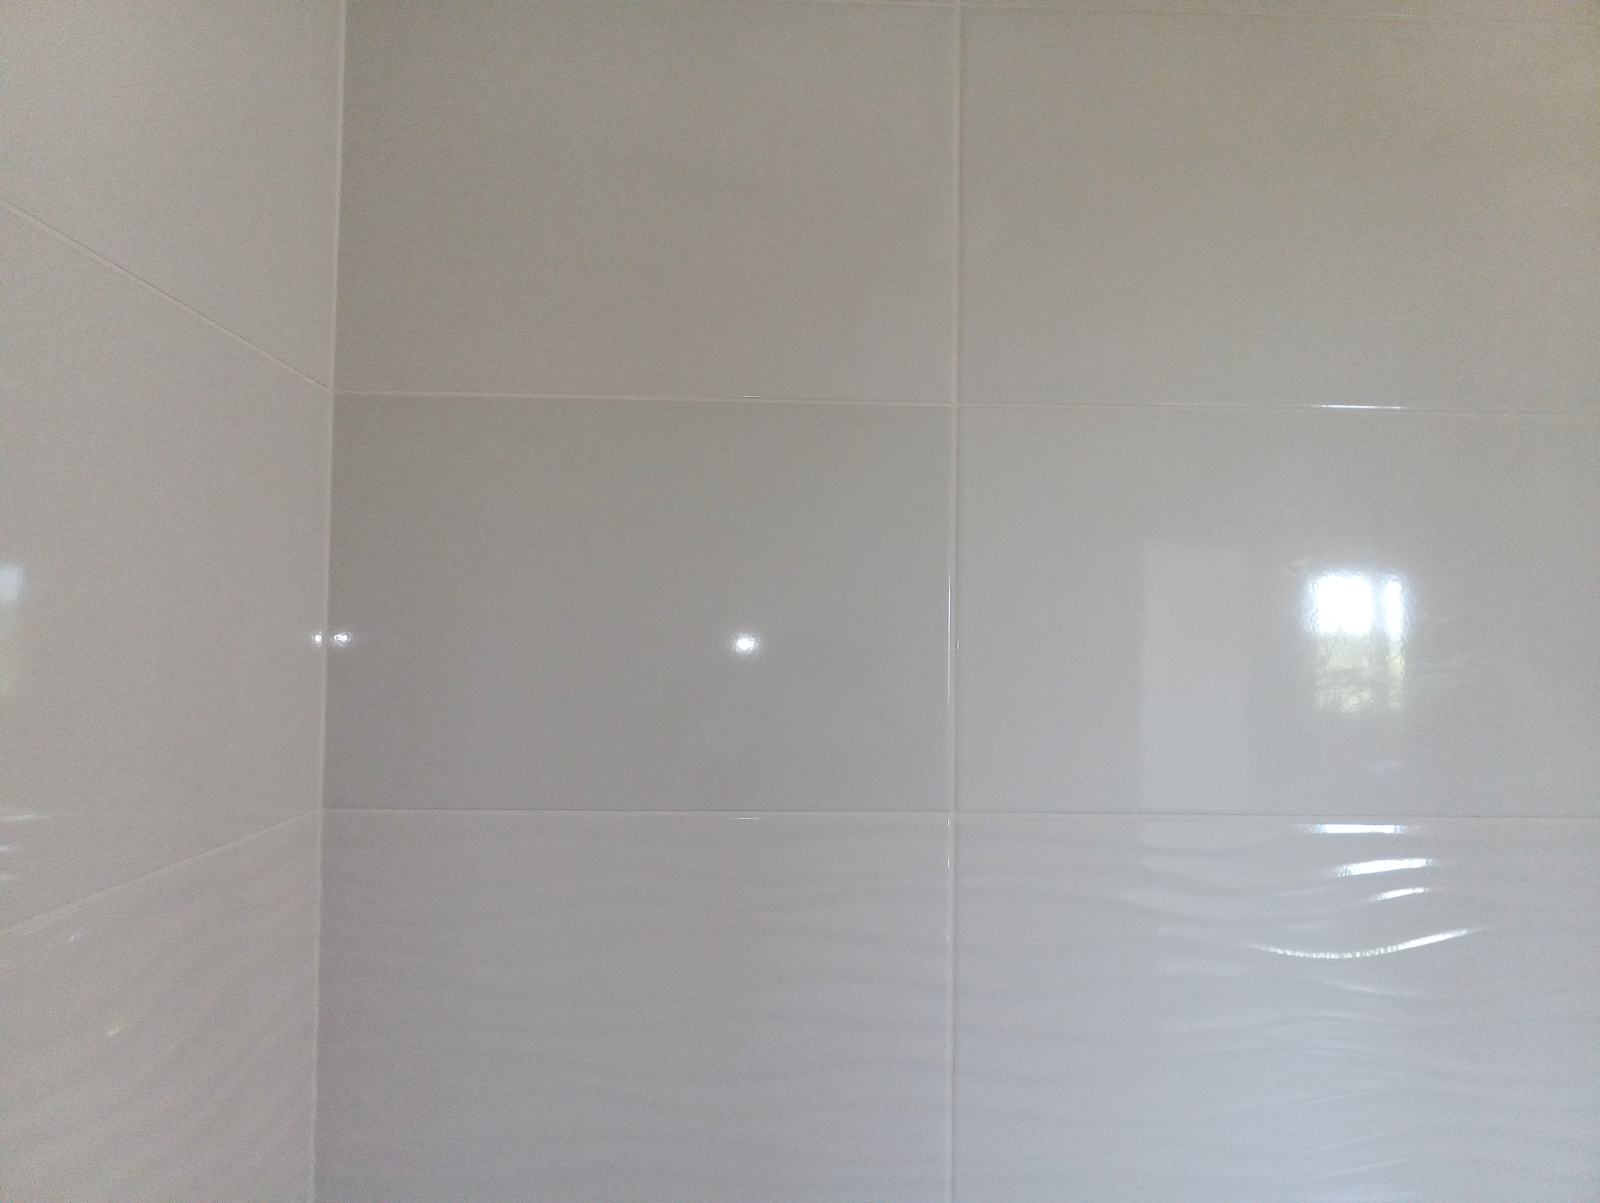
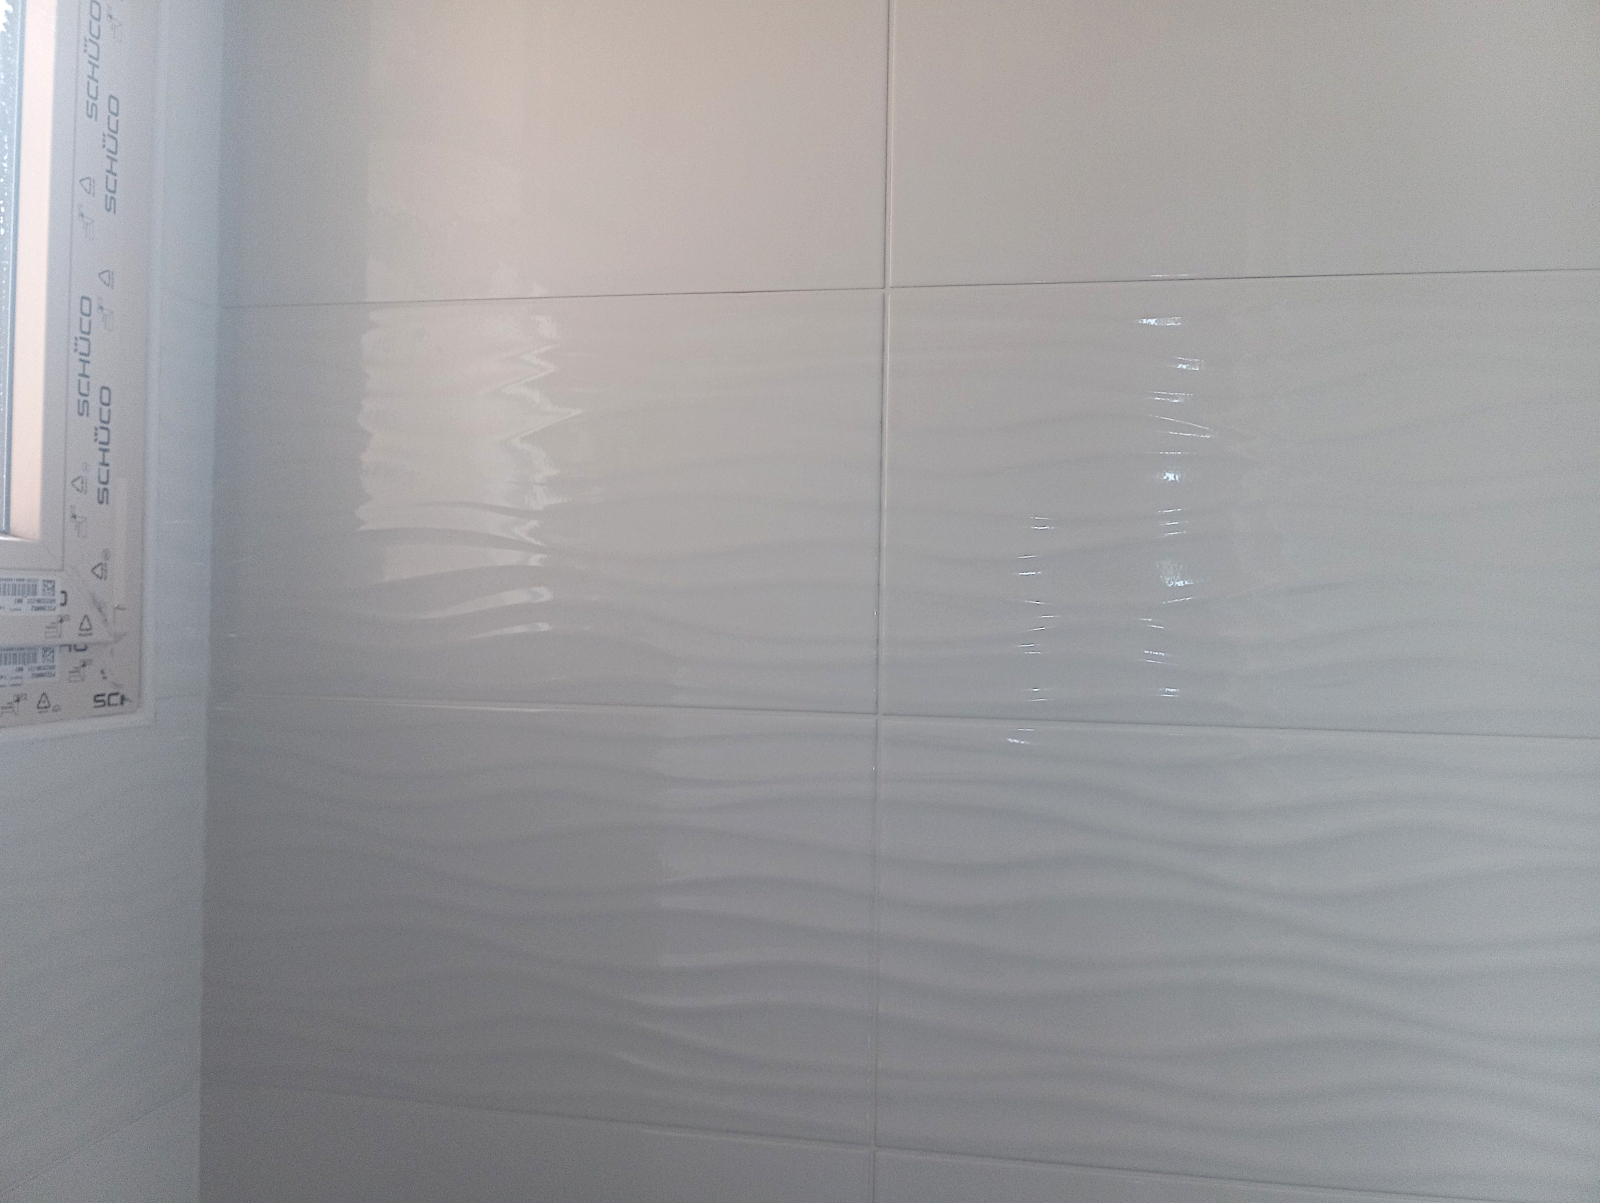
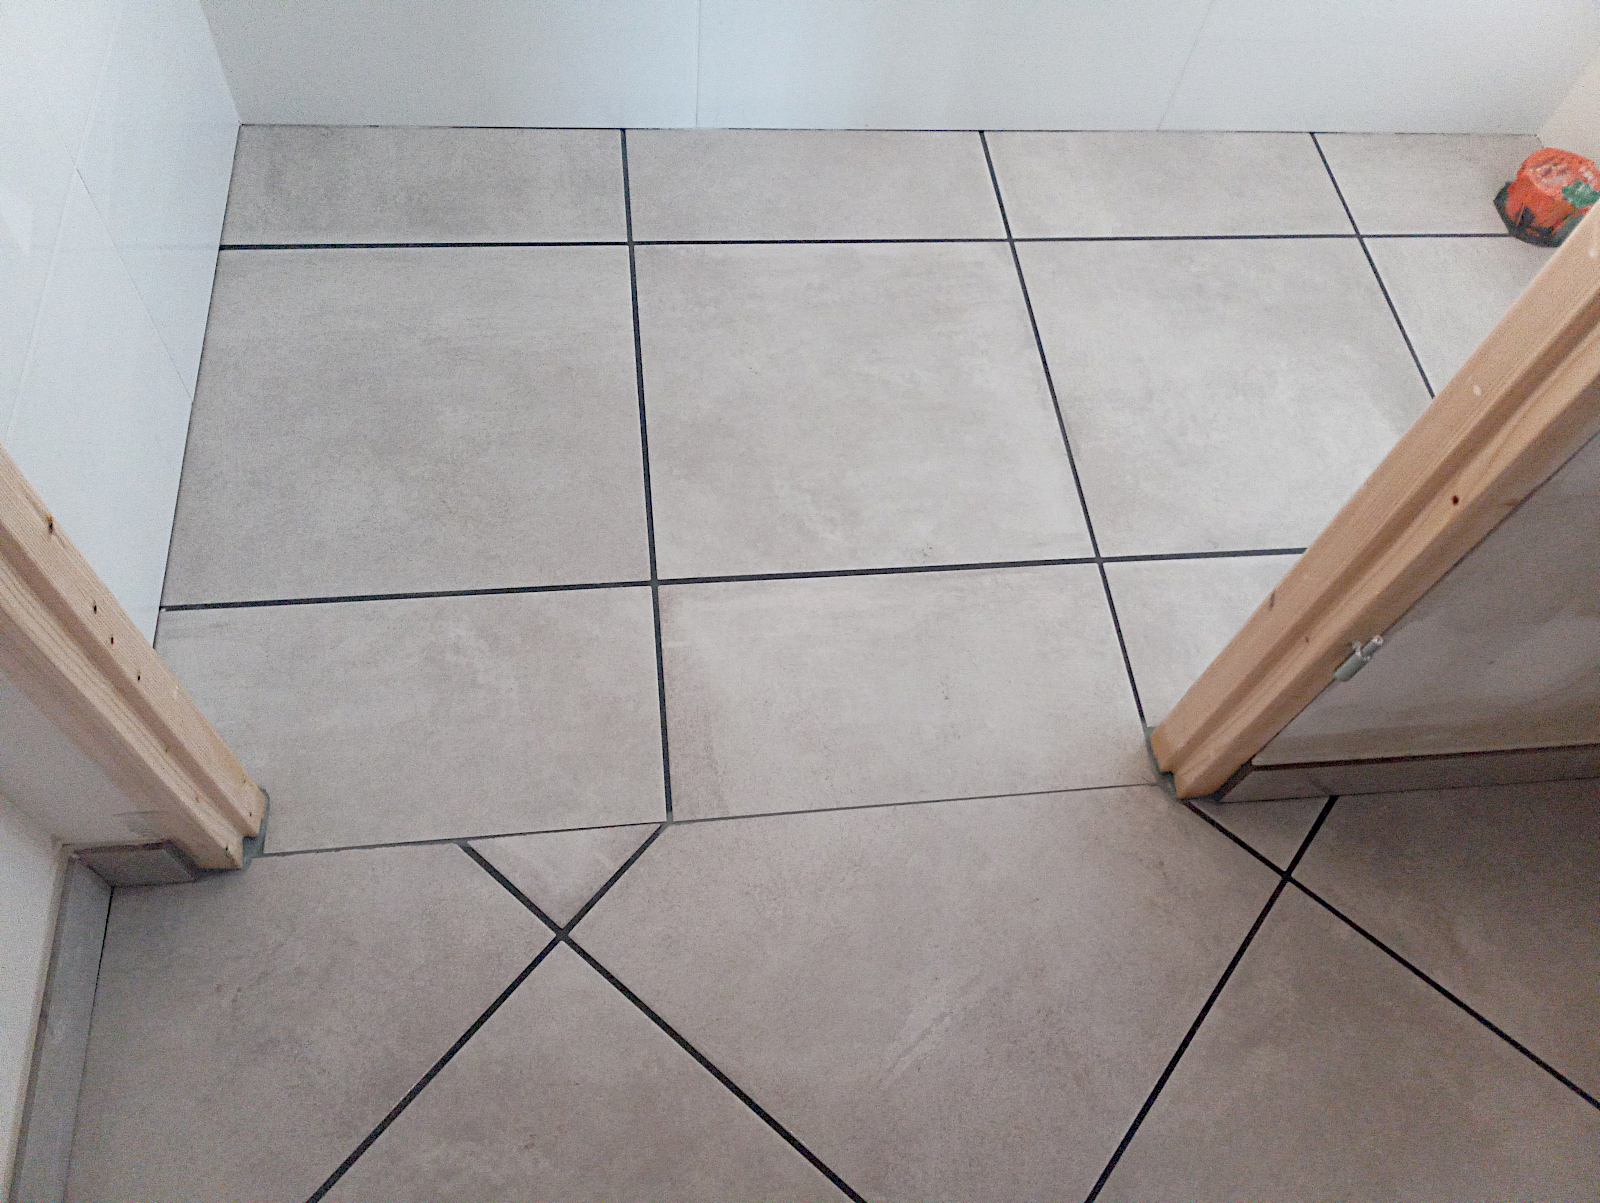
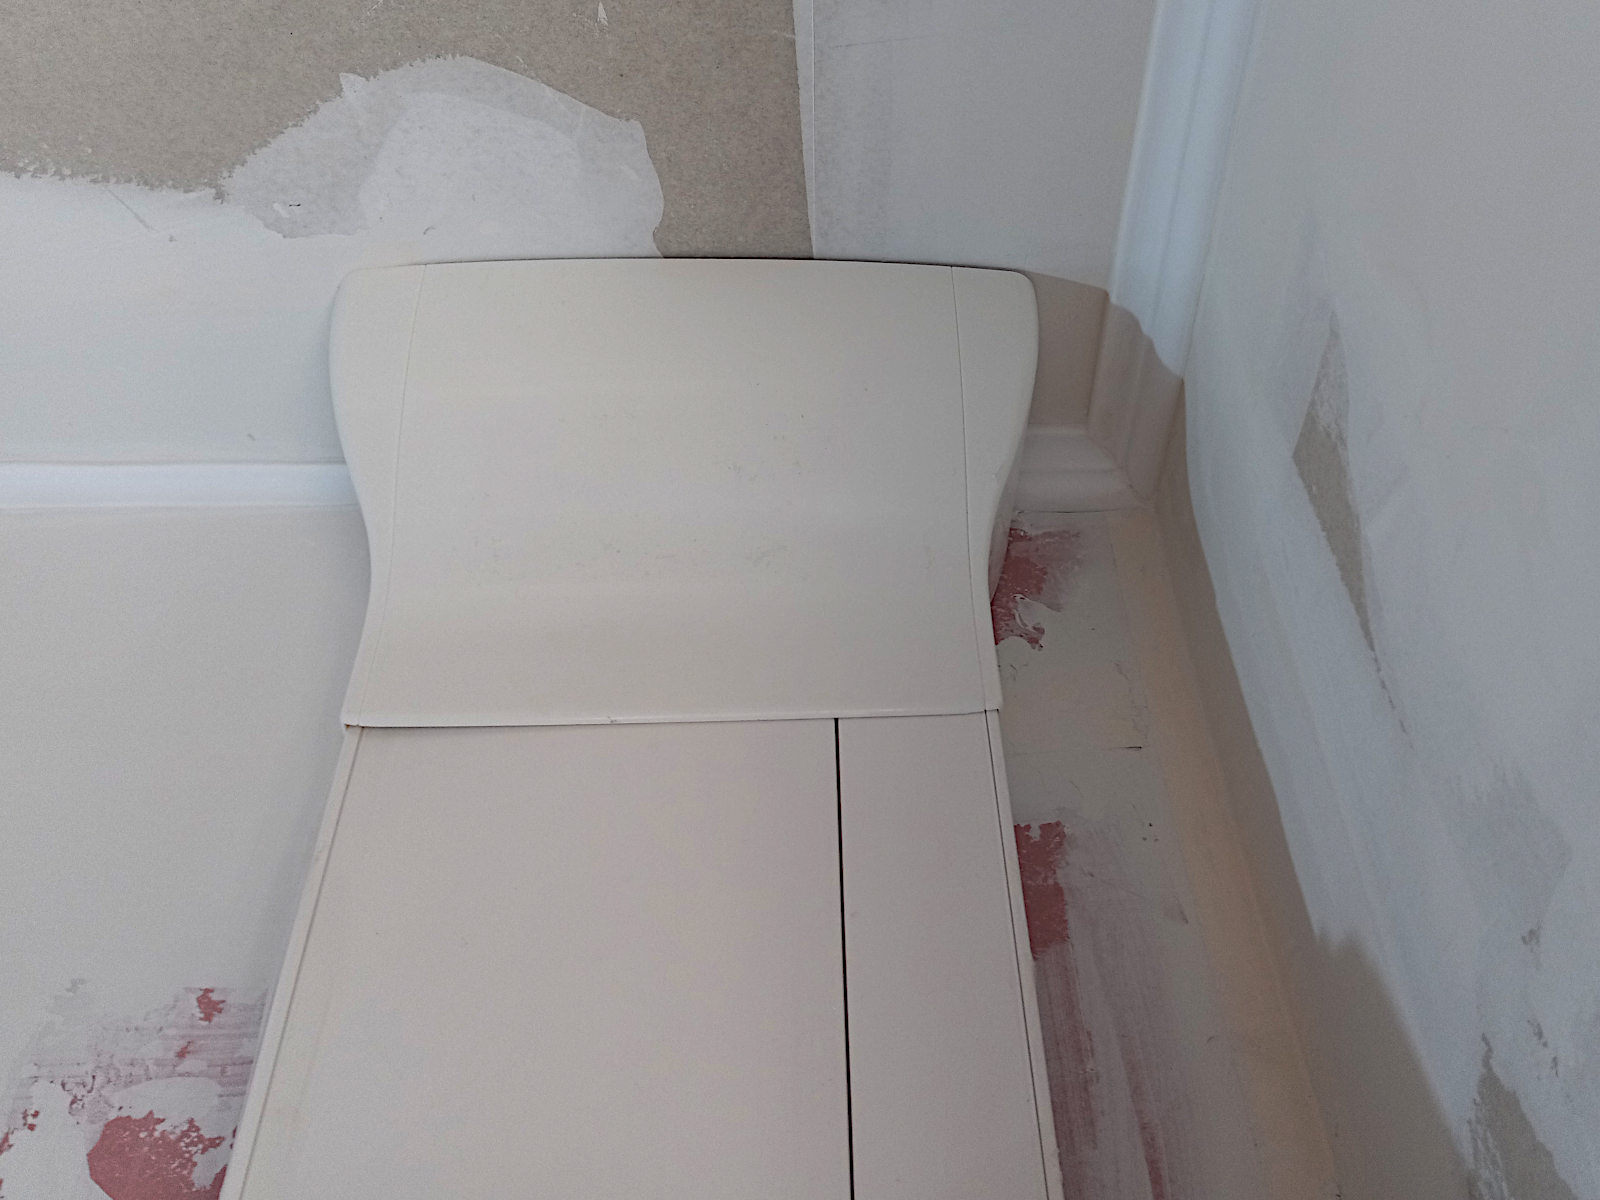
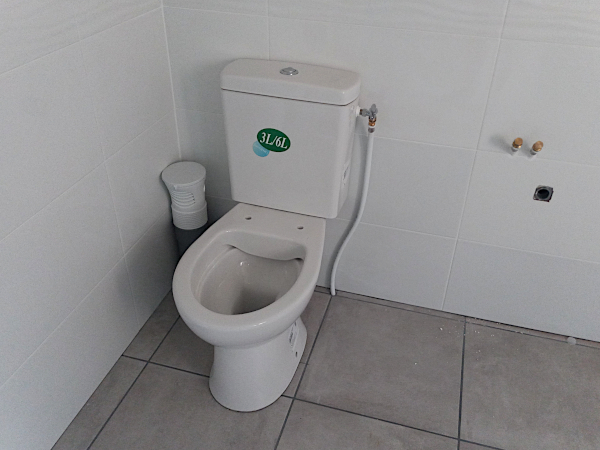
Similar comments to the above apply for the WC in the bathroom. Although it appears to be in the following shot, the WC hasn’t been fixed to the wall and floor. That’s because it will have to come out again to allow the dark tiles to be removed and replaced.

null

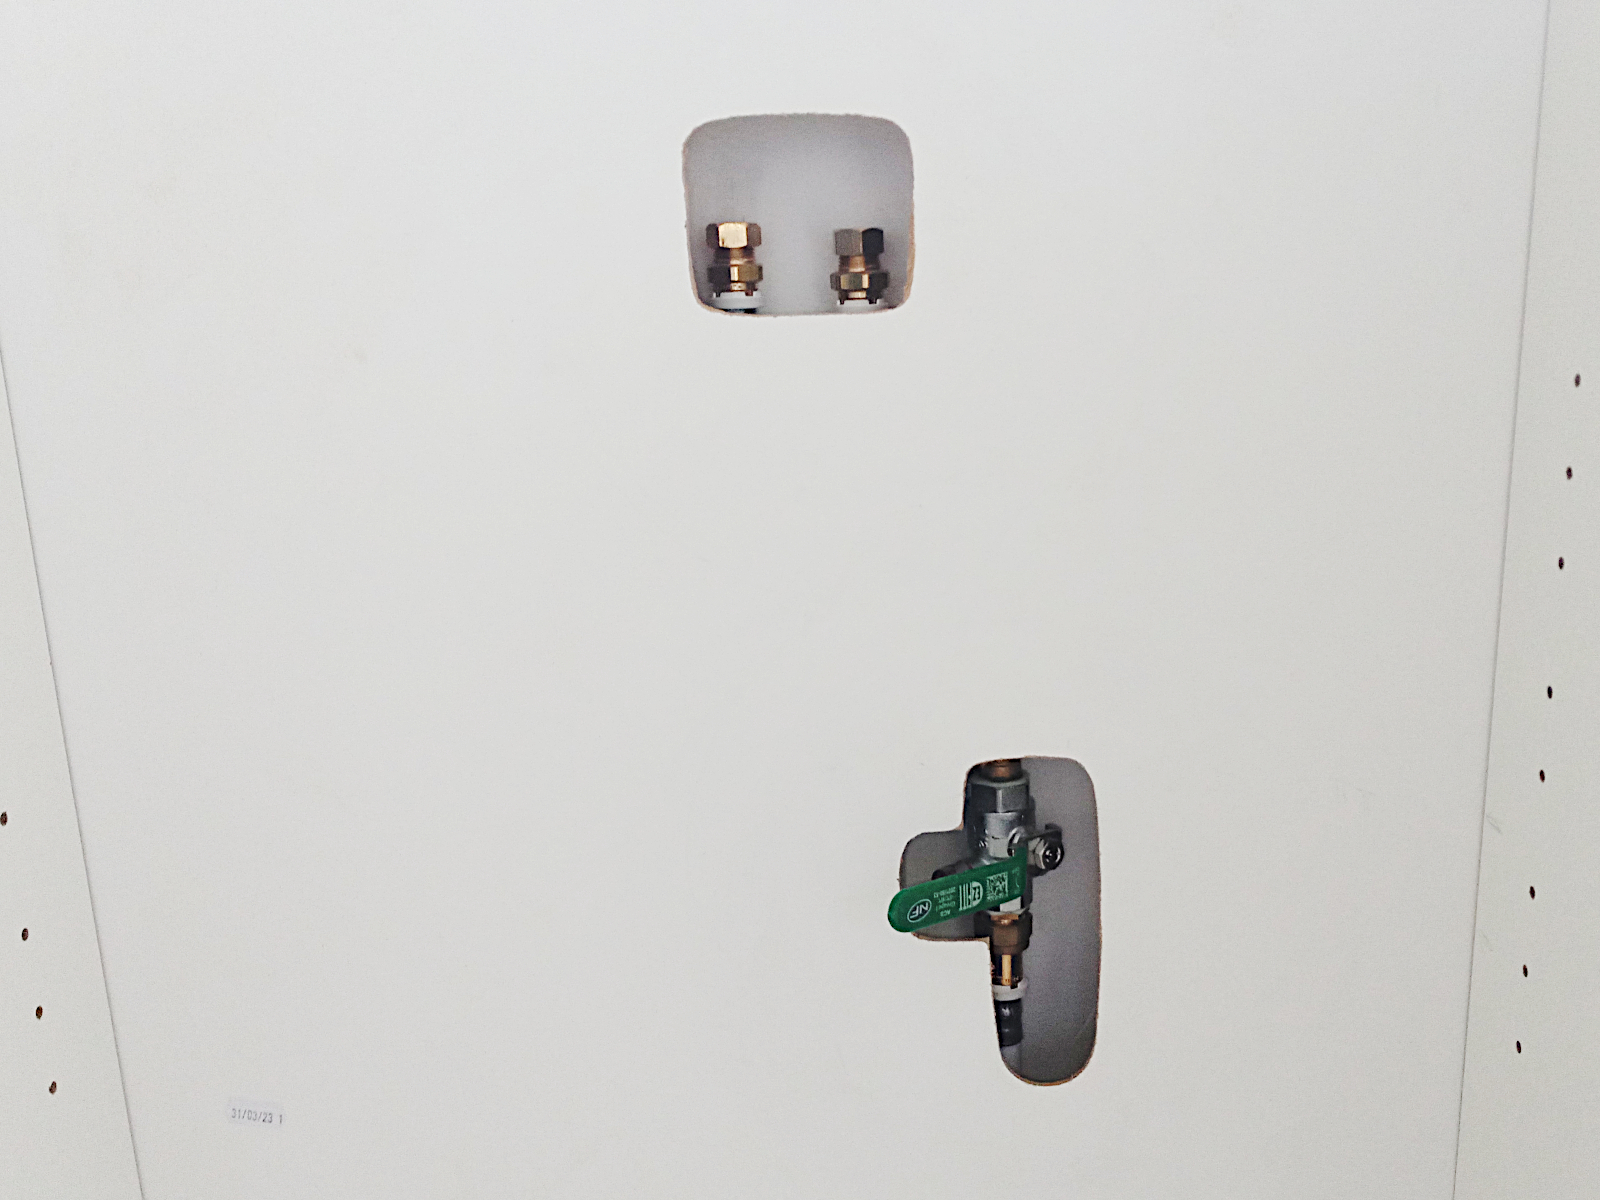
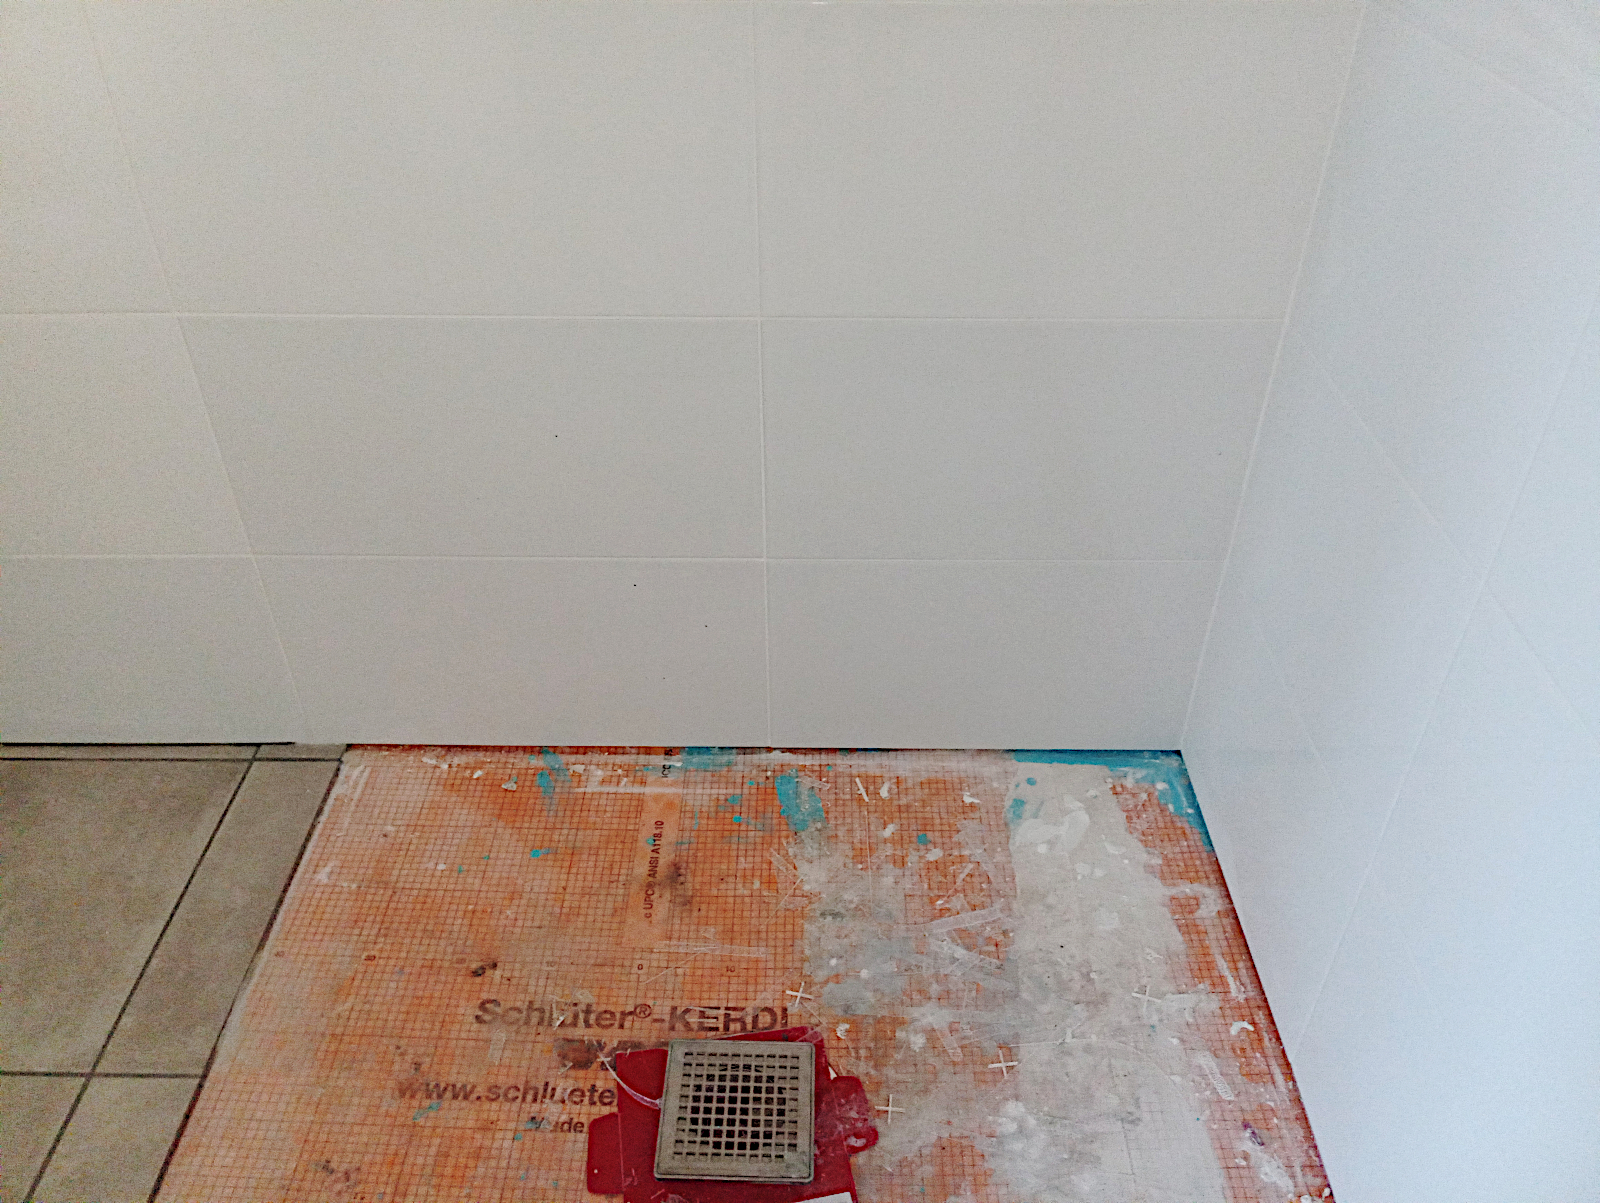
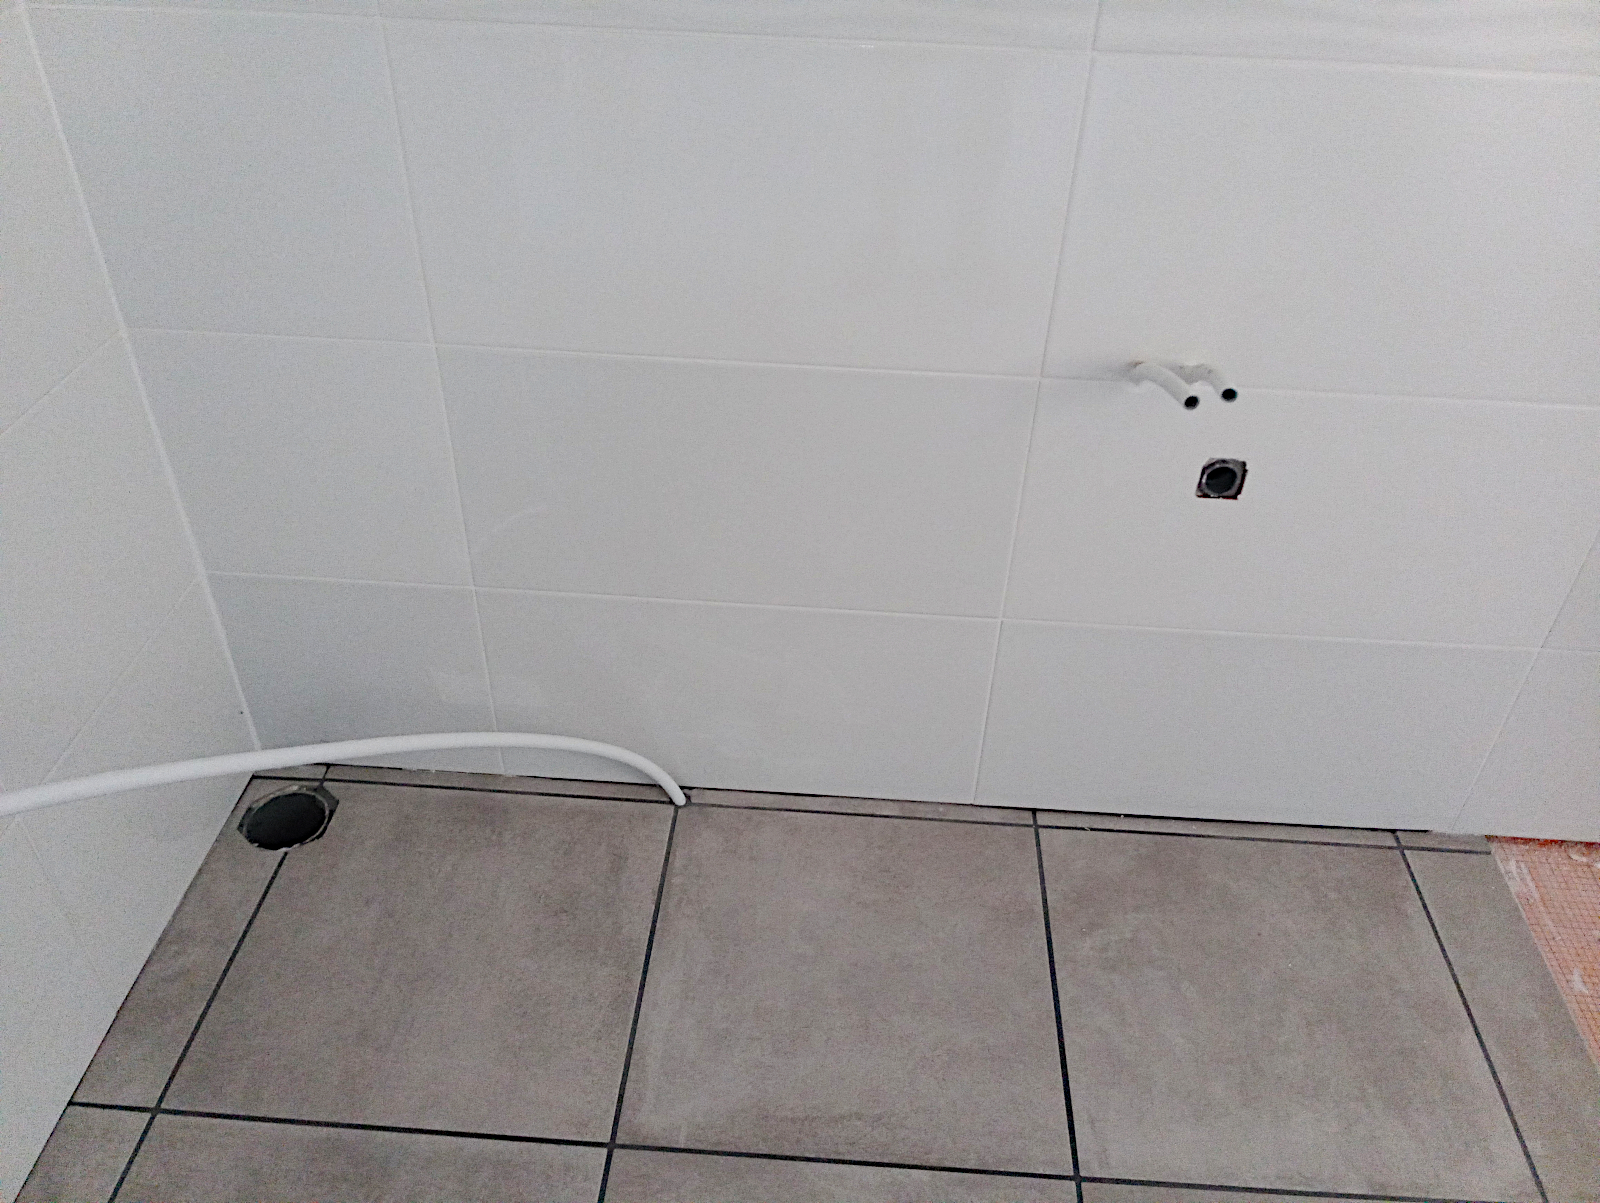
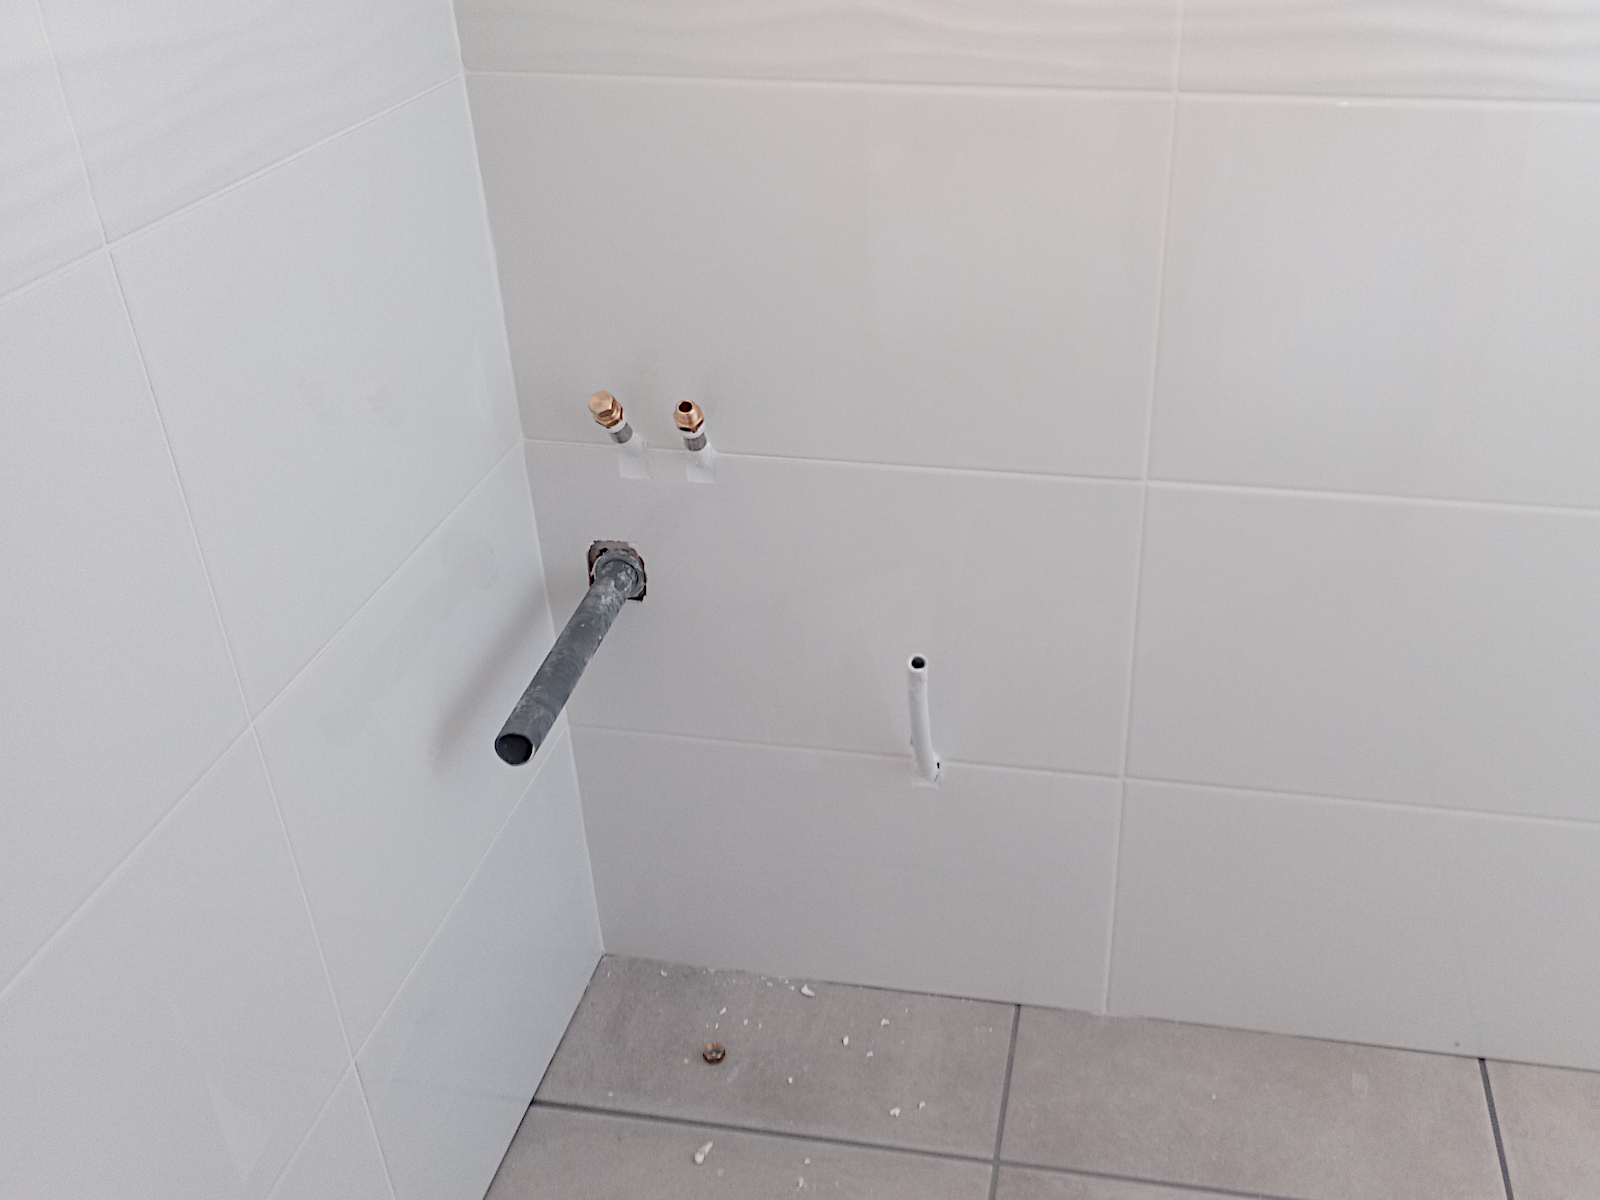
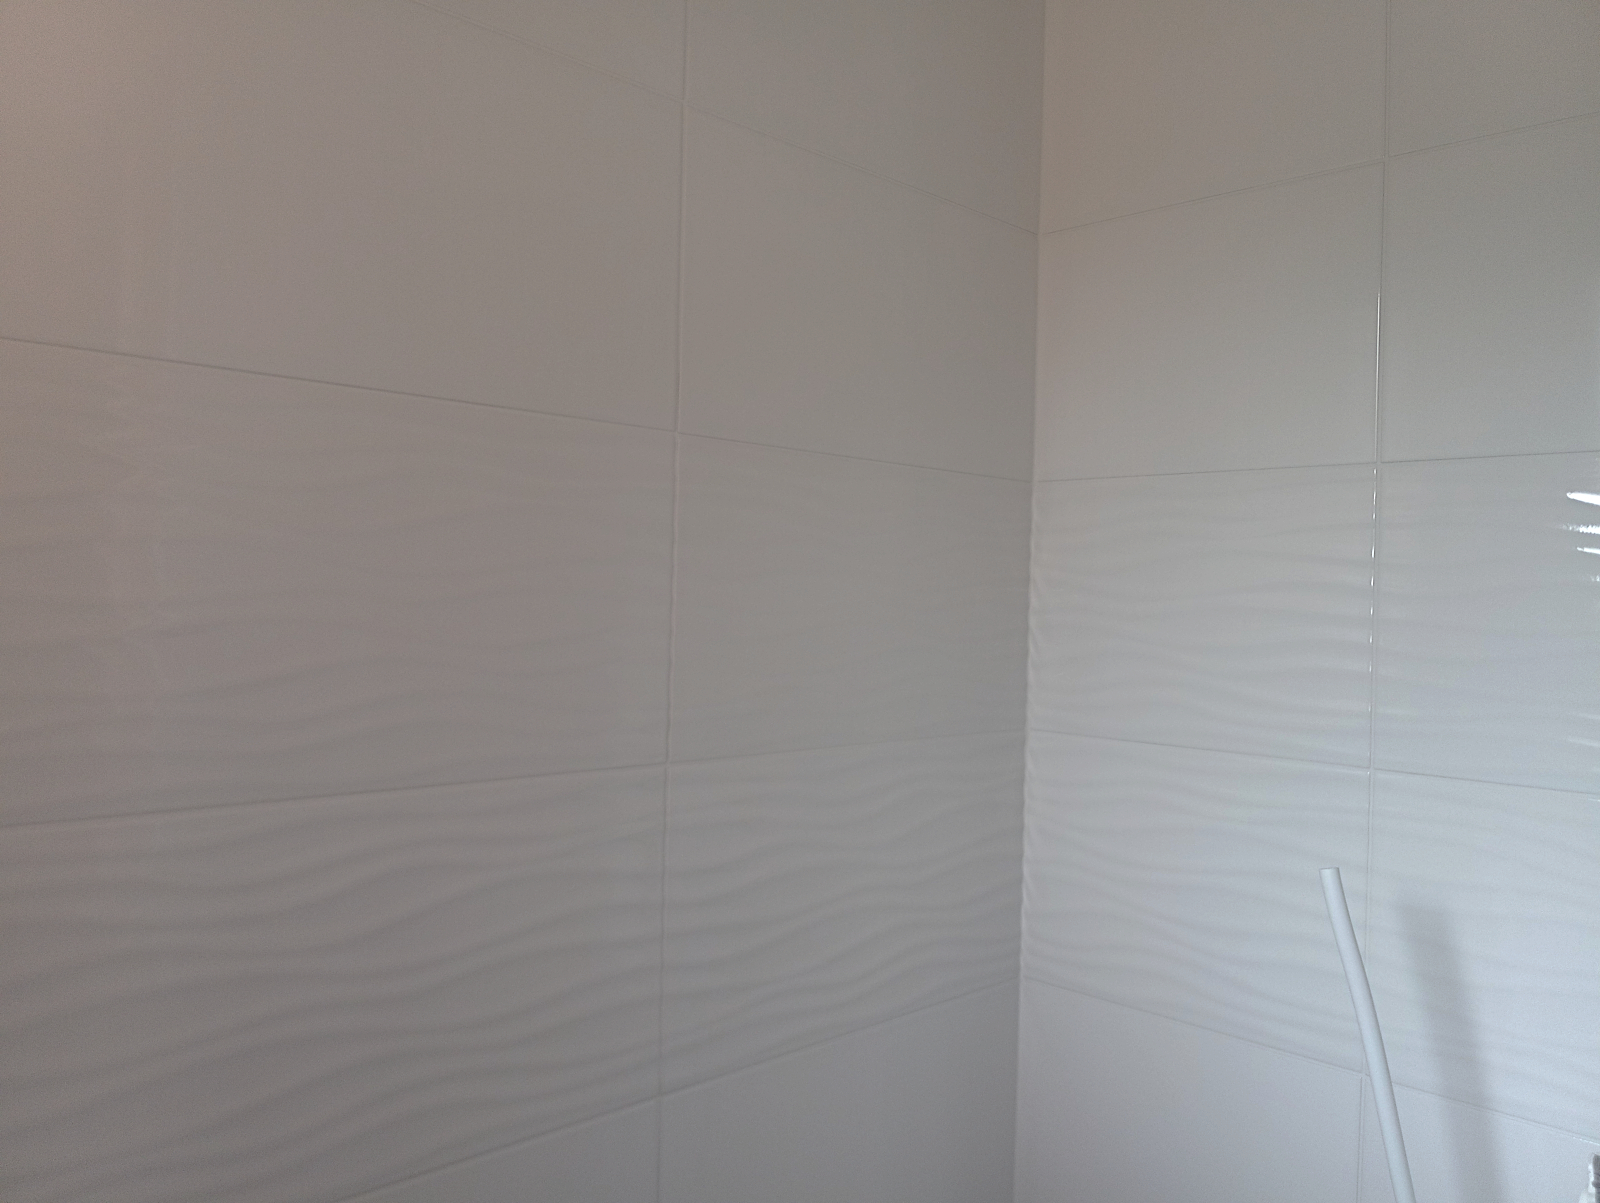
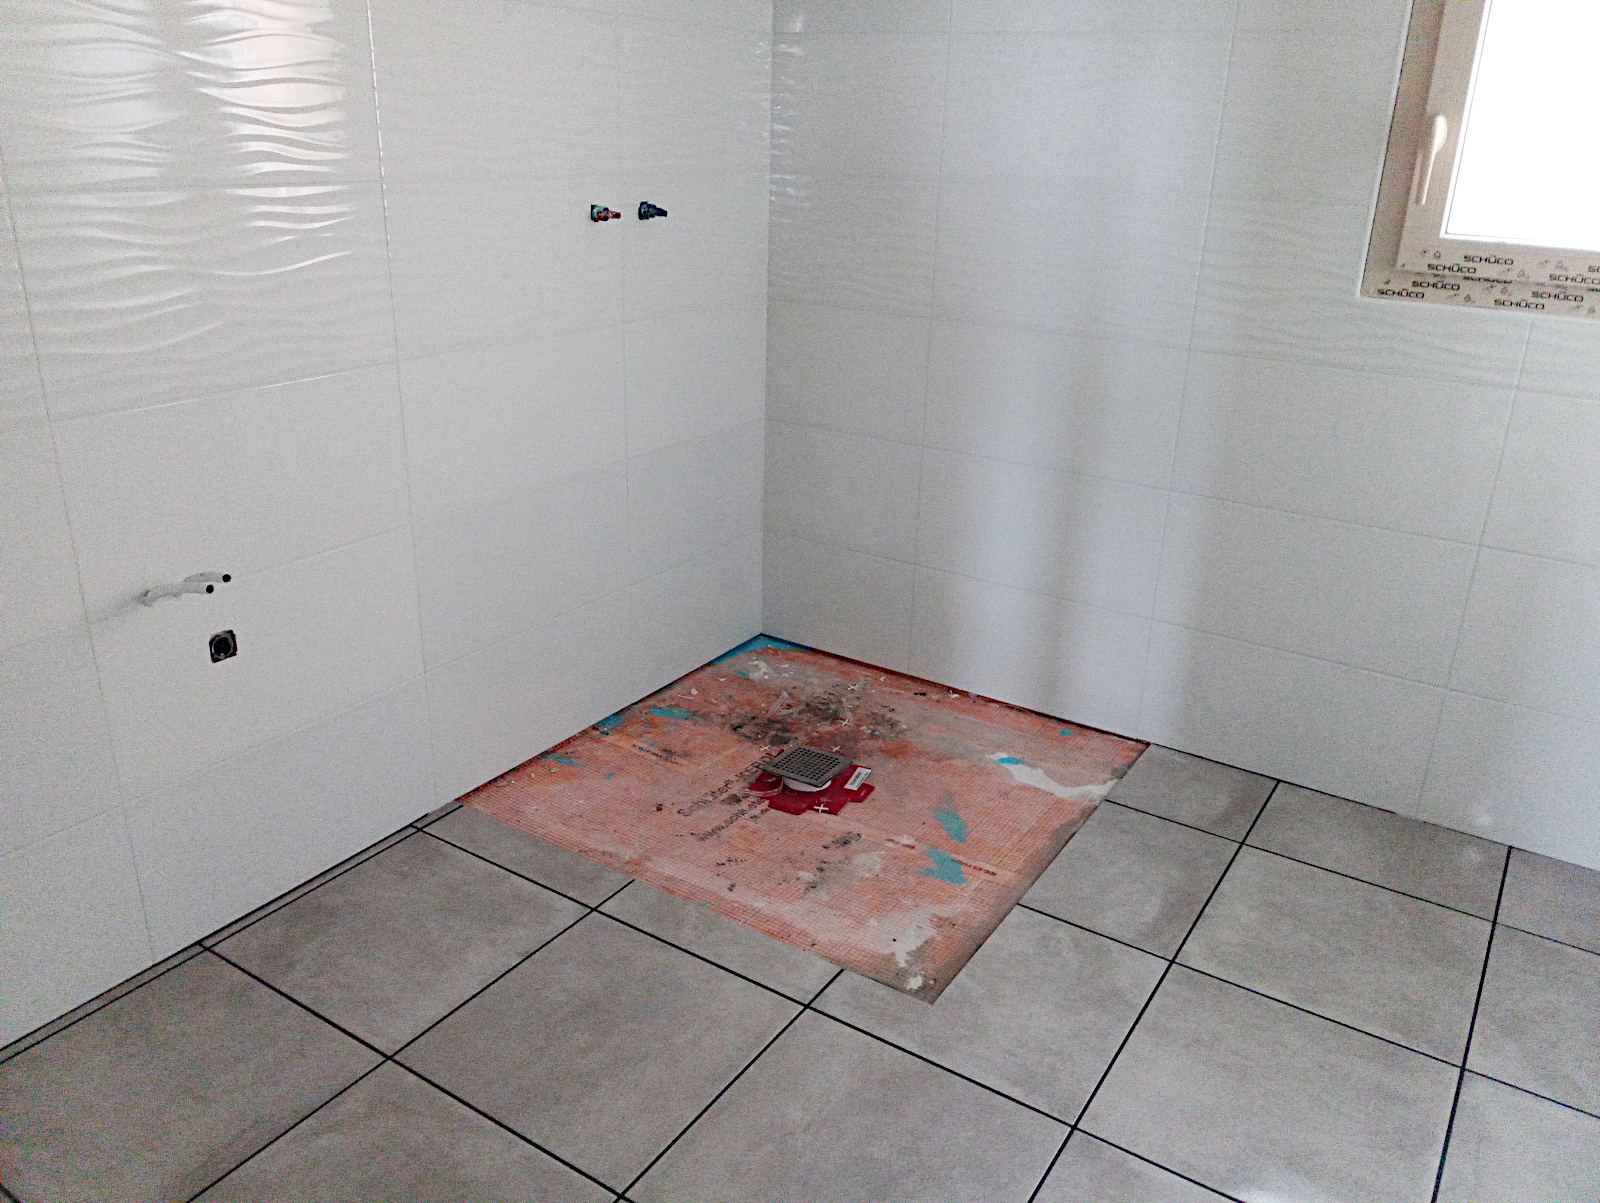
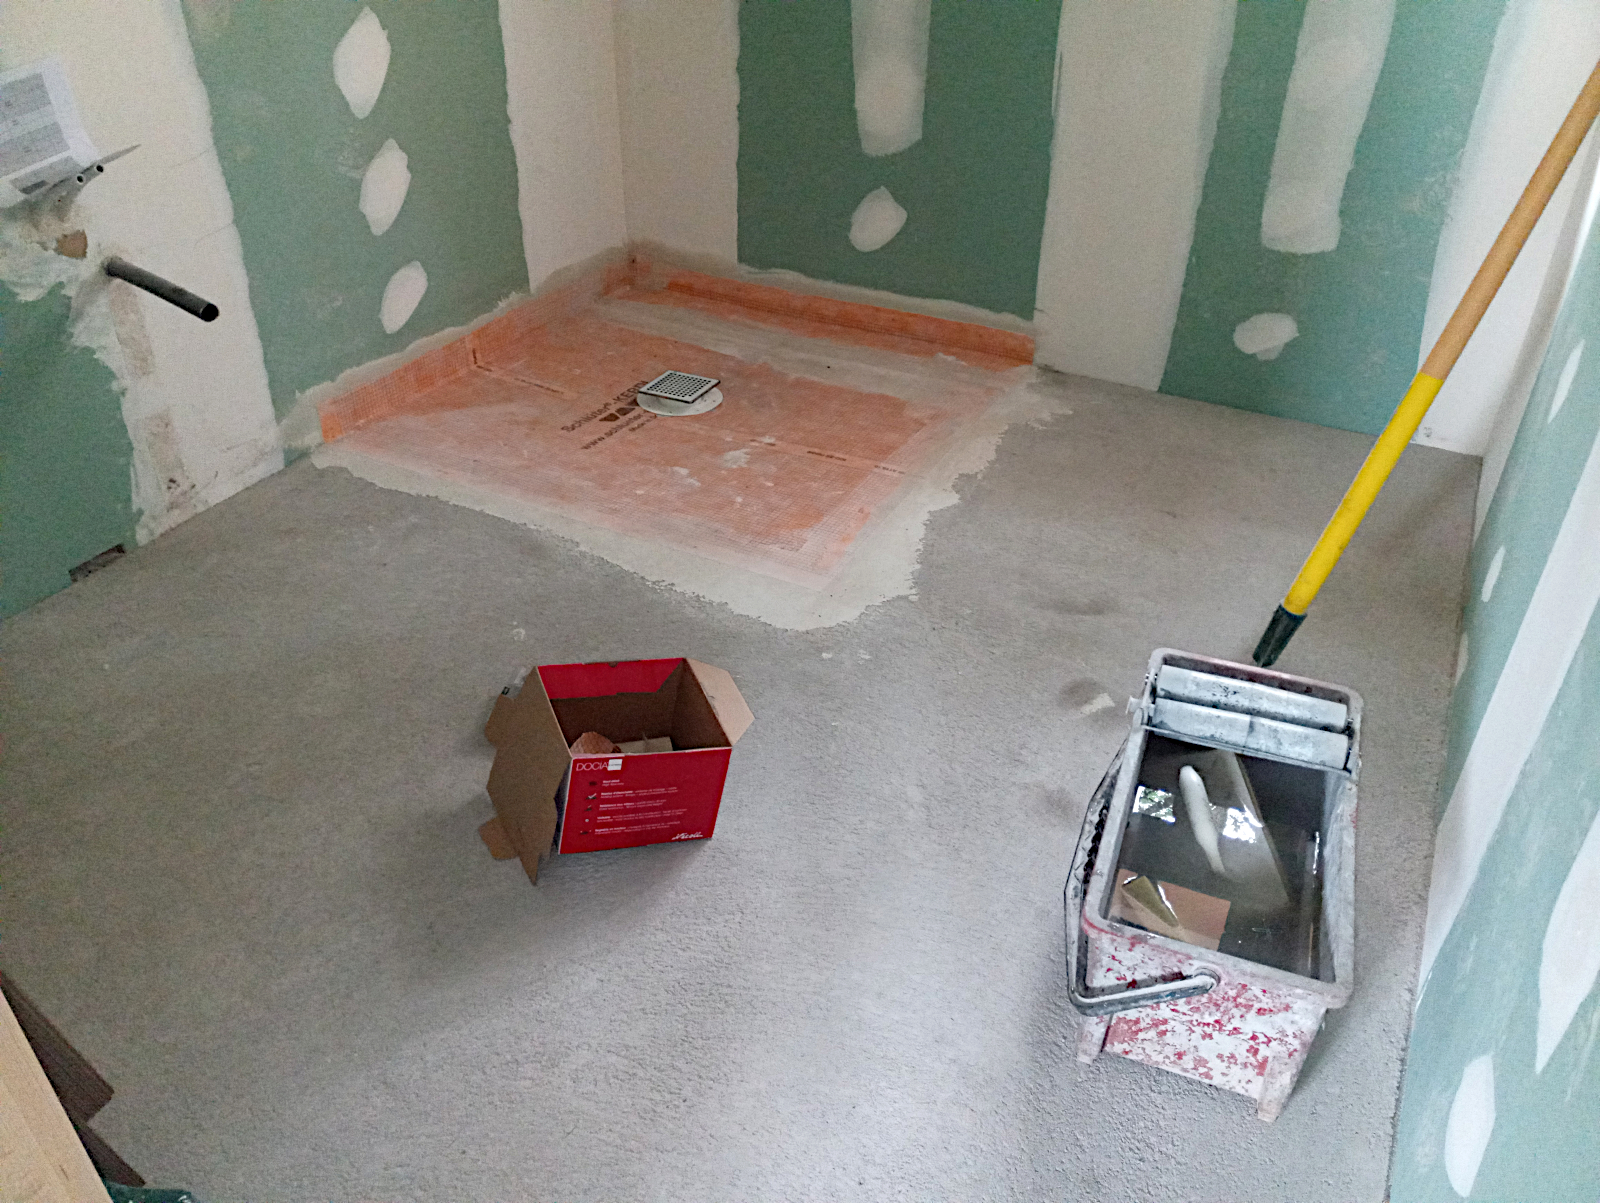
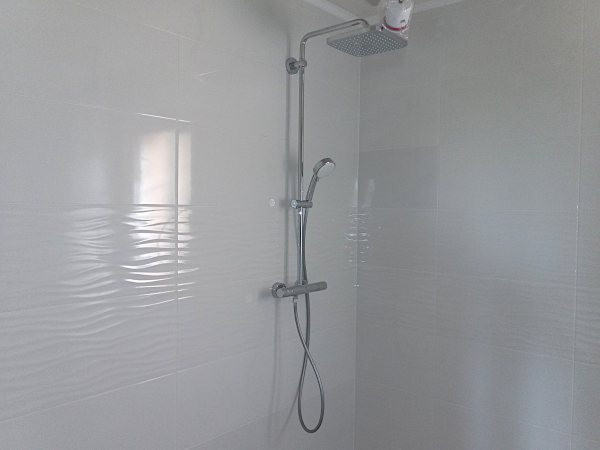
Here’s the shower unit, connected up but not usable until the mosaic floor tiles have been laid and the outlet made good.

null

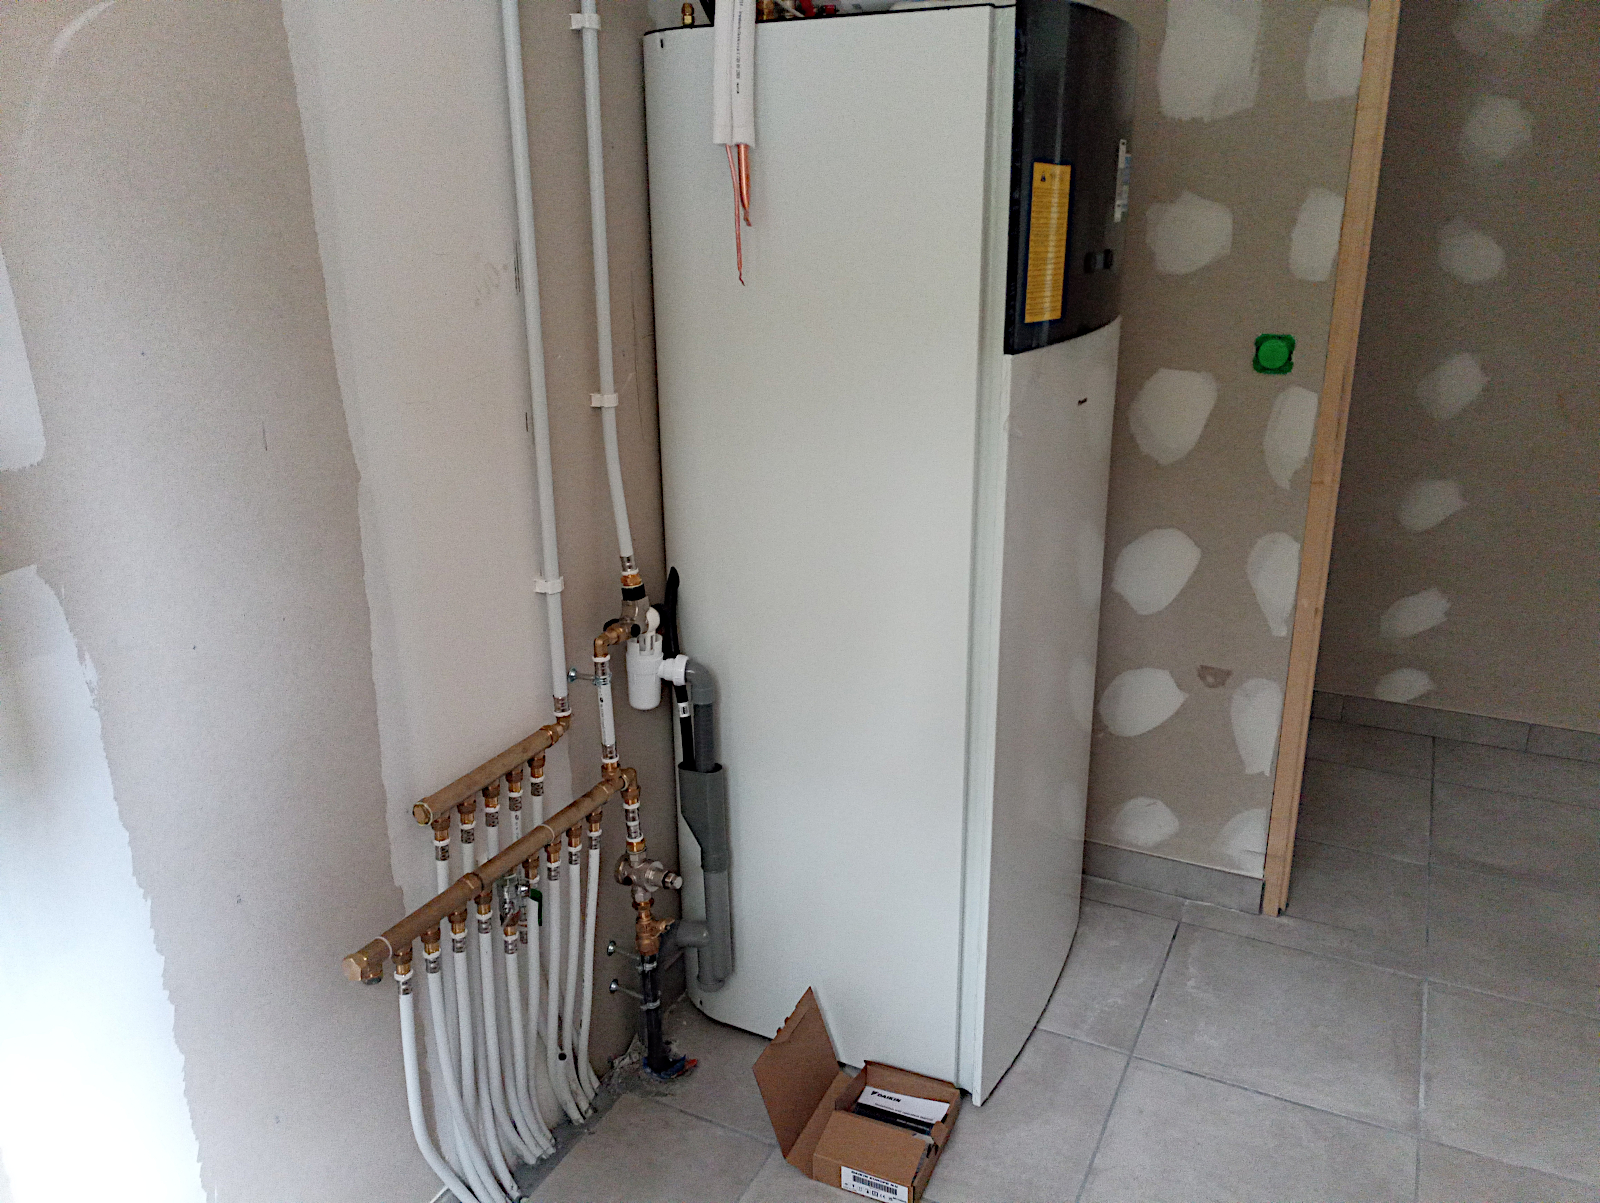
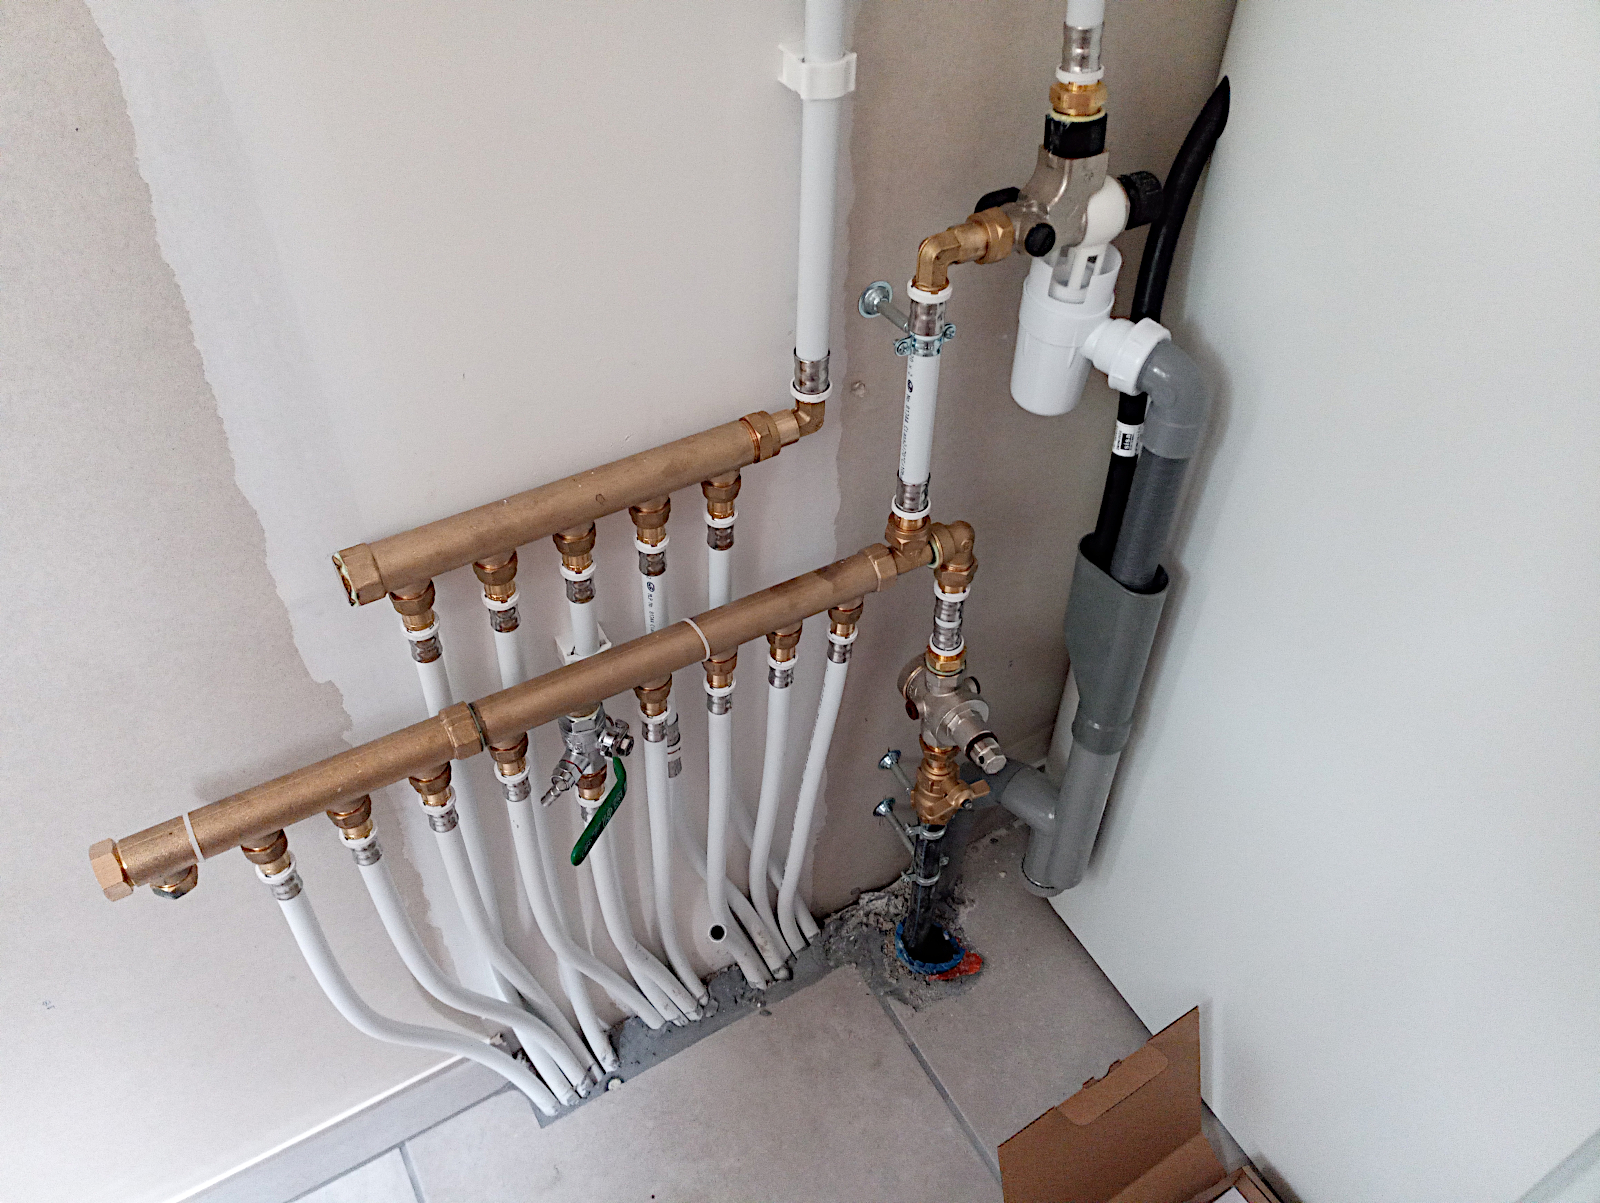
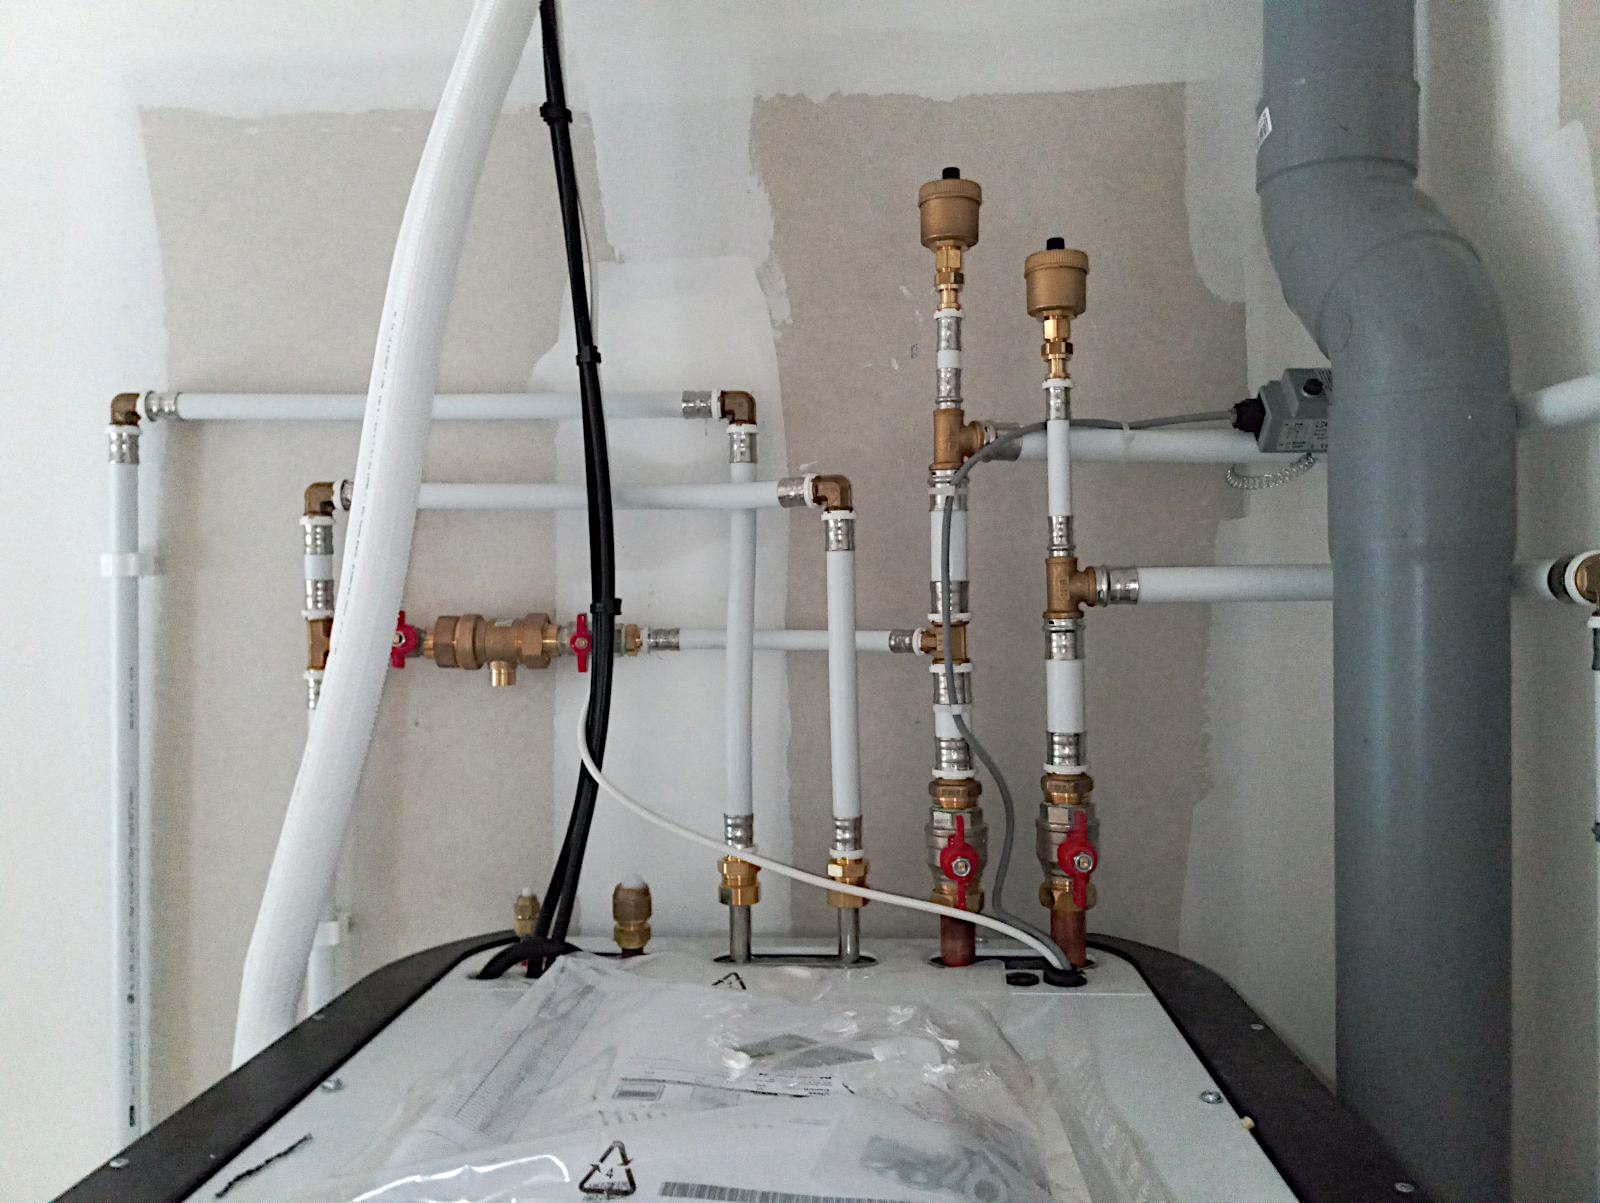
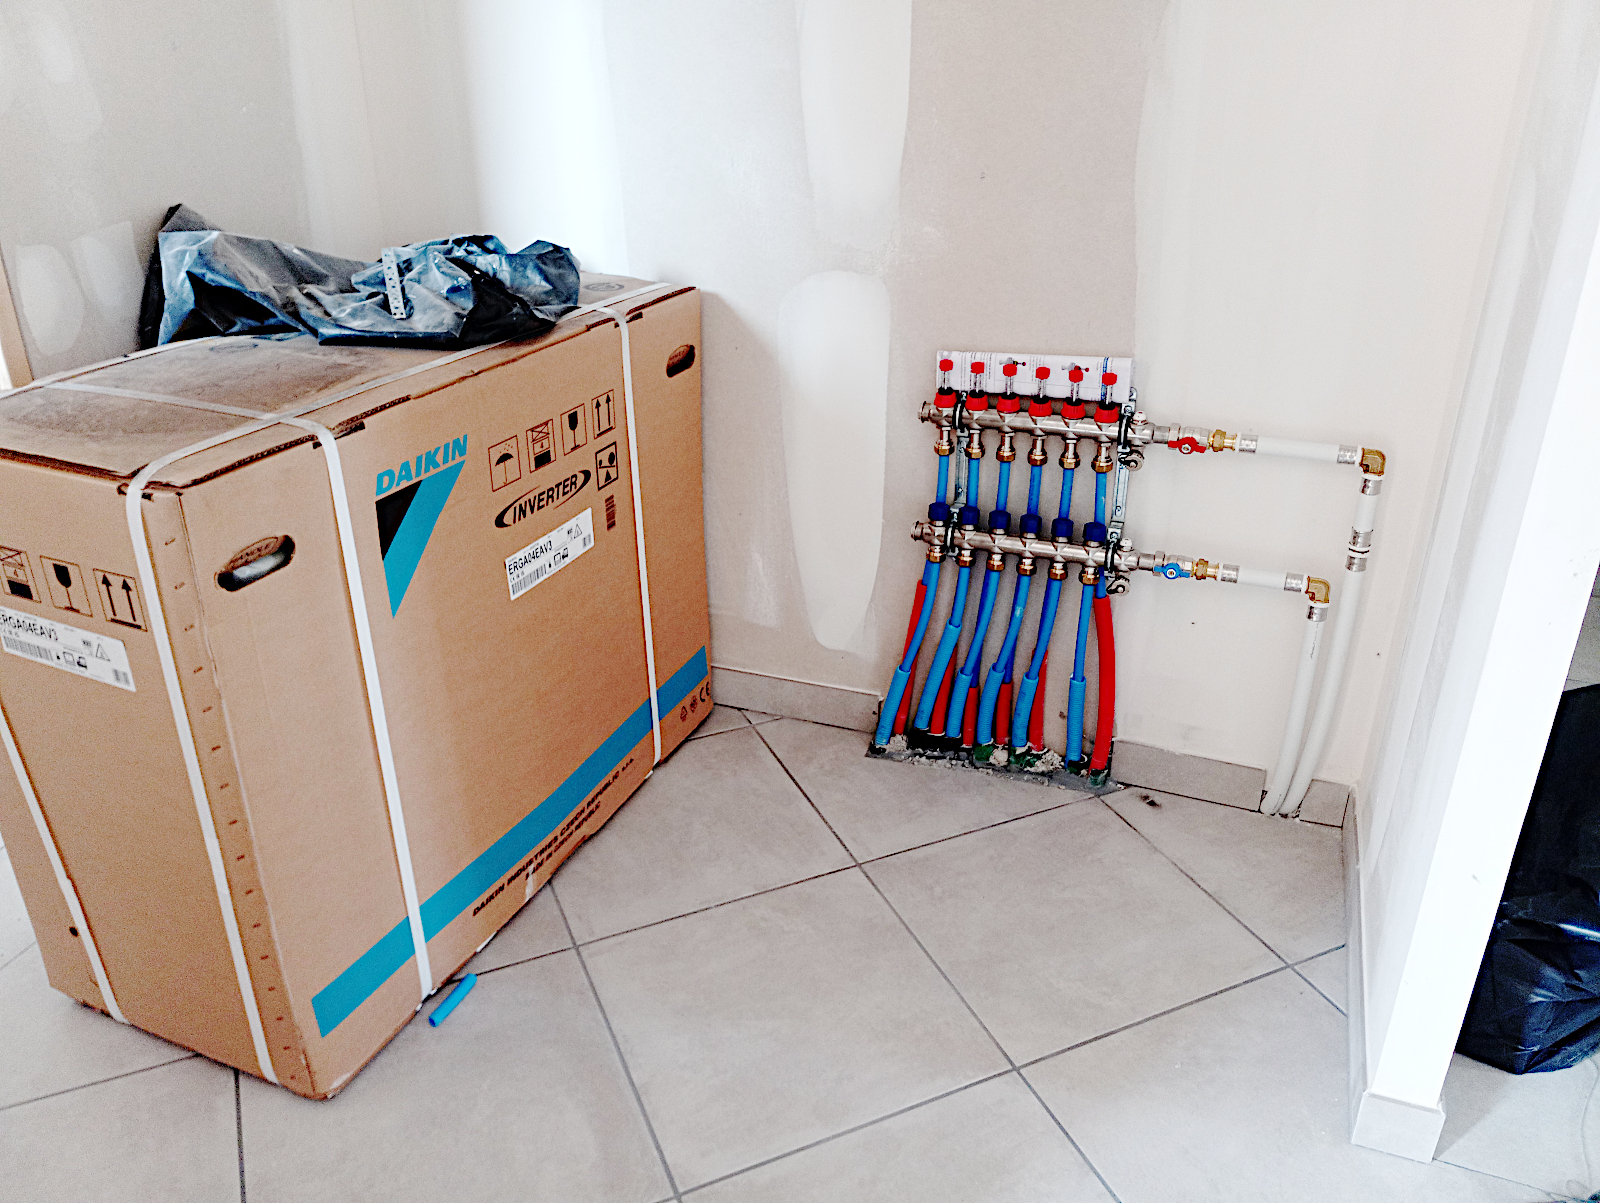
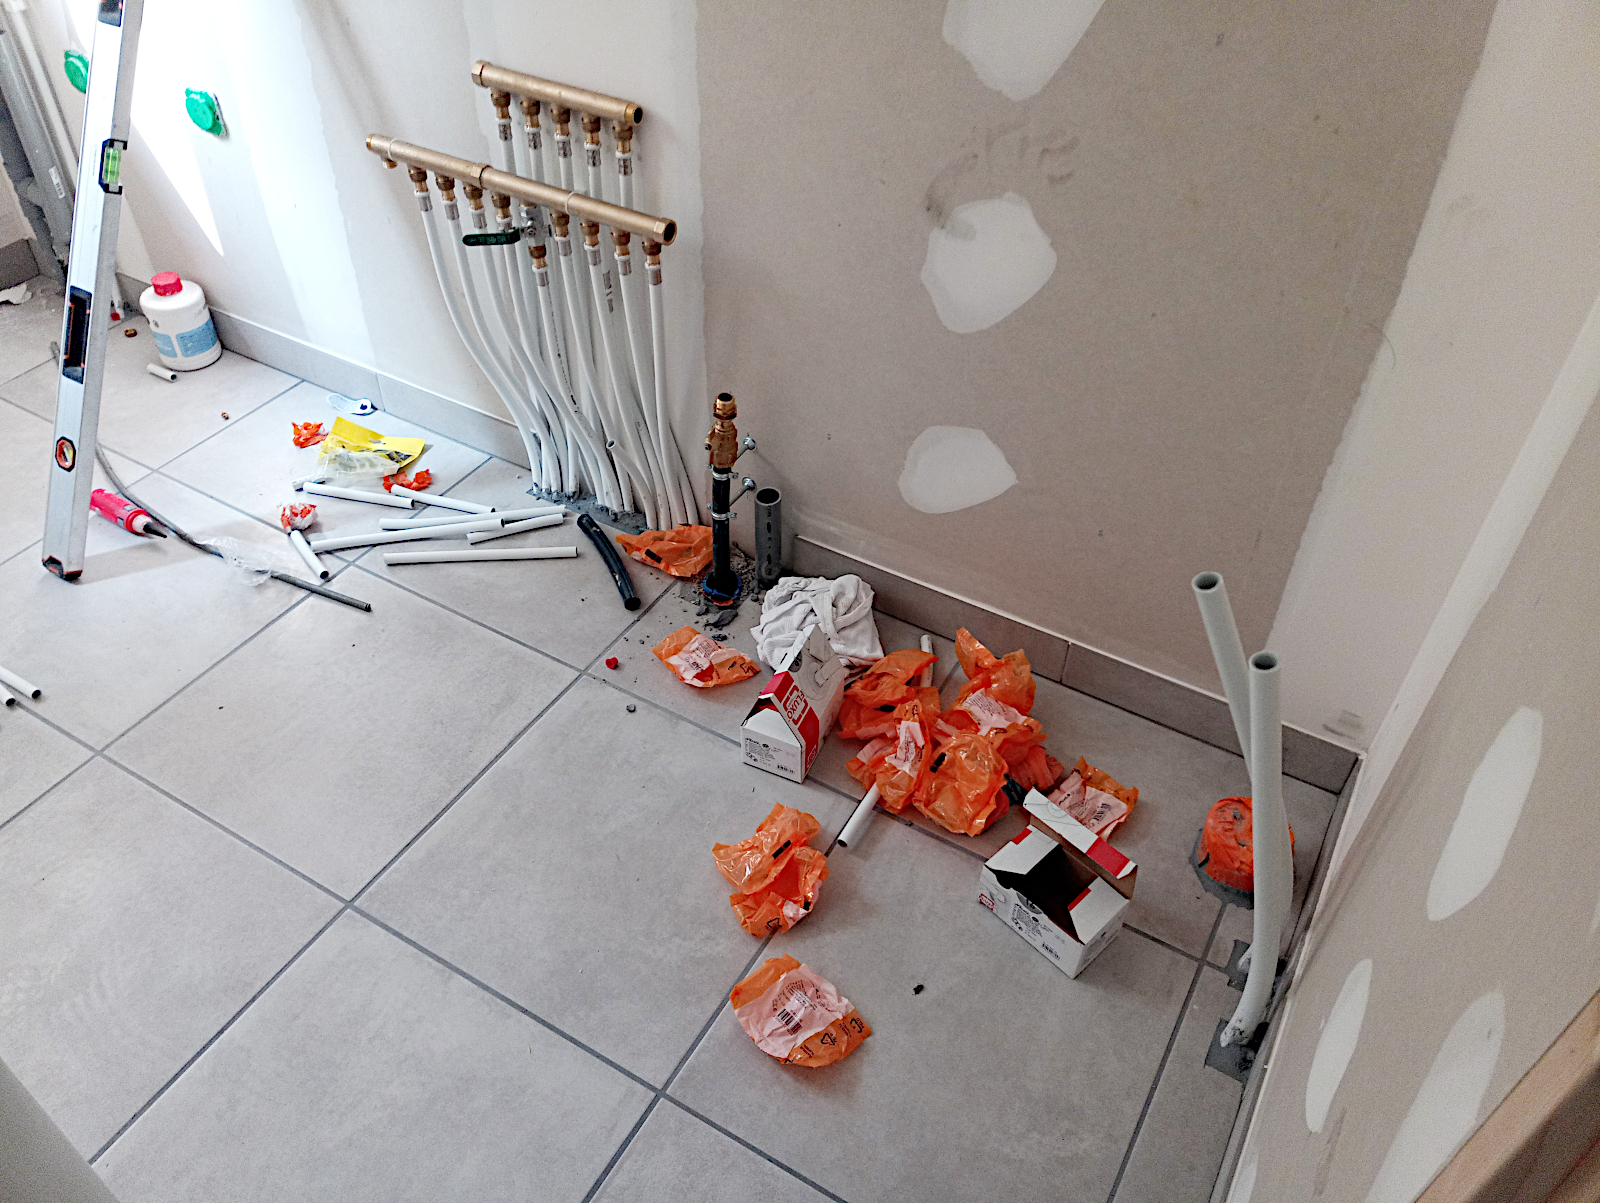
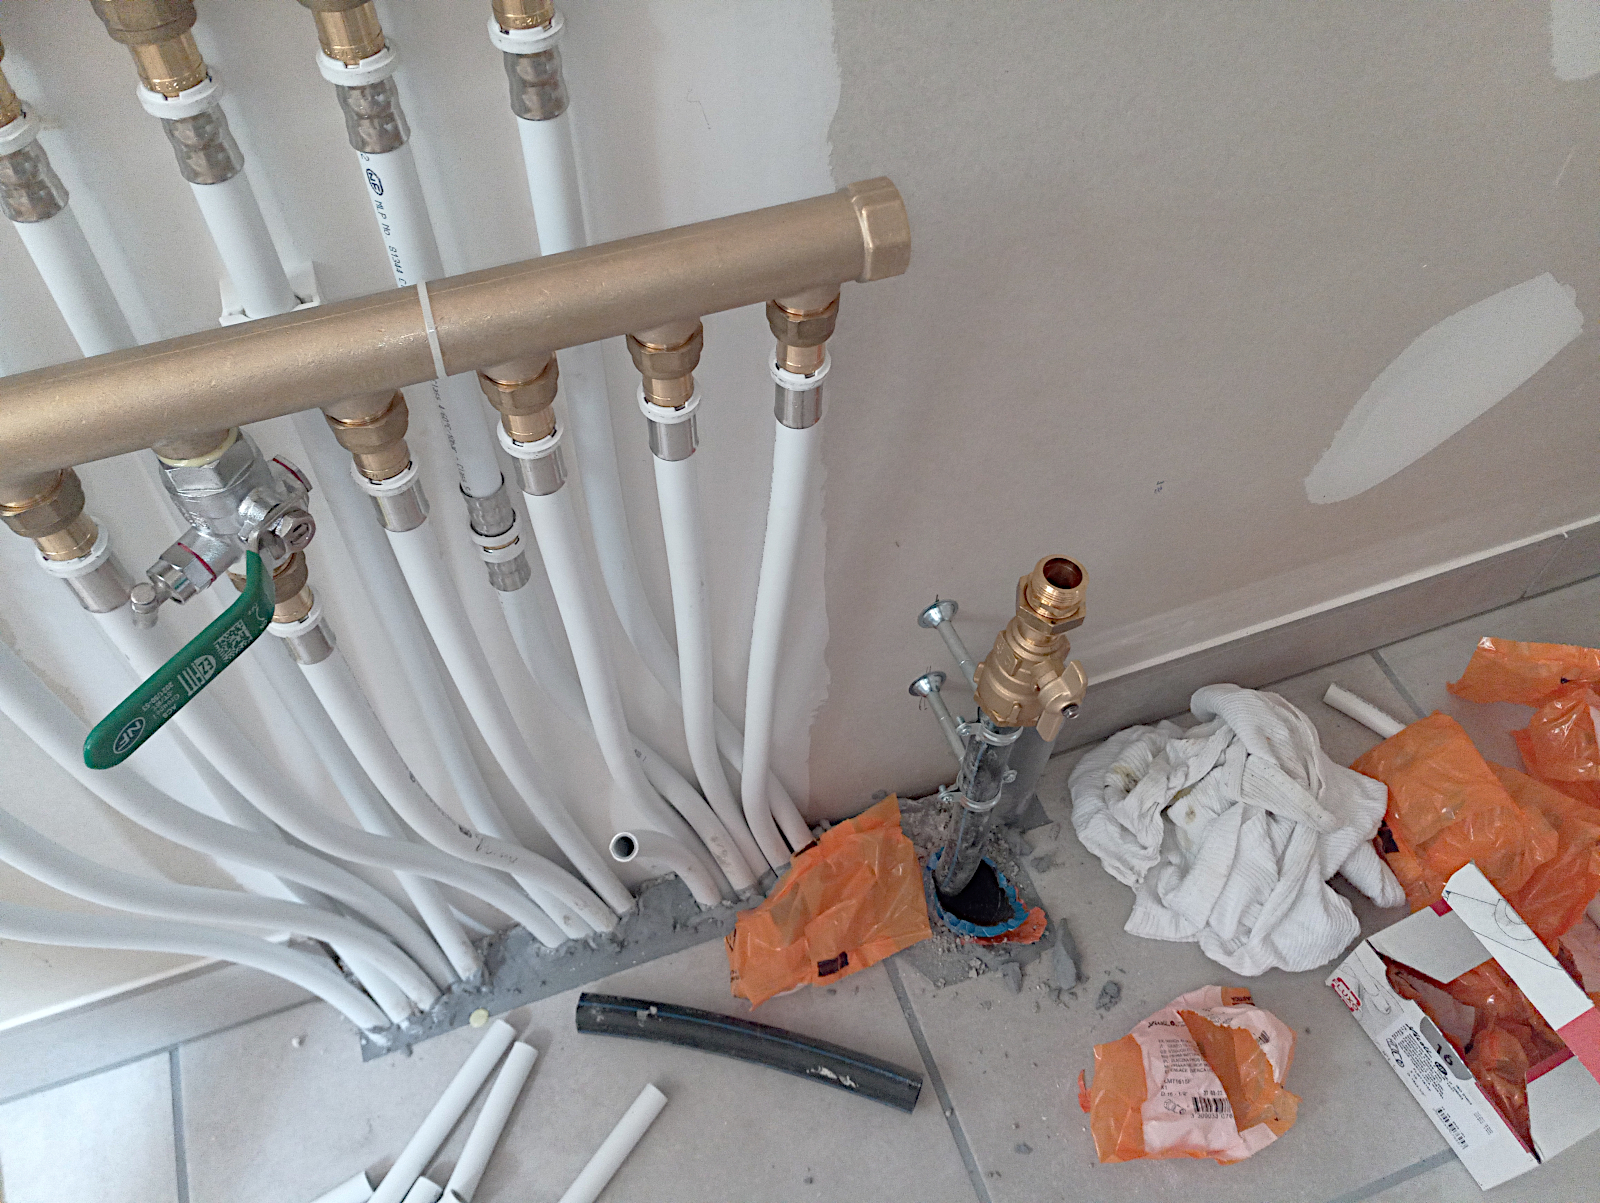
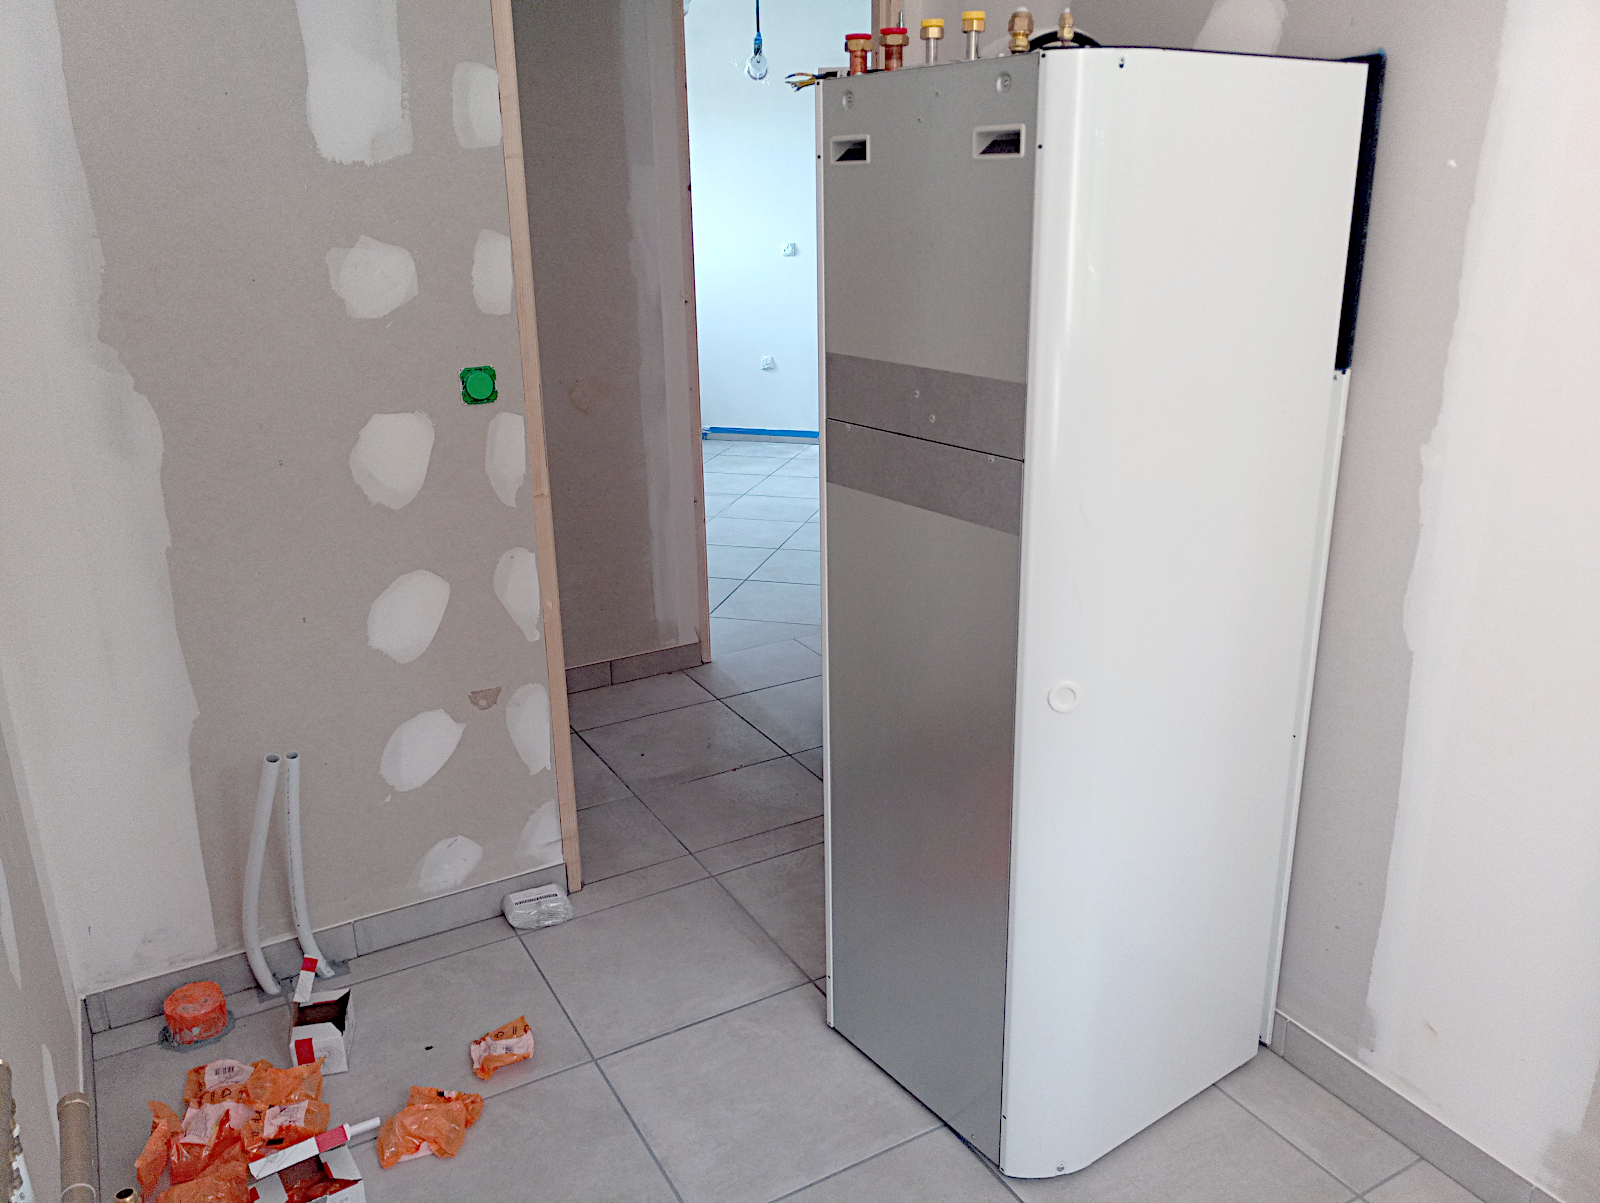
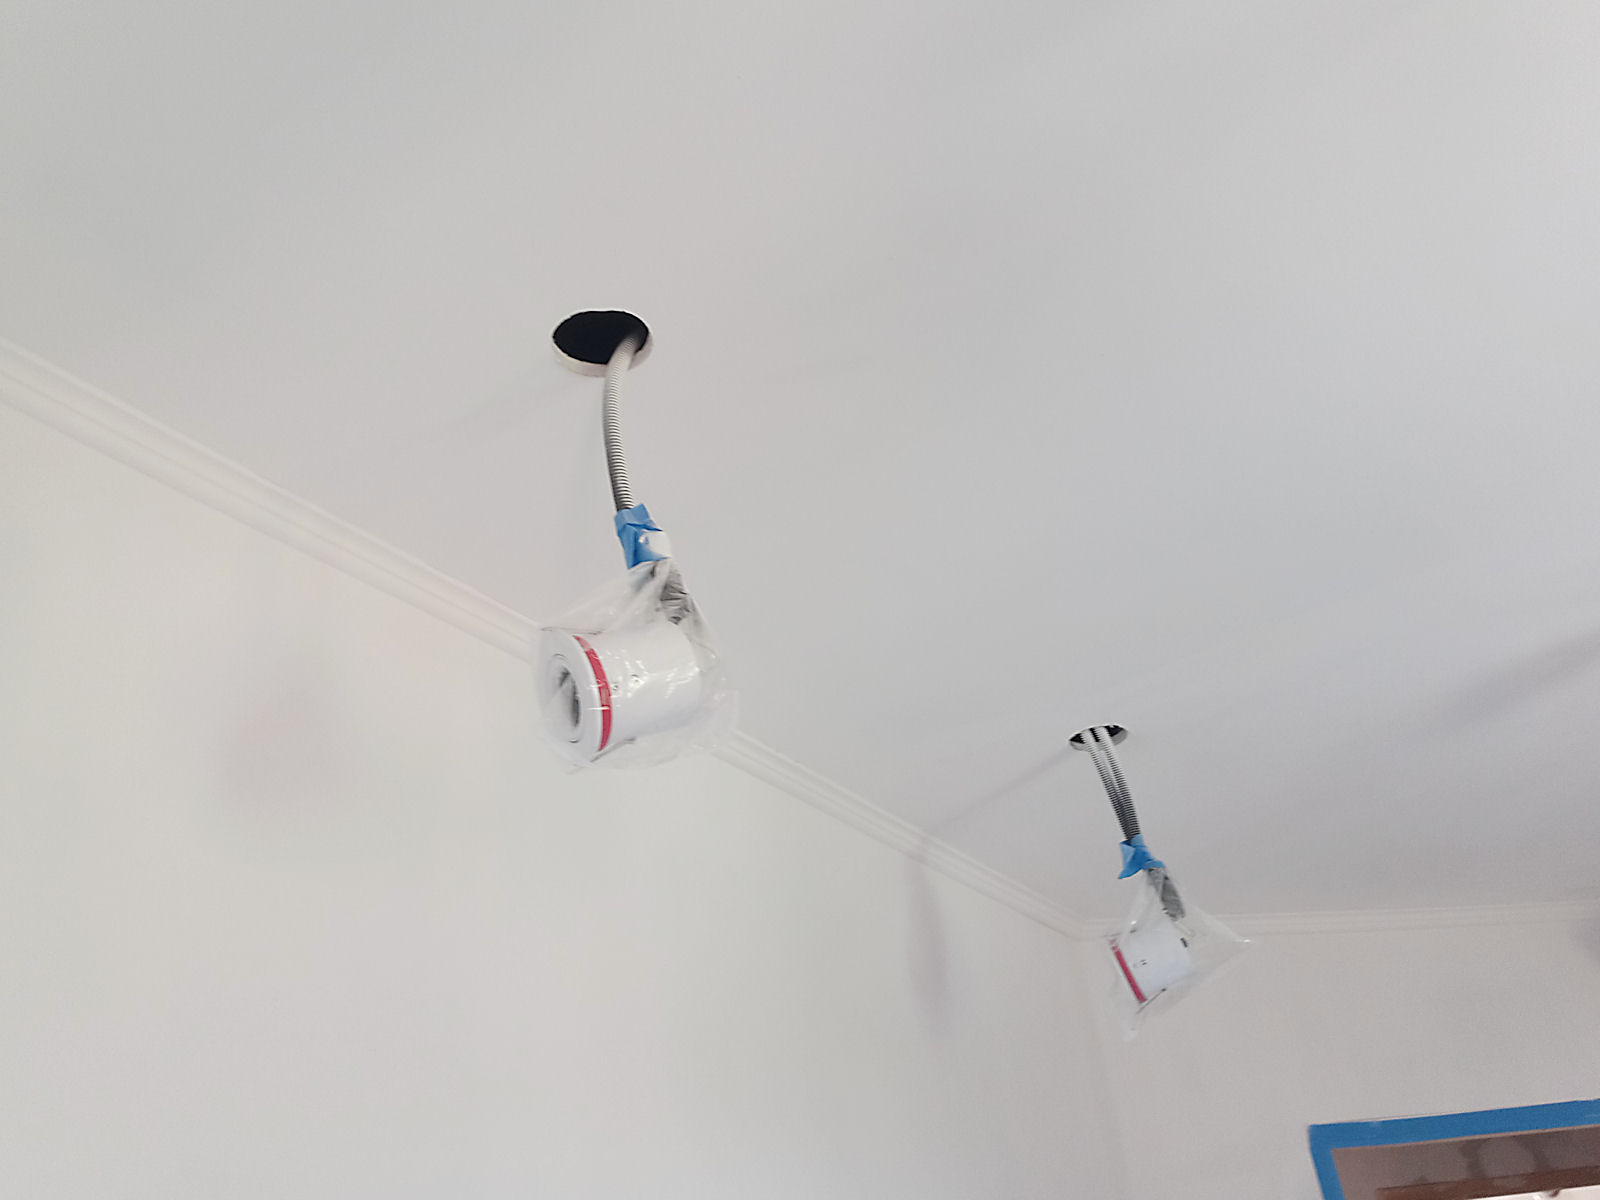
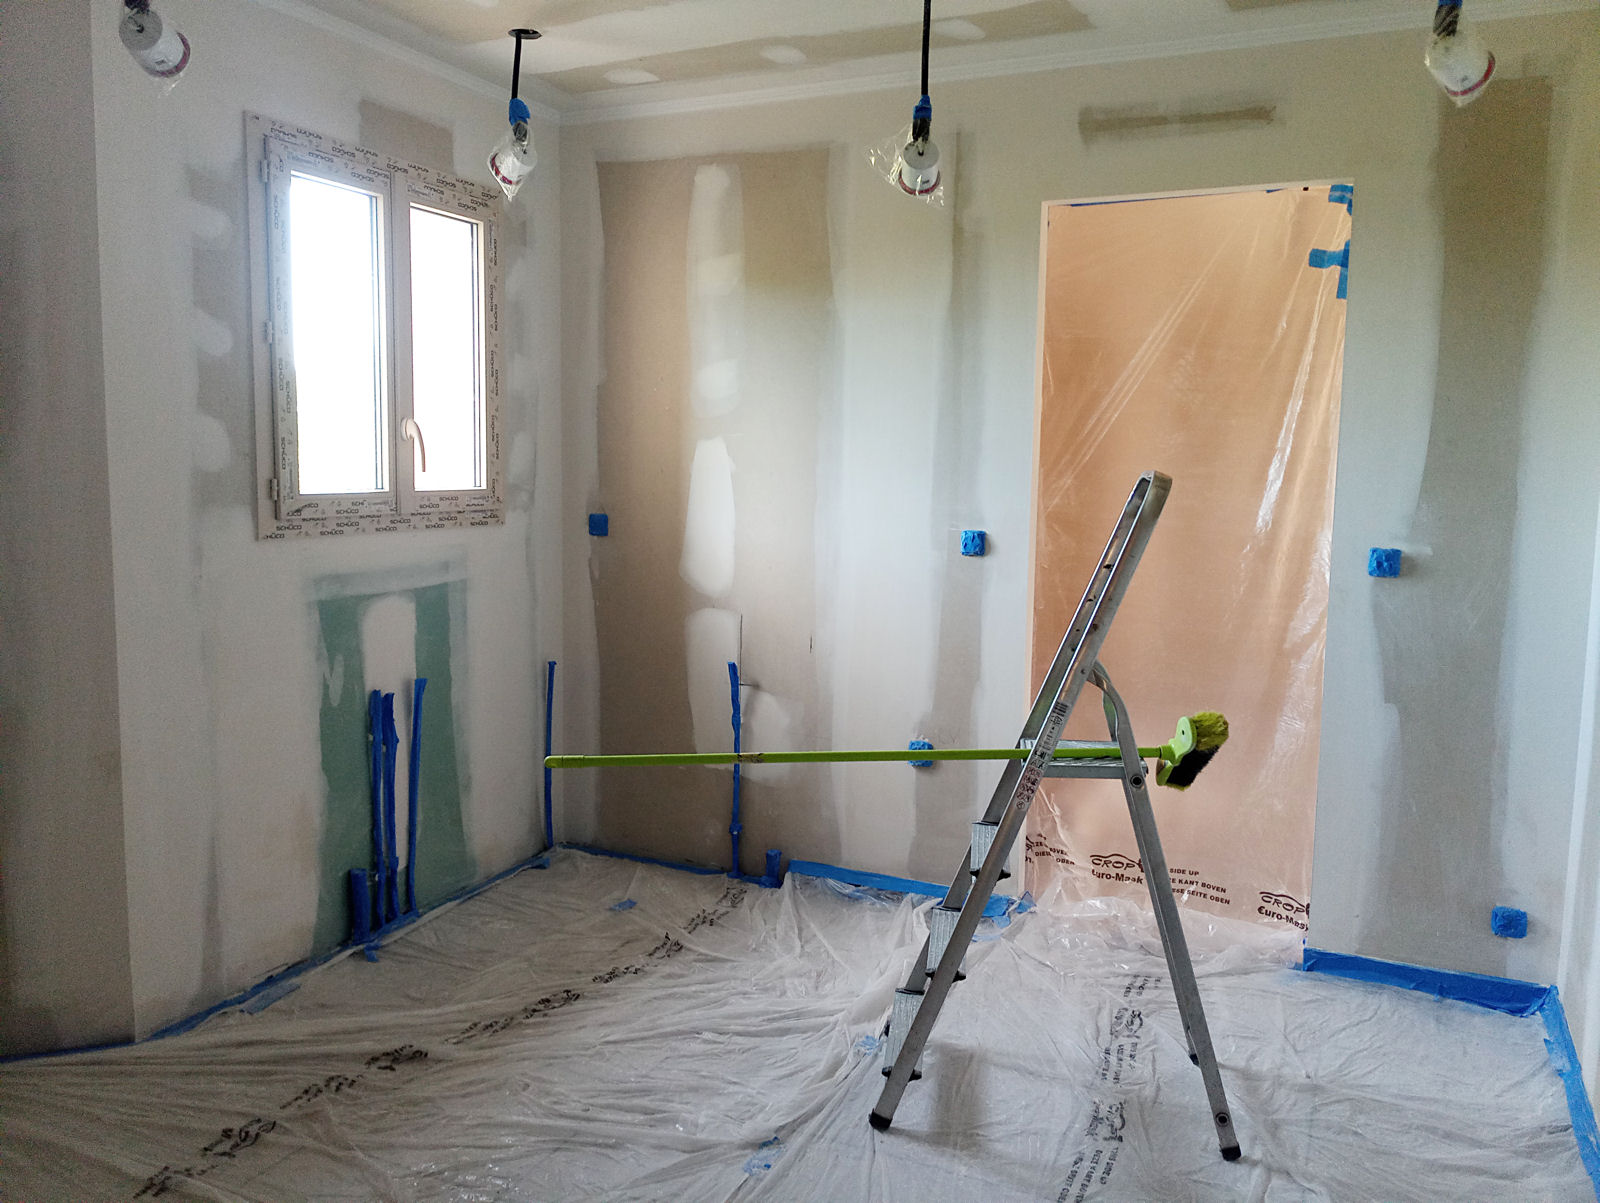
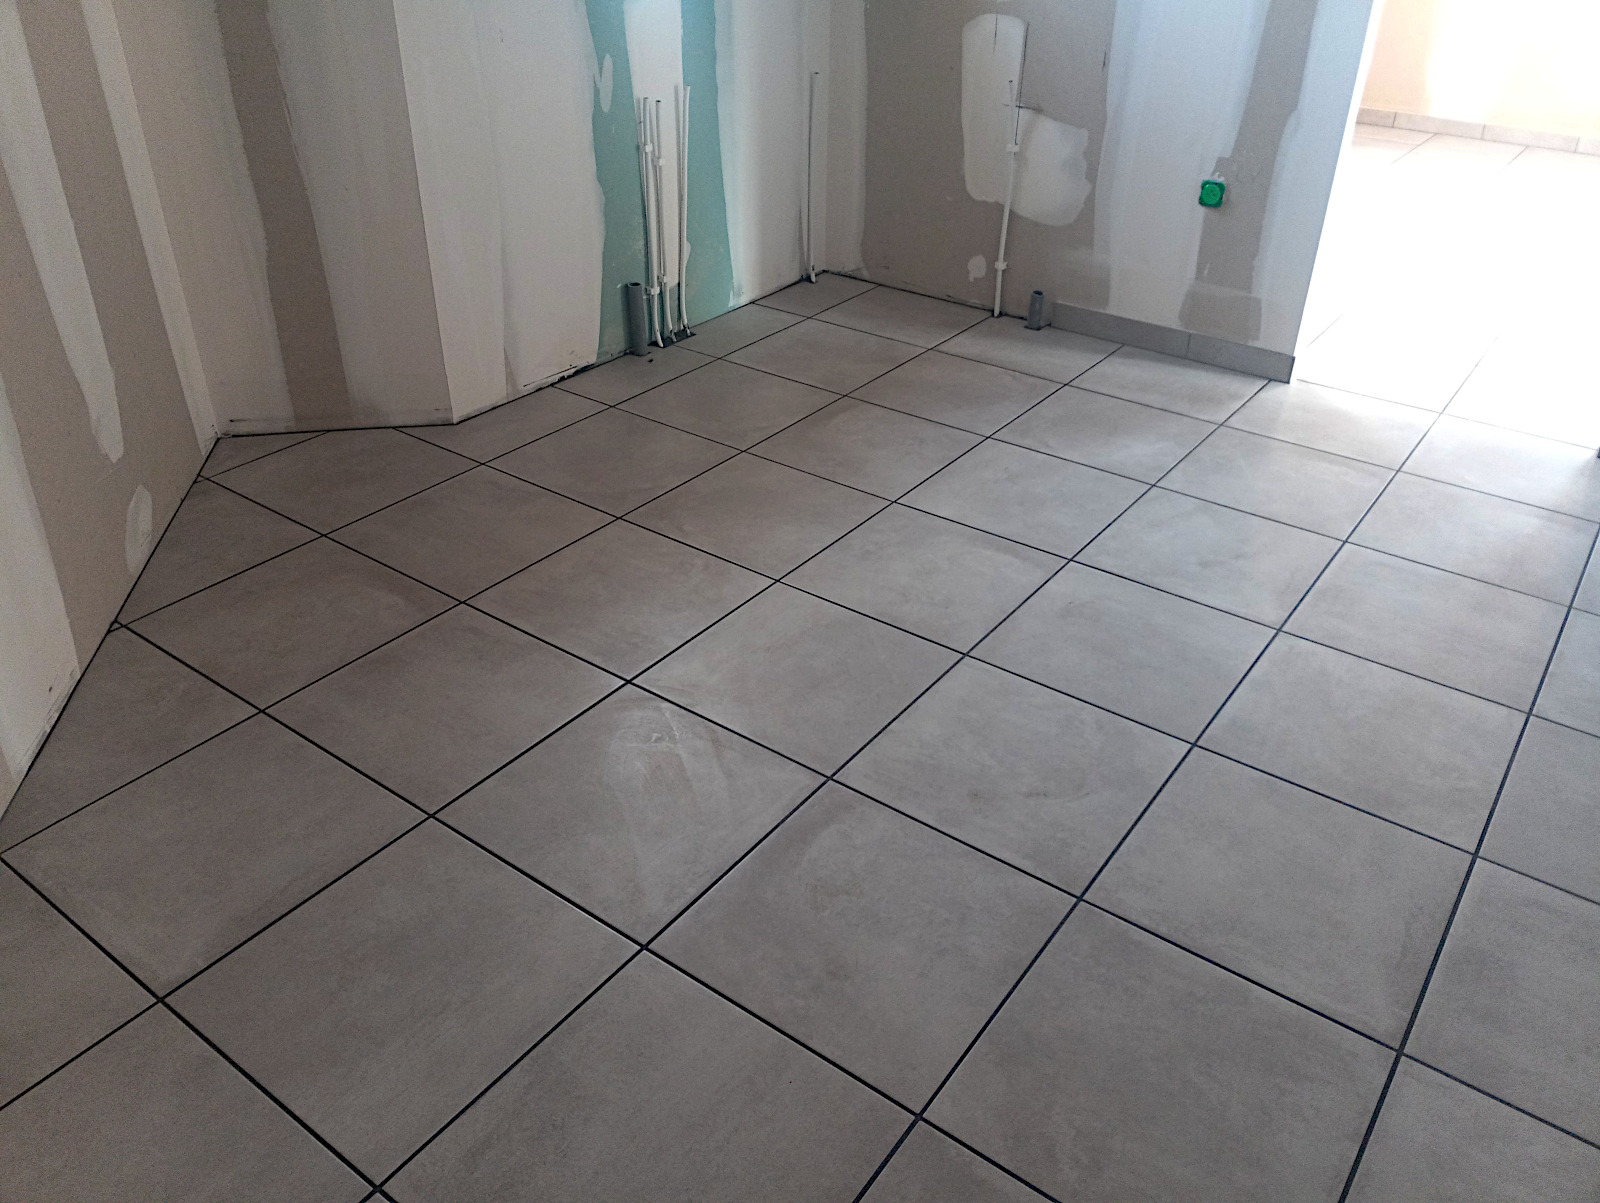
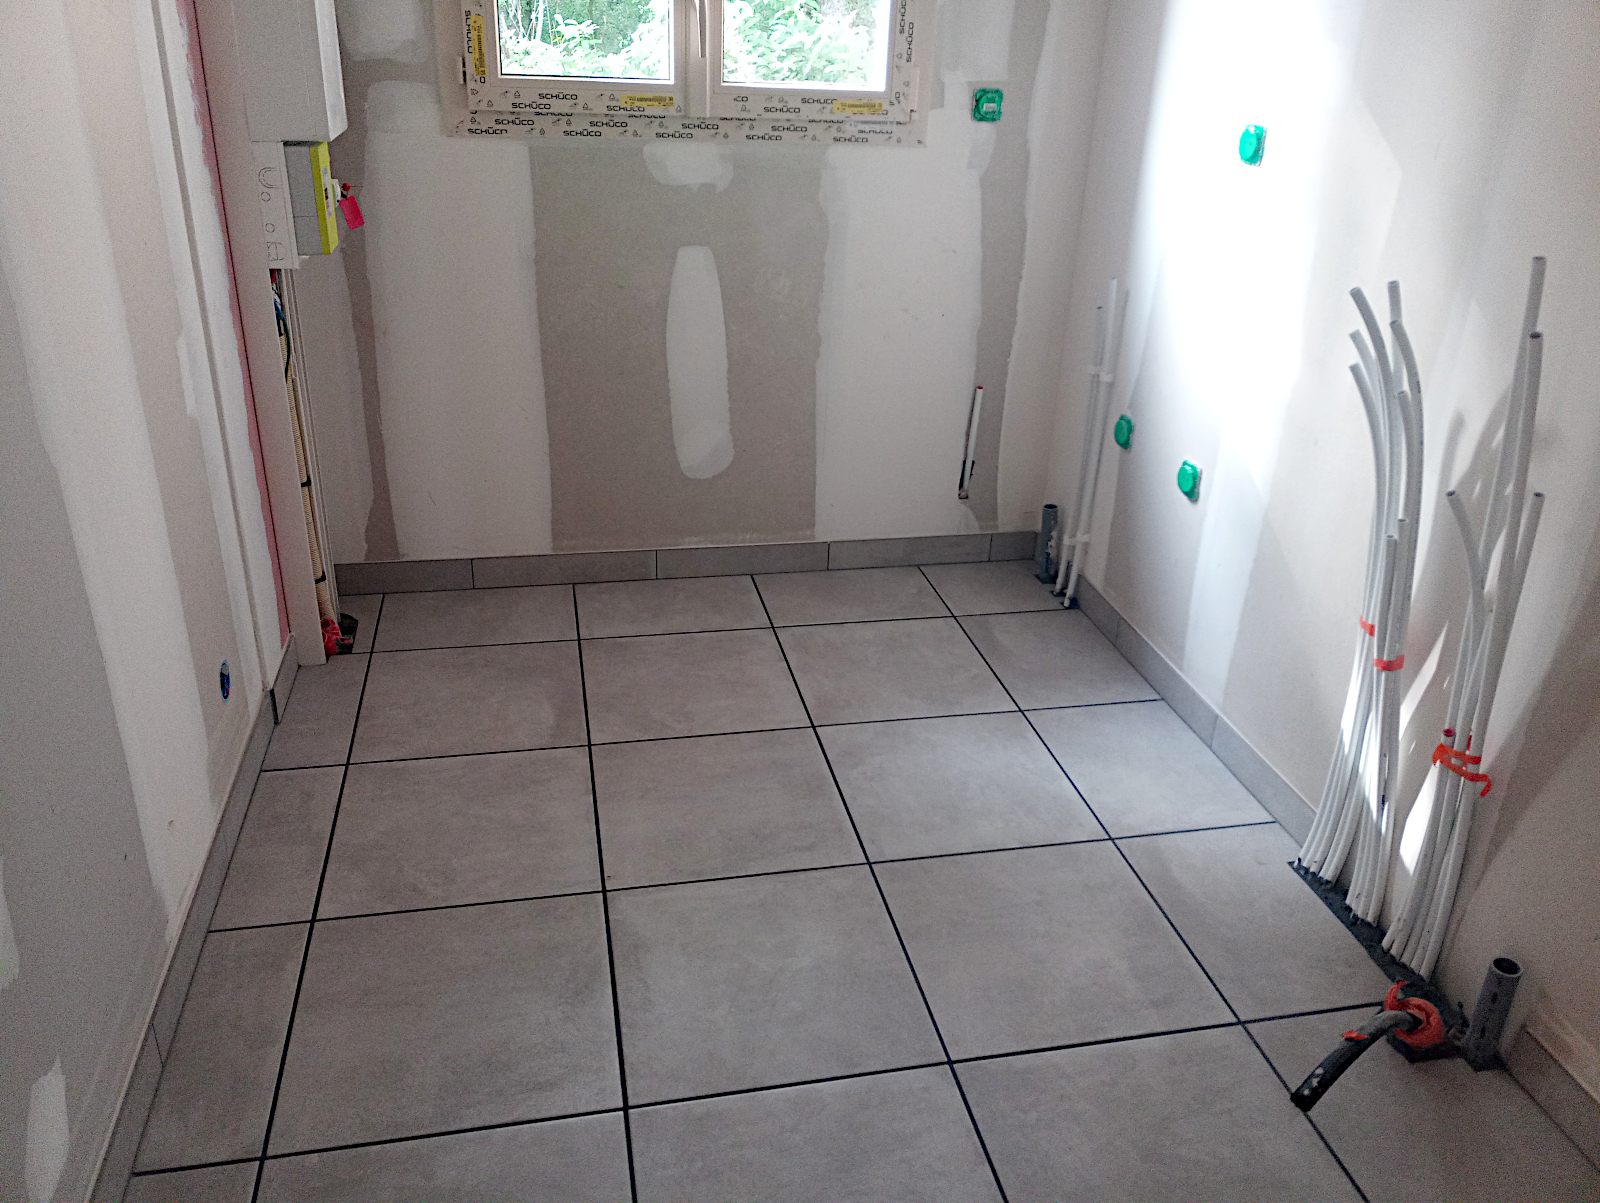
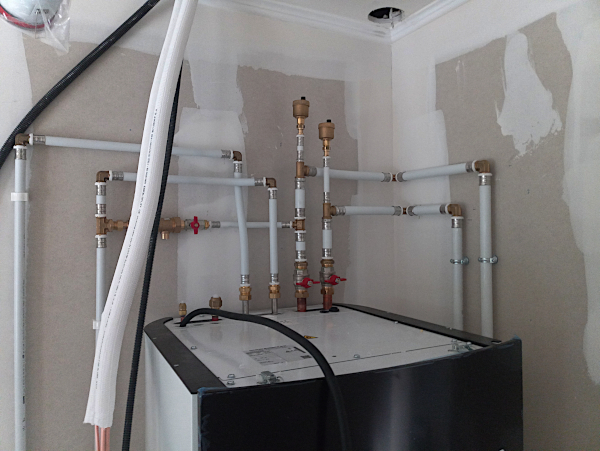
Now a couple of shots of the heat pump unit nearly fully installed in the utility room. As can be seen, the plumbing on and around it is quite complex and my big regret is that I didn’t paint the walls and ceiling in there the same as I did in the kitchen. It’ll be impossible to do them properly now and if there’s one thing that I detest, it’s visible unpainted plasterboard walls 😐

null

null

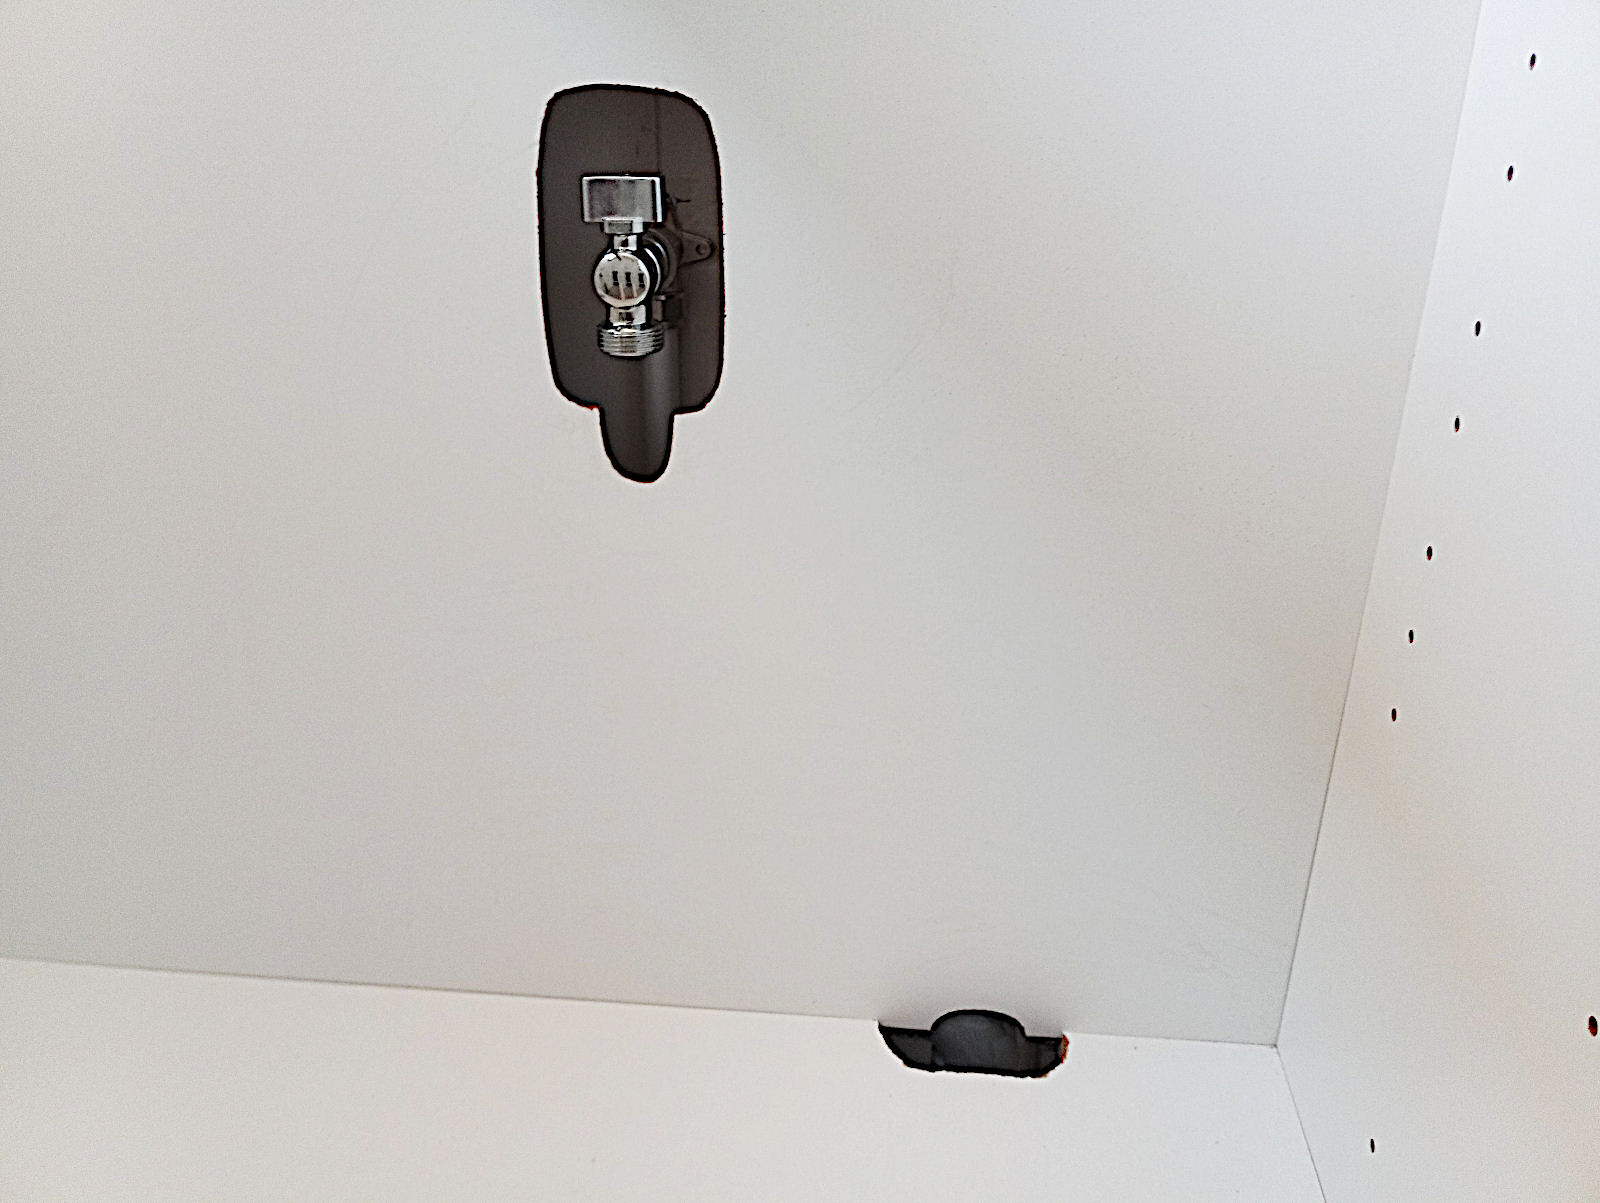
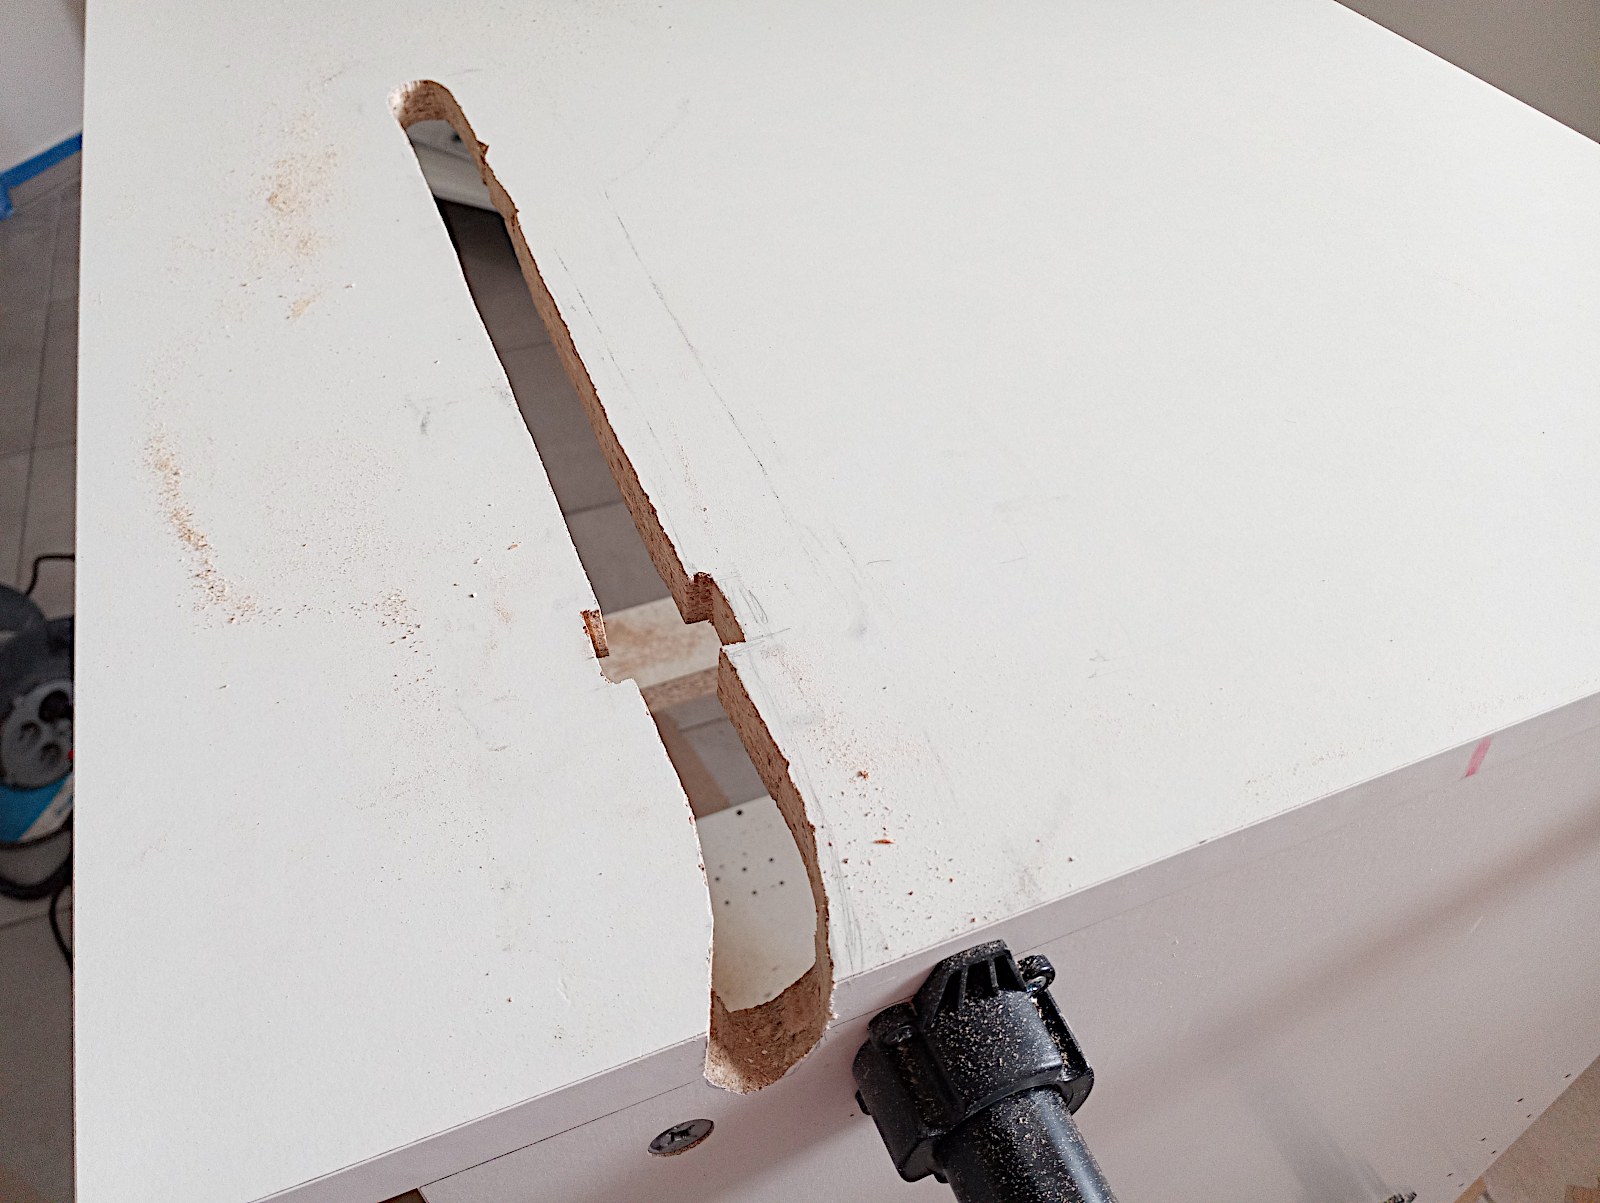
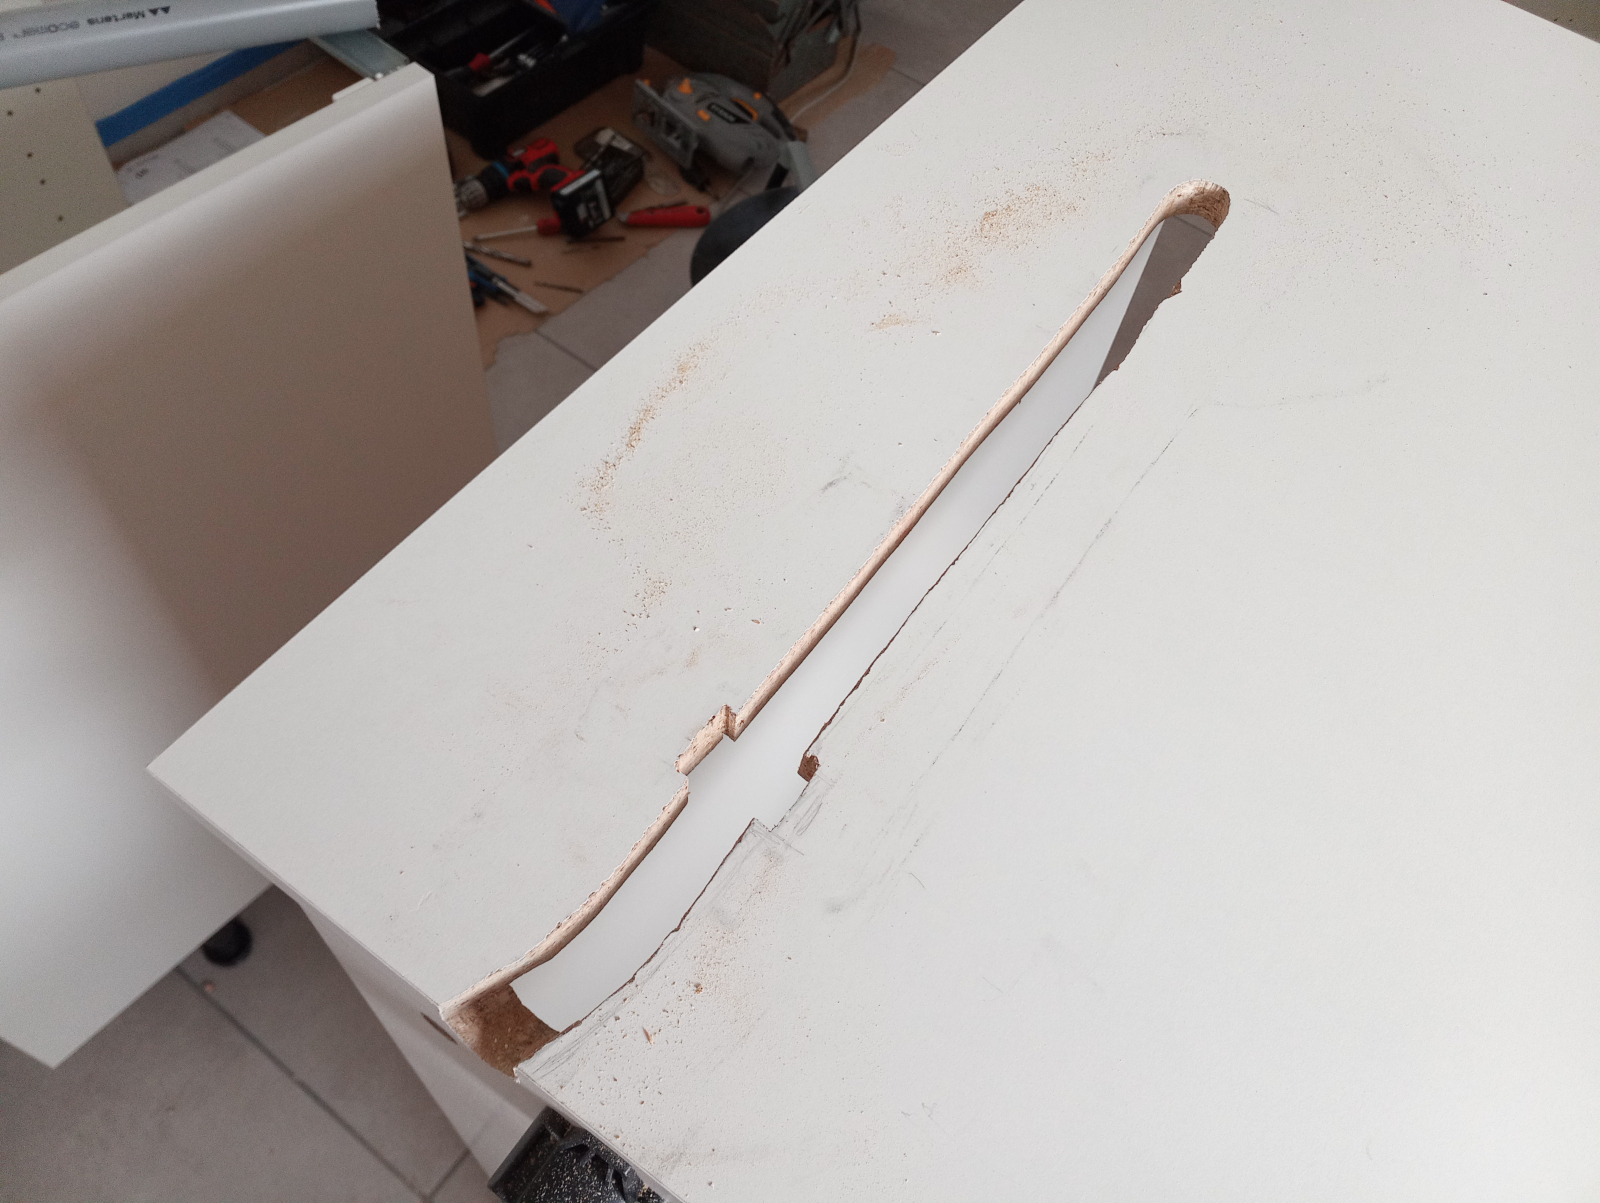
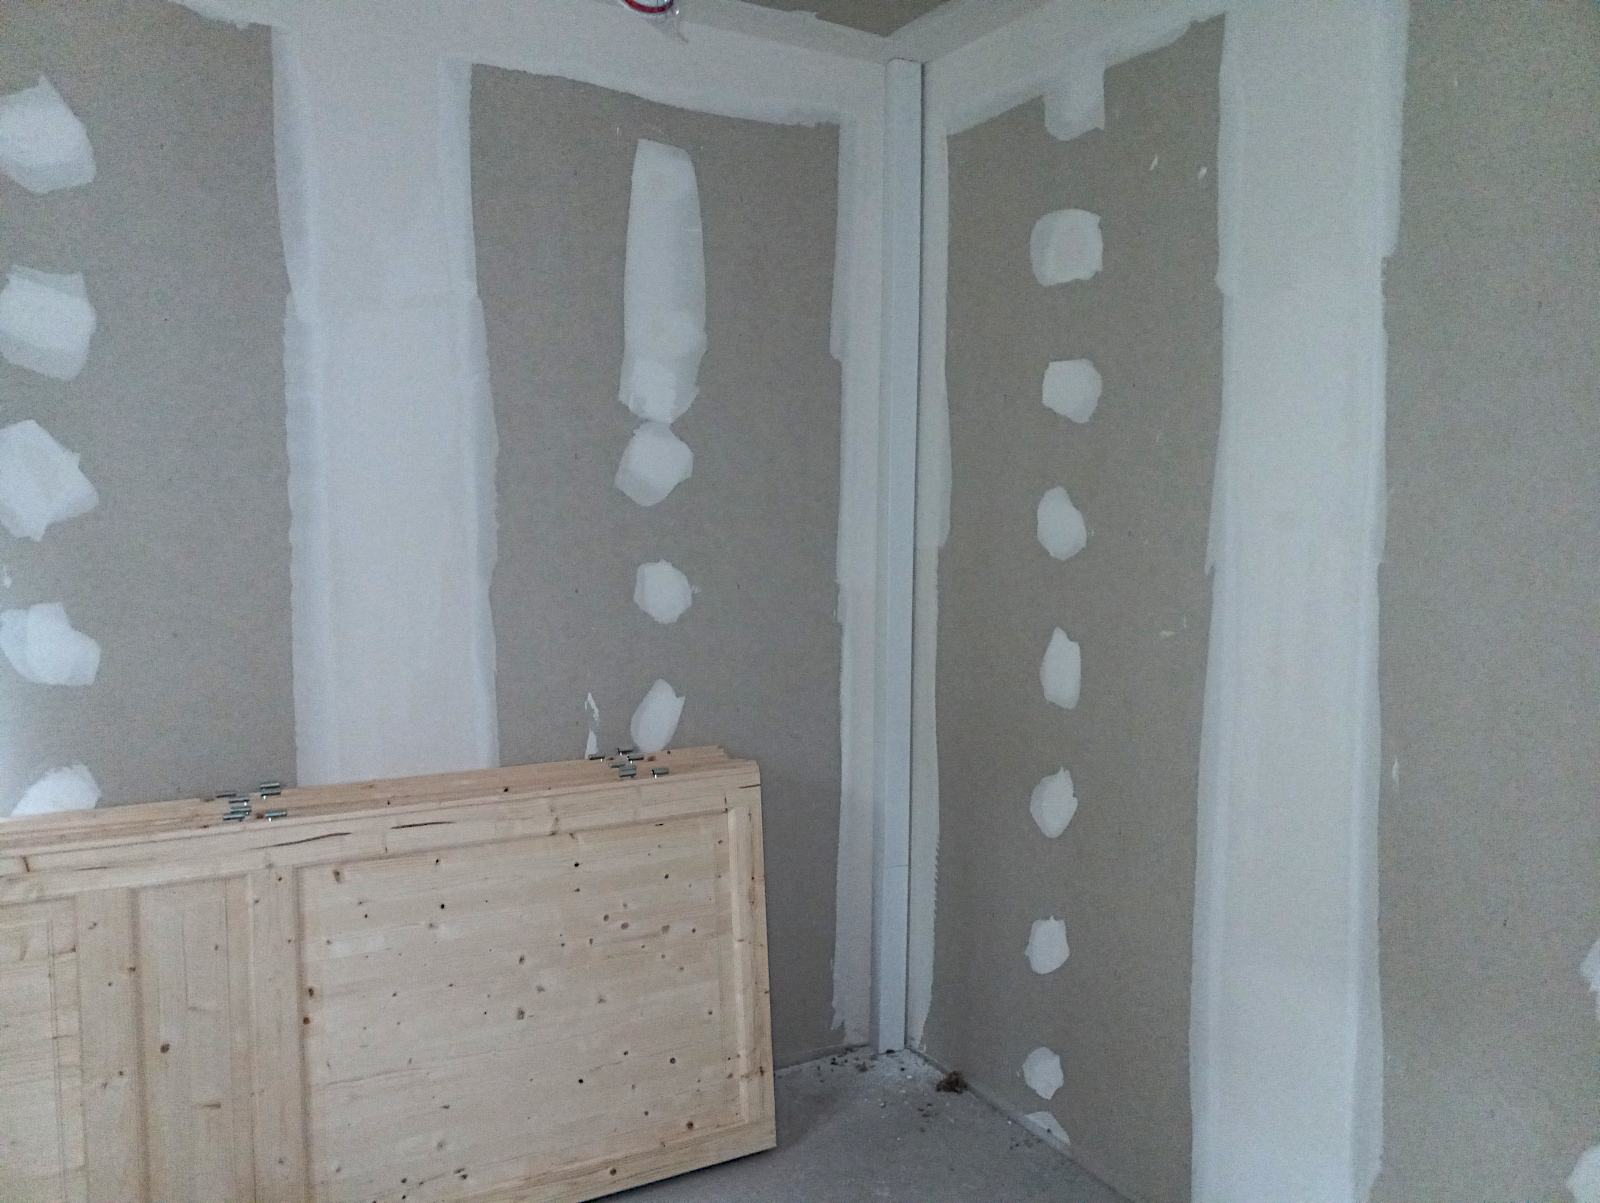
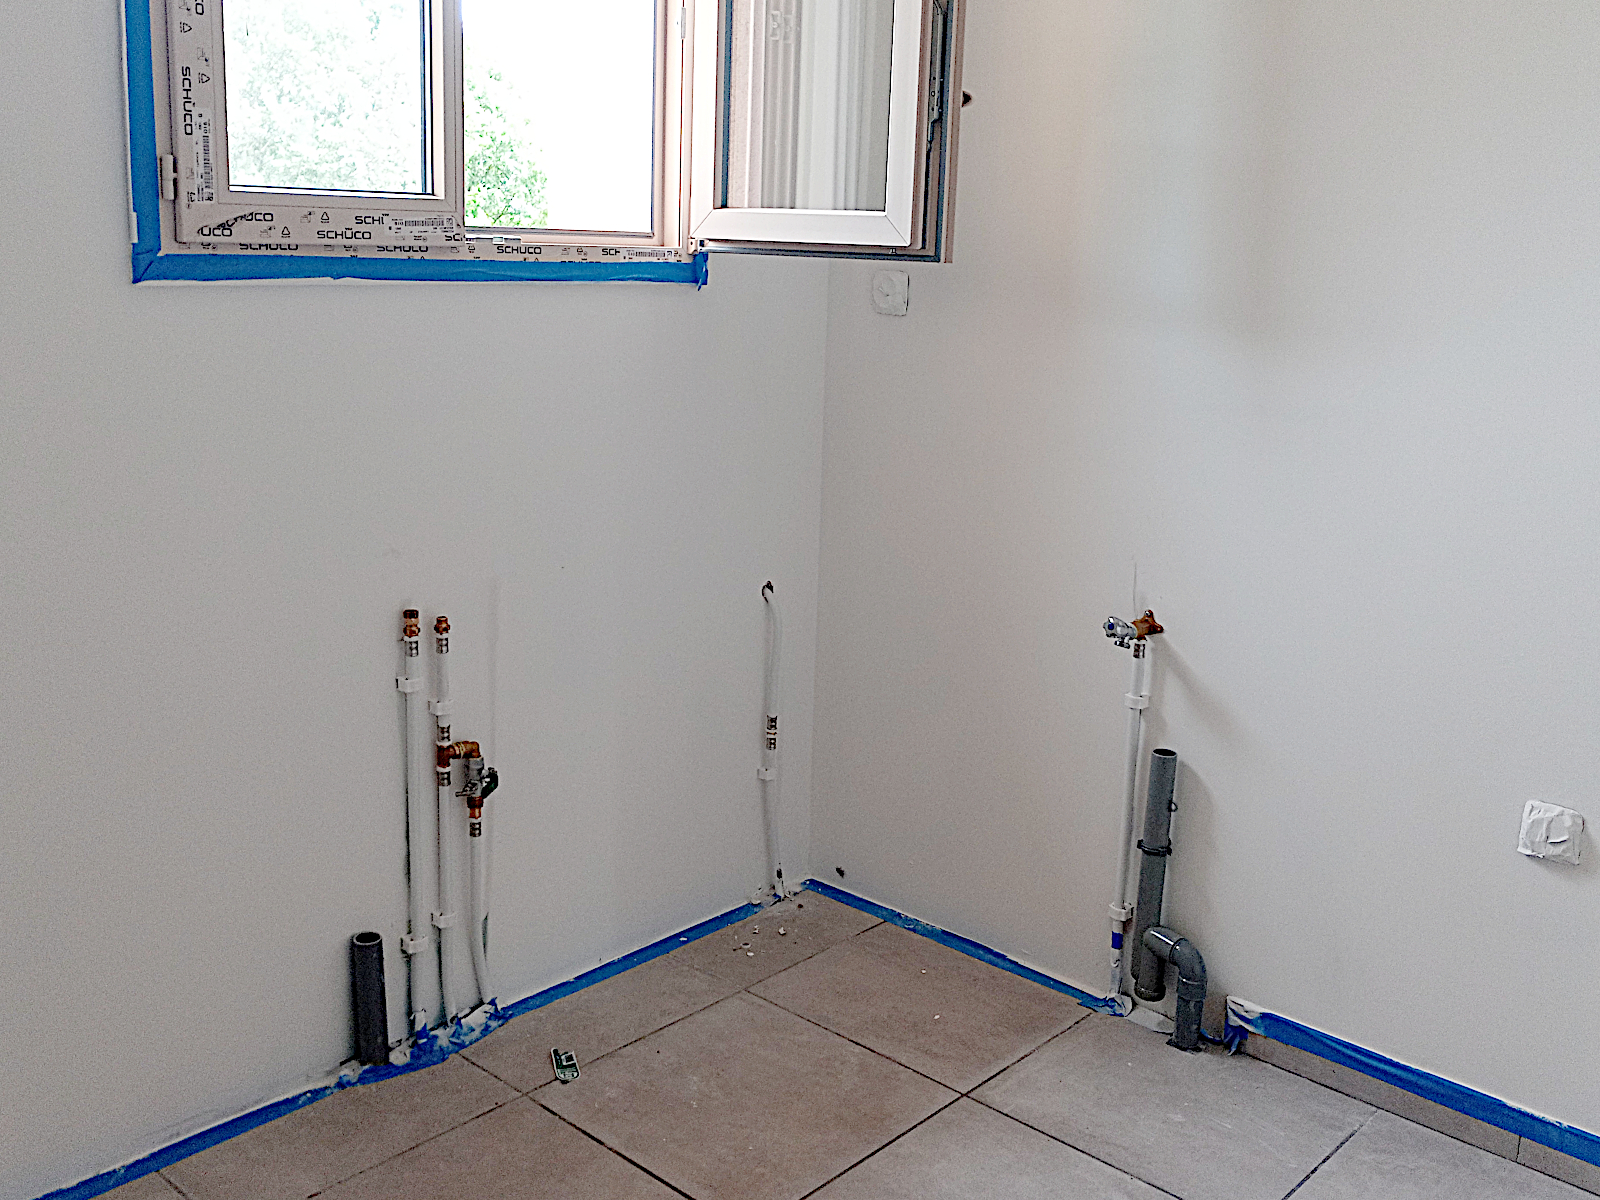
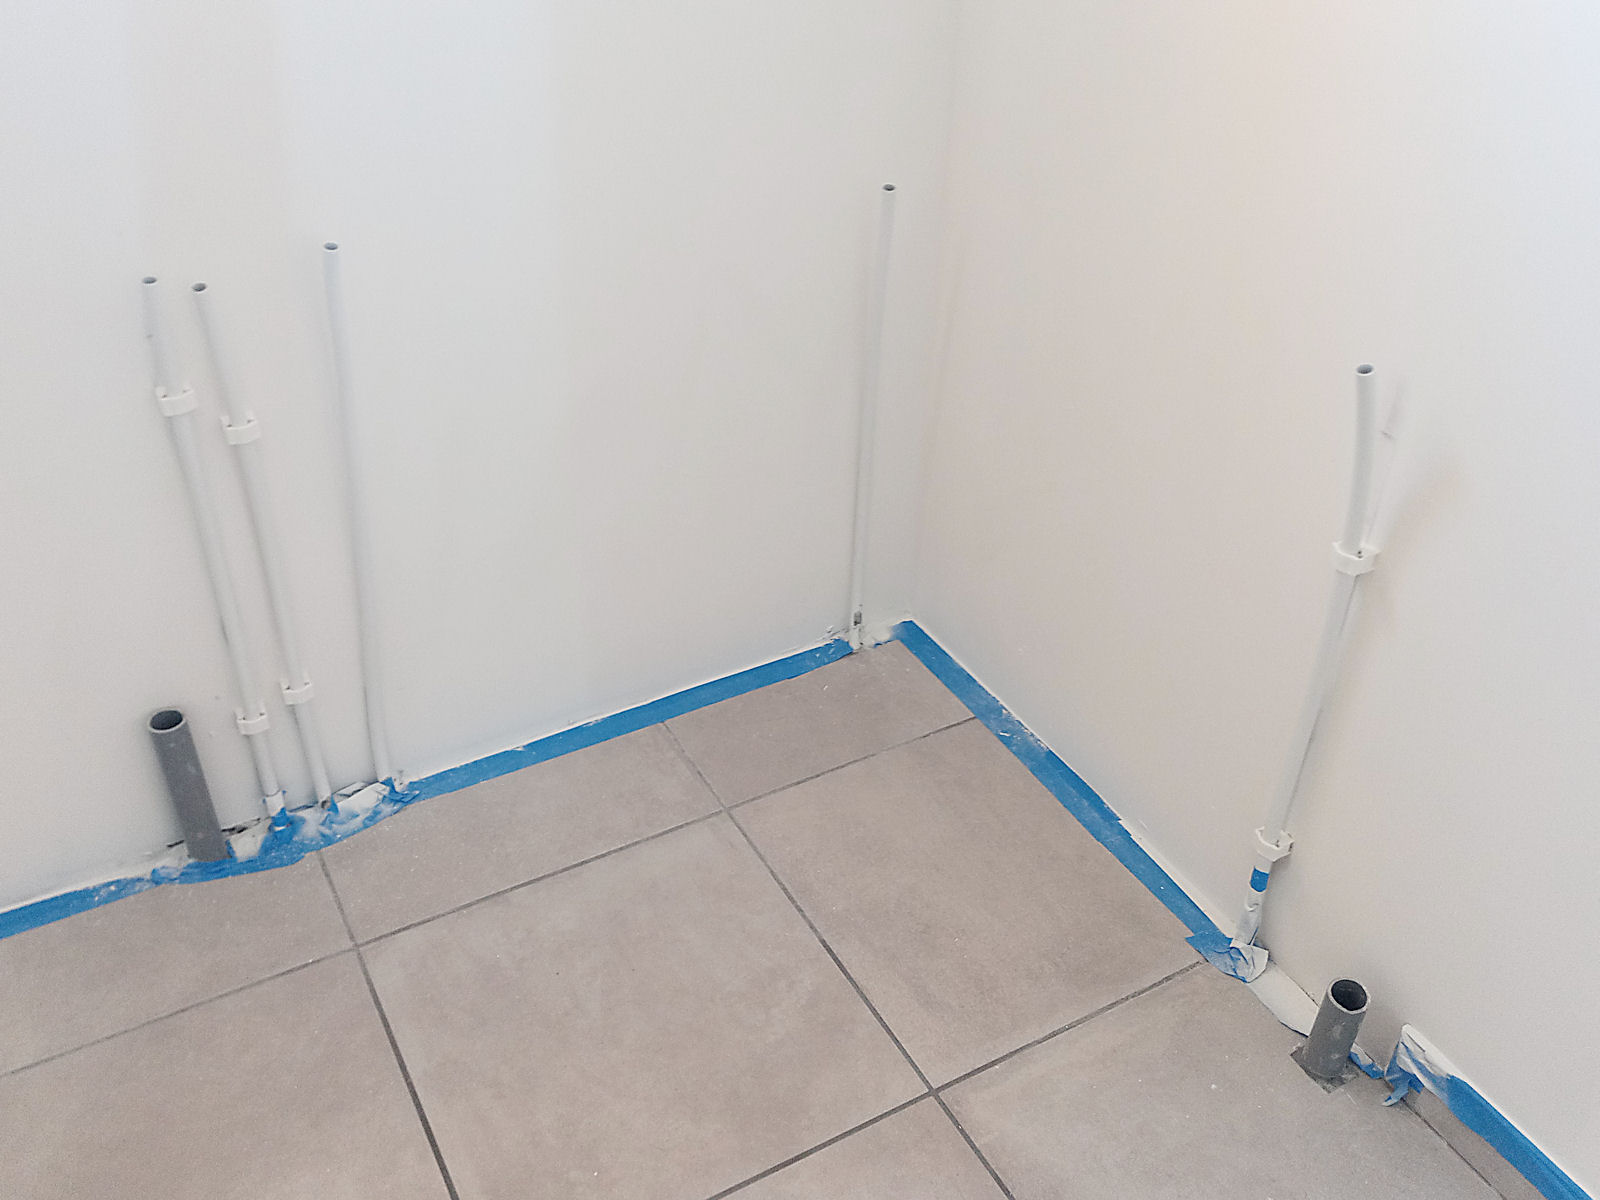
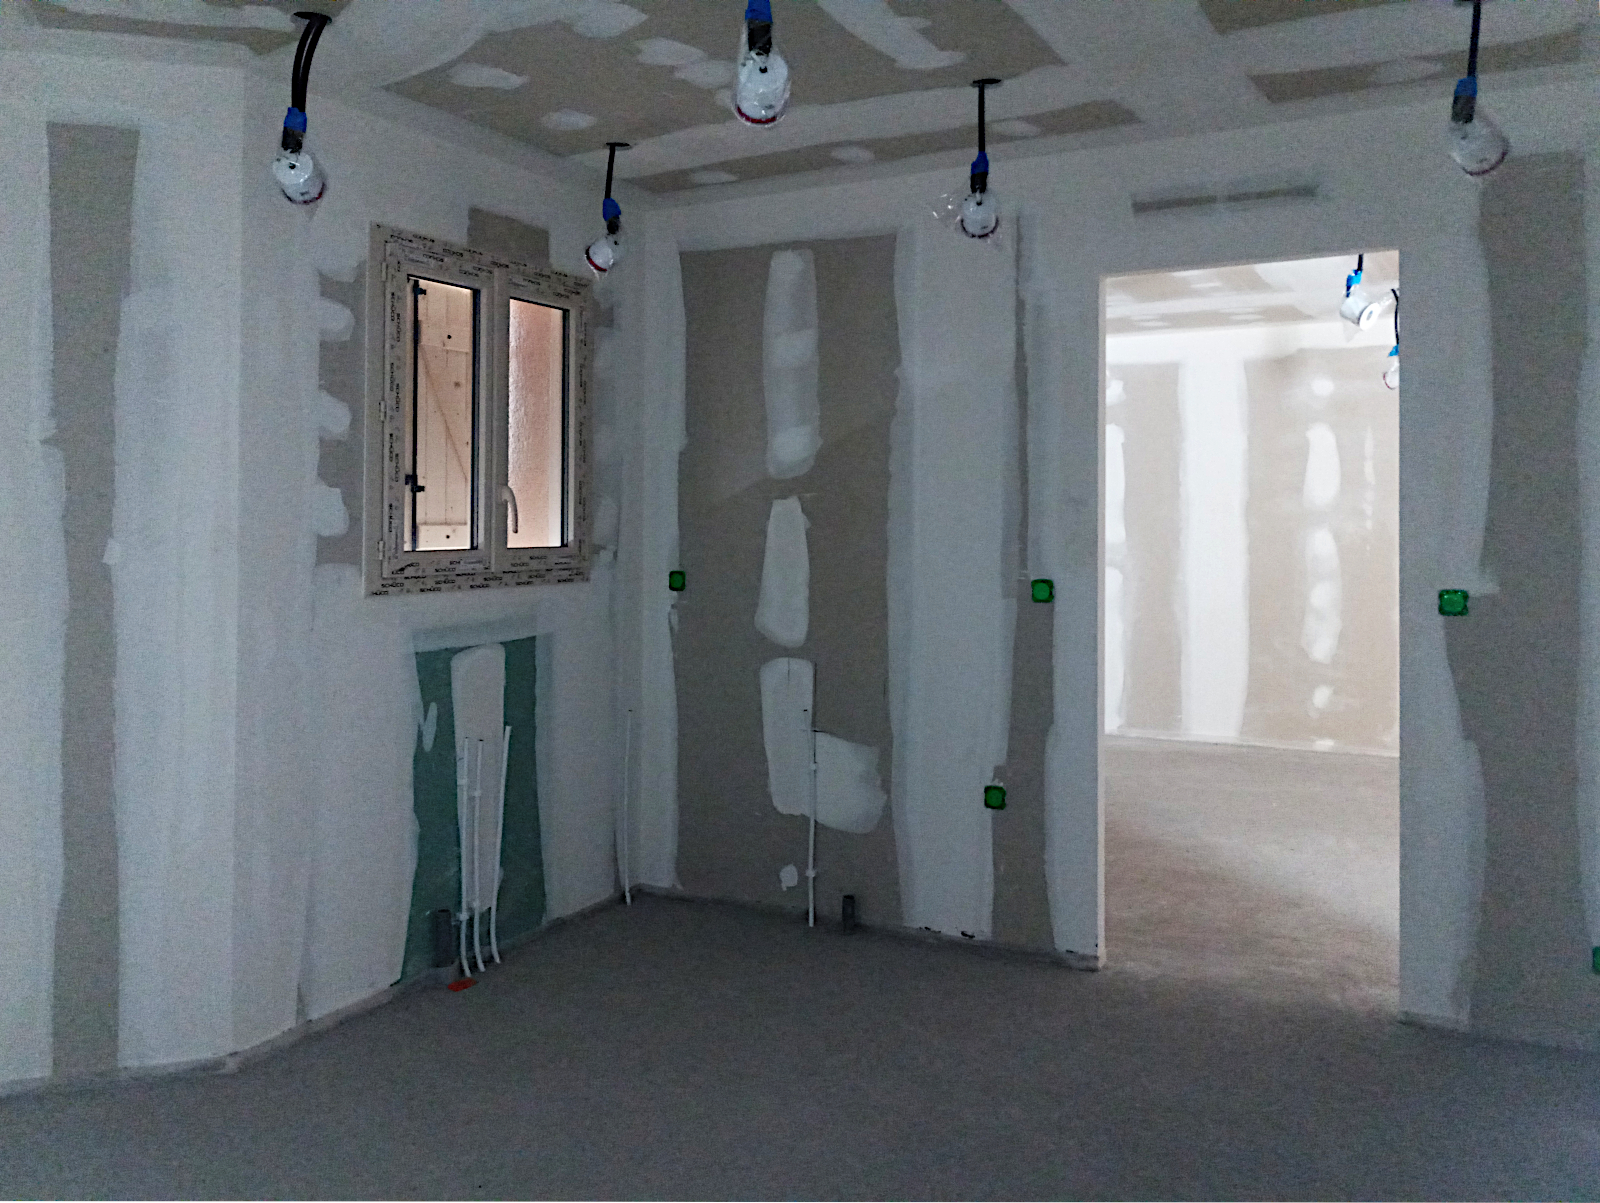
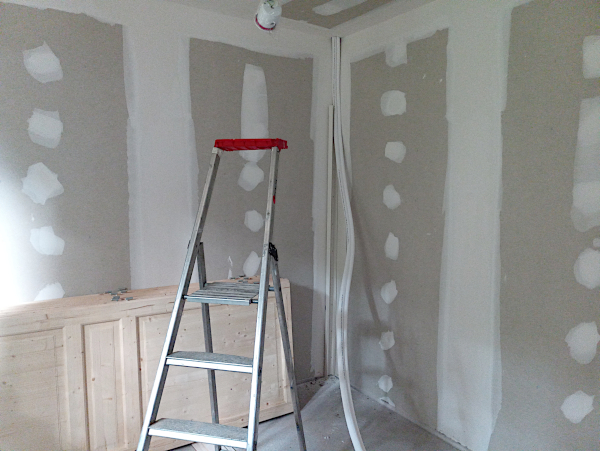
The exterior heat pump connections will be punched through from outside into the back corner of the alcove in bedroom two in which there will be a built-in cupboard. That hasn’t been done yet as can be seen in the next shot.

null

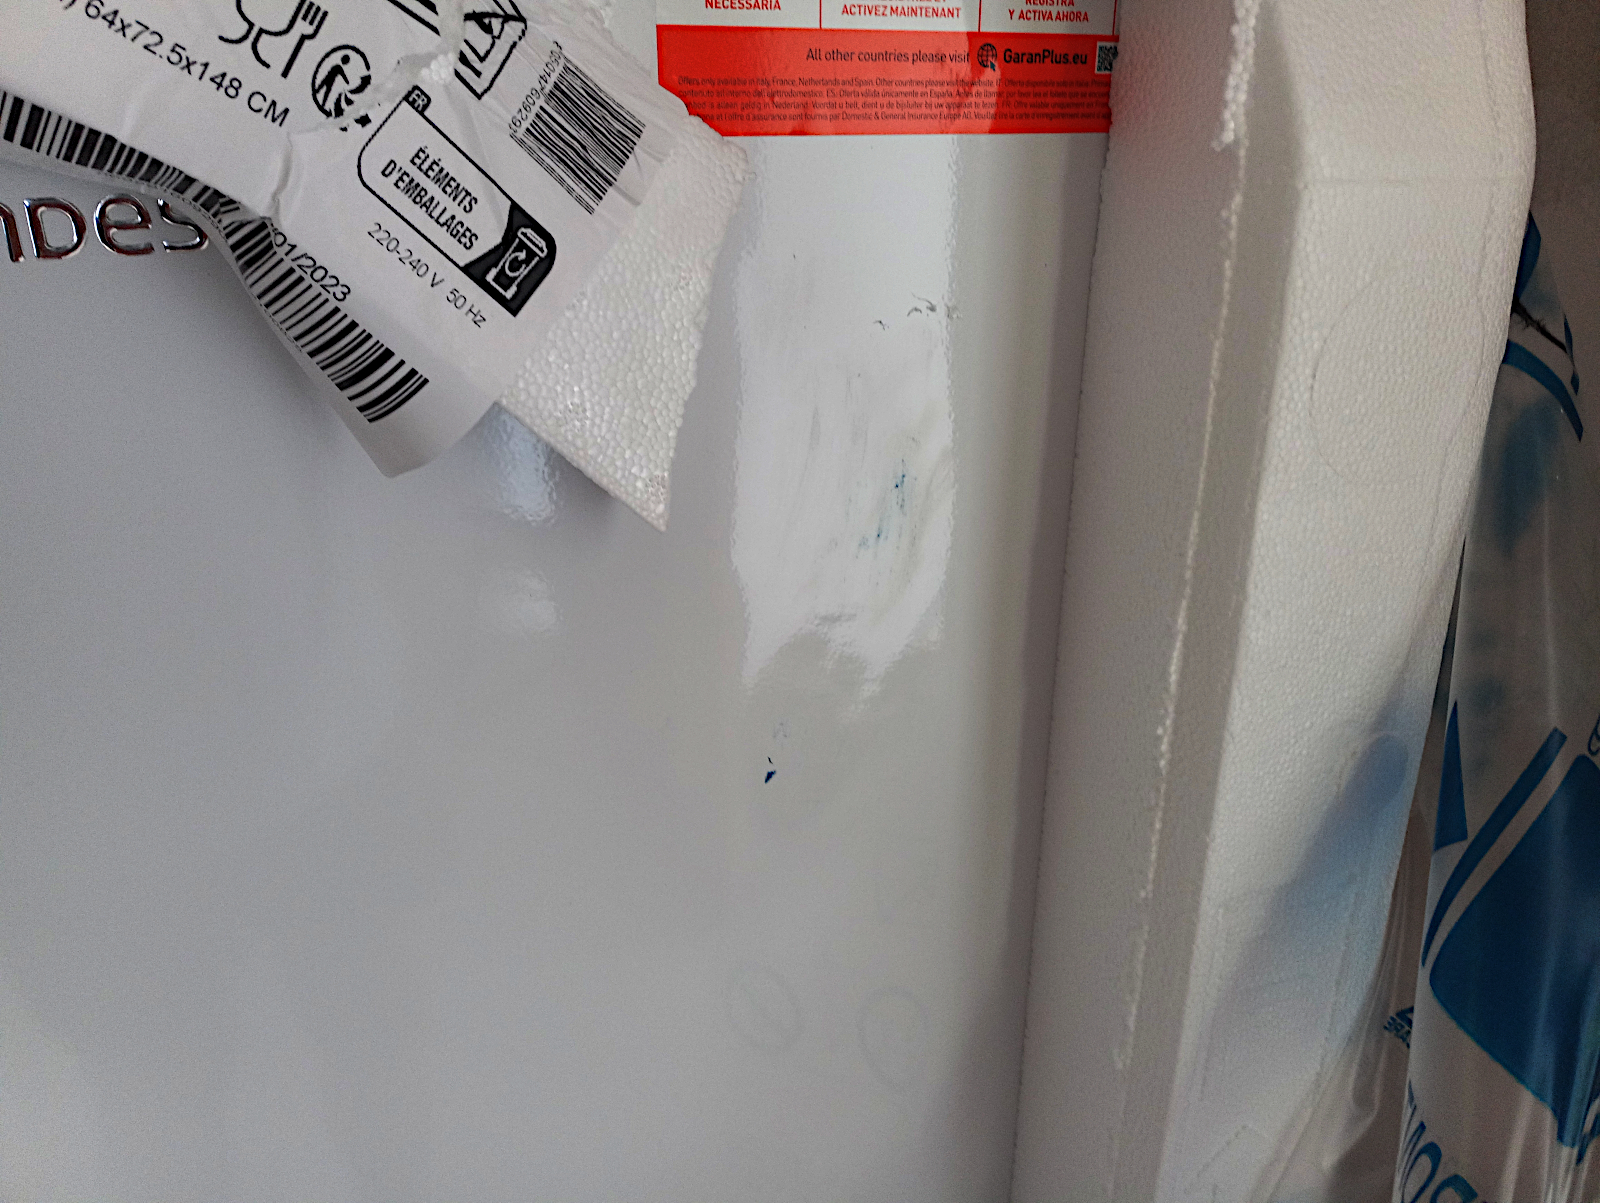
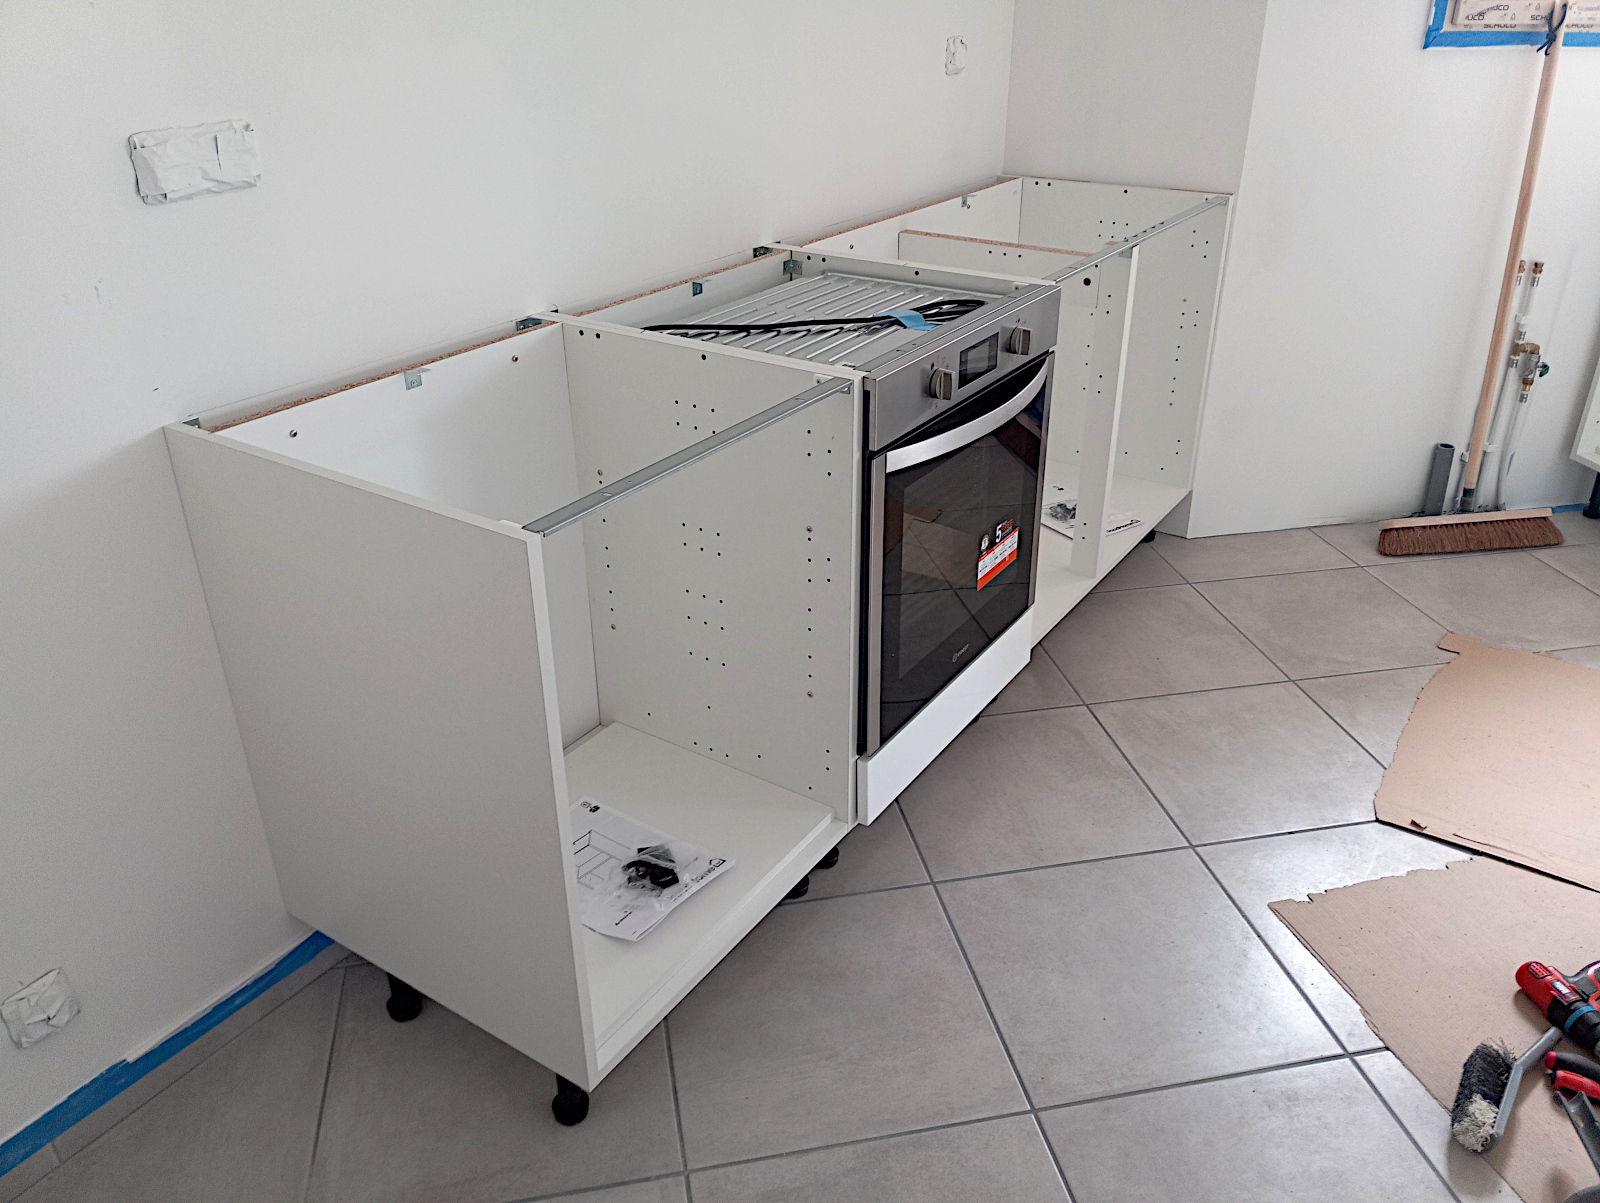
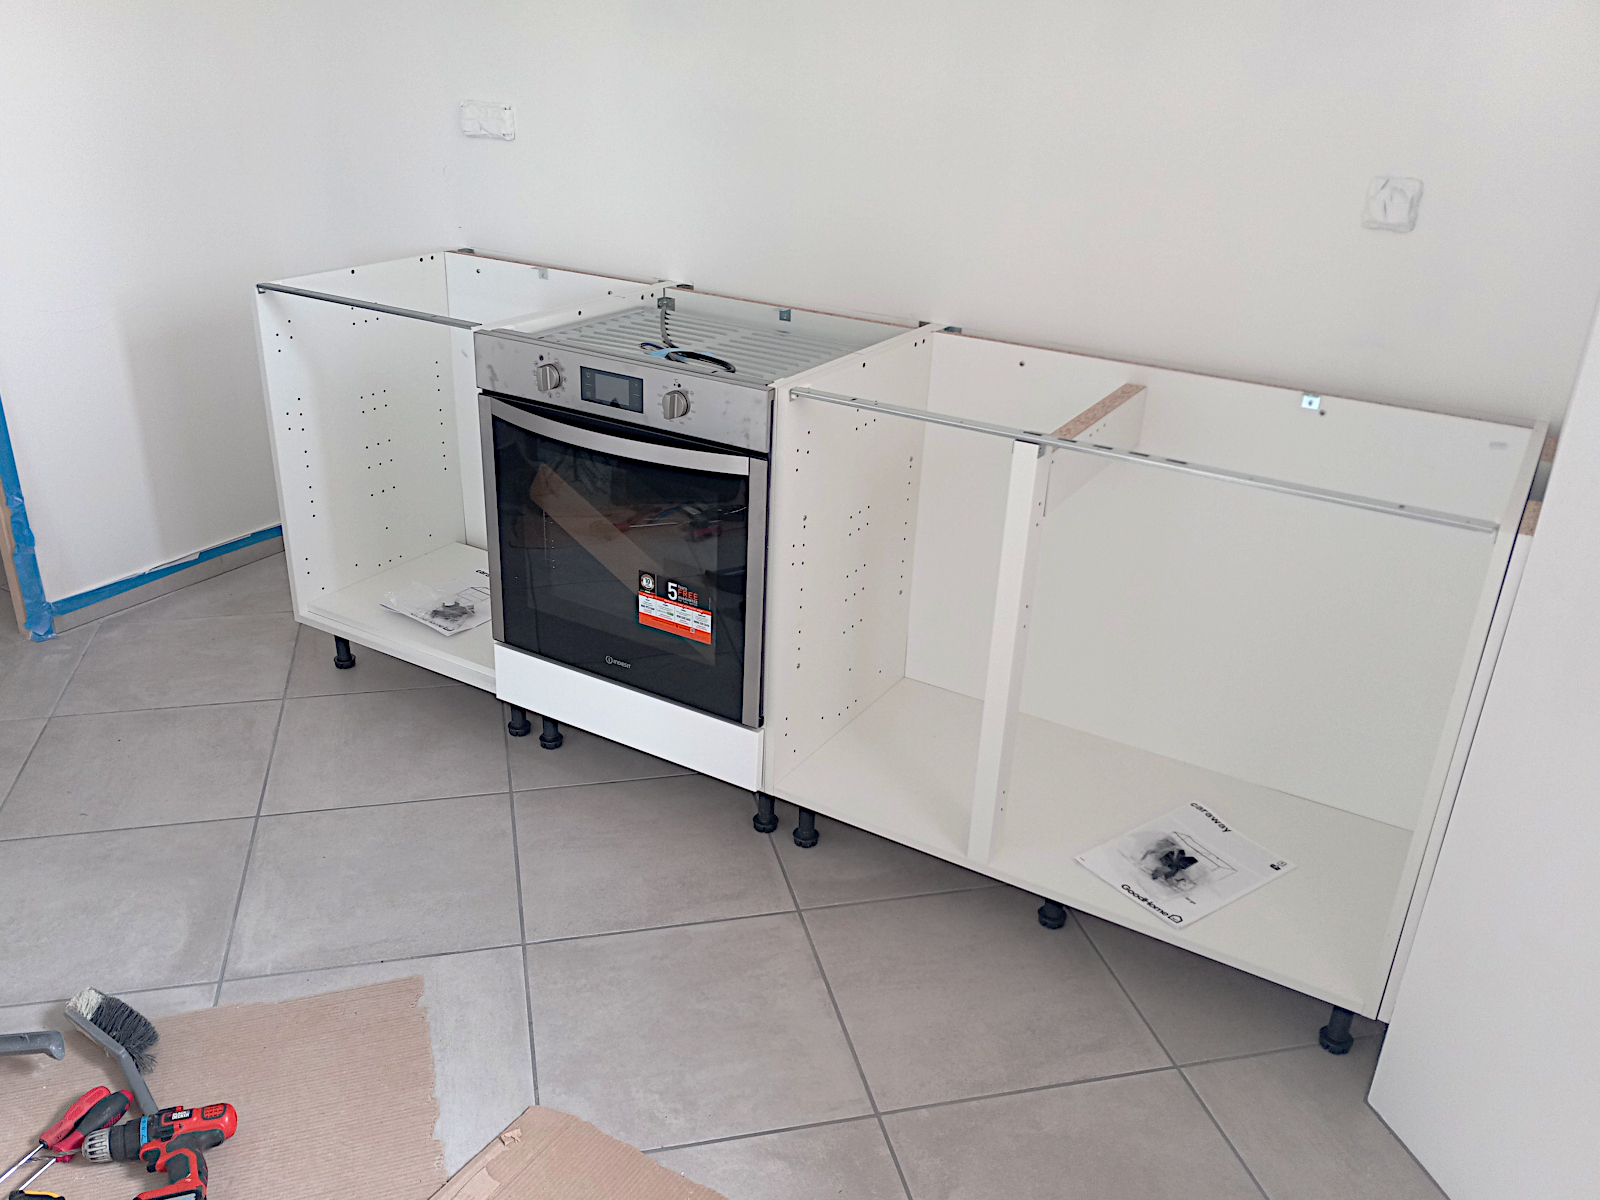
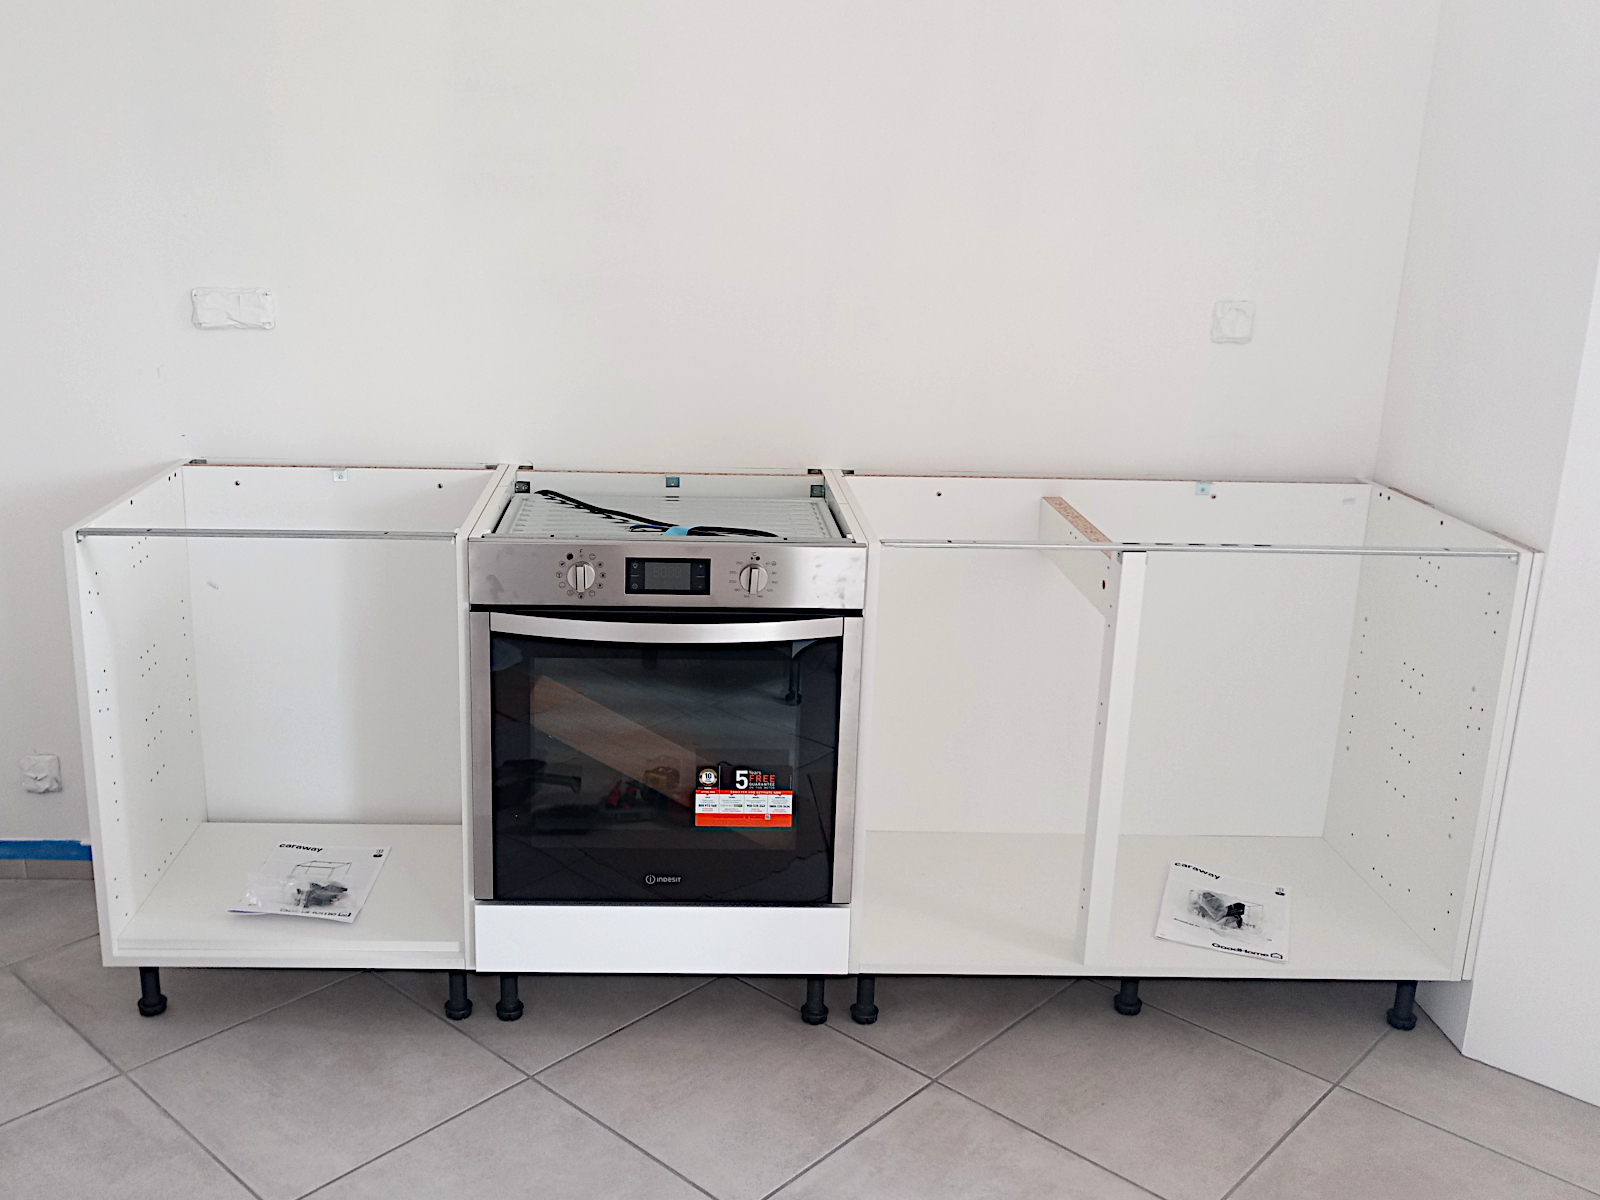
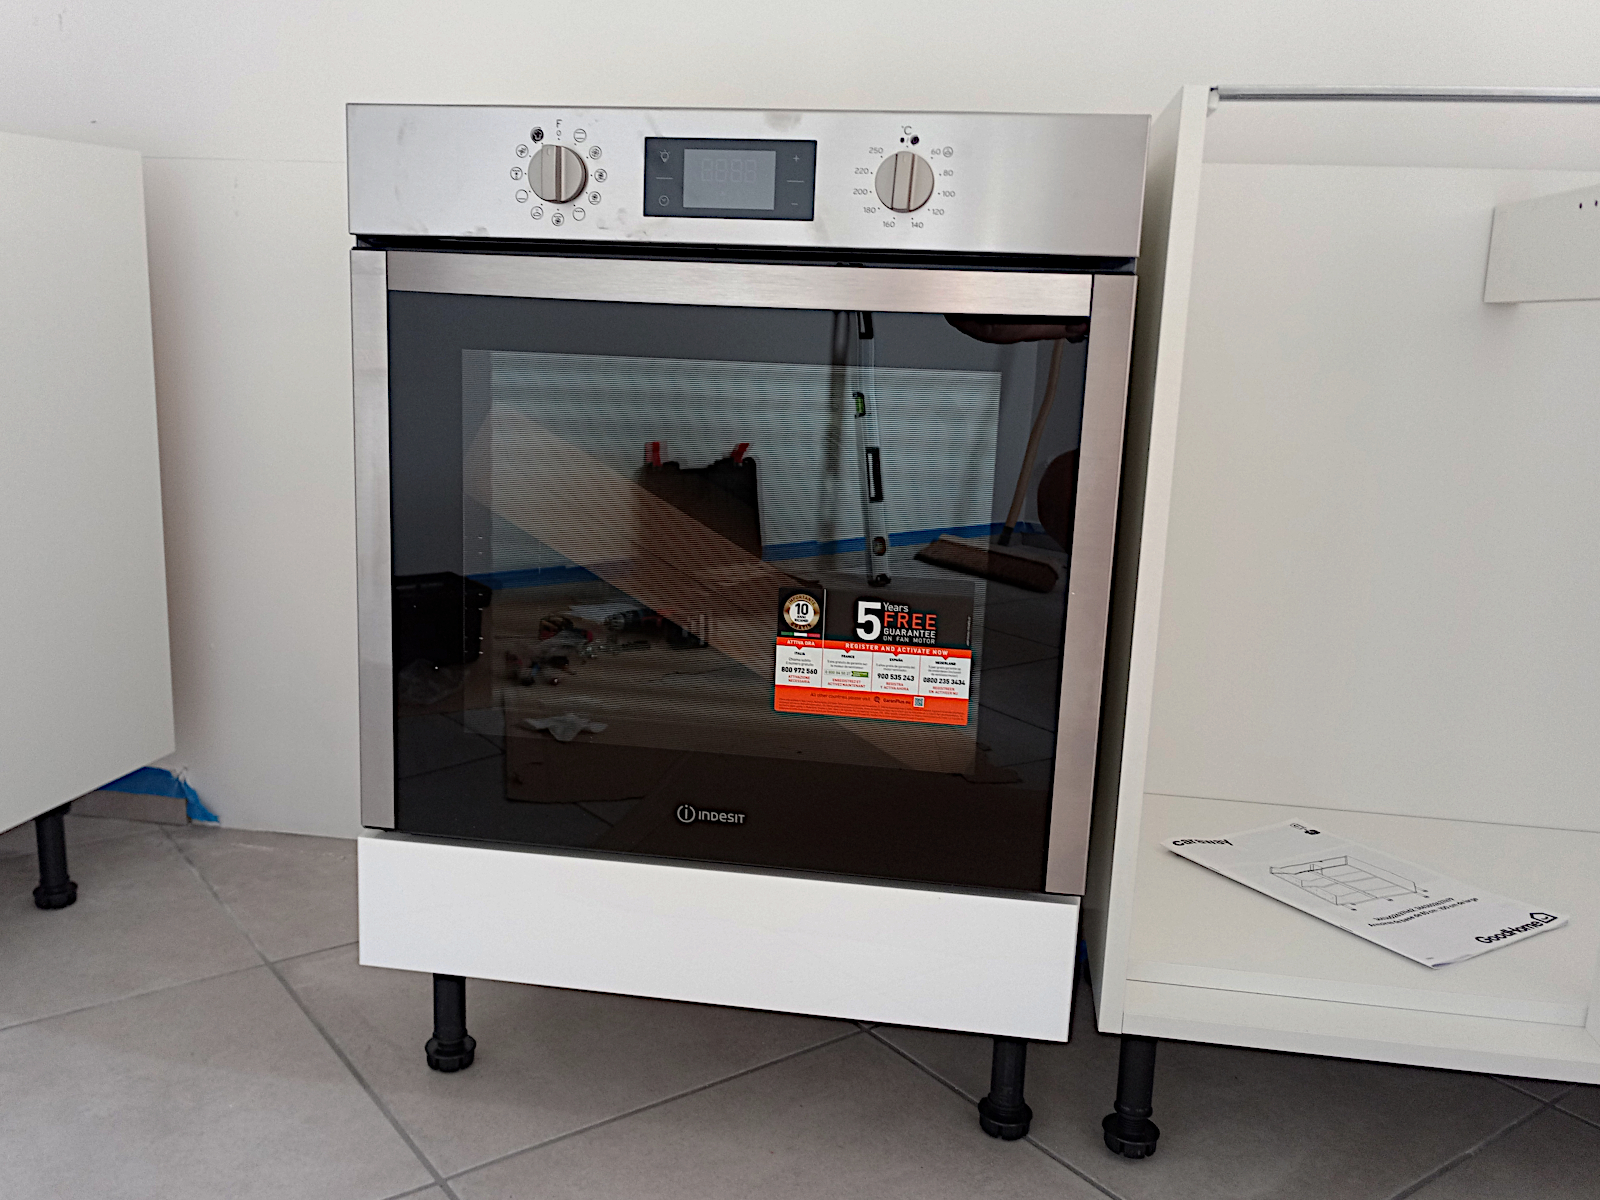
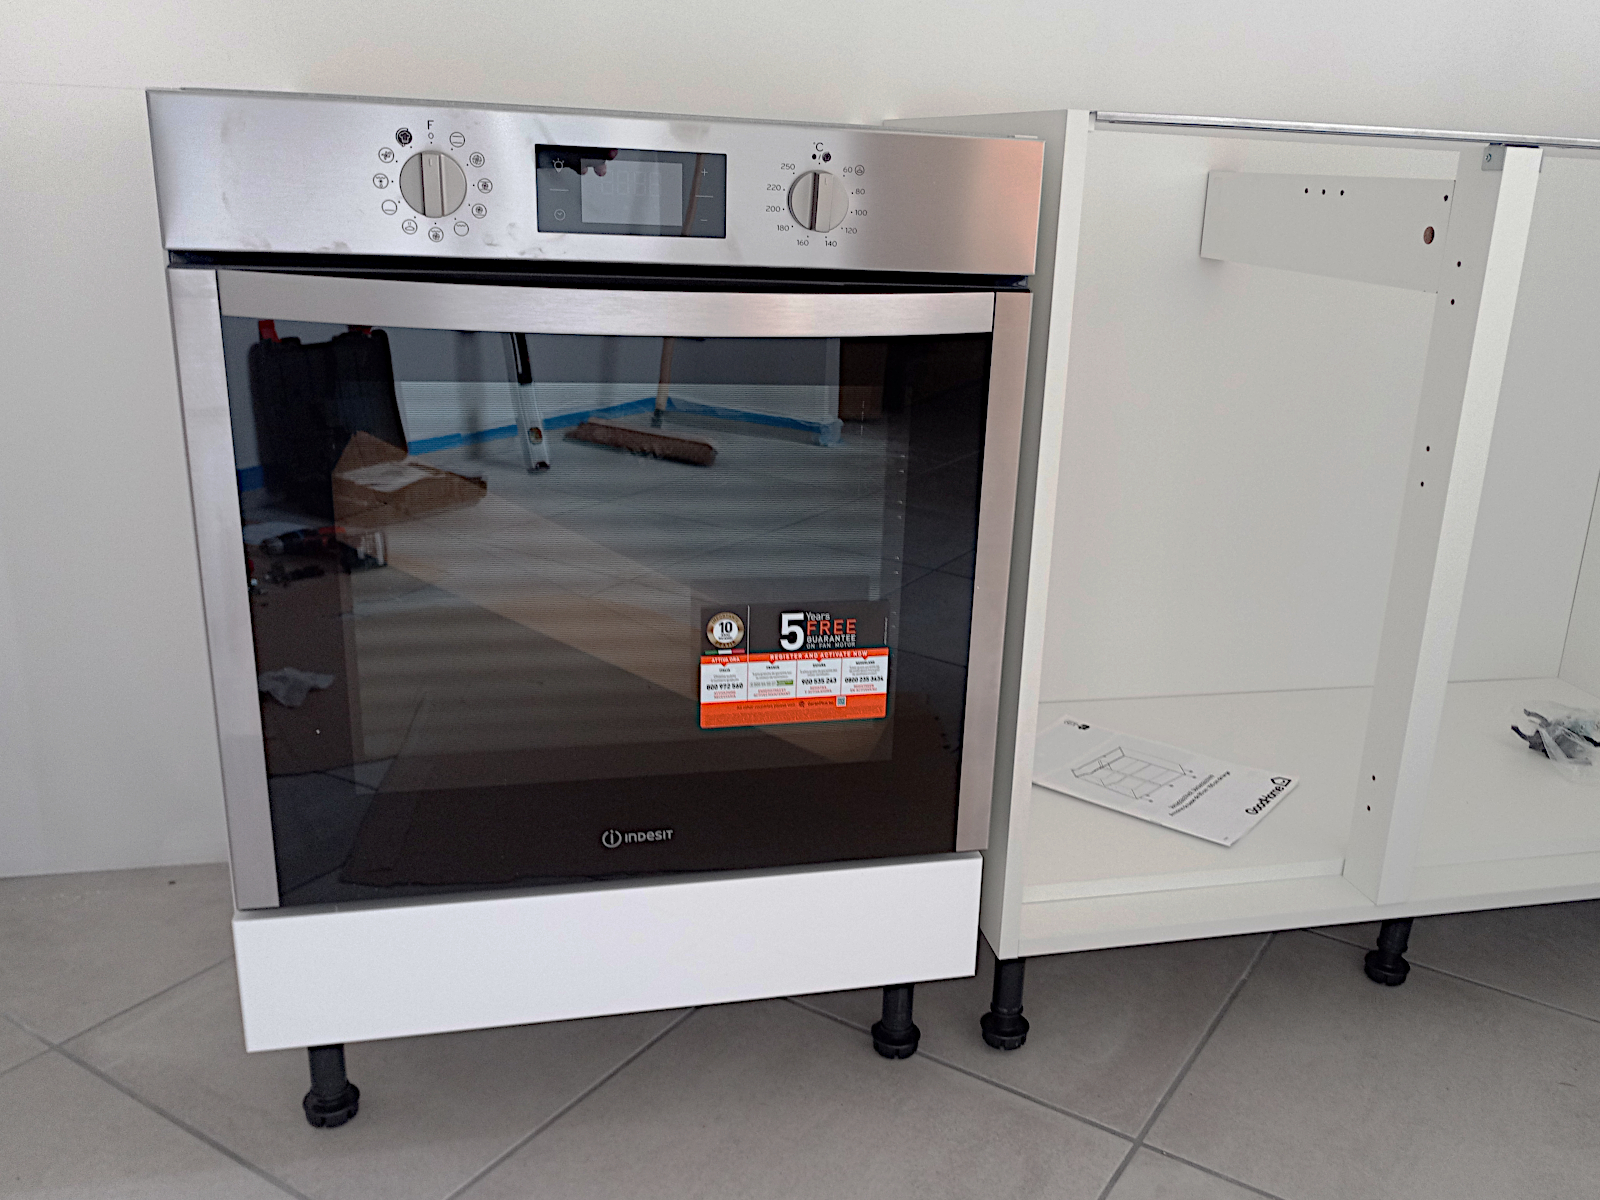
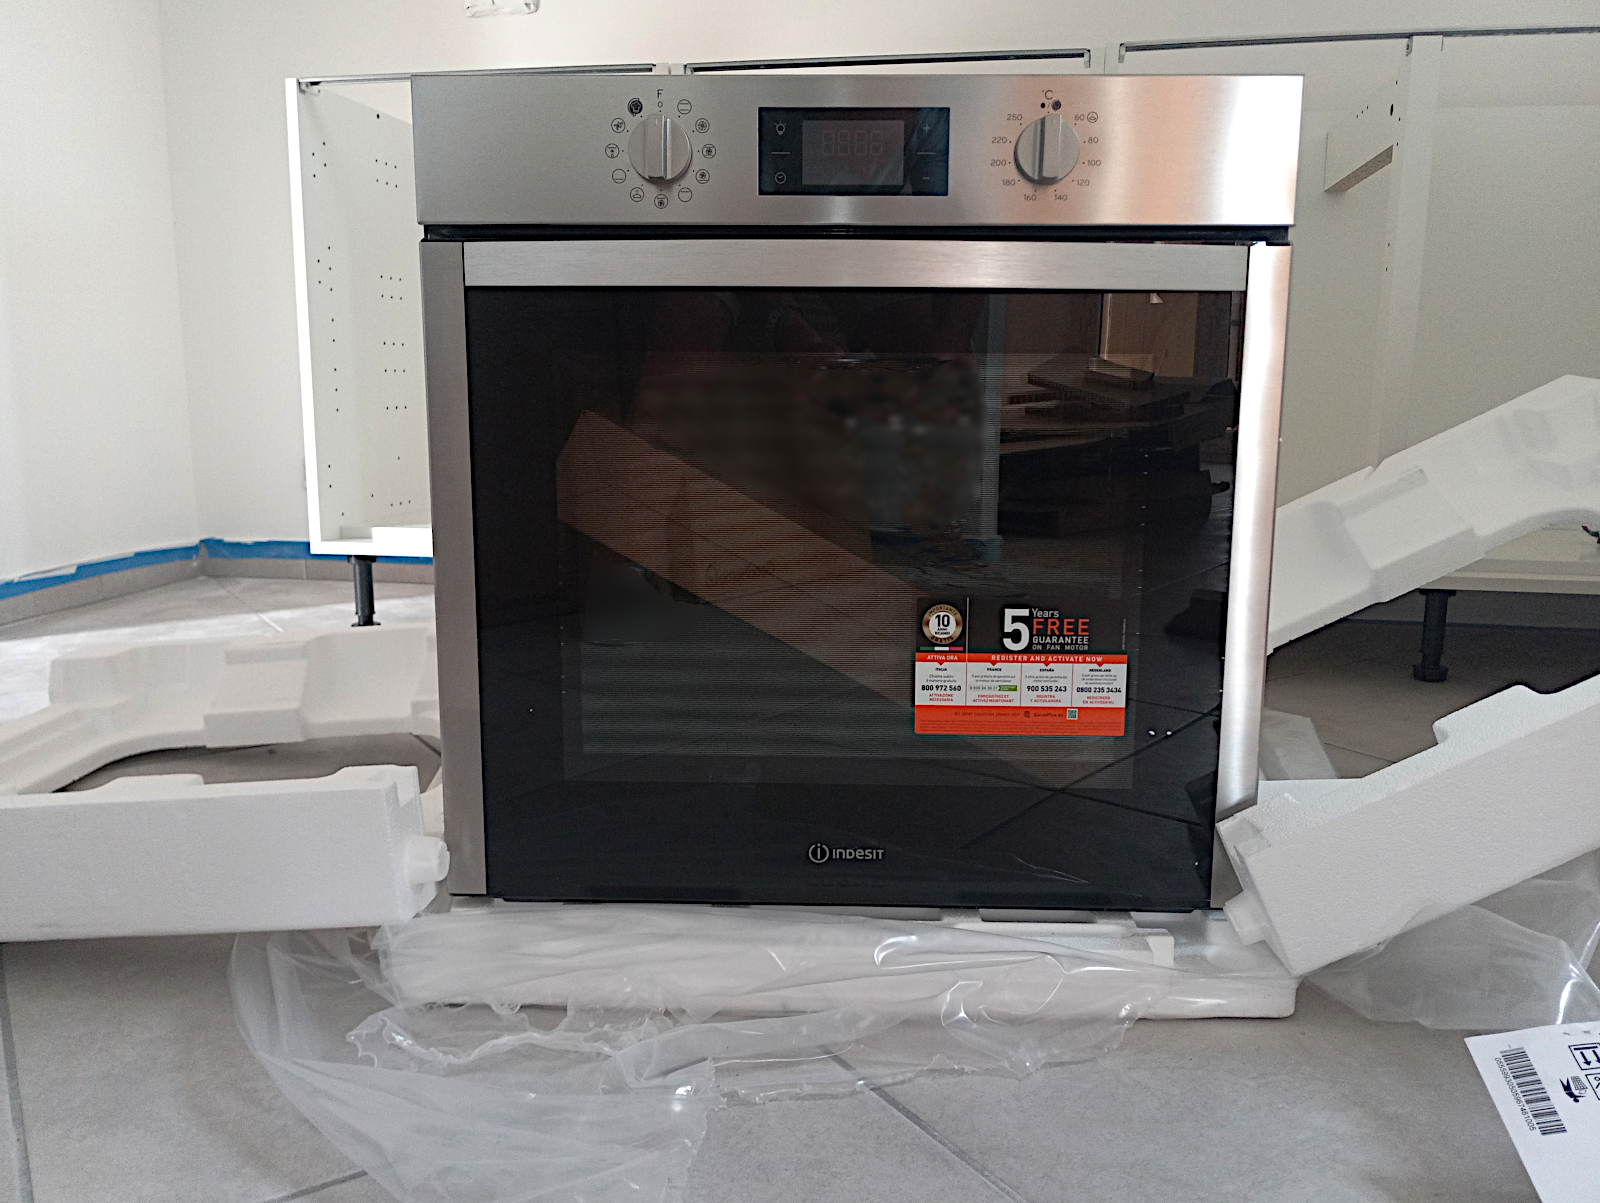
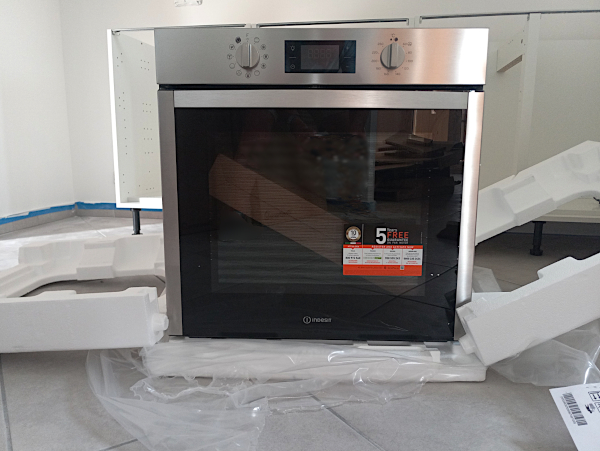
Finally, the Indesit oven that I picked up this afternoon from Brive. More about that when I come to install it.

null

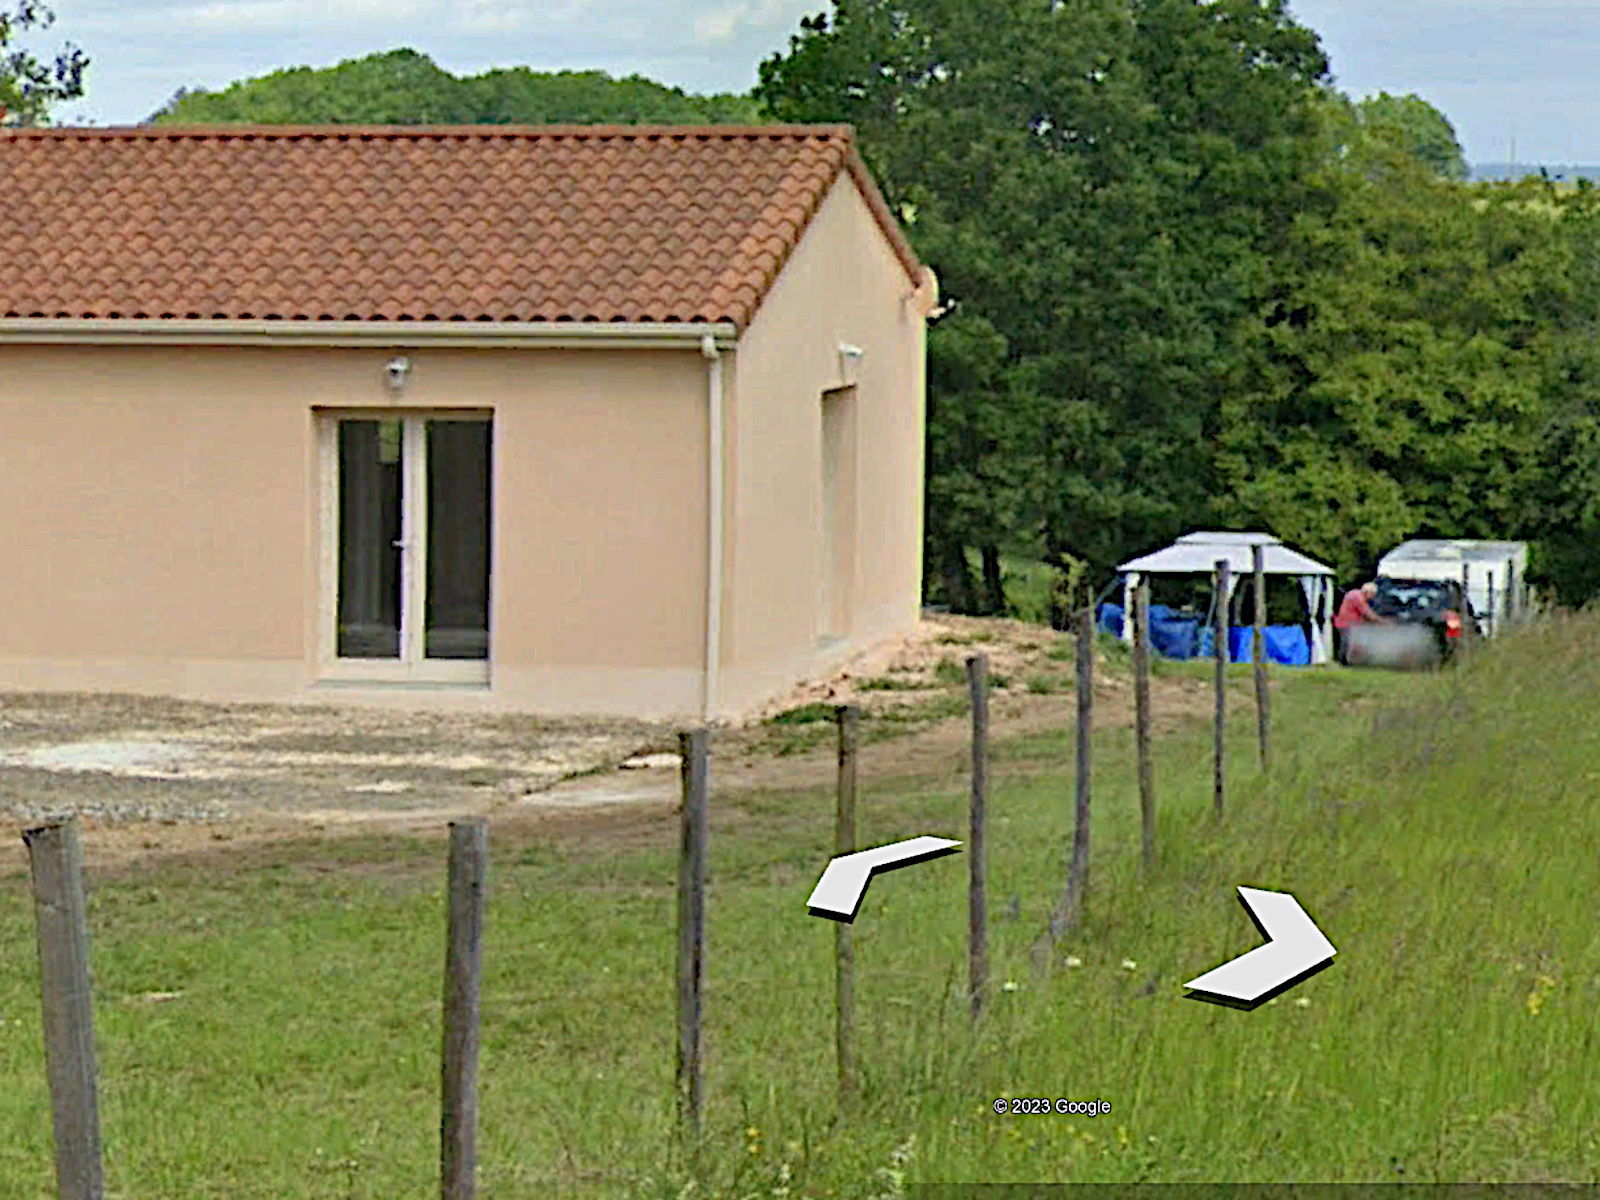
The final upside to the day – there’s a cherry orchard just the other side of Terrasson that sells the most delicious dark red cherries. I’ve been there a few times since I came to France but not since Covid and today was the first opportunity I’ve had to drop in again. And lucky actually, as the season will soon be over.

I treated myself to 2 kilos at 6€ a kilo, half the supermarket price and twice the quality. I’ll make a pig of myself for a few days and probably end up regretting it when I put on weight. But you’ve got to have some pleasures in life, haven’t you 😉

Coming along

The plumber didn’t show up today so there’s no way he’ll be able to finish his work by tomorrow, which he’d said was the plan. So yet again I’m in the dark as to what’s going on behind the scenes.

I had a couple of issues to deal with, therefore, this morning but after an early lunch I went straight up to start assembling the kitchen units. I started with the base units, of course, and I have to say that I’m very impressed so far with this new Brico Depot kit. It took me a short while to get the hang of the first unit I did but they all use the same principles and as time went on I was putting them together at great speed with no mistakes.

I’ve only put the shells together for now to see how they go into the kitchen space and I’m relieved to say that there were no nasty surprises. Everything fits into where it’s supposed to go although I’ll have to cut a slot in the back of the right hand corner unit where the pipe is for the outside tap, an access hole for the tap for the dishwasher and an access hole in the back of the sink unit for the services in that area, none of which is unexpected or difficult.

I finished at around 6.45 pm and here’s how things looked when I was about to leave.

null

null

null

null

null

All being well, I expect to press on with the kitchen tomorrow and hope to make more good progress, even getting to the point that the units are in and fixed to the wall. I was thinking about painting the shutters this week as the weather is so hot and dry but I think it’s better to concentrate on the kitchen while there’s no tradesman working inside the house, like today.

They just keep coming

Problems that is. Ones that are totally unnecessary and wholly avoidable.

Over the week-end after the tiler had cleared up and gone (hardly ‘cleared up’ actually as yet again it was left to me to clear away the rubbish and mess that had been left behind) I took a first proper look at the work that had been done. I was really pleased with the tiling in the little toilet but as soon as I entered the bathroom I was shocked by the sight that met my eyes.

A large area of the main wall that had been tiled was of a different shade of white to the rest. Almost half of the lower section together with another tile in the top left corner and yet another half way up the adjacent wall were of a much darker tint and the difference was so great as to be unignorable. Even if no more dark tiles were used in the rest of the room, as far as I was concerned the room was ruined.

The next few photos give an indication of the problem but the difference in tint is far more striking in reality than in the pictures.

null

null

null

null

I know what has happened. Tiles from two different manufacturing batches have been combined on the same wall. Anyone who knows anything about tiling, and a pro especially, knows that you should always avoid doing that and especially for tiles that are brilliant white. That’s why I bought a large number of tiles all at the same time rather than room by room.

I think I know what happened. All of the tiles originally came in white cartons and were, I suspect, from the same batch. However, when I asked Leroy Merlin to replace two cartons the contents of which were damaged, the replacements came in brown cartons and were almost certainly from a different batch. Instead of the pro putting these to one side and using up all the tiles in the white cartons first, they used the ones in the brown cartons part way through in the middle of the job.

I cannot believe that a pro should have to be told about this. I would never have done it and such a stupid error was totally avoidable as there’s a large number of tiles in white cartons still available. As it is the dark tiles will have to be removed which would have been easy if it had been done immediately the difference became apparent and the adhesive hadn’t cured. Now it will be much more difficult and to make matters worse, the plumber arrived today.

As agreed, he has finished in the kitchen and although he has agreed to leave the bathroom until last, he has capped off the connections to the bathroom hand-basin but will be unable to install the WC until the tile problem has been rectified. I have contacted the builder and the tiler about the problem but so far the tiler has not replied. If it means that the plumber is unable to install the toilet before Thursday when he is due to finish he’ll have to come back later because I am not going to live with an unsightly two-tone bathroom. By the way, the plumber agrees with me.

Here are today’s plumbing photographs starting with the two outside taps, which look great. This is the one at the rear.

null

Here’s the one at the front. The plumber questioned why I wanted it right up front on the angle of the house where it was going to be in full view and he also said that the supply for it would be an eyesore in the corner of the little toilet as you’ll see in a moment. He suggested that it would be better just to remove the supply pipe in the toilet and use another further along outside the utility room which he just happened to have installed when he did the initial plumbing work.

He was absolutely right of course, and here’s the front tap in the position that he recommended.

null

Here’s what he meant about the supply pipe in the toilet. He’s right, it would need a stop-cock on it and to be extended (see the kitchen below) and would have been a total eyesore. It’ll just have to be cut off and grouted over and if I can replace the tile later (which I doubt) that’ll be a bonus. Even if it’s just disguised it’ll be preferable to having the supply pipe in there and I have only myself to blame.

null

Next the kitchen. Notice the supply pipe for the rear outside tap and how it has to have a stopcock on it (a ball valve actually) which would have looked awful next to the small hand basin in the little toilet. It doesn’t matter in the kitchen though, because the whole arrangement will be hidden behind a kitchen unit and made accessible through a removable panel.

null

Now other stuff. Here’s the manifold now connected up for the underfloor heating. Standing next to it is the exterior heat pump unit which will go outside against the northern wall of the house.

null

This manifold in the utility room hasn’t been fully connected yet. It’s for the house’s hot and cold water system and seems to me to be very complicated seeing as it’s only for four rooms – the bathroom, kitchen, utility room and separate toilet. Next to it is the stopcock for the house’s main supply.

null

Here’s a closer shot of the main stopcock. It’s a pity that this whole setup takes up so much space and is so far off the wall.

null

The same can be said for this arrangement in the corner of the utility room. It’s for a hot and cold supply to a small sink when I can get around to putting it in and also for a washer/dryer. He’s used rather large shut-off valves for both this and the dishwasher in the kitchen – I found smaller, nicer looking ones for my old house.

If you notice, he’s also put the waste pipe for the sink to the left of the waste for the washer/dryer. This is not the arrangement I would have preferred because it means that the waste pipes will cross over bringing them further off the wall than necessary and causing the washer/dryer to stand further out into the room from below the worktop.

null

Finally a shot of the heat pump unit that will stand in the corner of the utility room. It’s much bigger than I thought it would be and I’ve also noticed something else. It has a thick electrical connecting cable and there’s no plug point in that corner of the room. Hopefully the electrician has another suitable arrangement in mind 😕

null

Taking it easy today

Yet again I’ve worked non-stop for several days so I’m going to take it a bit easy today and just cut the grass. If that can be called ‘taking it easy’…

Incidentally, I’ve done a quick calculation and I think that the total area of the walls and ceiling in the kitchen is about 49 sq. metres meaning that according to the tin, I used almost exactly twice as much paint on them as I should have done.

Looking at it another way, the spray machine makes it easy to apply a lot more paint than you realise, because unlike hand painting or rolling, it’s almost effortless. So in future I really must make sure that I take it more easy with the spraying as otherwise decorating the house will become a very expensive exercise 😐

Spraymazing!

First I had to mask up the kitchen window and the second doorway. The latter I did by masking it from the inside, cutting a slit in the middle to about half-doorway height and then adding a curtain covering the slit. I also had to add a band of masking across the bottom of the doorway to make the barrier more impervious. Then I had to get the spraying machine ready to go, which is when the fun began.

I had no idea how its controls actually worked aside from the very brief comments contained in the laughably entitled ‘user manual’. Having dipped the delivery tube into a bucket of water I aimed the gun outside towards an old sheet of polythene and pulled the trigger. What eventually came out was a solid jet of water, hardly what I expected or wanted.

I thought that maybe the machine required a more viscous medium to work so placed the delivery tube into a can of sealing undercoat and tried again. Same result. I’d wasted at least a litre or so of paint (probably more) before I decided that I needed to find out what was wrong with the jet. There was a jet that came with the machine in a separate container that, from the wording, sounded like a second ‘alternative’ jet so I decided that I’d do a swap and try it out.

To cut a long story short, it turned out that this was the ONLY jet and it needed to be installed in the machine as at the time of delivery no jet is actually fitted. I guess it would have been a nice idea to have mentioned this in the ‘user manual’ with clear instructions on how to install it but apparently the manufacturer thinks otherwise.

When I’d eventually got it into place (and cleared up the mess) it turned out that the machine worked amazingly well and after I’d realised that I hadn’t got a mask on, stopped and resumed spraying after donning my brand new 3M ‘masque de protection respiratoire’ it actually only took me a matter of minutes to spray all of the walls and ceiling in the kitchen.

null

null

Here’s after I’d removed all of the masking film from the floor. That was a blessed relief as there was a lot of plaster dust on its surface which until then had been walking in and out of the kitchen onto the floor tiles in the living room.

null

null

null

null

Some shots of the ceiling.

null

null

null

Here are the plumbing pipes after I’d removed their masking ready for when the plumber comes in.

null

Cleaning the machine took several times longer than it did to spray the whole kitchen, so the lesson is to get as much spraying of the same colour as possible lined up to do all at the same time. I was also surprised how much paint I used. I opened a new 12 litre can of paint and by the time I’d finished, the delivery tube was drawing in the last drops.

Let’s say that given what was left and the amount I’d wasted getting the machine running I’d used 10 litres. That’s enough, according to the can, to cover 100 sq metres. I haven’t done the sums but that seems like quite a lot for the size of the kitchen. Maybe I’ll have to be more sparing in my spraying efforts in future.

I’ve left masking tape around the doorways, window and floors because the walls and ceiling will have to be painted after the plumber has finished. I’ll have to re-mask the walls, window, doorways and floor to do the ceiling (in white) and the ceiling and coving when I do the wall sections that will not be tiled, but that’ll be a comparative doddle without all the plaster dust that there was previously.

Not a lot to show

I finished at around 6.30 pm because my back was killing me. I’d done a good few hours work but wanted to go on for longer and get the kitchen walls and ceiling sprayed with sealing undercoat but that was not to be.

Even so, I did get quite a bit done. The walls and ceiling have all now been rubbed down and wiped with a damp cloth to remove excess plaster dust, so they’re now ready for painting. It’s the masking up that’s taken the time – and the final bit of rubbing down near floor level that killed my back.

I’ve masked up one doorway and cleaned around the window frame so that’s also ready for masking. I’ve got to mask the other doorway though, but in a way that allows me get in and out while the paint sprayer is running so I can leave it outside the room but be able to turn it on and off.

null

null

The machine itself took a bit of assembling. Like most Chinese instruction manuals, it was as clear as mud. The problem was attaching a circlip to hold the paint inlet tube on – the instructions just said to do it without saying how. I managed it after bending its ears slightly because they were touching before the circlip could be made small enough to even begin to enter its groove, but I finally managed it.

null

So by the look of it, I should get the kitchen walls and ceiling painted tomorrow. The amount of dust generated by rubbing down the plaster has been the main bugbear with enough being present to make sticking the masking tape to the surfaces to be masked challenging to say the least. Luckily I did the walls and ceilings in the living room and corridor before the tiles went down and if I did it again, I’d do the same in every room. Too late now though 🙁

I’ve not done this before

Not on a house anyway. I’ve used sheets of the film that’s used to mask up cars for painting to mask up my kitchen floor prior to rubbing down the ceiling and wall plasterwork. I’m not too worried about some dry plaster dust falling onto the tiles as it’ll brush off but I want to catch the worst of it and also protect the floor when I spray the ceiling, coving and tops of the walls with sealing undercoat.

null

null

null

null

This is what it’s all about. As I found when I did the ceiling and walls in the living room and corridor before the floor tiles were laid, just a little rubbing down creates an awful lot of plaster dust.

null

null

Tomorrow I’ll wipe the ceiling, coving and wall tops with a damp rag and when it’s dry use my ‘pulverisateur’ airless sprayer to give them a coat of sealing undercoat. I haven’t yet decided whether to try doing all of the walls because that would need the dust to be removed without damaging the film and creating a mess and for the masking to be securely attached all around to protect the floor tiles. I’ll have to see how things go.

Tiling done!

Not quite, but the tiler did what I asked him to, which was everything that was necessary to allow the plumbing work to go ahead, starting with the kitchen. More actually, because as well as doing all of the floor, he totally completed the tiling of the small toilet and just left one wall to be tiled in the bathroom, which he’ll be able to do when he returns to do the shower area.

Here are the pictures, which are mostly self-explanatory.

null

null

null

Looking towards the entrance of the separate toilet.

null

Here are a couple of shots of two walls inside the toilet showing the two rows of ‘wave’ pattern tiles that break up the plain white. Exactly the same theme appears in the bathroom and will also be above the worktops in the kitchen and utility room.

null

null

The kitchen. As can be seen, I told the tiler that he didn’t have to fit plinths beyond the ends of the two walls where there will be appliances – fridge near the opening door and dishwasher near the opening into the living room. There was no point as the rest of the walls will be covered by fixed furniture units and will therefore be invisible. He has left behind a lot of plinths and floor tiles anyway which will be available in the future should they be required for any reason.

null

null

The utility room. Although much of the plinths along the wall where the pipes are will be covered by fixed furniture units, that could be several months away so in the meantime it will be better for the plinths to be in place as they will be visible.

null

The bathroom.

null

null

null

Because the house is in a ‘V’ shape there has to be a change in direction of the floor tiles where the two arms of the ‘V’ join. Here’s a shot of where the living room joins the corridor outside the kitchen door.

null

Here’s a shot of the entrance into the separate toilet. In theory the living room tiles could have been continued into it but we decided that having floor tiles that were diagonal to the walls rather than parallel would have been an eyesore.

null

So that’s it, the plumber can now come in any time and hopefully soon. In the meantime I’ve now got a huge amount to do – painting the ceiling in the living room and corridor, painting the ceiling and walls in the kitchen, assembling and fitting out the kitchen, removing and painting the shutters, replacing the exterior hold-back clips for the living room double door shutters, laying the bedroom floors, painting the ceilings in all of the other rooms… and that’s just for starters. But know what? Now we’re getting there I’m really looking forward to it 😀

More tiling

The tiling team were back on site bright and early to continue the floor tiling. They don’t say much, especially the two younger members of the team, they just press on and get the work done.

null

null

They will continue on to tile the walls in the bathroom and separate toilet and work had indeed started on the latter by mid-afternoon which came as a surprise to me.

null

The walls in the bathroom were prepared for tiling earlier in the day with the walk-in shower corner having been specially treated to make it completely waterproof. Unfortunately I didn’t get any shots when I had the chance and I didn’t want to enter the house later after they’d left for the day. I also don’t know if the small toilet was fully completed for the same reason.

null

null

null

null

null

Didier, the builder’s clerk of works, turned up this afternoon and it was formally agreed that when the tilers have finished and the plumber can come in to start their work, the latter would complete the plumbing in the kitchen before starting work in other areas of the house so I can start the installation of the kitchen units. I also impressed the importance of the house being ready for occupation before August and I was reassured that this would definitely be the case 😐

Well pleased

When I looked out of my caravan at around 8.45 am all was quiet up at the house and the tiles that had been stacked outside at the rear were still there, so I thought that nothing was happening. I’d already been up there at around 7.00 am and had opened as many windows and doors as I could (I still couldn’t open the double doors in the living room because the builder still had the keys) to let some cool air inside because it was quite warm in there with the shutters having been left open for several days.

So I was pleasantly surprised when I was driving out shortly after 9.30 am to collect the paint for the shutters that had been delivered to a ‘point relais’ in Montignac to find that the tilers had arrived and had already started work some time before. When I looked inside the interior was filled with a thick cloud of dust and the boss asked if I had the keys to the living room doors. I didn’t, of course, because the builder had them and hadn’t thought to issue them to the tilers who were rather put out, so the builder had shot themselves in the foot.

After I’d picked up the paint I went inside to check on progress and was pleased to see that a waterproof area had ben laid for the shower even though the mosaic tiles for it are not yet available and a good start had been made in the living room.

null

null

null

Things had moved on quite a bit more when I looked in again in the early afternoon.

null

null

I looked back in at around 5.00 pm just before they finished for the day and took some final shots. I didn’t want to go into the house after they’d gone in case I did any damage to the floor even though they said that the floor could take weight after only a very brief delay and were walking on it themselves.

null

null

null

They will not have finished the corridor today and the bathroom and ‘cellier’ floors are still to do. This morning I gave the boss a copy of my tiling plan for the bathroom so I’m also looking forward to finding out tomorrow what the deal will be for them to tile all of the walls in there and also the separate toilet.

Mission accomplished

I got the coving up in the kitchen this morning. It took about 3 hours, a bit longer than the other rooms, but that was because of the complexity of its shape.

null

null

null

null

It’s been a very hard few days but at least the job is now done and the interior is clean and tidy and ready for when the tilers come tomorrow, hopefully, to lay the floor tiles. The effort should be worth it though as after all the delays, I’ve got to do everything I can to help bring forward the date when I can finally move in.

3 out of 4

I was up at around 6.00 am this morning and after I’d had a leisurely breakfast and emptied my bins I was up ‘on site’ getting things ready to start work by about 8.00 am. The two ceiling coving priorities were the bathroom and the separate toilet because let’s say, unlikely though it’ll be, that I can agree a price with the tiler and he says that he can continue non-stop with the wall tiles after doing the floor, as both of these rooms will have floor-to-ceiling wall tiles the coving will have to be already in place for him to tile up to.

So I started on the bathroom first, which took about 2 1/2 hours to do.

null

null

I was then going to move on to the separate toilet but as I was on my last cartridge of adhesive, I decided that it would be a good idea to get some more so I can work tomorrow. I checked on the internet and found that Bricomarché at Le Bugue had what I needed at a cheaper price than Leroy Merlin so I saved a lot of time by going there. When I returned I had a very quick lunch and resumed work on the separate toilet.

null

null

By the time I’d done that it was still only mid-afternoon so plenty of time to get cracking on the ‘cellier’ (the utility room). Despite there being some tricky trimming to do around the electric utility box it was all done and dusted by about 5.30 pm.

null

null

As can be seen in the final shot above, the plasterers didn’t make good the corner of the ‘cellier’ next to the electrical service. I’ll just do it myself to save time as that part of the room will be painted and the corner will therefore have to be tidied up.

But there you have it! Of the four rooms that I wanted to put coving up in, I managed to get three done and there’ll be plenty of time to just do the kitchen tomorrow. That will be a huge leap forward as only the bedrooms will be left to be done, probably after I move in. I have to say that I’m over the moon with today’s results which turned out to be much better than I originally expected 😀

Pleasantly surprised

Tired, but pleasantly surprised because today I got all of the coving up in the living room and corridor. I didn’t start until 10.30 am and finished at around 6.45 pm with just a brief stop for lunch, but I’ve exceeded my expectations. And not only that, I’m also more than happy with how the job has turned out. It’ll be well worth all the effort though, as I think it truly enhances the appearance of the interior.

null

null

null

null

null

null

null

So that leaves tomorrow and Sunday to get the bathroom, toilet, utility room and kitchen done. To be honest, if I get the first three or even two done I’ll be delighted but I’ll have to see how things work out. Although I bought more yesterday, I think I could well run out of adhesive 🙂

Good news at last

And about time! It looks as though my message about the floor tiling got through because the floor tiles that I’d been told by the builder would be delivered next week actually arrived this morning and the driver said that the tilers will be along on Monday to start laying them. These people know more about what’s going on than I do but I suppose it’s hardly surprising as they’re working and communicating together the whole time.

null

null

null

null

So by not long after 9.00 am the tiles and the adhesive were left ready for the tilers at the back of the house. I hope it doesn’t rain because if they’re going to start going in and out through the rear double doors it’ll become a mud bath that they’ll walk indoors.

null

null

null

So that left me with today, tomorrow and the week-end to get some work done myself inside the house, starting with the ceiling coving as I mentioned in my previous post. The method I use is to first fit all of the corner pieces ie two to a corner and then to finish off with straight cut pieces. The reason for that is that it can be tricky measuring out from a corner to fill a gap and it’s much easier to fill the gap with straight cuts.

The first couple of lengths were a total pain in the backside to get up and took me far too long and not only that I got into a mess with the adhesive and ended up smearing my phone and the new smart speakers that I’m using for music while I work. OK, I’m old school and this is the first time I’ve put up polystyrene coving, but even so it’s not meant to be like that.

The big problem was that it was taking ages to apply the two beads of adhesive needed on each length of coving ie wall and floor edges and I blamed my old mastic gun for that, see below.

null

And it turned out I was right to do so. I lost over 3 hours driving to Leroy Merlin to pick up a new, high tec one but it turned out to be worth it. Applying the adhesive with it became a piece of cake and needed a fraction of the time so at around 17€ it has turned out to be an excellent investment. Here it is at the end of the day. You can’t see that much because a wet rag is wrapped around the nozzle of the cartridge to keep the adhesive wet until tomorrow.

null

Like I say, I’m old school and have been used to putting up plaster coving which is tricky and difficult to get good results with, especially in the corners. So I was somewhat sceptical about this new-fangled polystyrene material and ready to turn my nose up at it. But I was wrong! Not only is it much quicker to put up but with a modicum of care, you can also get great results with it. Take a look at the corner examples below.

null

null

And here’s a straight cut joint.

null

Lovely, and that’s before going around afterwards when everything’s dry with a bit of fine filler to tidy all the joints up. After I got back from Leroy Merlin and had a quick sandwich I was able to work through with my new site lamp for a couple of hours until 9.30 pm. Seeing the amount that I got done in that time I’m pretty confident that by Monday when the tilers arrive I’ll have got all of the coving up in the living room and hall.

As I’ll probably then be unable to enter the house for at least a couple of days I’ll be looking for jobs outside. I’ll probably start stripping all of the fittings off the shutters ready for painting as the paint for them is waiting for me to pick it up and the trestles should also be along next week. I’ll probably have to move my high pressure spray machine outside as well as it’s in bedroom 3 at the moment and I’ll be unable to get to it otherwise if the floor tiles have to be left to cure for a few days.

The problems continue

I’ve just received an email from my builder saying that the floor tiles for my house will be arriving this week but that the mosaic tiles for the floor of the walk-in shower will not be available until the beginning of July. I would think that this will more likely be mid-July based on my experience to date, which poses a problem.

As I’ve explained in previous posts, until the floor tiles are down nothing more can be done inside the house – plumbing, electrical, heating – and unless work on the house restarts very soon we will end up running into August. All work will then stop and will not resume until the autumn which I’ve already told the builder will be unacceptable.

I’ve therefore suggested that the floor tiles are laid throughout the house as soon as possible but excluding the shower area. This will allow for partial tiling of the area of the bathroom wall on which the WC and washbasin are located together with the wall areas in the separate toilet on which the handbasin and WC in there are located, which will allow for all of the plumbing to be installed. This will in turn allow for the heat pump to go in and the electrical work to be completed.

I’m now waiting for a reply but while I’ve been waiting I’ve not been sitting on my hands. While no other work is going on I can be pressing on with internal work of my own, namely the ceiling coving and even the painting of the ceilings. I’ve been hampered in this by the builder playing games by taking away the keys to the double doors in the living room preventing me from opening the shutters. To overcome this and with the aim of also allowing me to work inside at any time, daytime or evening, I’ve today acquired a very useful new tool in the form of a site lamp. It’s very effective as can be seen in the following shots.

null

null

It uses high power LEDs as can be seen below.

null

I’m looking forward to trying it out by getting cracking on the ceiling coving as soon as possible this week. I’ve also got some other stuff going on. I found a supplier of very inexpensive wooden trestles and have ordered 8 of them to be delivered in a week or so’s time. These will allow me to remove the shutters from which I intend to remove all the fittings and lay them flat for spray painting using the high pressure machine that I purchased a few weeks ago.

This should make short work of them and I’ll also be using the machine to paint the interior ceilings and walls, as well as to eventually varnish the interior doors. That way I’ll not be wasting time and be getting jobs done that I’d normally have done after moving in. But the key is to get the main floor tiles down as soon as possible. I can live without a shower for a short while – after all, I’ve been in the caravan without one for two years – but I need to install the kitchen and the floors in the bedrooms so I can get all my stuff out of storage which is ticking up additional cost month by month.

My bad

The swivel clips that hold all of the house’s small shutters back against the wall when they’re open are attached to the walls below the bottom edges of the shutters, which is normal. When they fitted the clips for the shutters for the three full height double doors, the shutter men asked me if I wanted the clips below the shutters, the same as for the small ones, or on the edges.

Silly me, I should have asked what is usual, but I didn’t and after thinking about it for a few moments I told them to go ahead and fit the clips below the bottom edges. As soon as I saw the finished job I was uneasy because the clips would be very close to the ground, but I thought I could live with them.

But what I didn’t allow for was for someone who knows about these things ie Chantal, my lovely ex-neighbour from Plazac 🙂 to say as soon as she saw them that they looked silly. So that was it, they would have to be changed and today was as good a day as any to do it.

I couldn’t finish the job because the builder is playing silly buggers and has taken away the keys to the double doors making it impossible for me to open the shutters, but I could at least remove the clips today and make the holes left in the walls good and can refit them some time in the future when the builder stops playing stupid games. Here are some before and after shots.

null

null

null

null

null

null

null

While I was at it I thought I’d tackle another couple of small jobs that have been niggling me. The ‘Crépi’ gang did a good job overall but they wanted to get in and out as quickly as possible and their attention to detail left a bit to be desired.

They only applied ‘Crépi’ to the column in the front of the house down to the level of the porch which I have never thought was low enough. Obviously the ground level will be below that of the porch and the ‘Crépi’ has to go right down to ground level, which means going below it. So I decided to add some extra myself, as shown below.

null

I’ll need to decide how I’ll finish the porch off – probably with terra cotta tiles that’ll be bull-nosed along the front – but whatever I decide to do, the column ‘Crépi’ will need to go the whole way down to the ground, which it now does.

They also hadn’t been as careful as they might have been taking the ‘Crépi’ down as low as they should have in various other places around the house. It’s no big deal as I was left with two spare bags of material and later on I’ll be able to go around and patch in the high spots at my convenience. There was one small area on the front however, that was getting on my nerves and I decided to patch that today while I was at it.

null

So that was it for today, another lovely hot, sunny day. It was a bit too windy for flying so I think I made the best use of the time available by tackling the little jobs that I did do.

Shutters up

The two guys were back at around 8.00 am this morning to finish the shutter work. Just like yesterday, it was another lovely day and they made fast progress, although I’m afraid that sadly their making good doesn’t stand up to close scrutiny. Once I’ve moved in and am established in the house I may have to go behind them and make a few improvements myself as there are several places around the house where I intend to add a bit more ‘Crépi’ anyway.

They’d finished and were off by lunch time. They told me that they’d leave the shutters closed to keep the house’s interior fairly cool and when I asked they said I could open them anytime that I want. I’ll leave them for a few days before doing so, though, to allow the hinge fixings plenty of time to cure. Here are some shots of the finished job.

null

null

null

null

null

null

null

null

null

Here are some shots of the interior with all of the shutters closed. Most of the visible light is coming from the open front door.

null

I mentioned yesterday how dark it is at the bedroom end of the corridor with the bedroom shutters closed. It’ll be the same when the doors are fitted but at least then the lights will be working.

null

null

To finish off, some closer shots of the shutters themselves. If you look at the magnified versions you’ll be able to see what I mean about their making good not really being as good as it should have been.

null

null

null

null

So that’s as far as we can go for now with the external work. I suspect that the builder will leave the ‘terrassement’ (making good the ground around the house) and driveway right up until the very end. So now it’s essential for the floor tiling to go ahead before any more progress towards completion can be made. I’m hoping that that’ll be next week, but to be honest I haven’t a clue and there’s no way that I can speed it up anyway 🙁

It gets better

I knew that my hopes from yesterday had been realised when I looked out of my caravan door this morning and could see a pair of shutters leaning against the wall on the ground below the house’s kitchen window. It was also apparent from the sounds I could hear that work was going on on the front of the house.

By the time I got my drone airborne the two workmen involved had made great progress, with the shutters at the bedroom end all having been put into place and a start having been made on the full height double doors at the living room end.

null

Later on I caught them after they’d moved onto the windows at the back and it was evident that they were making great efforts getting the shutters exactly vertical and parallel to each other with identical spaces all round.

null

null

null

I went to take a closer look at the progress they’d made at the end of the afternoon.

null

null

null

null

null

The interior character of the house had been much changed by the shutters and in fact the bedrooms, bathroom and utility room were surprisingly dark with their shutters closed when I took a look inside them. Not so much the lounge, though, because the shutters on the double door at the rear still hadn’t been fitted.

null

Here are a couple of shots showing the interior locking mechanism that’s on each shutter and the locking foot that’s on the bottom of each one.

null

null

Here’s a shot of one of the gadgets attached to the wall that secure the shutters when they’re open

null

Finally, a general shot of the house’s rear.

null

They told me they’ll be back tomorrow to finish off. I haven’t looked closely yet, but obviously there’s had to be a bit of making good around the shutter hinges and fixings. I was pleased to see that they’d found the two bags of ‘Crépi’ left over from when the walls were rendered and had opened one to make sure that it matched the wall finish.

As the photos show, the shutters are in bare wood and when they’ve been fitted I’ll have the job of painting them all myself. I hope I’ll be able to take them off, lay them horizontally and use my spray-gun but I’ll have to wait and see. I certainly don’t fancy painting them all by hand 🙁

A satisfactory outcome and a pleasant surprise

Anyone following my last few posts will probably have guessed that the ‘satisfactory outcome’ refers to my ‘tonnelle’ repairs. Just stretching the roof covering onto the roof framework puts the framework under quite a lot of stress and I had no idea until I arrived at that stage whether my repairs would work or not. But first I had to take all of the sharp edges and corners off them to protect the roof fabric and give them a flash of matte black paint.

null

null

Then it was time to assemble the complete roof frame and to help things along I gave each joint a quick spray of WD40 to overcome the rust that had formed.

null

Then I fitted all of the wall curtains. They were all undamaged except for a couple of tapes that tie them to the uprights that had been torn off and which I stitched back on again at the very end.

null

null

It was then just a matter of stretching the roof covering onto the roof framework, manoeuvring the whole roof onto the tonnelle framework, aligning all of the roof struts with their securing holes and bolting everything together. And voilà! One almost complete repaired ‘tonnelle’.

null

null

null

null

null

null

null

Amazingly, considering what it’s been through, the whole thing is still in remarkably good shape, standing upright and fairly square on the ground. I patched some small areas of damage in the roof covering before I fitted it but it was only after I’d mounted the roof that I found several more areas that needed patching. That won’t be too important for the amount of time that the ‘tonnelle’ is likely to be in service and I’ve still got the roof covering from the other damaged ‘tonnelle’ that only has one rip in it that I could always switch over to.

But the main thing is that my repairs seem to be OK. They were tested earlier because earlier this evening some large wind gusts were forecast and I took the precaution of adding some hefty tie-downs just in case. The gusts duly arrived in the form of a storm-like squall. I was quite surprised by their severity but I’m glad to say that no harm was done.

So what was the pleasant surprise, you might ask? While I was up to my neck in the ‘tonnelle’ work I had a couple of missed calls on my mobile. Later, when I went up to take some stuff back to my tool store, this is what I found.

null

null

null

They’re wrapped in plastic but they appear to be the six large shutters for the full height double doors. Does this mean that someone will shortly be along to fit them together with the twelve smaller ones for the windows? I hope so. It would be nice if it does… and not before time 😐