Surprise delivery

As I was going up to check on my post this morning I was surprised to hear the sound of a truck engine. It turned out that it was parked in front of my house and the driver was just in the process of completing a delivery.

null

I hadn’t been told to expect anything although I’ve been waiting for the floor levelling screed to be laid for over a week so I expected that the delivery was of the materials for that. I was under the impression though, that a special machine with a pump is used for that which arrives on site with the material already contained in it as it’s fairly liquid.

Here’s what I saw when I checked on what had been dropped off.

null

null

When I took a closer look, although the packaging had been enclosed in waterproof plastic I could see the writing and codes on it. The maker’s name was Parexlanko and the product was Monodécor.

null

That didn’t mean anything to me until I did a search on the internet, which made everything clear. These bags contained the material for the ‘Crépi’, the special plaster that will be applied to the outside of my house. I spotted the code ‘R20’ printed on the bags and when I did a more detailed search I came up with the following colour chart and sure enough, R20 corresponds to the colour that I selected for the walls of my house.

null

The square on the colour chart is a bit small to get an impression of how the house will look so I created the following image.

null

Allowing for the colour variation that any screen on which the image is viewed will be subject to, it gives a pretty good indication of what the colour of the house will be. It’s called ‘Sable Rose’ and when I chose it I was a bit concerned that it might be a bit too pink but now I see it again I’m a lot happier.

I’m wondering if this delivery means that the ‘Crépi’ will be applied before the floor screed goes down but I think not. I’ve got a suspicion that the screed will be laid right after the Easter break and while it’s being allowed to cure for a few days the builder will take the opportunity to do the ‘Crépi’. It would make sense but stranger things have happened as everyone knows by now 😕

Head over heart

I mentioned a week or so ago that I planned to install a small (8.2 x 4.7 metres) ‘hors sol’ swimming pool in my garden below my house once the build was finished. I posted a picture of the model I had in mind and below is how things look now, with the garden in its present state, and how they would have looked with the house finished before the bare earth was made into a grassy bank.

The pool in question was on offer until 2nd April with its price slashed by 1100€, about 20% off its usual price, so was a bit of a bargain. I hesitated but thought, ‘What the heck!’ and placed an order last Sunday before the deadline expired. Then I went off to bed.

I awoke on Monday having slept on it with the thought in my mind that I must be crazy and alarm bells ringing. The pool kit weighs not much short of 2 tonnes and would have been delivered in 10-15 days time and then what would I have done with it?

It would have been dropped onto my land and with all of the essential work ahead of me, things like relocating my tool store and building a garage on top of all the work I have to do indoors, decorating, tiling, furnishing, laying floors, putting in a kitchen and much more, there it would have stayed for many weeks, if not months. I doubt that I’d even have been able to install the pool before the end of the season, making buying it pretty pointless.

So reluctantly I made my head overrule my heart and bowed to the sensible decision to call the pool company and cancel my order. They were very understanding and did so after a young lady called me to confirm that that was what I wanted to do. When I checked their web site a short time afterwards the price of the pool had already returned to normal so there was no going back.

Not this year anyway. I have no idea how the price of the pool will change by this time next year but by then I should have all of my main jobs behind me and be in a much better position to take on the task of installing it. So in my heart I haven’t given up on the idea of having it – far from it – but for now I’ve had to listen to what my head tells me 🙁

Here we go again

It’s now been over a week since any work was done on my house which is very frustrating given how close it is to being finished. However, I think I know the reason why.

The builder I’m employing heavily uses sub-contractors and probably only has a few direct employees of their own to perform basic functions. When it comes to more specialised activities – roofing, plumbing, electrical work, possibly even the groundwork for foundations and putting in septic tanks – they call in outside firms.

One of the reasons for this is the French system of employment which, unlike those in northern and other parts of Europe, makes it difficult and costly to fire people – for example, to reduce a firm’s workforce and costs if business falls off for some reason. This means therefore, that firms like my builder are very reluctant to take on new employees, even when their volume of work is expanding, for fear of getting caught out should business fall away again.

So that’s why they try to reduce their risk by hiring in sub-contractors. The problem though, is that the sub-contractors have the same mindset and are also reluctant to take on extra employees, even when business is booming as it seems to be at present with the orders that were placed for new rural houses post-Covid. So builders like mine who want to call in sub-contractors as and when needed either have to plan ahead very carefully and risk not being ready when the sub-contractor turns up to do their work, or are placed in a queue.

My own experience suggests that builders like mine are not that good at planning ahead so that’s why their clients, like me, end up constantly seeing work on their houses starting and stopping and being subject to constant delays. And that’s why almost every morning when I look out of my caravan nothing is happening on site.

Reflections

Living in my caravan for the last 21 months has been a miserable, depressing and isolating existence that I wouldn’t wish on anyone. But the last few weeks have been absolutely ghastly. Right at the very beginning I invested in two gazebo-type tents called ‘tonnelles’. These were planned to perform two functions, namely to house furniture that I’d otherwise have had to pay for to put into storage and to provide space where I could continue entertaining and meeting with my friends during the summer months while not otherwise having the space to do so.

Unfortunately I lost one of them almost immediately, destroyed by high winds shortly after I’d erected it and then had to leave to go to England, and had to replace it by yet a third one. The two which I then had performed well in both roles and it was a source of sadness to me when the weather deteriorated at the end of the summer and the fun side of things had to wind down. Things then became more serious and the emphasis moved to just finding ways to defend the two ‘tonnelles’ from the weather which became ever more threatening to their very existence week by week.

Having lost one of them already to high winds, in the autumn the second of the first two that I’d bought suffered serious roof damage from a wind gust. Luckily I had kept the roof covering from the first one and although it had also been damaged during the fist incident, it was comparatively unnoticeable and I was able to swap it over. I then had to keep a weather-eye open and if any strong winds were forecast I found that the best way to mitigate against them was either to partially unzip all the side curtains of both ‘tonnelles’ to allow the wind to pass through them or, in extreme cases, to fully open the curtains and tie them securely to the structures’ support legs to stop them being ripped.

This worked well up until a few weeks ago when we had a day of high winds culminating in a final tremendous gust that had a devastating result, getting under the roof and ripping the guy ropes of the second of the first two ‘tonnelles’ that I’d originally bought out of the ground, turning it completely over and smashing it against the side of my caravan. It took me a minute or so to get out as the ‘tonnelle’ was jammed up against the caravan door and when I eventually did I witnessed a scene of total disaster.

It was raining, the wind was still blowing with enormous force and the ‘tonnelle’s’ curtains were still being blasted around in all directions. The roof was still on but I could see that several of the structure’s metal tubes were either badly bent or broken and that there would probably be little hope of saving it. Nevertheless, I managed to struggle to remove its curtains and also eventually its roof covering and I decided to leave the framework where it was, upside-down outside my caravan until I had time to make a better inspection to see if I might be able to repair and maybe save it. Unfortunately it’s still there to this day in the mud in front of the caravan.

null

But that wasn’t the end of things. As a result of the above experience, I decided that it would be a good idea to tie down the last of the three ‘tonnelles’ still standing with heavy rope, which I did while still maintaining my policy of partially unzipping or fully opening and tying back its side curtains whenever strong winds were forecast.

null

This worked well as before but even so, was still not enough to appease the weather gods who decided to send in another wave of storms and high winds over the last week or so.

Unfortunately, the last ‘tonnelle’ is of a design which includes a top roof vent which has its own fabric cover (see images above and below). It’s attached by the four rods forming the vent’s framework merely sticking into its four corners and stretching it into place and I’ve always had my concerns that this would not be enough to resist any really strong winds.

null

Unfortunately these were proved right when during storm-force winds last week the two corners of the fabric that were taking the greatest battering finally gave up the ghost and allowed the rods to rip right through them.

I managed to save the cover before it was eventually either blown away or totally destroyed and had to decide what to do next. With the side curtains tied back and the roof vent cover off, it’s almost like having nothing at all covering the ‘tonnelle’s’ contents, which of course is the case for the contents of the ‘tonnelle’ that blew over and which are now standing in the open air, albeit with a plastic tarp over them. This isn’t too important as the items affected are mainly garden furniture that would normally be outside anyway, or garden chairs that are fairly weather resistant.

null

But this is not so for the contents of the last ‘tonnelle’ for which the implications are far more serious. This is because thinking that it would be weather-proof enough, I decided to store the interior doors of my house in it until the floor-levelling screed has been laid in my house and they can be taken back inside and mounted in their frames. I took the precaution of wrapping them in yet another new waterproof tarp but I’ve no idea up to now whether this will be enough to protect them because at times when the ‘tonnelle’s’ top vent cover was off and its curtains were tied back, they were being directly lashed by the strong winds and heavy rain.

null

null

I could do nothing about it until a couple of days ago when I repaired the ‘tonnelle’s’ vent cover by hand-stitching some short lengths of strong tape over the rips in its corners. Up to now the repairs have held against the strong winds that we suffered for two days up to yesterday, and for now the curtains are also all back in place. So if I’m lucky, the rain holds off and the floor screed goes down soon (I was told it would go down during last week) I might get away with the doors not getting wet and warping. If that happened it truly would be a huge disaster.

But in any event, I am utterly sick of living in my old caravan. The upside is that it has saved me a lot of money, literally thousands of euros, that I’ll be able to spend on the house and its contents, but it has been a soul-destroying existence the cost of which has been high both spiritually and emotionally. I can’t wait to get out and back to living a civilised life surrounded by four walls and a proper roof and although knowing what I now do, I’d do another house-build project, I don’t think I could ever face living in a little caravan again. Certainly not for the best part of two years, anyway 🙁

More catch-up

The past few weeks have been utterly depressing living through awful weather and high winds in my caravan. However, I’ve managed to pass some of the time by making some more catch-up videos of my house-build, three of which are shown below covering the period up to just before Christmas, up to the first day of constructing the roof.

These are new videos but are not new material as such as their content was covered at the time by postings here and on Facebook using solely still images.

I like to produce these ‘shorts’ because ultimately I want to create a long video of the complete house build and it will be easier to stitch a whole series of short videos together rather than to try to create one long one from the huge volume of material that I’ll have at the end. So more videos like these will be coming up shortly, if you’ll forgive the pun 😉

Are you receiving, over…

No. As I’d surmised, although a contractor turned up as expected to connect the house to the electrical supply, they couldn’t. One man did spend quite a bit of time putting in the Linky smartmeter and the main switch, as shown below, and another did appear to be getting the roadside box ready to take a connection, but when he’d finished the two cables in the green ‘gaines’ were still above ground as they’d been yesterday.

null

null

null

Didier was on scene to open up the house for them and he thought that they might be along tomorrow to lay the floor-levelling screed. He said that it would be by the end of the week anyway, but I hope that it will be tomorrow because it’s forecast to be sunny and dry, which will give the interior a chance to dry out afterwards.

On another subject, we’re expecting more rain and high winds the day after tomorrow so I didn’t want to leave my last-standing ‘tonnelle’ with a gaping hole in its roof from where the last dose of strong winds had damaged its top cover and blown it off. I found some strong tape in the old sewing box that I brought with me from the UK and used it to patch the tears.

I then had to remove the whole roof to replace the panel and put it back on again, so now it’s just a matter of waiting and seeing if my hand-sewing holds up. I’ll let you know how it goes and I’m keeping my fingers crossed 😐

Ready for ‘Crépi’

The two septic tank men turned up again today to conclude their landscaping role. As they told me yesterday, this won’t be the last time that I’ll see them though, because they’ll be back later to finish tidying up all of the ground around the house when it’s finally ready for occupation, of which more later.

Today they adjusted and smoothed the earth that they’d put into place yesterday to make it look tidier and also scraped off a layer at the front of the house which they moved down towards the house’s front wall, concentrating on the bedroom end. They also had some more rough stone delivered to place on top of that which was put in place in the site’s entrance and parking area when building first started but which had been crushed and rutted by the heavy vehicles that had been driven over it and also soiled by having concrete and other materials dropped onto it.

Here’s how things looked once they’d finished, the best the site has been from day one, I think.

null

null

null

null

null

null

I was worried that I’d asked for the septic tank to be placed too close to the house meaning that the slope down to it from the house wall would be too steep for a pathway. The older man, who was the same one who’d opened the site up by digging the first hole in the ground back in March of last year, assured me that it would be OK, and the next shot shows that he was right, especially as there’s scope for adjusting the level as I’ll explain shortly.

null

The next two shots show how the level at the bedroom end of the house has been adjusted by moving earth into the area by scraping a layer off other areas at the front.

null

null

Previously there was a step down along the boundary between the original ground level and the parking area, shown by the line in the image below. He obviously knew when he dug the parking area out a year ago that he’d be able to scrape earth away from that area in order to bring it down to the parking area level and in line with the level along the (south) side of the building, that he would then be able to be use elsewhere. That’s what experience does for you!

null

Here’s a final shot of the house taken today at ground level.

null

As I mentioned above, this isn’t the last I’ll see of these two guys. As can be seen in some of the pictures above, they’ve pulled the earth back away from the house walls so it’s ready for the ‘Crépi’ (special wall plaster) to be applied. I don’t know much about how this will be done – I know that a special machine is used but I don’t know if they just slap it on to below the damp proof course, let it dry and then push the earth back over the bottom of the ‘Crépi’ layer or if they are more sophisticated than that.

In any event, the two guys from today will be back to push the earth back against the building and create levels to make a terrace out at the back and a pathway all around the building which they will then lay down in clean crushed stone. They’ll also be finishing off the entrance and parking area in the same way, exactly according to my plan as they builder promised they would. I’m not sure when that will be, but it can’t come soon enough as far as I’m concerned 😀

Electrics and water

Normally they don’t mix, but they do when you’re trying to finish building a house. Today the electrician was busy working inside to pull together what appeared to me to be a huge amount of complicated wiring, see later below, and the ‘fosse septique’ duo were busy outside finishing the installation of the septic tank waste water treatment system and digging trenches for underground cables and pipes.

The programme for the septic tank boys was to finish connecting the pipework running from inside the house, make the trenches lower down the land to accept the now clean water run-off, make connections for the downpipes from the gutters, make trenches for the cables that will be left ready for my proposed garage (in front) and swimming pool pump (at the rear), extend the trenches in the front of the house for the mains electrical and water connections and then fill everything in and roughly level all the land that had been affected by all of this work.

For the most part the pictures speak for themselves. To start off with, here’s how things looked after they’d dug, connected and prepared to refill the run-off trenches. At this stage nothing could be filled in and covered until the local inspector from SPANC had come on site and given the system her seal of approval. Only then could filling in start.

null

They connected this rainwater downpipe on the front and the two on the back to create a common run-off at the rear of the house. The other one on the front was treated separately.

null

null

This photo was shot during the initial setting up of the ‘fosse septique’.

null

null

This shot was taken after work had just started on digging a trench from the front to the back of the building to accept the green ‘gaine’ (plastic conduit) to take the cable for the swimming pool pump.

null

null

null

The next shot shows the start of the infilling process to bury the whole system underground.

null

null

null

Here’s how things looked at the end of the day – much tidier but not yet finished. The team will be back to complete their ‘terrassement’ (landscaping) tomorrow.

null

null

null

null

null

The next two shots show the two trenches with the connections ready for electricity and water.

null

null

Here’s what it now looks like out at the back of the house viewed from the living room doors.

null

null

This is the sight that greeted me when I popped in to see how the electrician was doing just after lunchtime. I’m amazed that such a tiny house can have such a complex electrical system with so many breakers. I think that mostly this is down to the heat pump.

null

This is how things looked at the end of the day after the electrician had finished. But his job is far from over as he’ll be back to connect up the heat pump and hot water system when the floor levelling screed has been run and the heat pump and plumbing have been installed.

null

To finish off, one more shot of the exterior of the house from ground level.

null

As I mentioned earlier, the septic tank guys will be back tomorrow to finish tidying up the ground and on Wednesday Enedis are due to connect the house’s electrical supply. However, I’ll be surprised if this will go ahead as firstly it’s supposed to be ready for use, which obviously it isn’t just yet, and it’s supposed to have been inspected, which it hasn’t been. I’ll be interested to see what happens… 😉

Well, here’s a thing

I mentioned in my last post that having many weeks ago chosen the tiles that I wanted for my bathroom, it now transpires that the supplier says they are out of production and no longer available. As I particularly liked the tiles that I’d chosen, the one in plain brilliant white and other ‘brillant’ with a wave motif, I said that I wasn’t interested in selecting alternatives and would look for another supplier.

The way things work is that the builder specified three alternative suppliers and an upper budget limit and it was then up to me to make my choice of tile. Things became slightly complicated because whereas the builder is only contractually required to tile the two ‘faïences’ (the two walls comprising the end and side of the walk-in shower) I want to tile the whole bathroom and want to add a second tile to break up what would otherwise be plain walls.

As I want both tiles to be the same colour ie brilliant white, it makes sense to source them both from the same manufacturer in order to achieve perfect colour matching. This meant that I will have to pay for extra tiles of the one that the builder will be putting up plus as many of the second, patterned, tile that I’ll need to complete the whole room.

But that’s not all. Because I also want to use the same tiles to tile the whole of the separate WC, the walls over the worktops in the kitchen and, most likely, parts of the walls in the utility room, I’ll actually be paying for significantly more tiles than the builder will.

I hadn’t bothered thinking much about this until yesterday. On Friday I visited both of the other specified tile suppliers and made my new choices from one of them. Both were slightly more expensive than the ones I’d originally chosen but I figured that I’d have to just bite the bullet. The plain white one was priced at 24.90€/m2 and the one with the wave motif at 25.90€. And those were my prices, of course, because the builder will have a trade account with the supplier and enjoy a trade discount.

But on Saturday I went to Leroy Merlin to check on a couple of things that I’ll soon be needing to buy and while I was there I thought that I’d take a quick look in their tile section. I was surprised to find that they also offer tiles identical to the ones that I’d chosen the day before, but was even more surprised when I looked at the prices. Here’s what I saw.

null

The plain tile was 10€/m2, or 40% less than I’d agreed to the day before for an identical tile from the other supplier, and the one with the wave motif 9€/m2 less. In fact I’m entitled to a 10% discount on my Leroy Merlin loyalty card, so the plain tile will actually come out to 13.41€/m2 (11.49€/m2 less) and the patterned one to 15.21€/m2 (10.69€/m2 less).

These savings are really worth having so I’ve presented the builder with a proposition. I’ve suggested that either they source the (plain) tiles for the two bathroom ‘faïences’ from Leroy Merlin so I can also source the other tiles that I’ll be needing from them safe in the knowledge that they’ll all match or I’ll source ALL of the tiles that will be needed for all areas in the house, including the ones that the builder will be putting up, and they can make me an allowance or a consideration for the ones that they would have provided. I should get an answer tomorrow.

It’s a bit difficult showing photos of the two tiles on here but Leroy Merlin have an excellent image in the right setting of them both which especially features the one with the wave motif. I’ve shown it below.

null

I haven’t decided what I’ll be doing in my bathroom just yet. I like how they’ve used it as a panel in the shower but alternatives are to feature it on one complete wall or as a horizontal strip or band, for example, around all four, as in the image below.

null

But that’s for later and the first thing is to get an agreement with the builder and cancel the arrangement that I proposed with the new supplier on Friday 😐

FOOTNOTE

We’ve had an awful day today with gale force winds. The gusts became stronger and stronger almost as though, having destroyed one of my ‘tonnelles’ a week or so ago, they wanted to do harm to the second one also. Well, I’m sad to say that they succeeded in doing so, ripping the top panel off its roof. So here I am, almost at the end of my exile in my caravan after 21 months with the end in sight, having started off with three ‘tonnelles’ and now ending up with none. The weather gods had it in for me for sure for some reason, why I do not know 🙁

Chaotic!

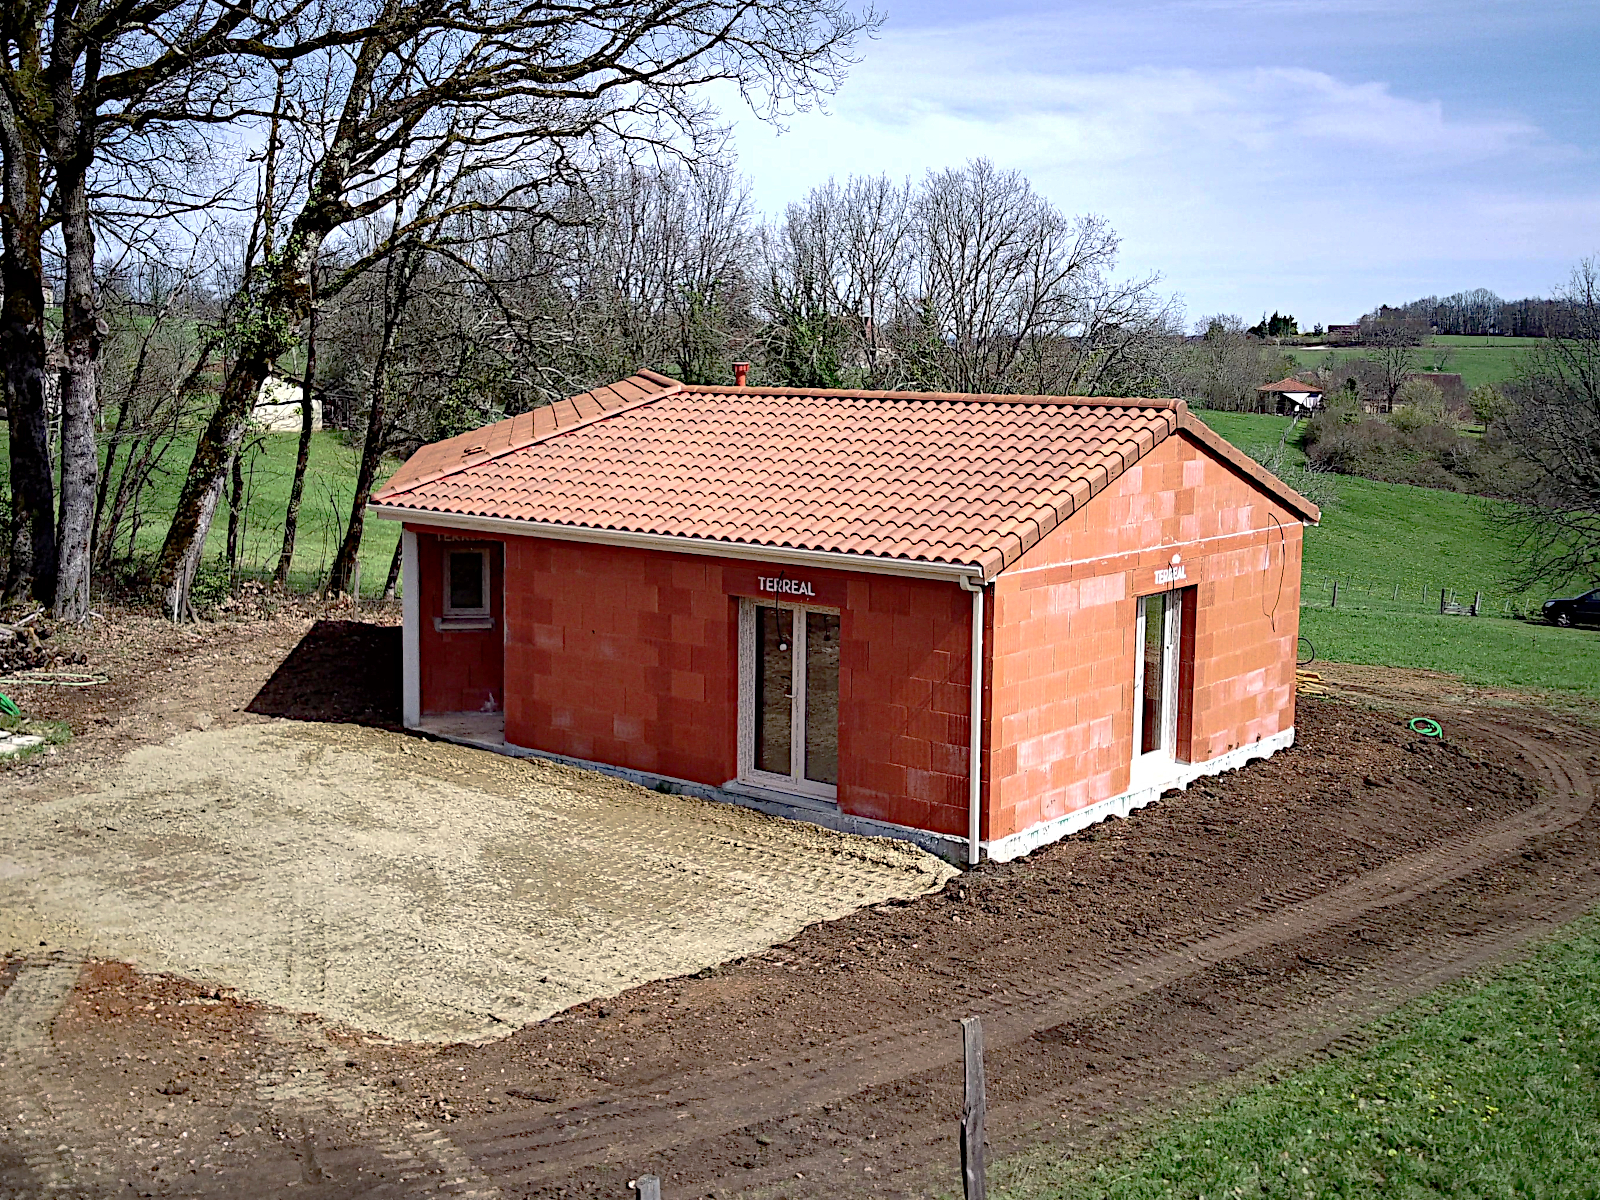
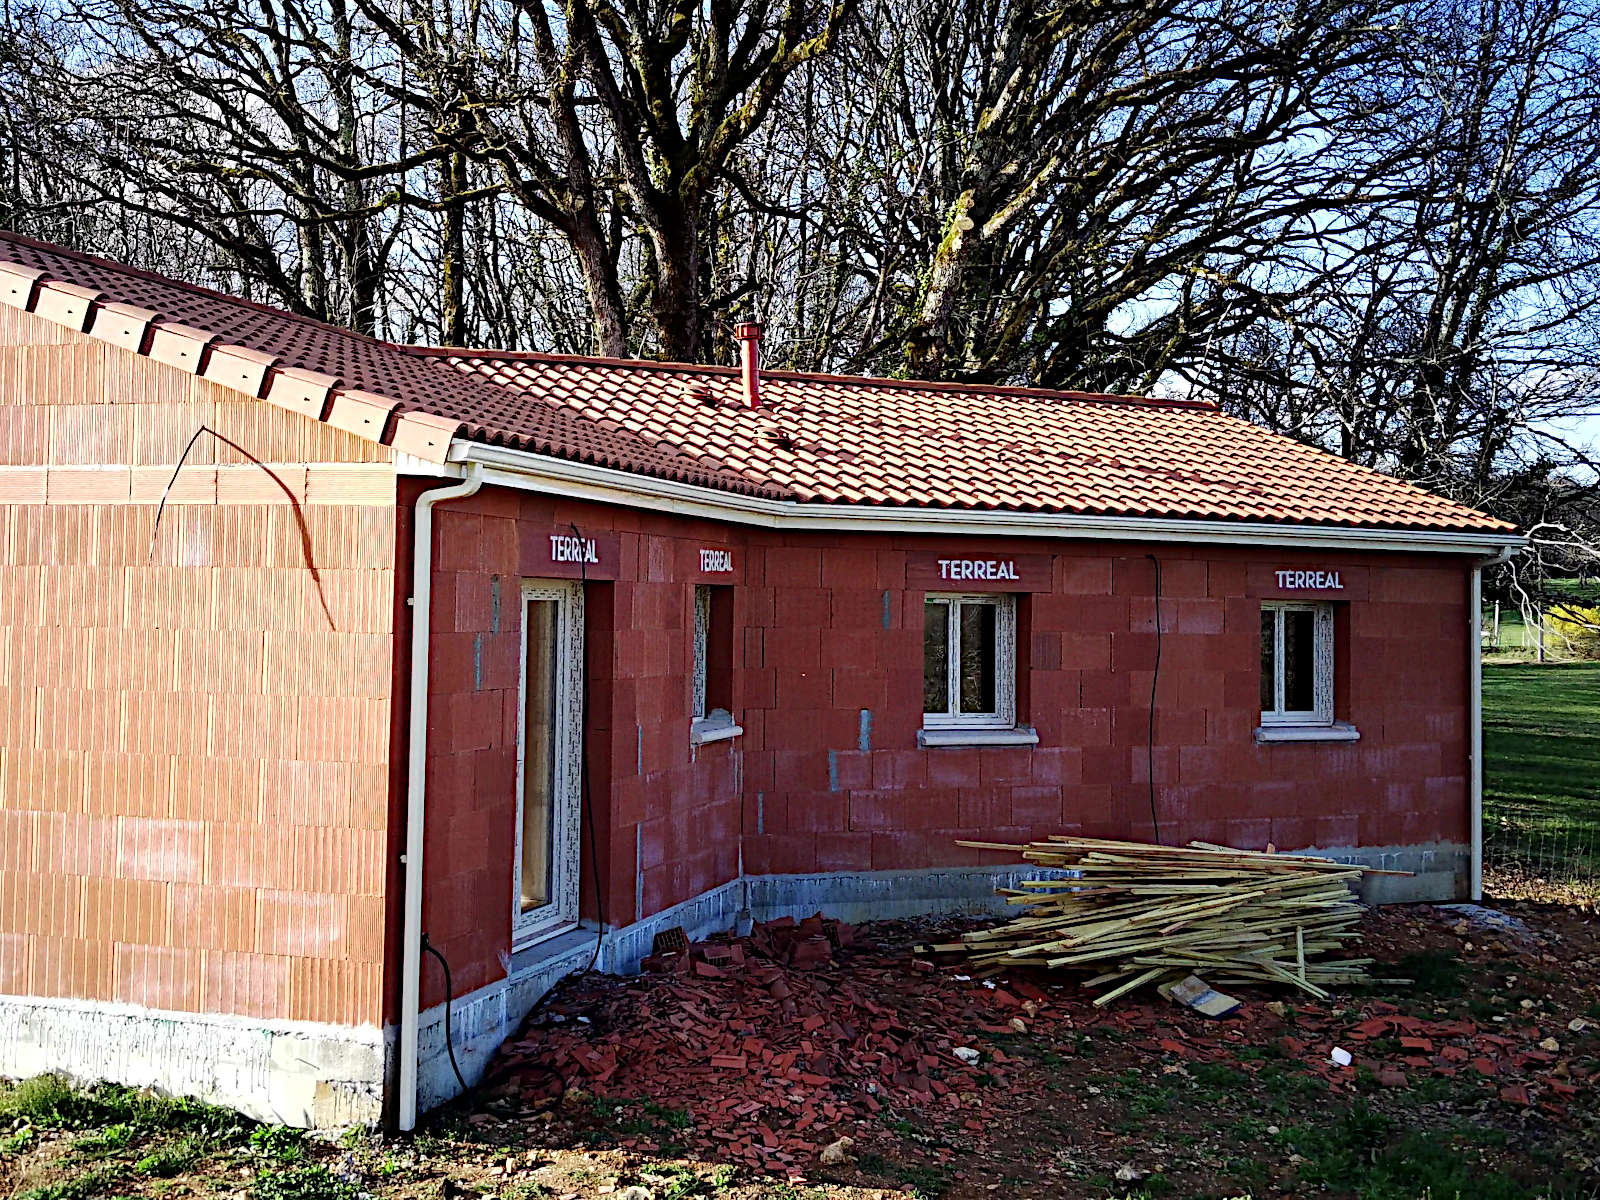
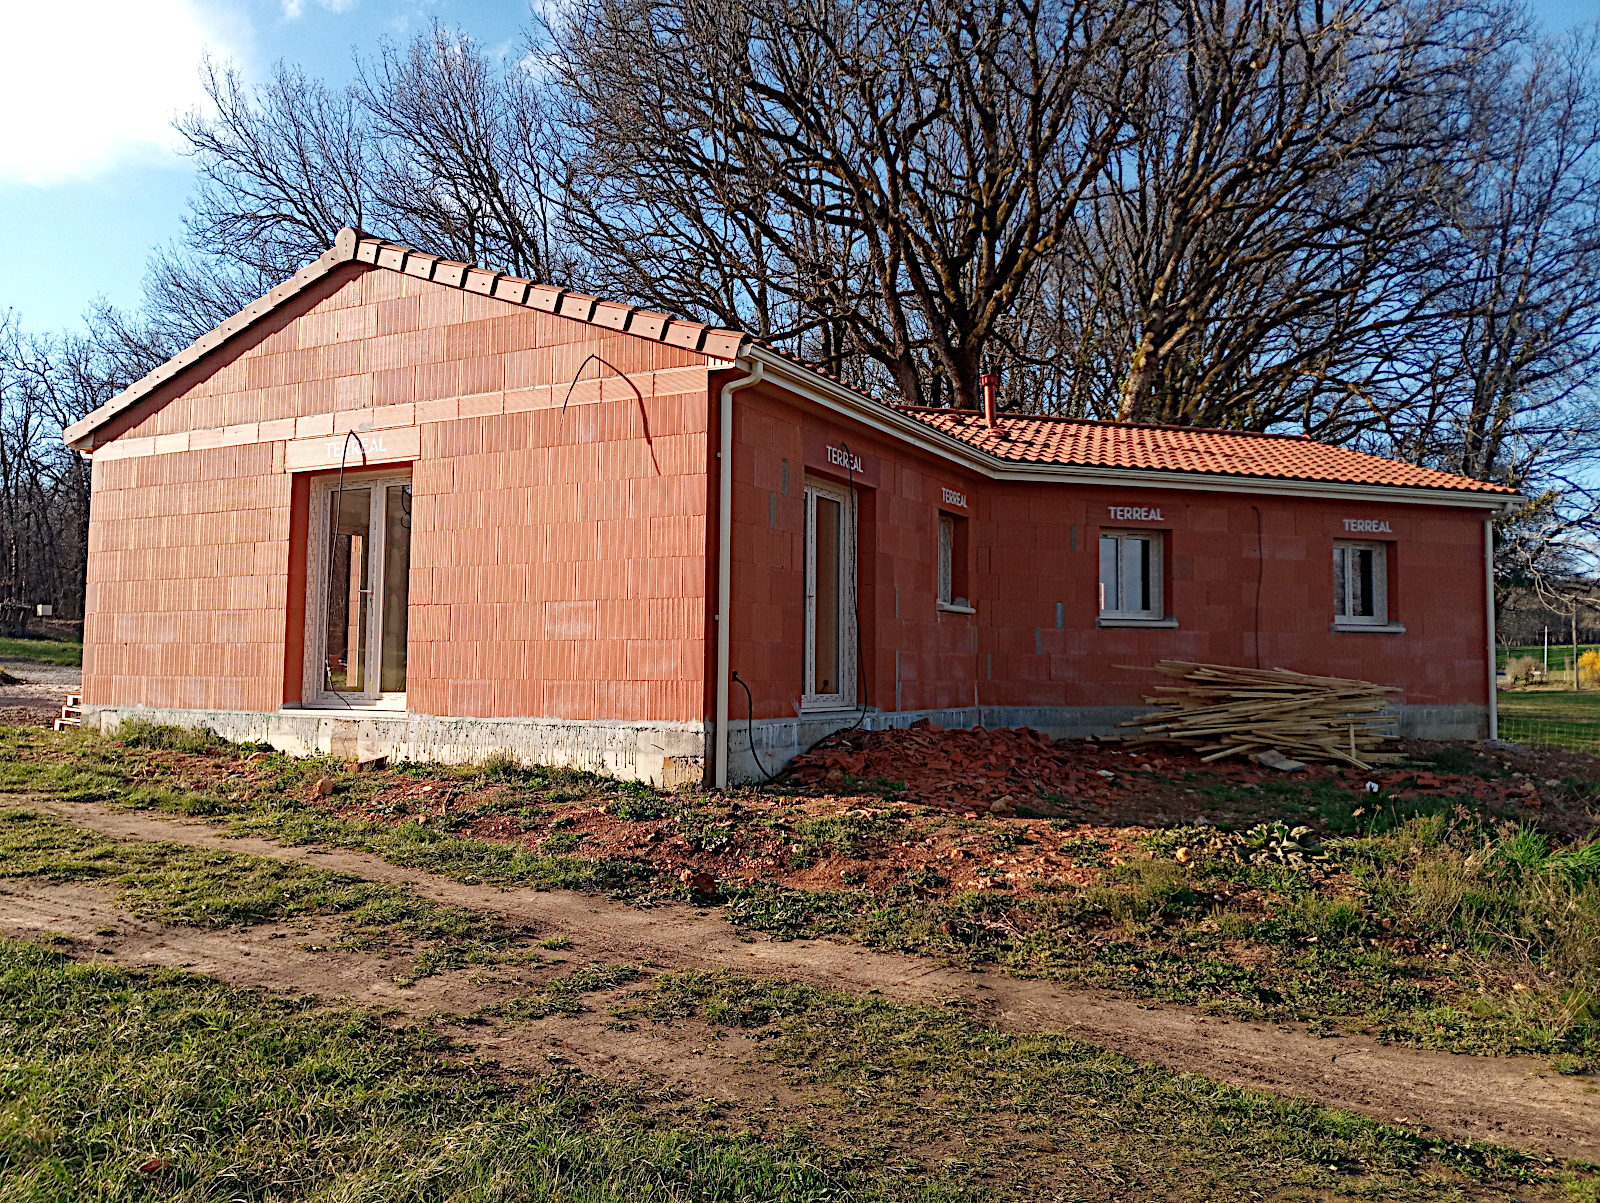
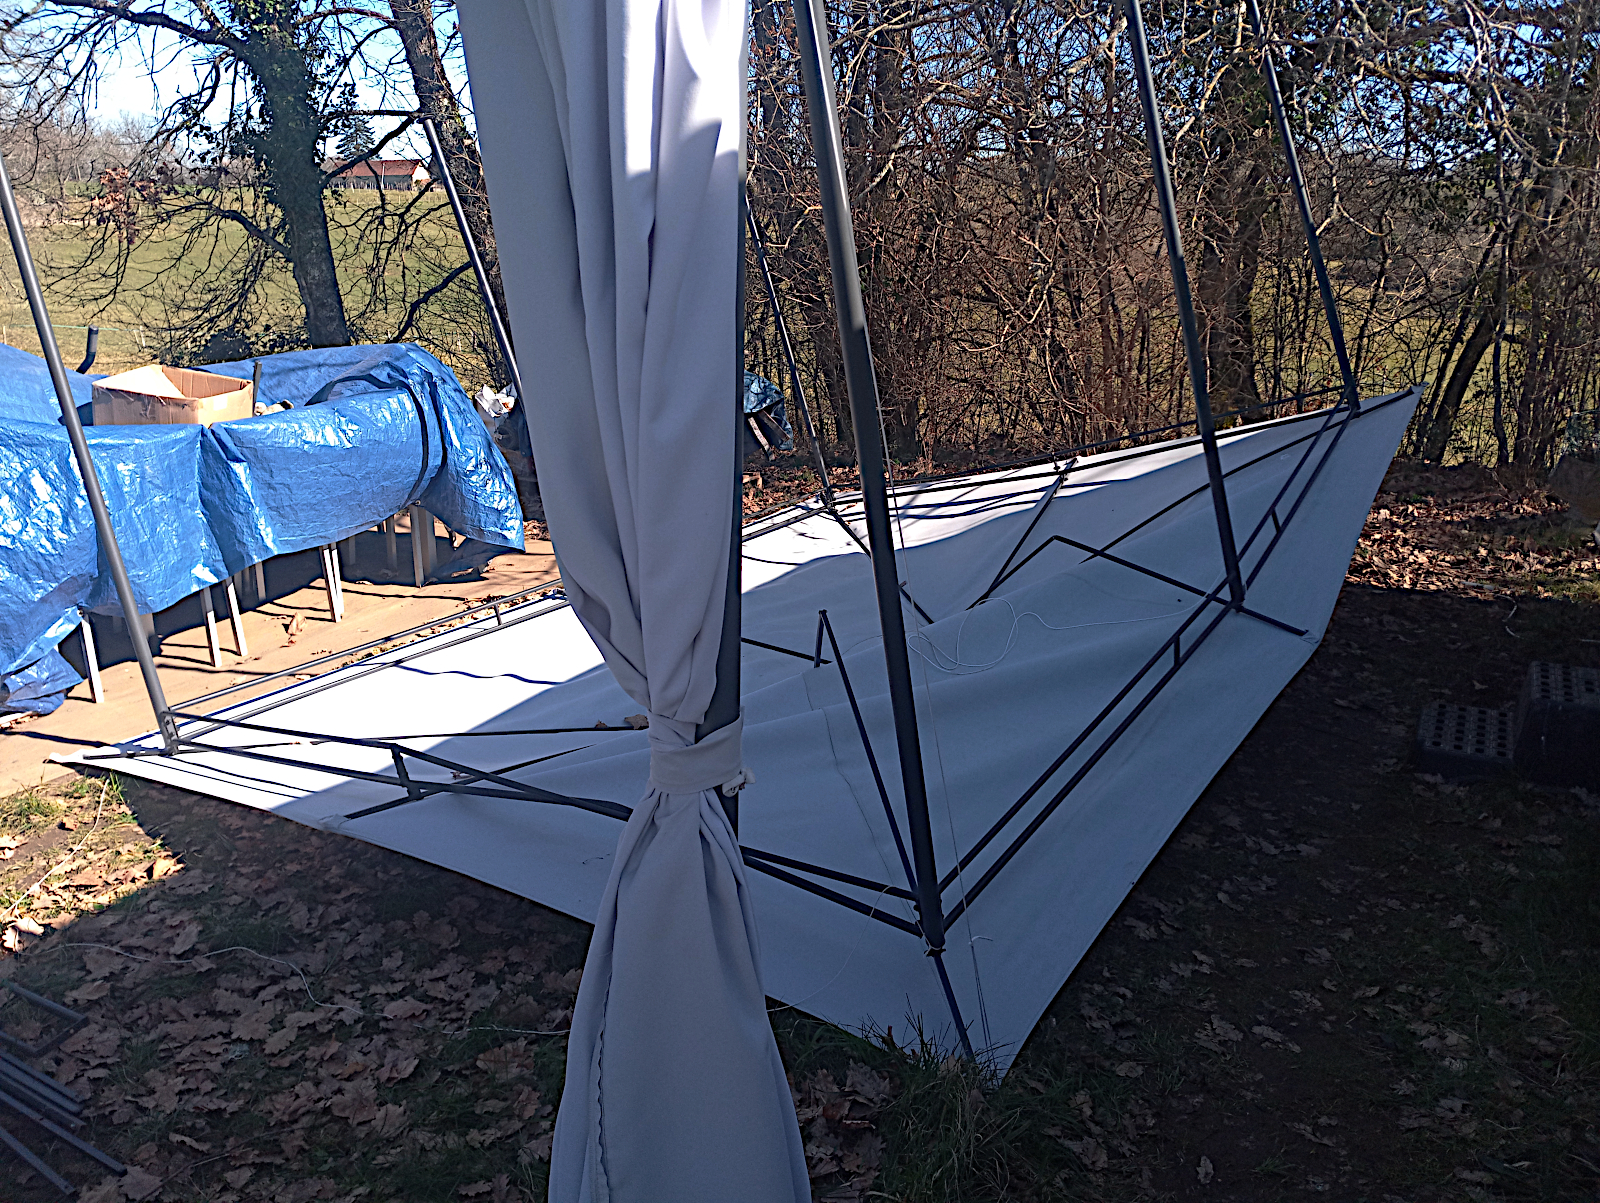
The only word to describe today’s proceedings, maybe not for the workmen involved but certainly as far as my own involvement in them was concerned. The day didn’t start off well when the phone rang while I was eating my breakfast. It turned out that one of the tiles that I’d chosen for the walls in my bathroom several months ago has gone out of production and as I want brilliant white and the only alternative that the supplier can now offer is matt, I needed to confirm, today ideally, whether one of the other two approved suppliers could offer a replacement in the same price range.

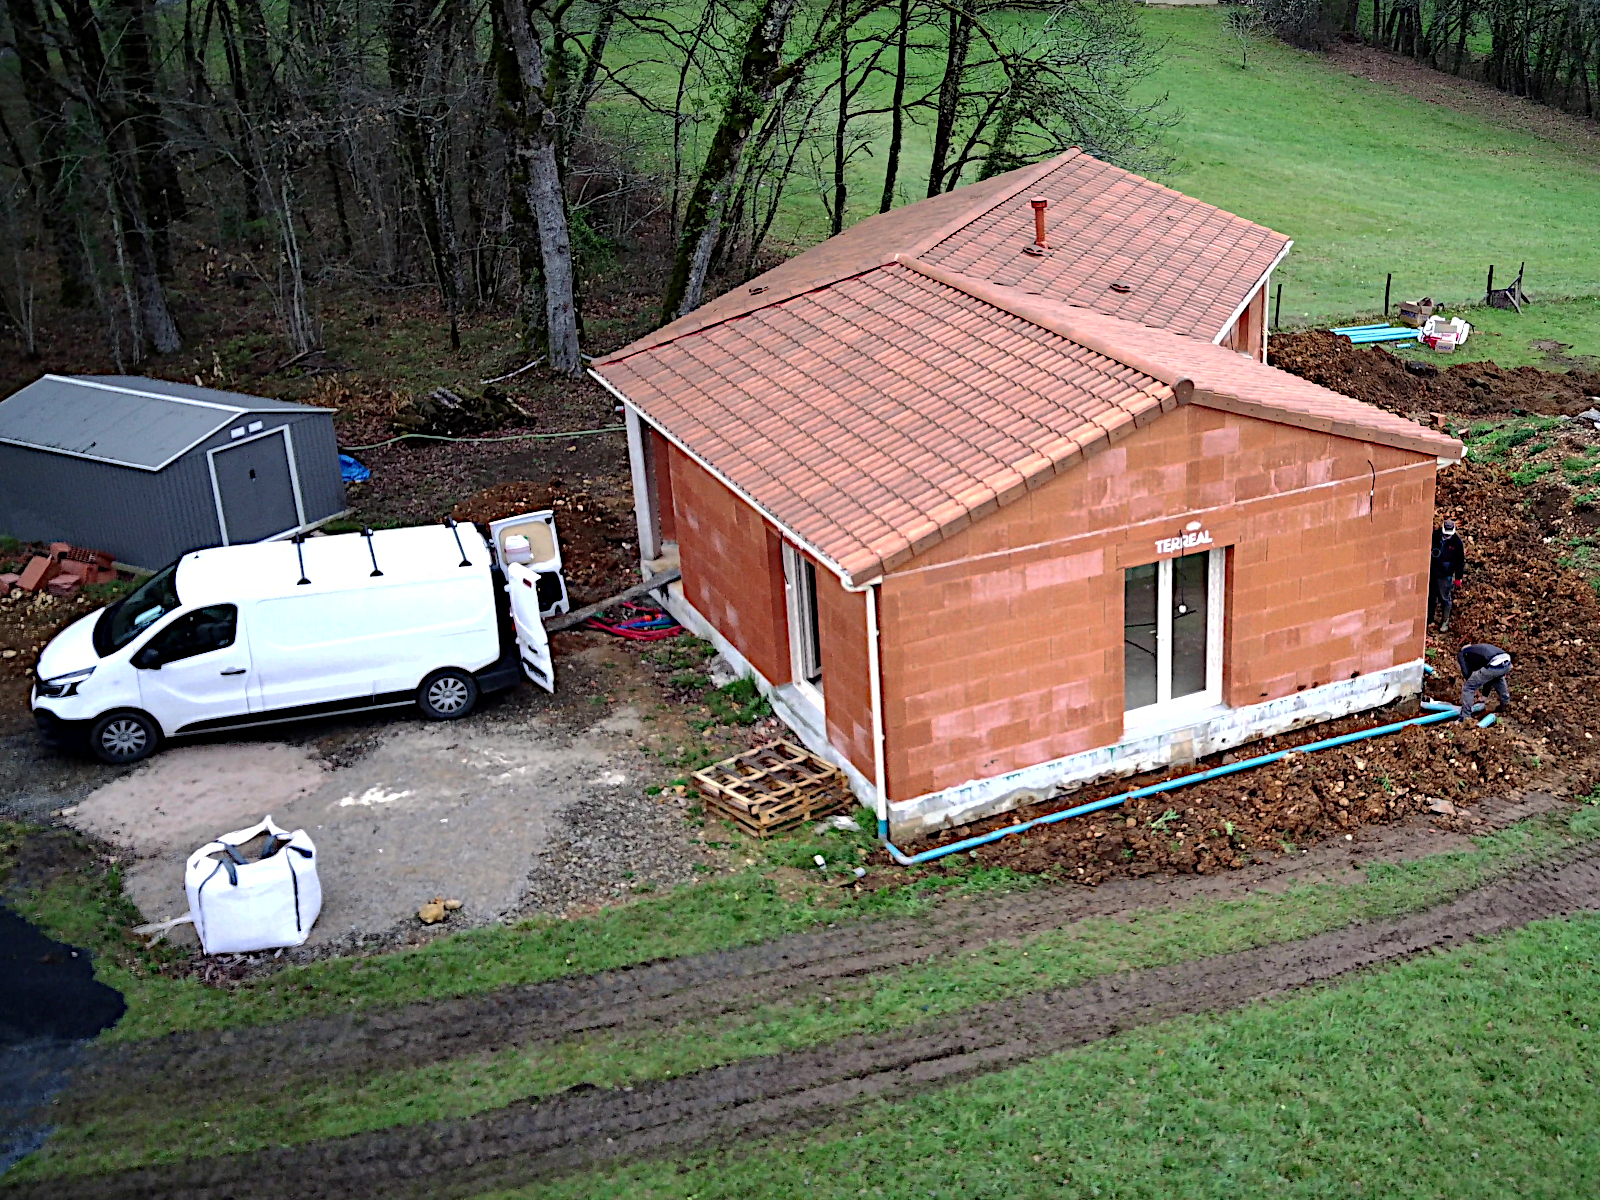
That would mean leaving the site, today of all days, because of the amount going on. I expected just the ‘fosse septique’ (septic tank) men and the plumbers to be on site today but it turned out that the electricians had also turned up. I knew that would mean taking lots of small but important decisions about where I wanted things to be positioned and how I wanted things done so all of those things had to be sorted out before I left shortly after lunch.

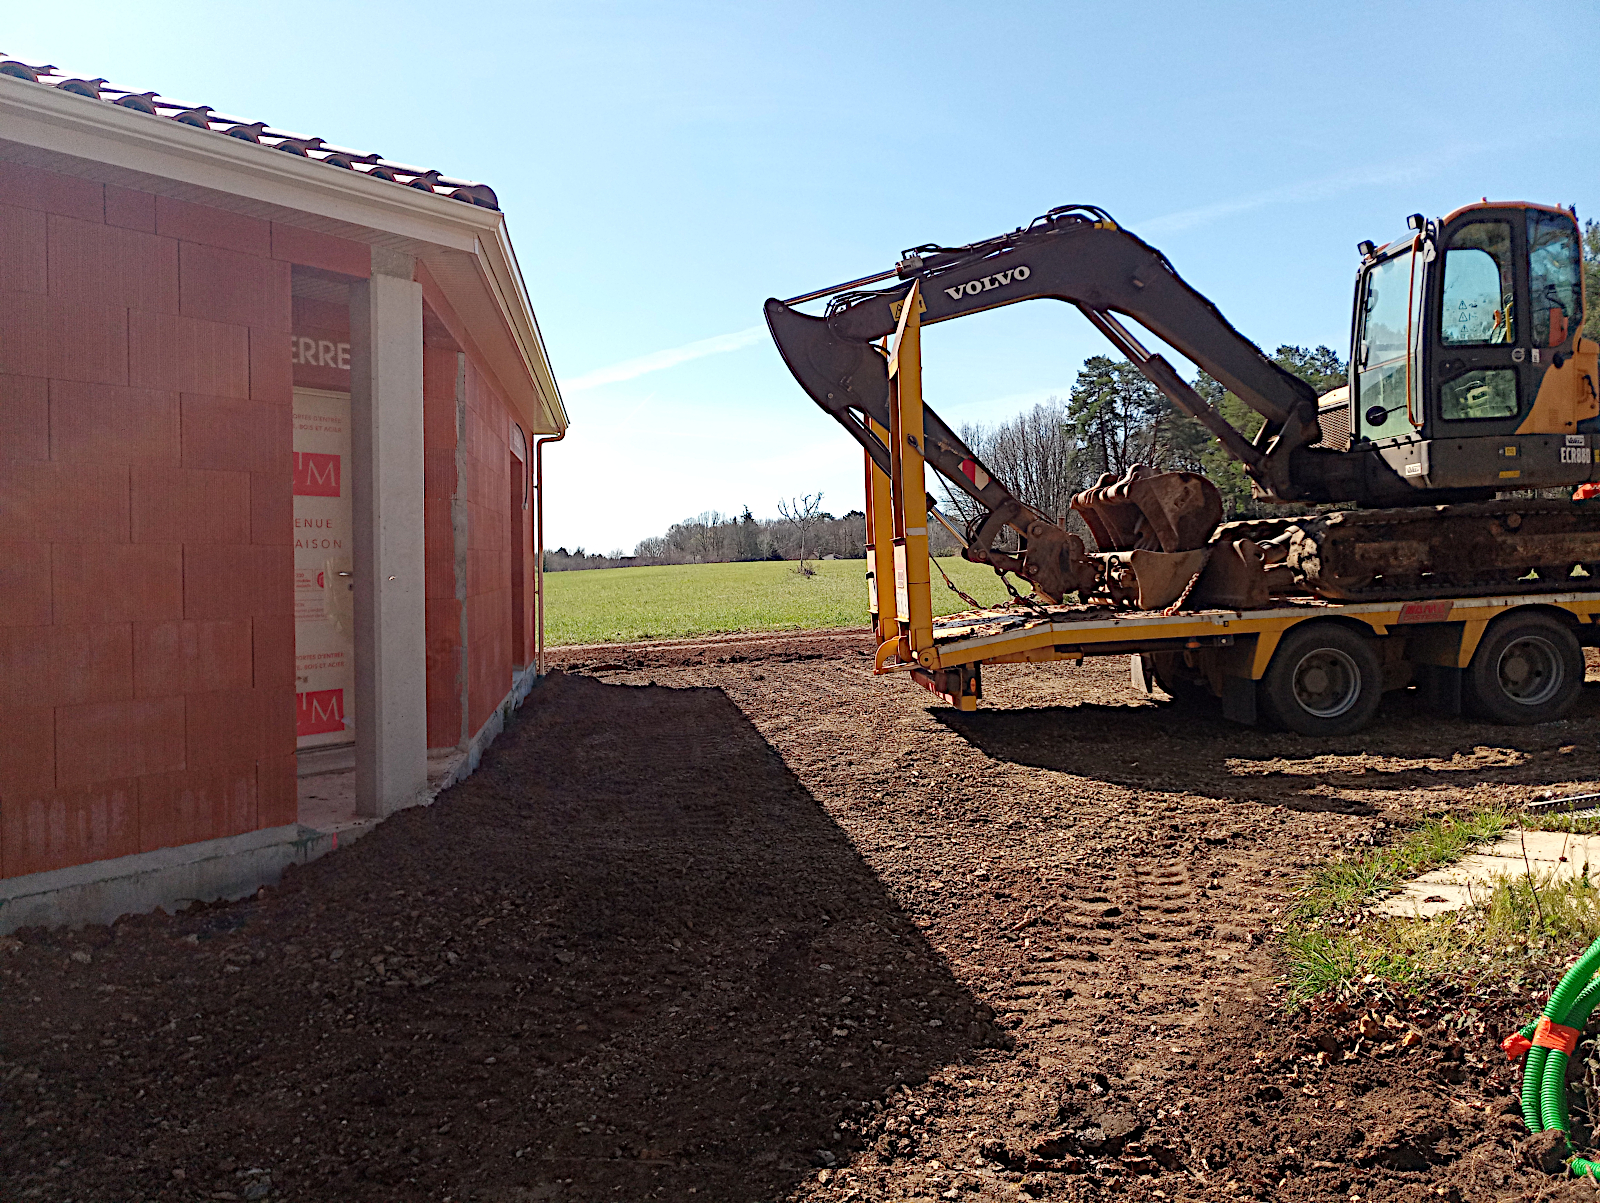
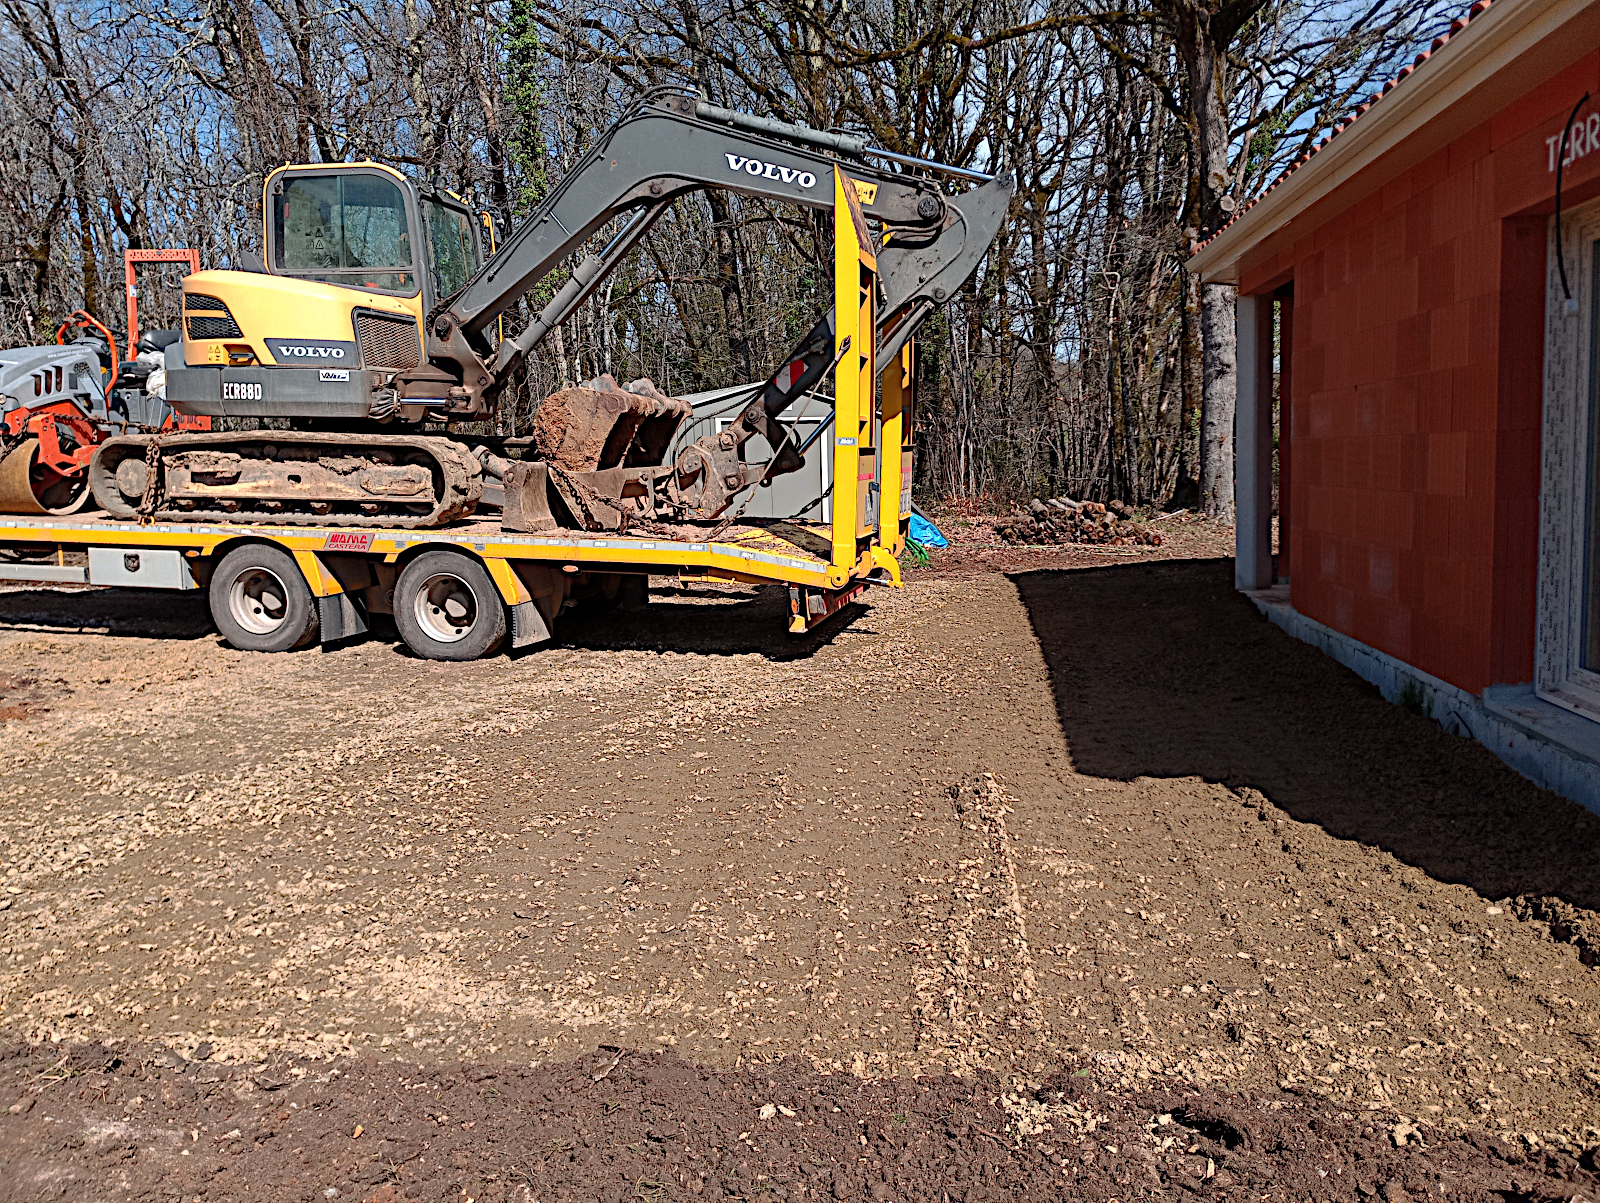
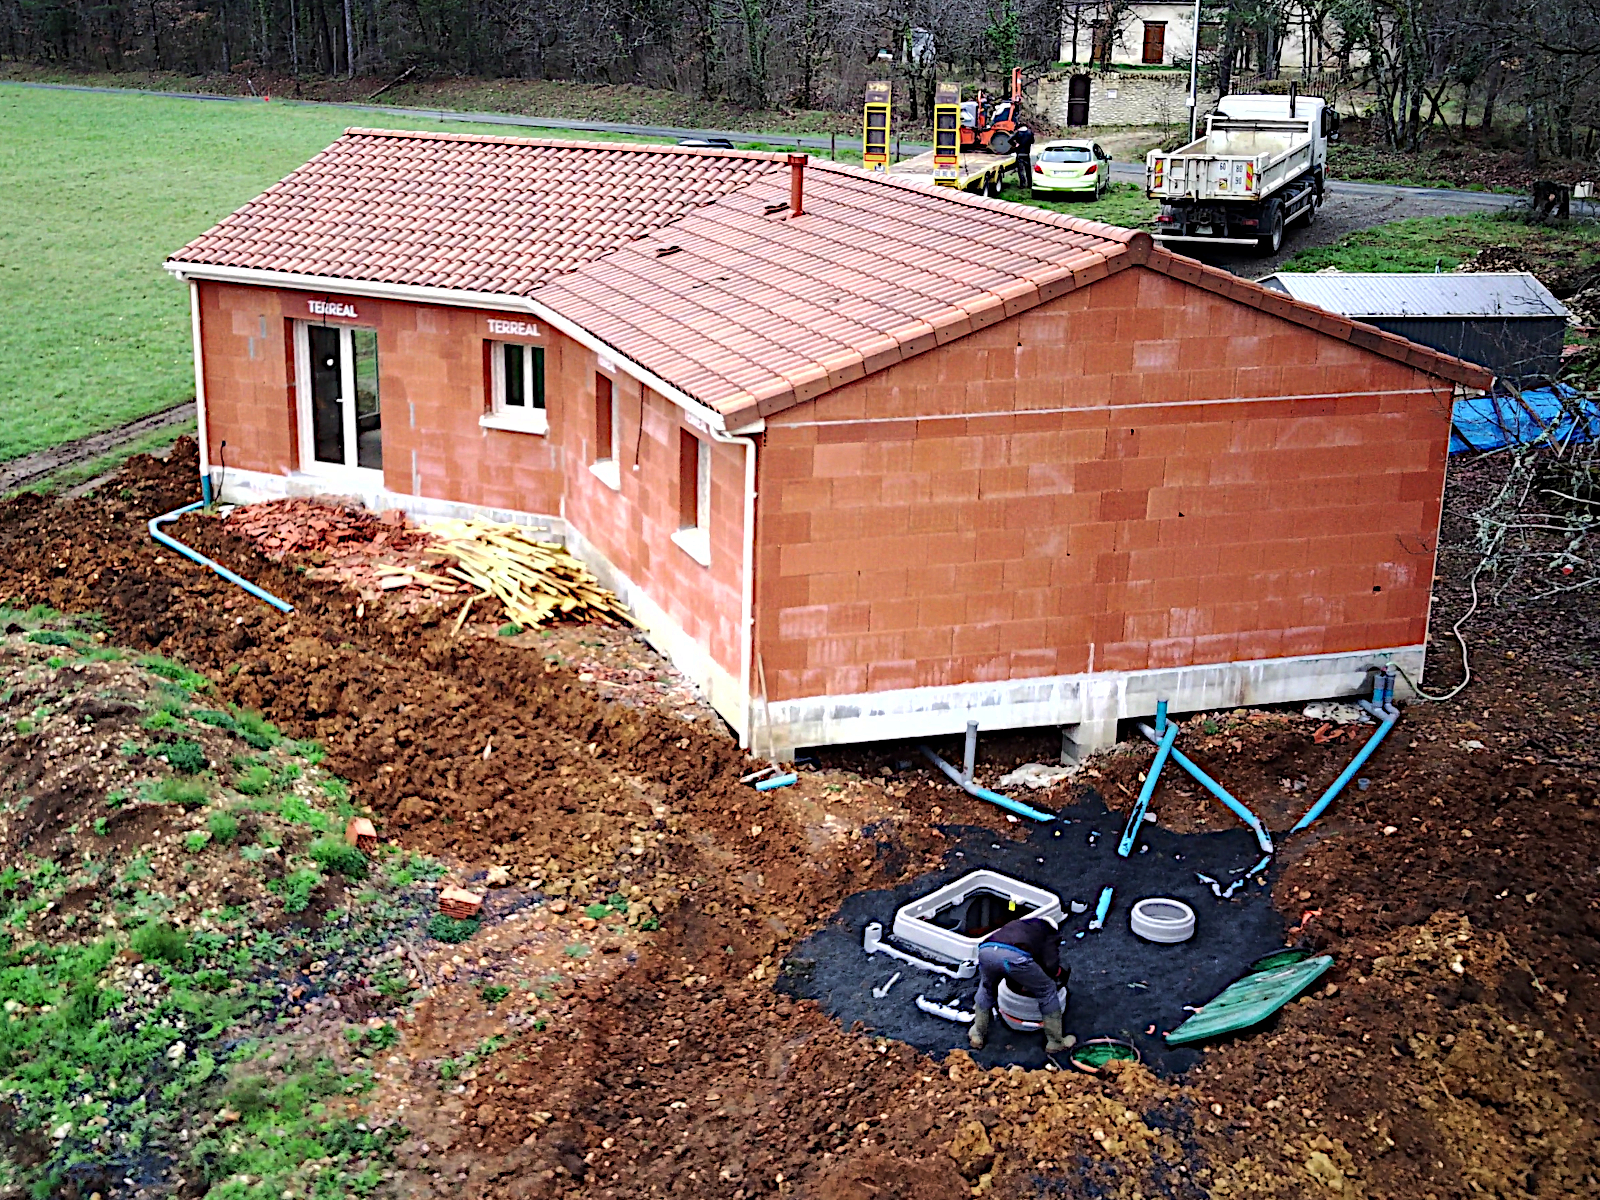
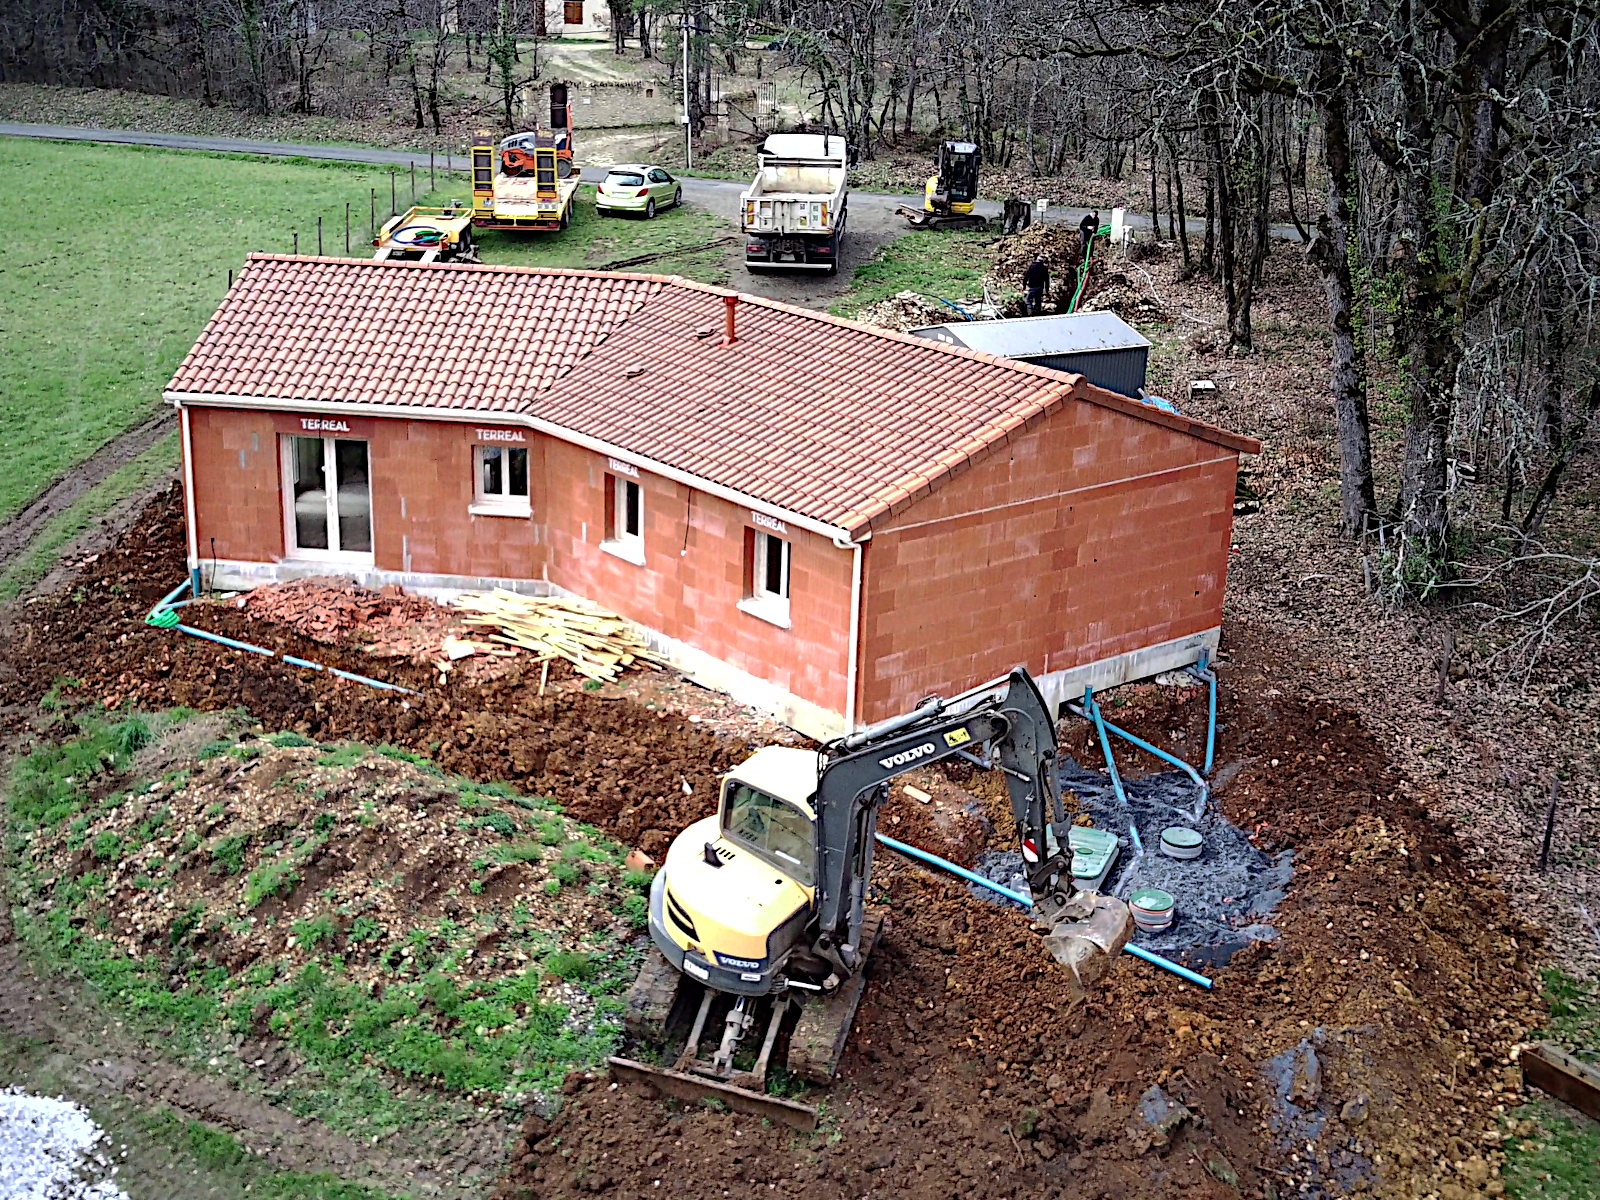
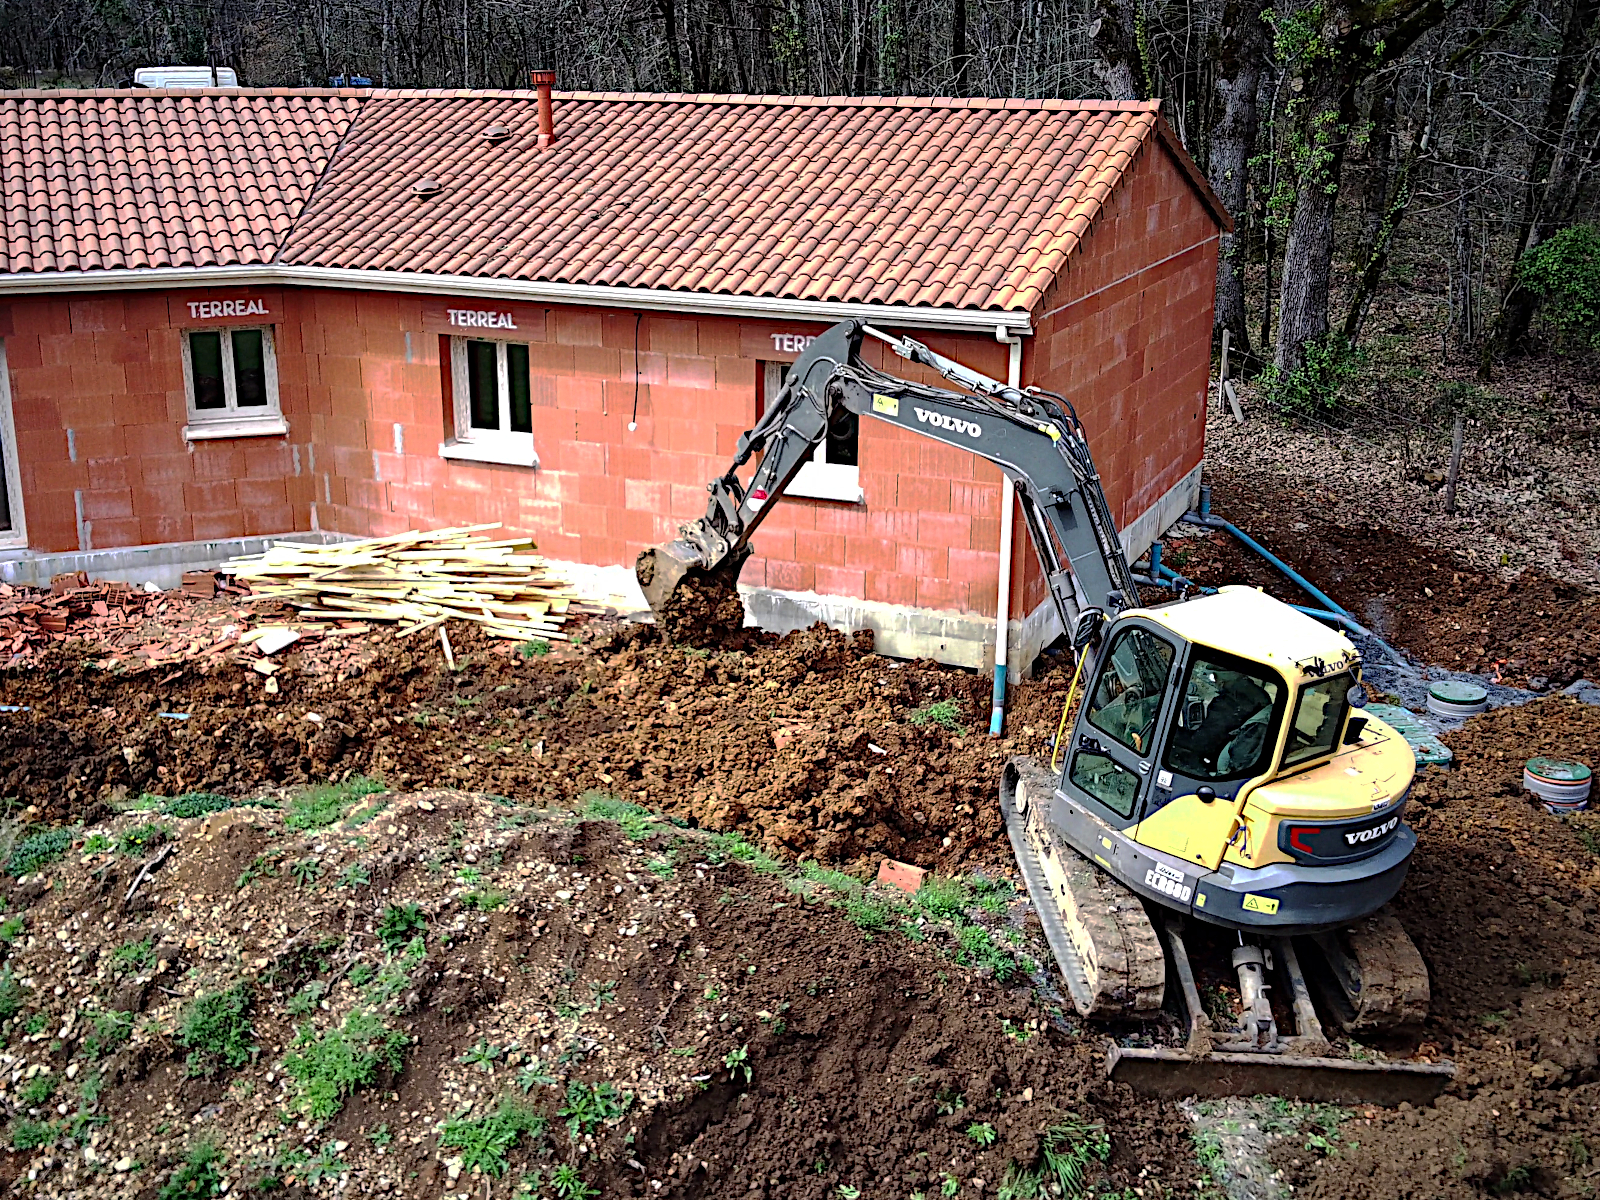
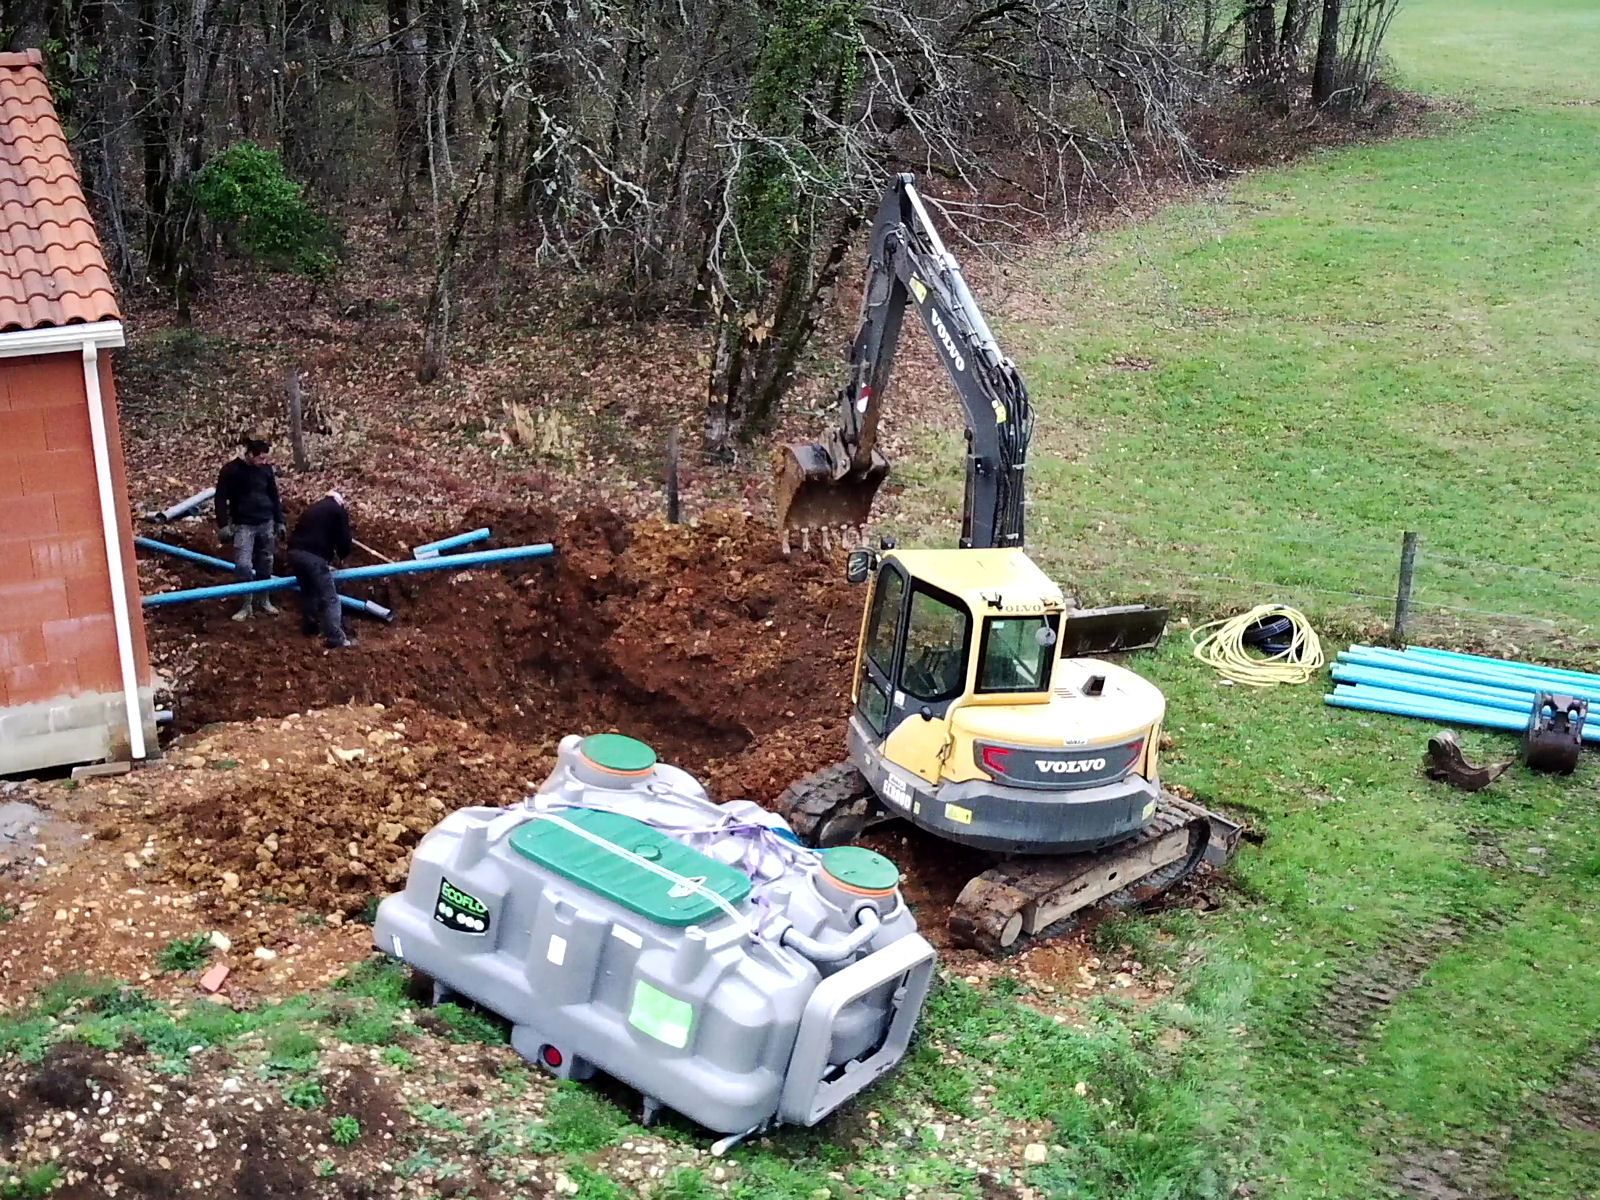
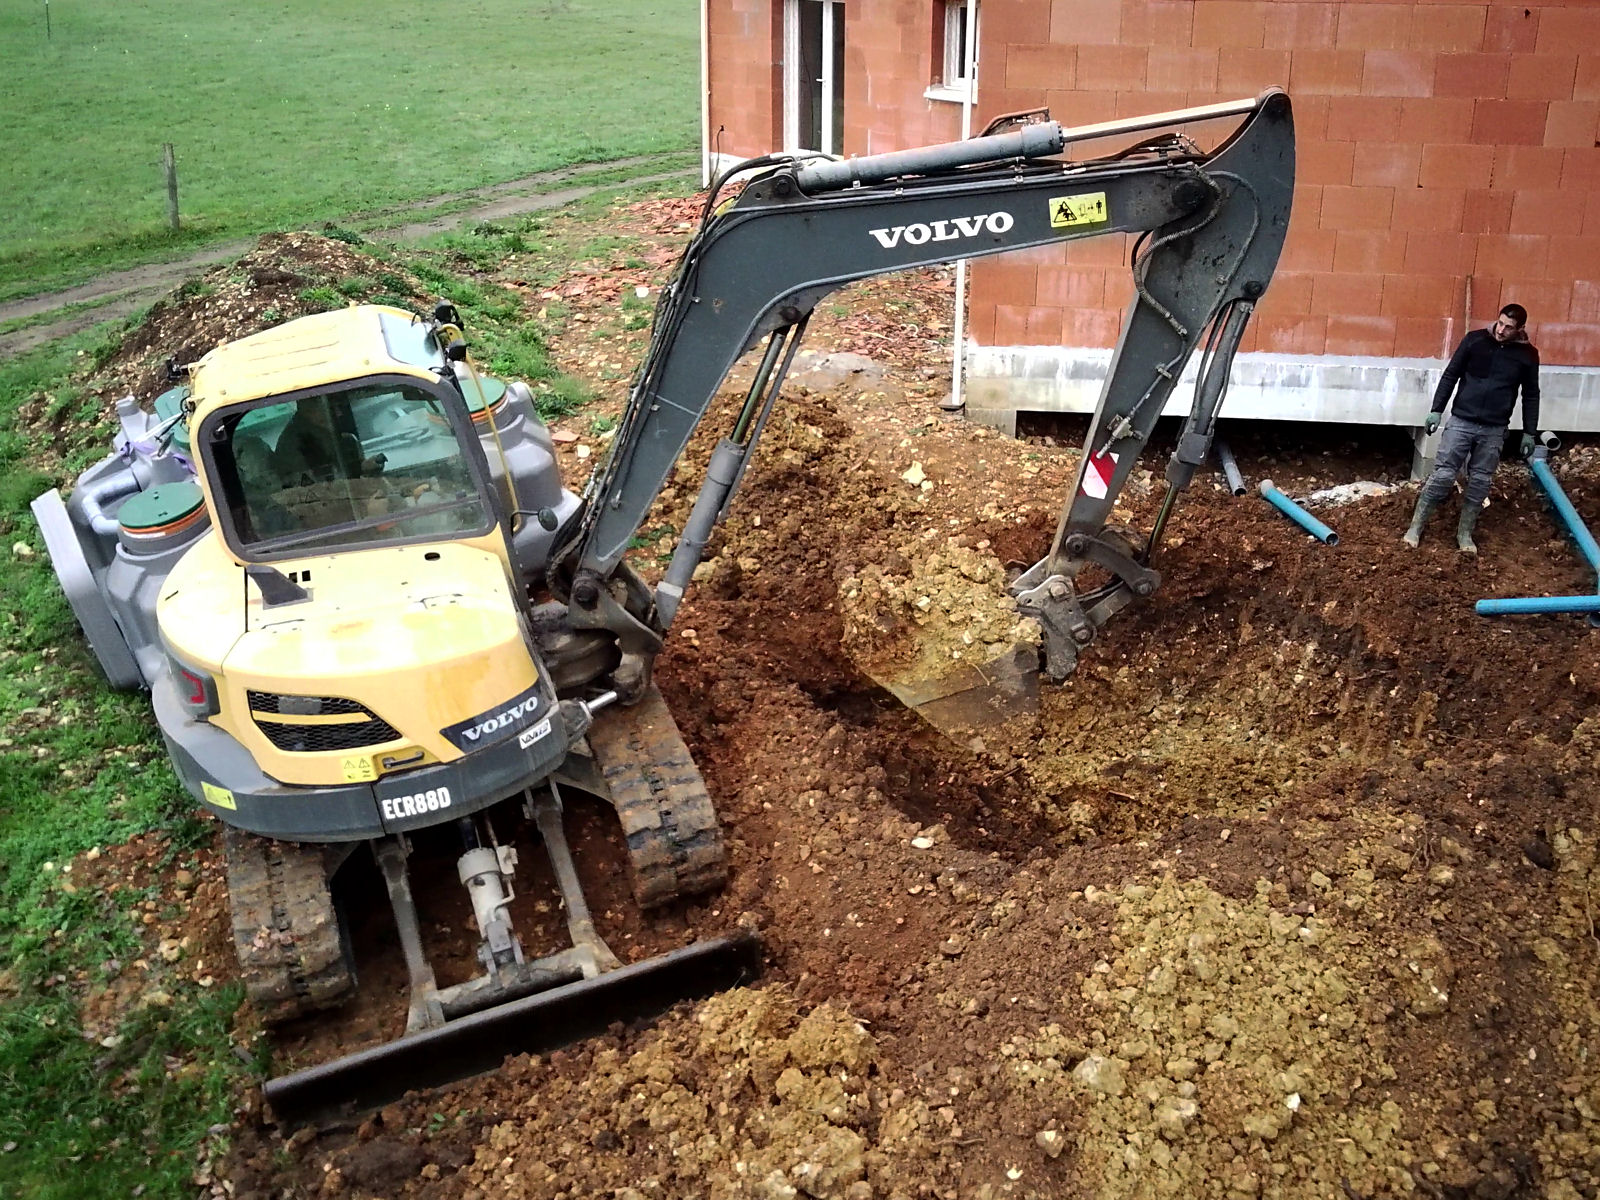
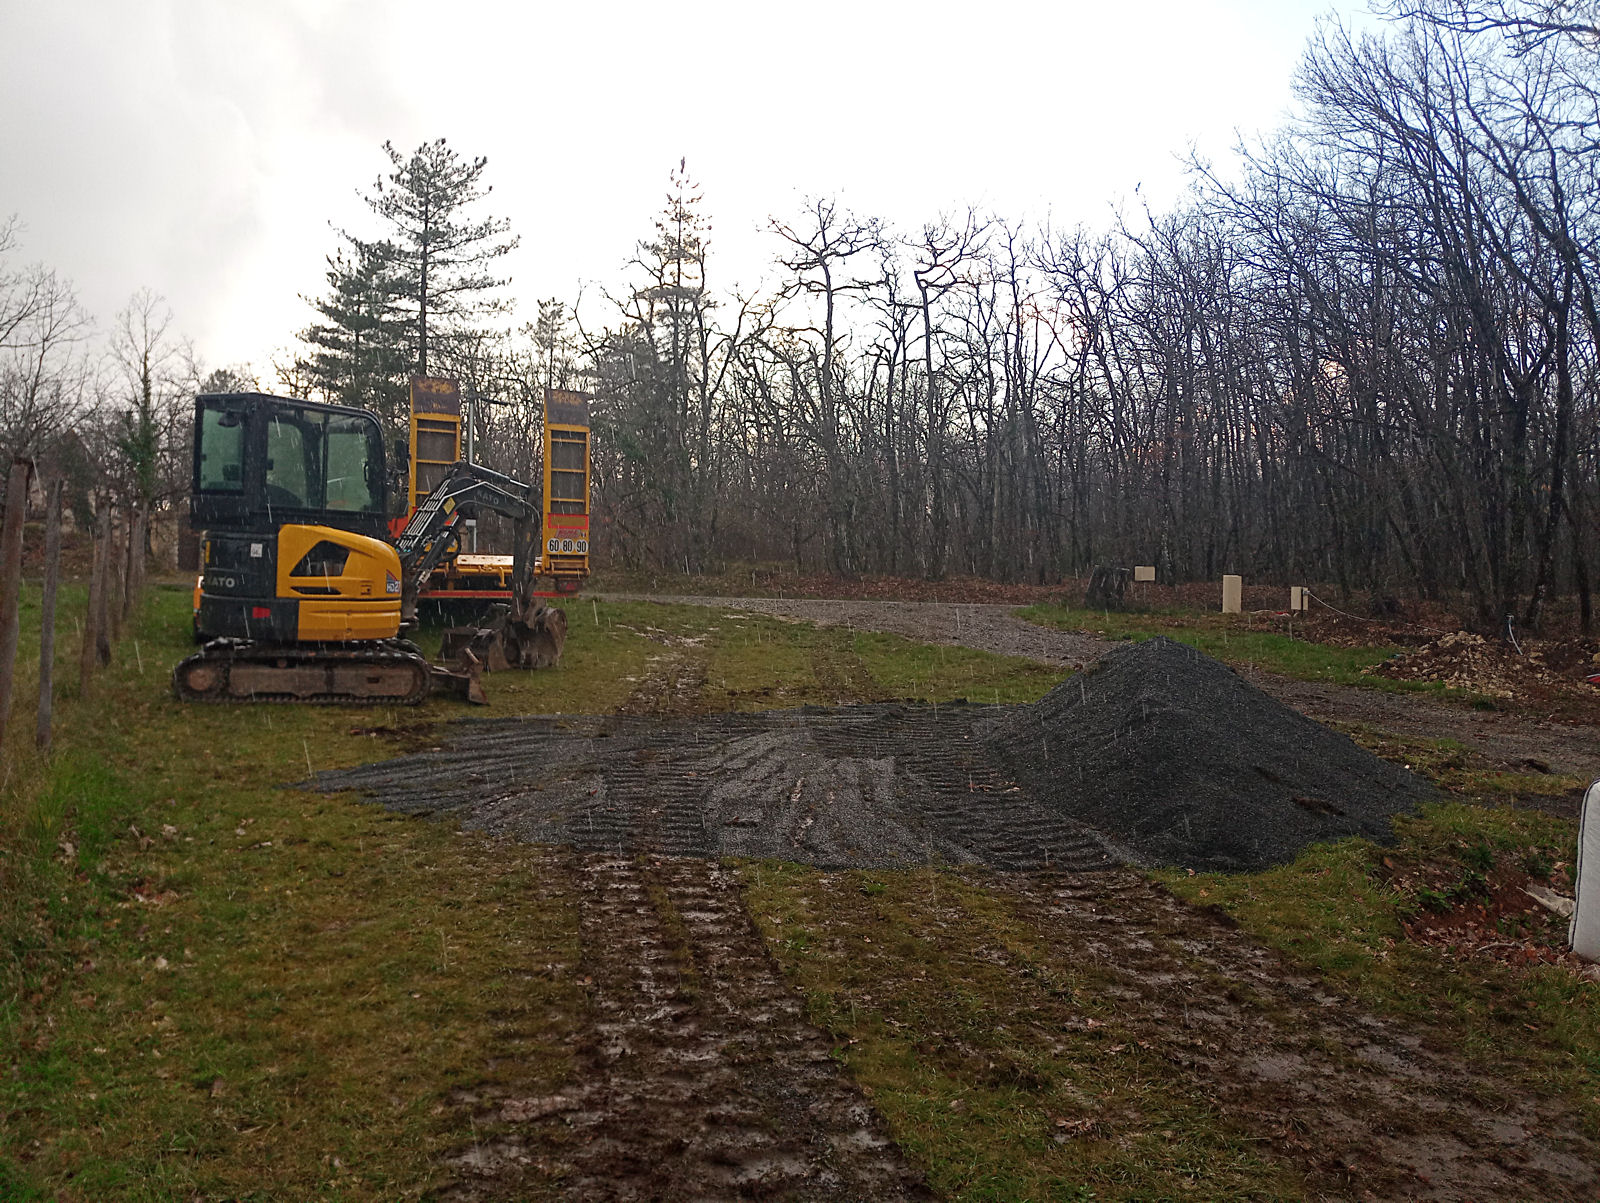
I’d wanted to take videos of the full ‘fosse septique’ installation but because of having to go out I was only able to shoot footage of the beginning of the process and the stage reached at the end of the day. The first few images below are lifted from the video that I shot at the beginning of the job in the pouring rain (luckily my Fimi drone is one of the few waterproof models that are available).

null

null

null

null

null

null

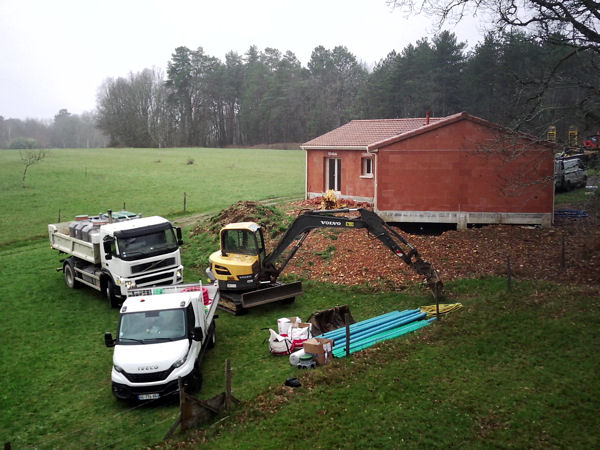
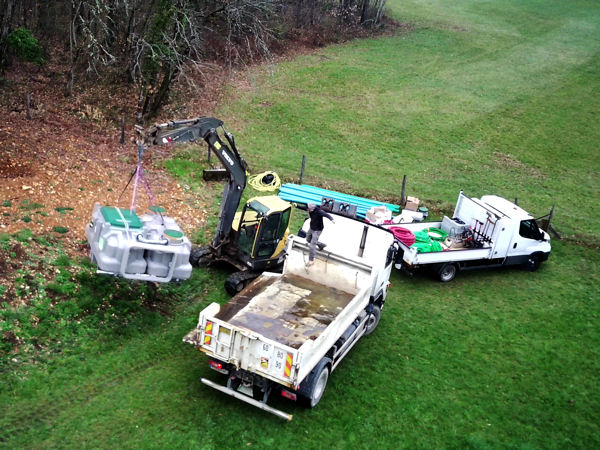
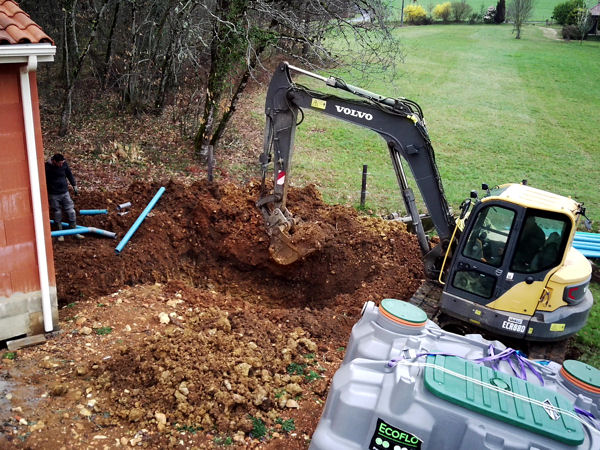
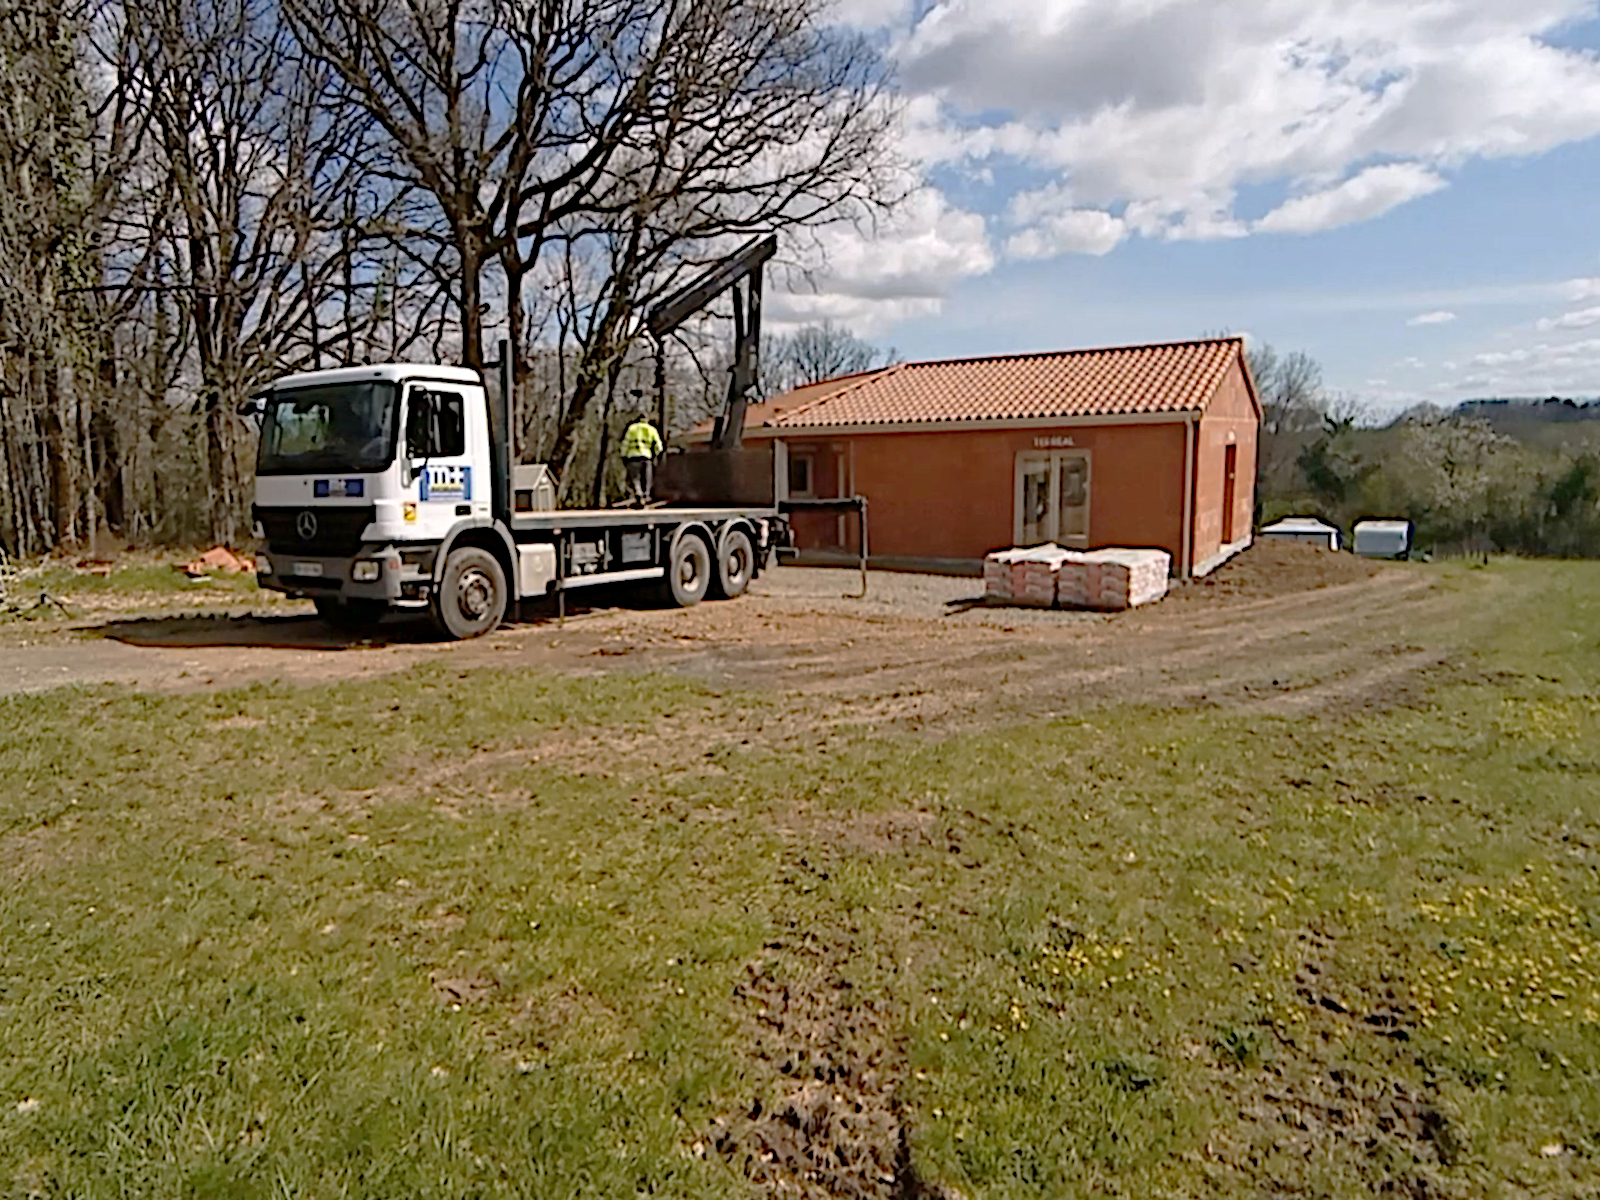
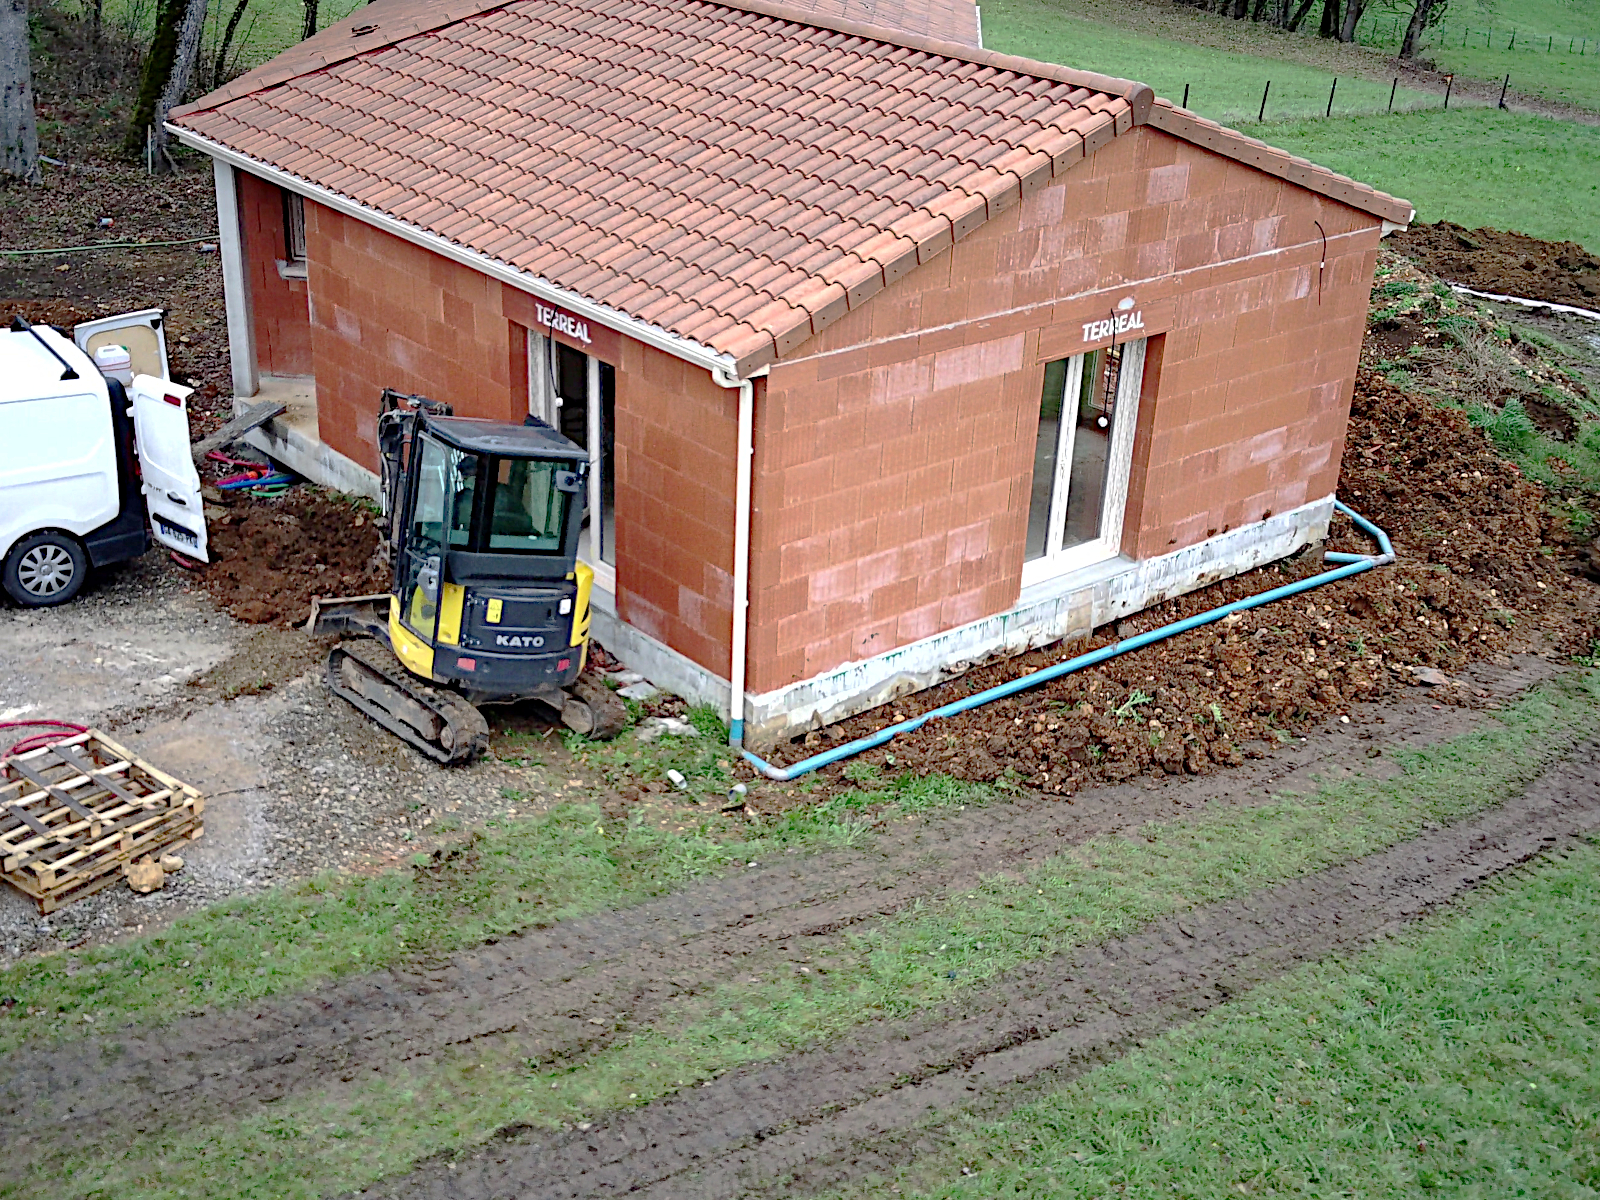
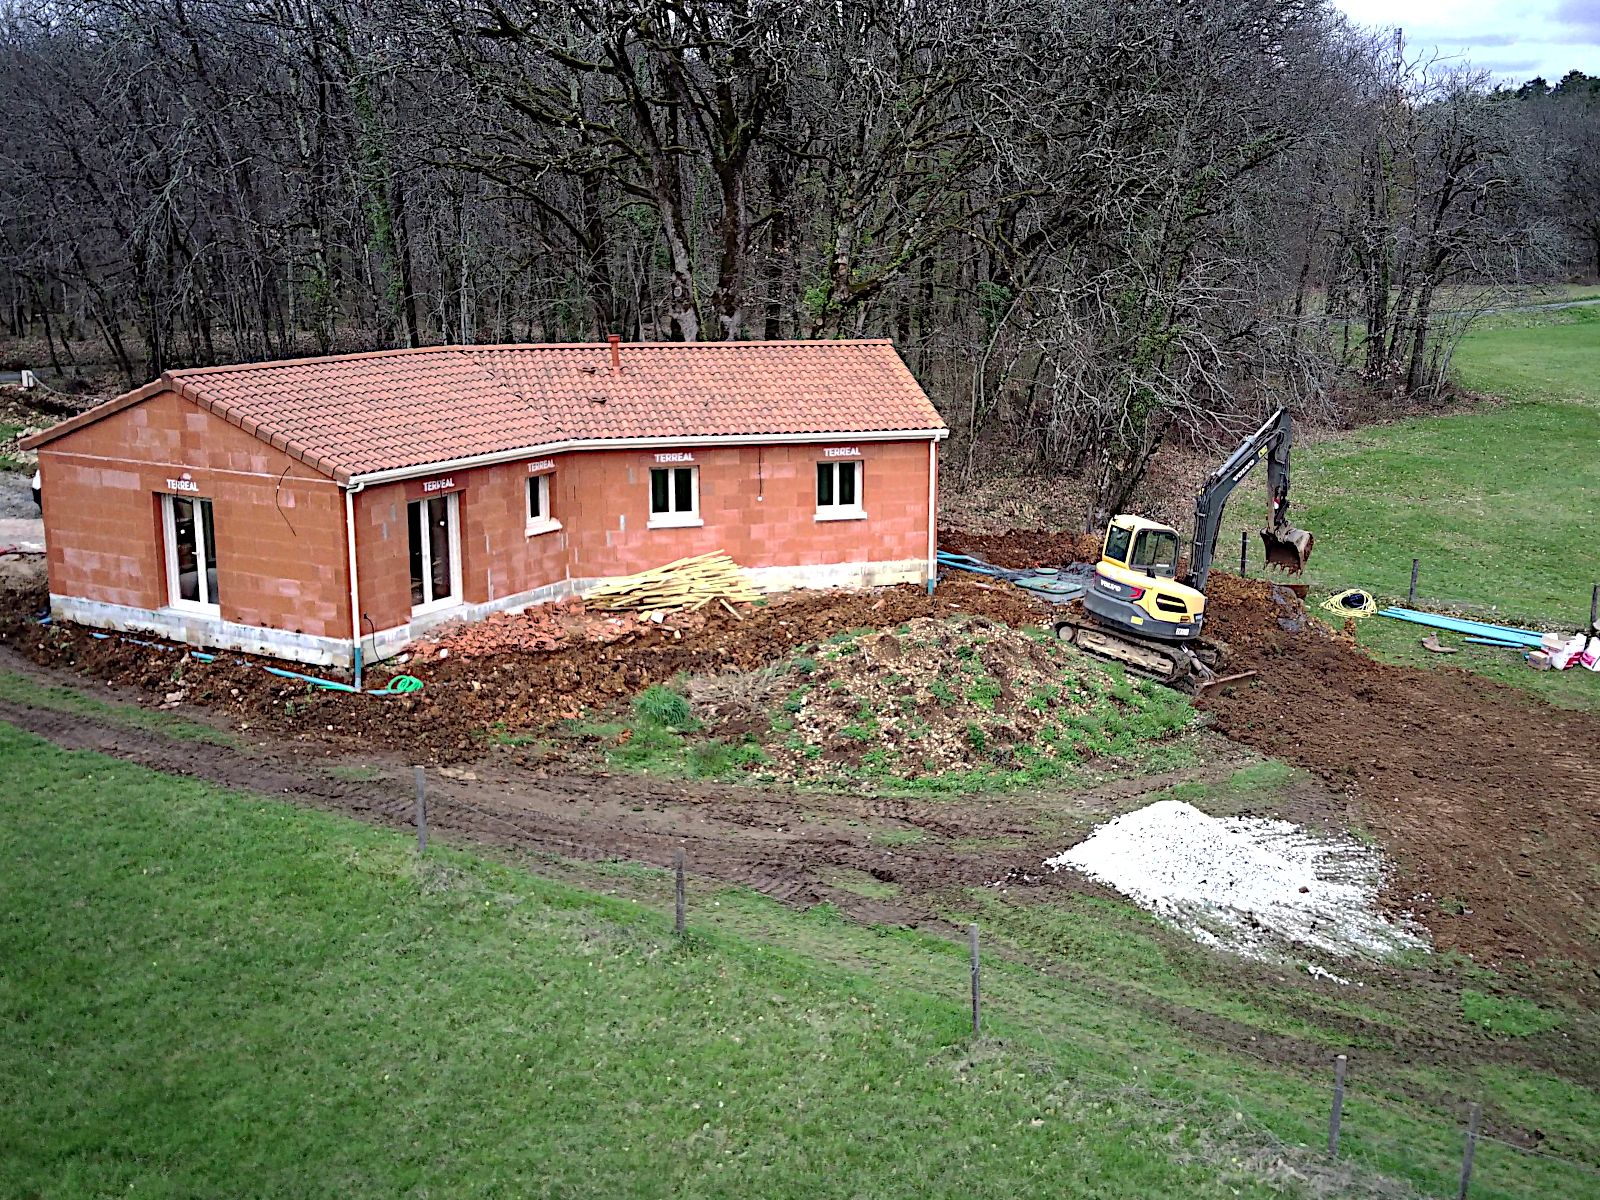
They’d brought the ‘fosse septique’ with them on the back of a large lorry and when they’d unloaded it, as shown above, the driver reversed it down the land to turn it around and drive out. Unfortunately it turned out to be impossible because the wheels just started spinning on the wet grass churning the grass up a bit. Things got even worse when they drove their excavator over to give it a push so my grass is now starting to look rather badly cut up from the spinning tyres and the machine’s tracks.

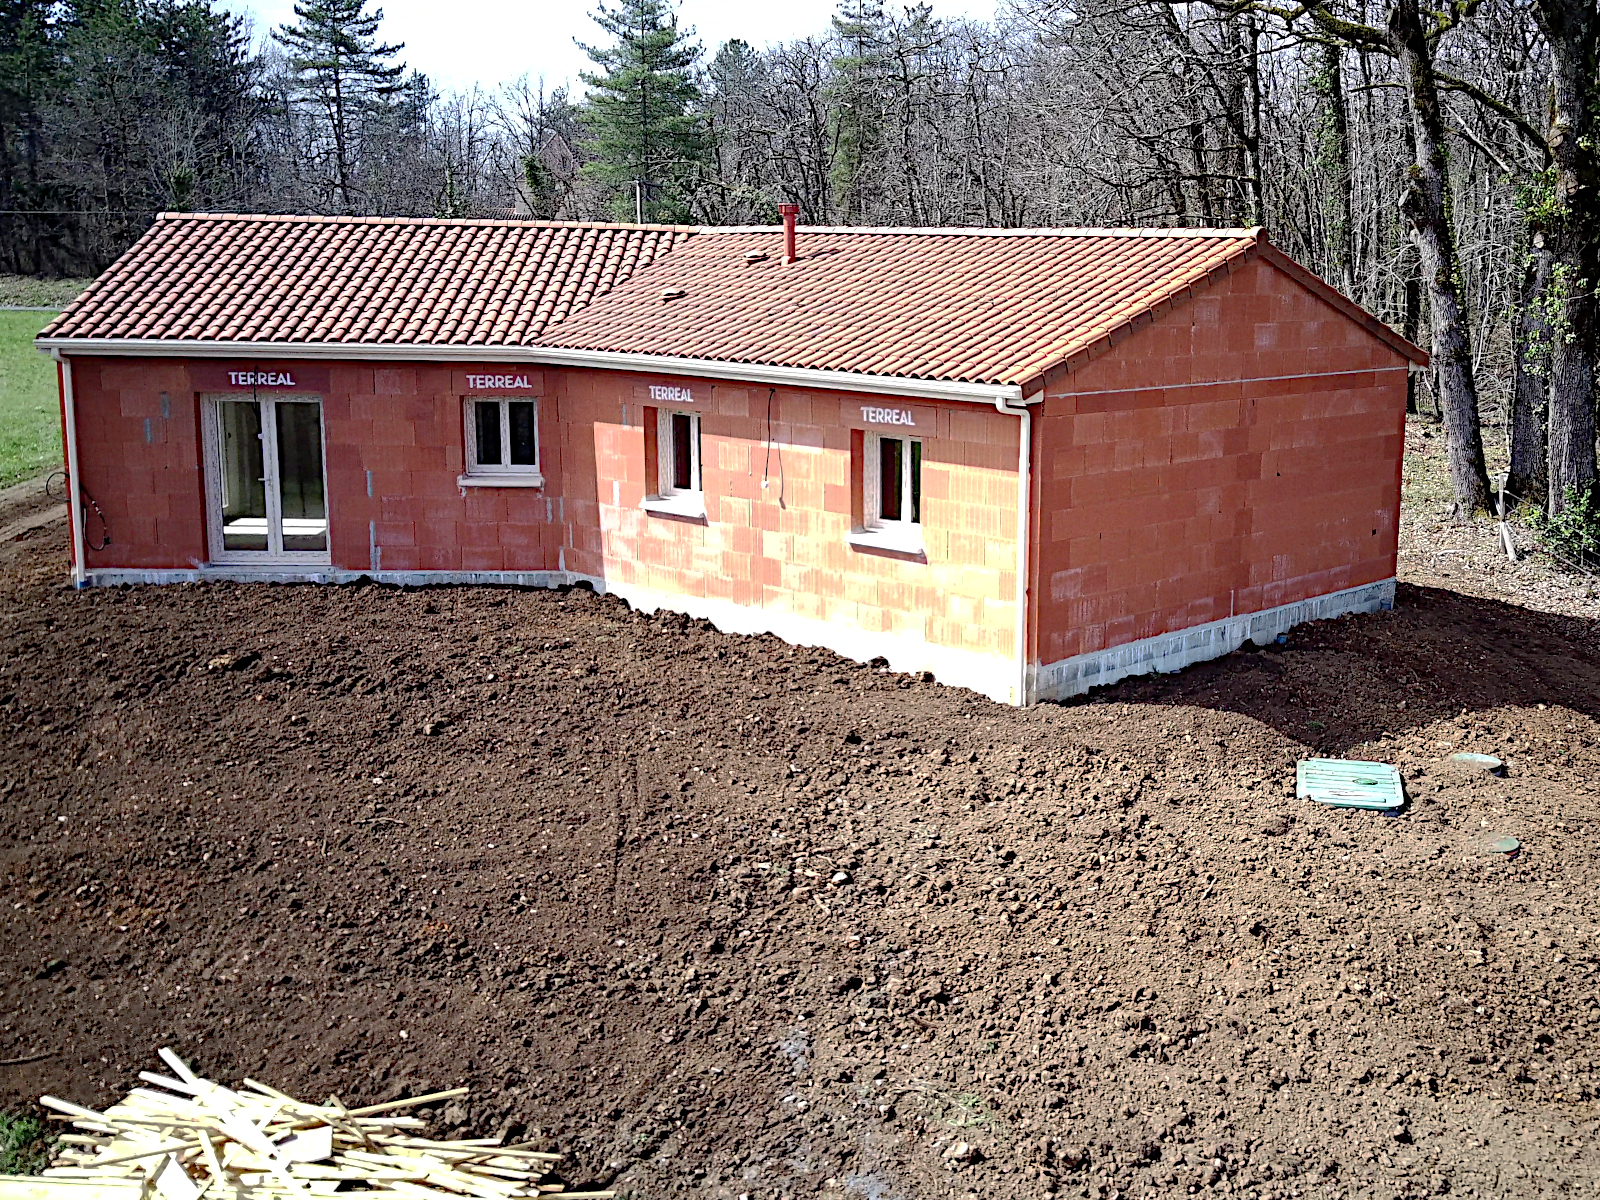
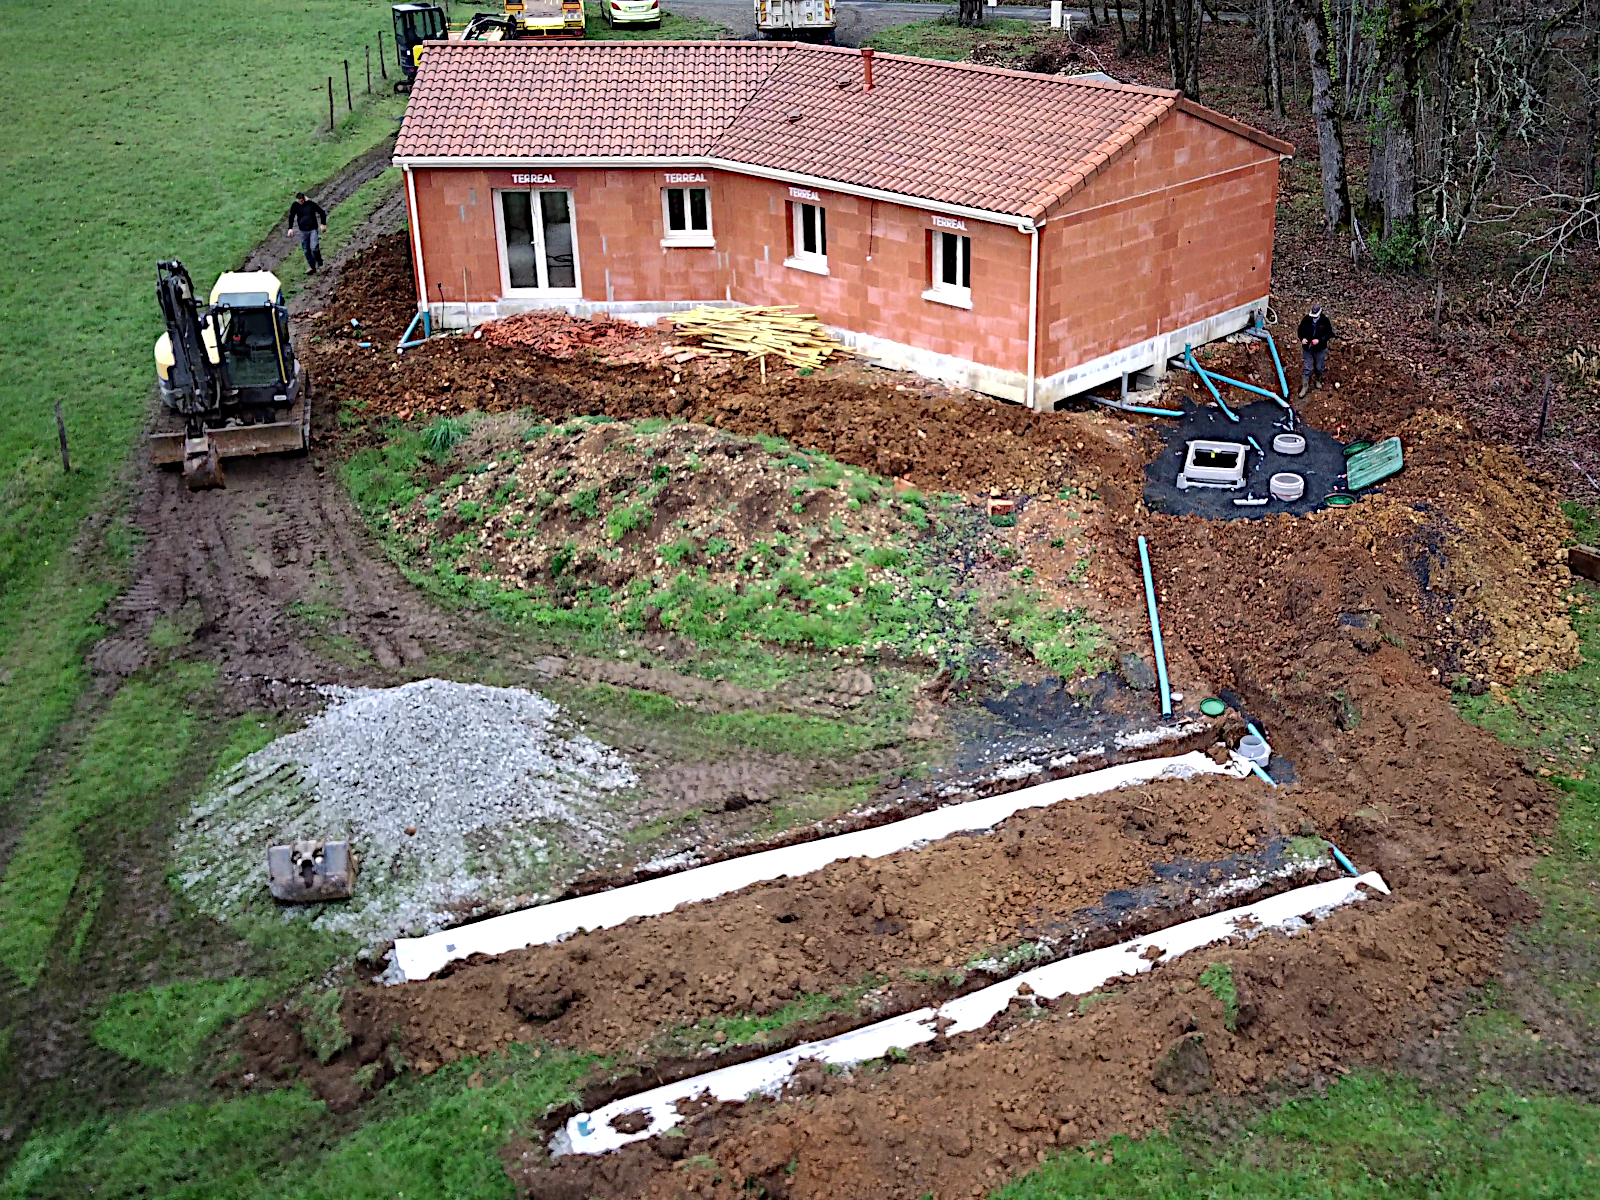
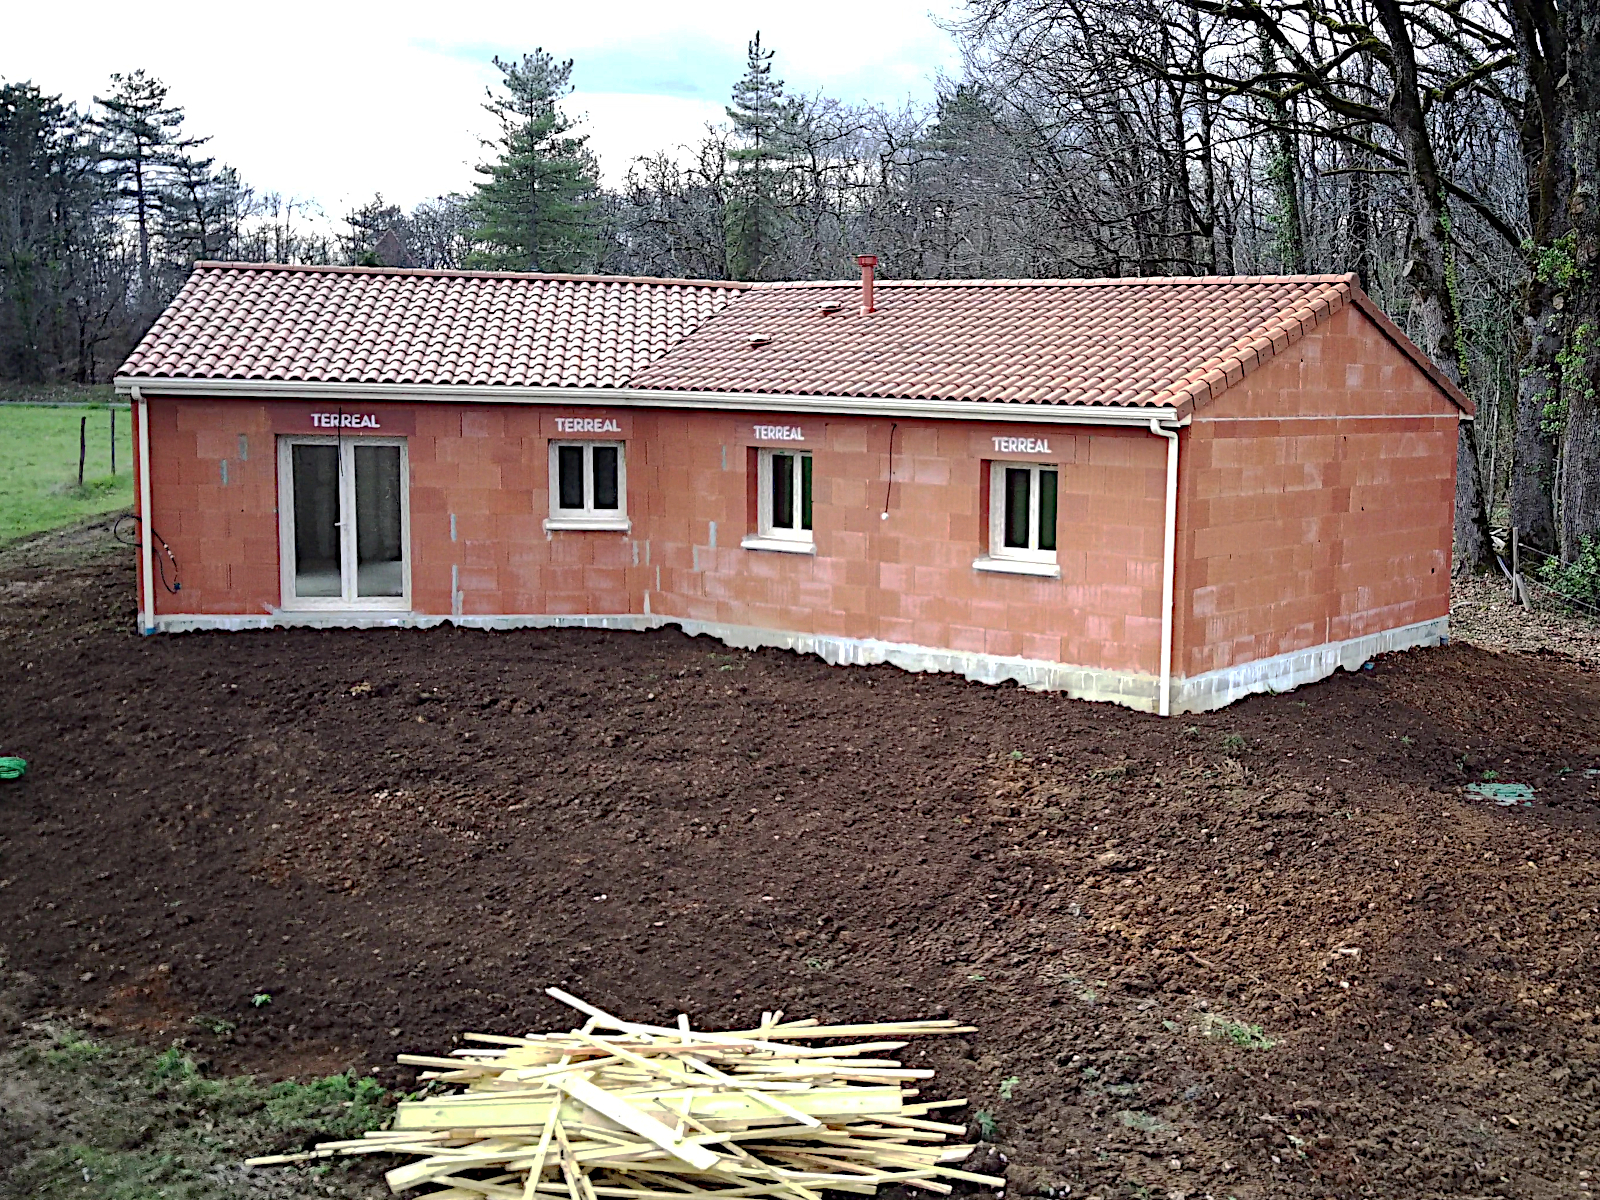
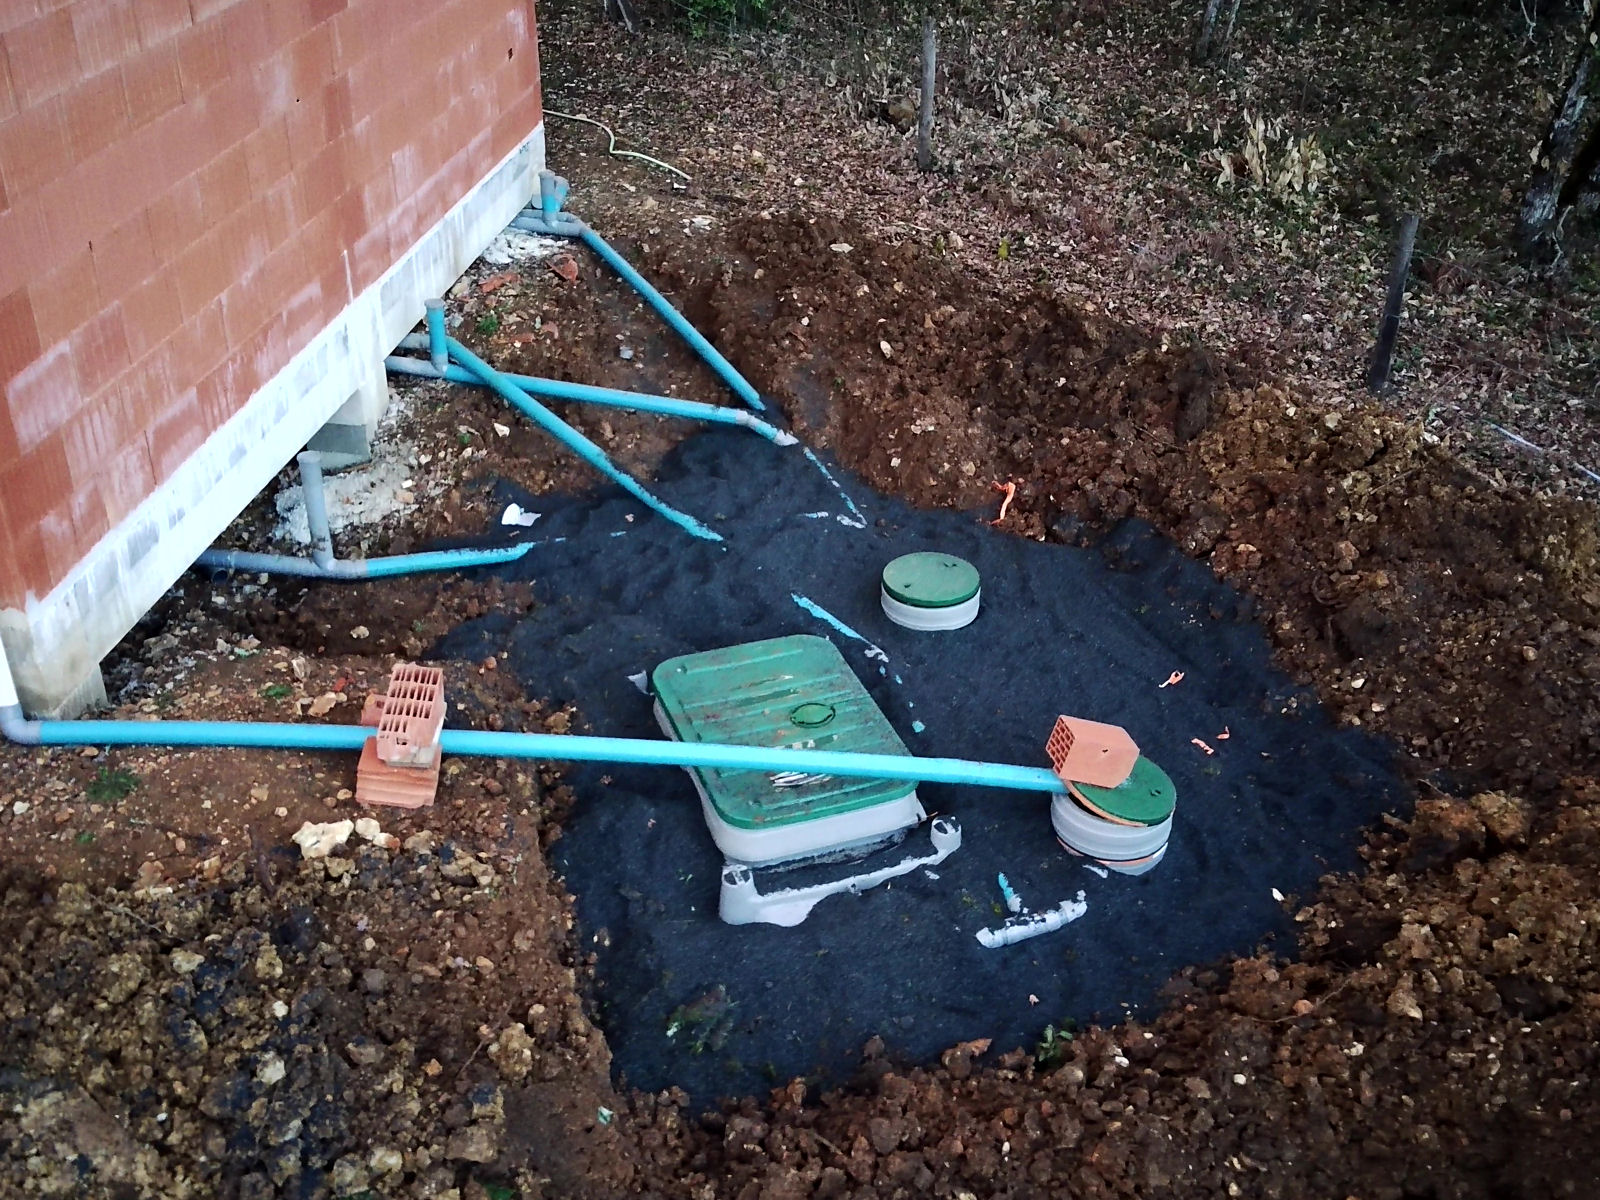
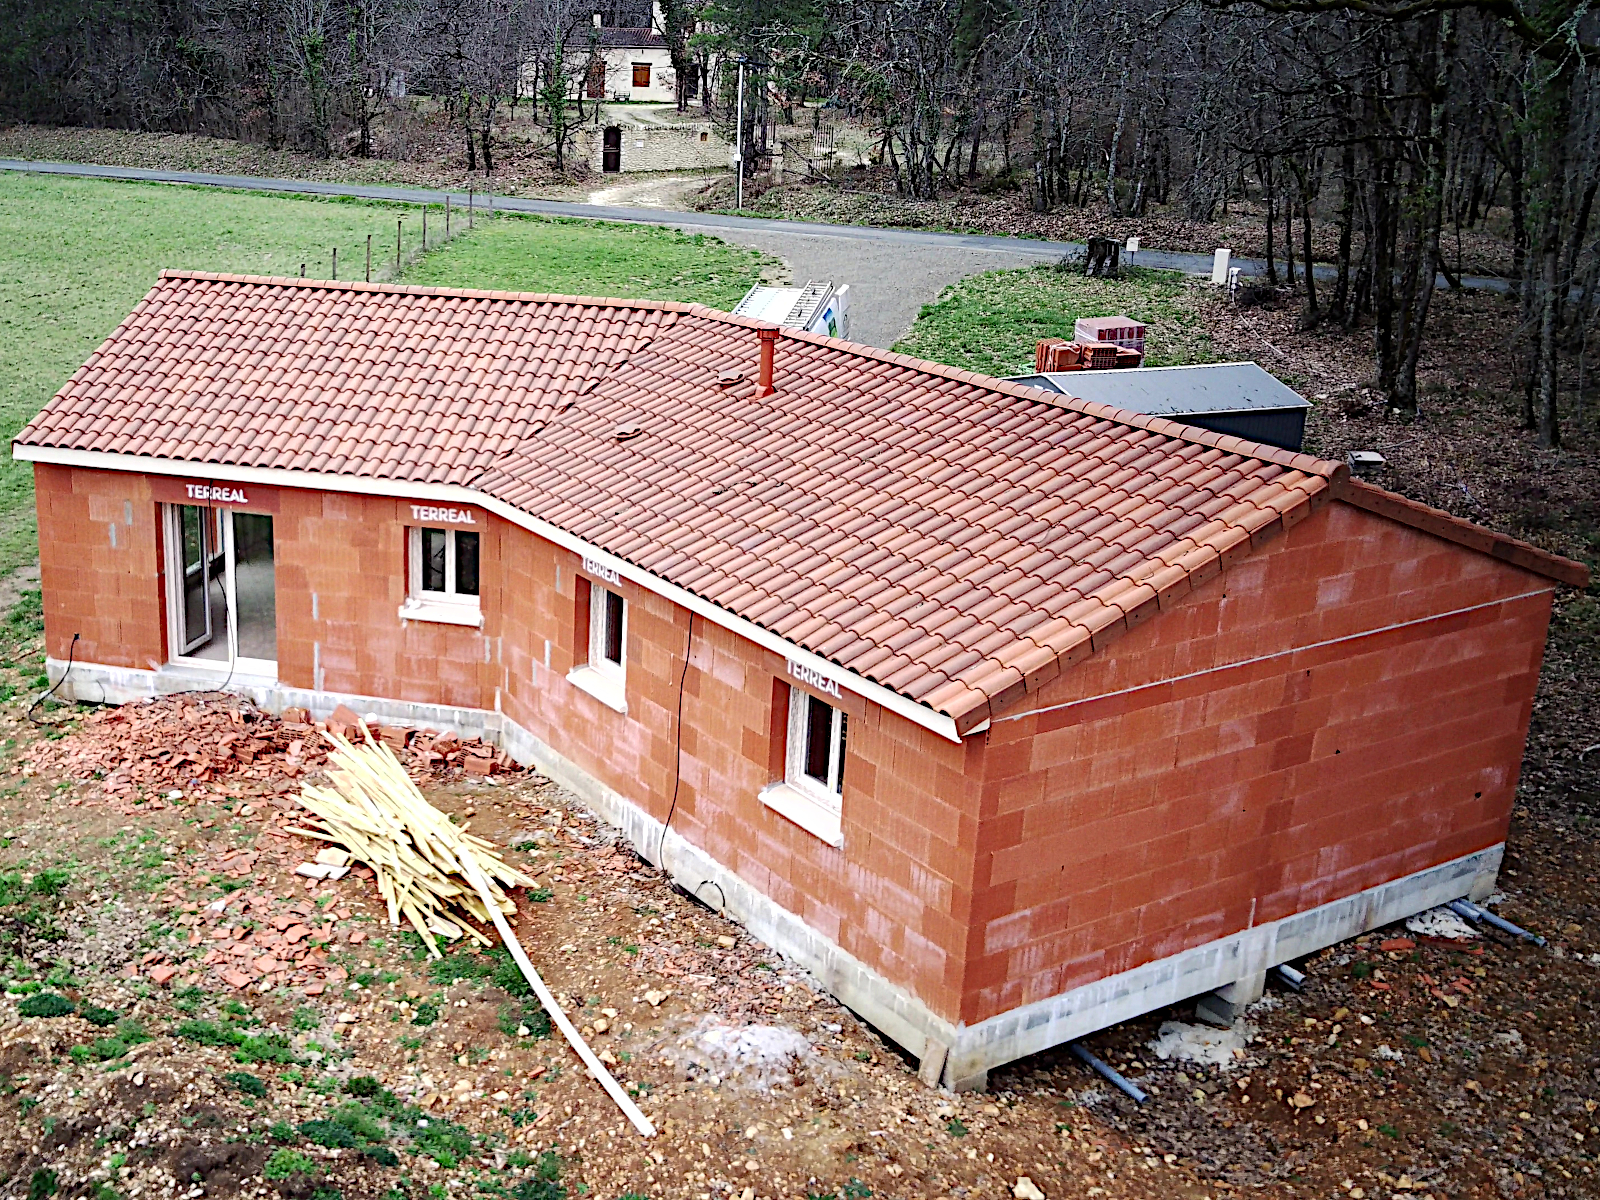
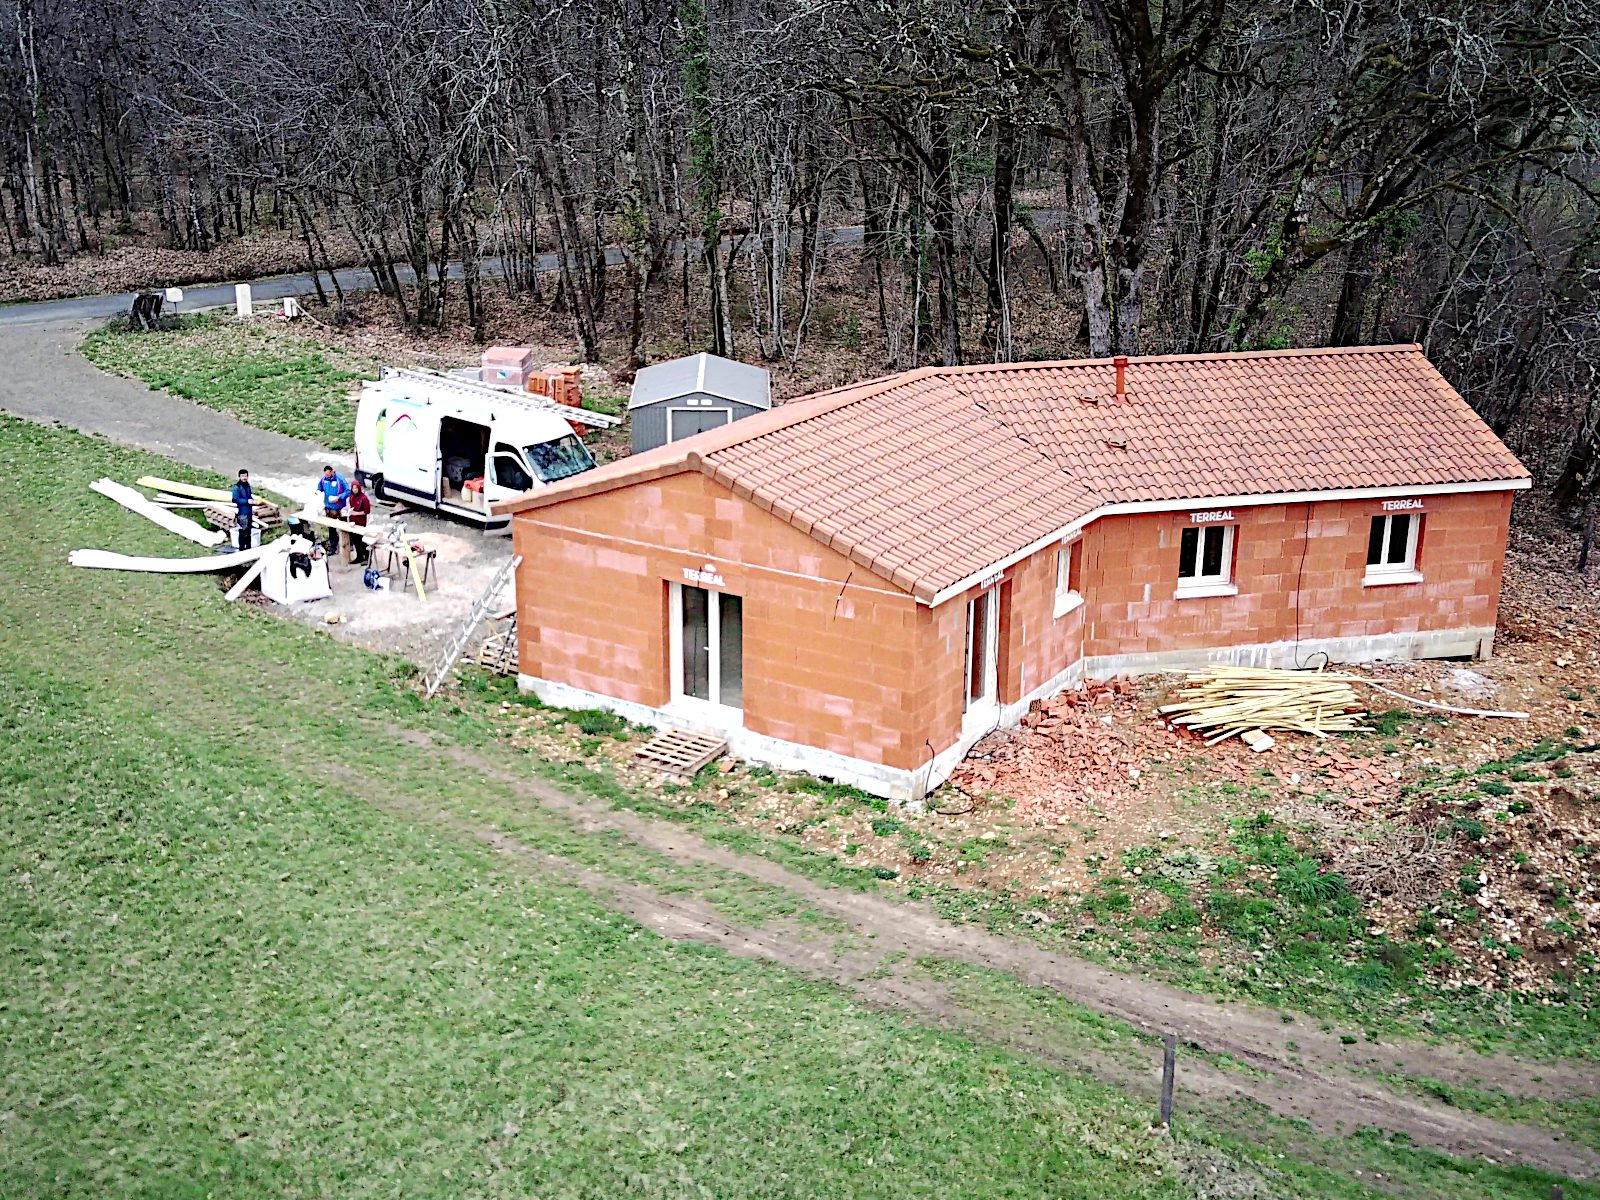
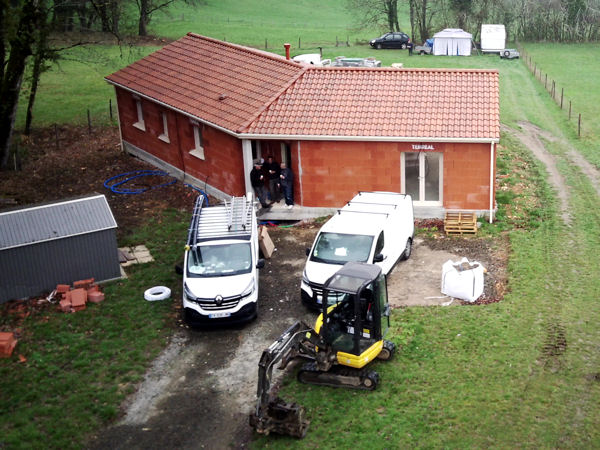
By the time I got back towards the end of the afternoon only the electricians were still on site and even they’d left by the time I went up to take a look at what had been done during the day, starting with the ‘fosse septique’.

null

null

null

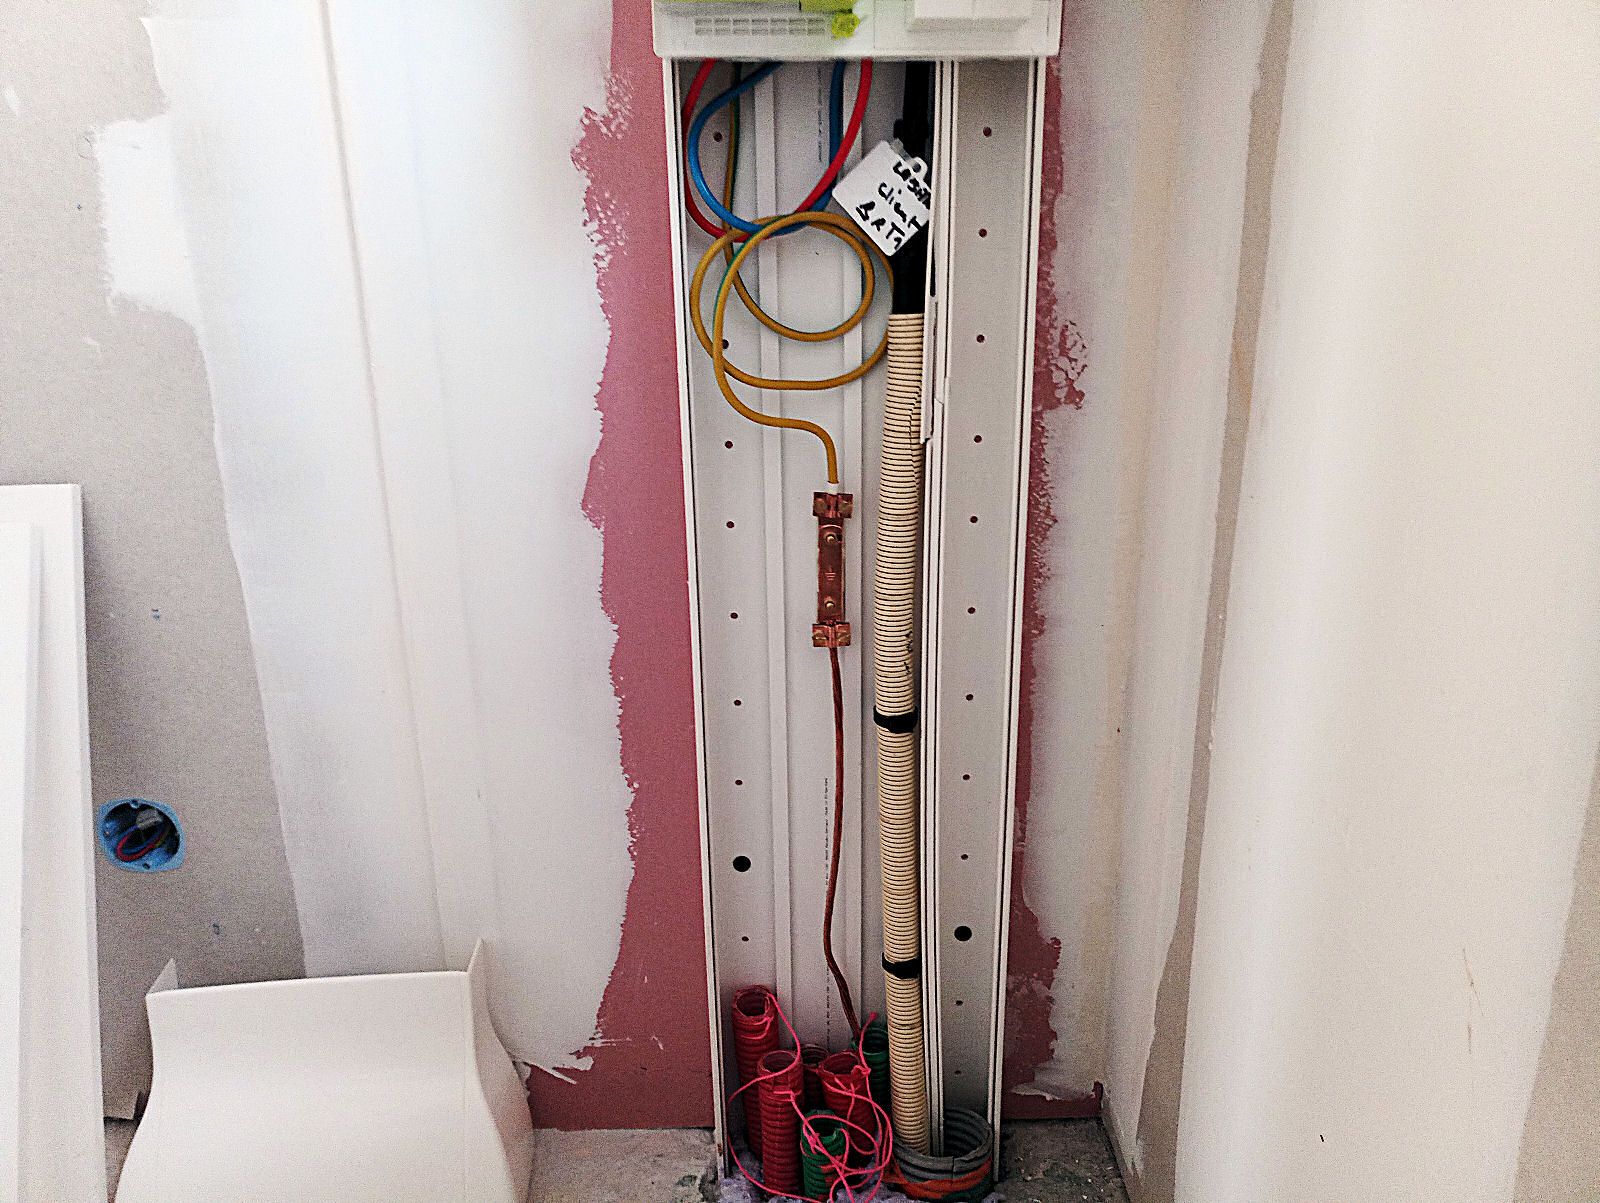
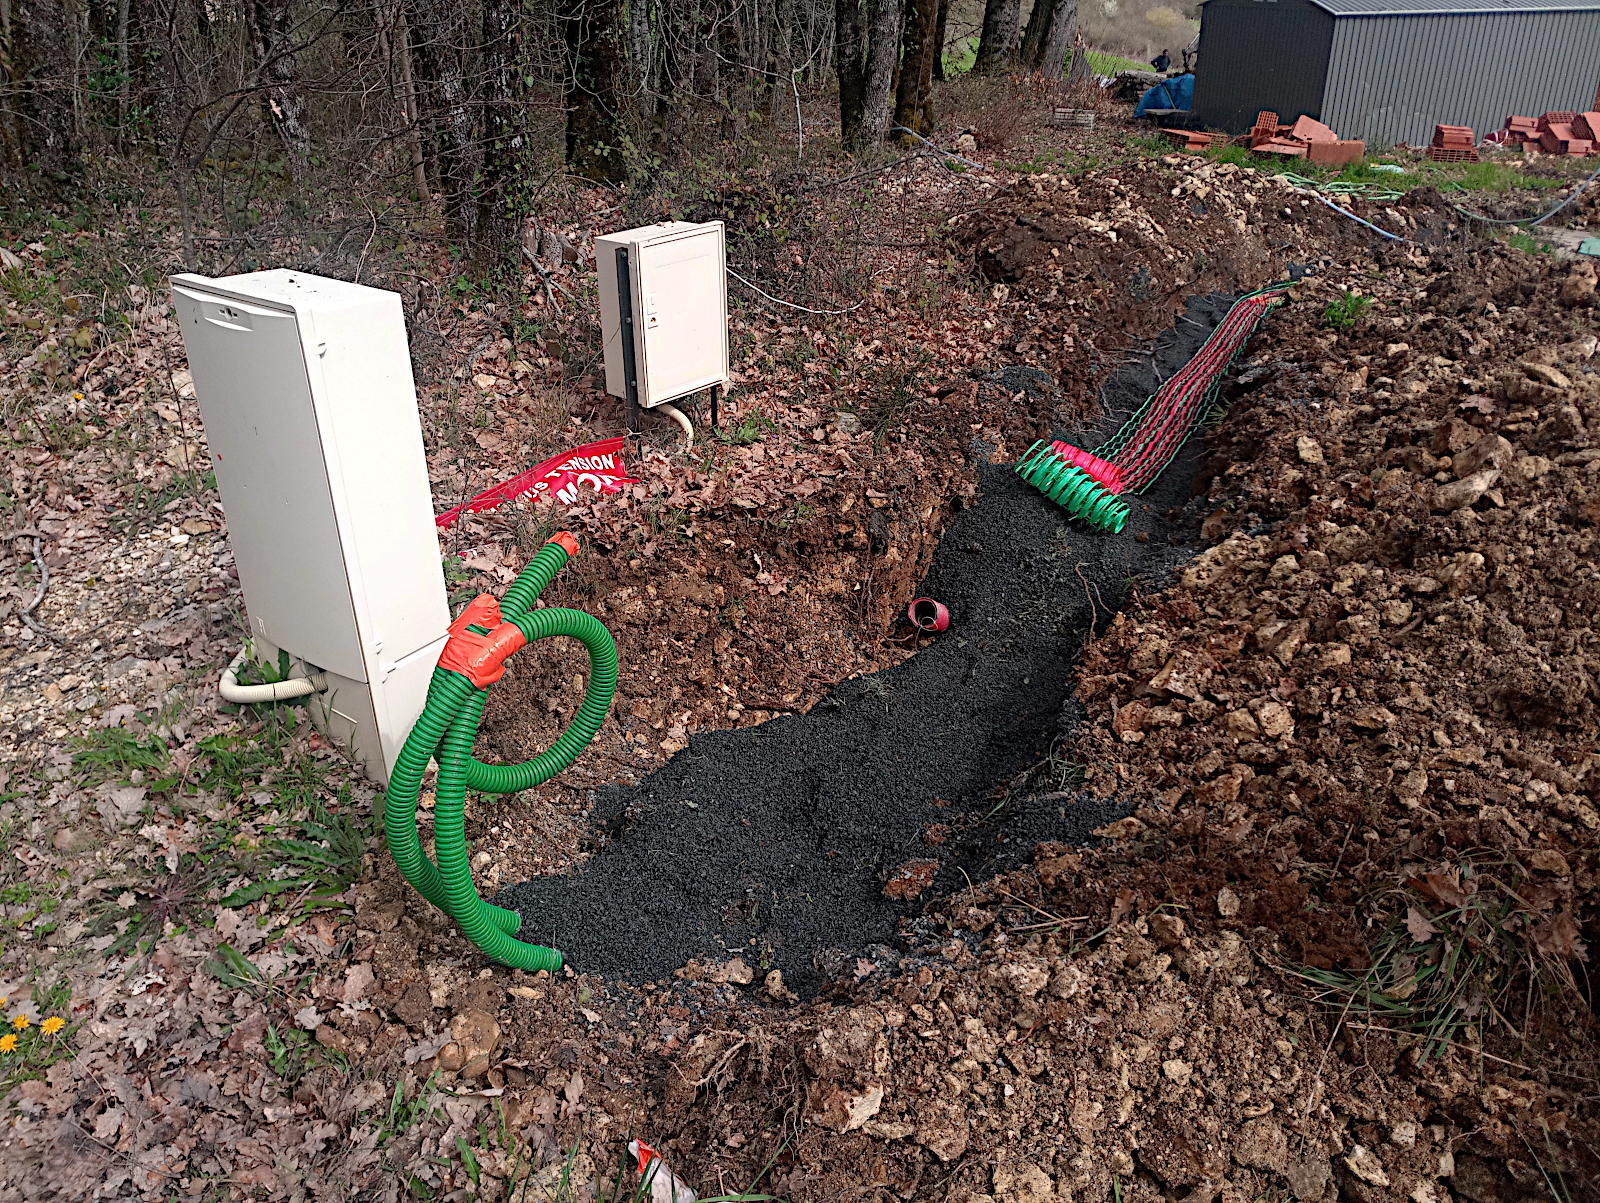
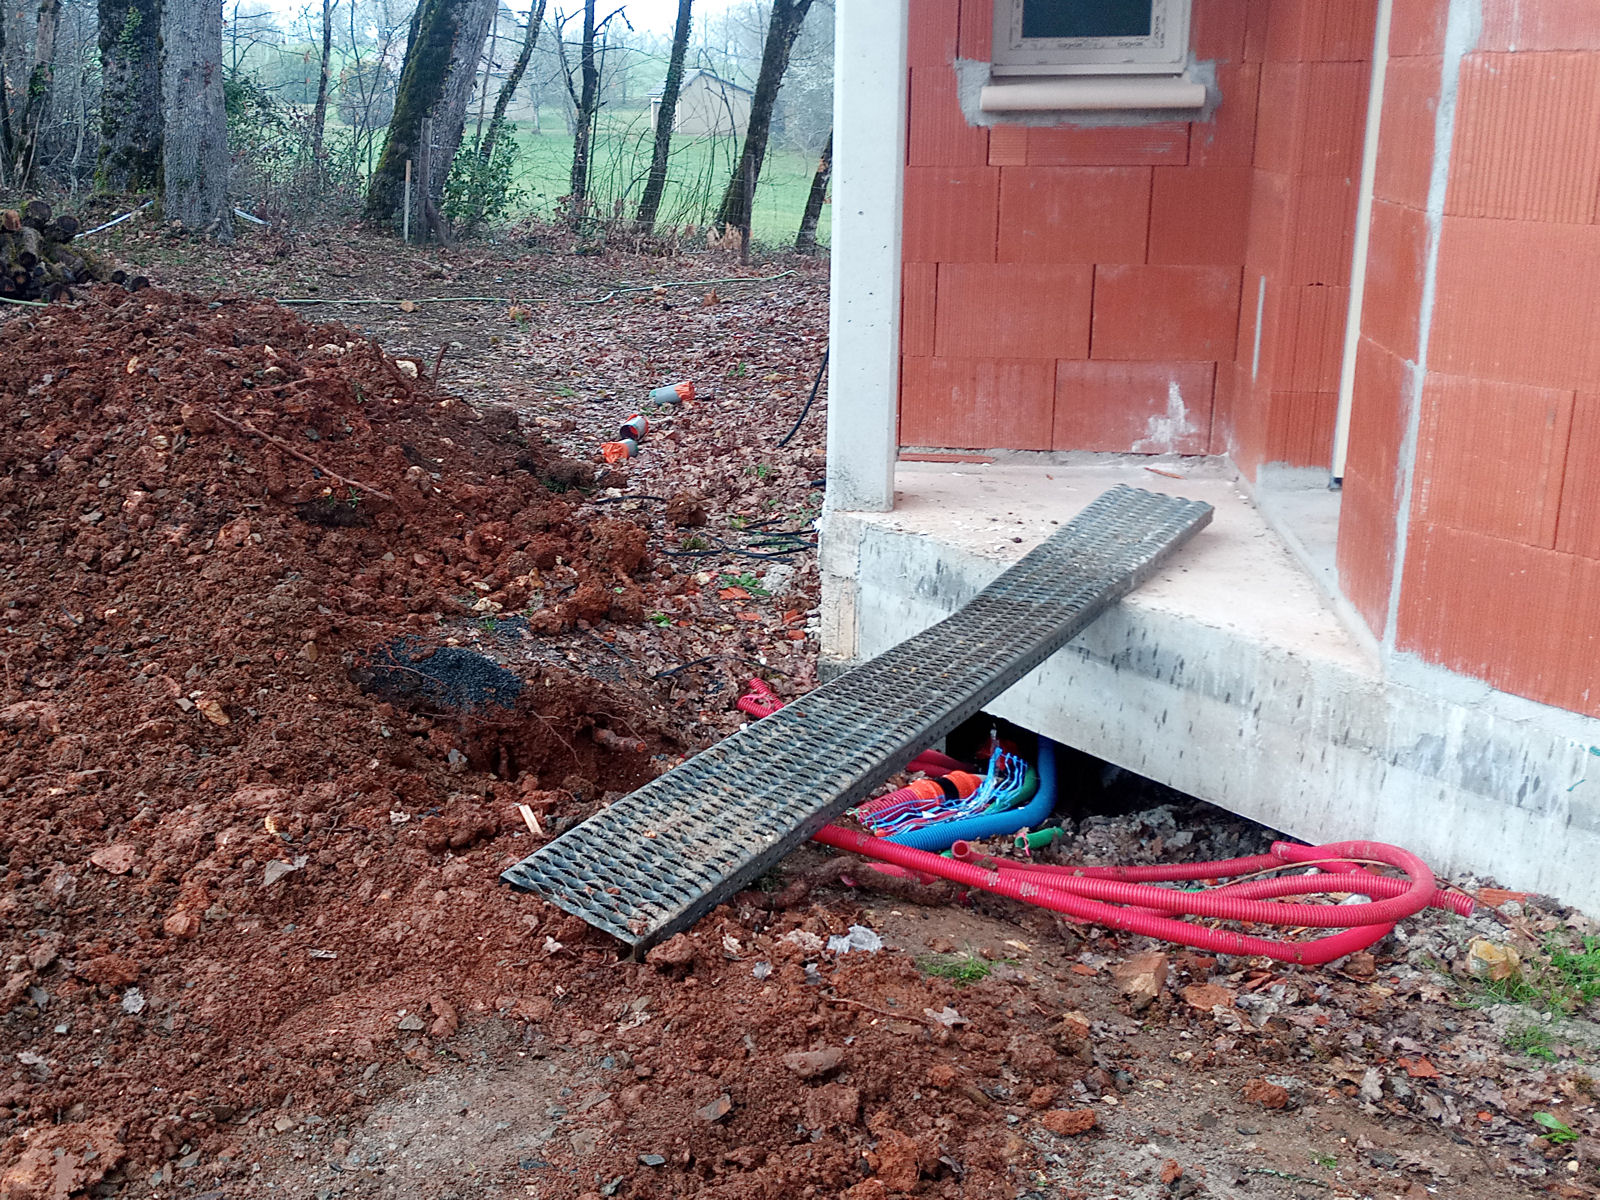
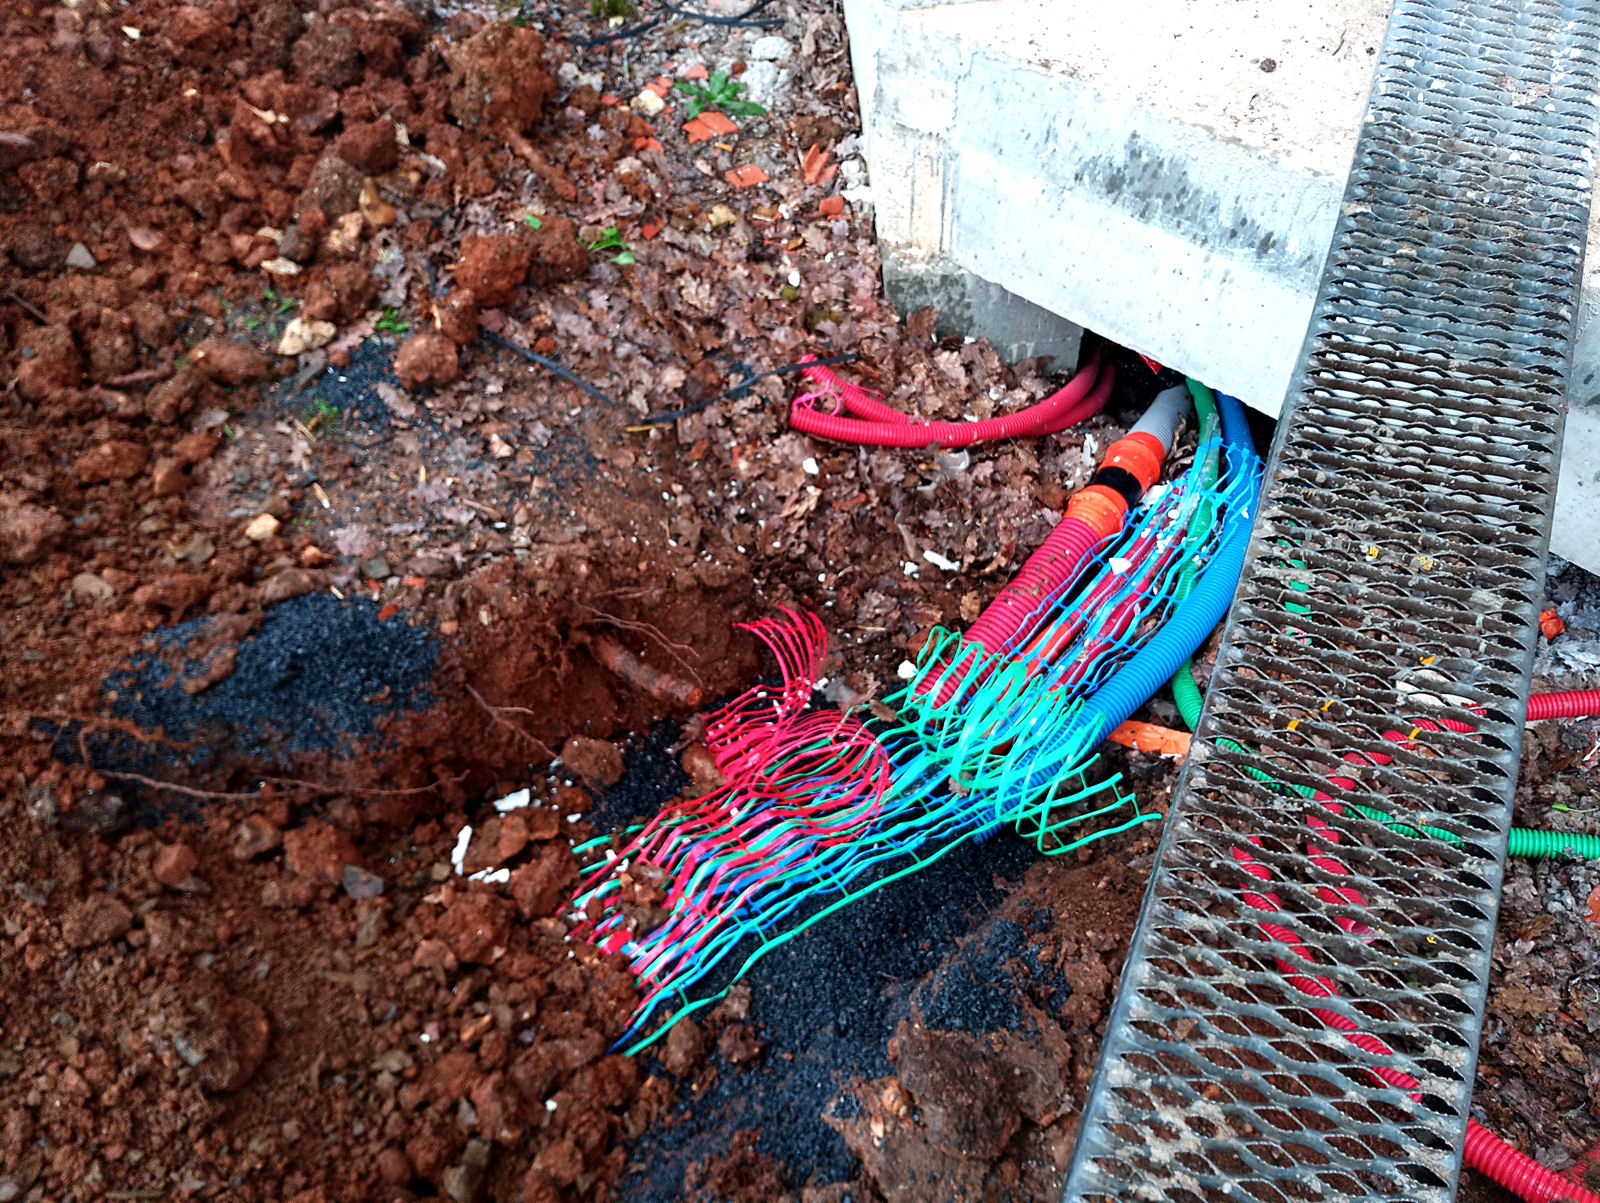
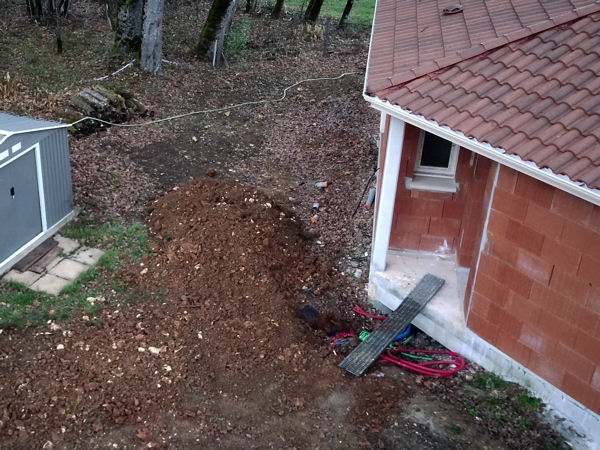
Before I’d left there’d been what appeared to me to be a somewhat animated discussion involving what seemed like all the parties about conduits, cables and trenches outside the front of the house. The reason for that was because the ‘fosse septique’ man was going to dig trenches to take the house’s water and electricity supplies and they had to decide what colour plastic conduits (‘gaines’) would be available and where the trenches needed to be dug, bearing in mind that I also want to have a cable left available to connect to my proposed garage in due course and also a connection for a generator to run the house if/when the electricity fails.

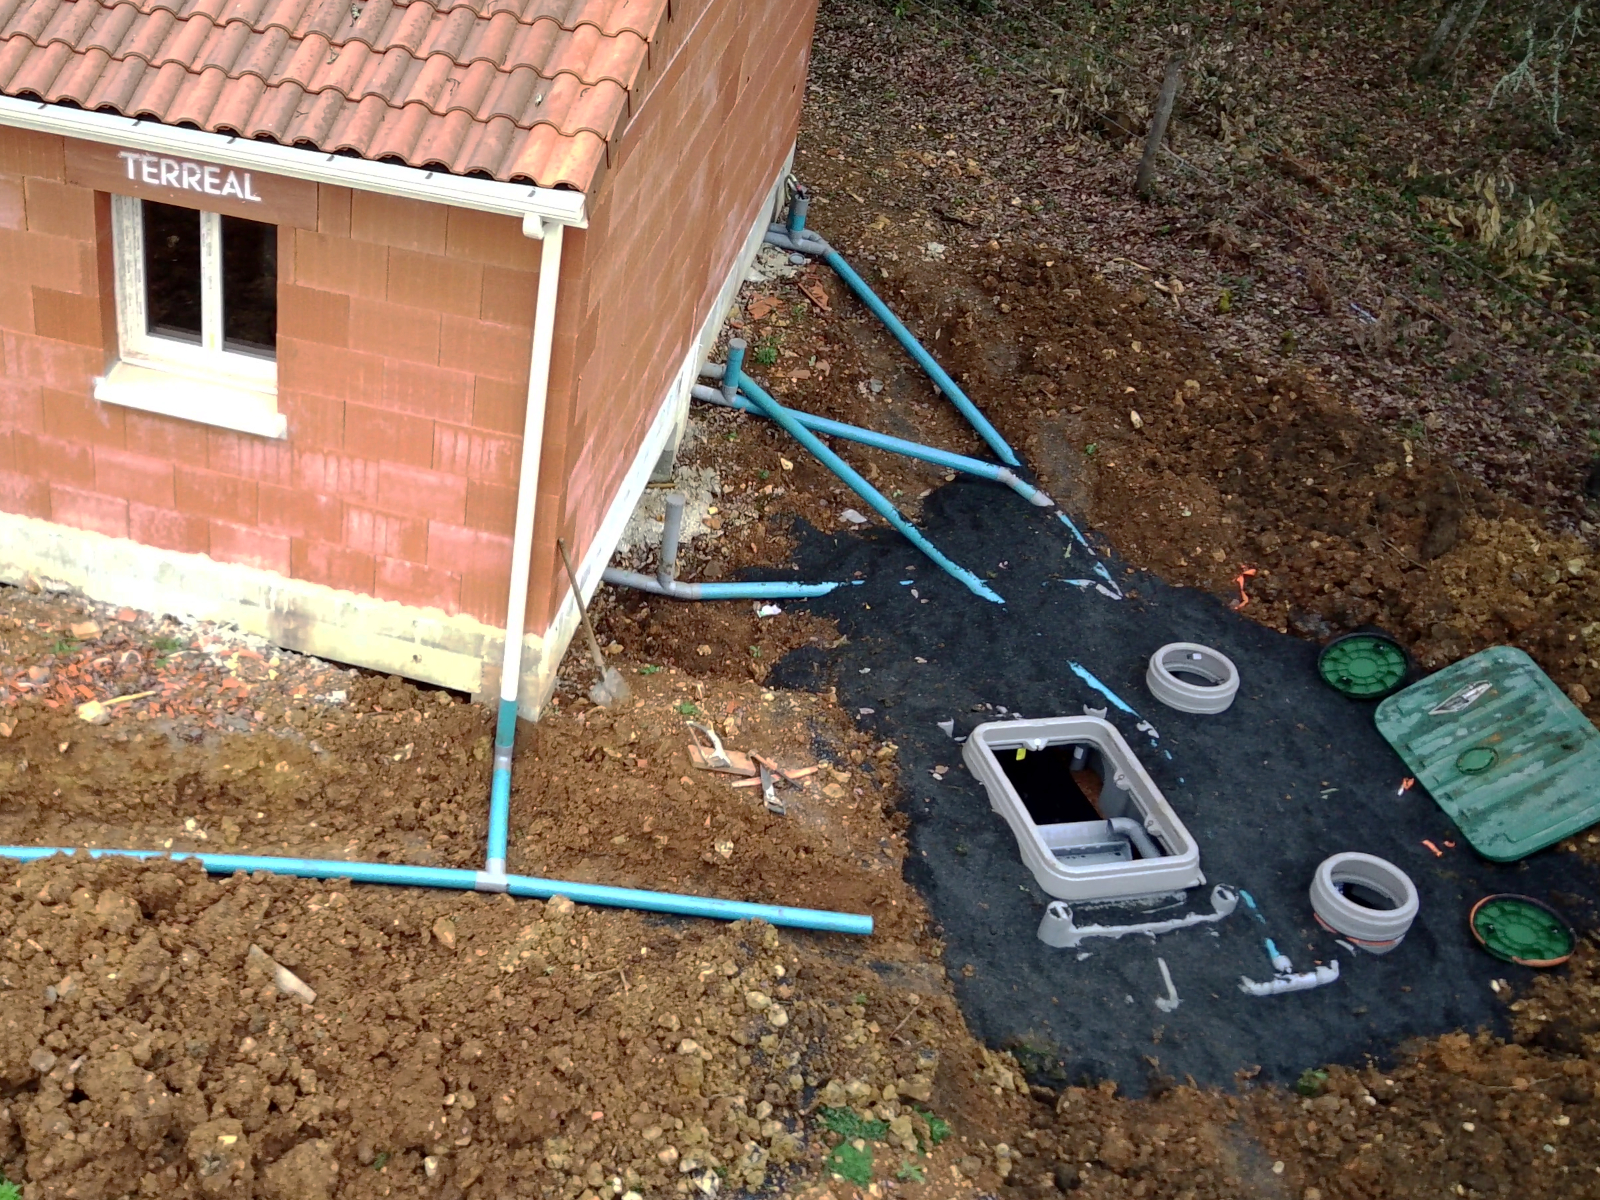
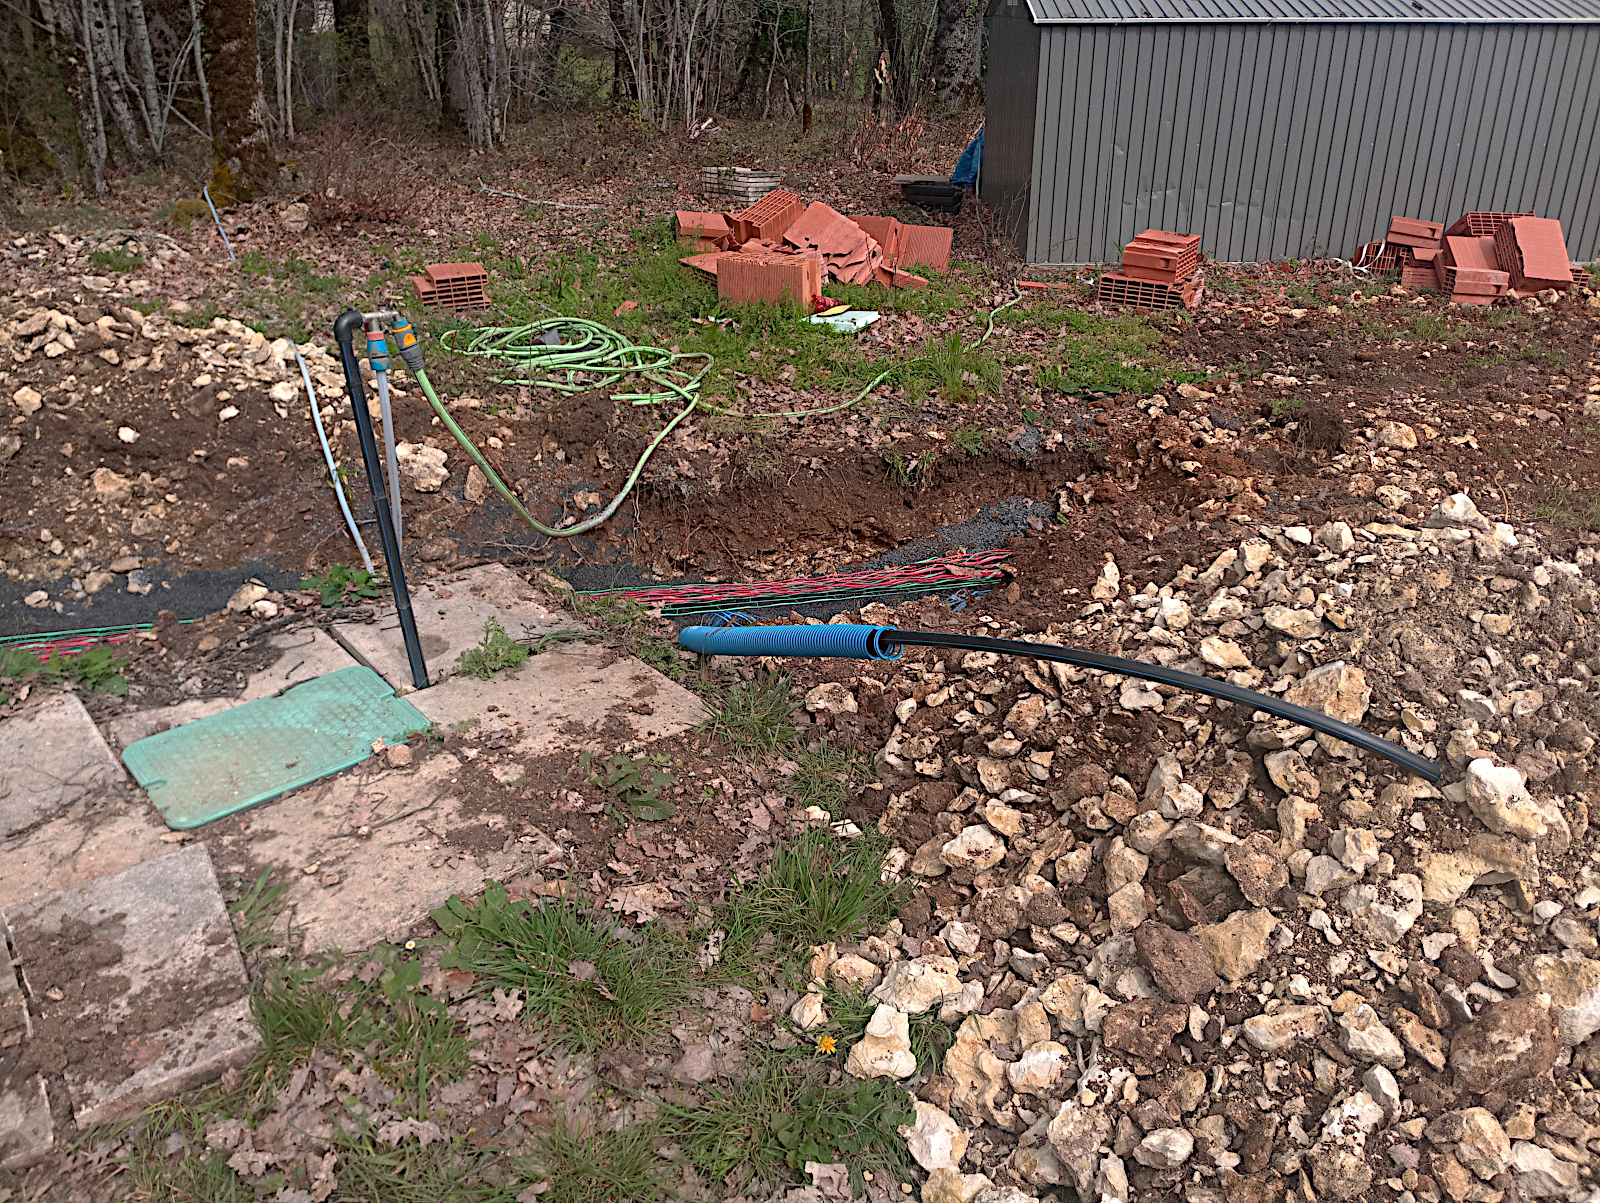
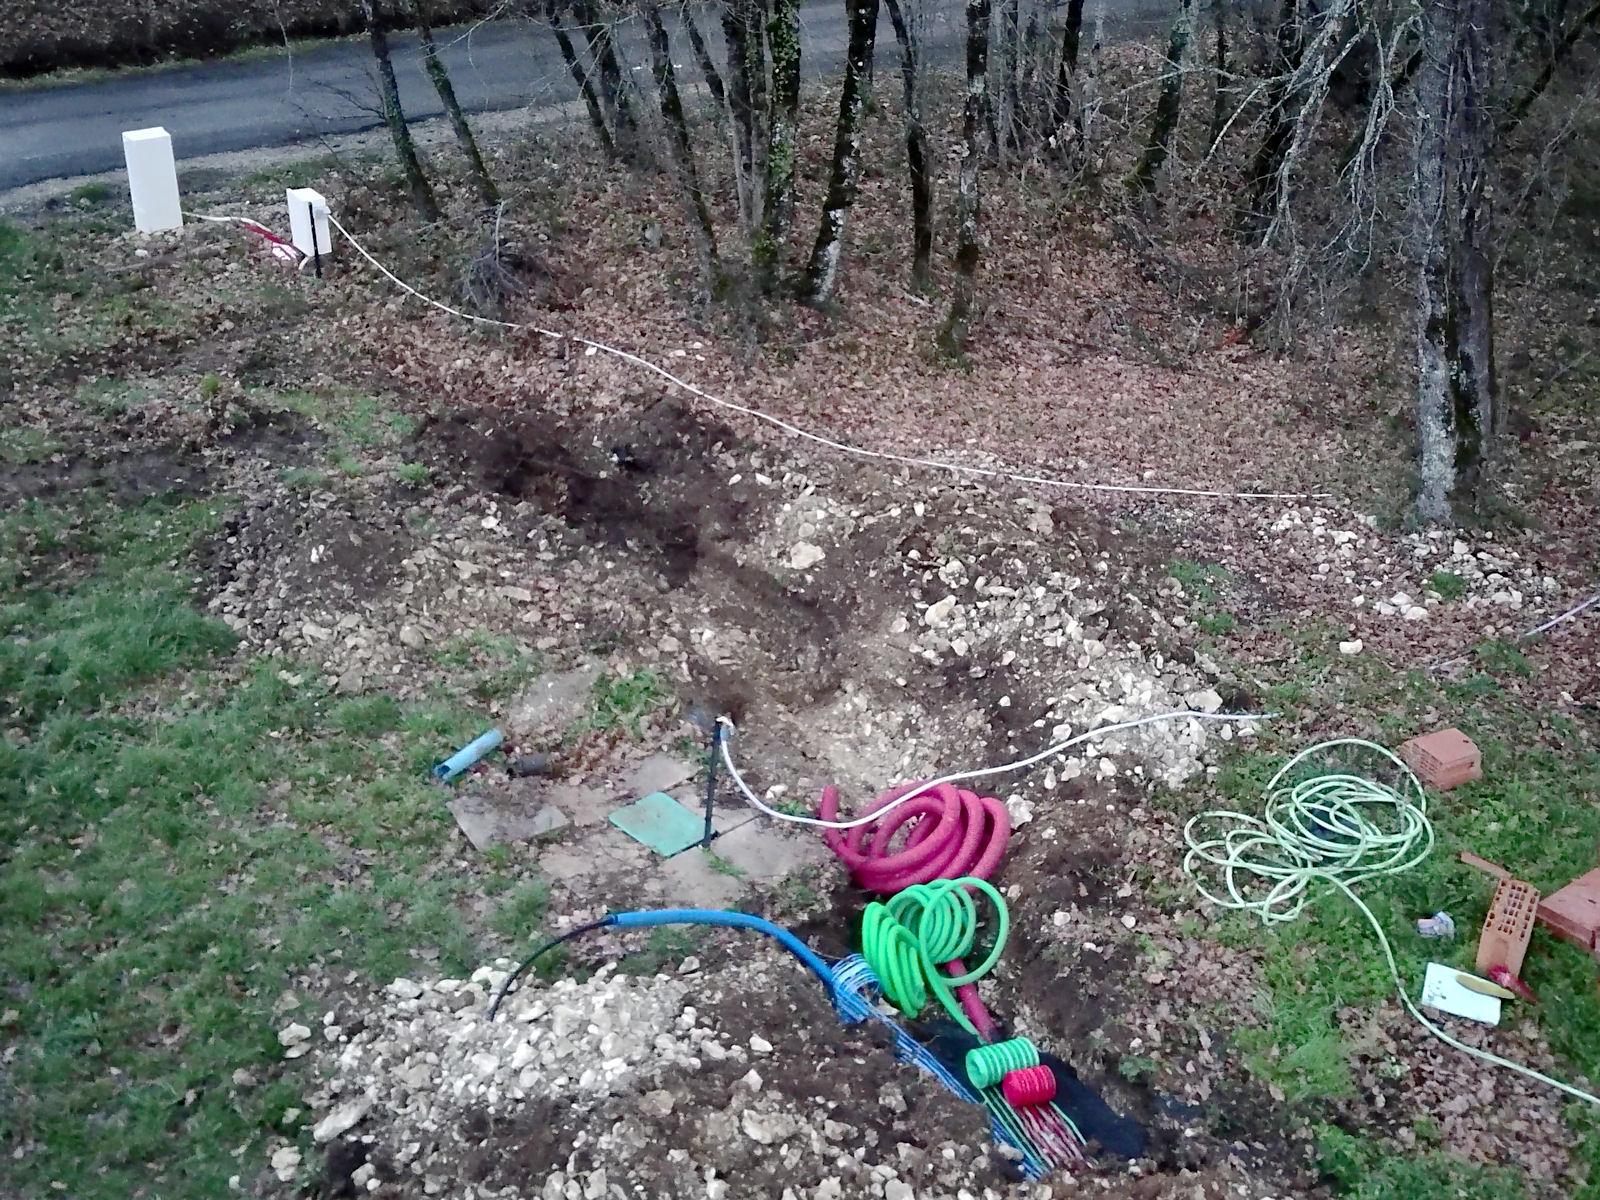
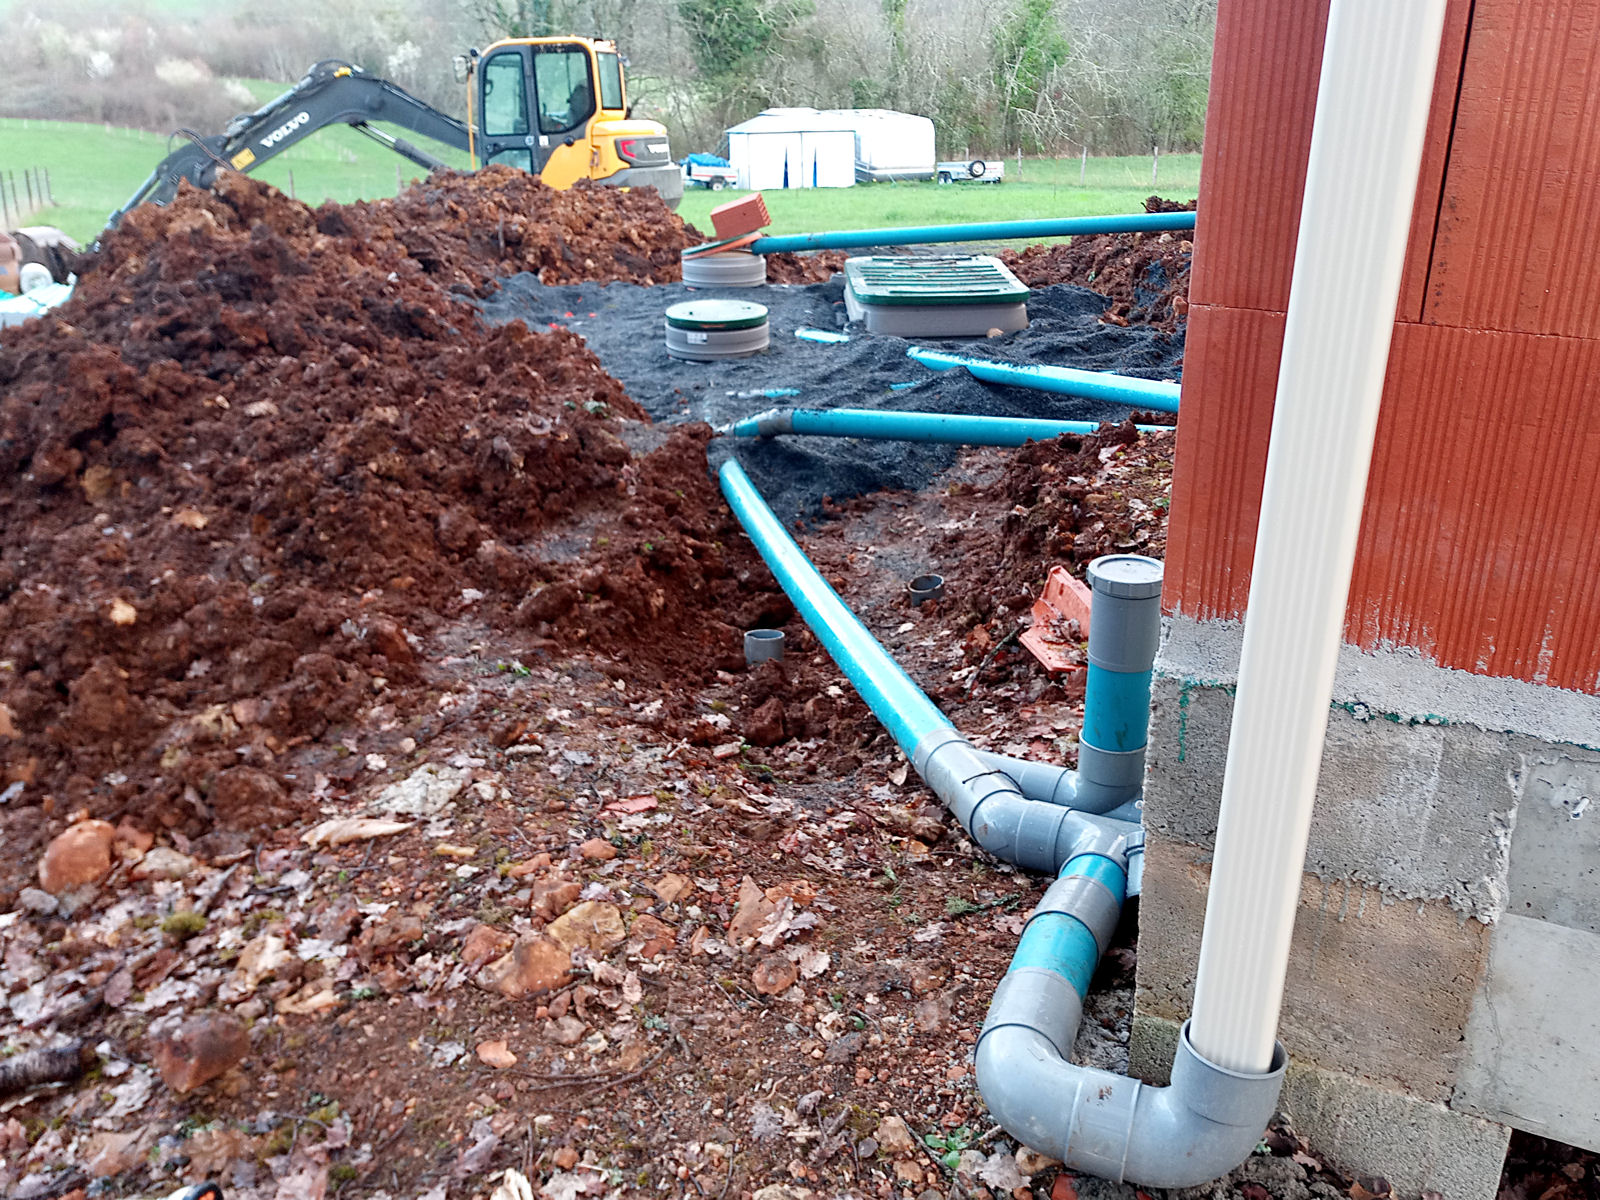
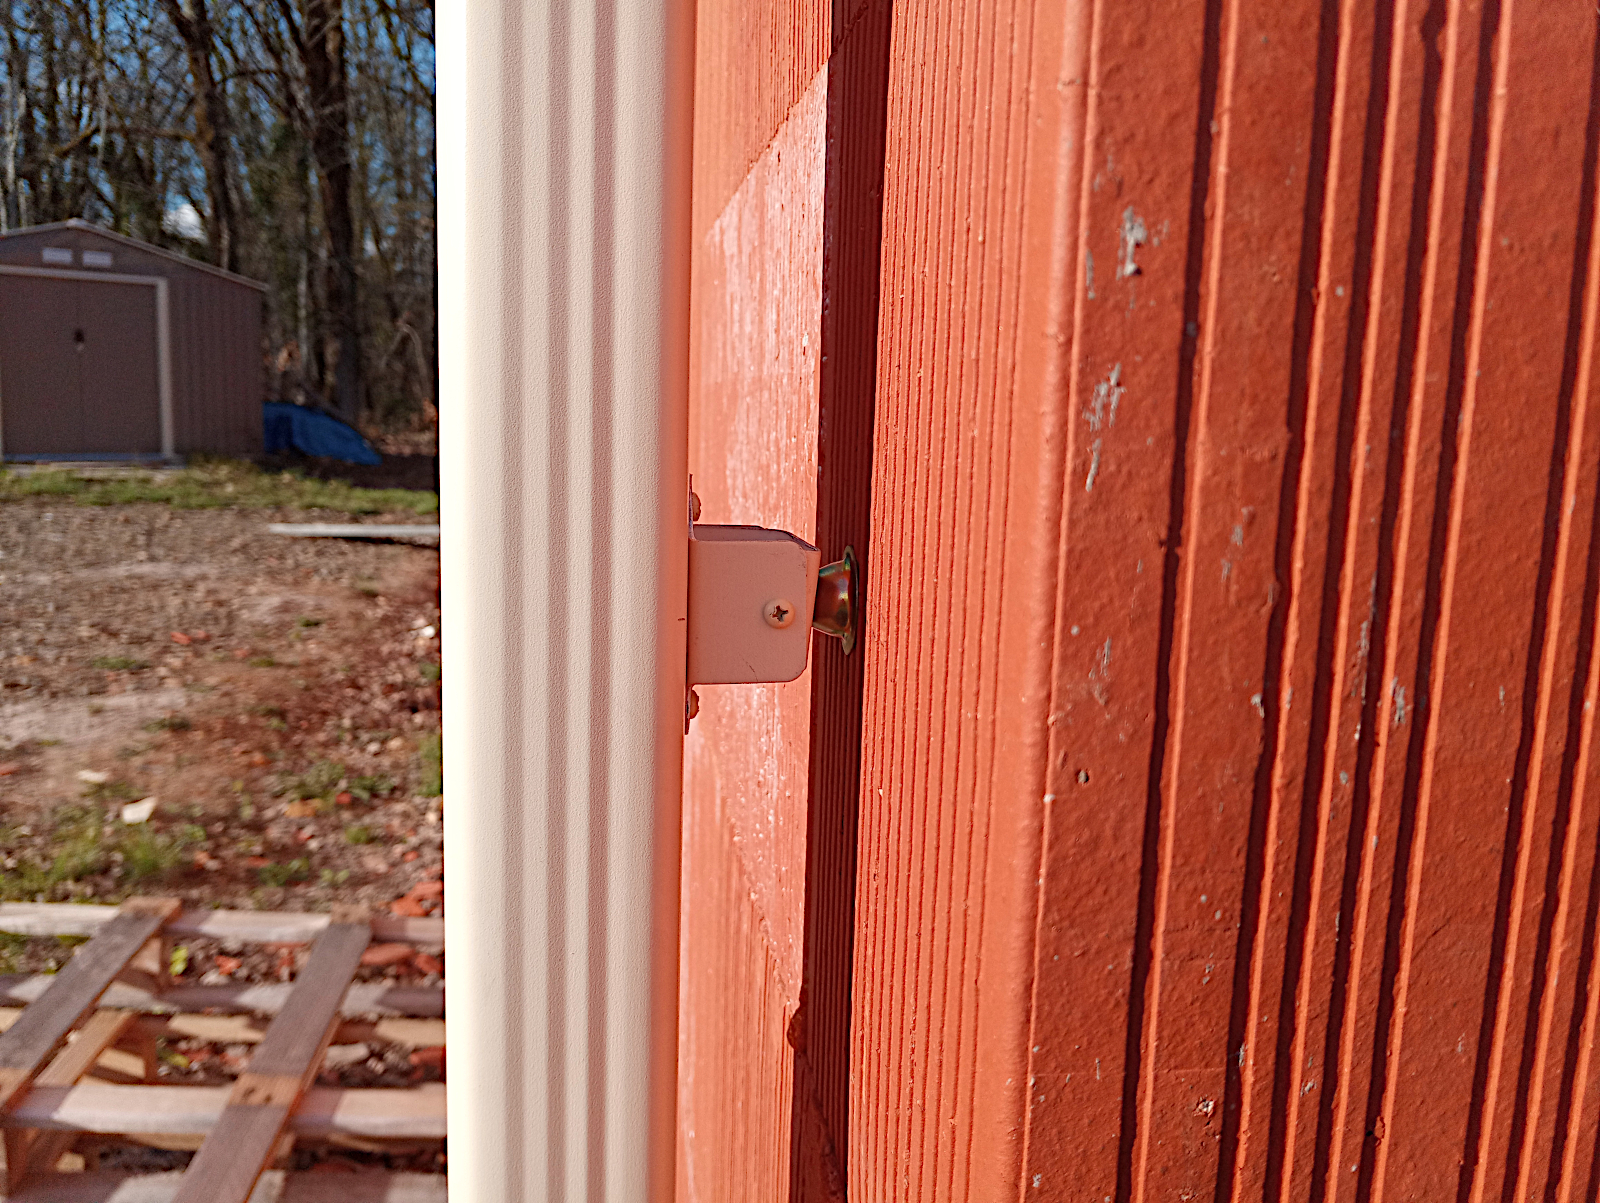
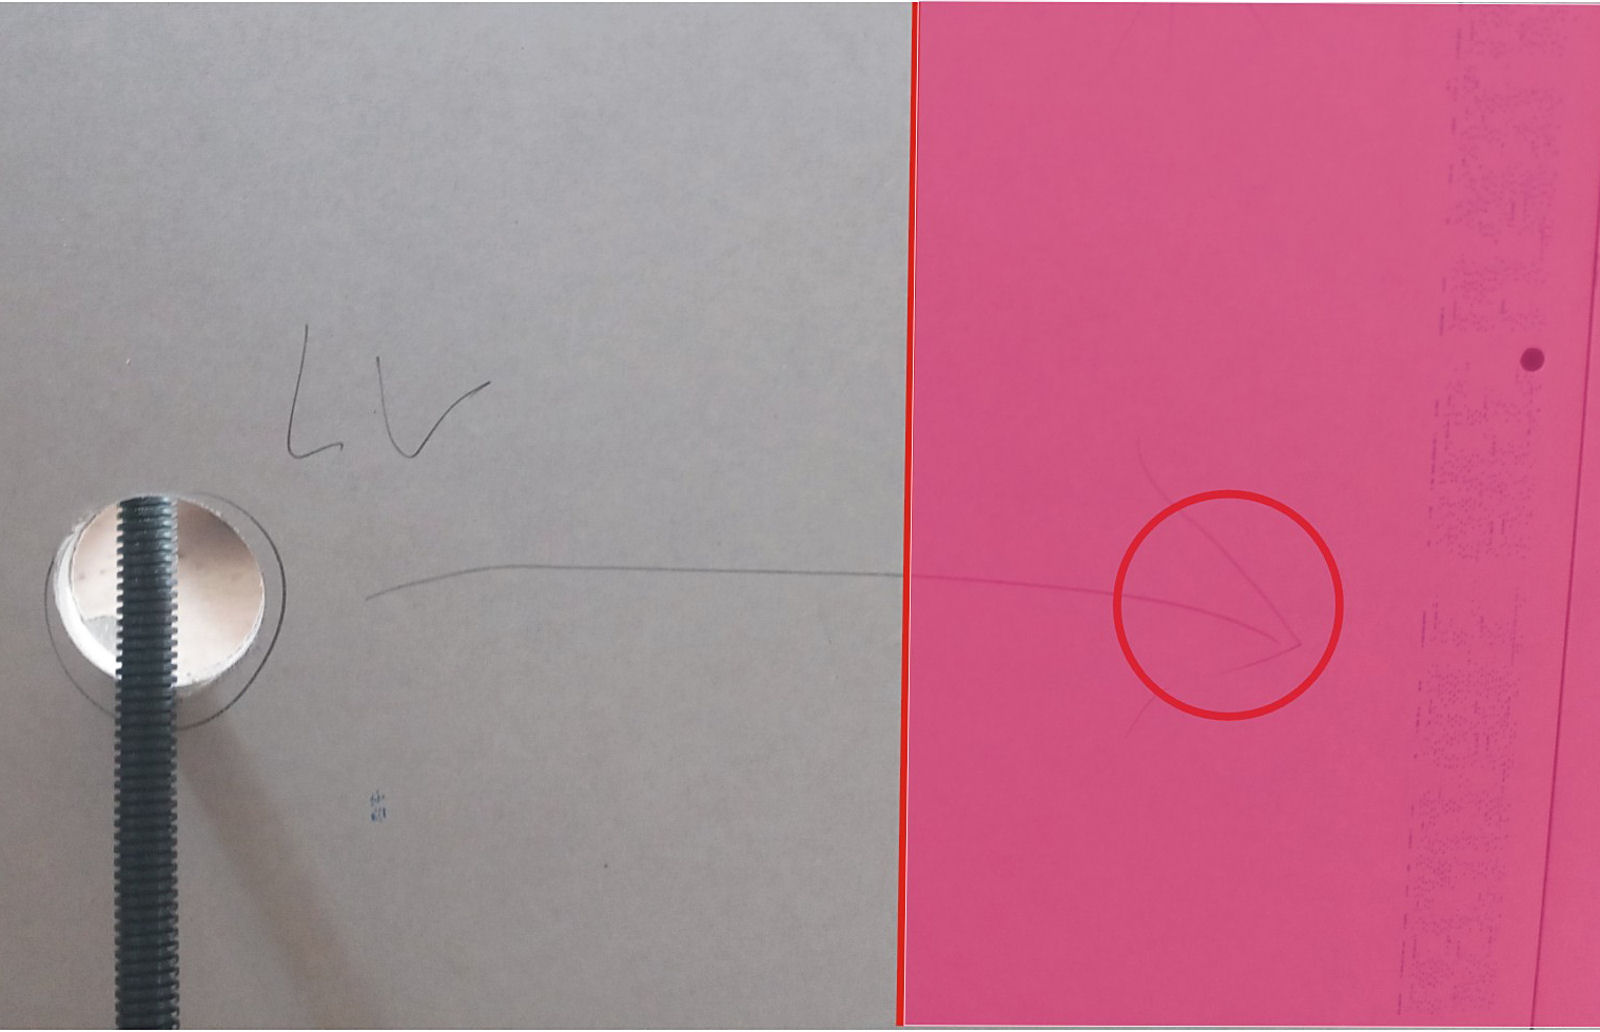
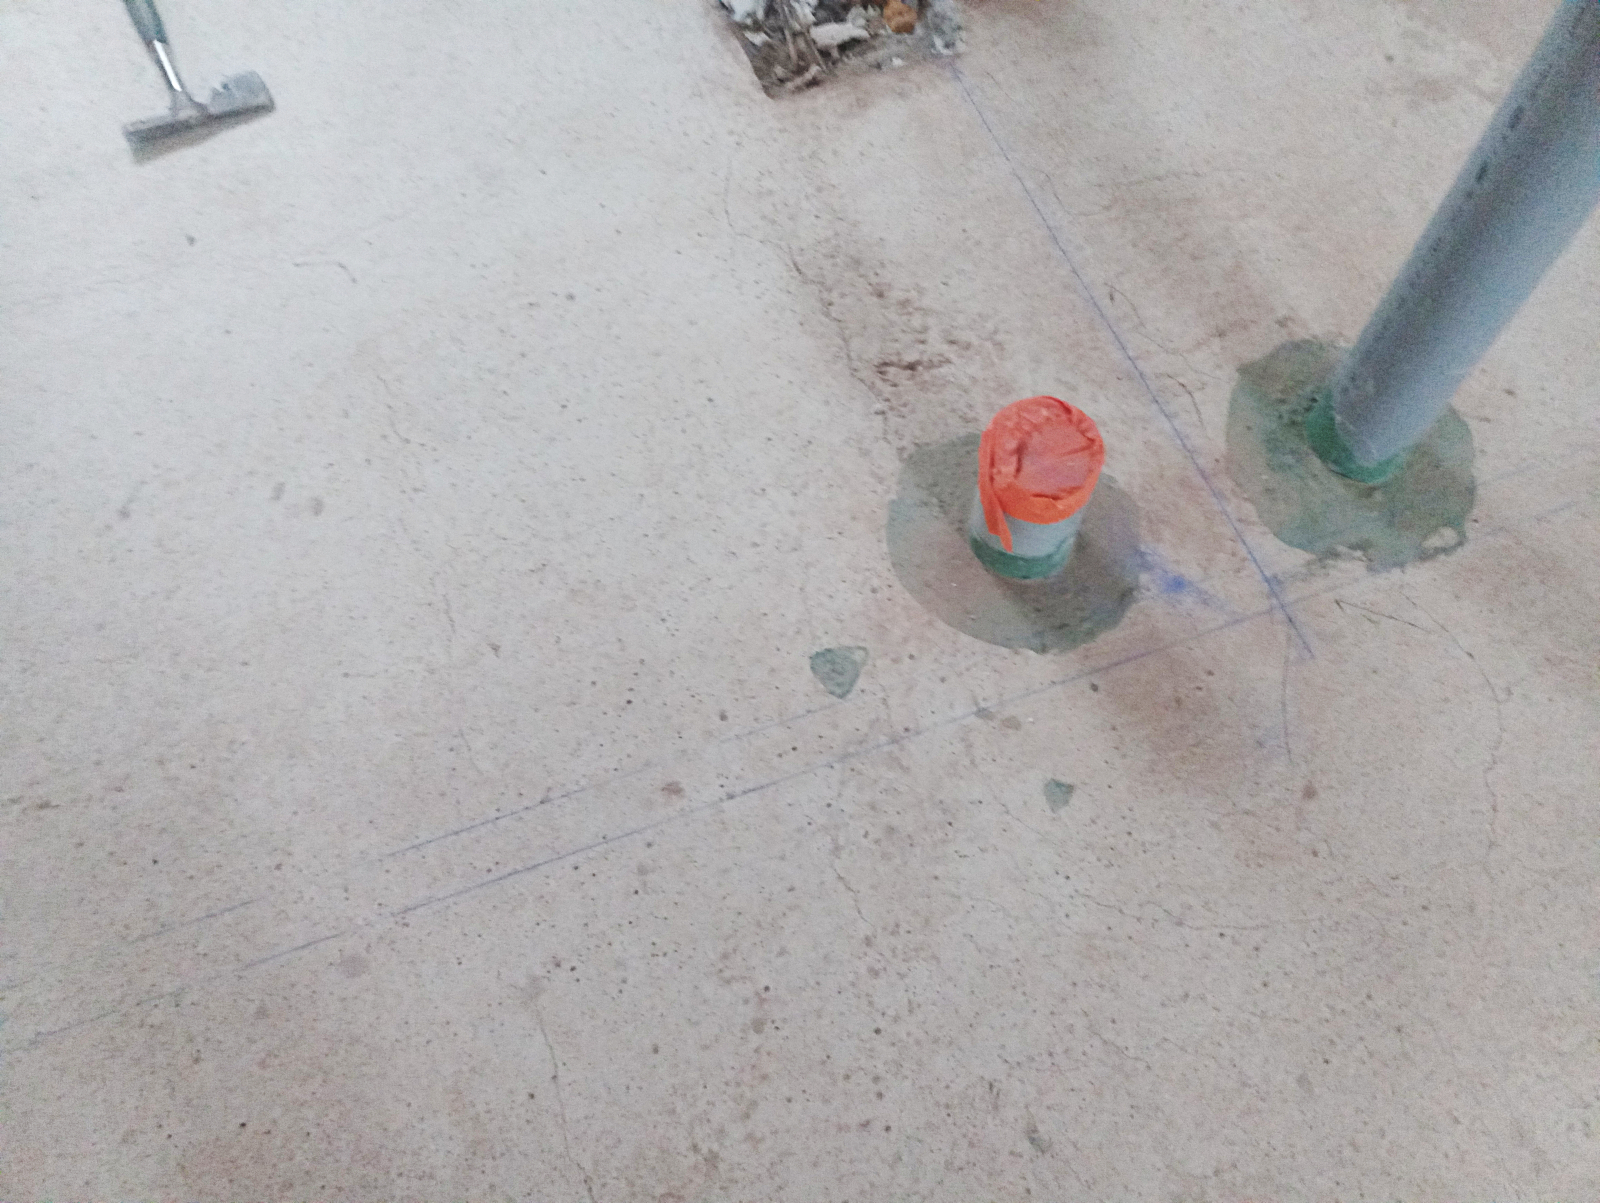
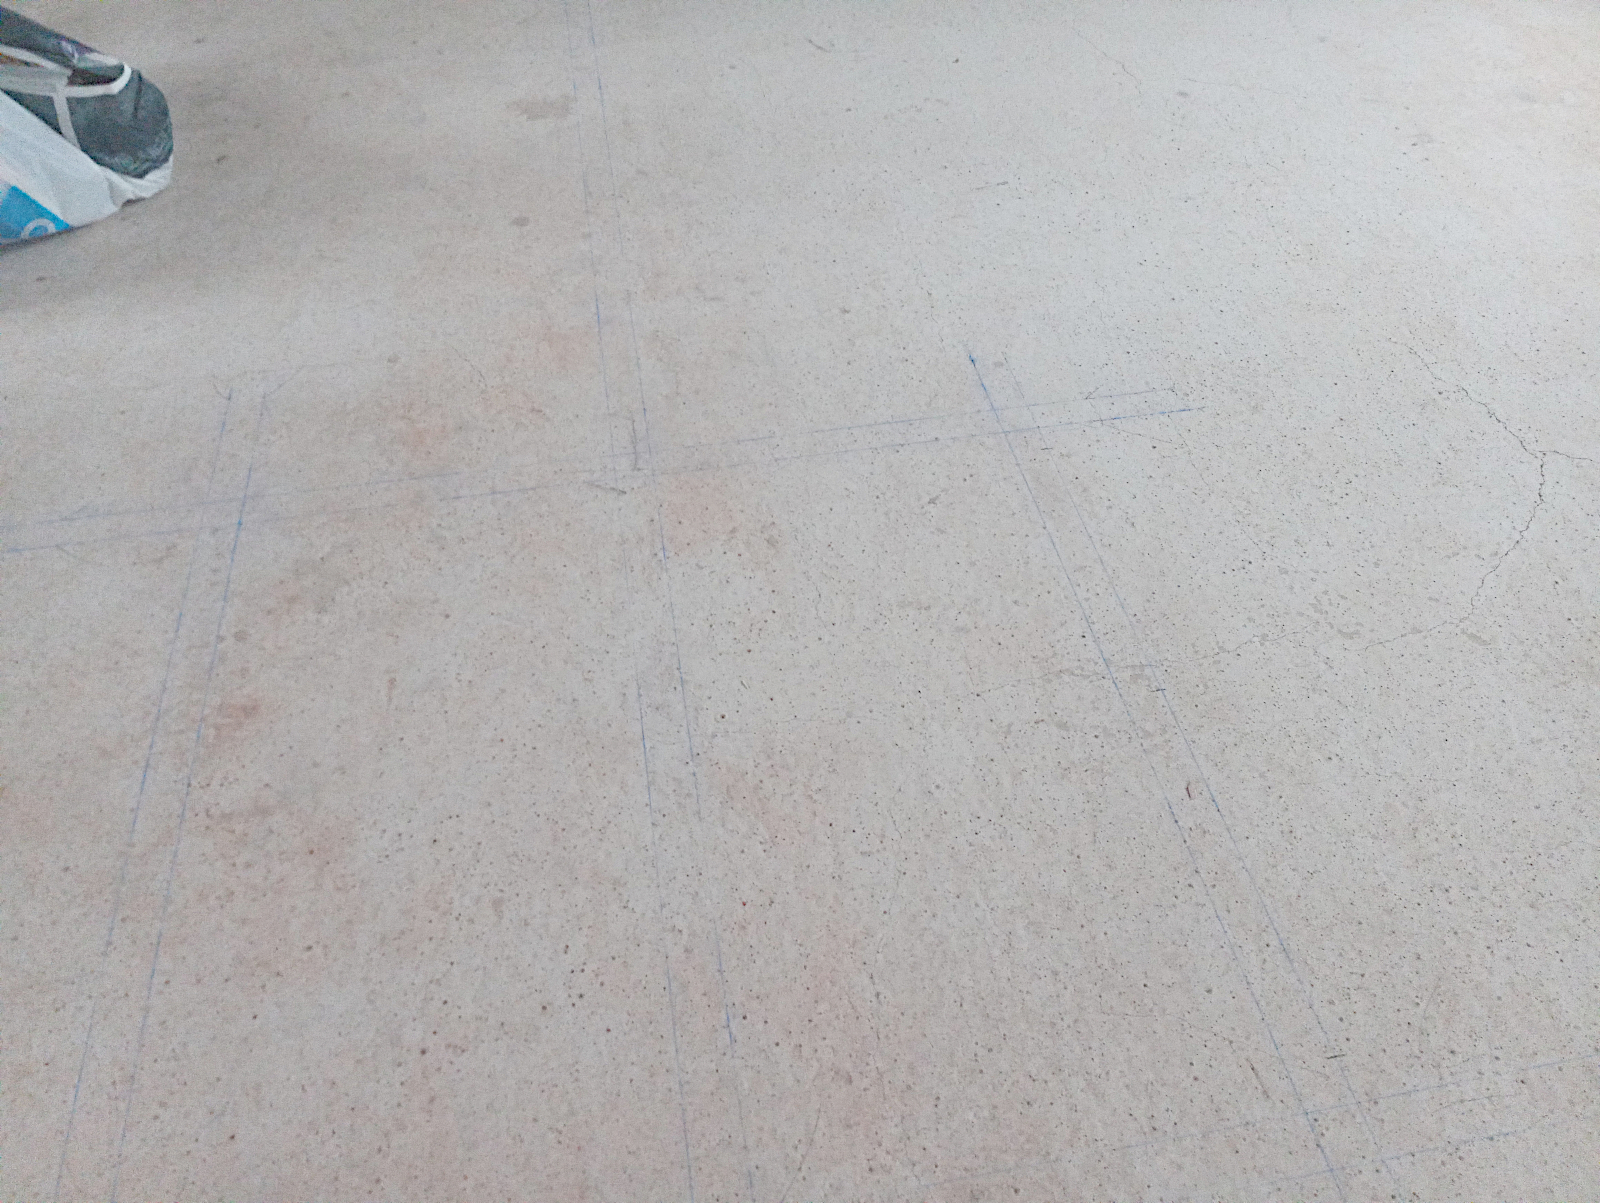
Here’s what I found when I took a look. A trench had been dug from just outside the front door up to the water main where the new connection will be made. At the moment there’s a standpipe there for construction use and my caravan but that will disappear when the house is finally connected.

null

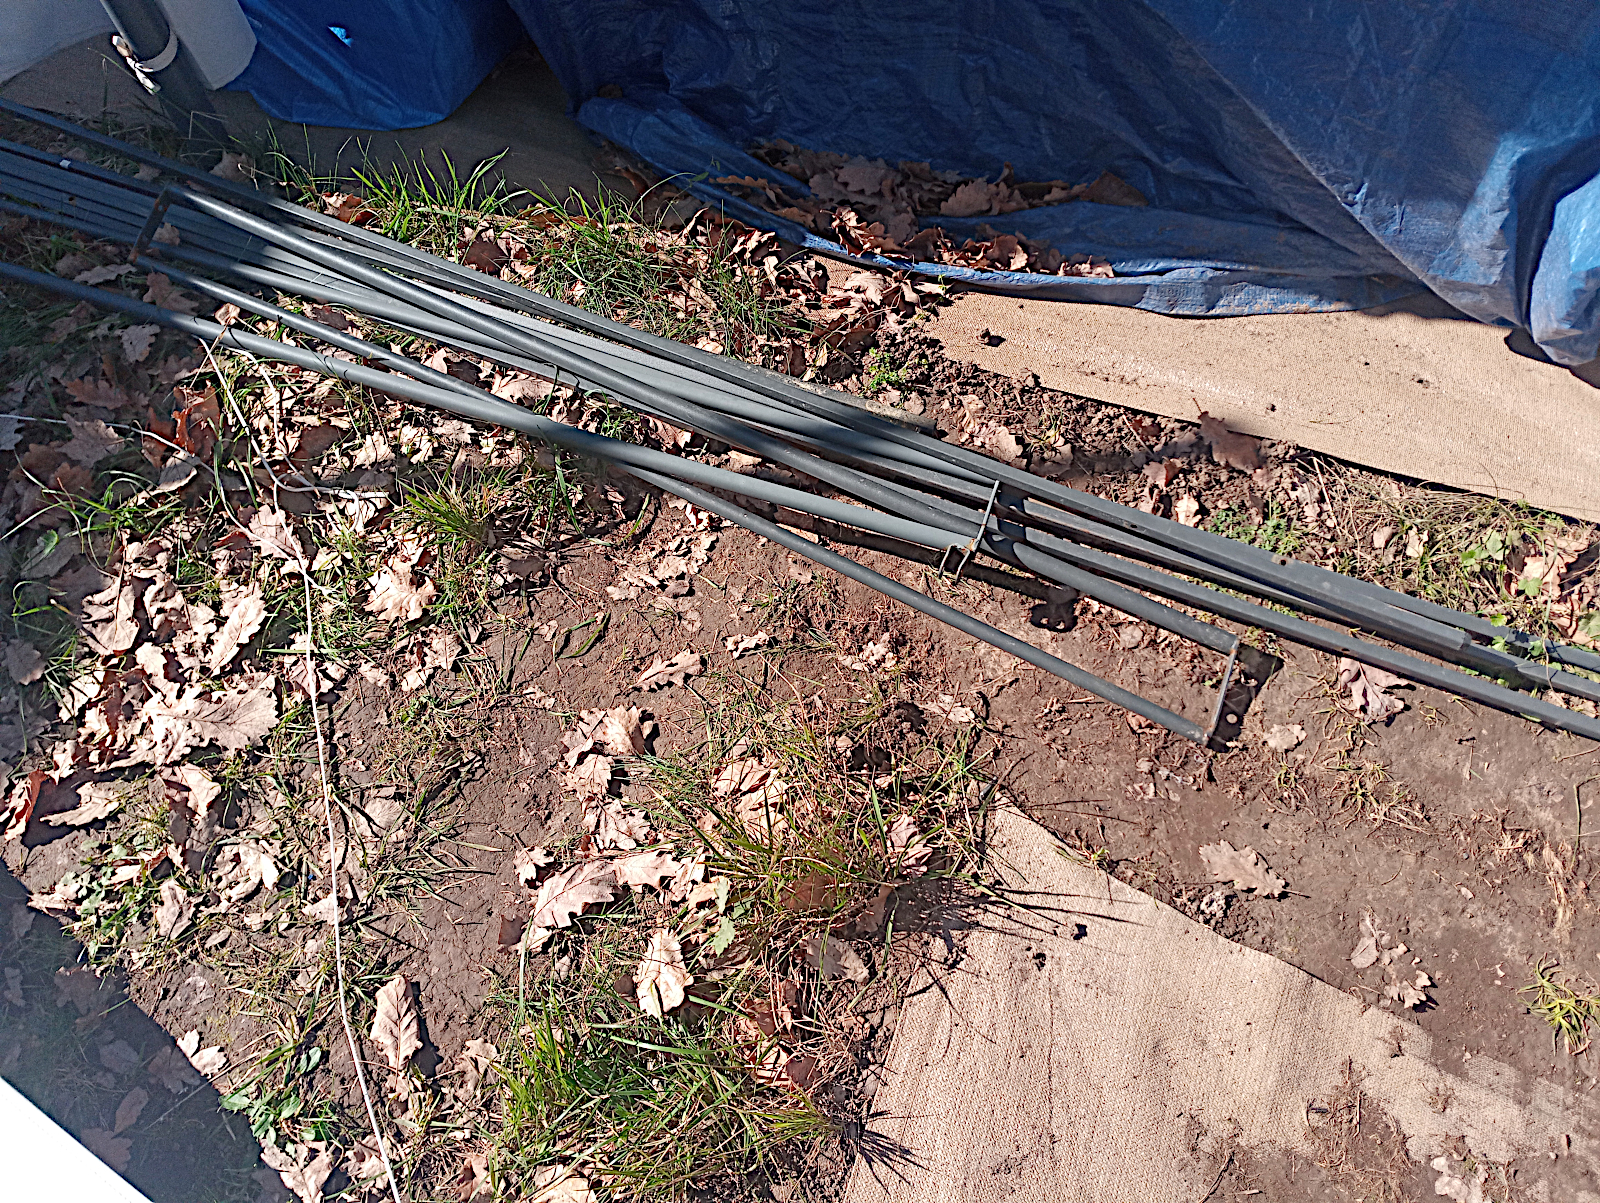
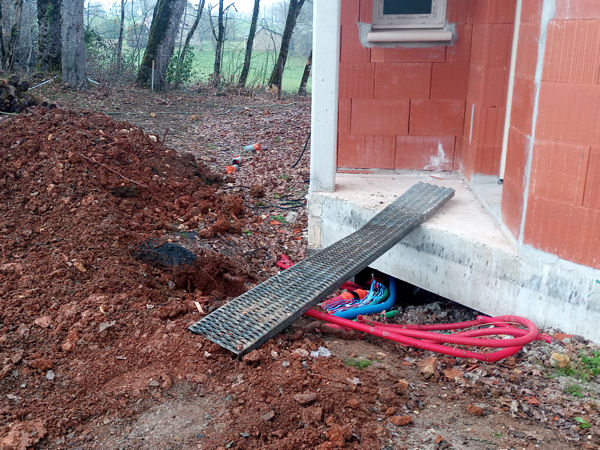
The next shot shows the bunch of ‘gaines’, cable and tubing in the other end of the trench in the hole outside the front door.

null

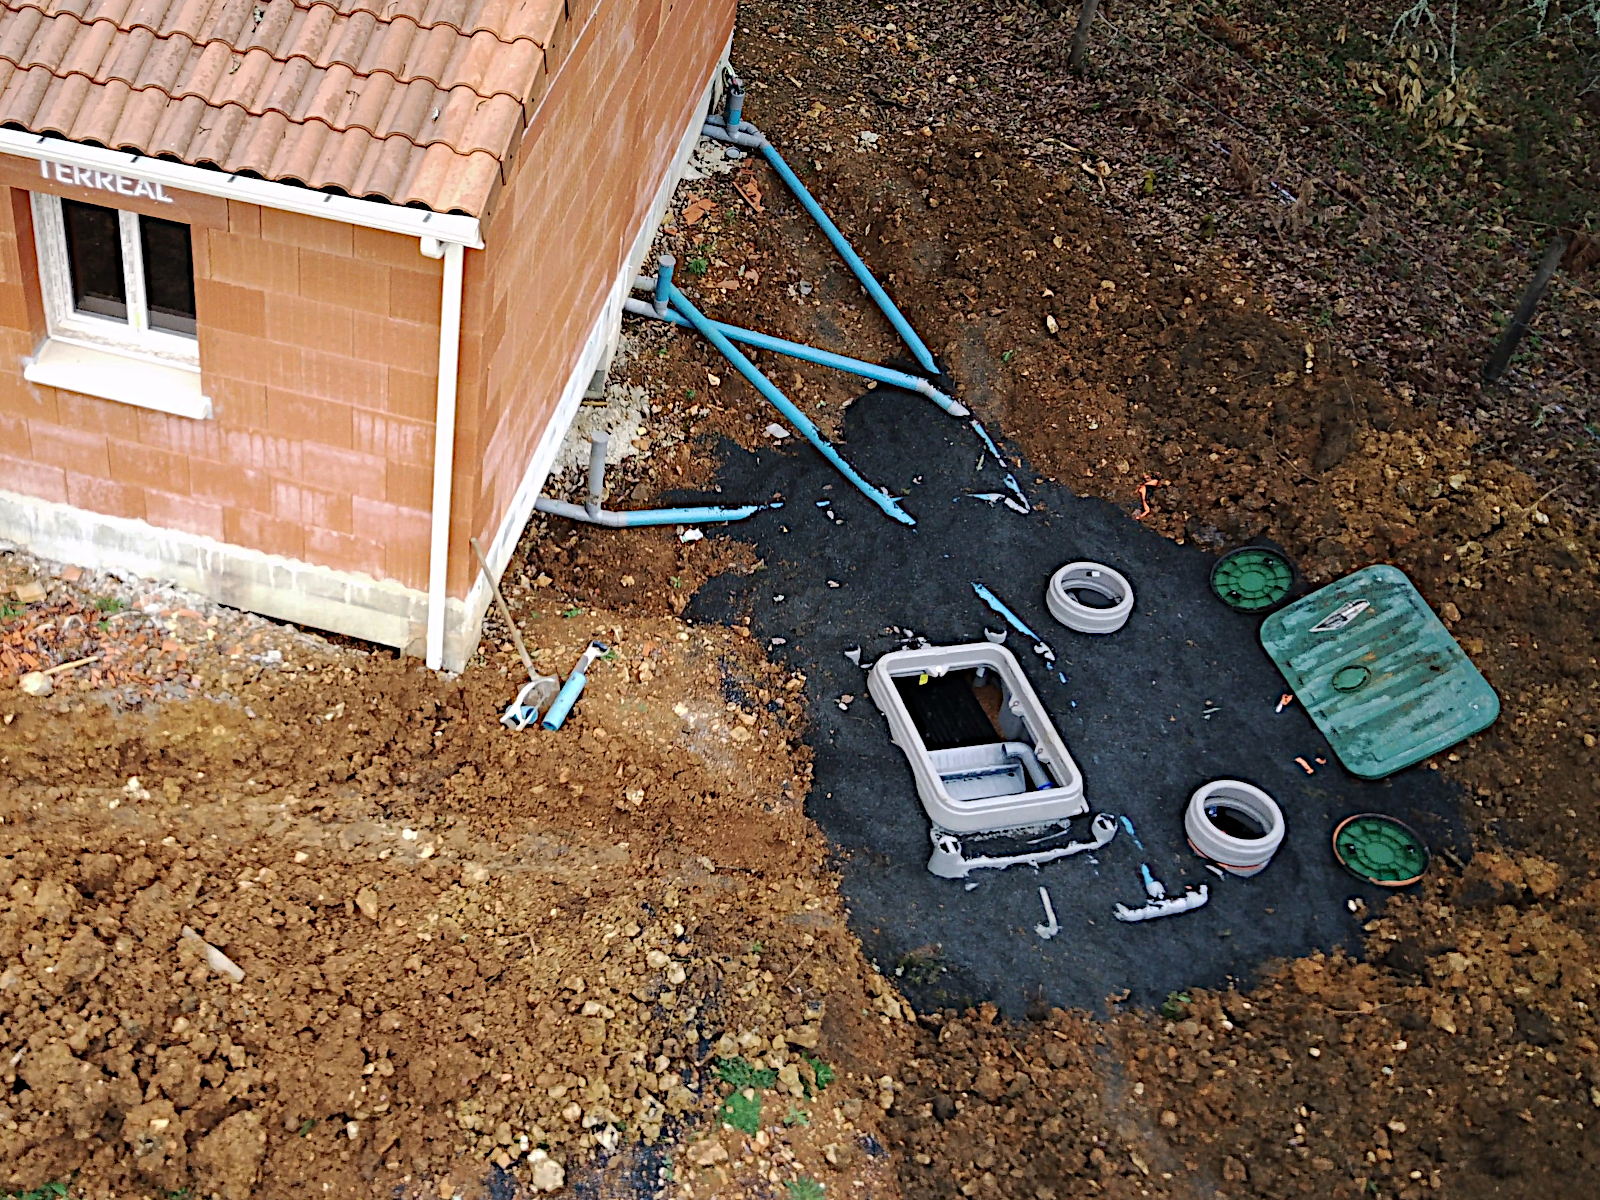
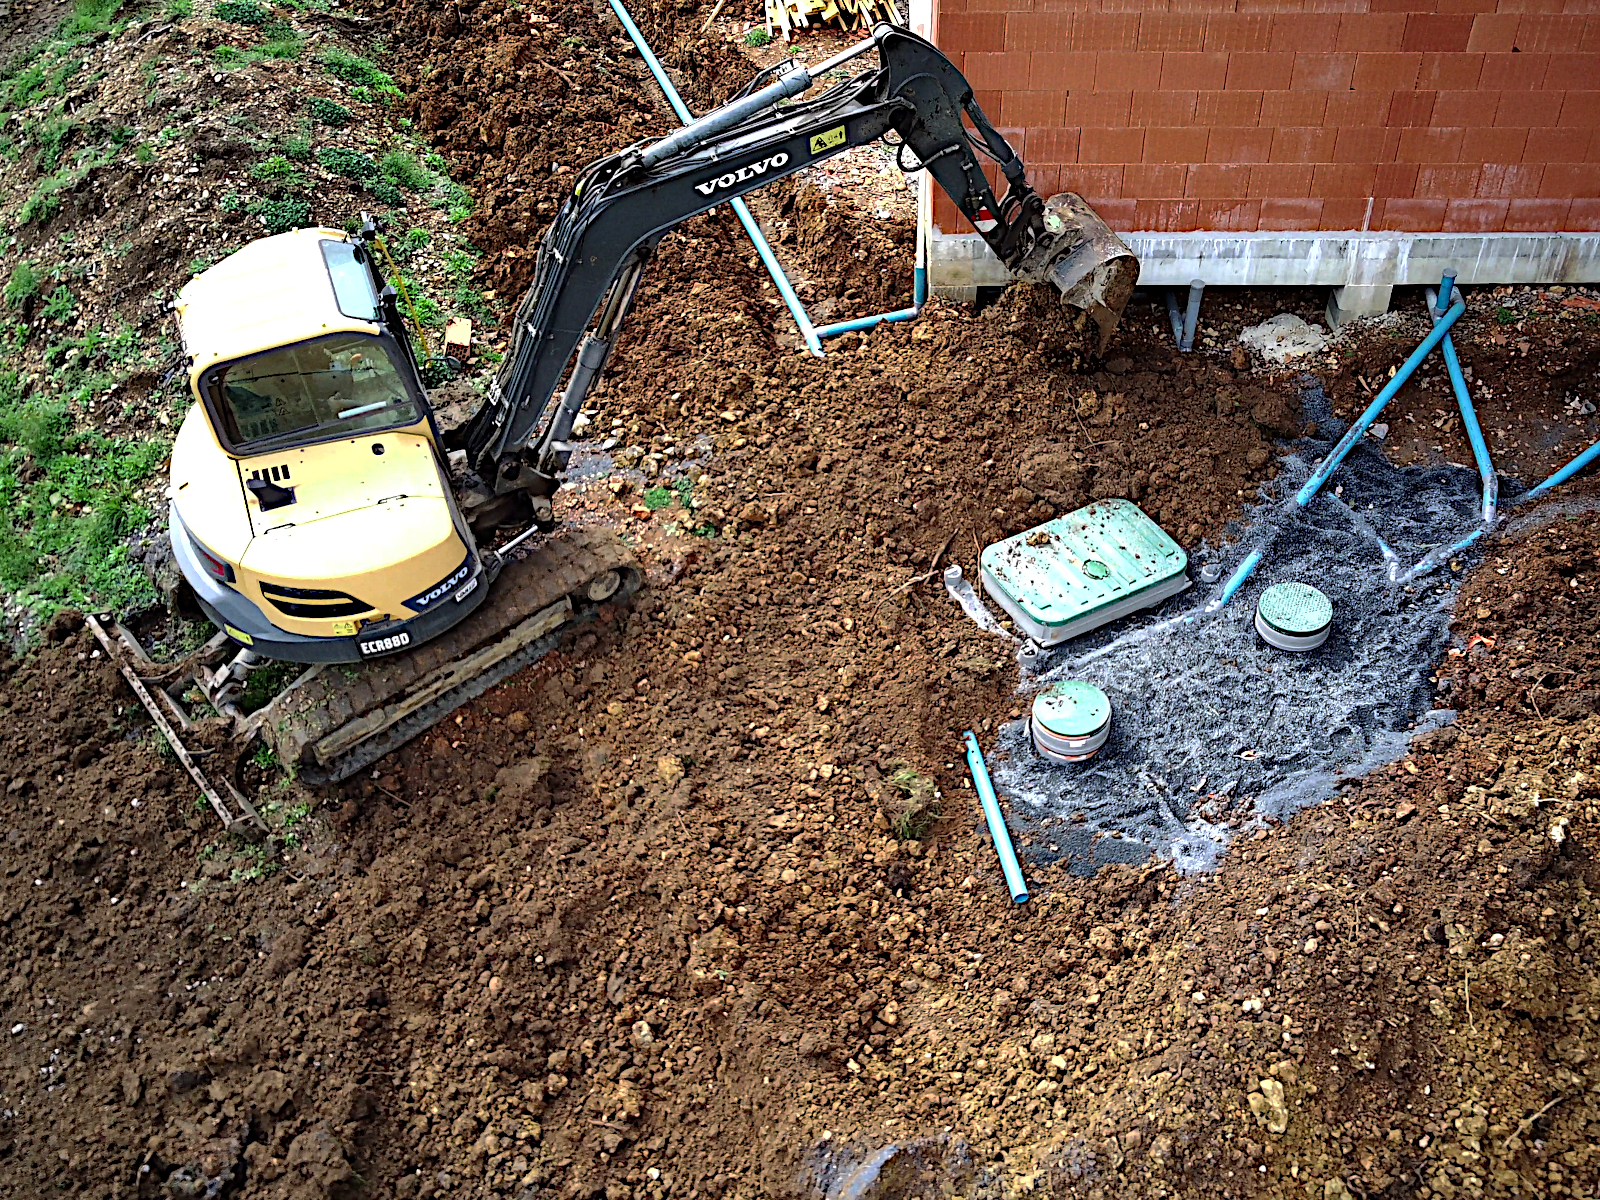
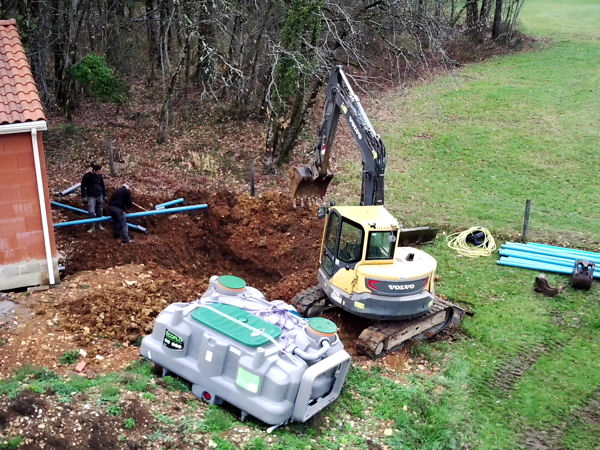
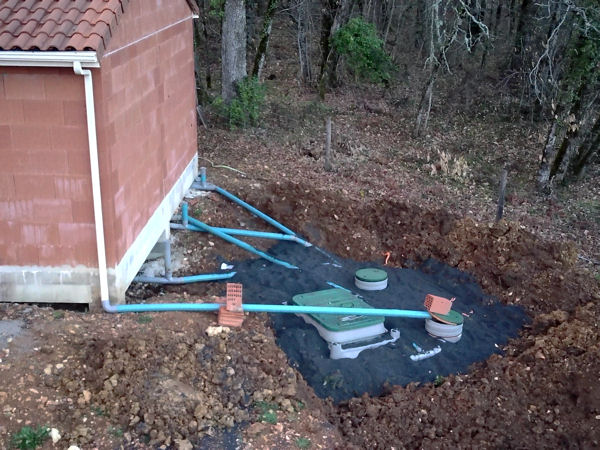
Now coming back down to ground level, here’s another shot of the ‘fosse septique’ taken at the end of the day.

null

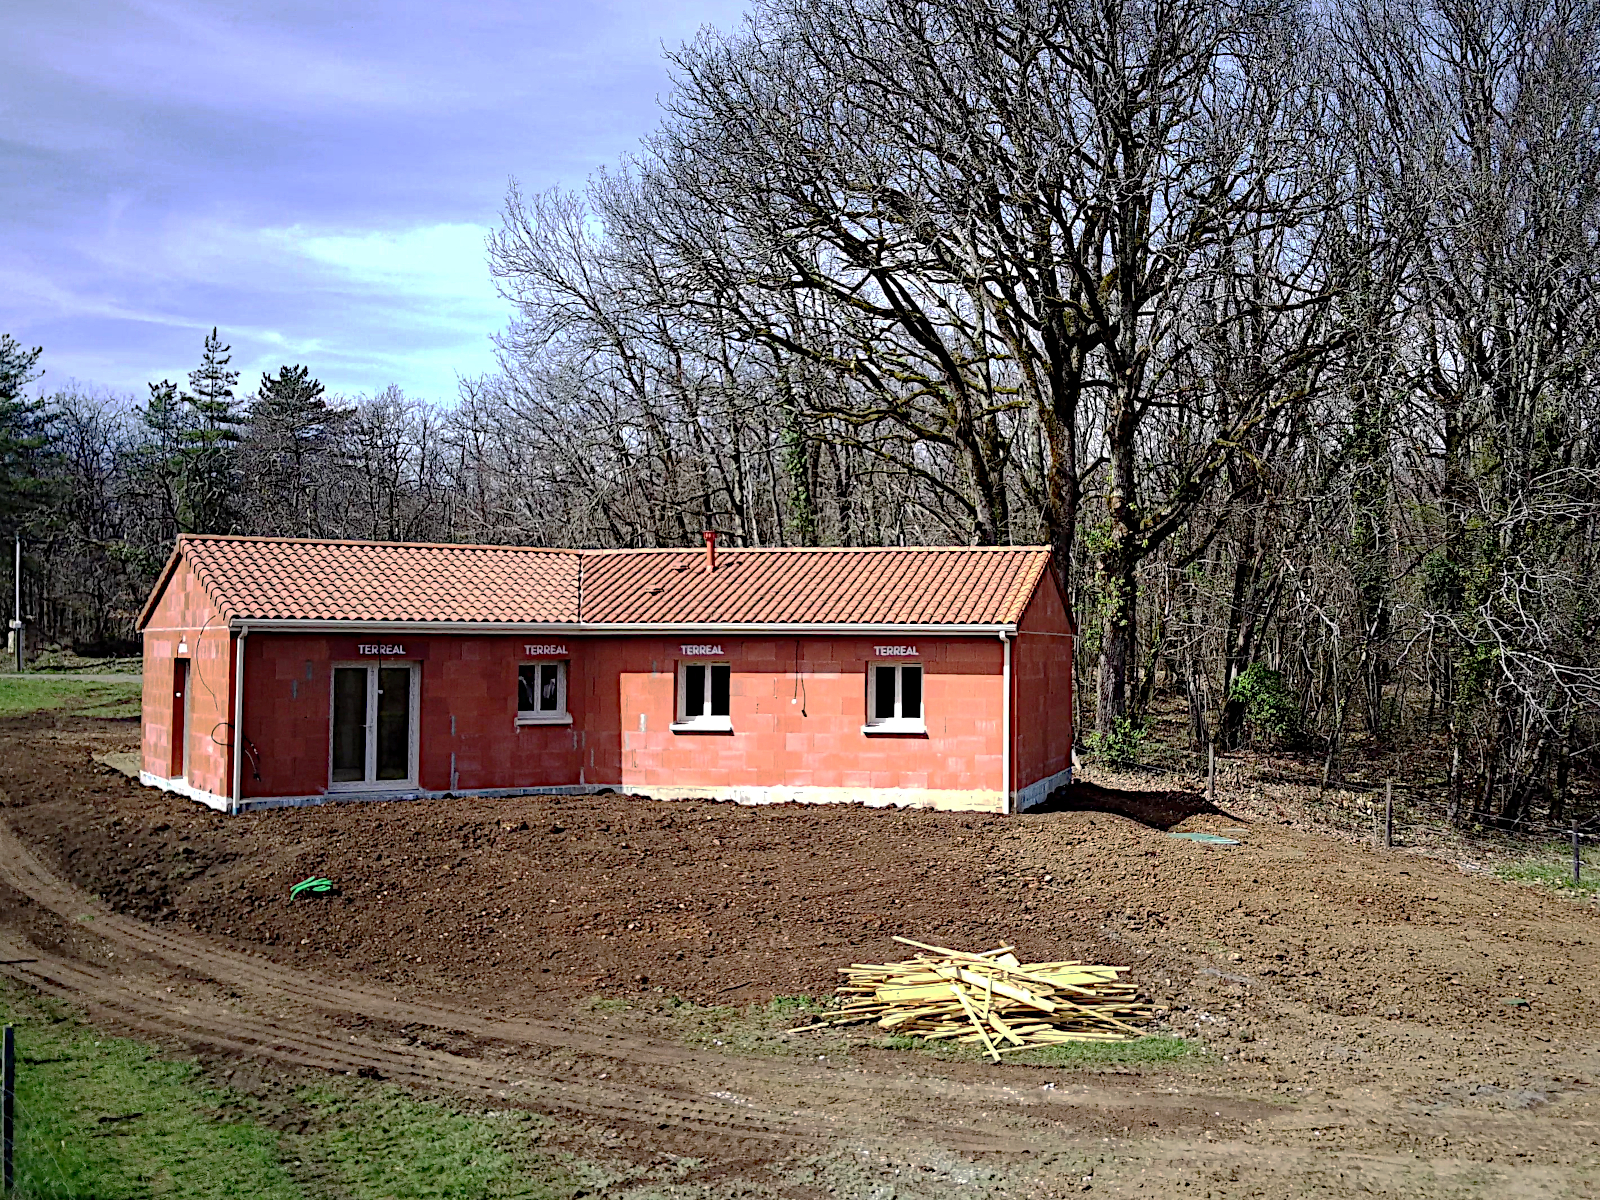
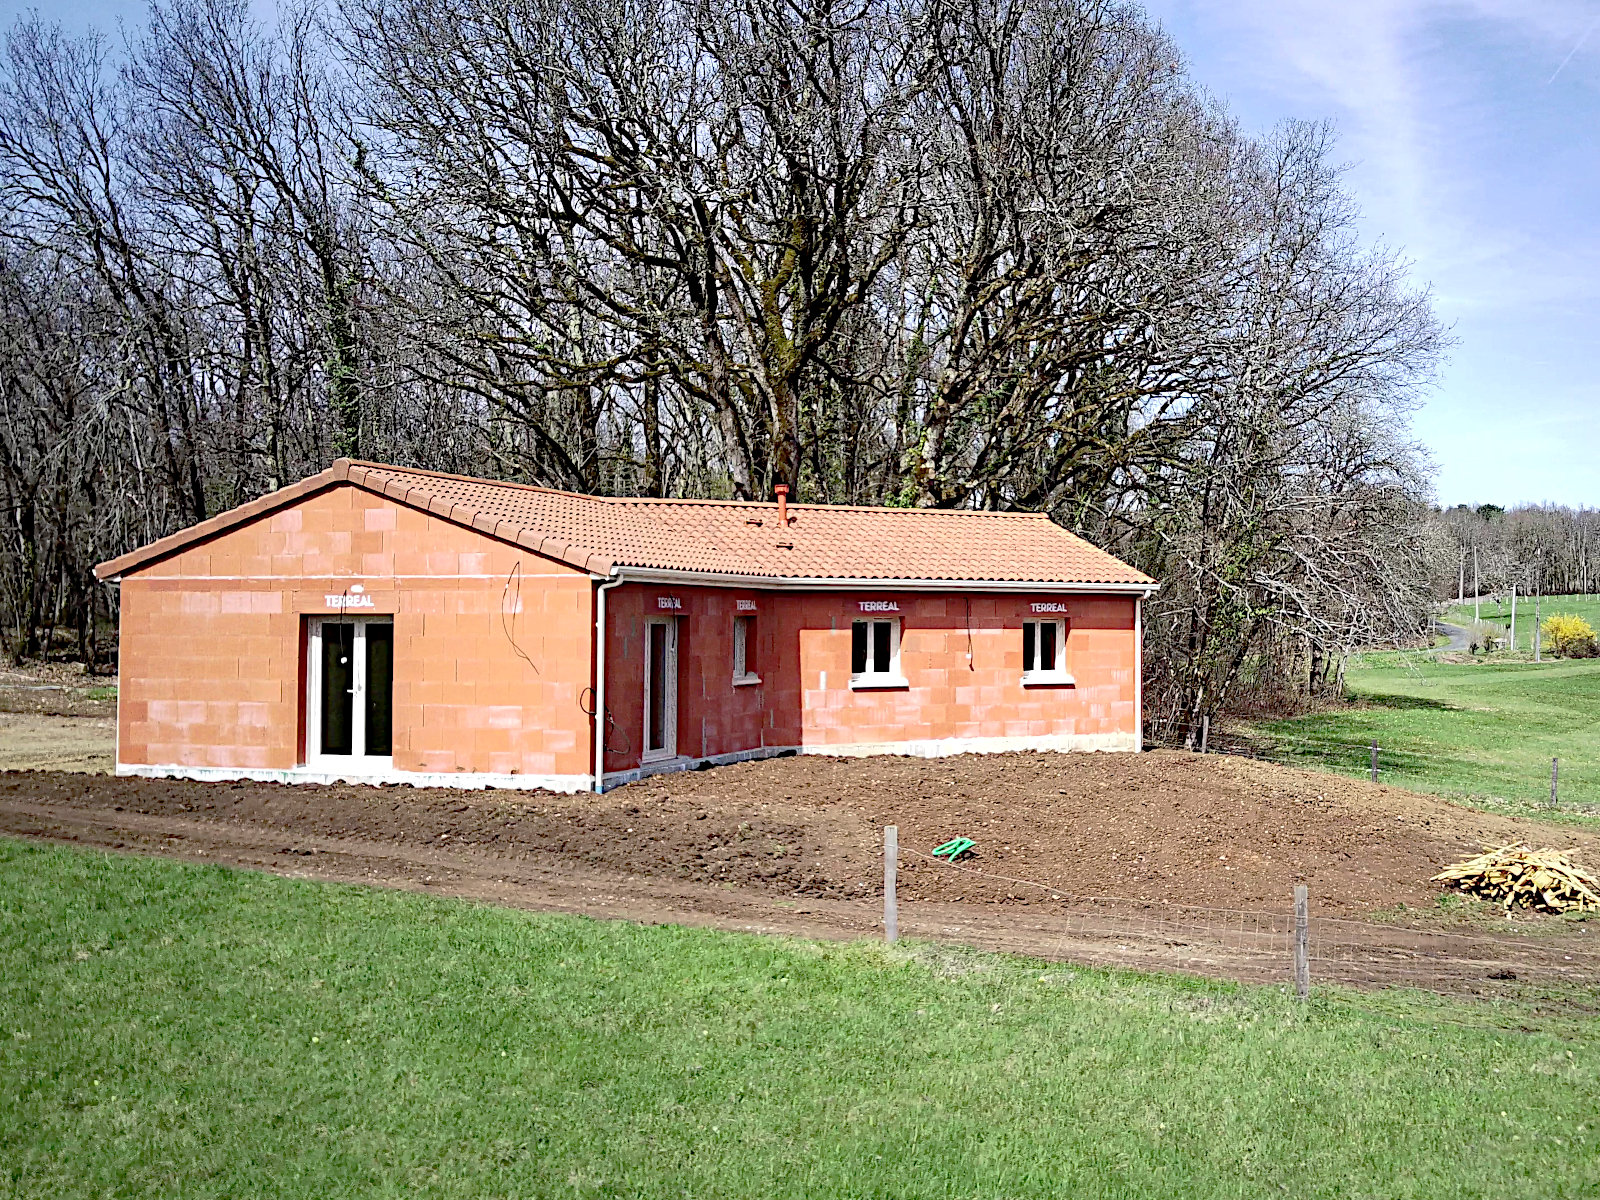
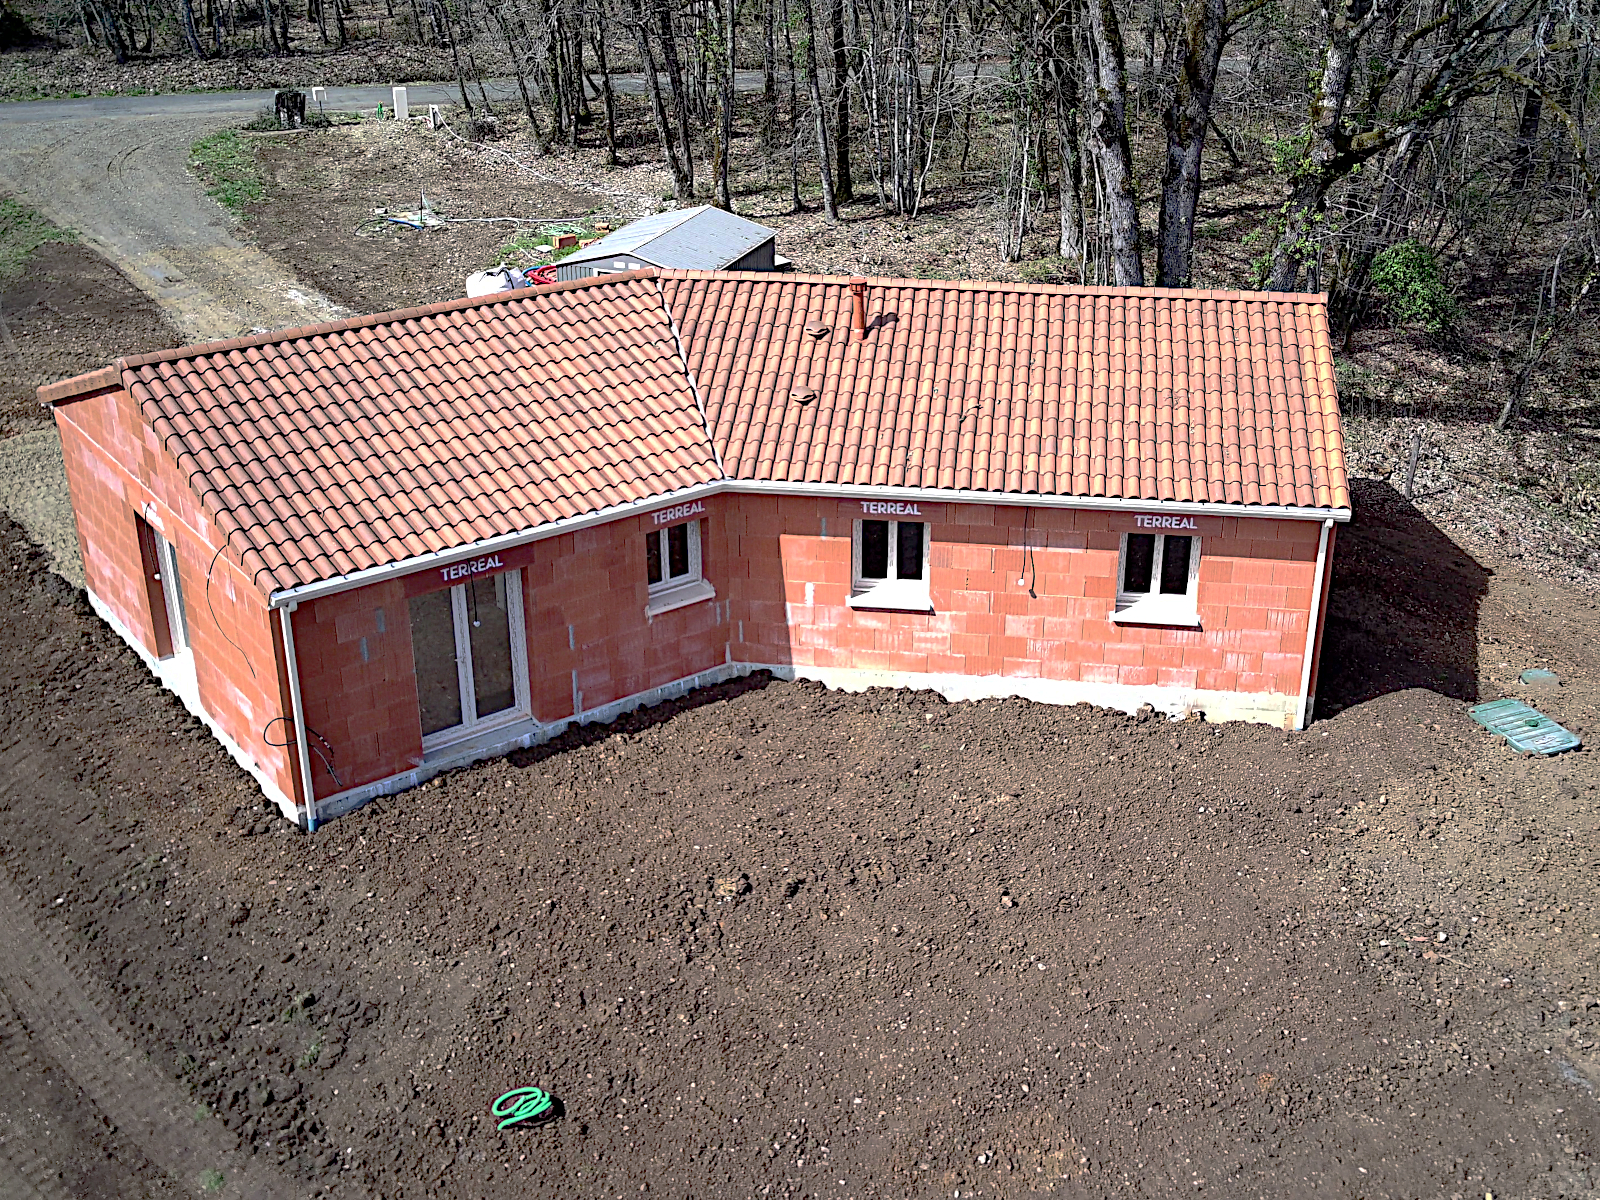
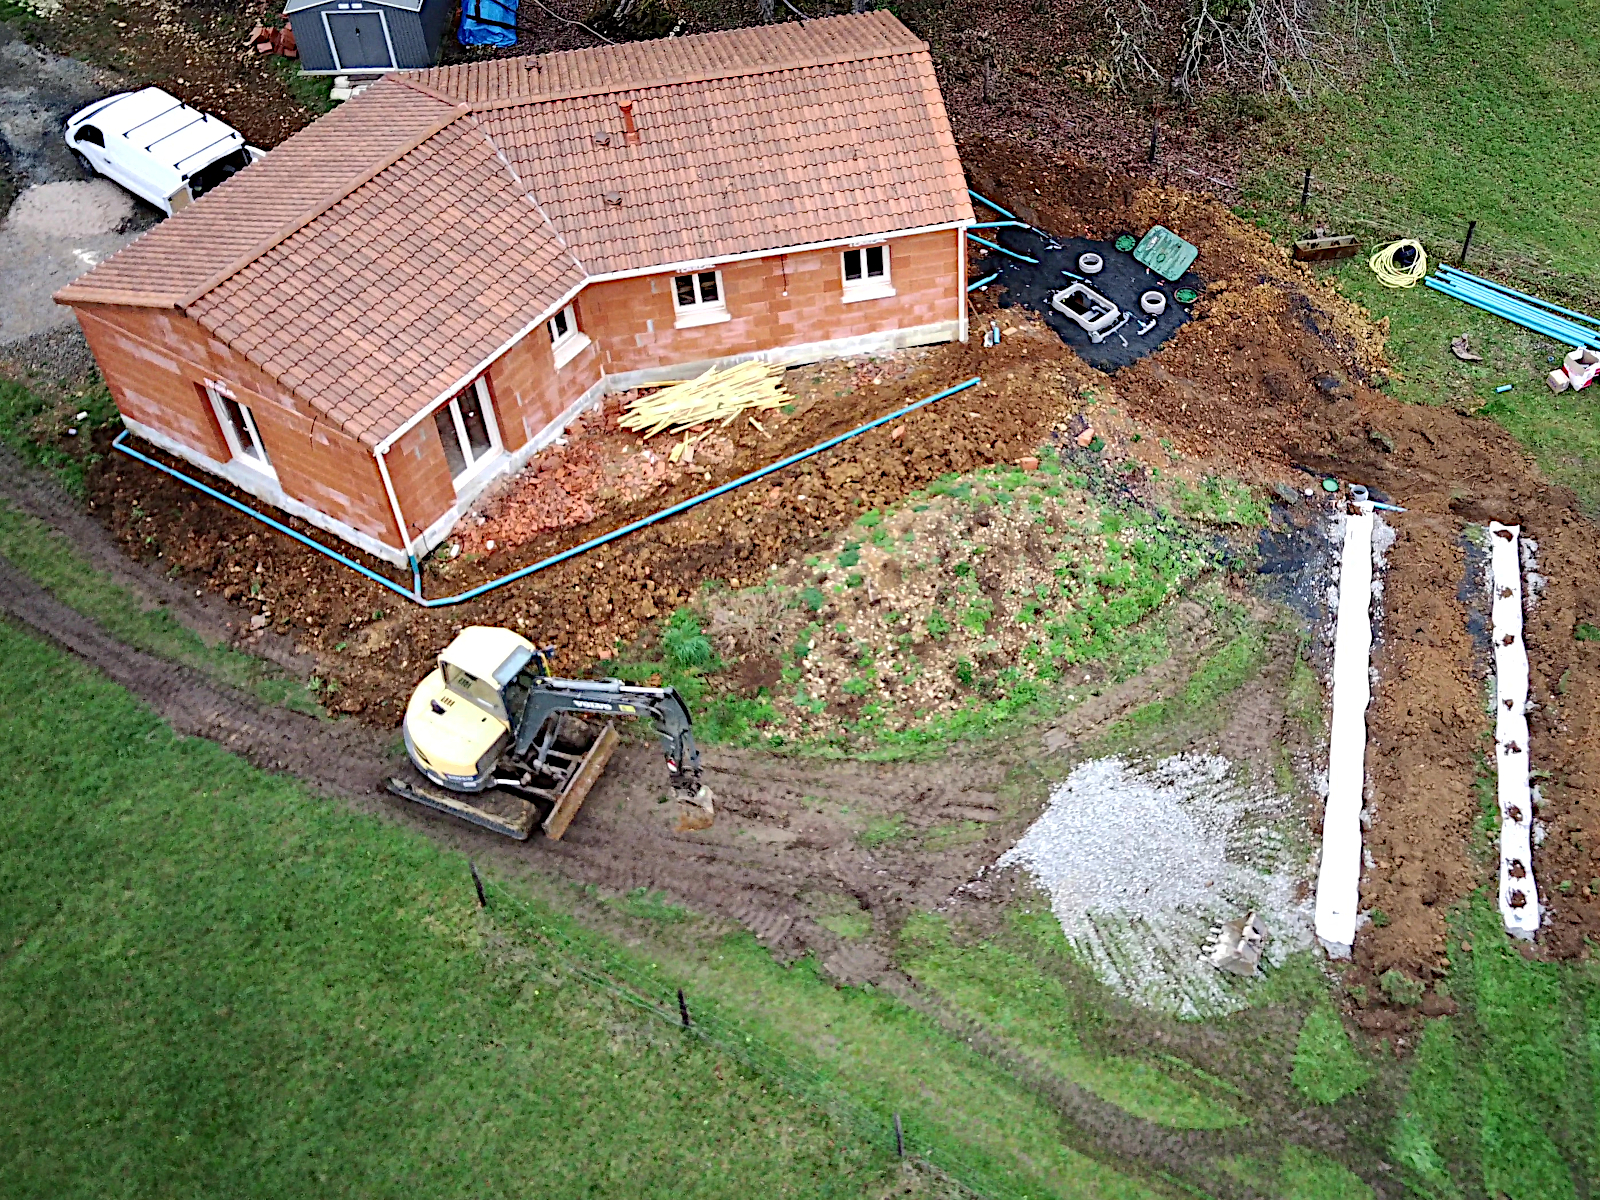
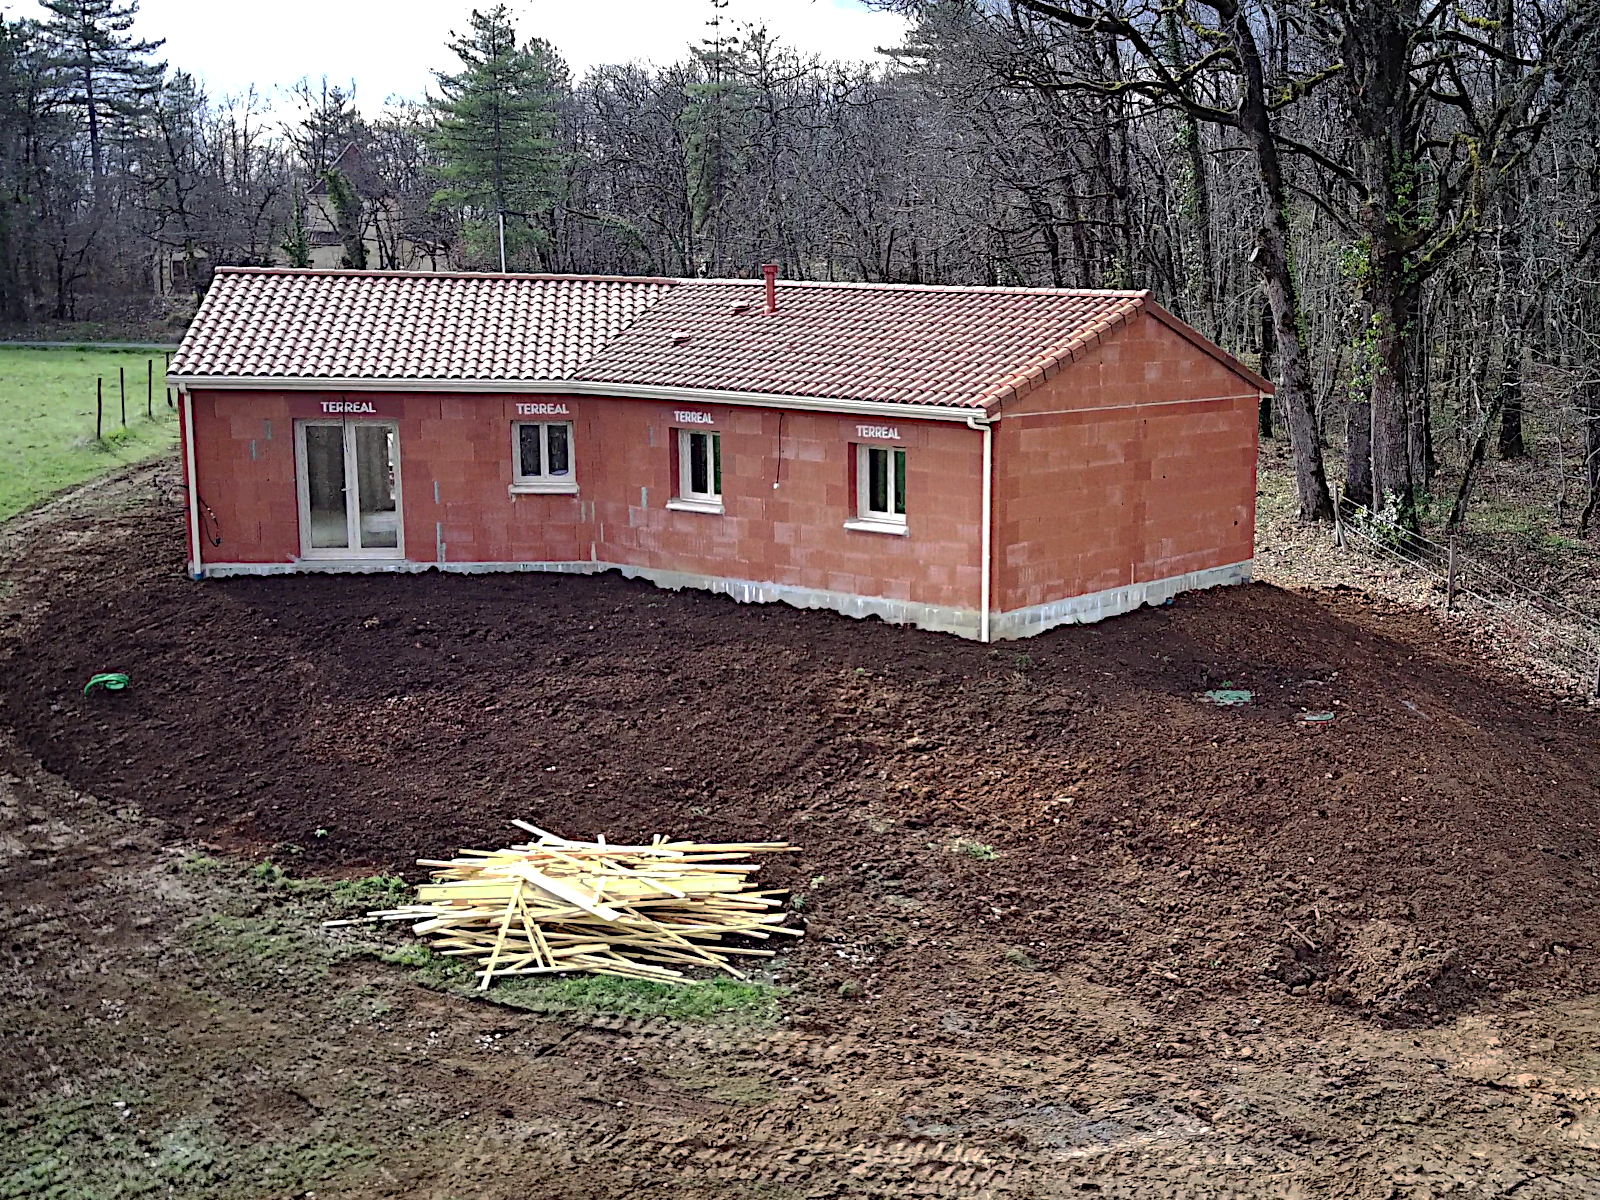
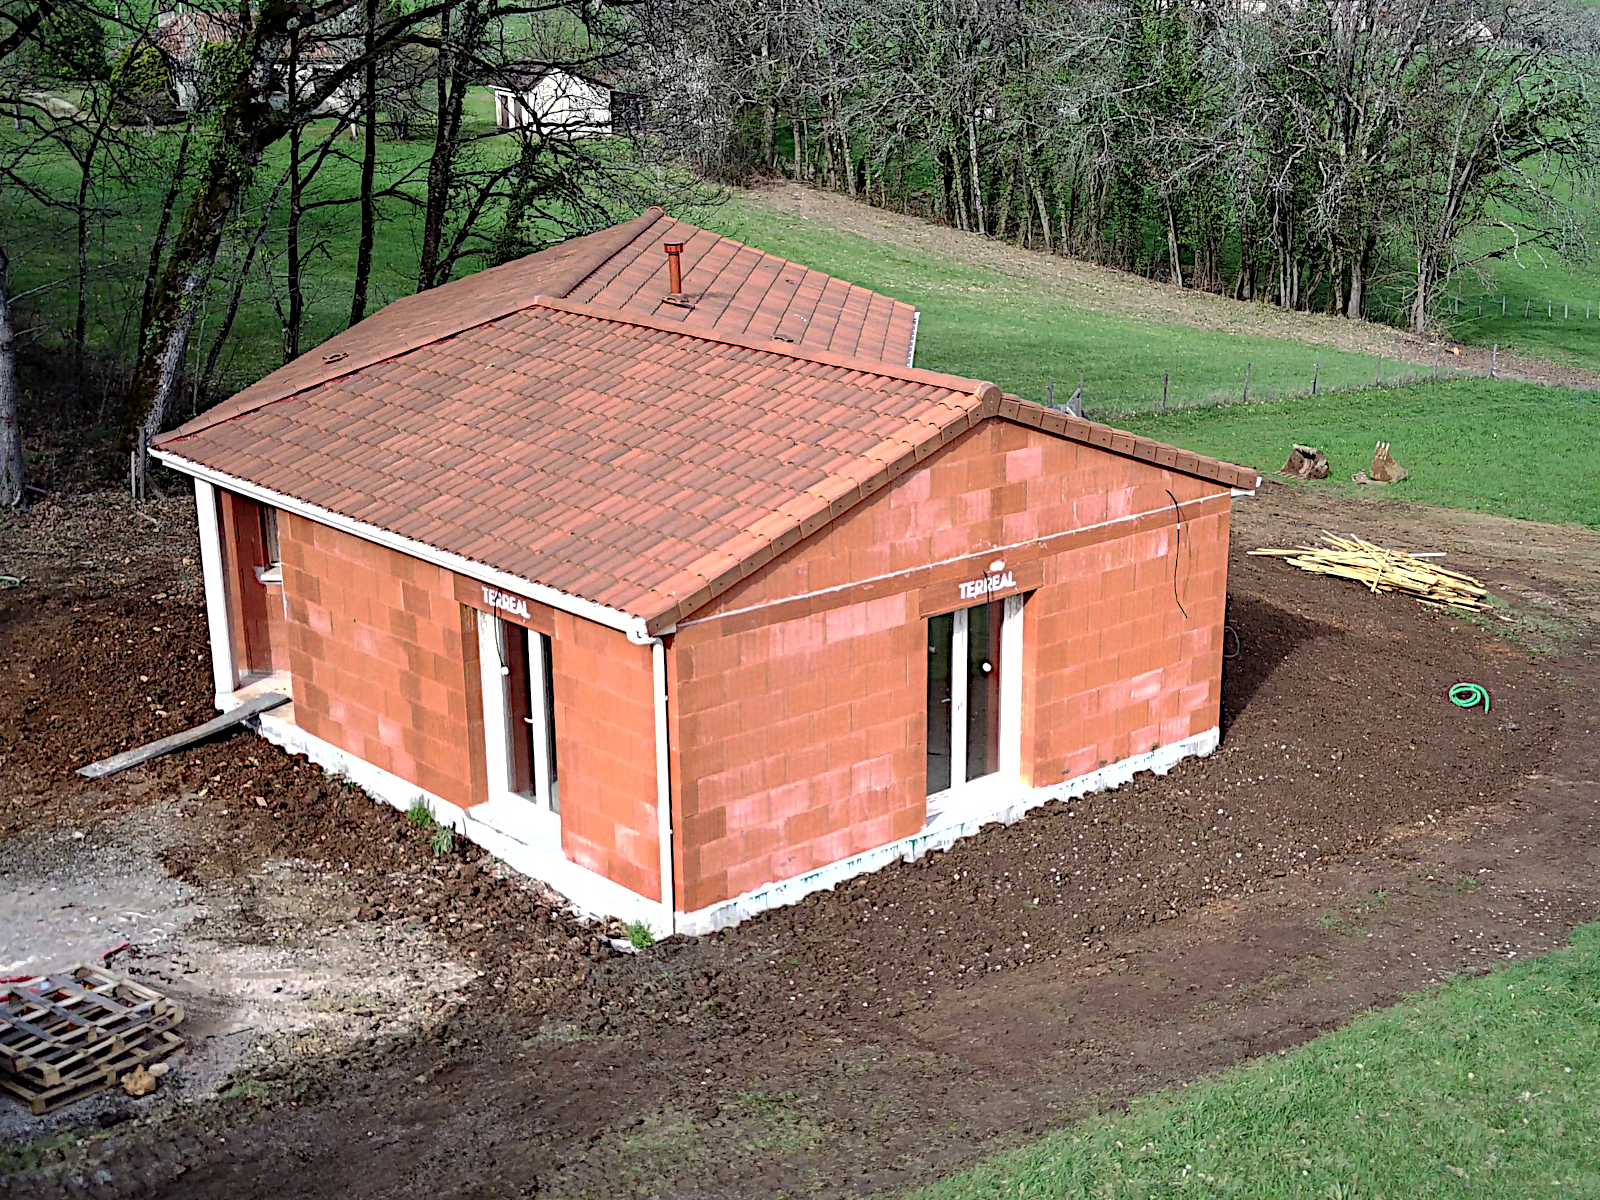
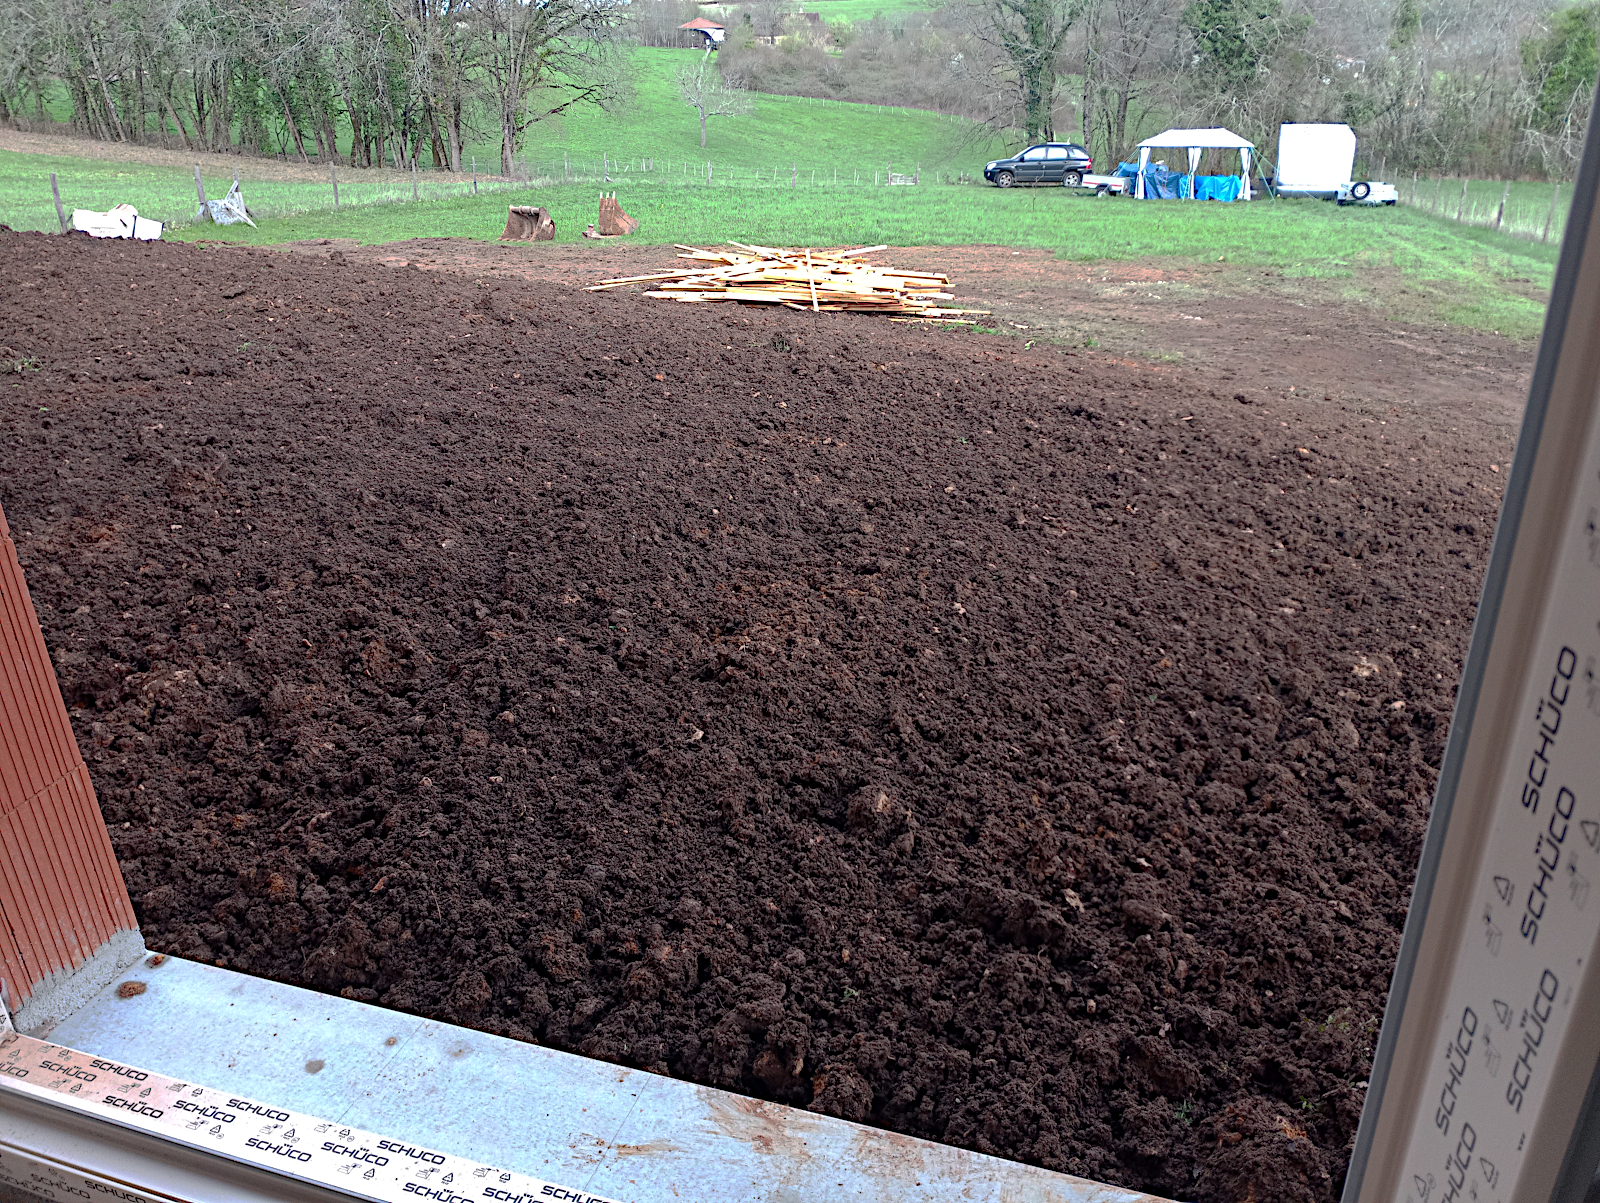
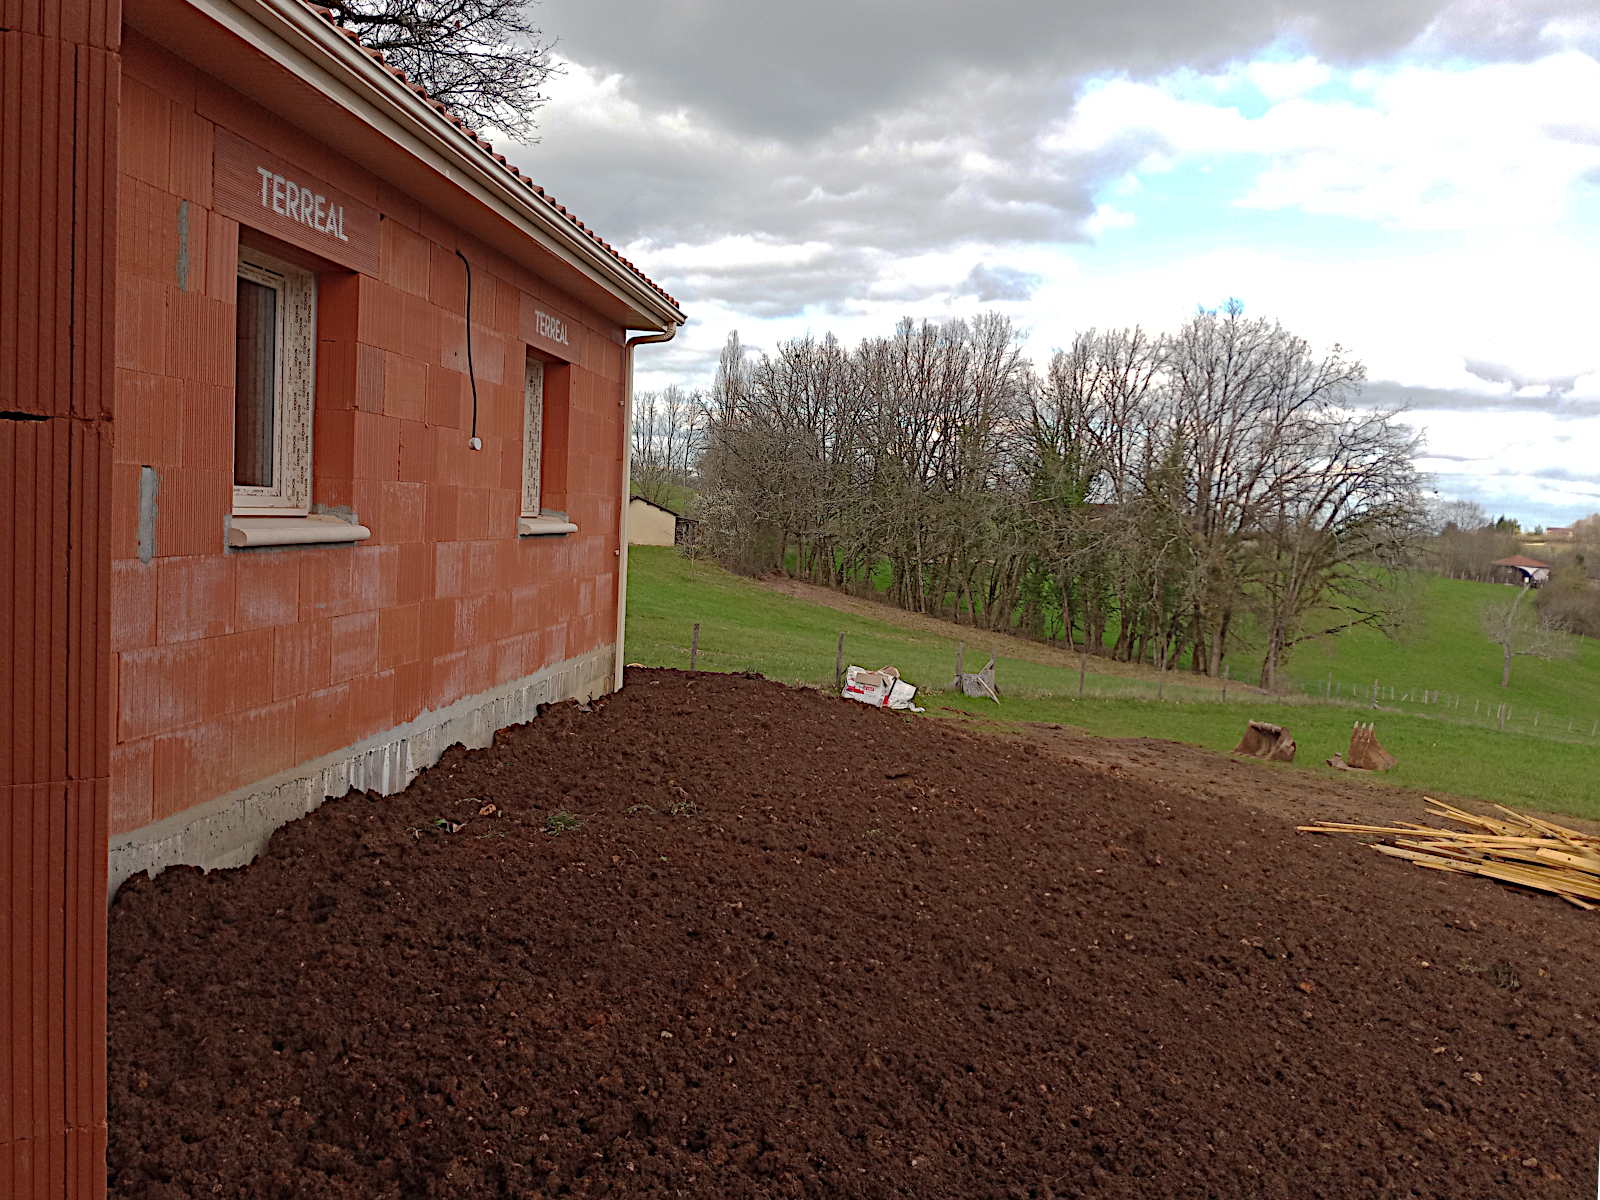
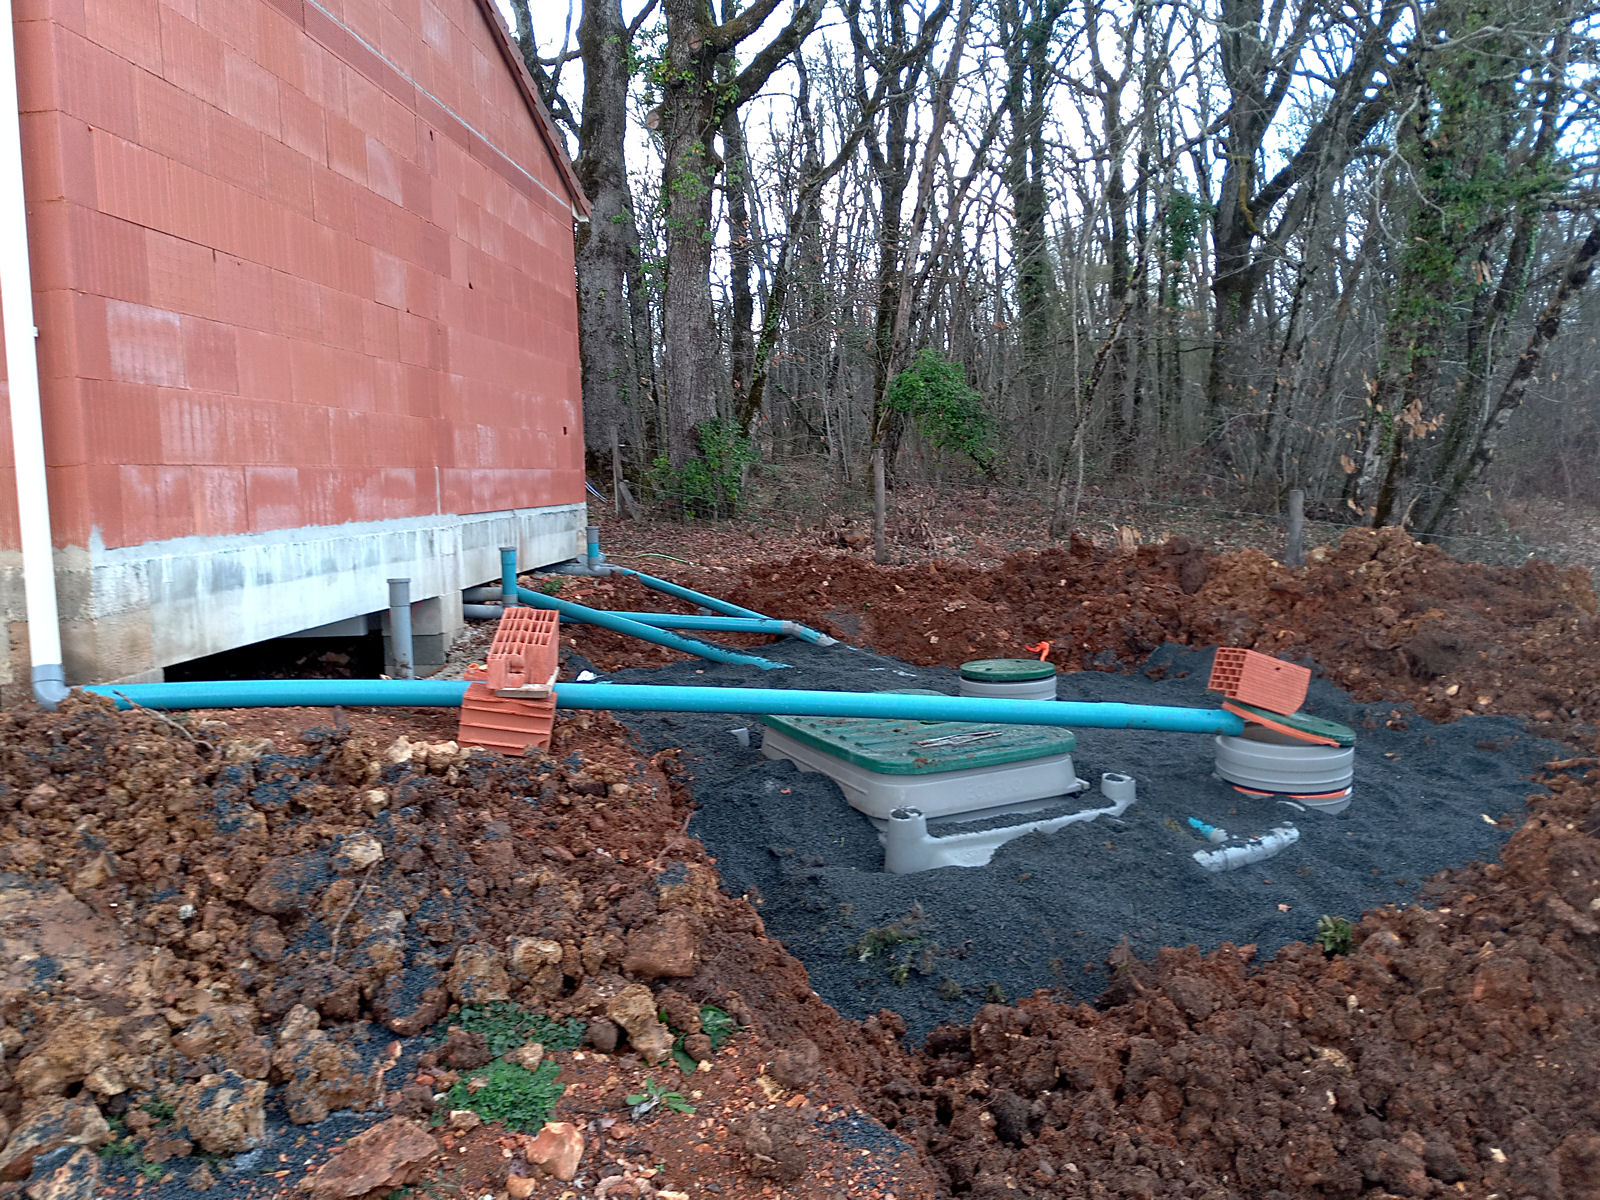
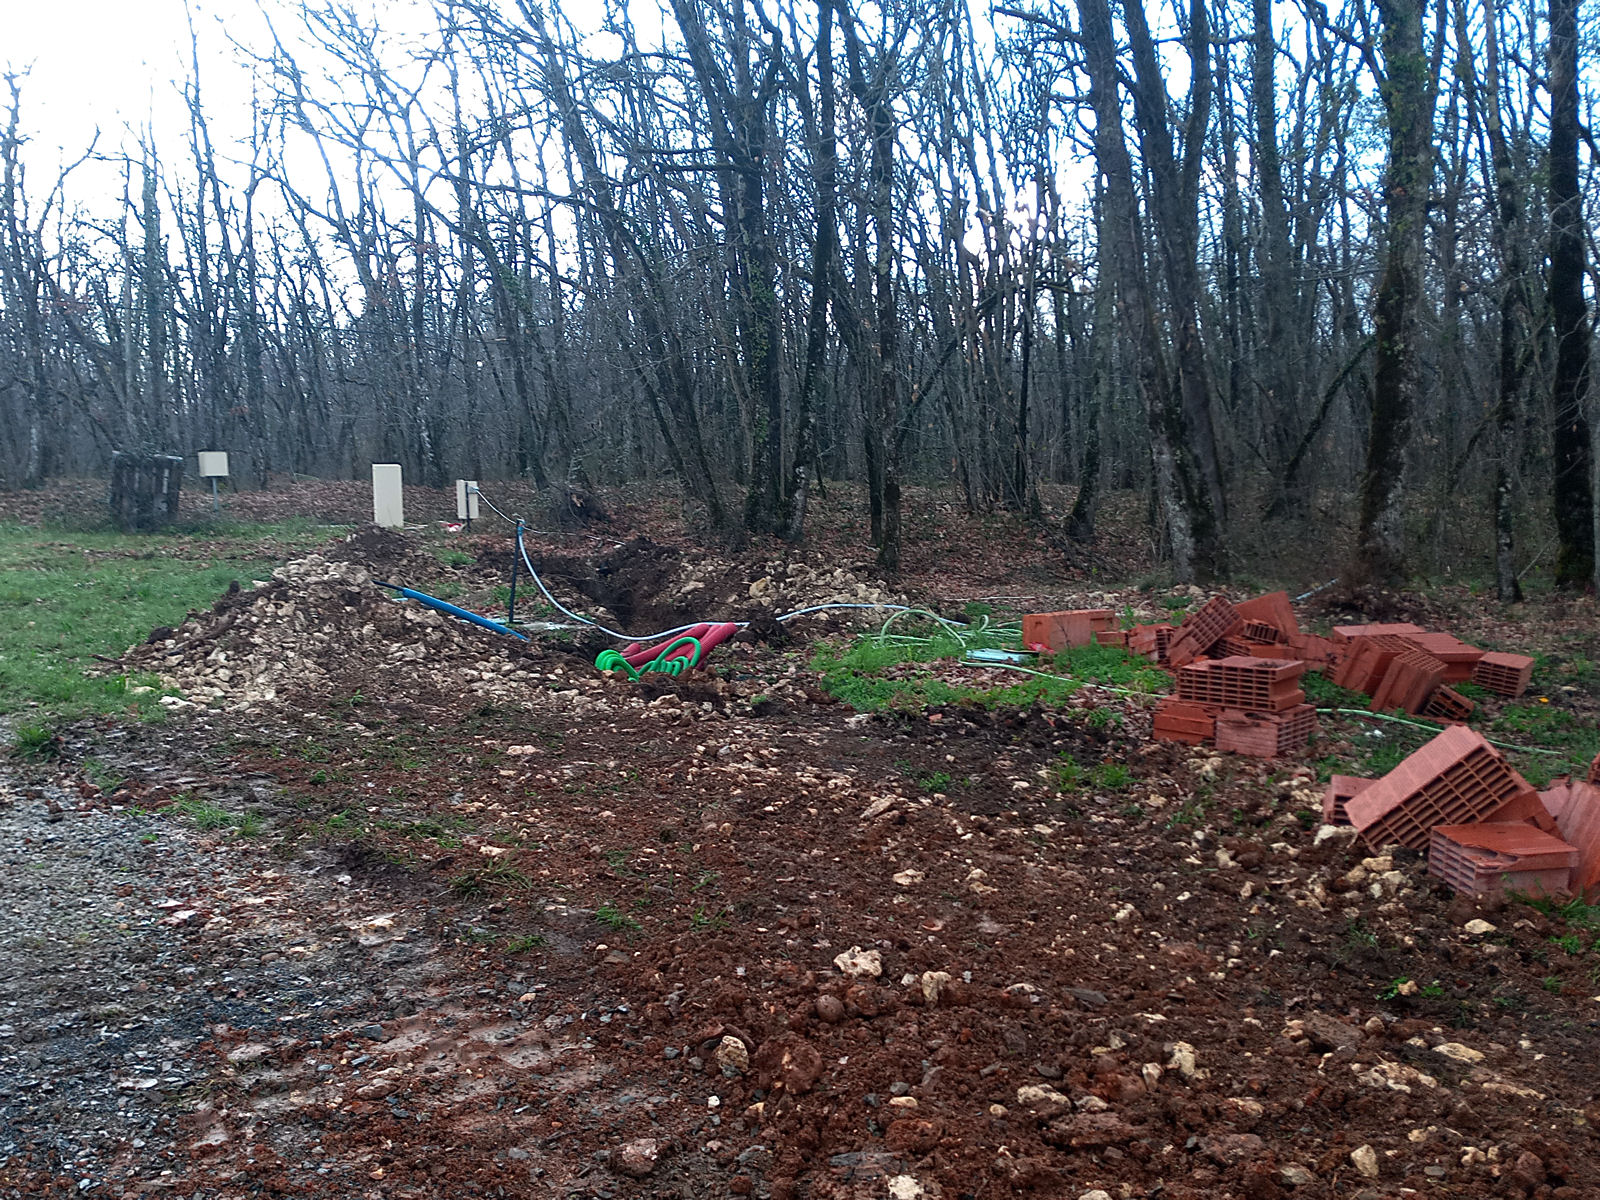
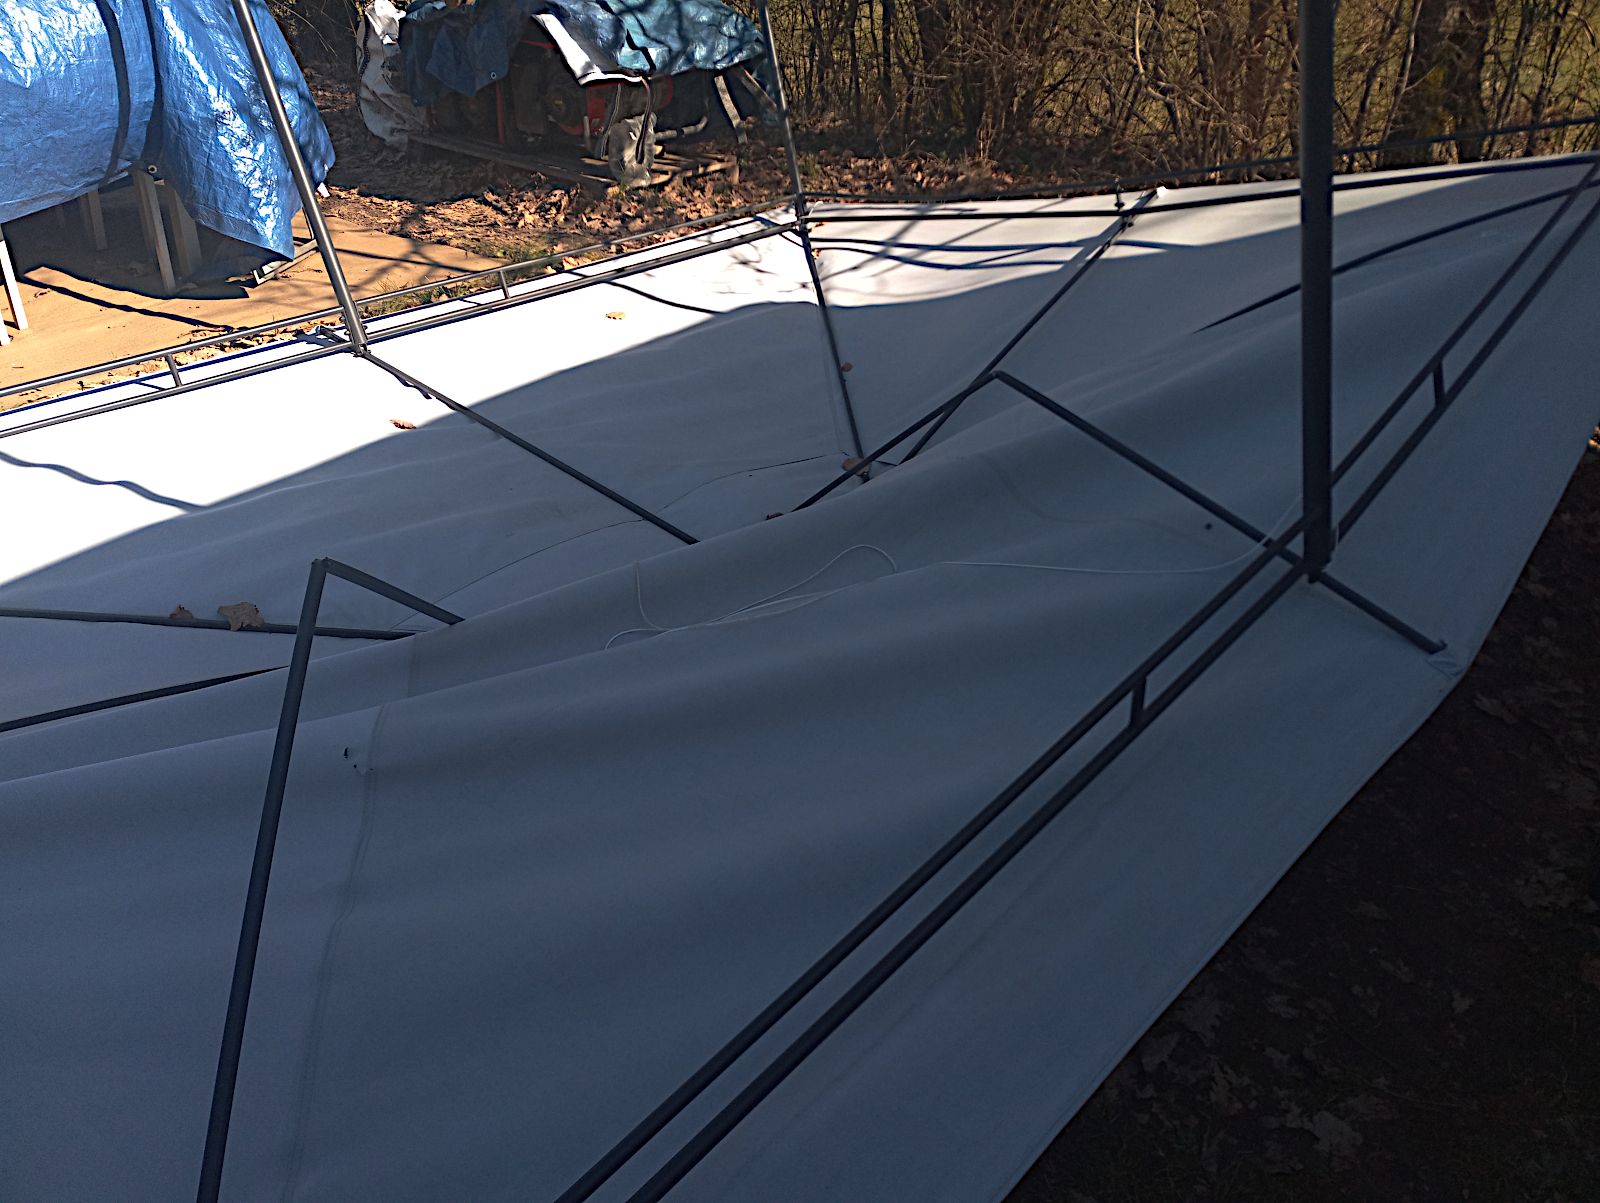
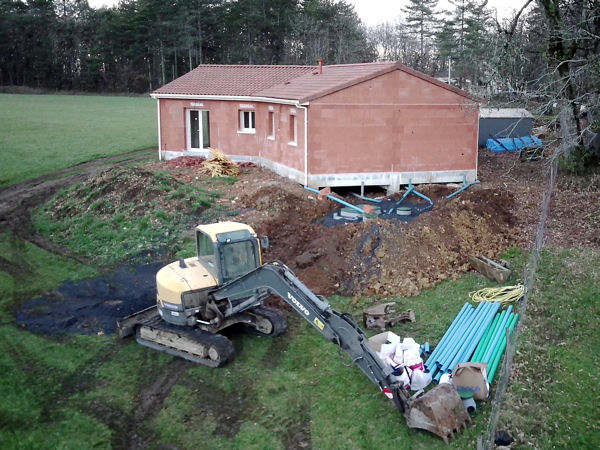
The next shot shows the state that the land is now in with the machinery that it’s had driven over it and the materials it’s had dumped on it. The words ‘omelette’ and ‘eggs’ come to mind…

null

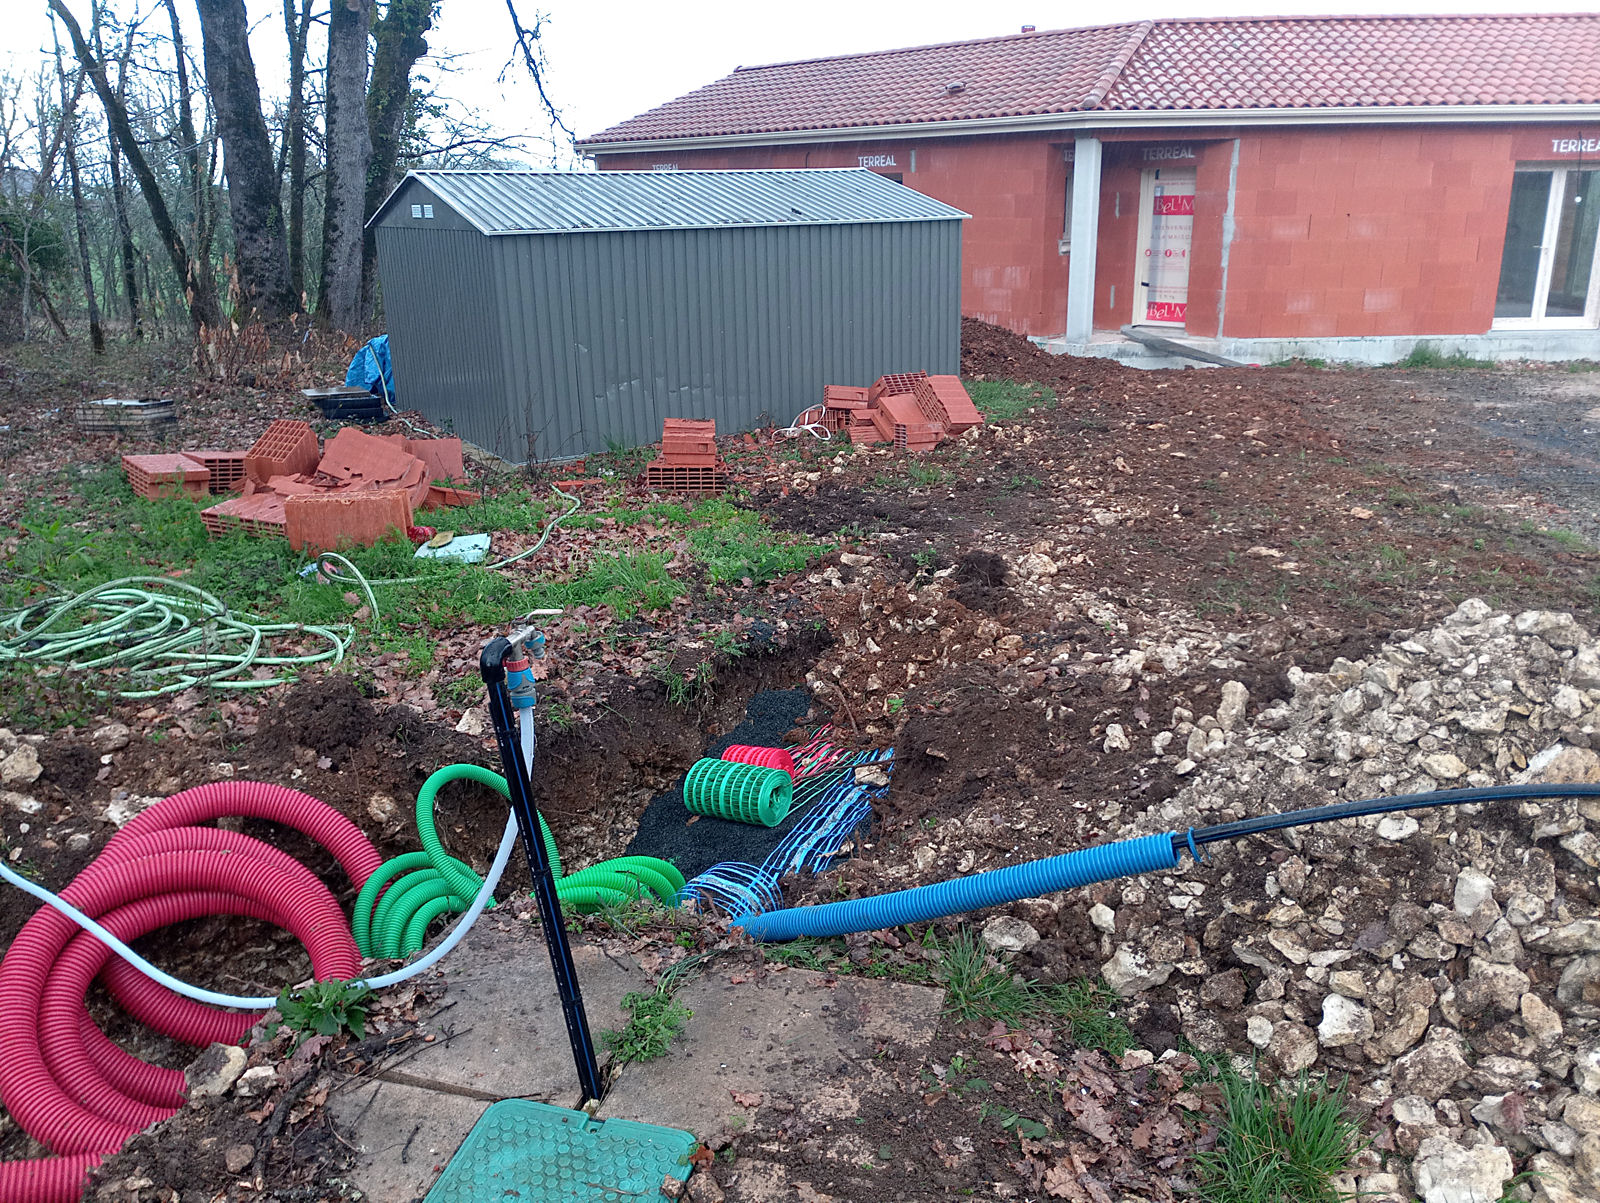
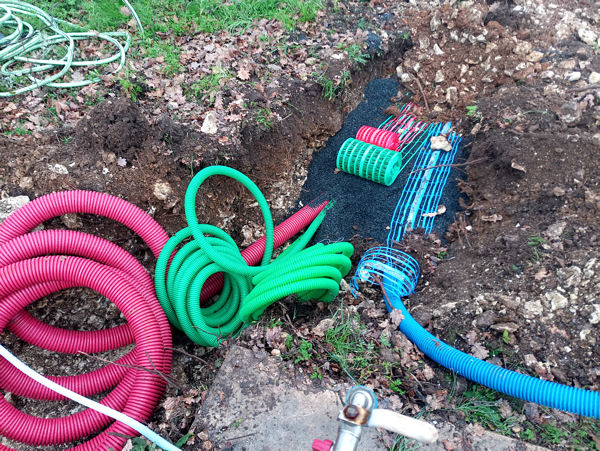
Now five more shots of the trench containing the electrical and water services.

null

null

null

null

null

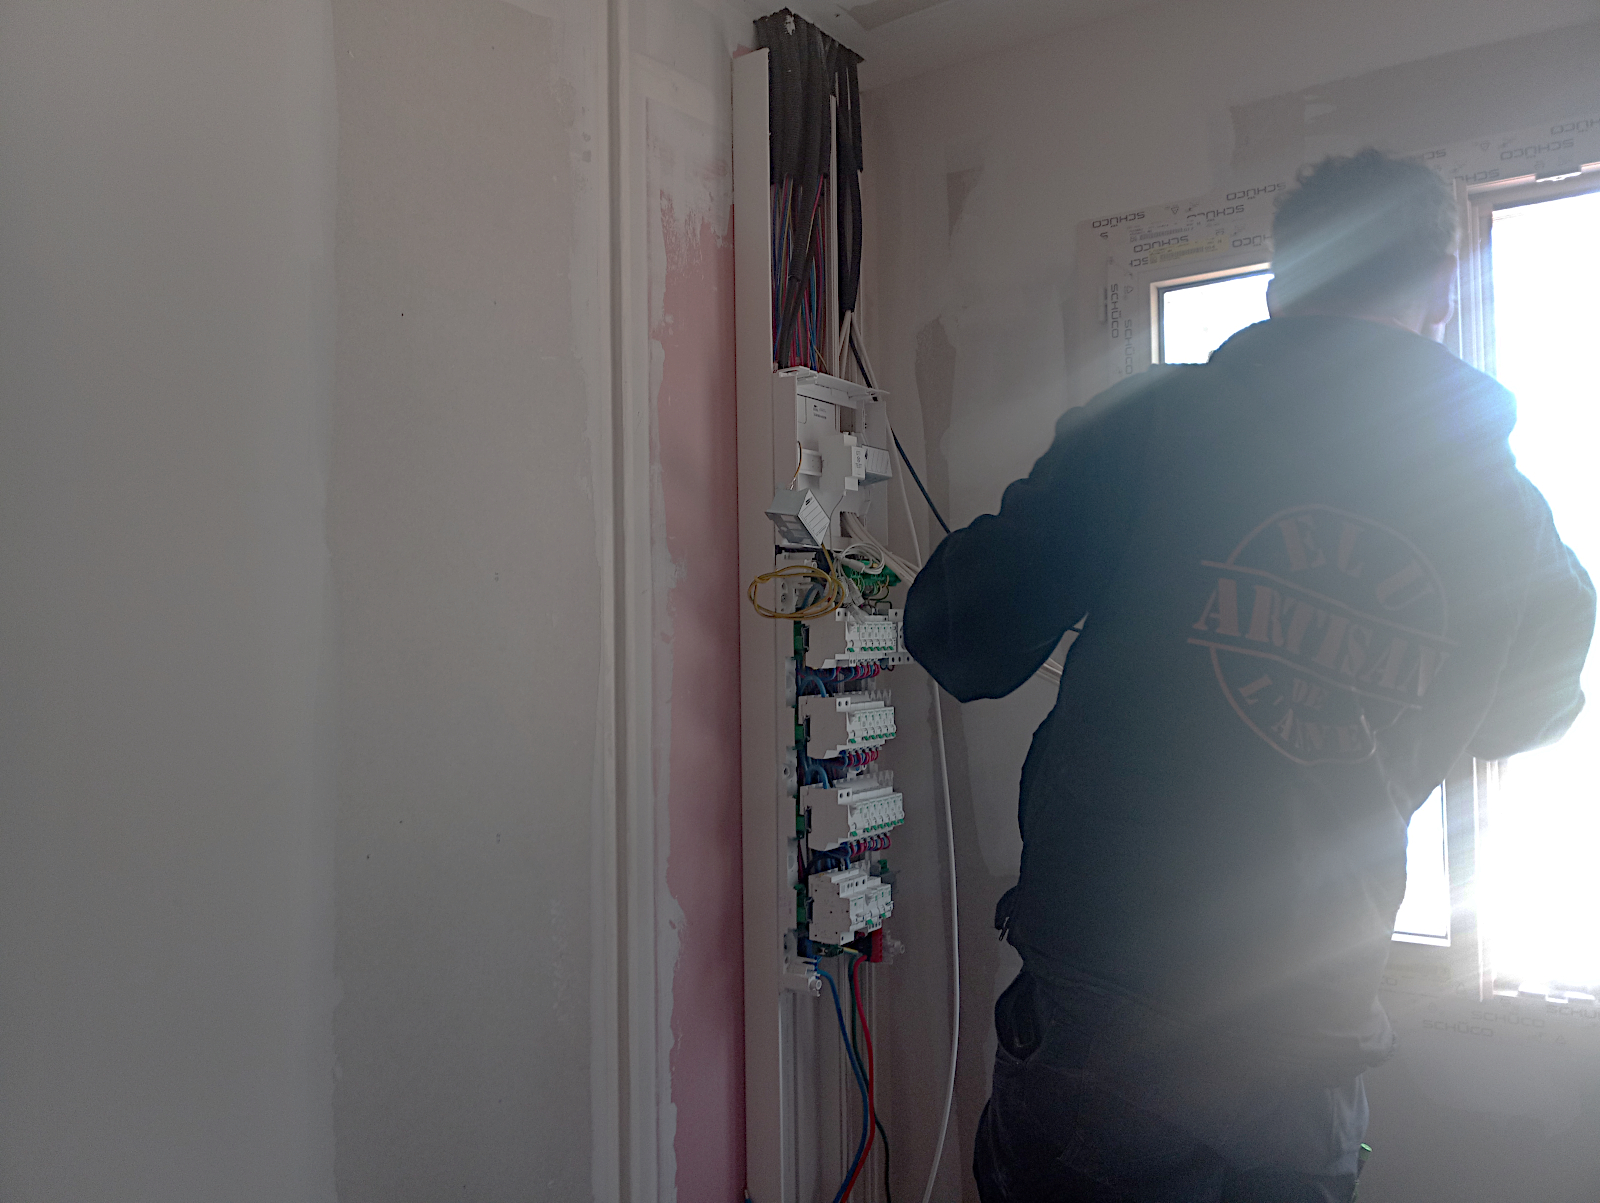
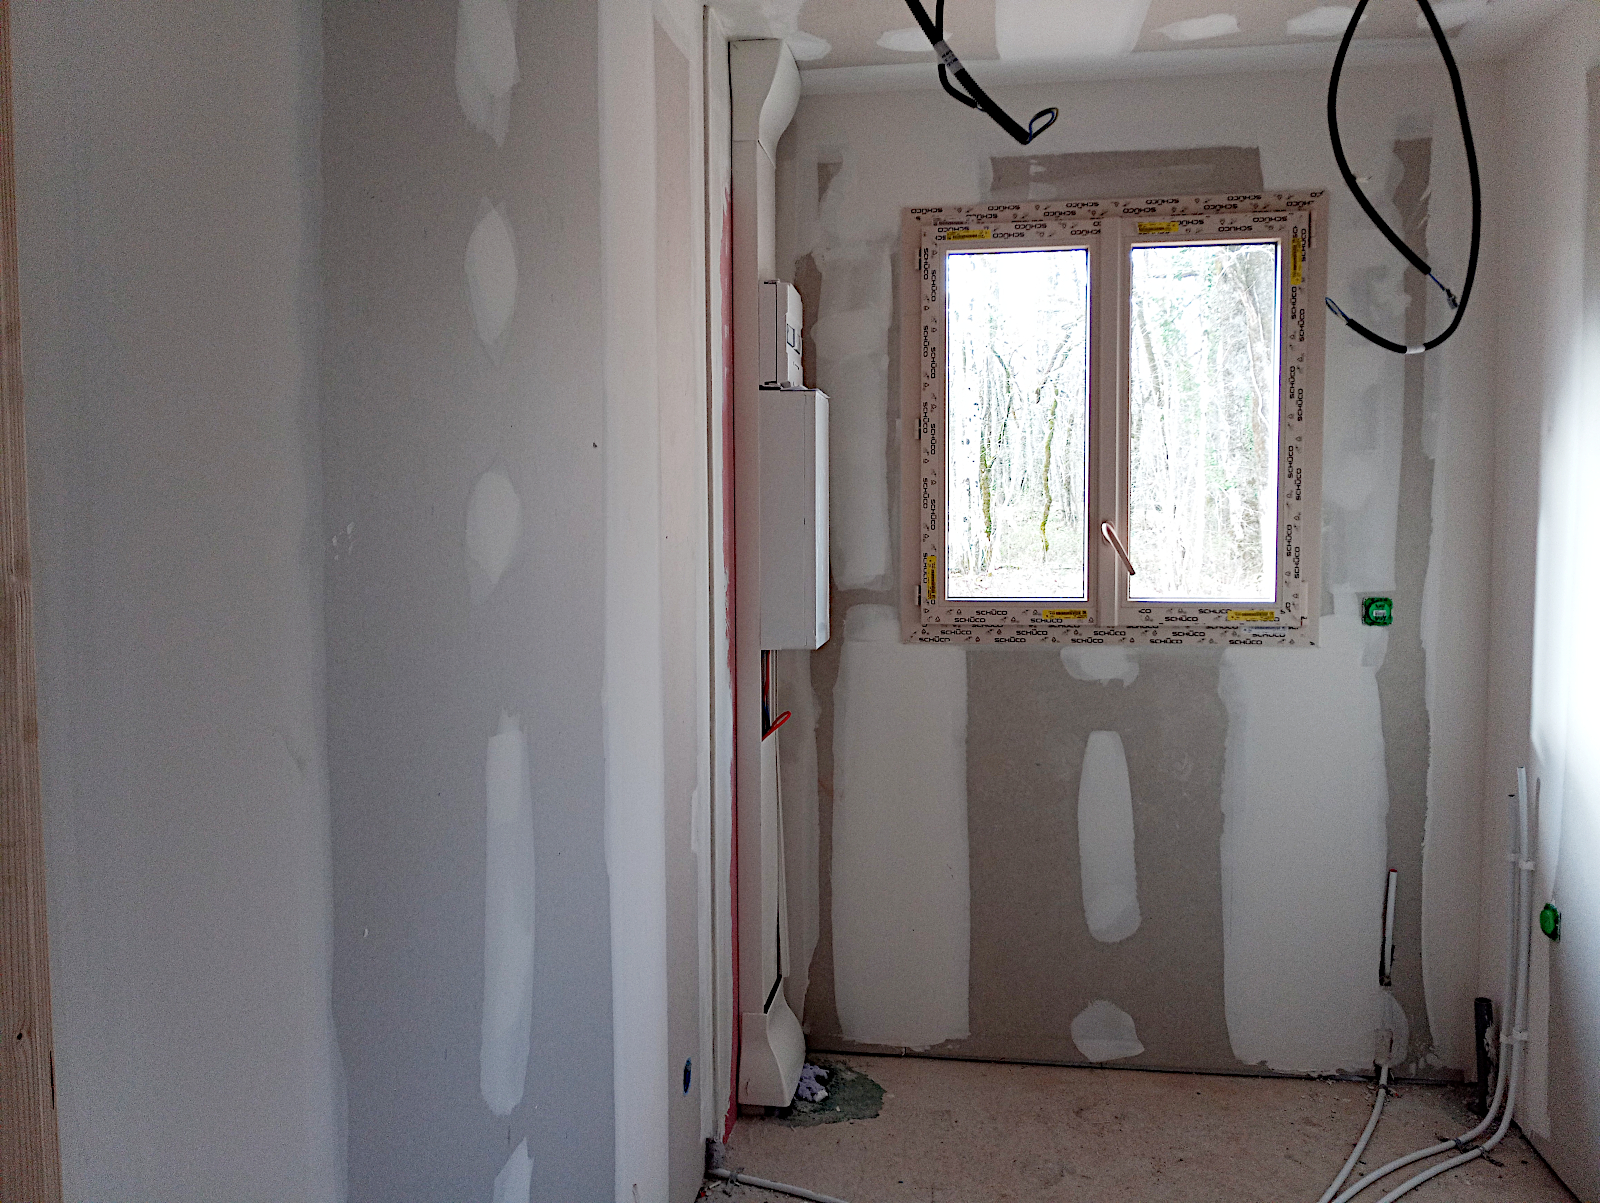
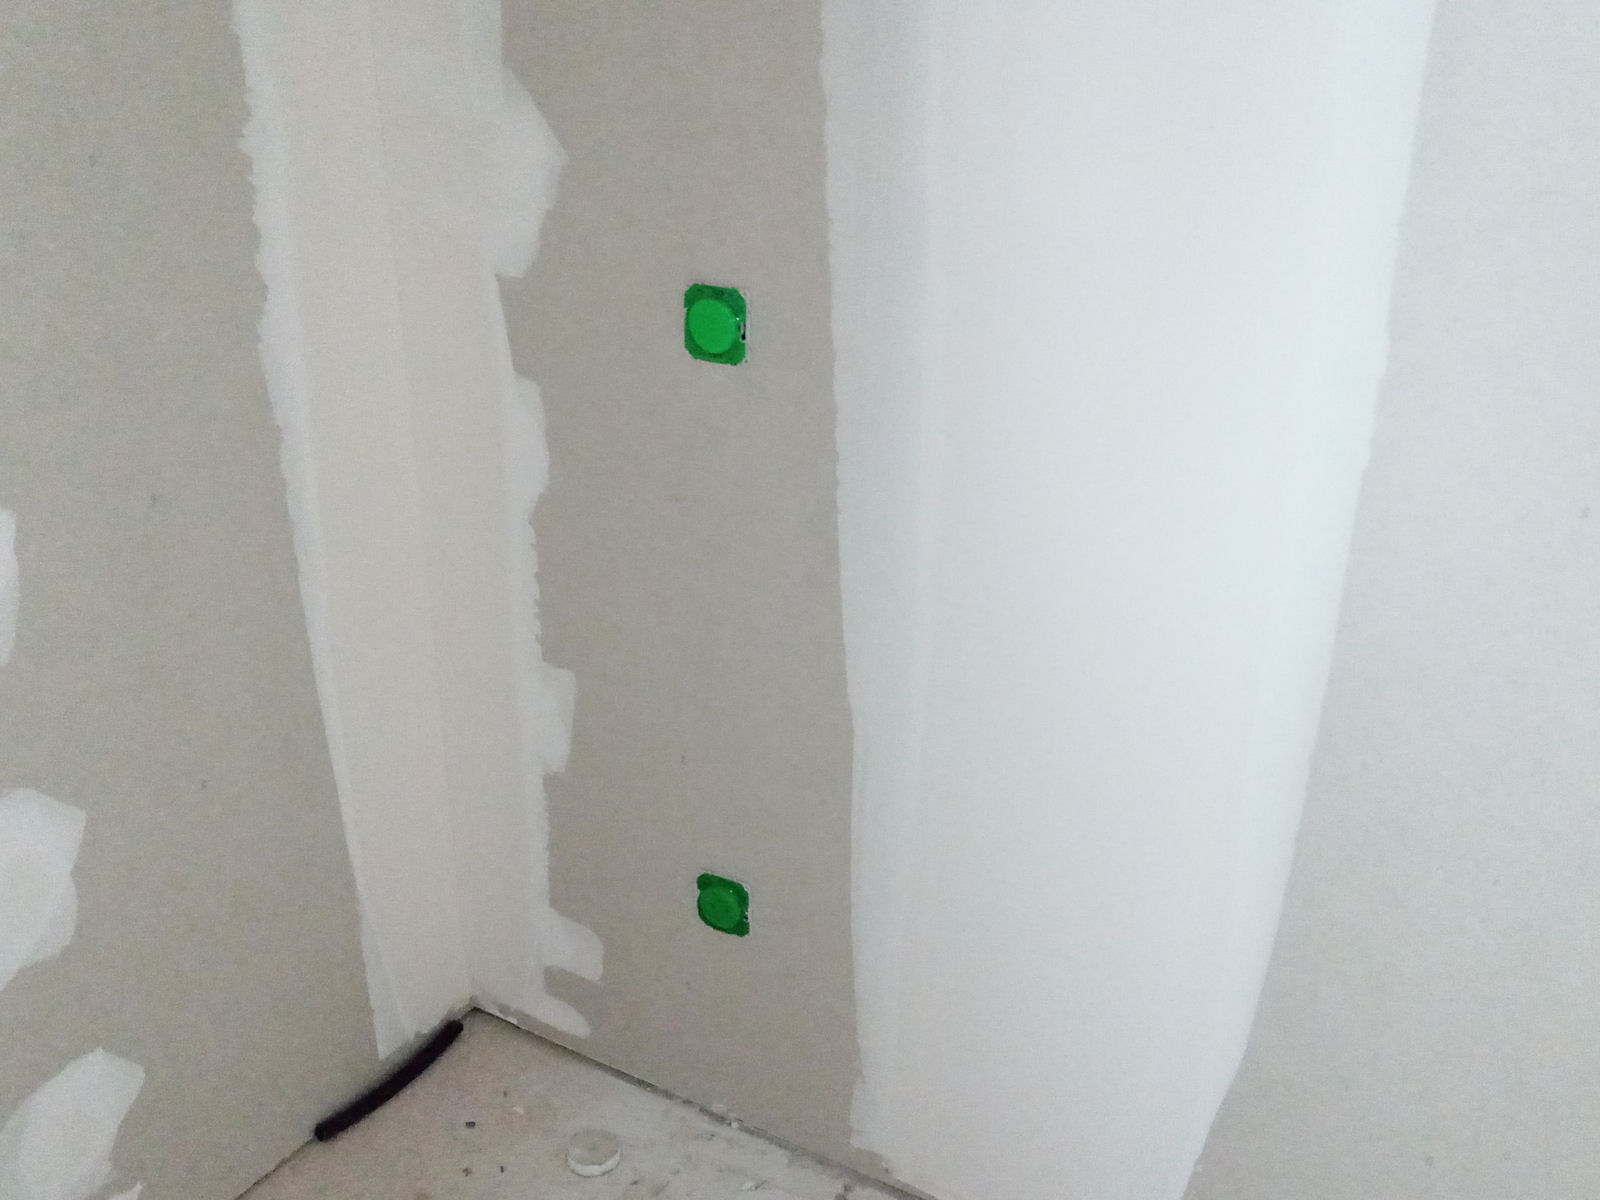
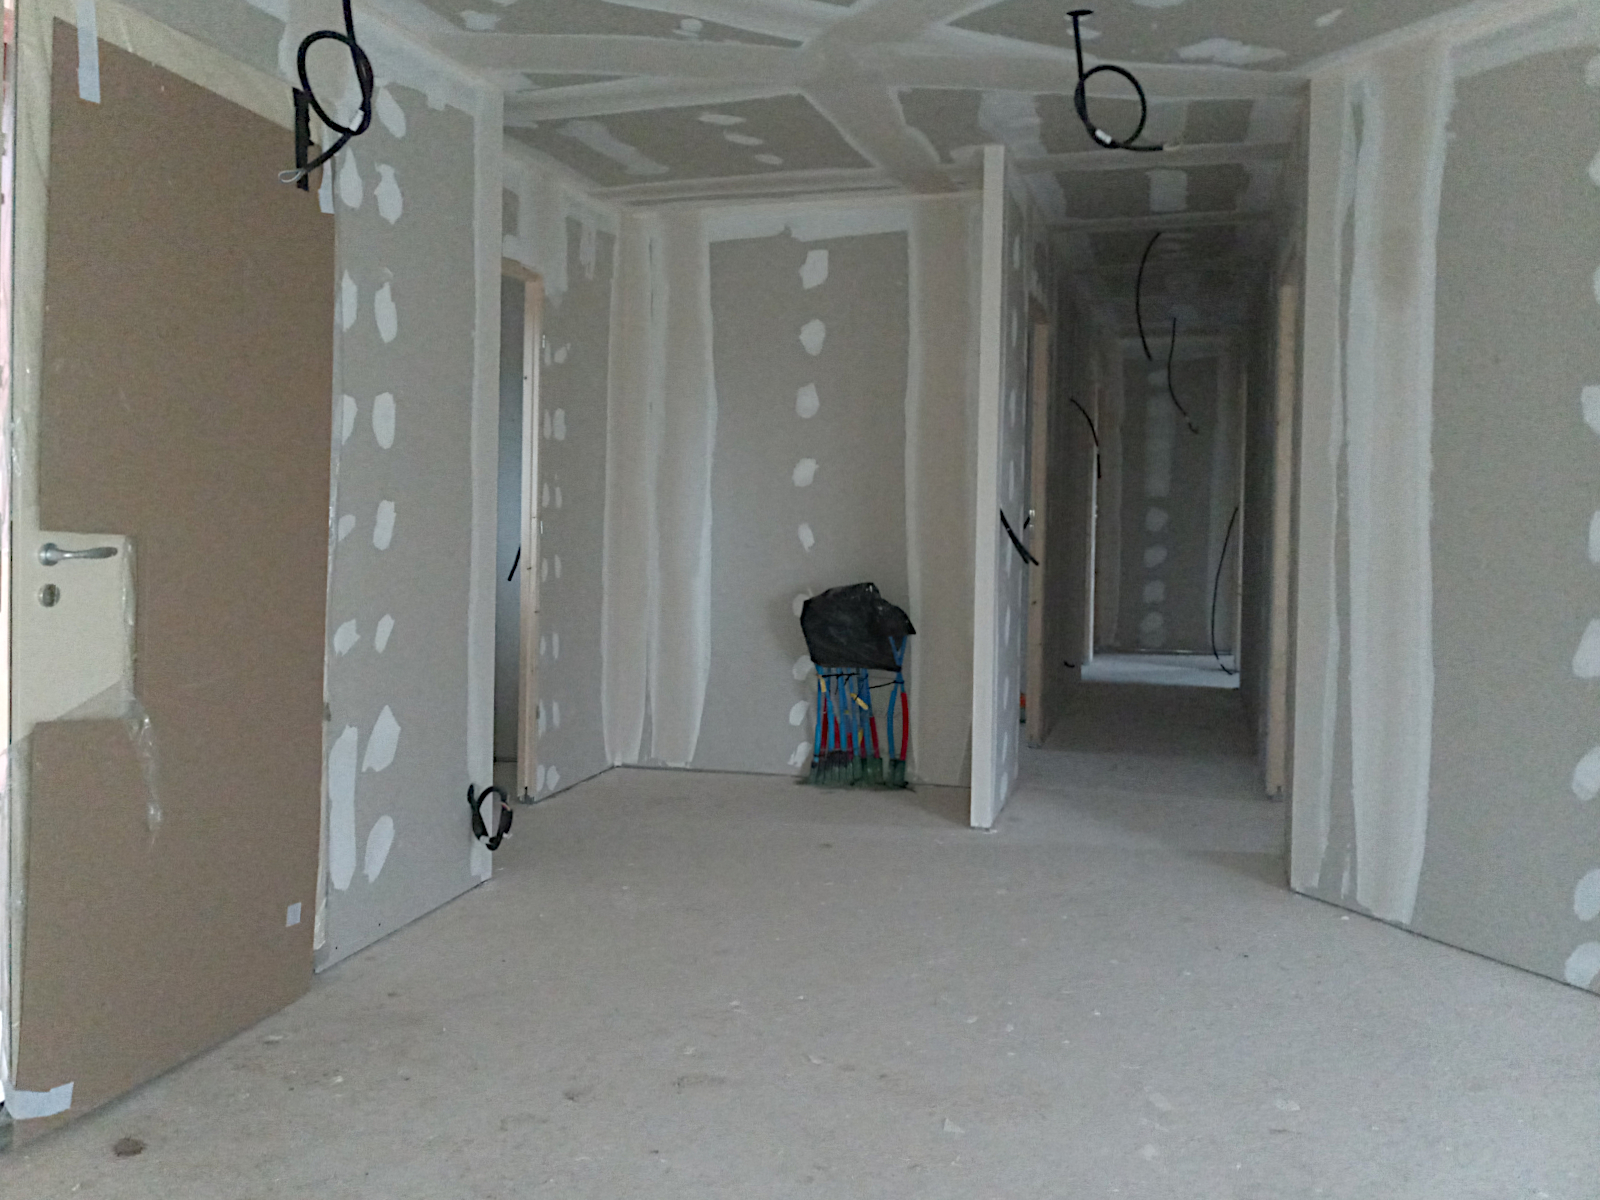
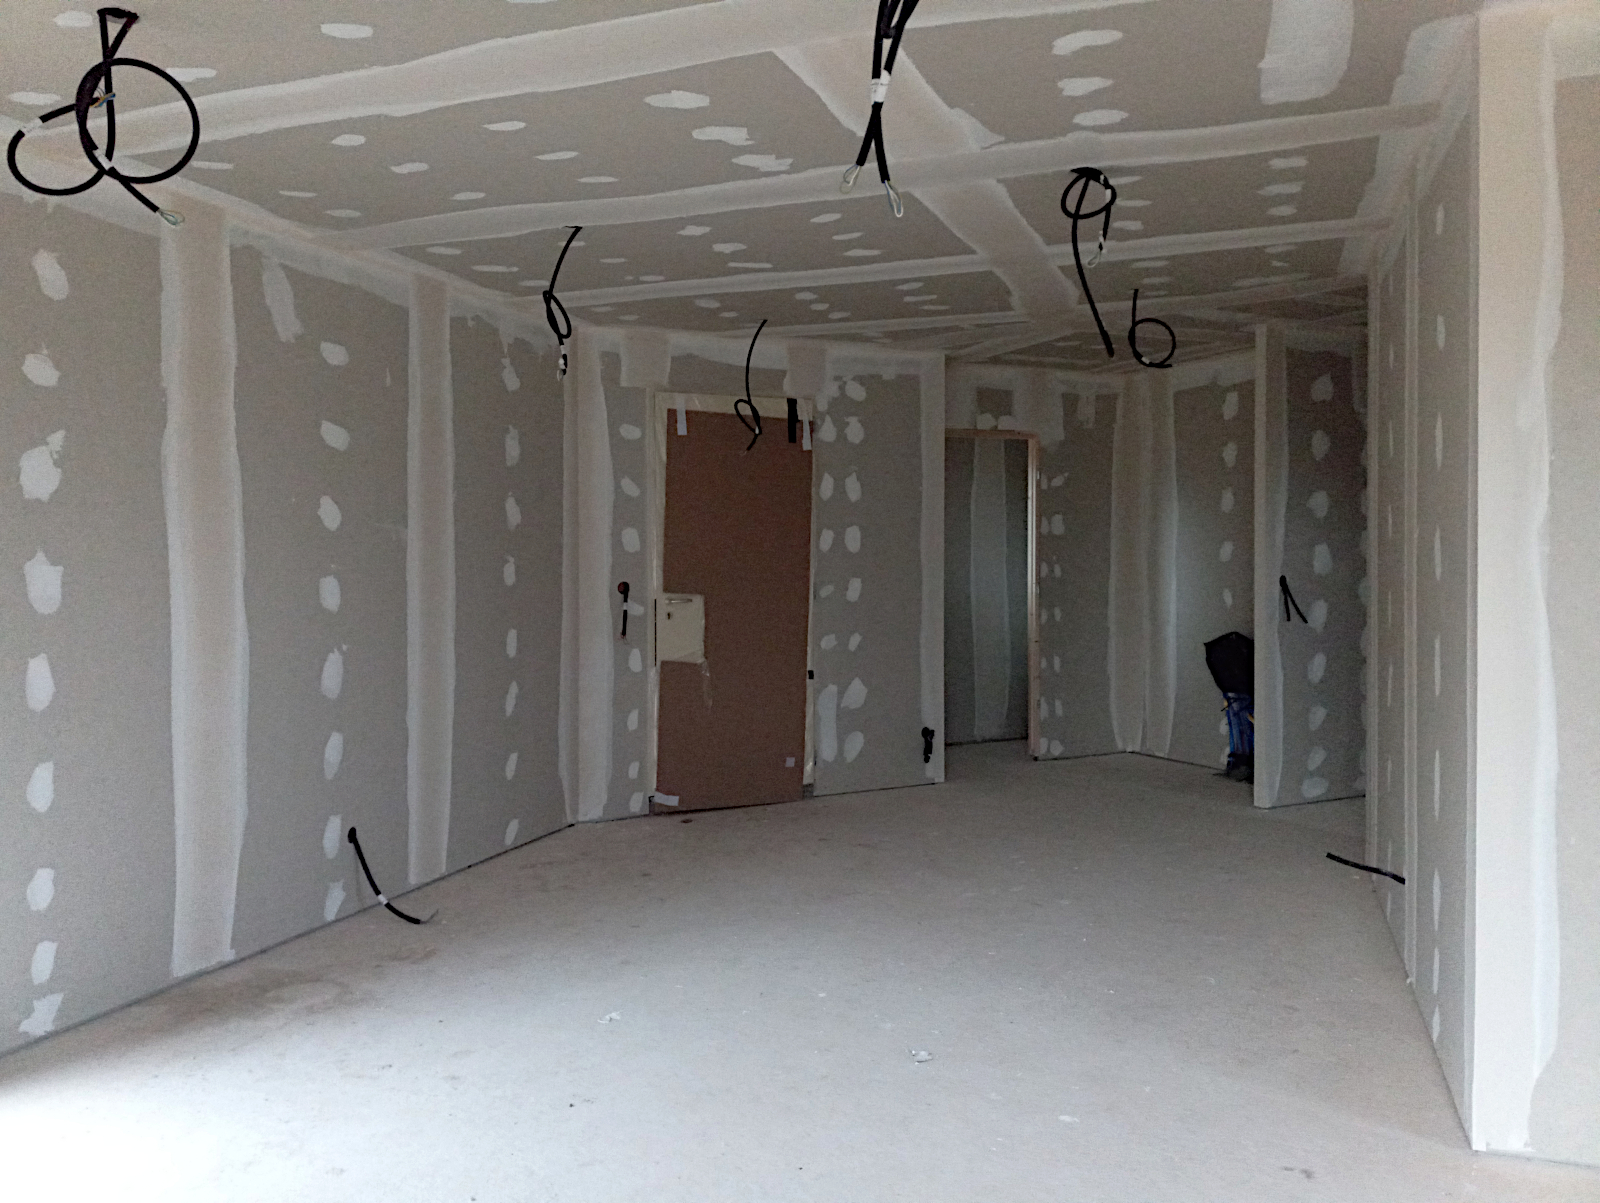
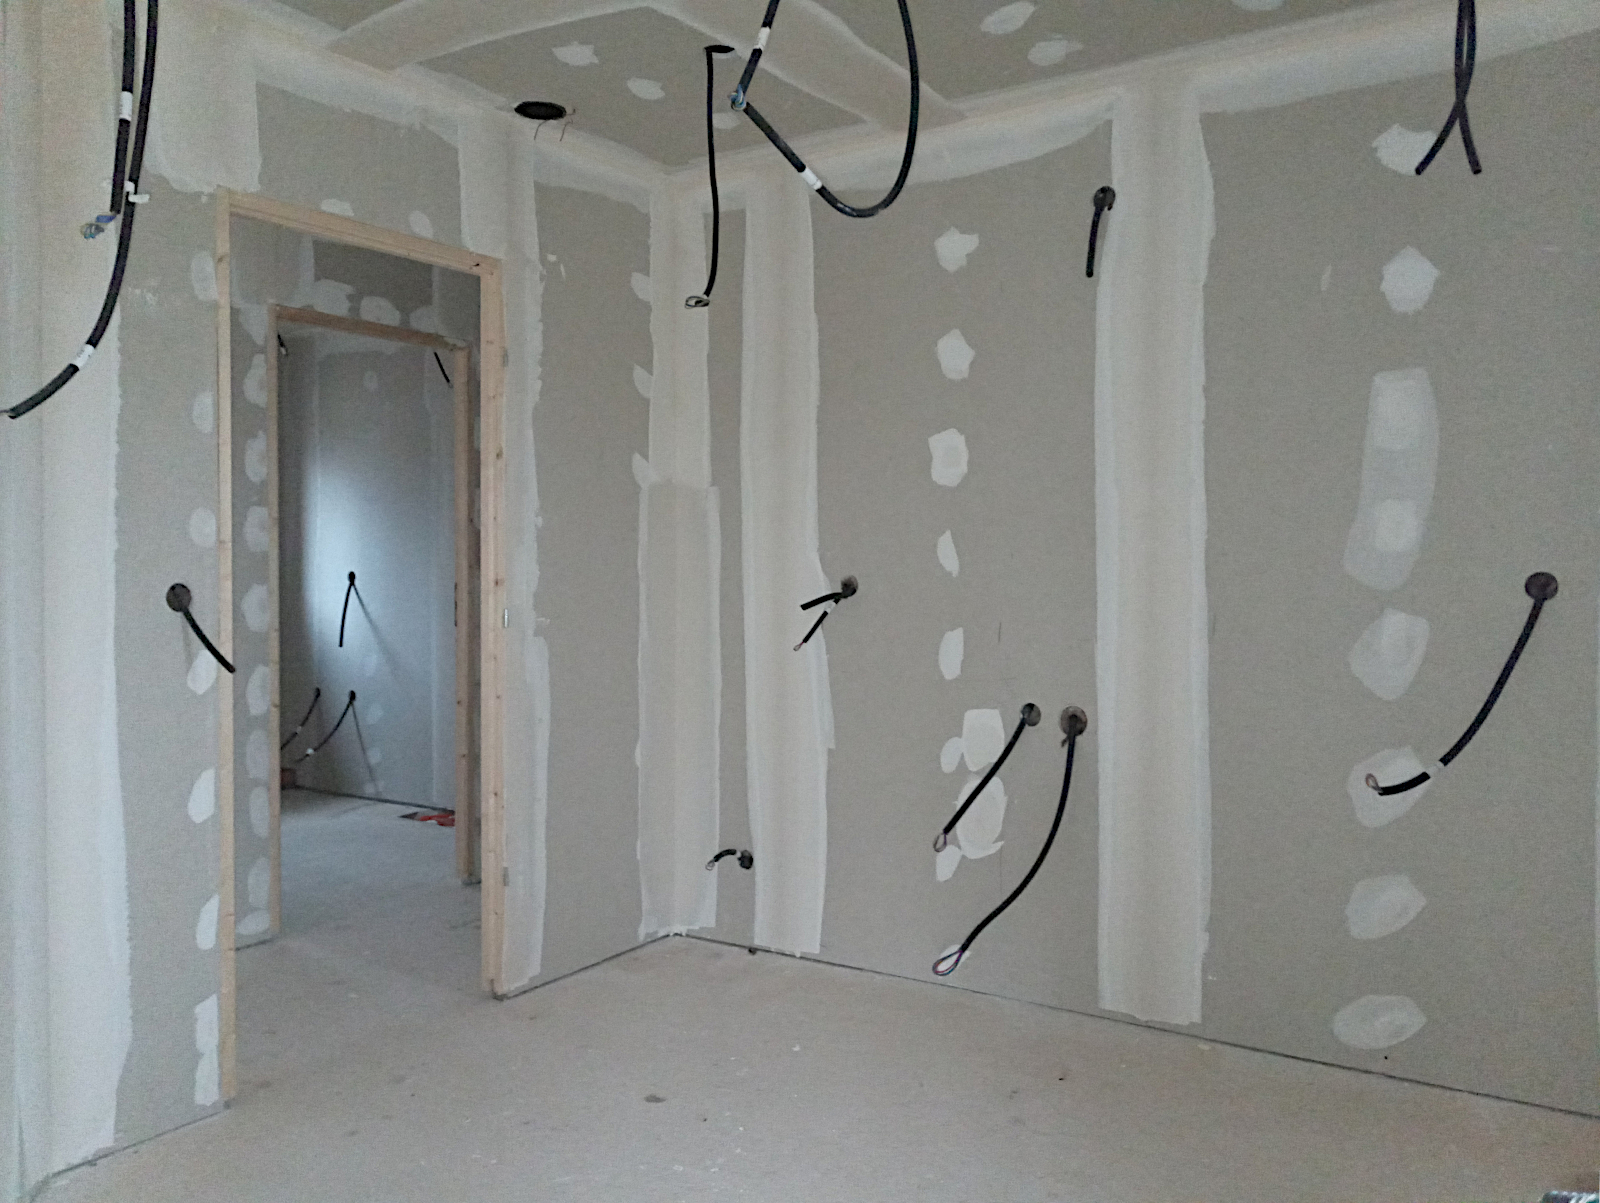
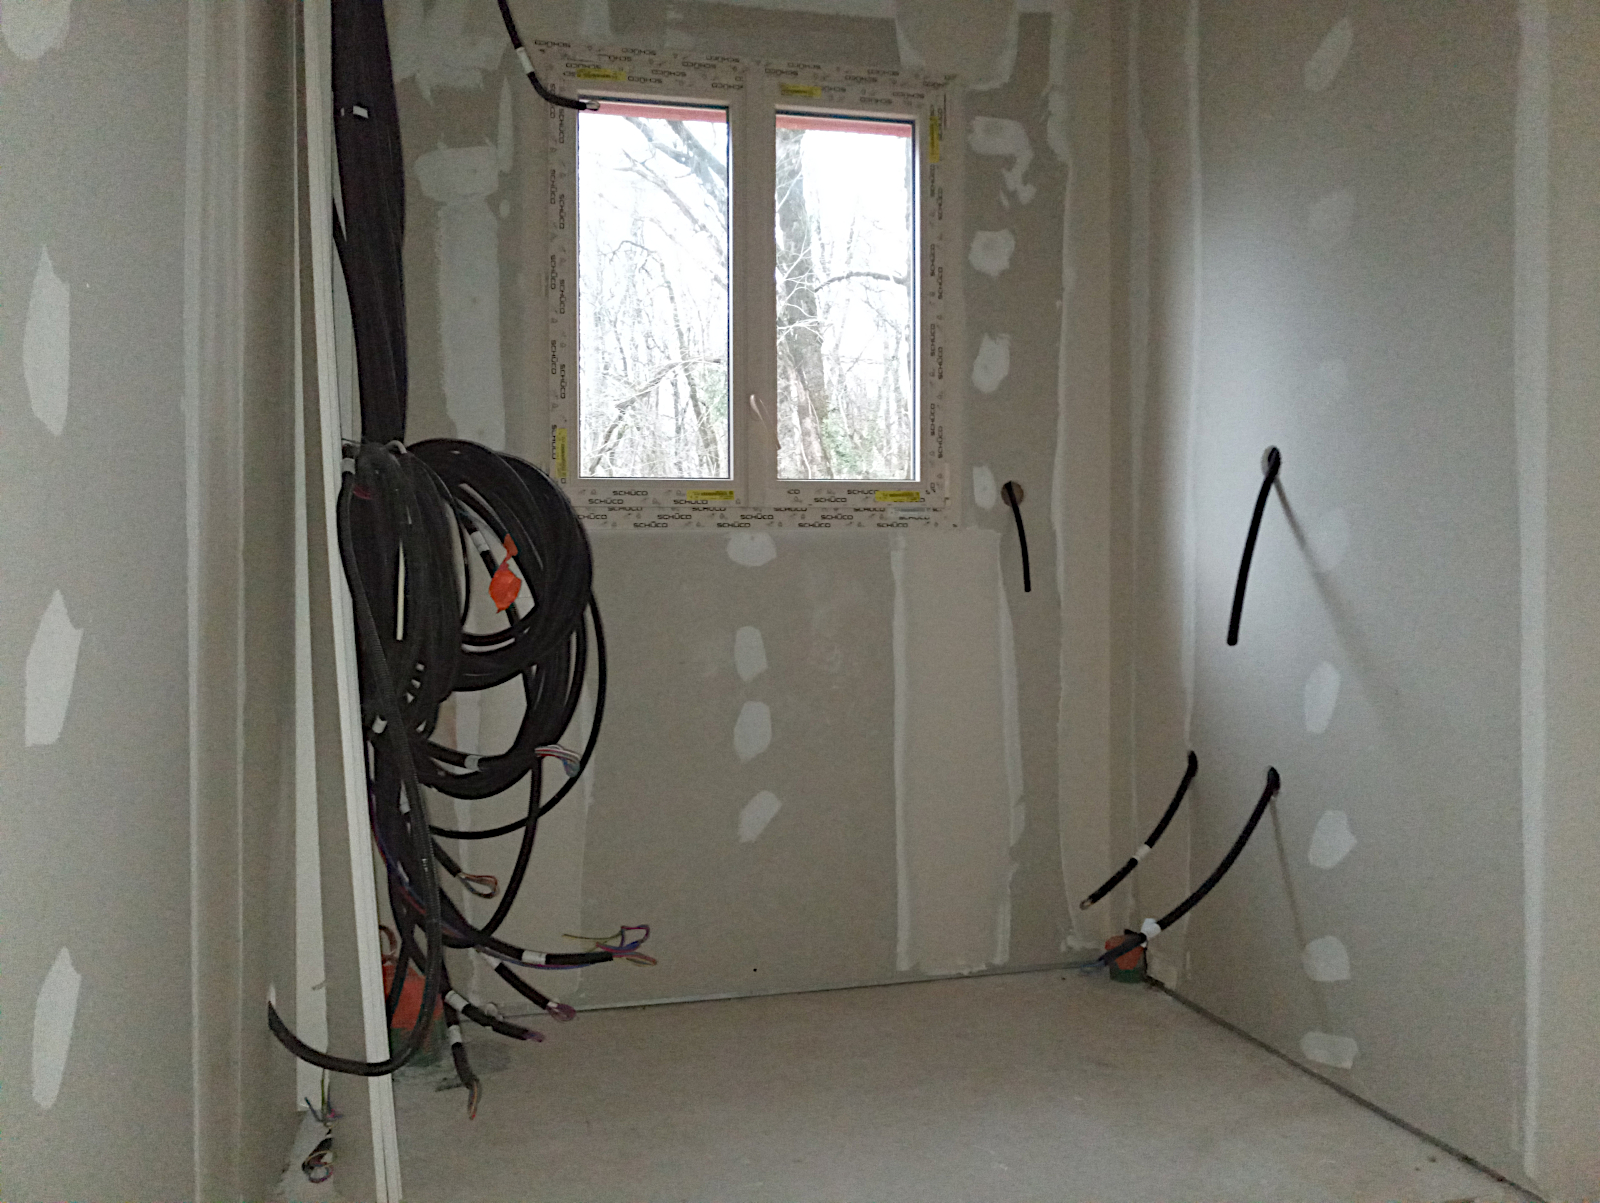
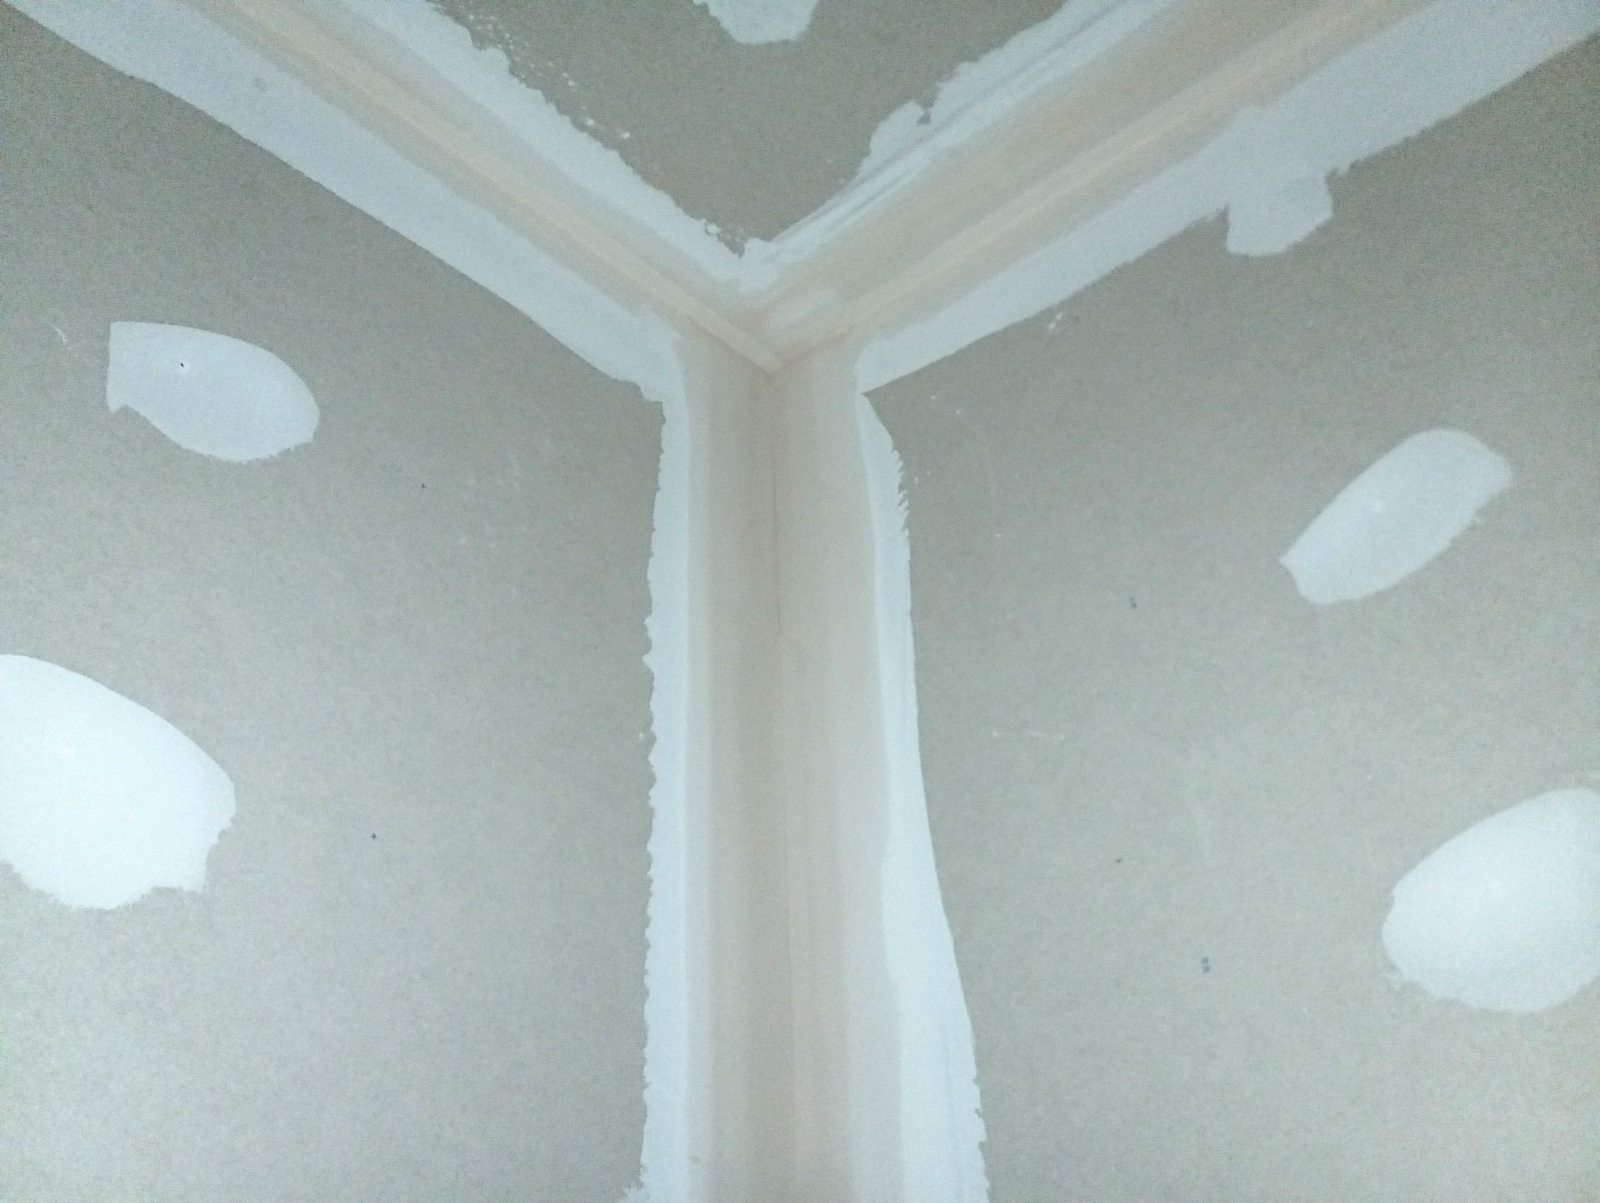
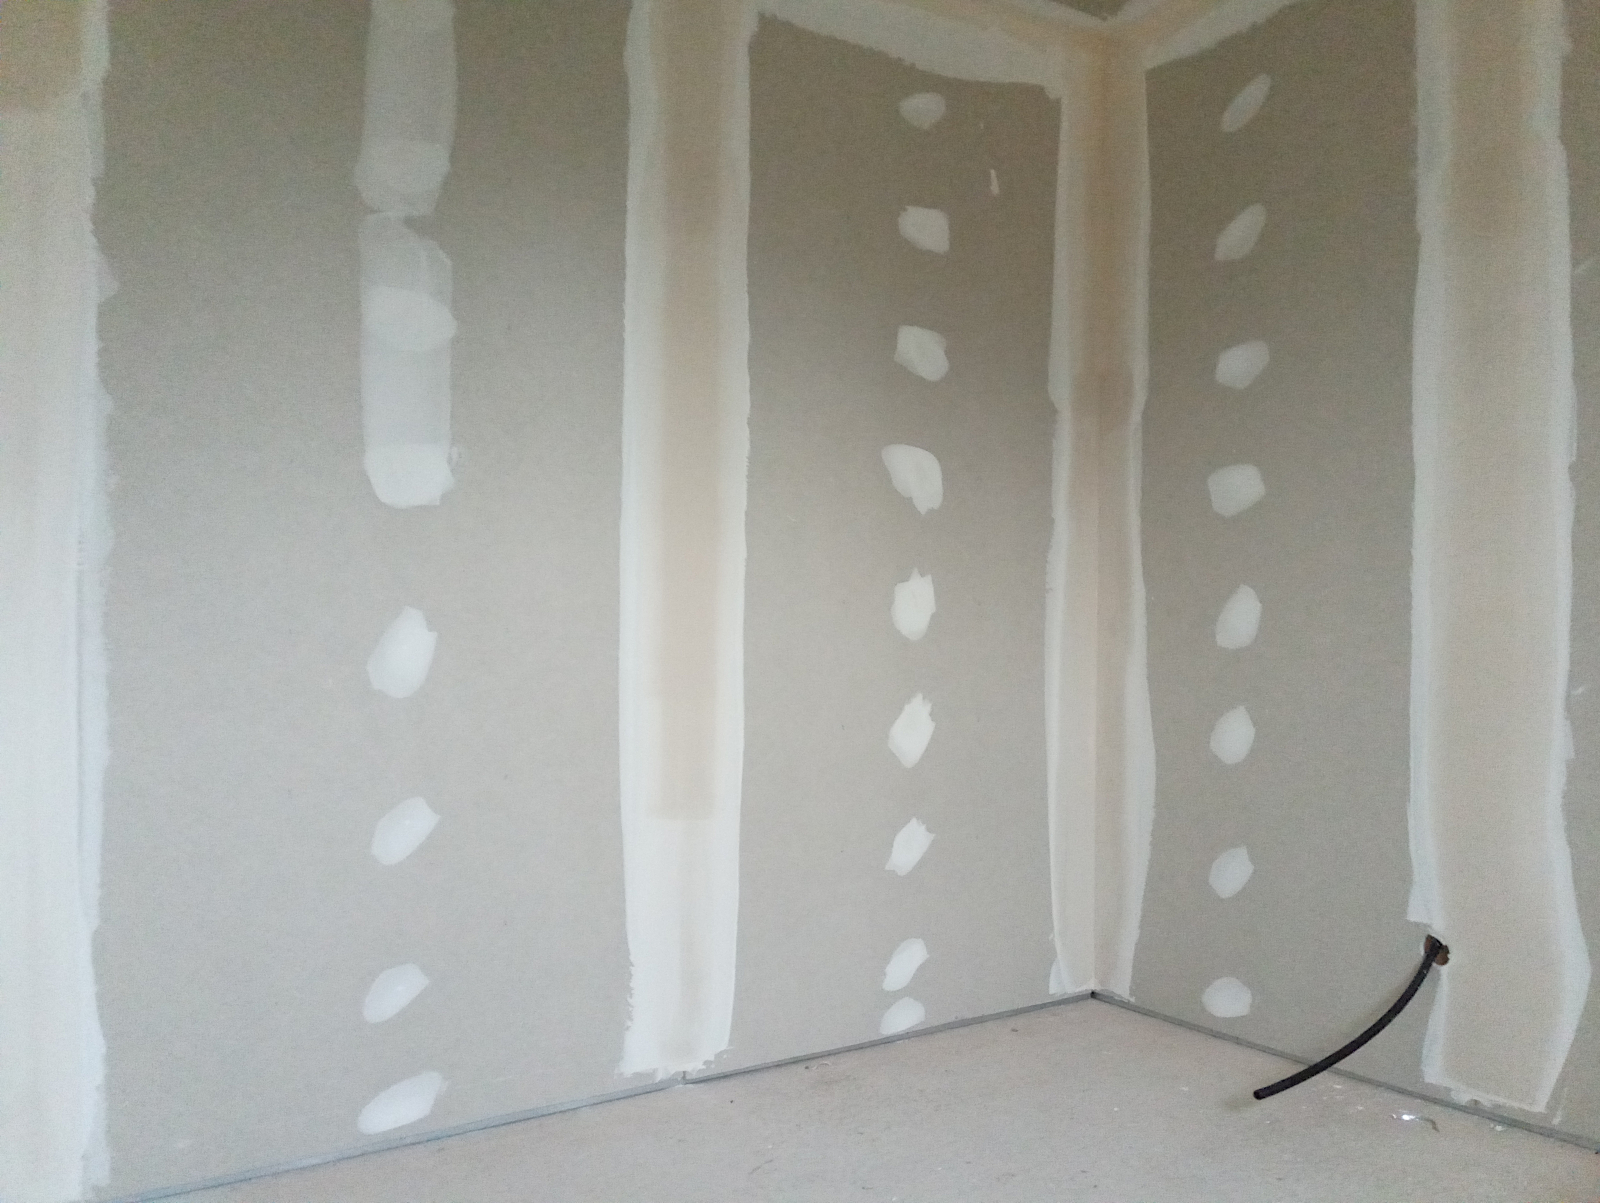
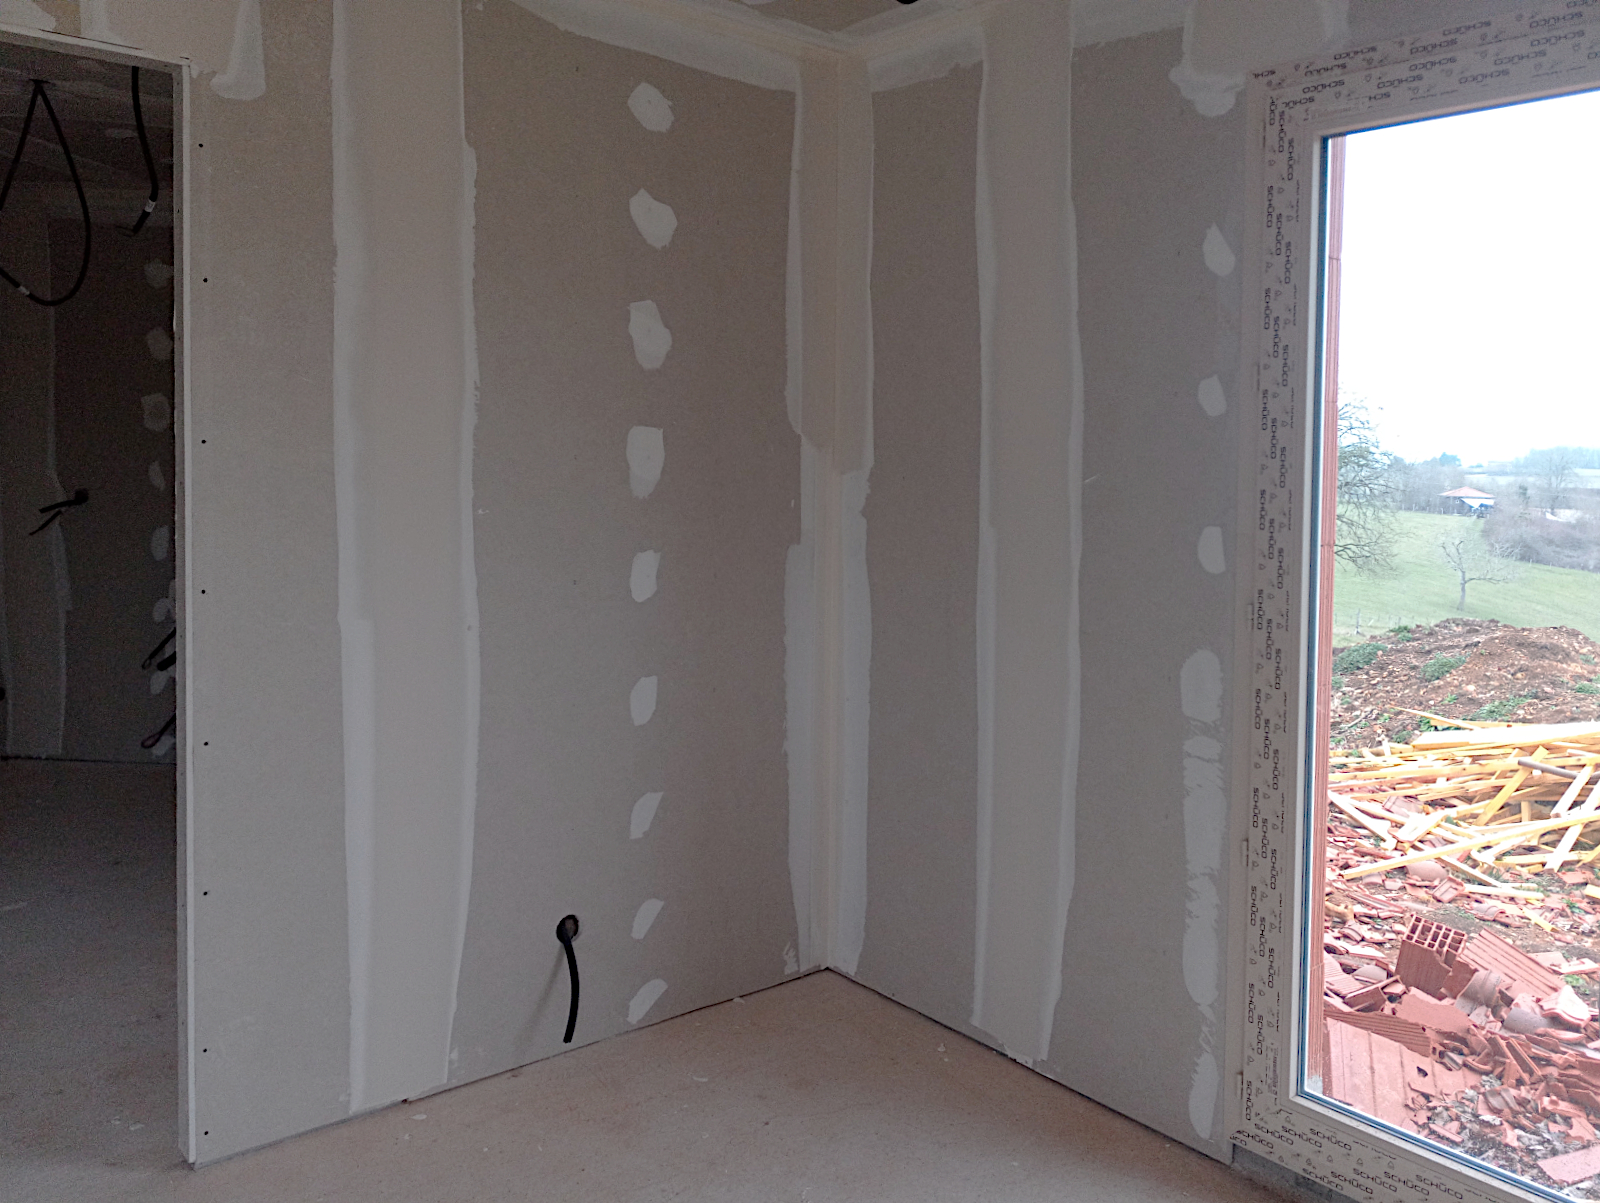
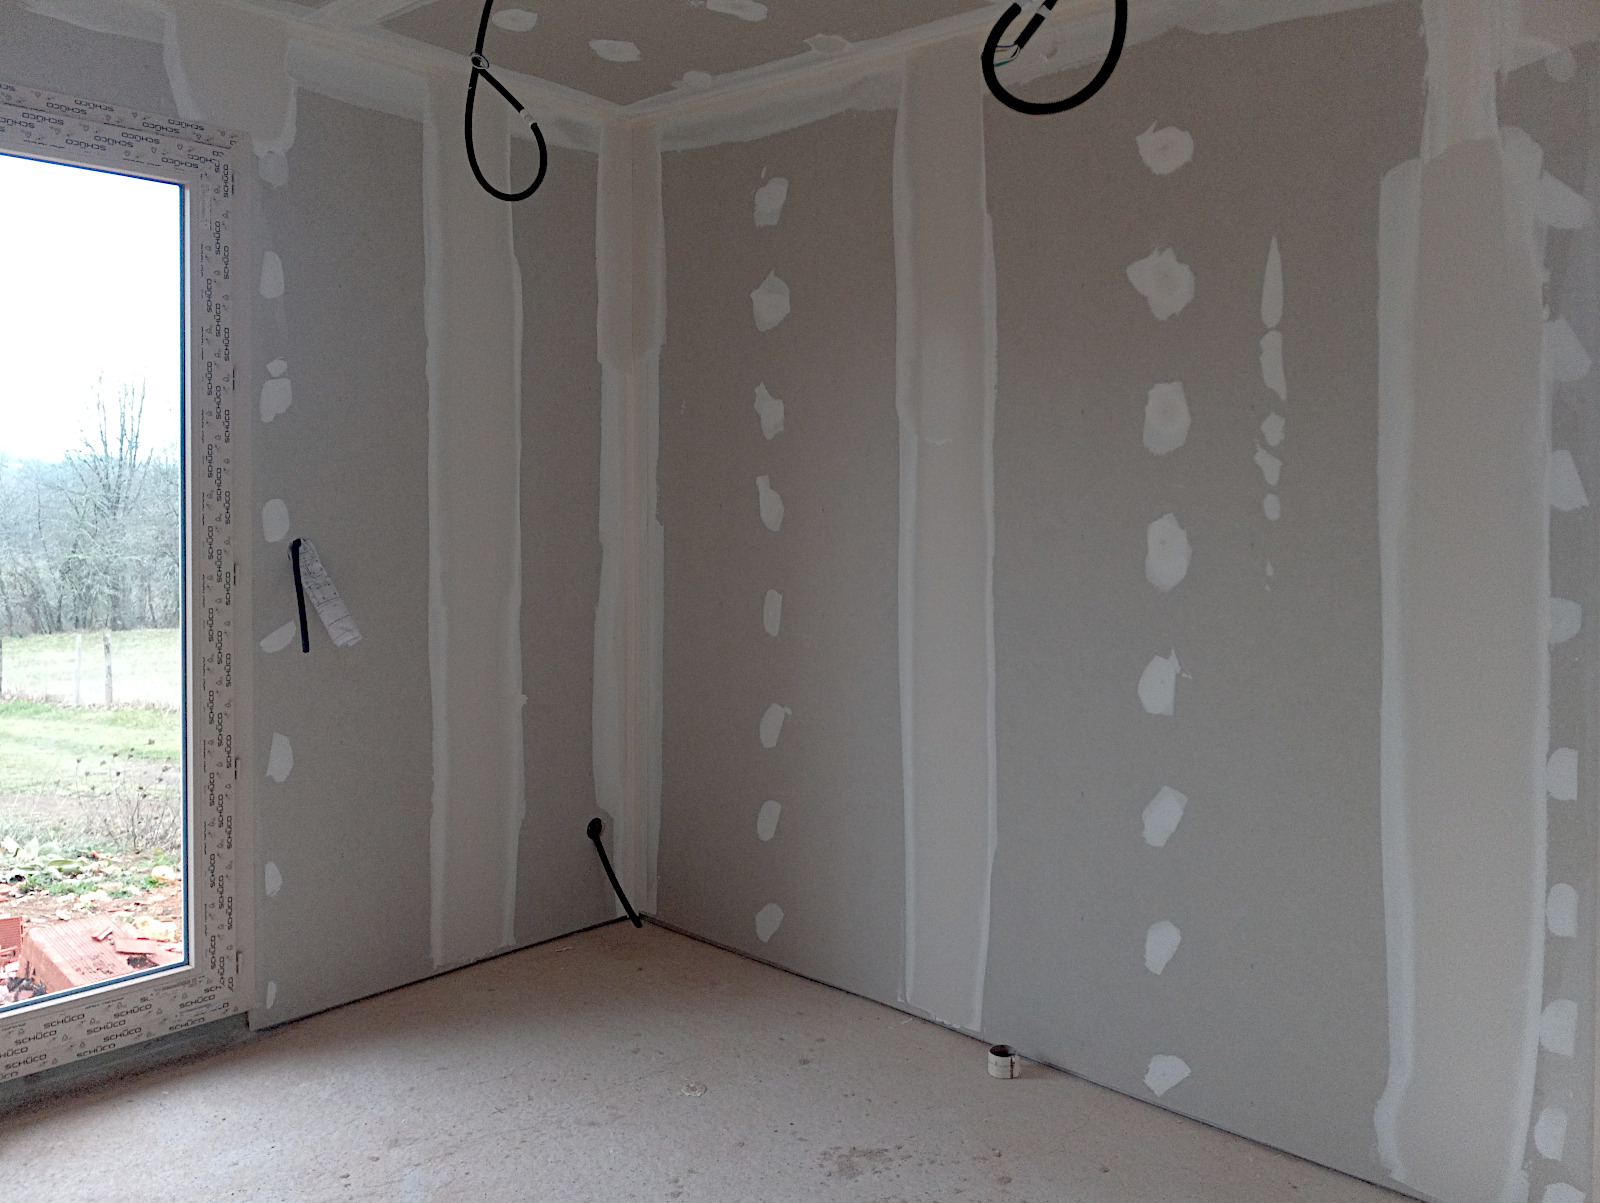
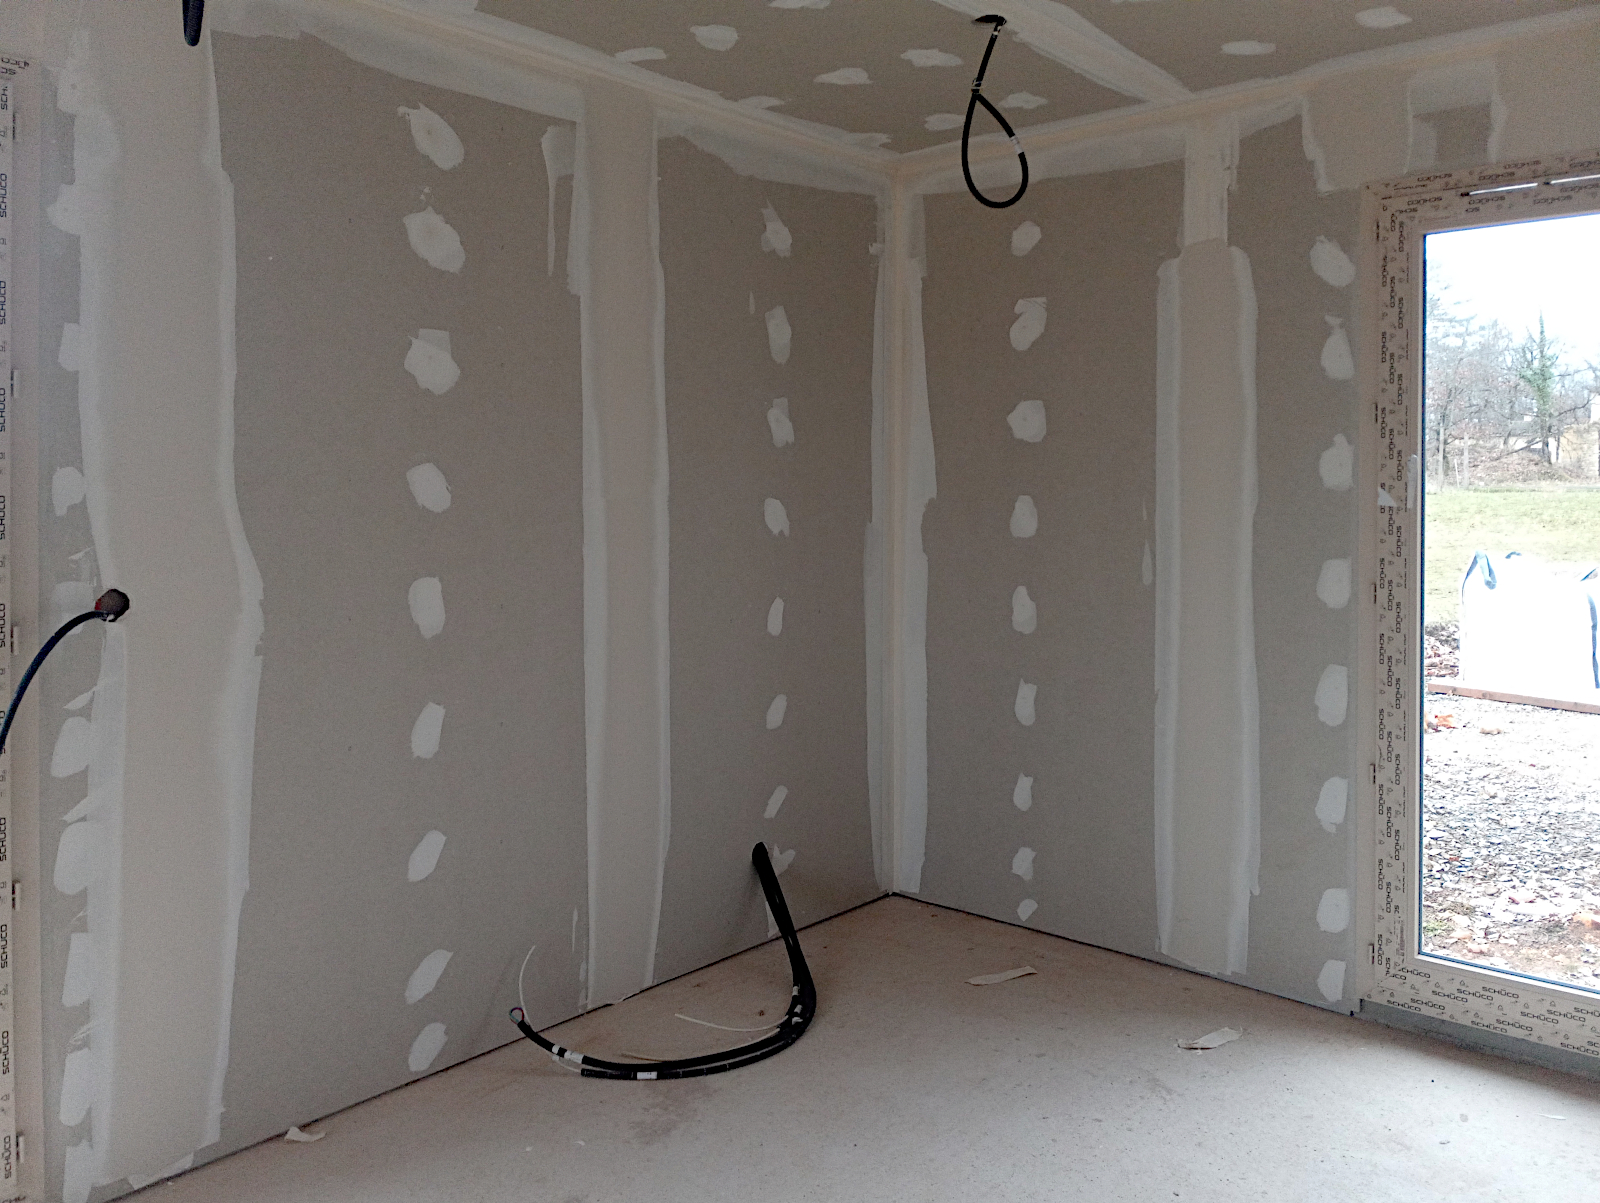
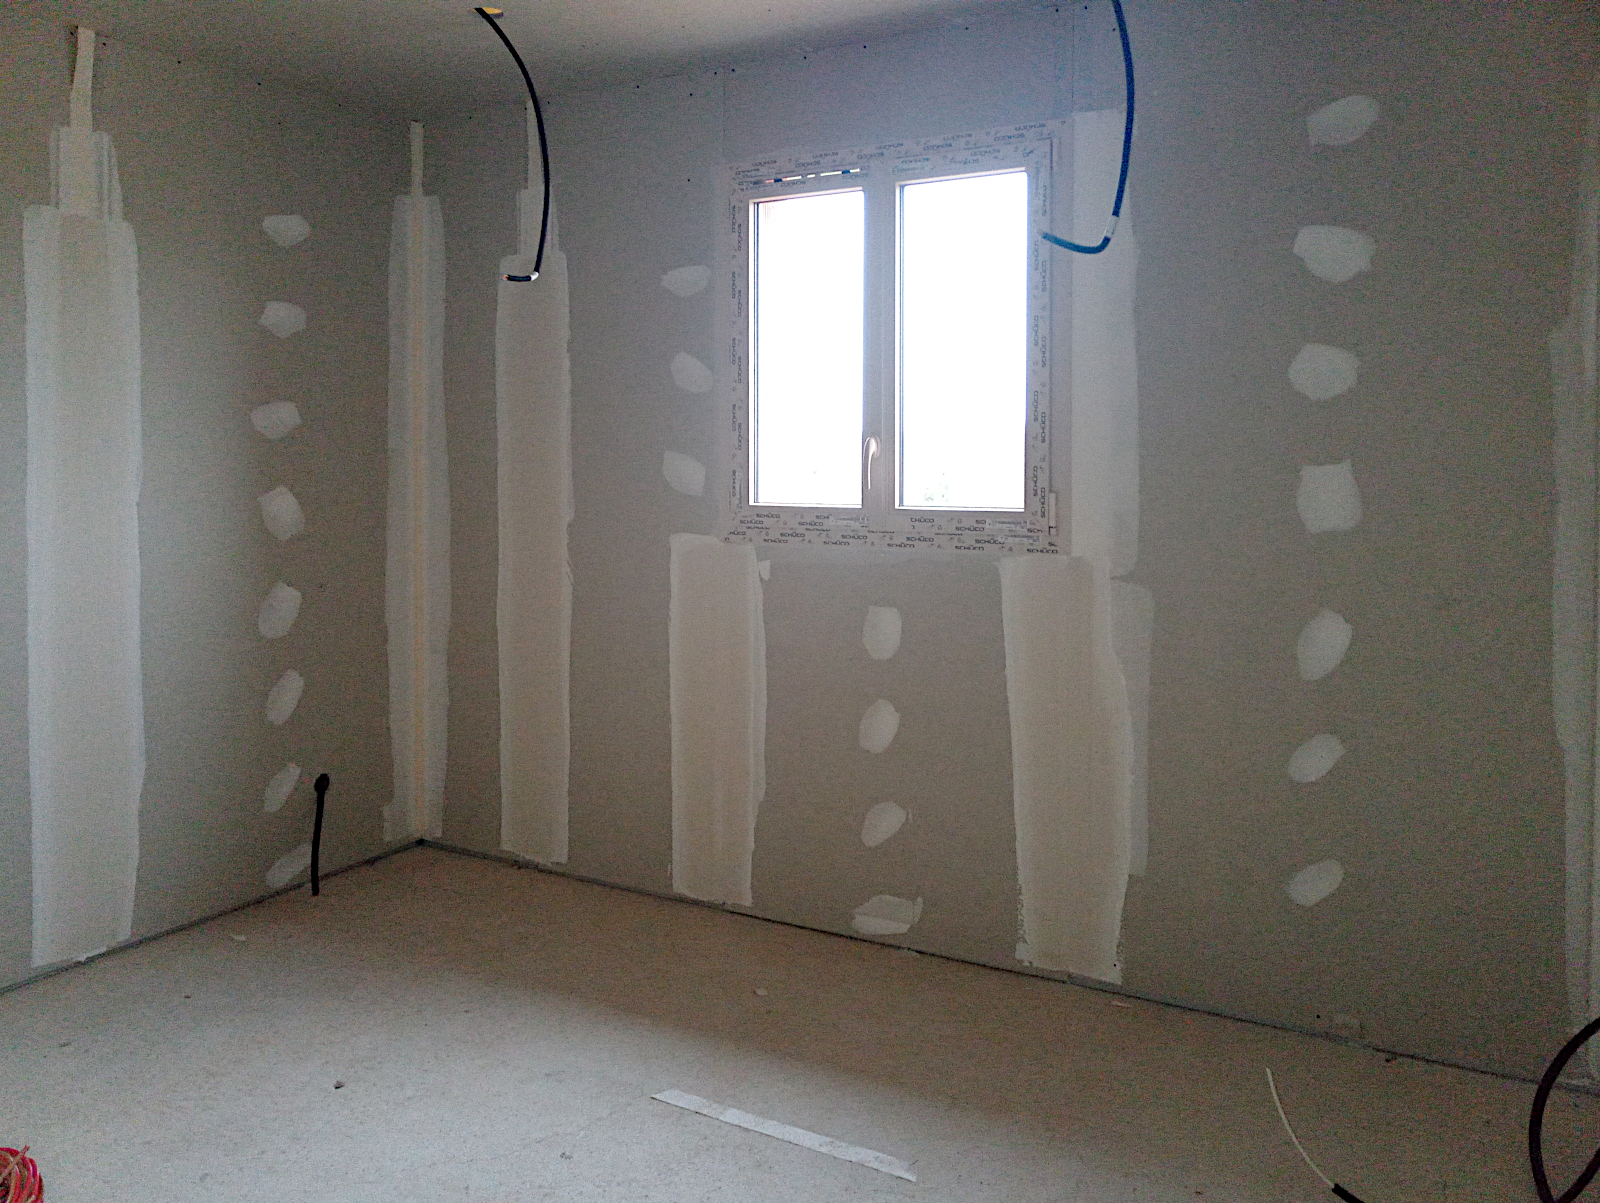
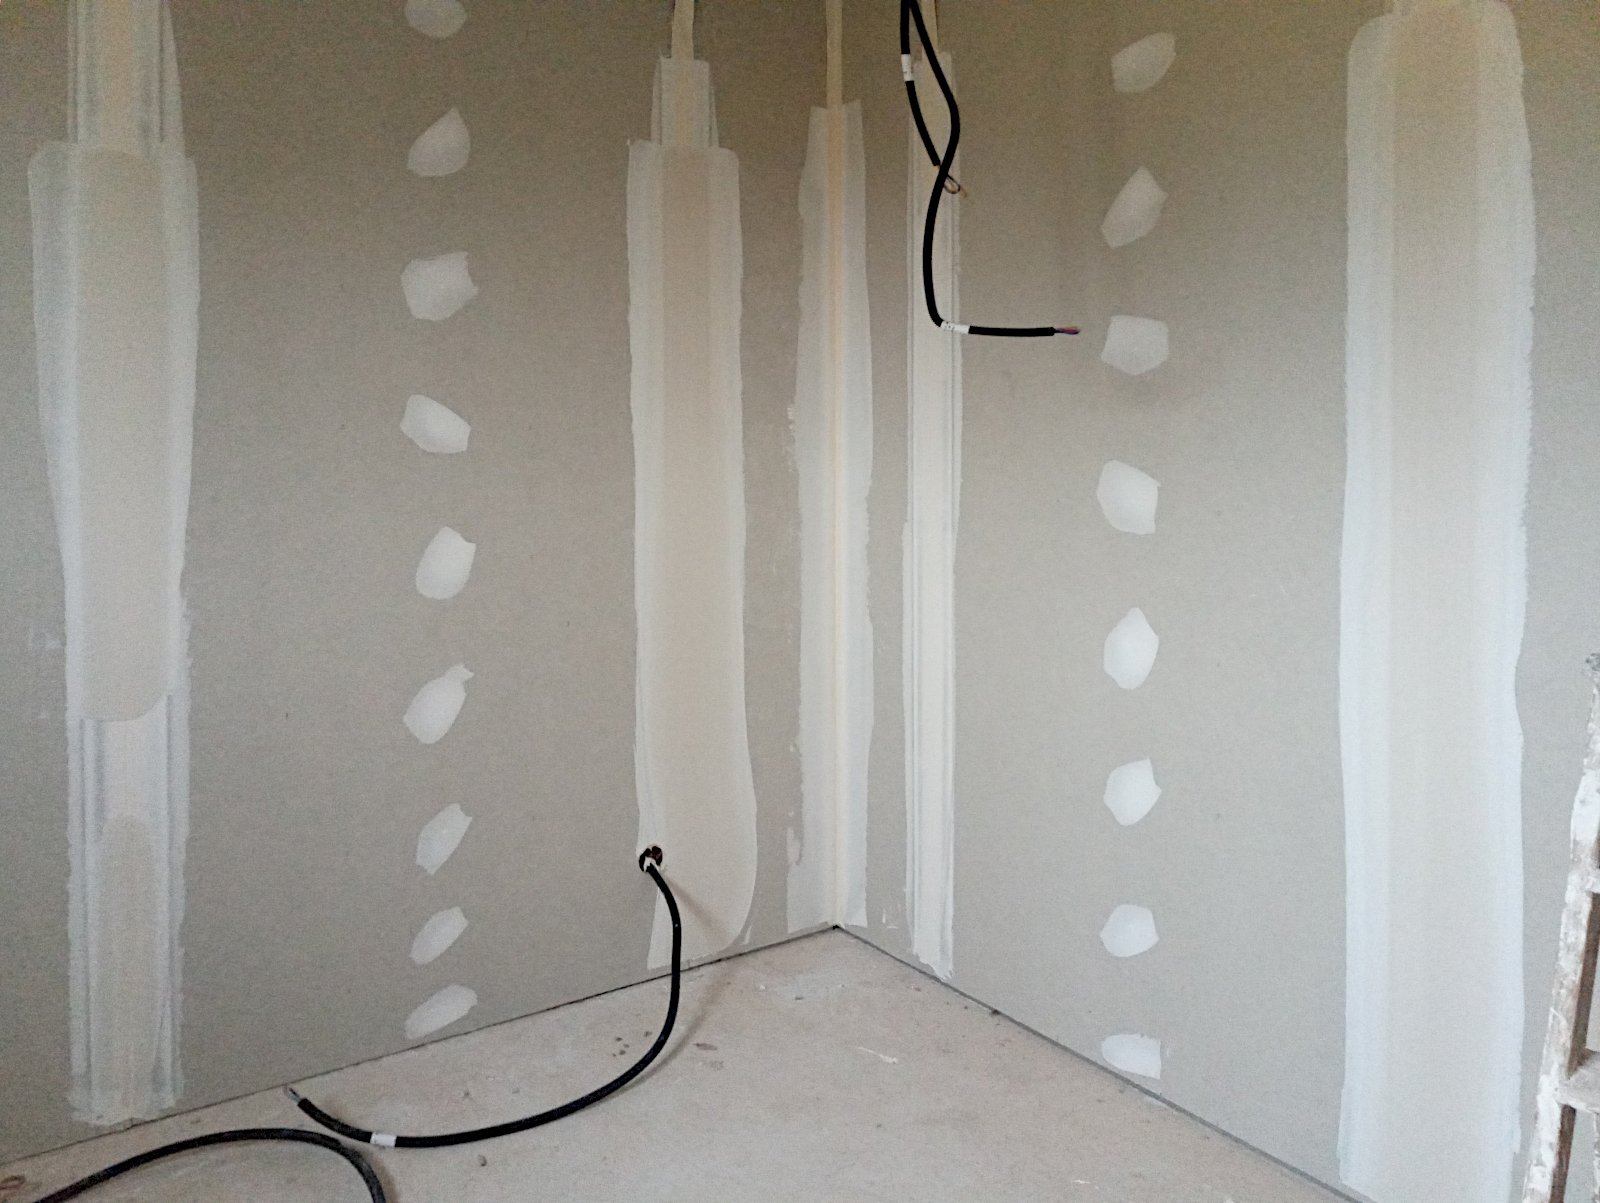
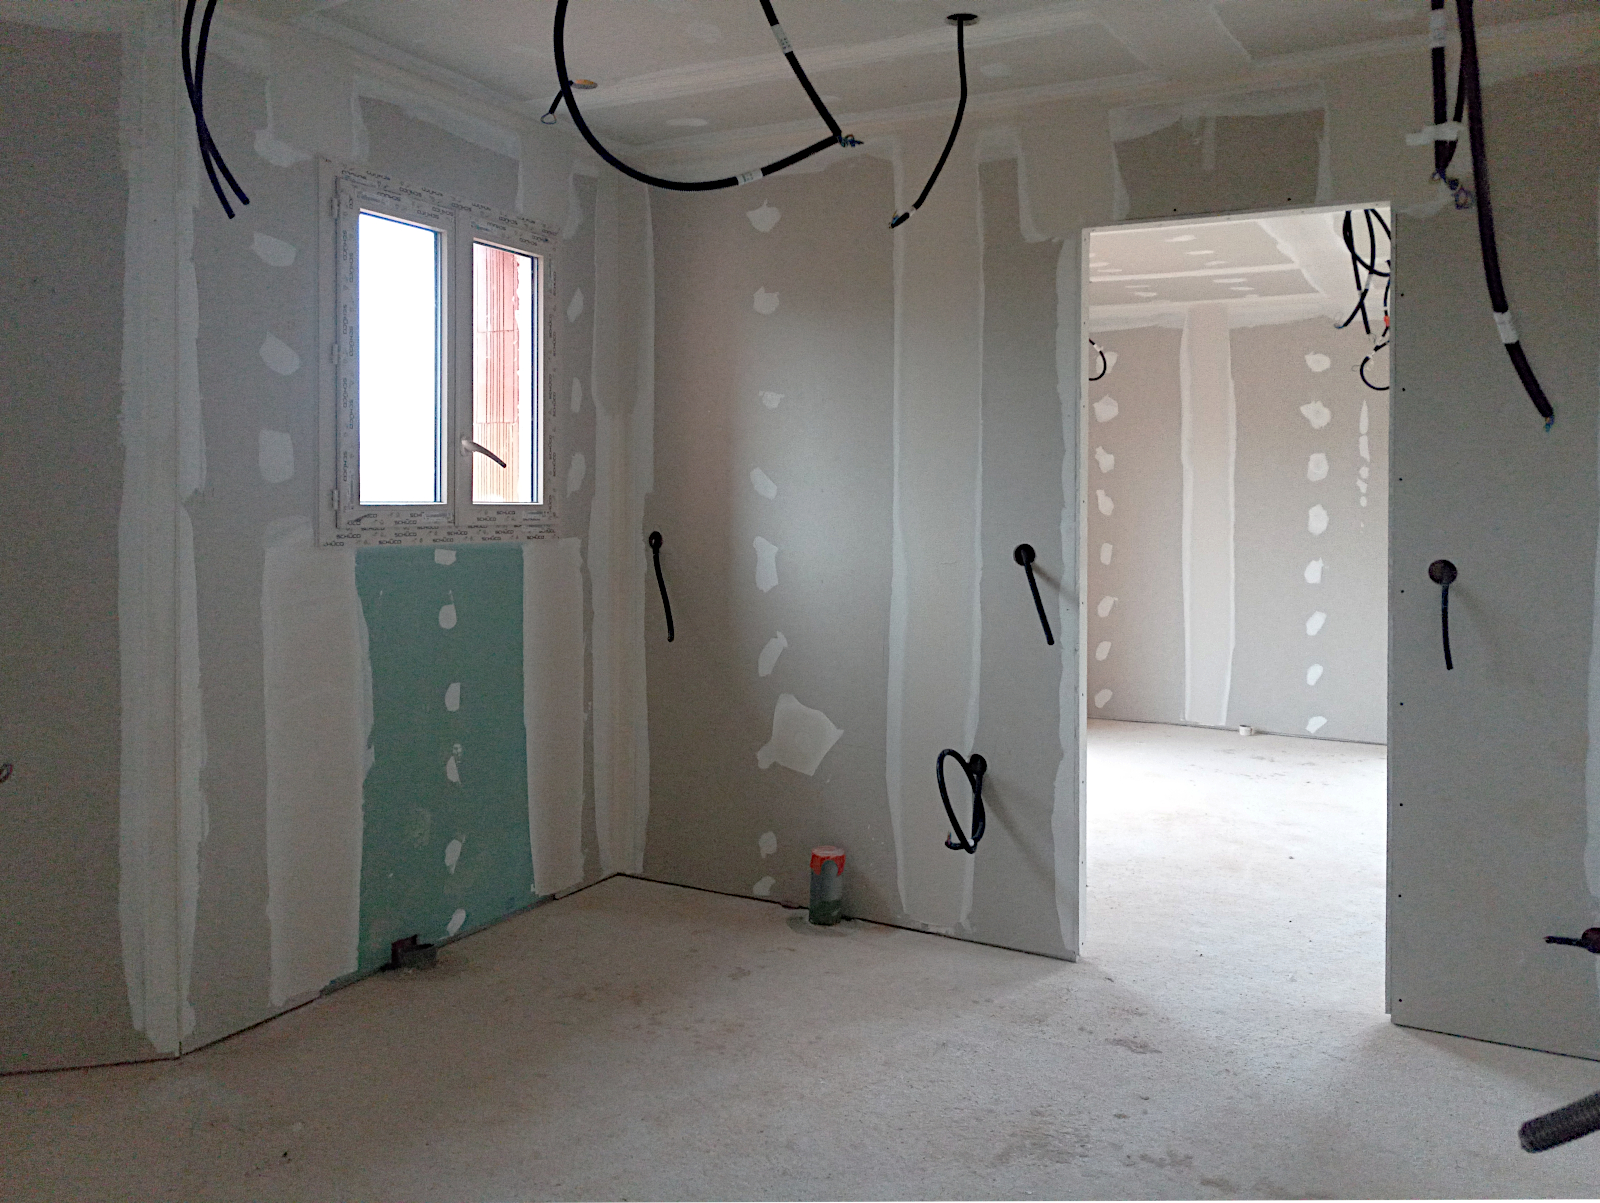
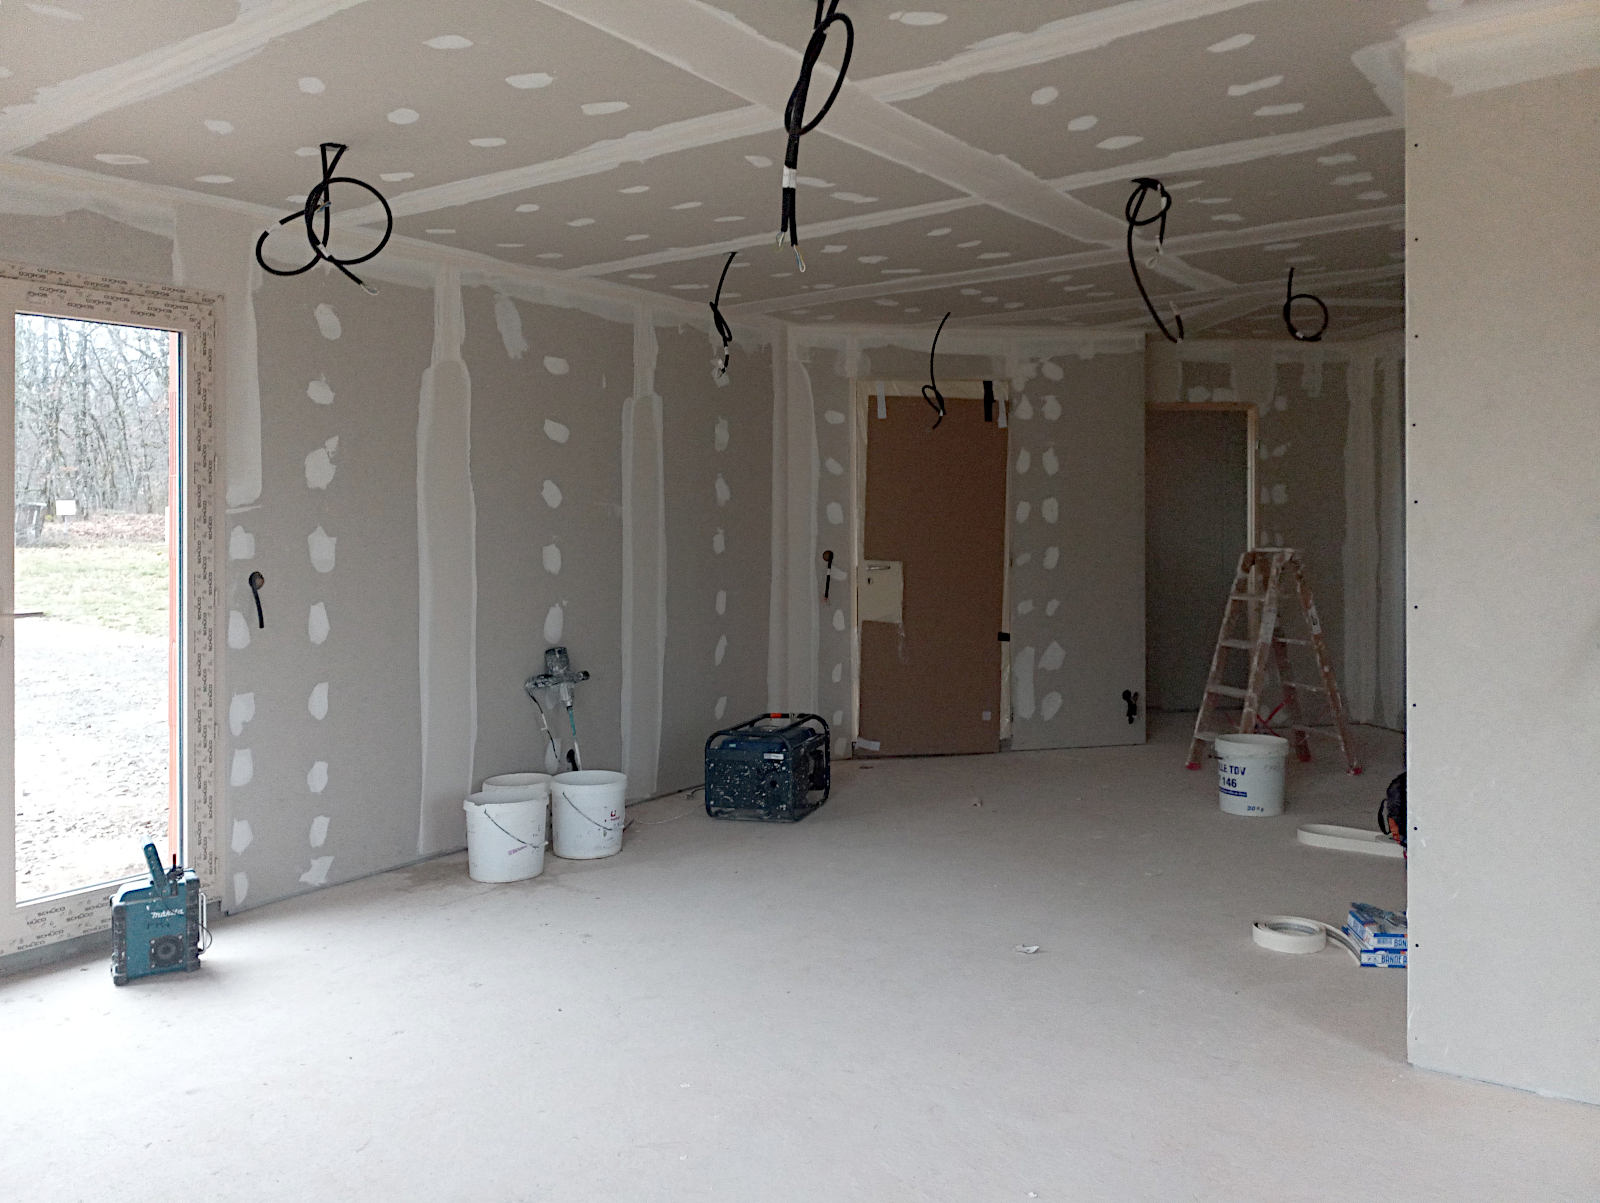
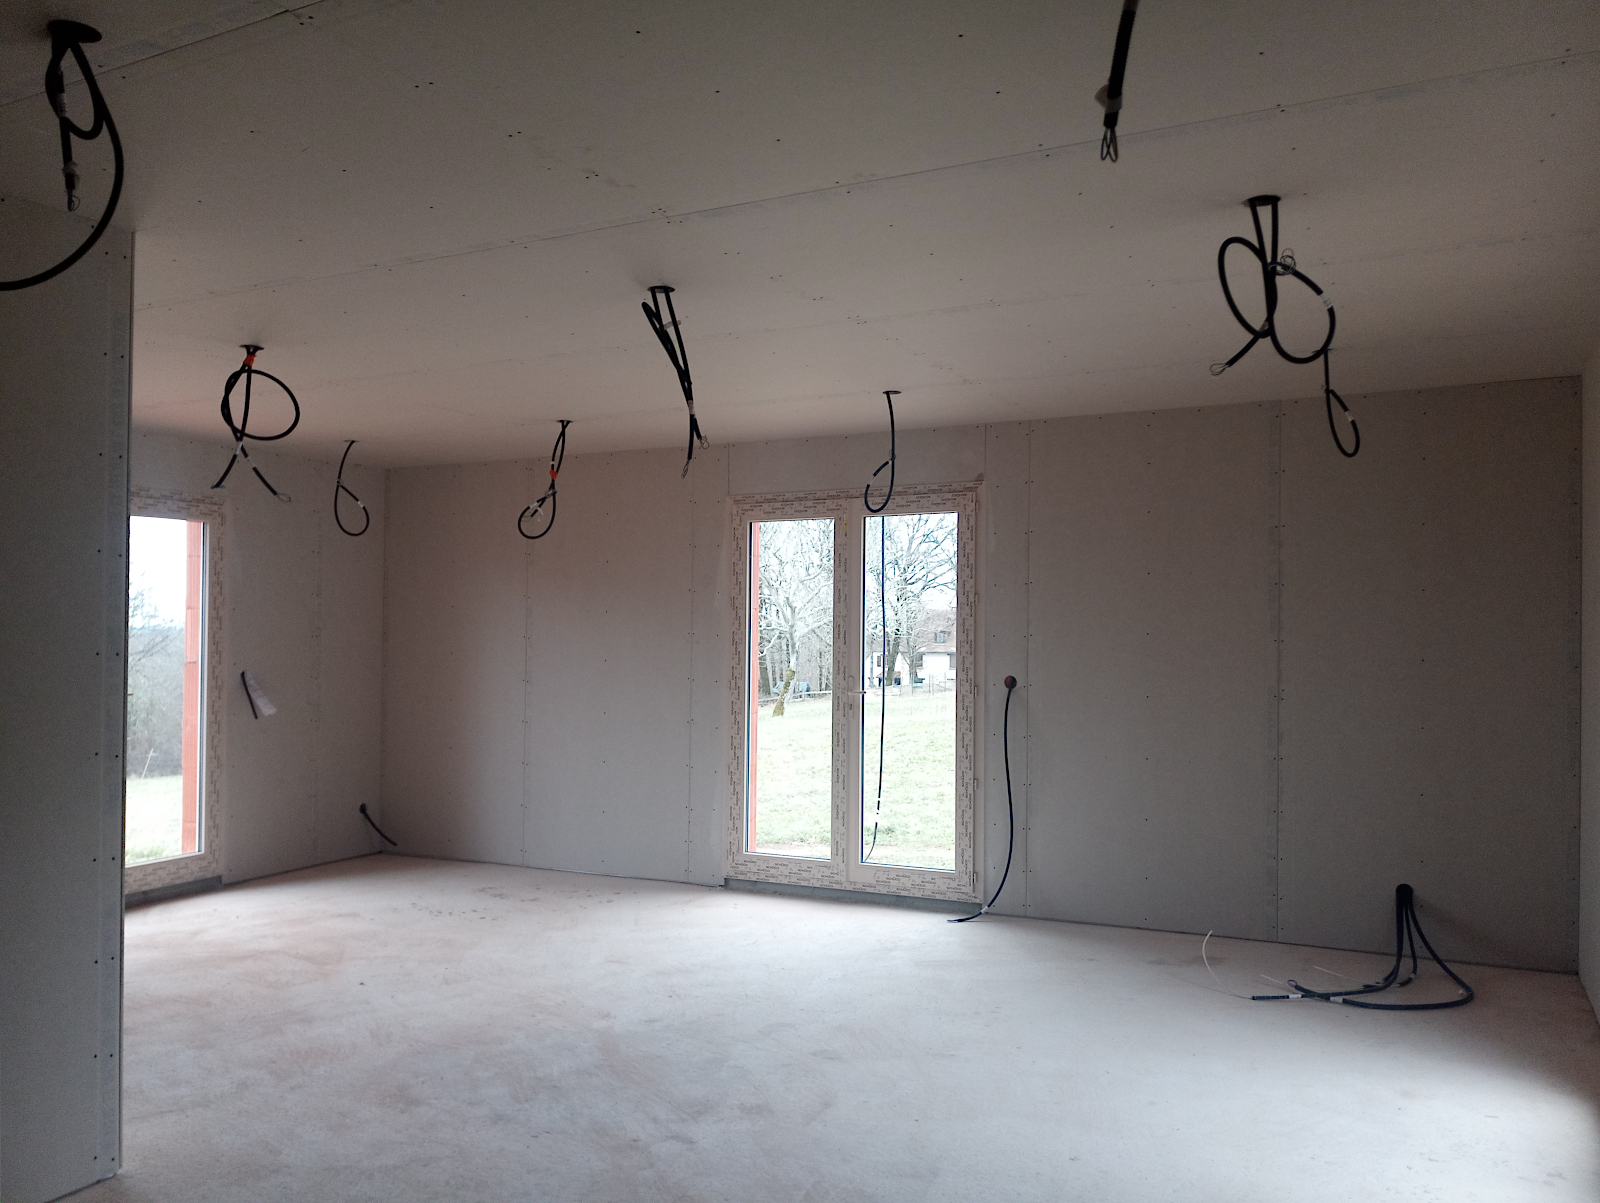
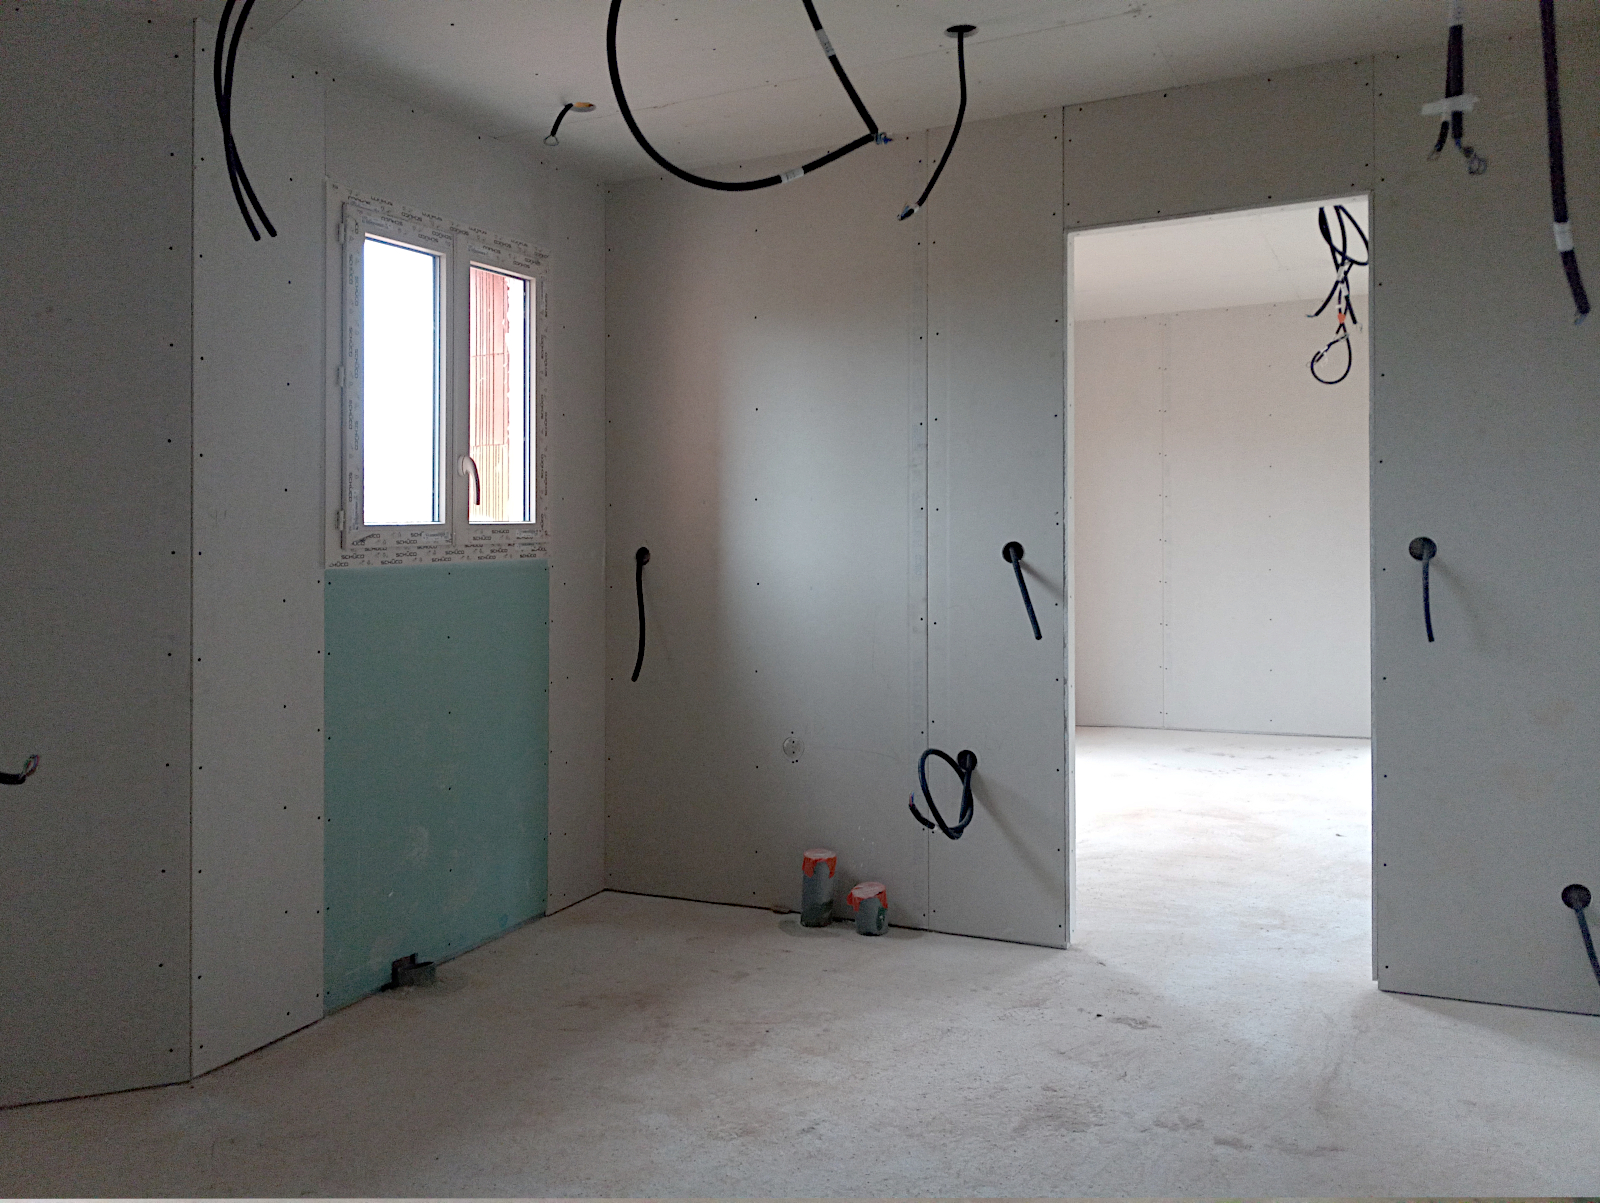
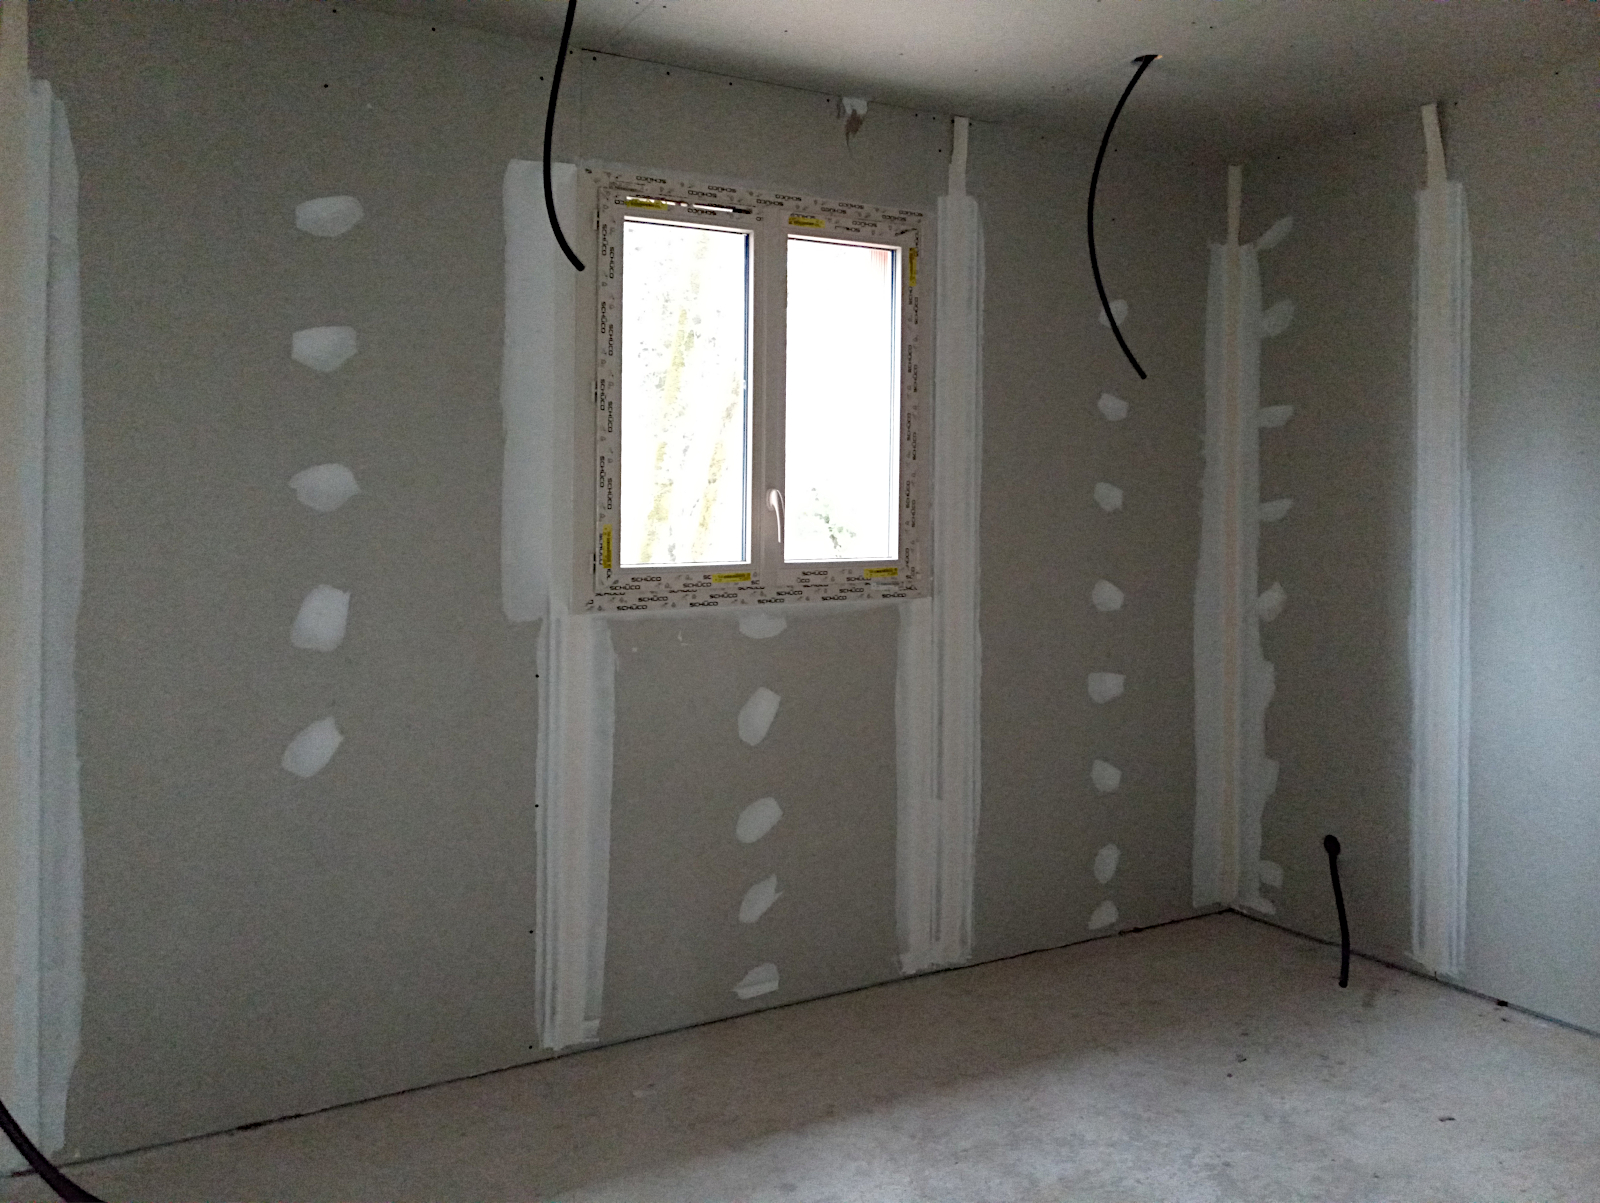
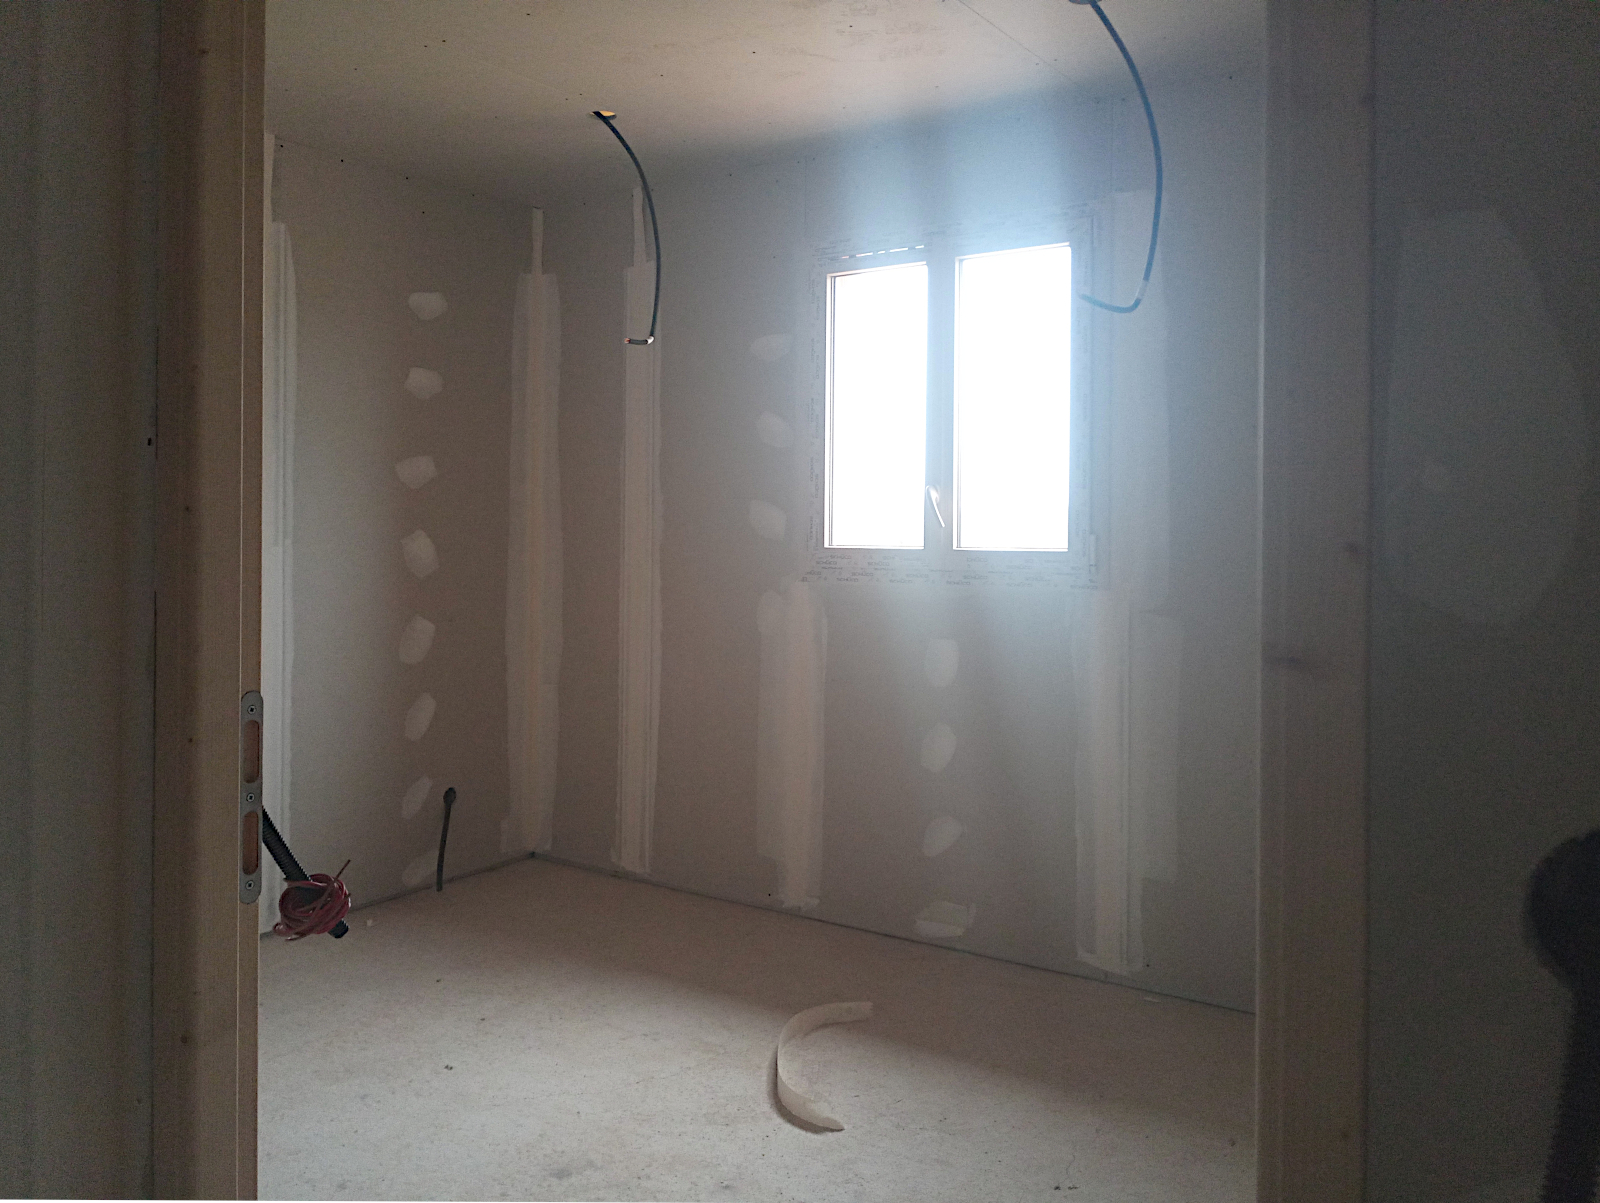
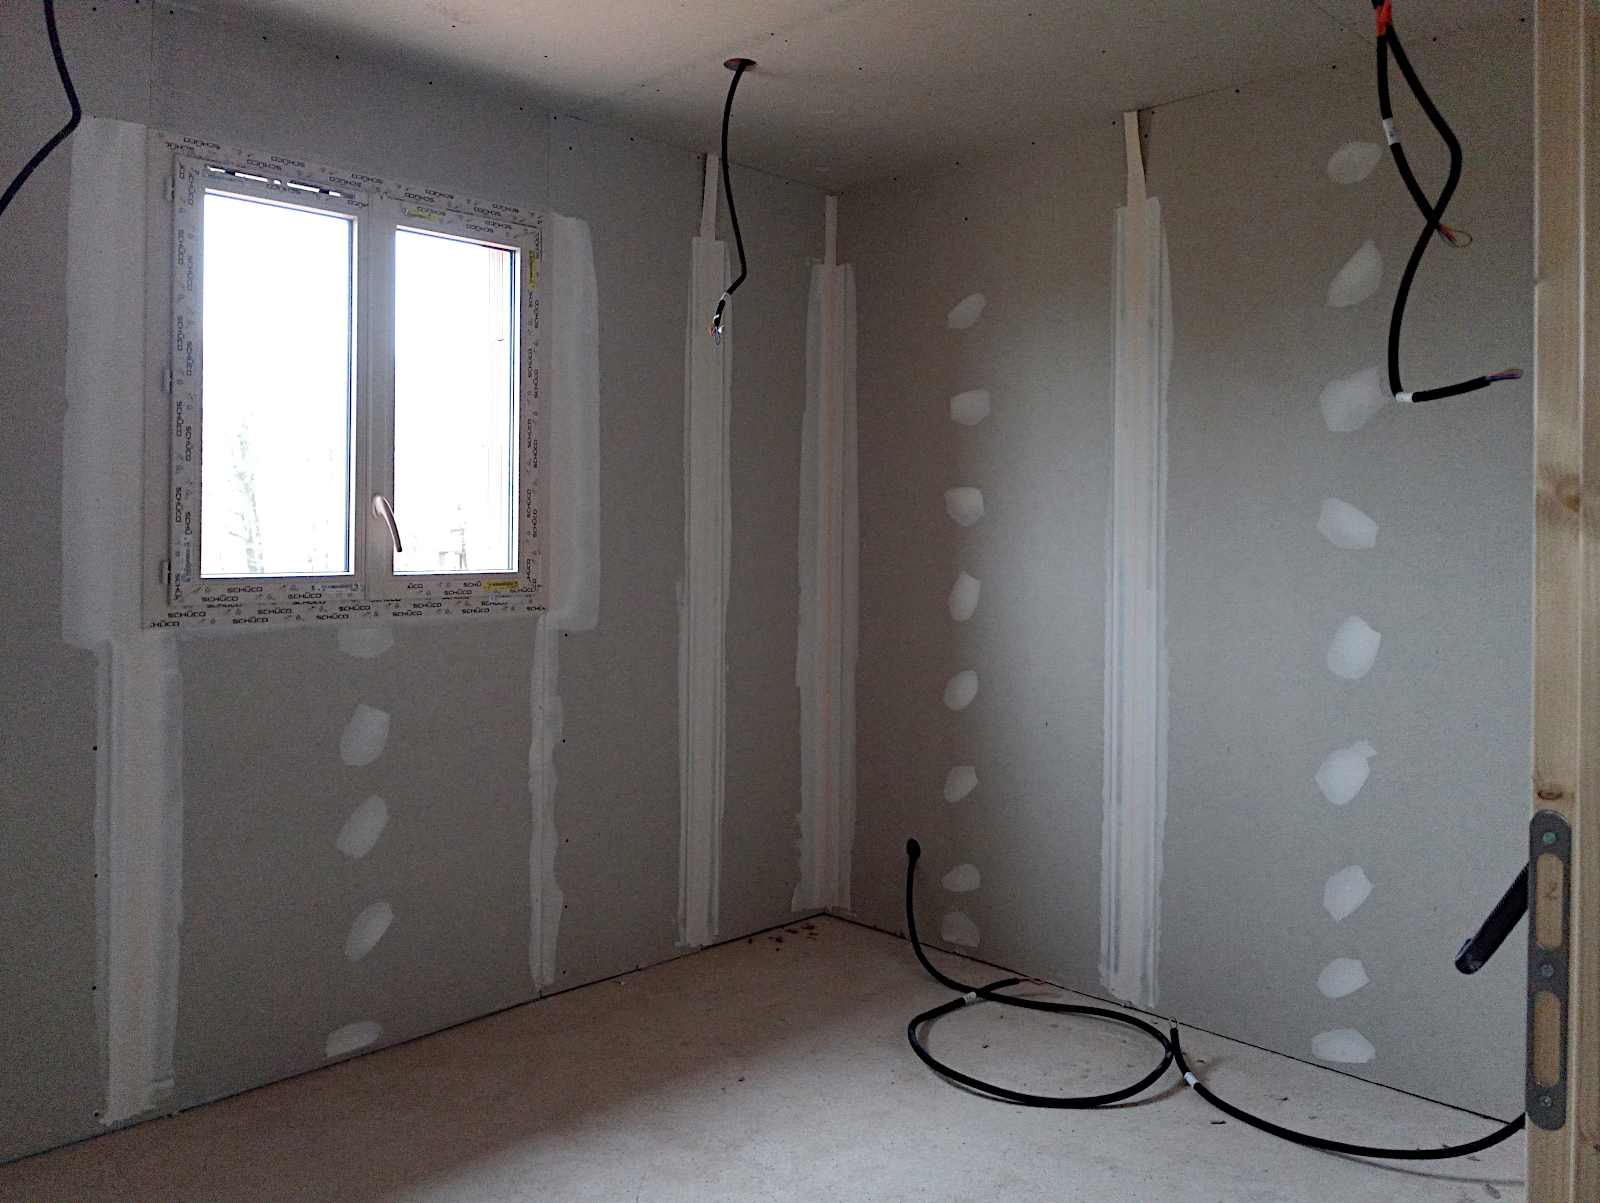
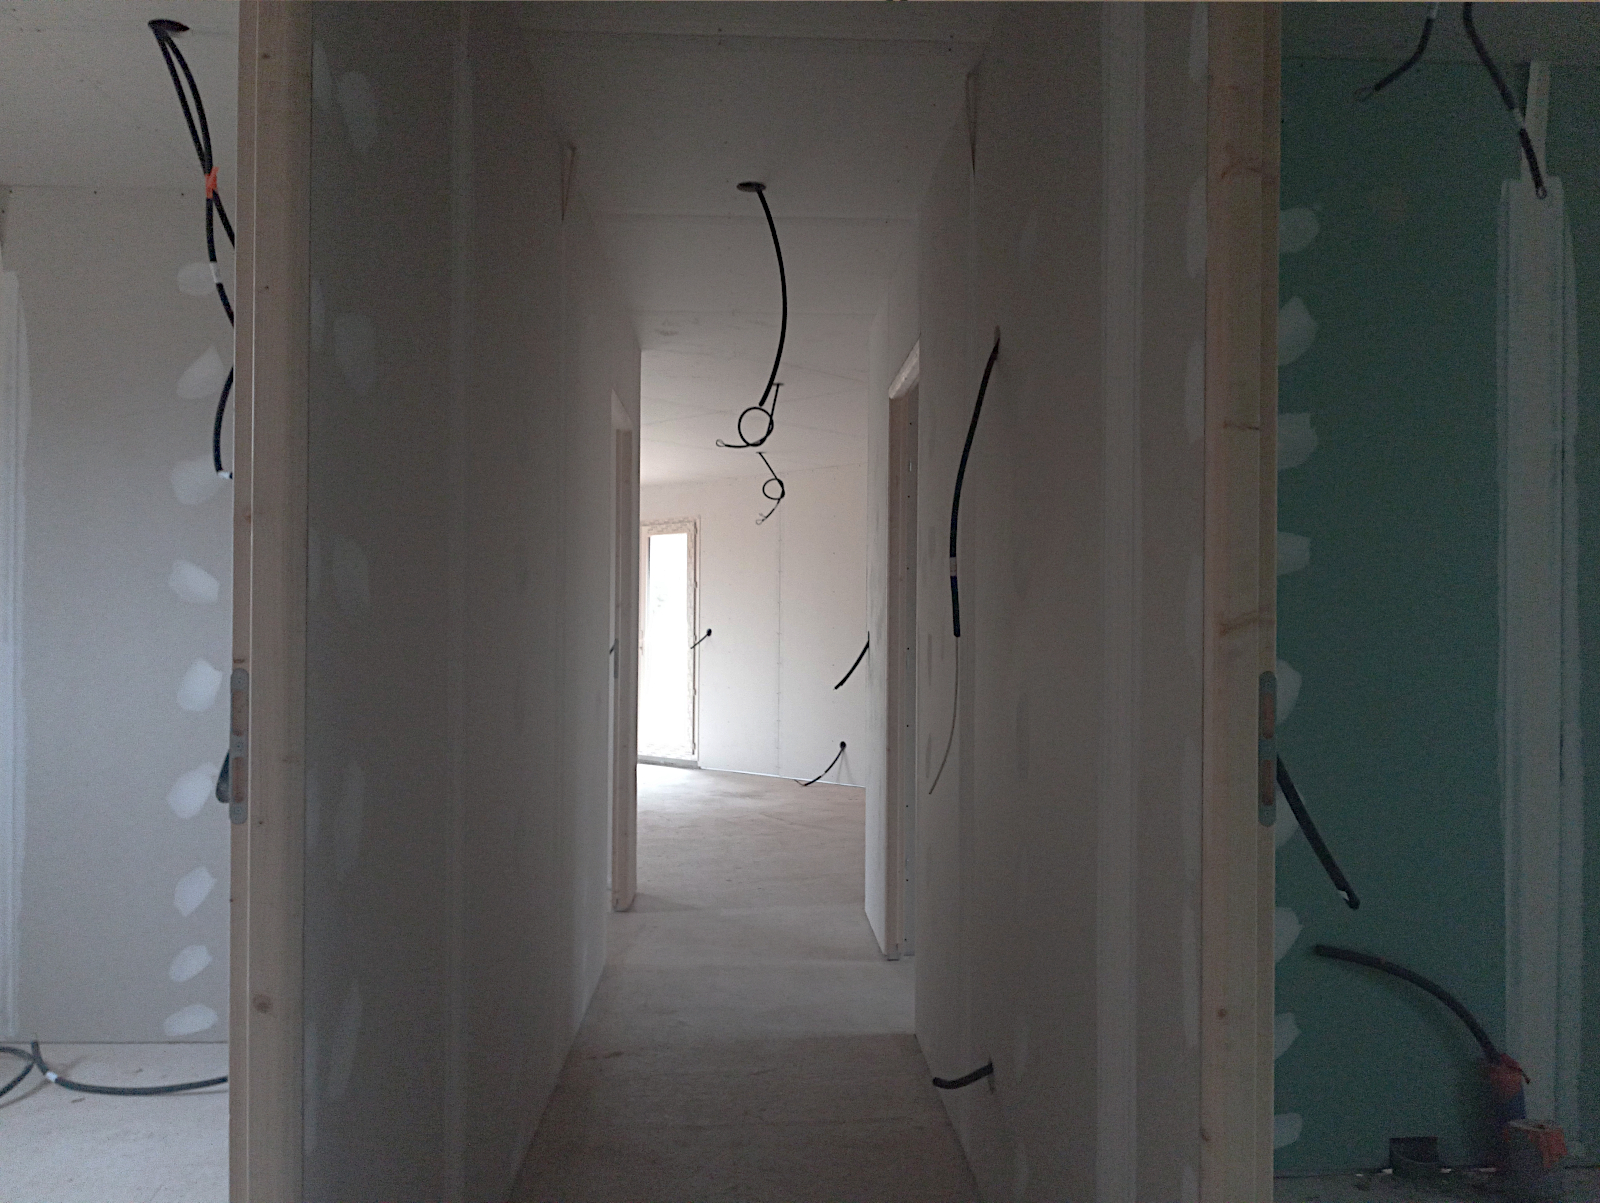
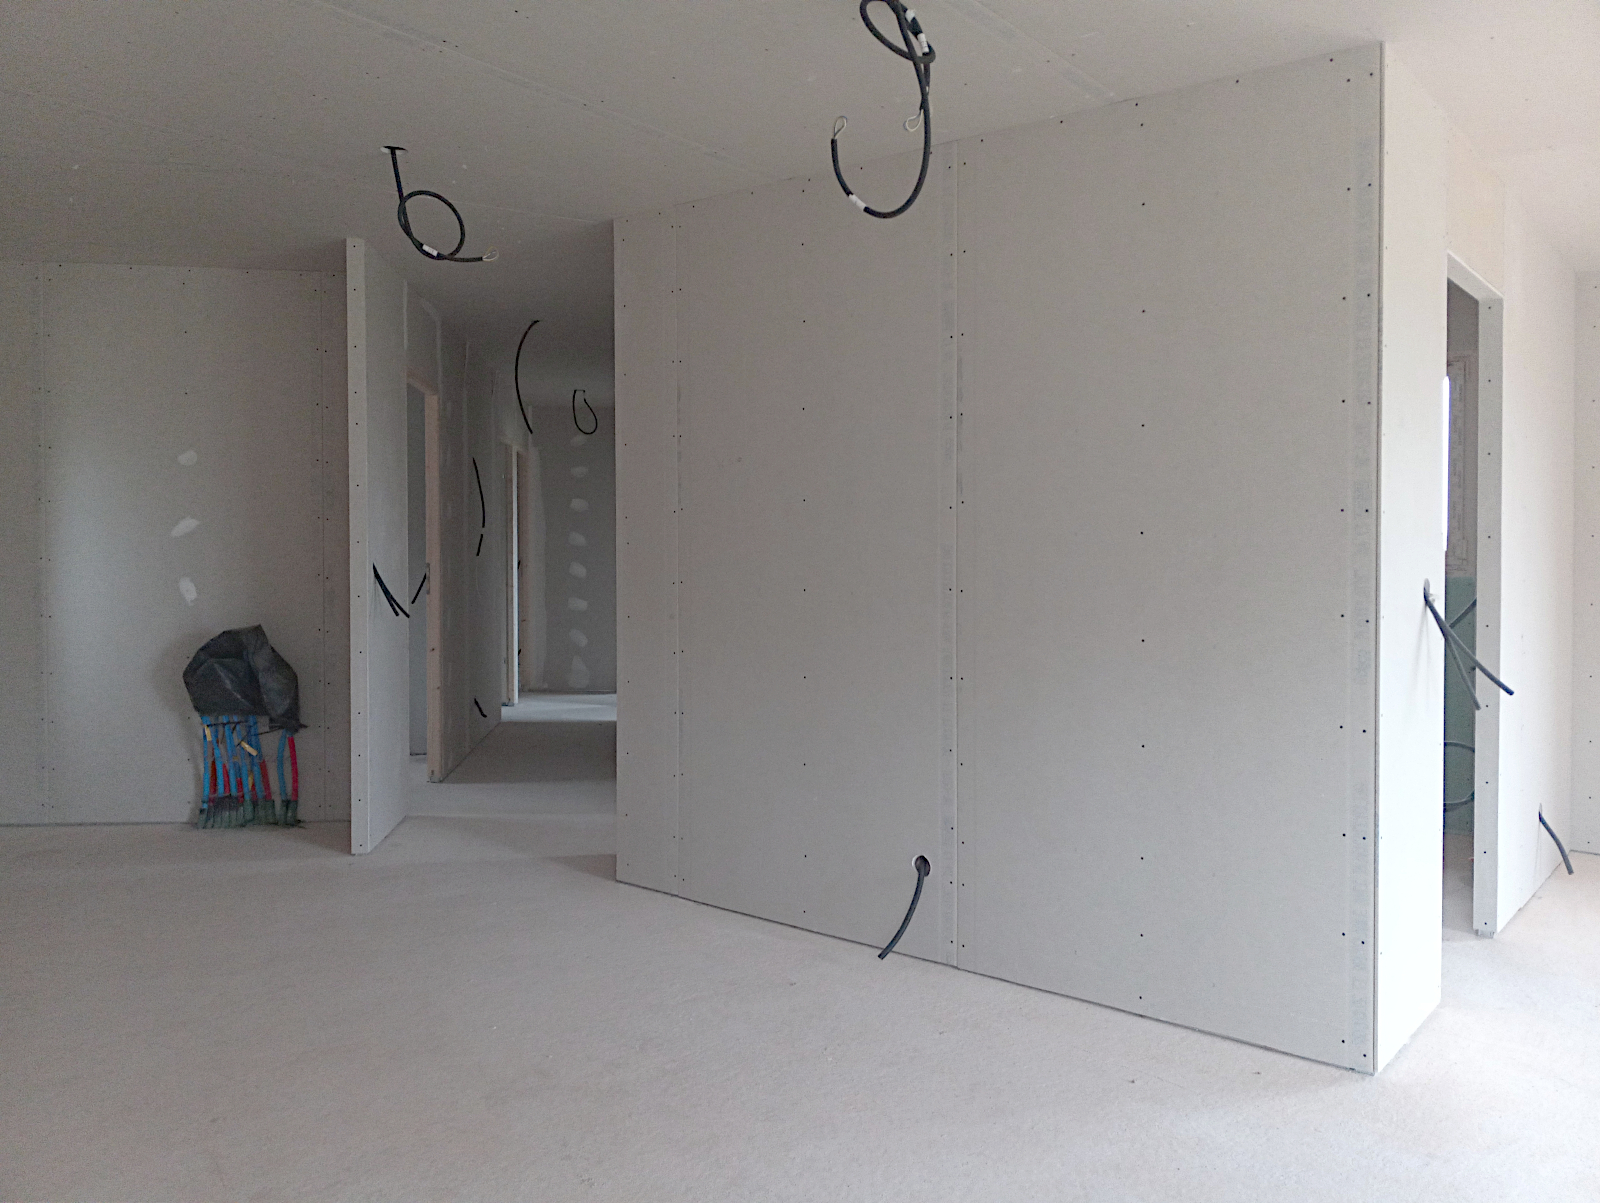
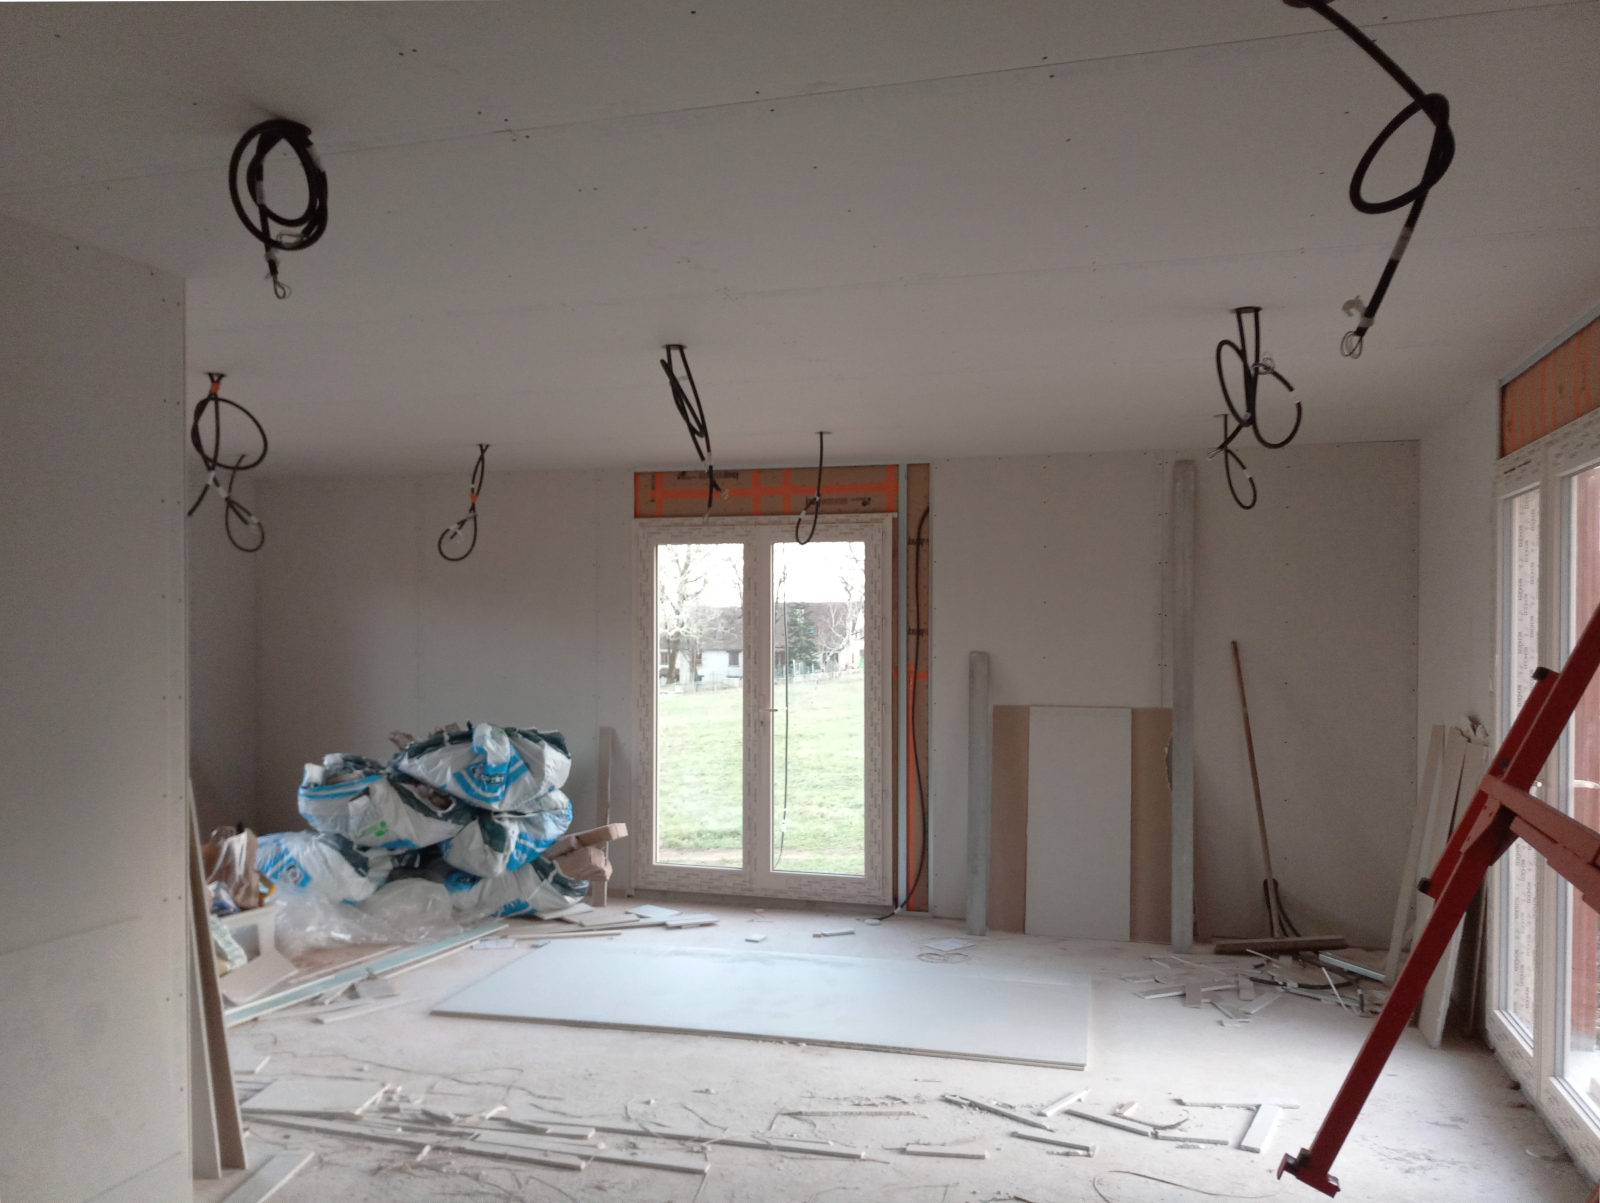
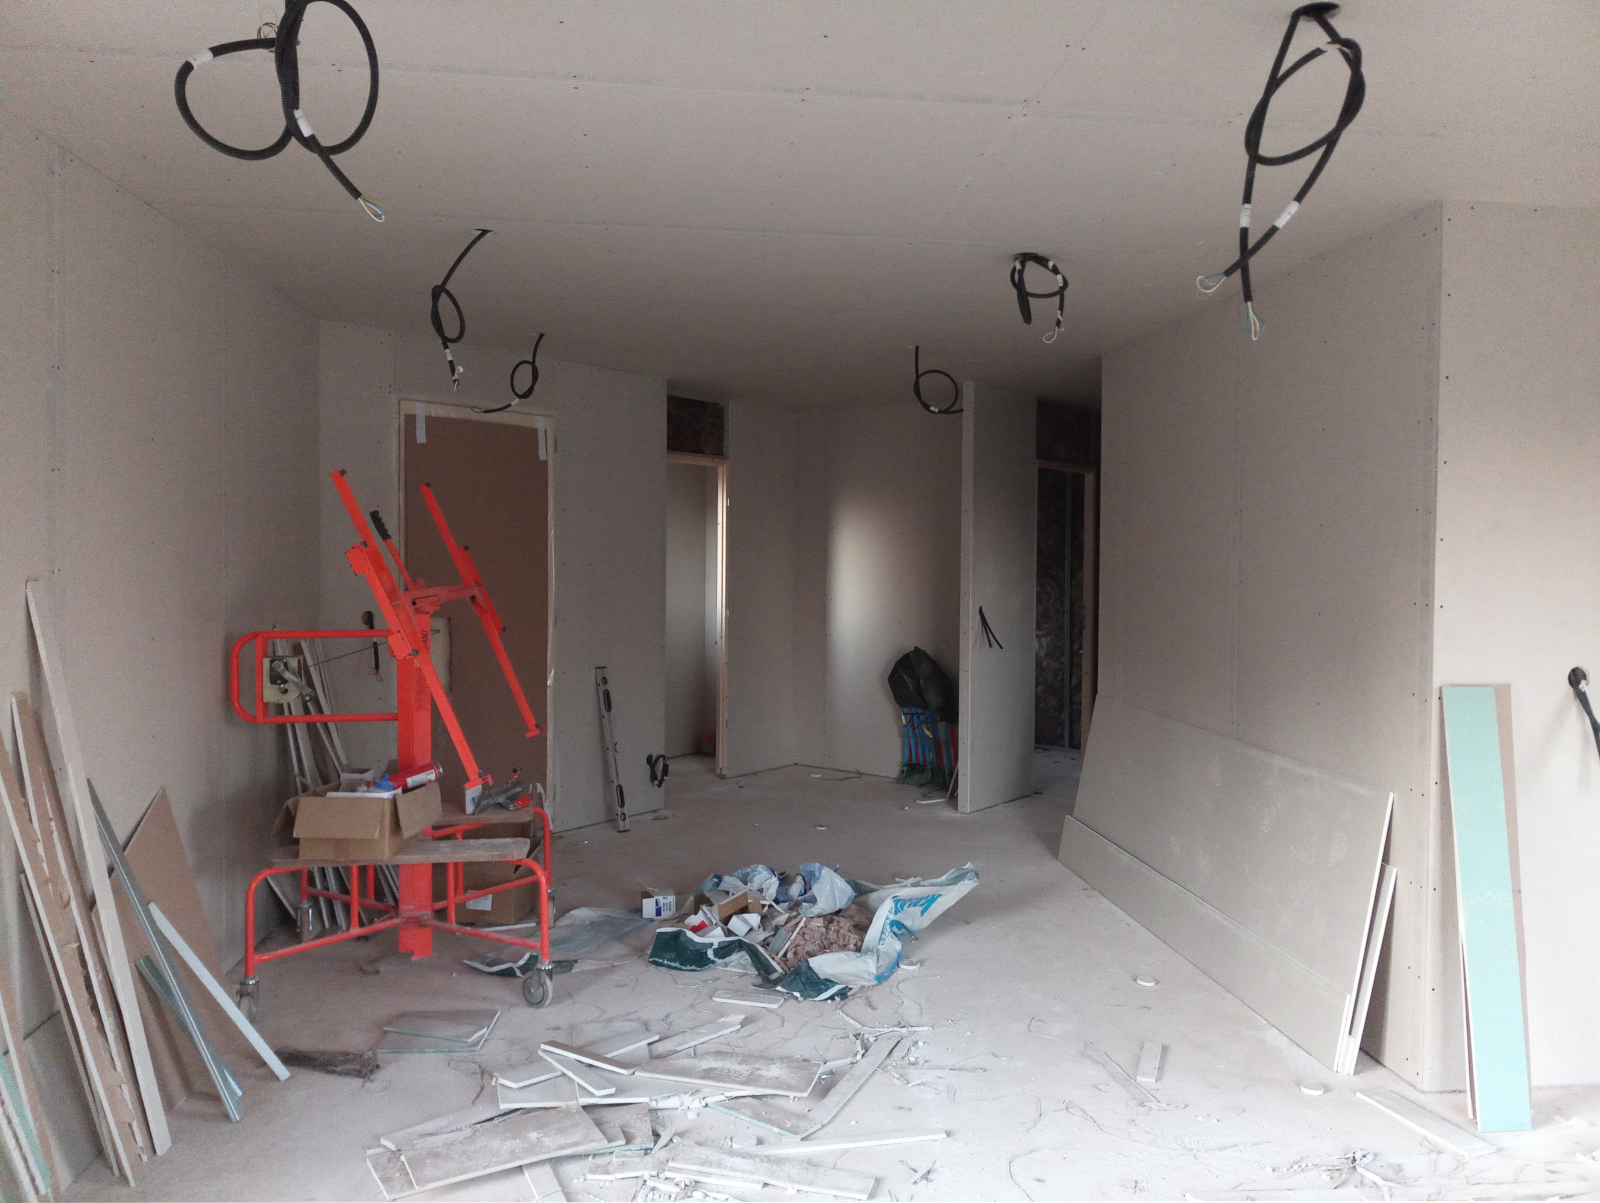
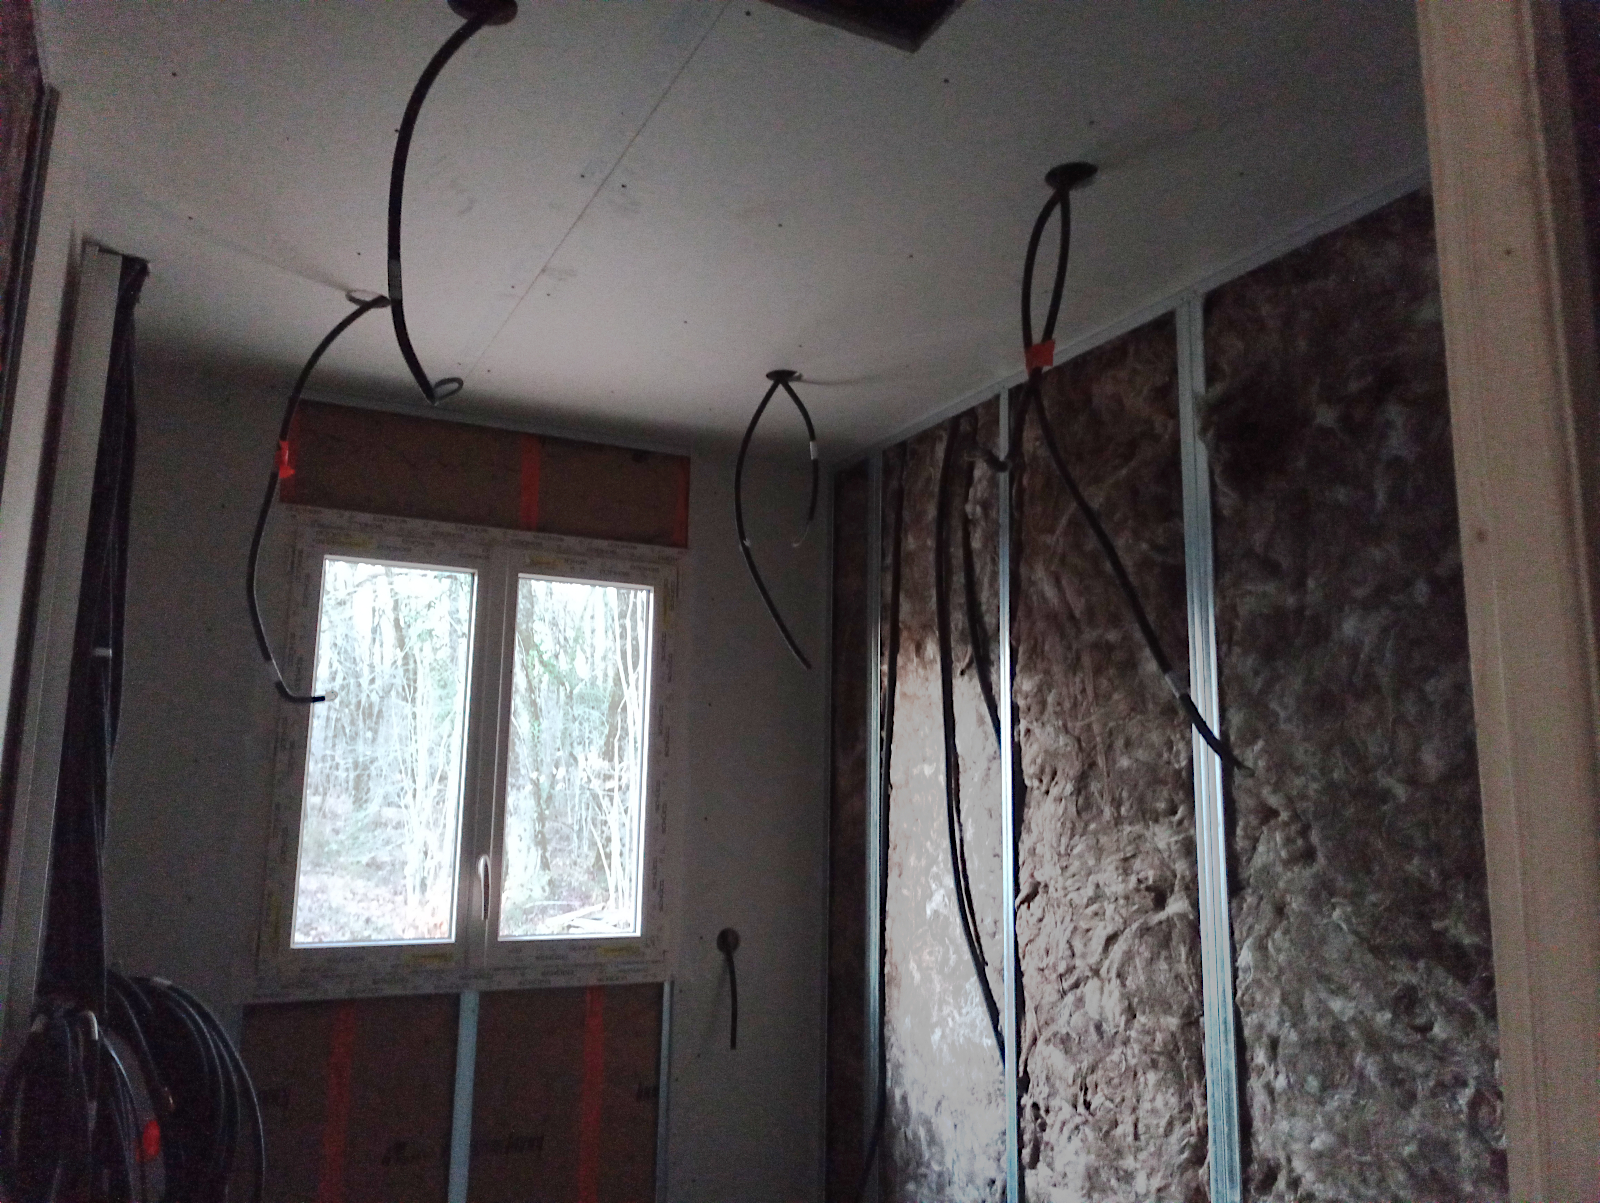
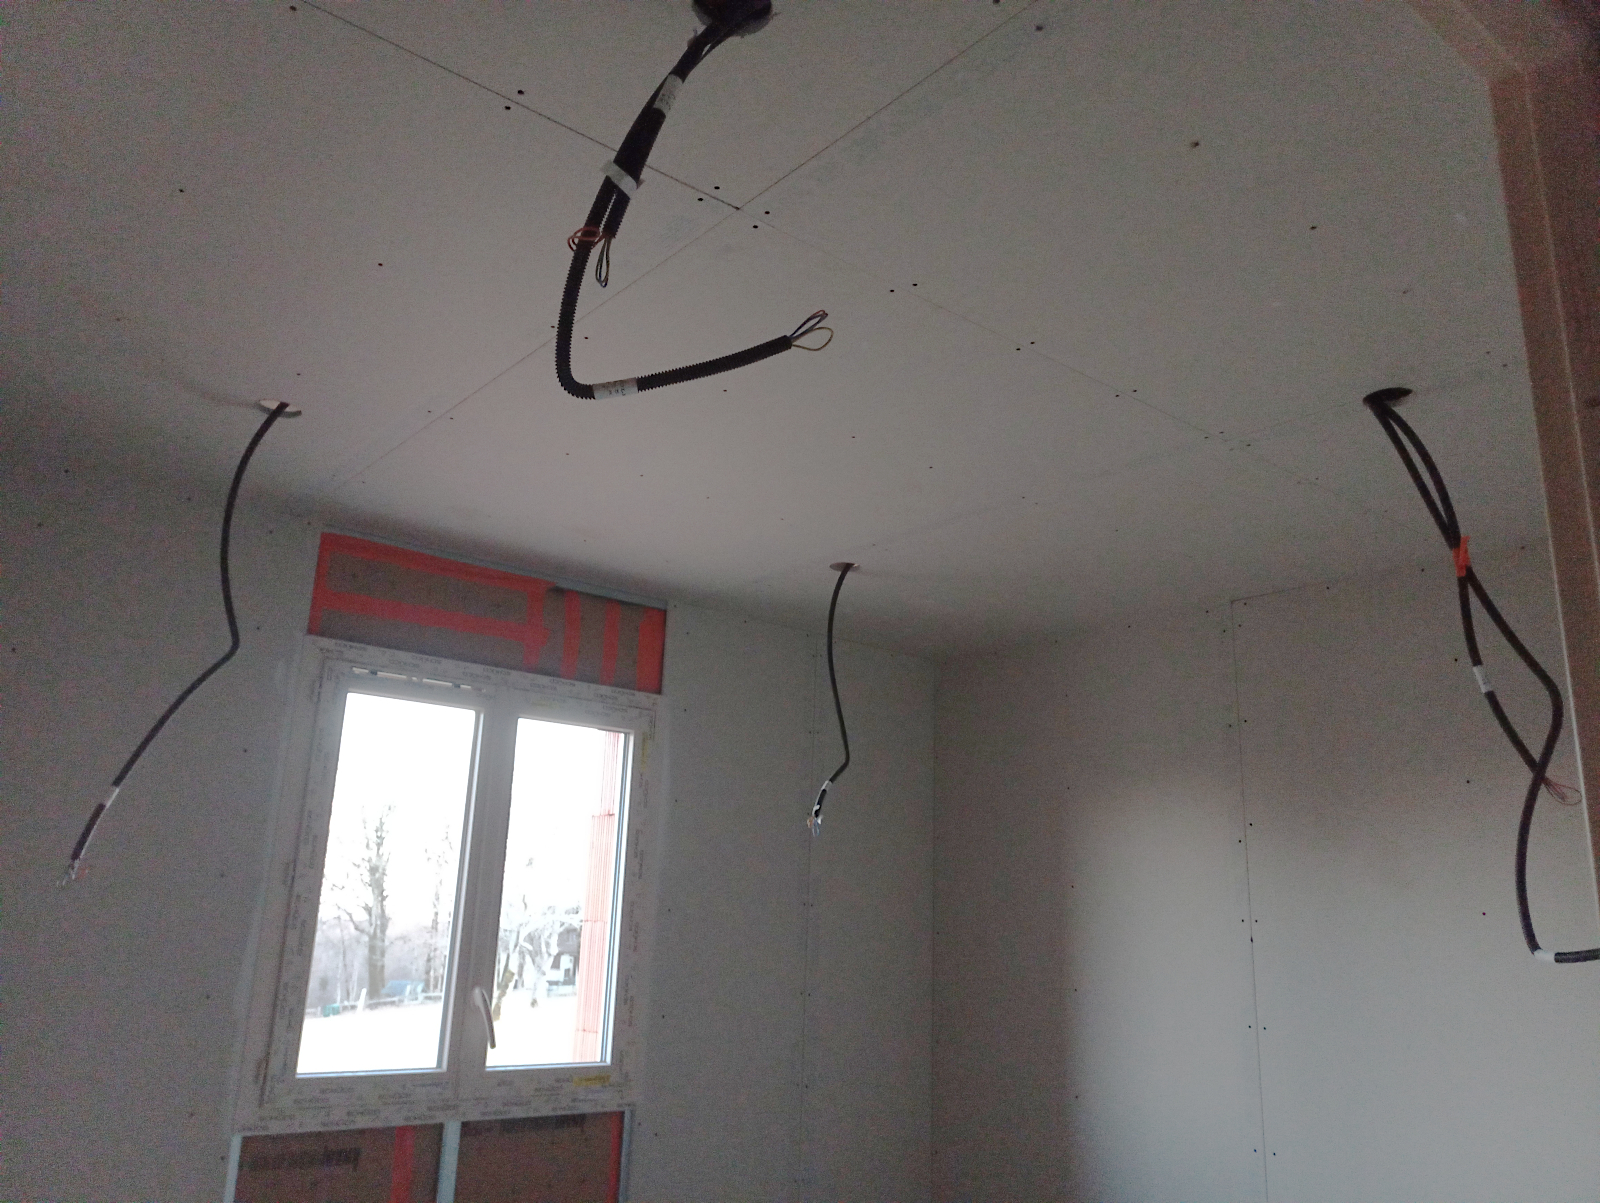
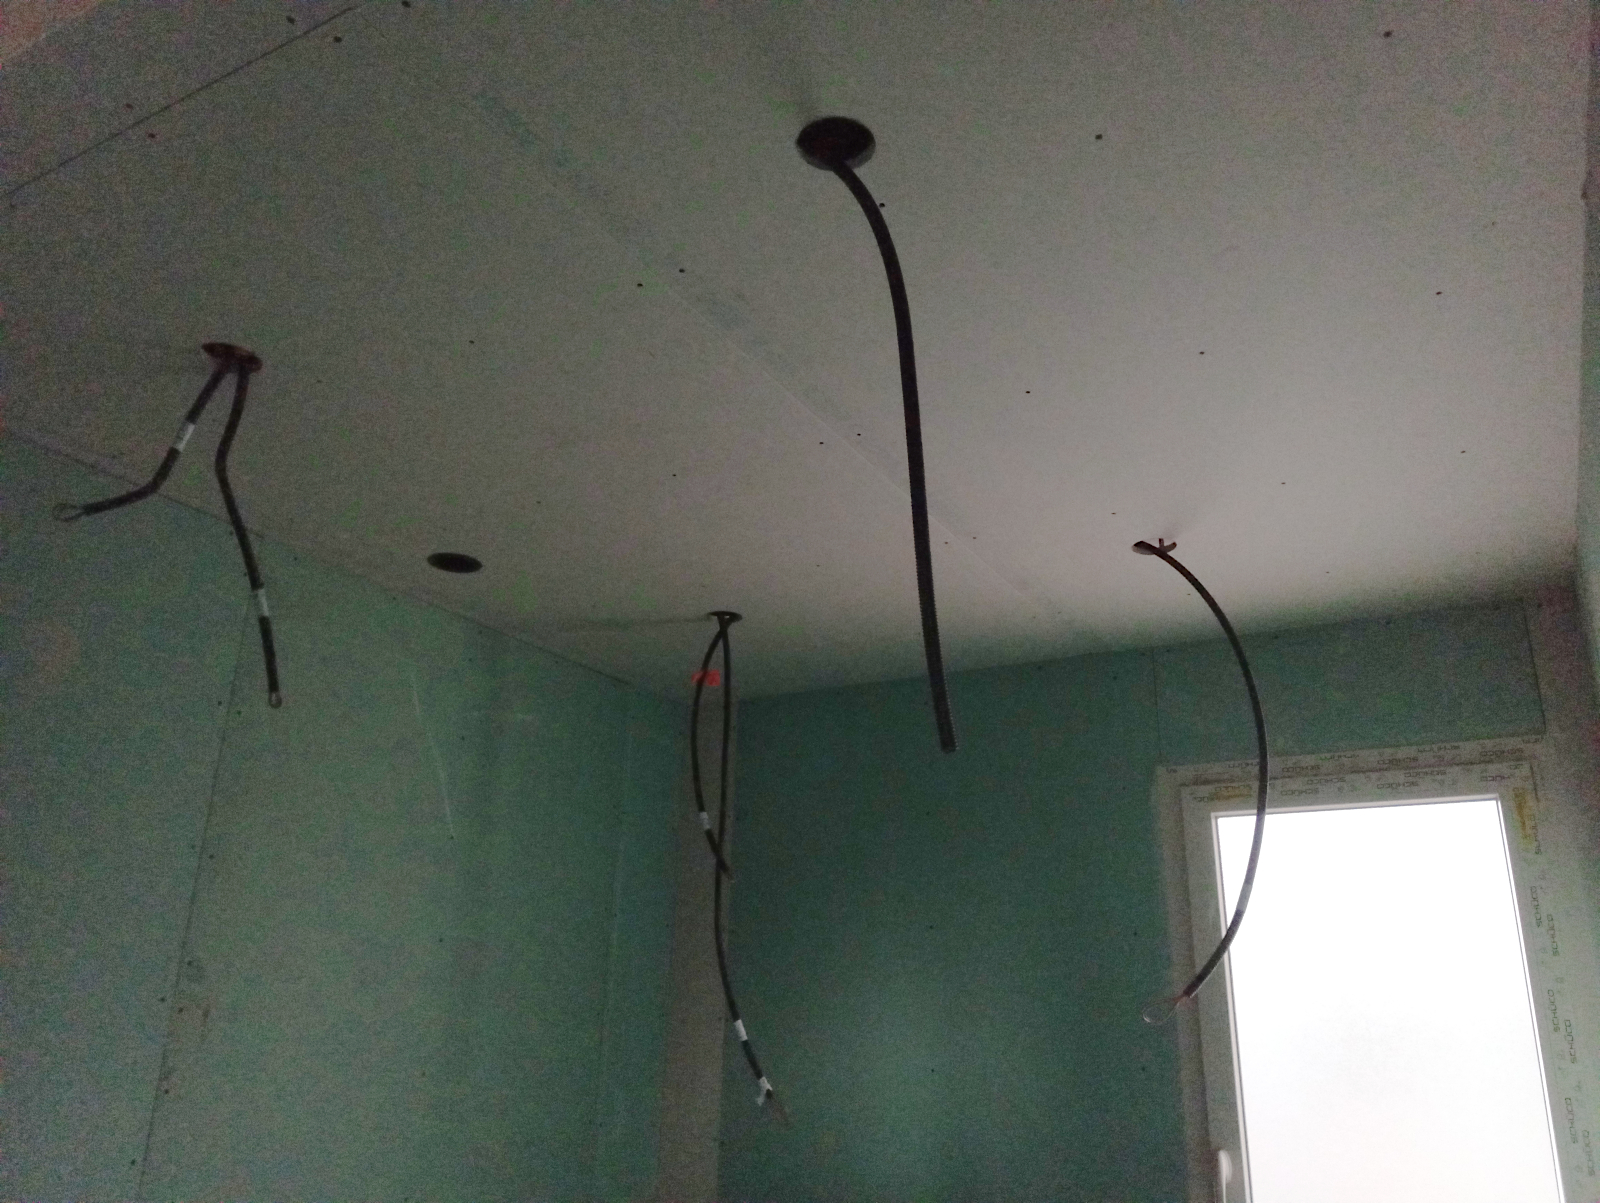
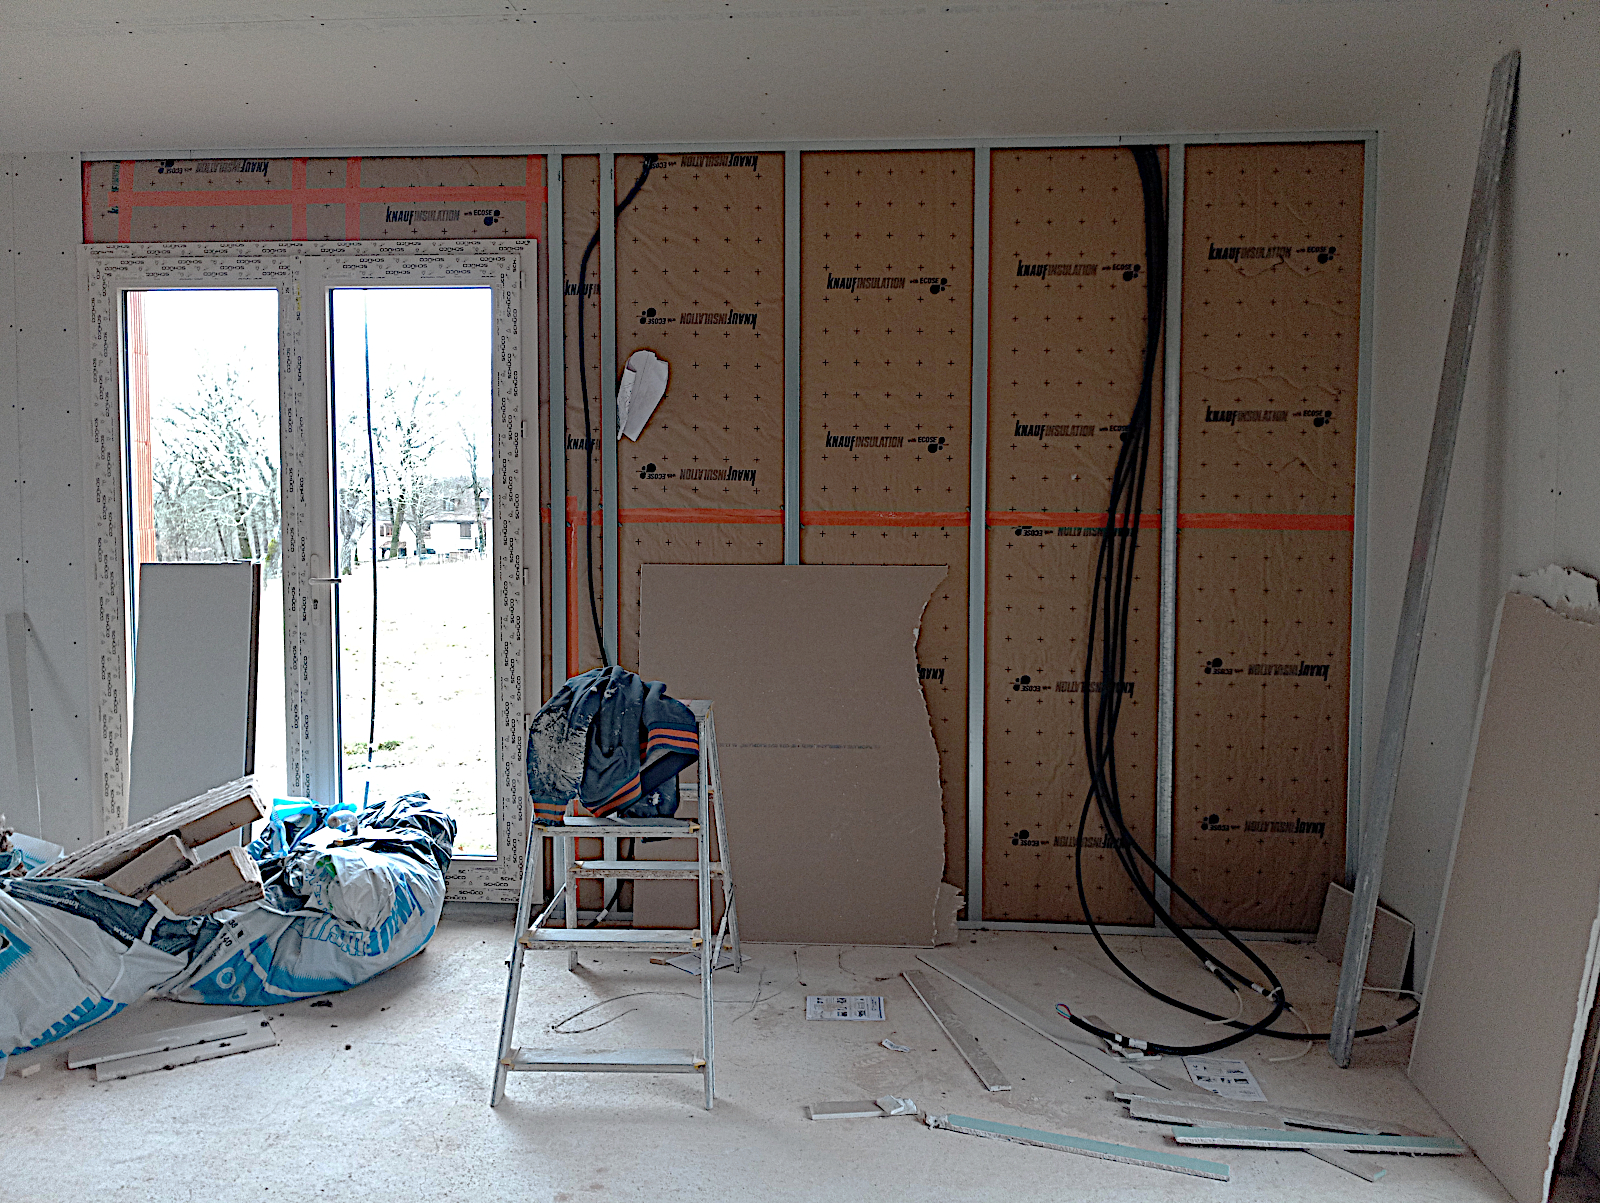
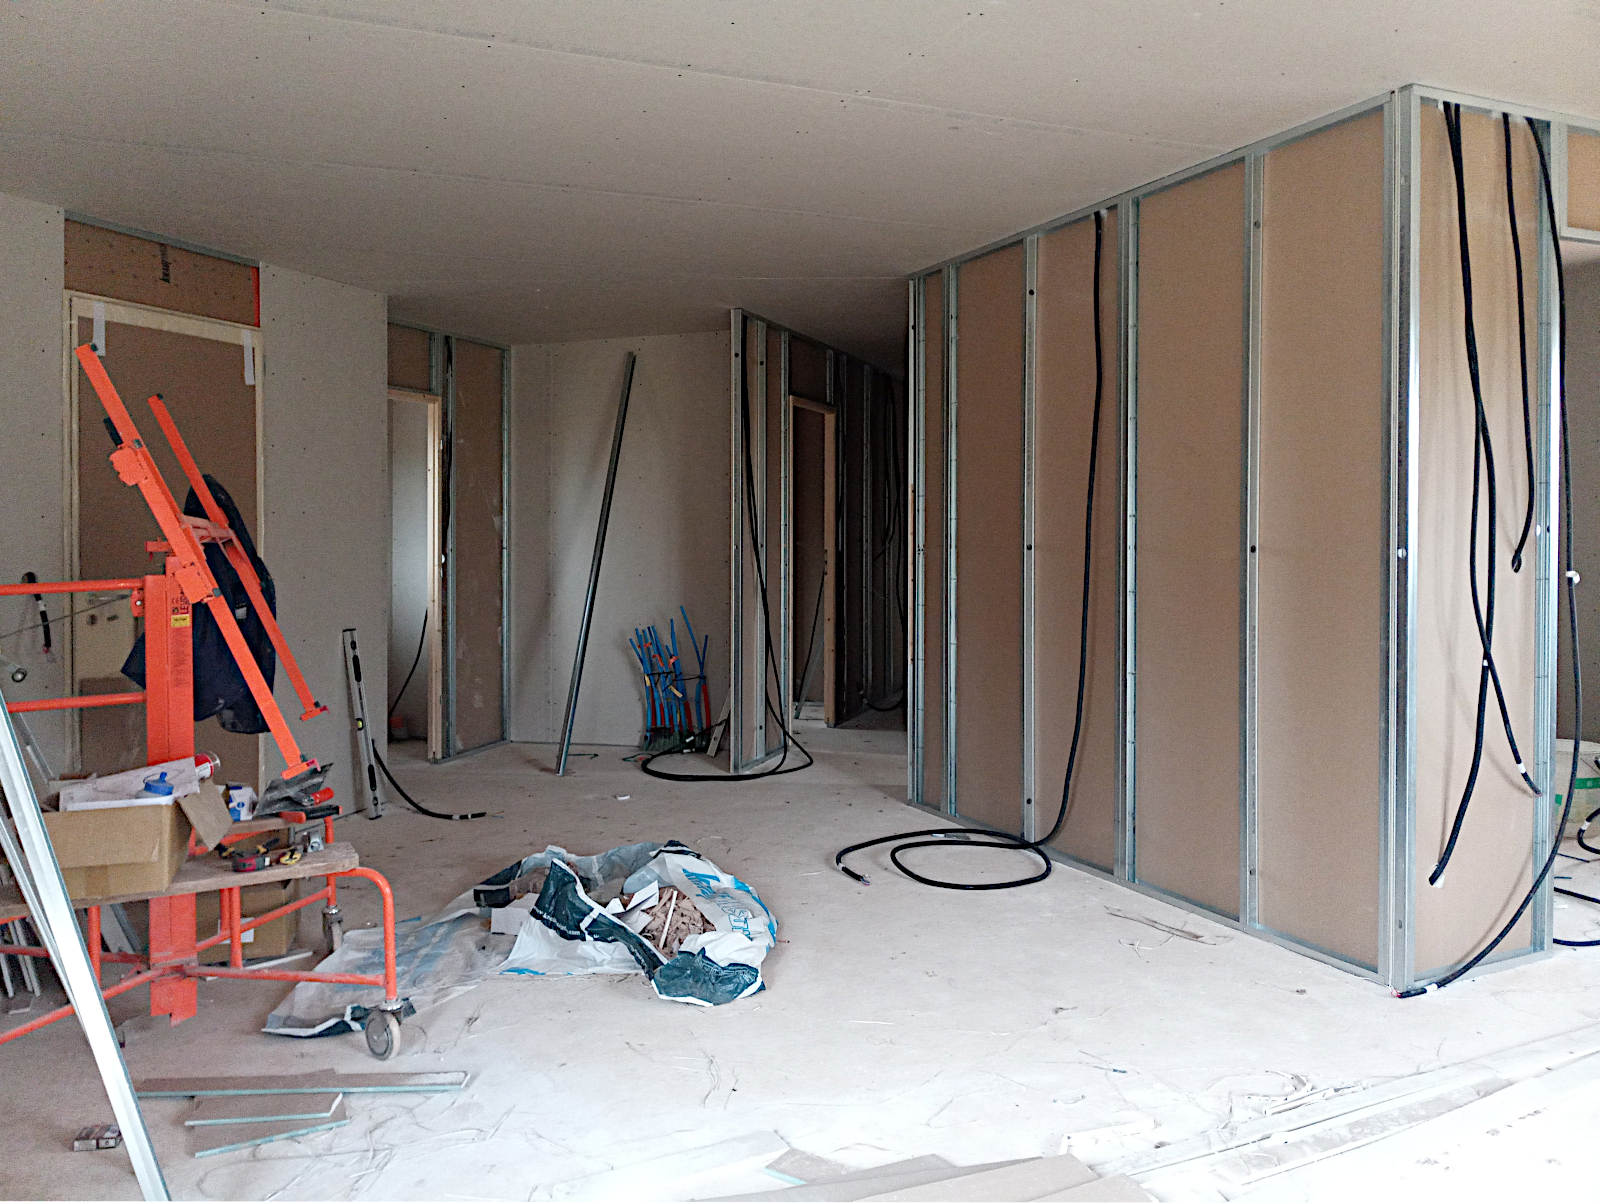
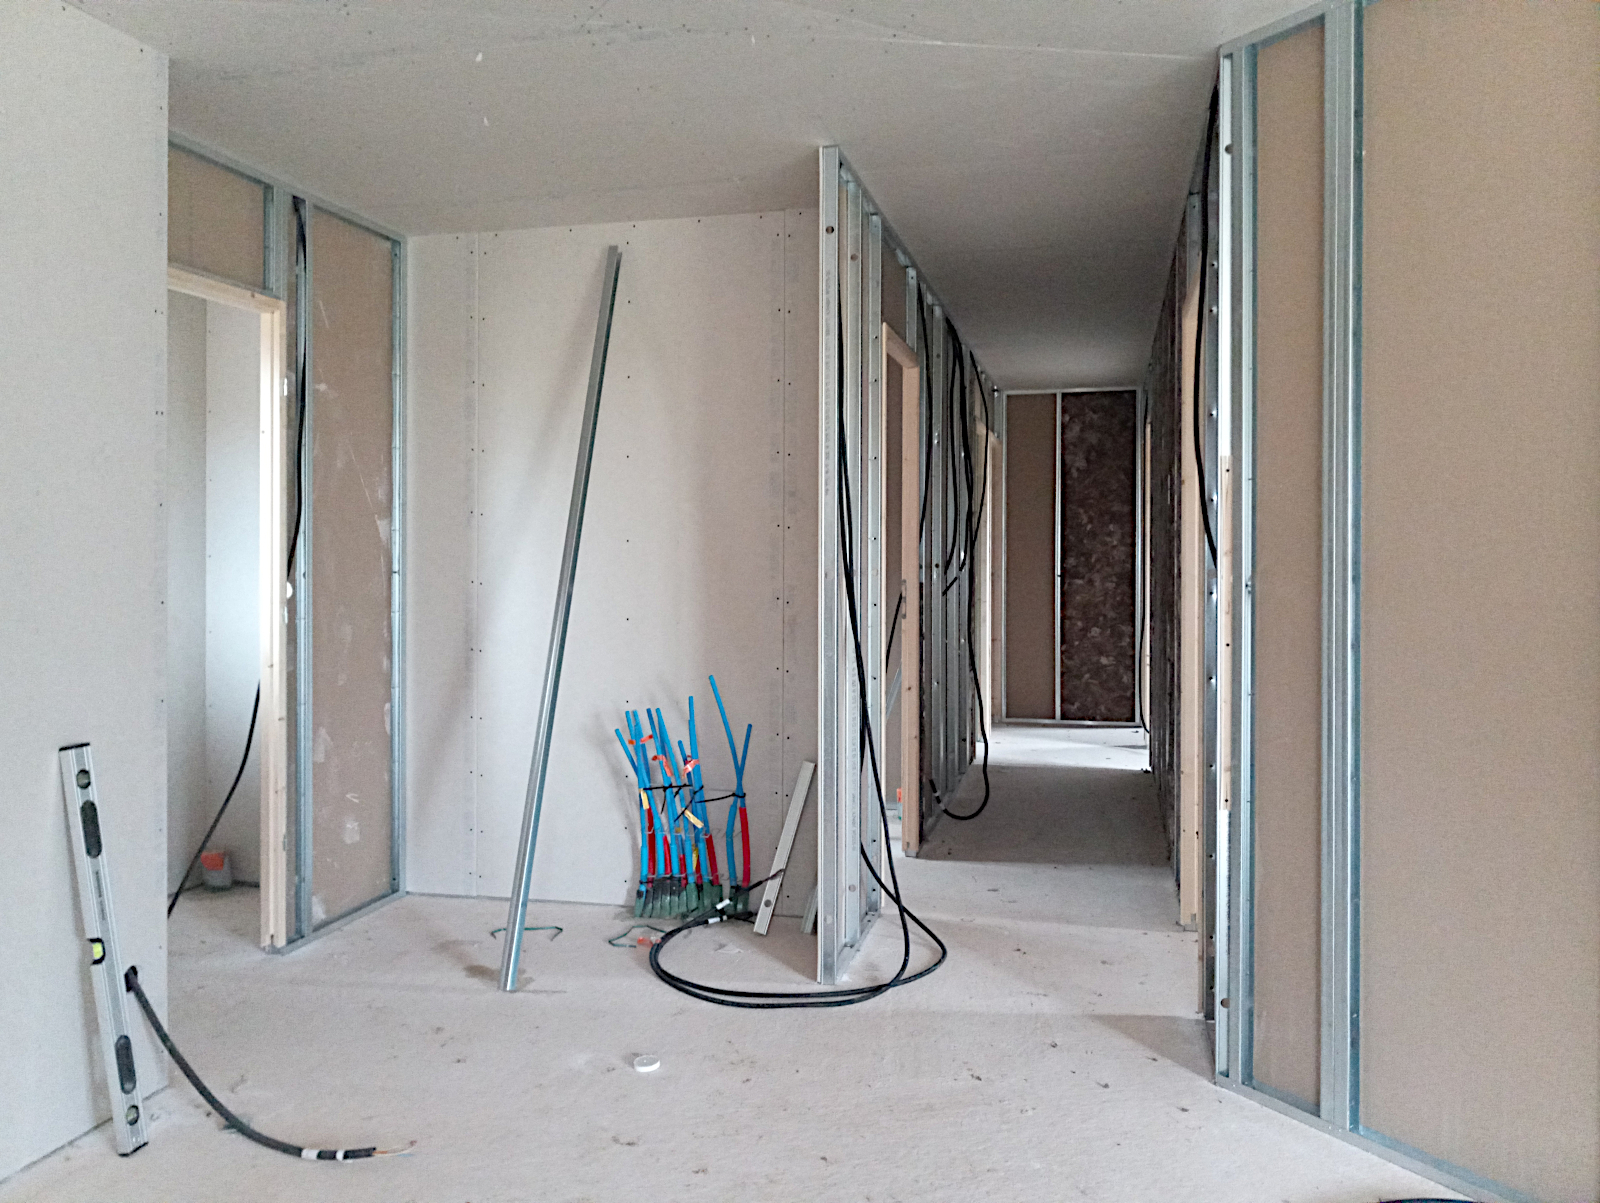
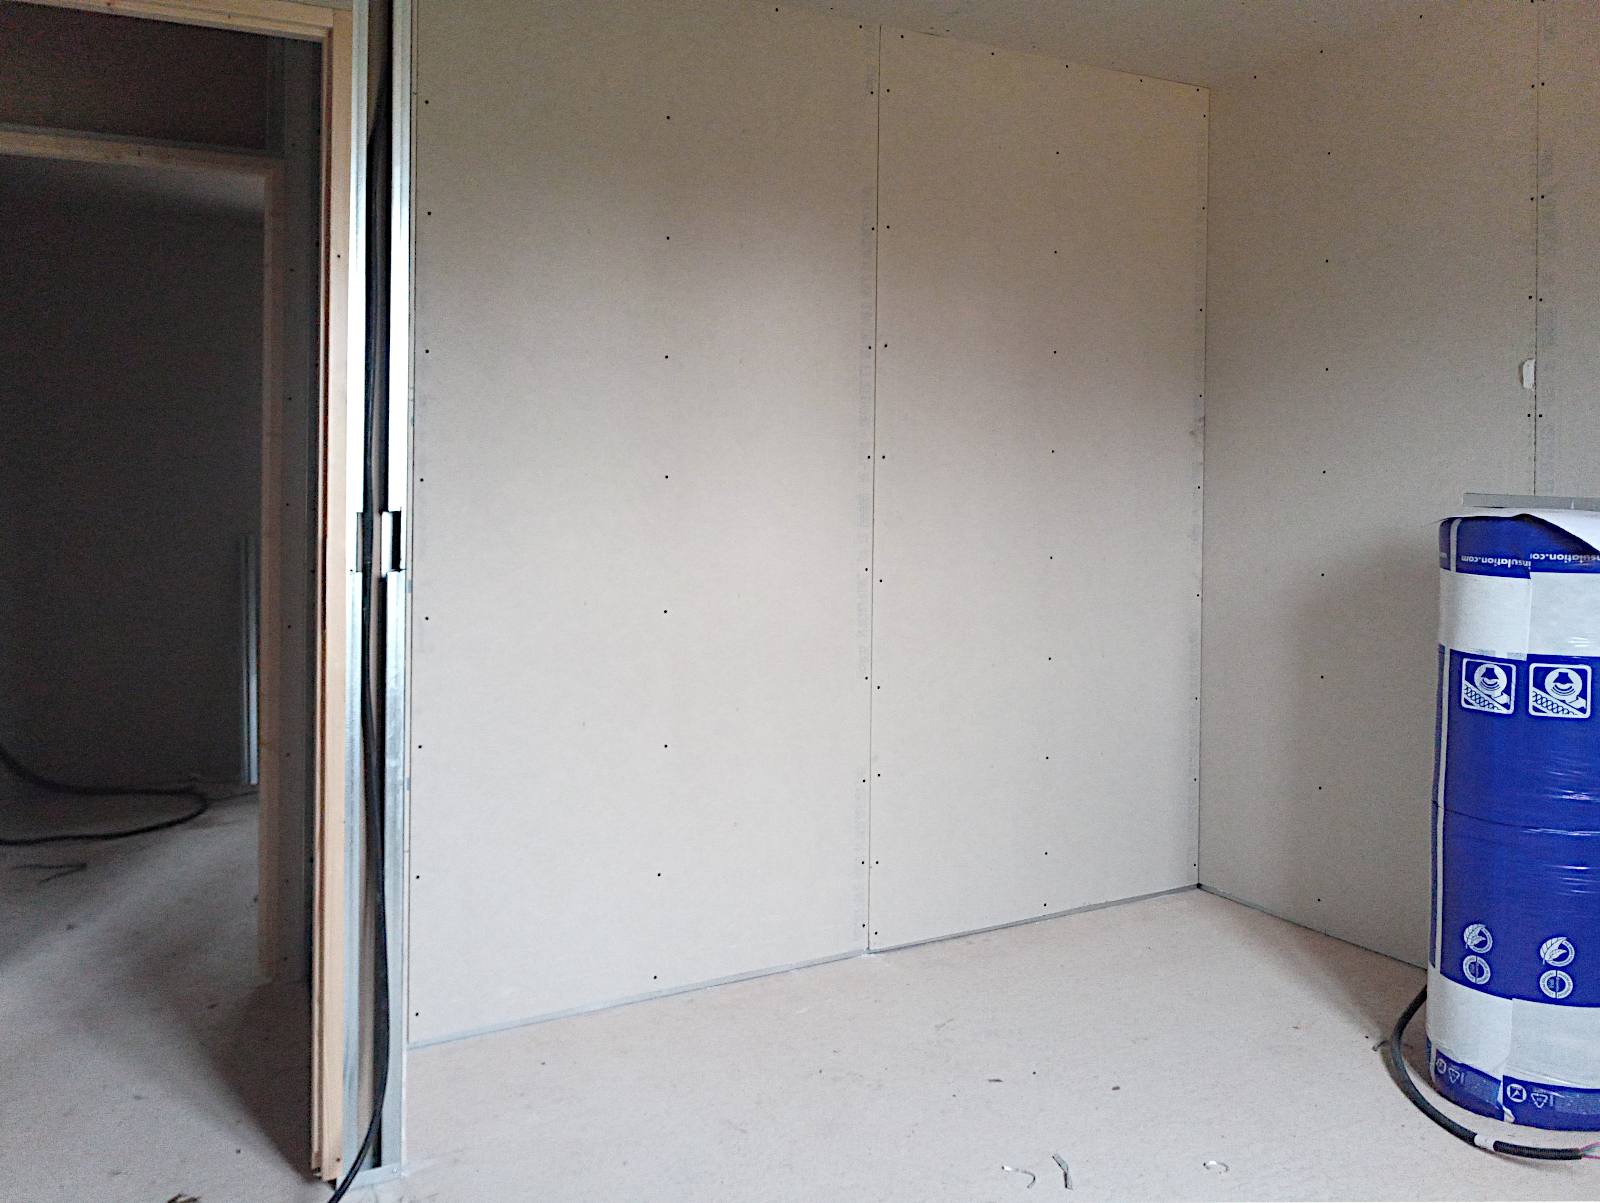
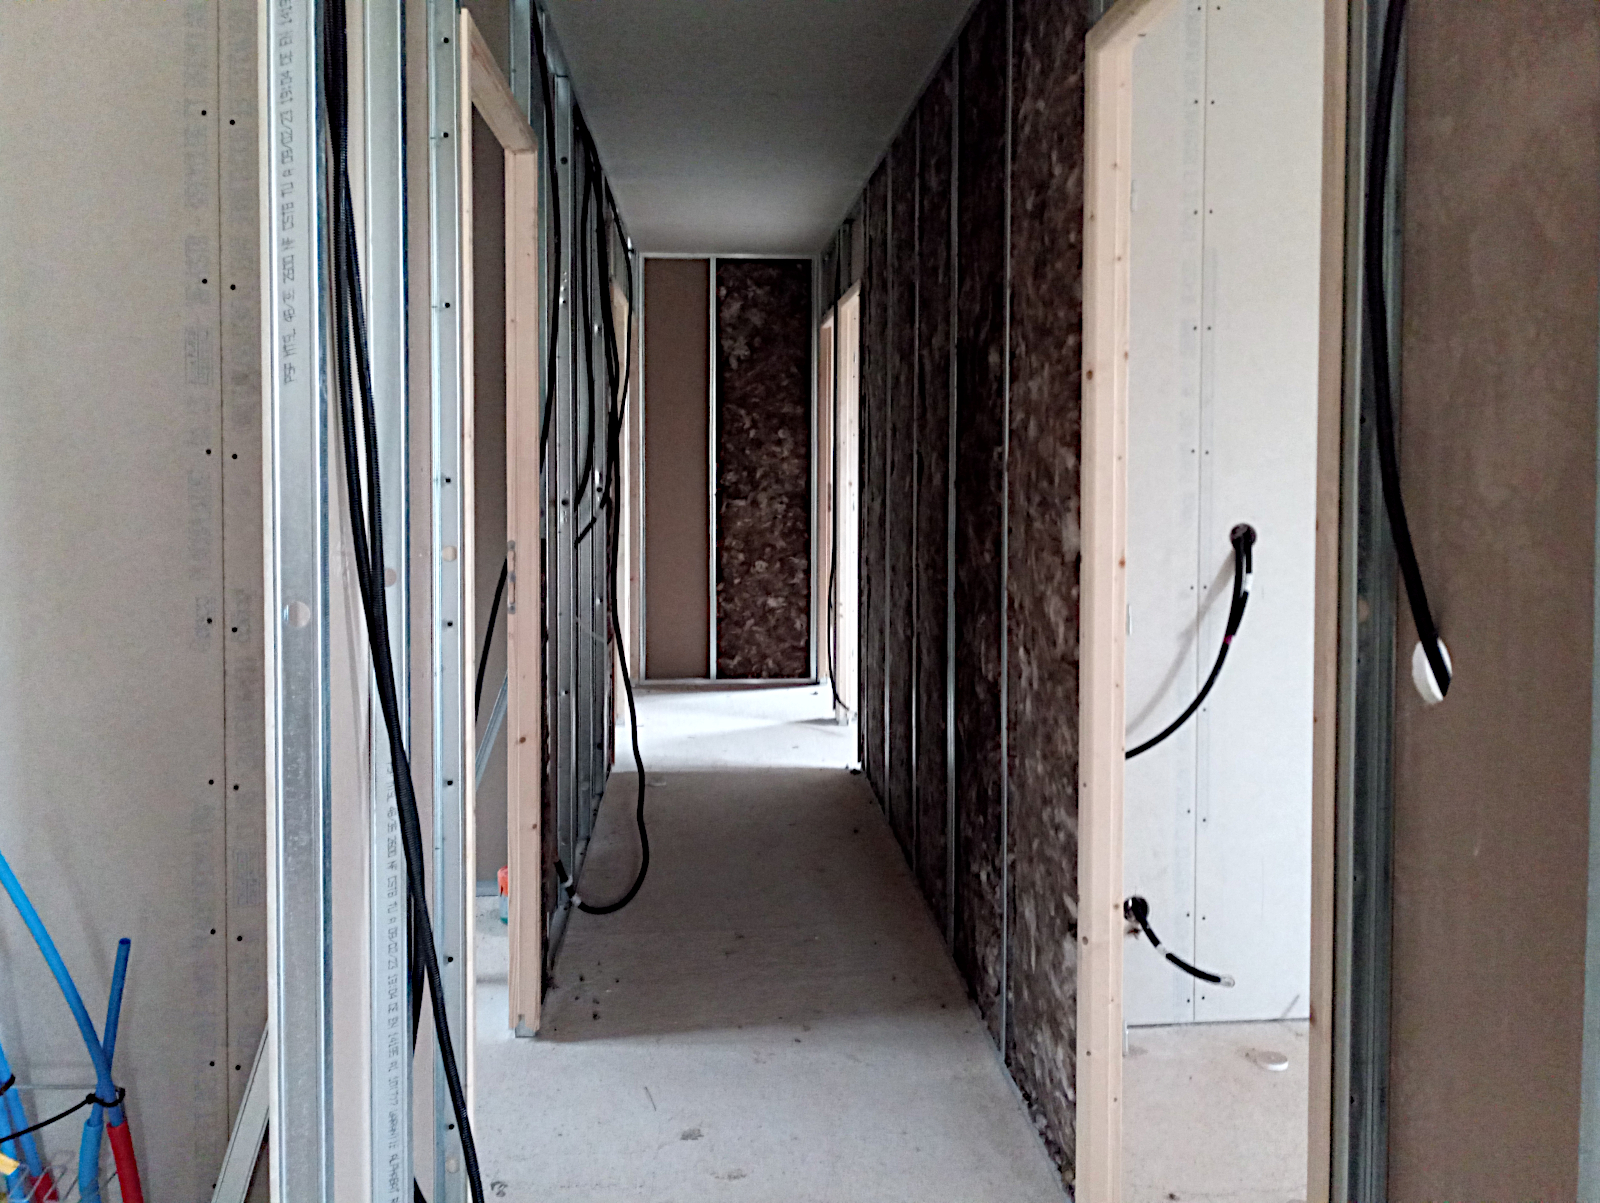
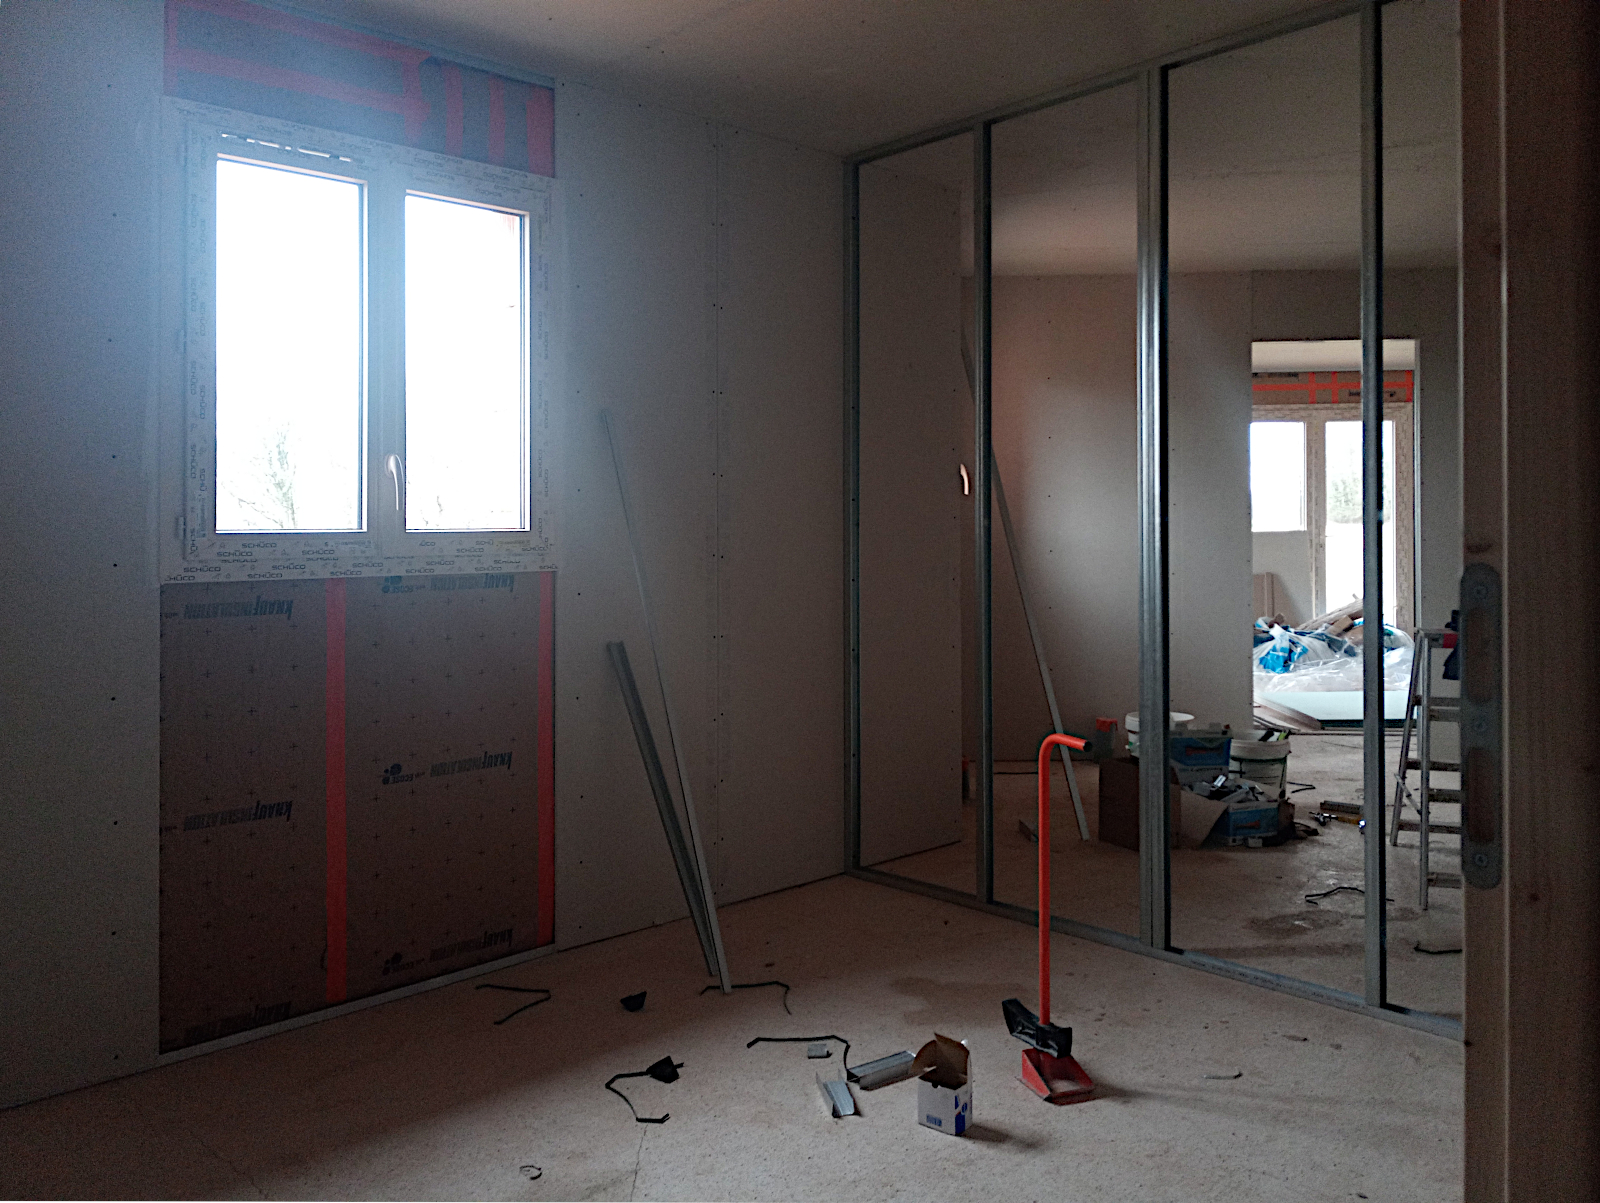
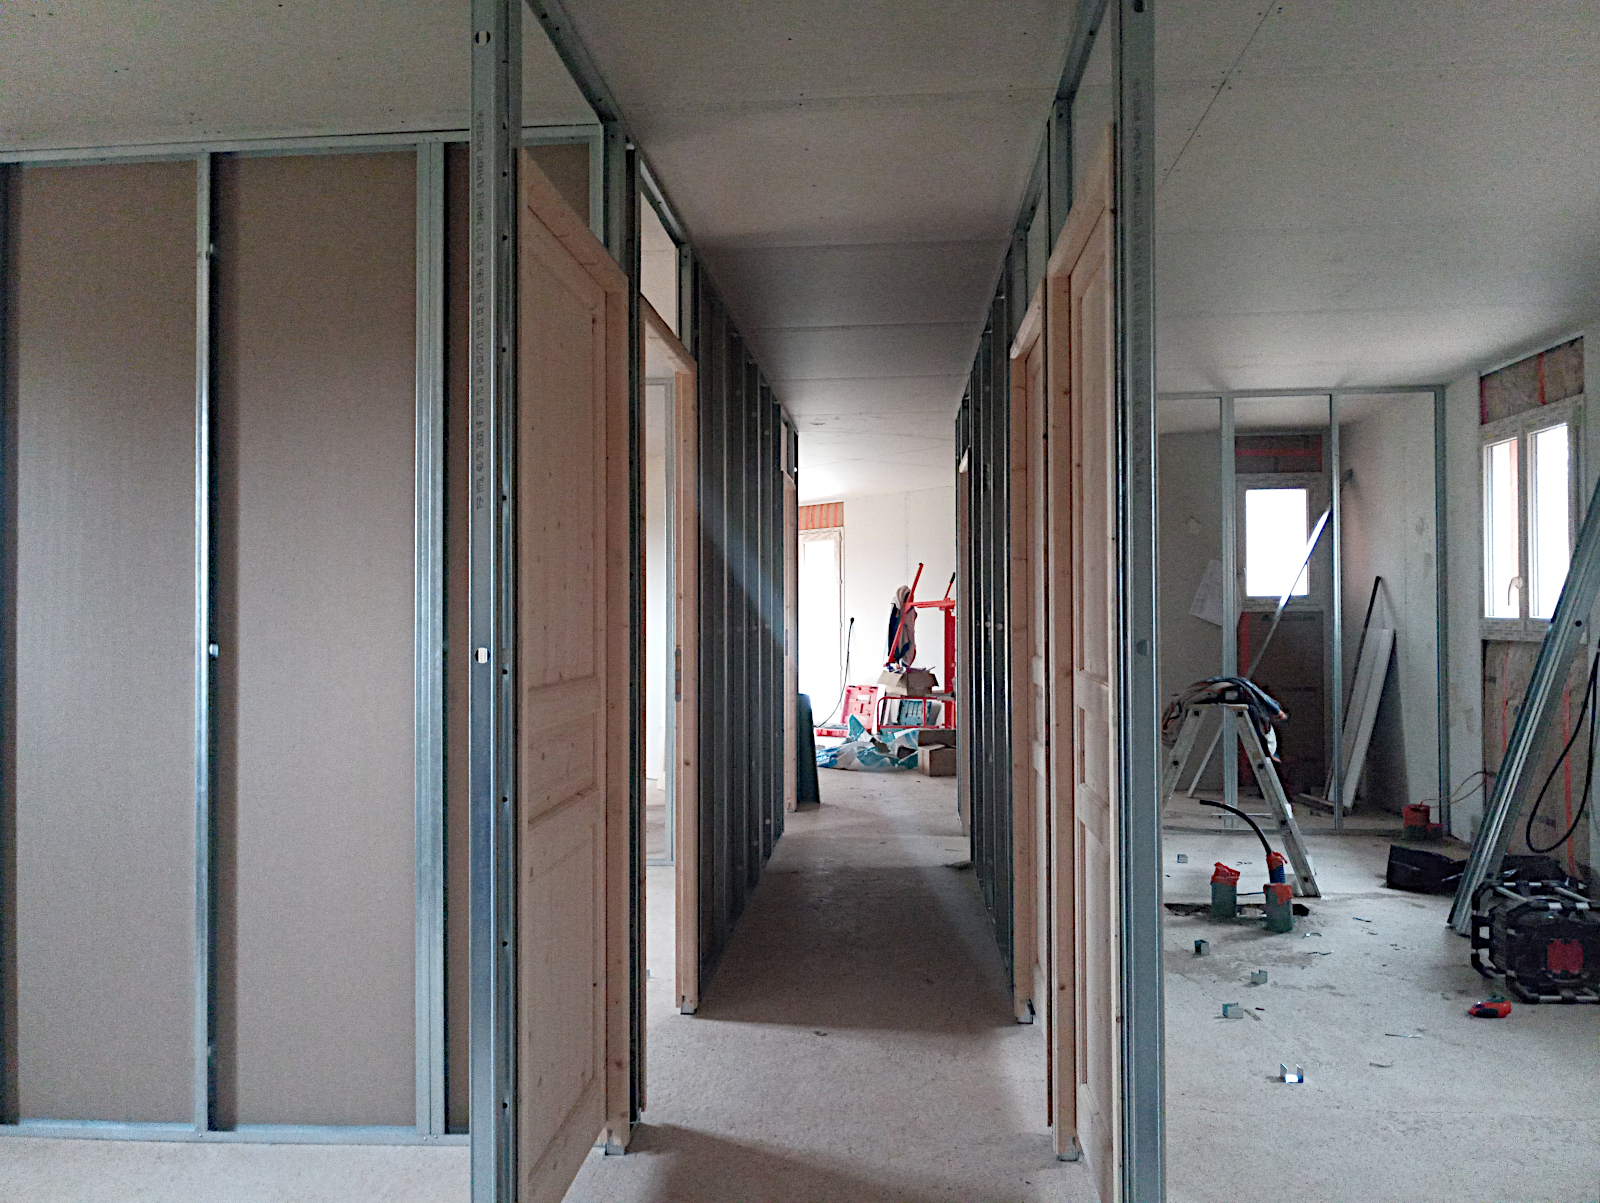
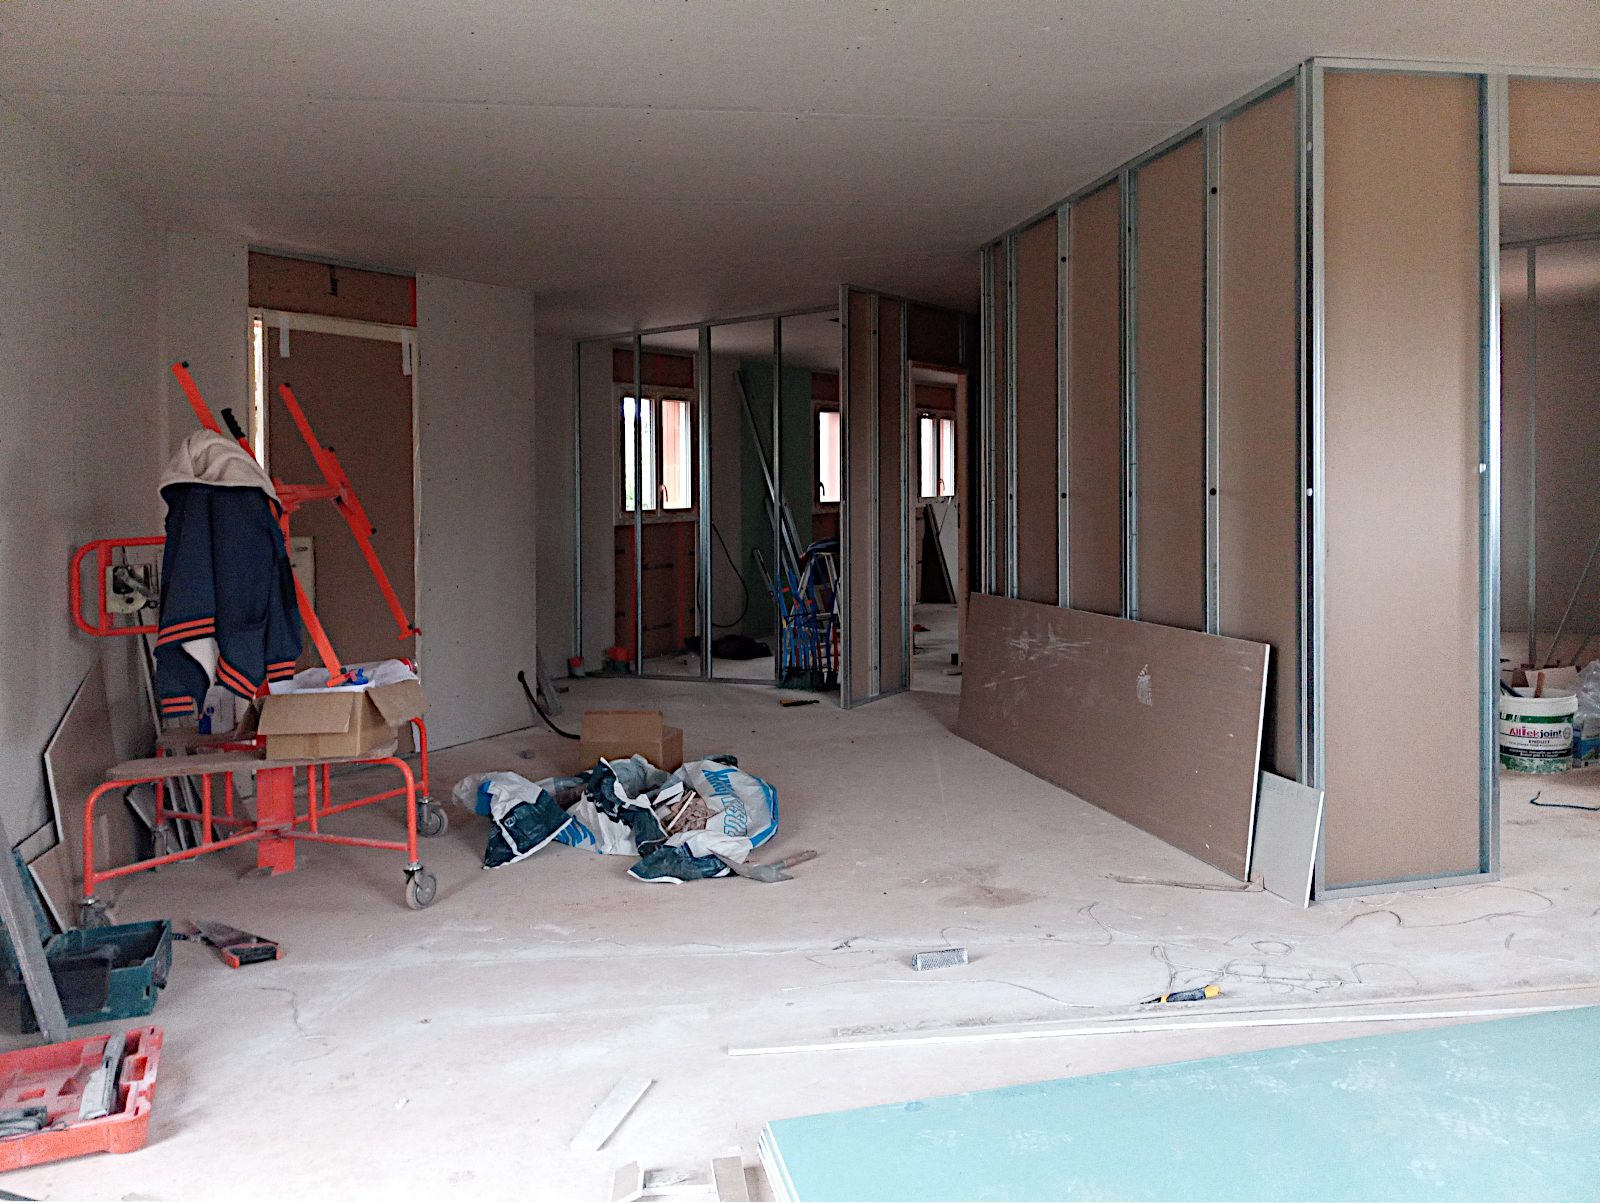
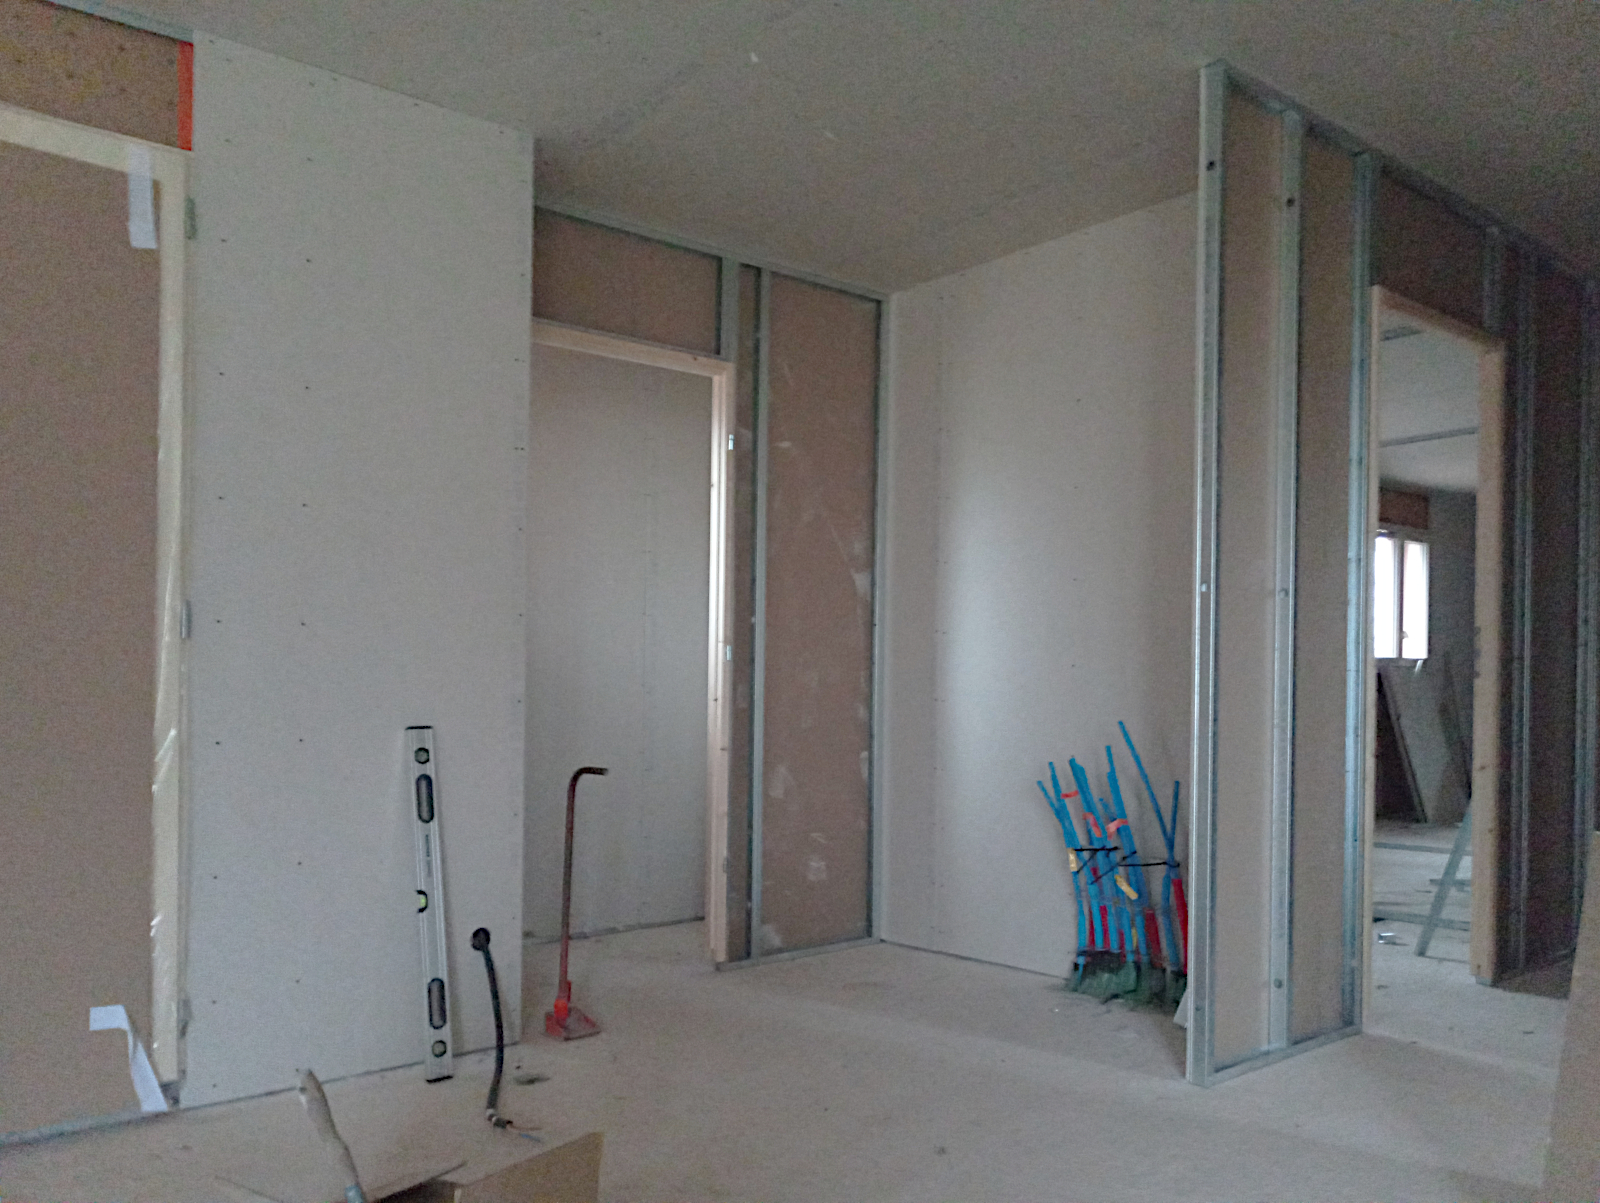
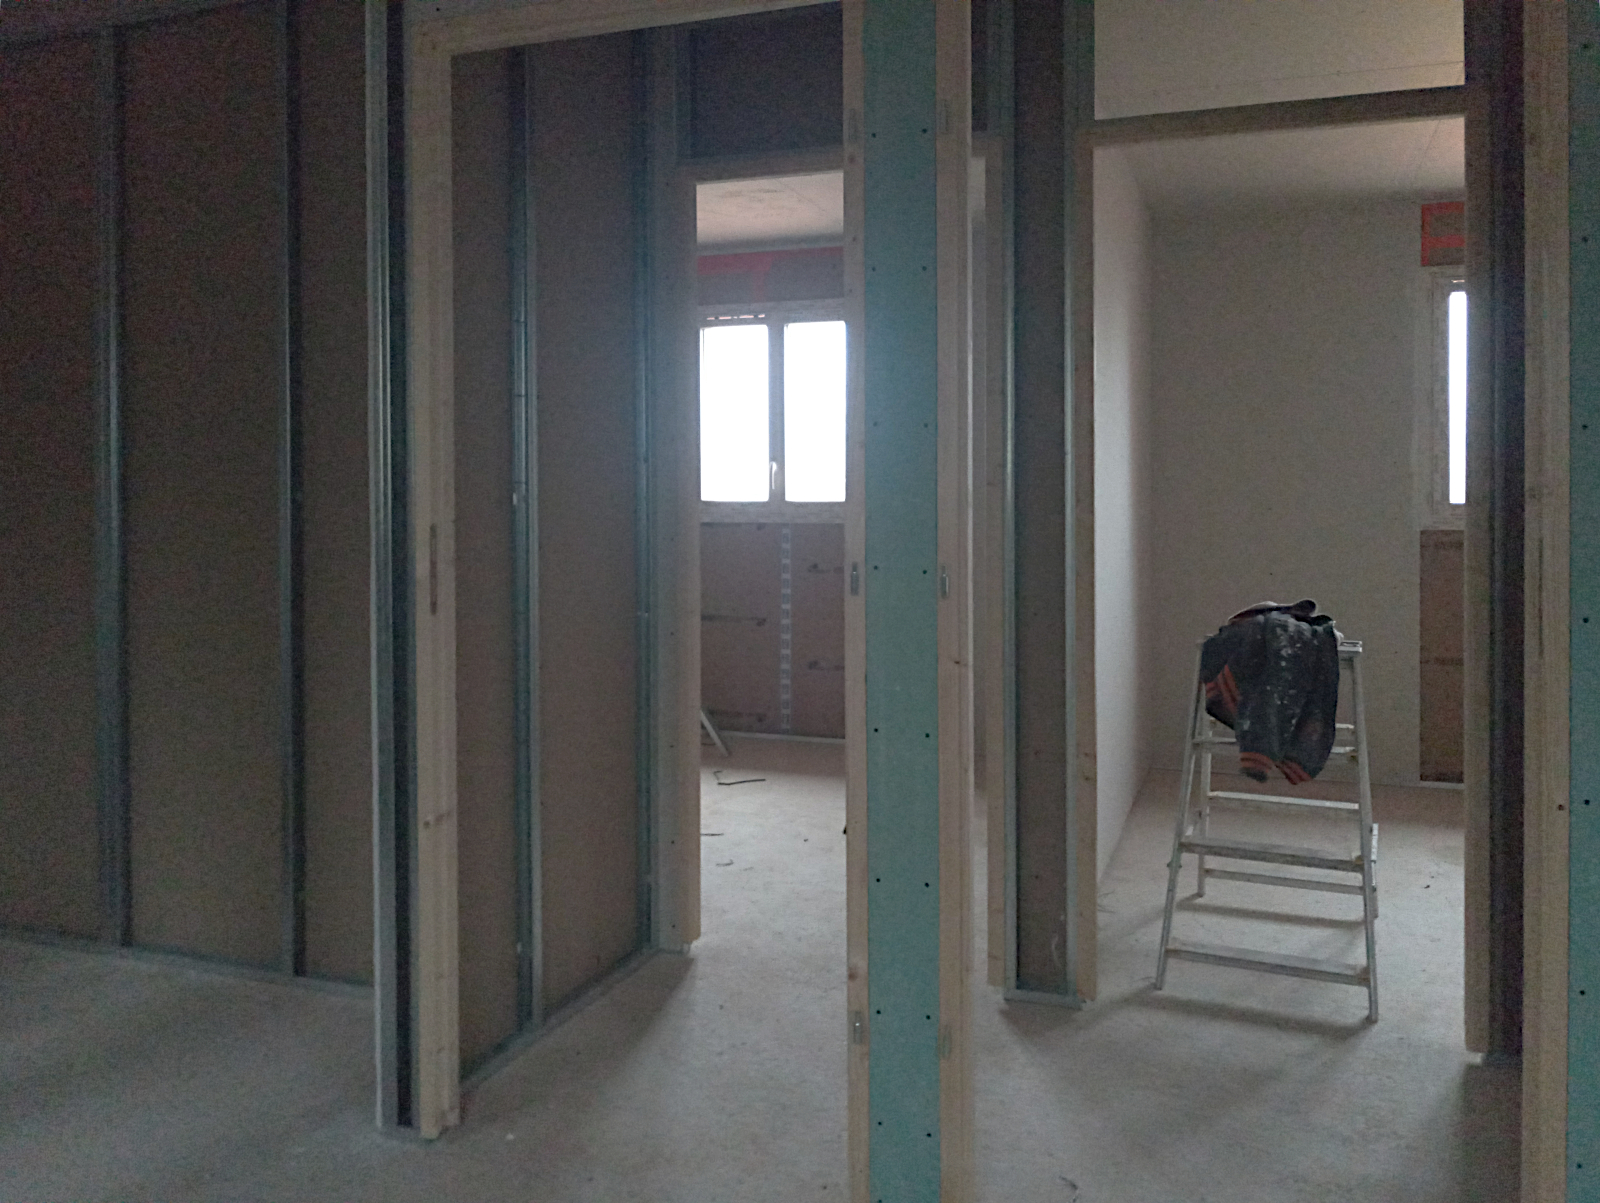
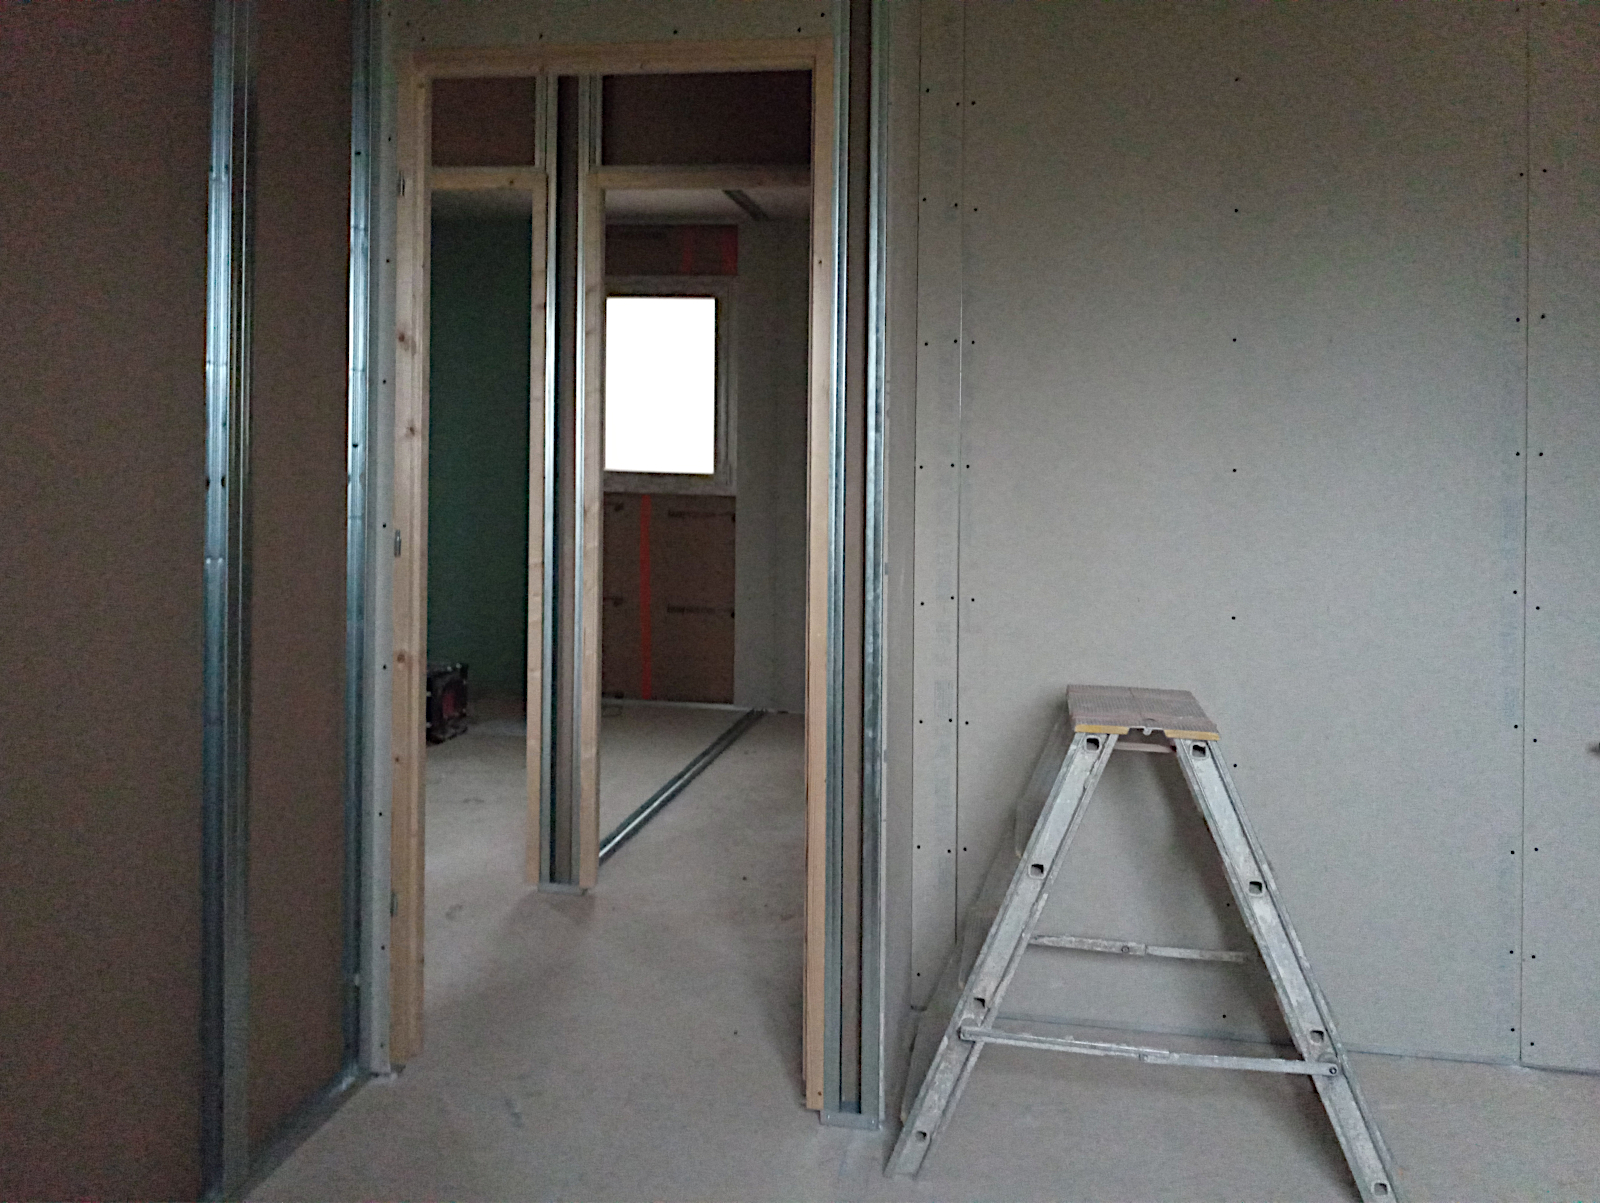
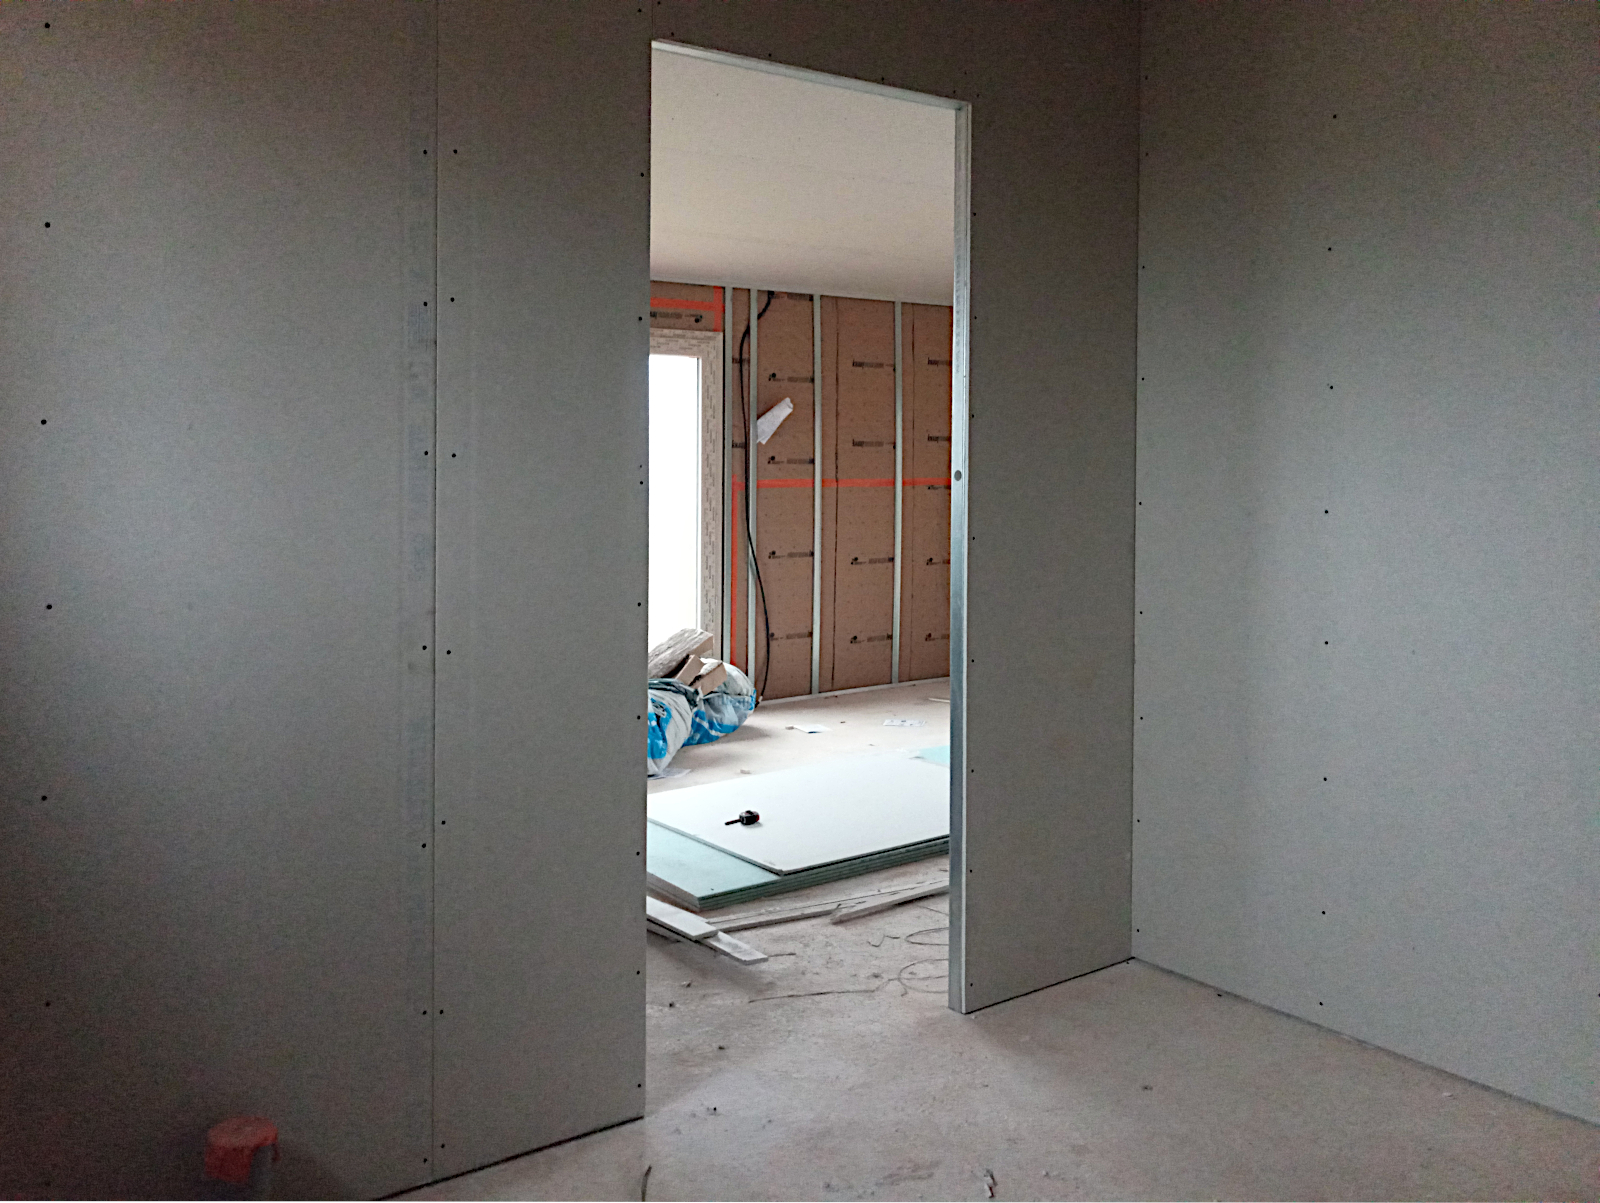
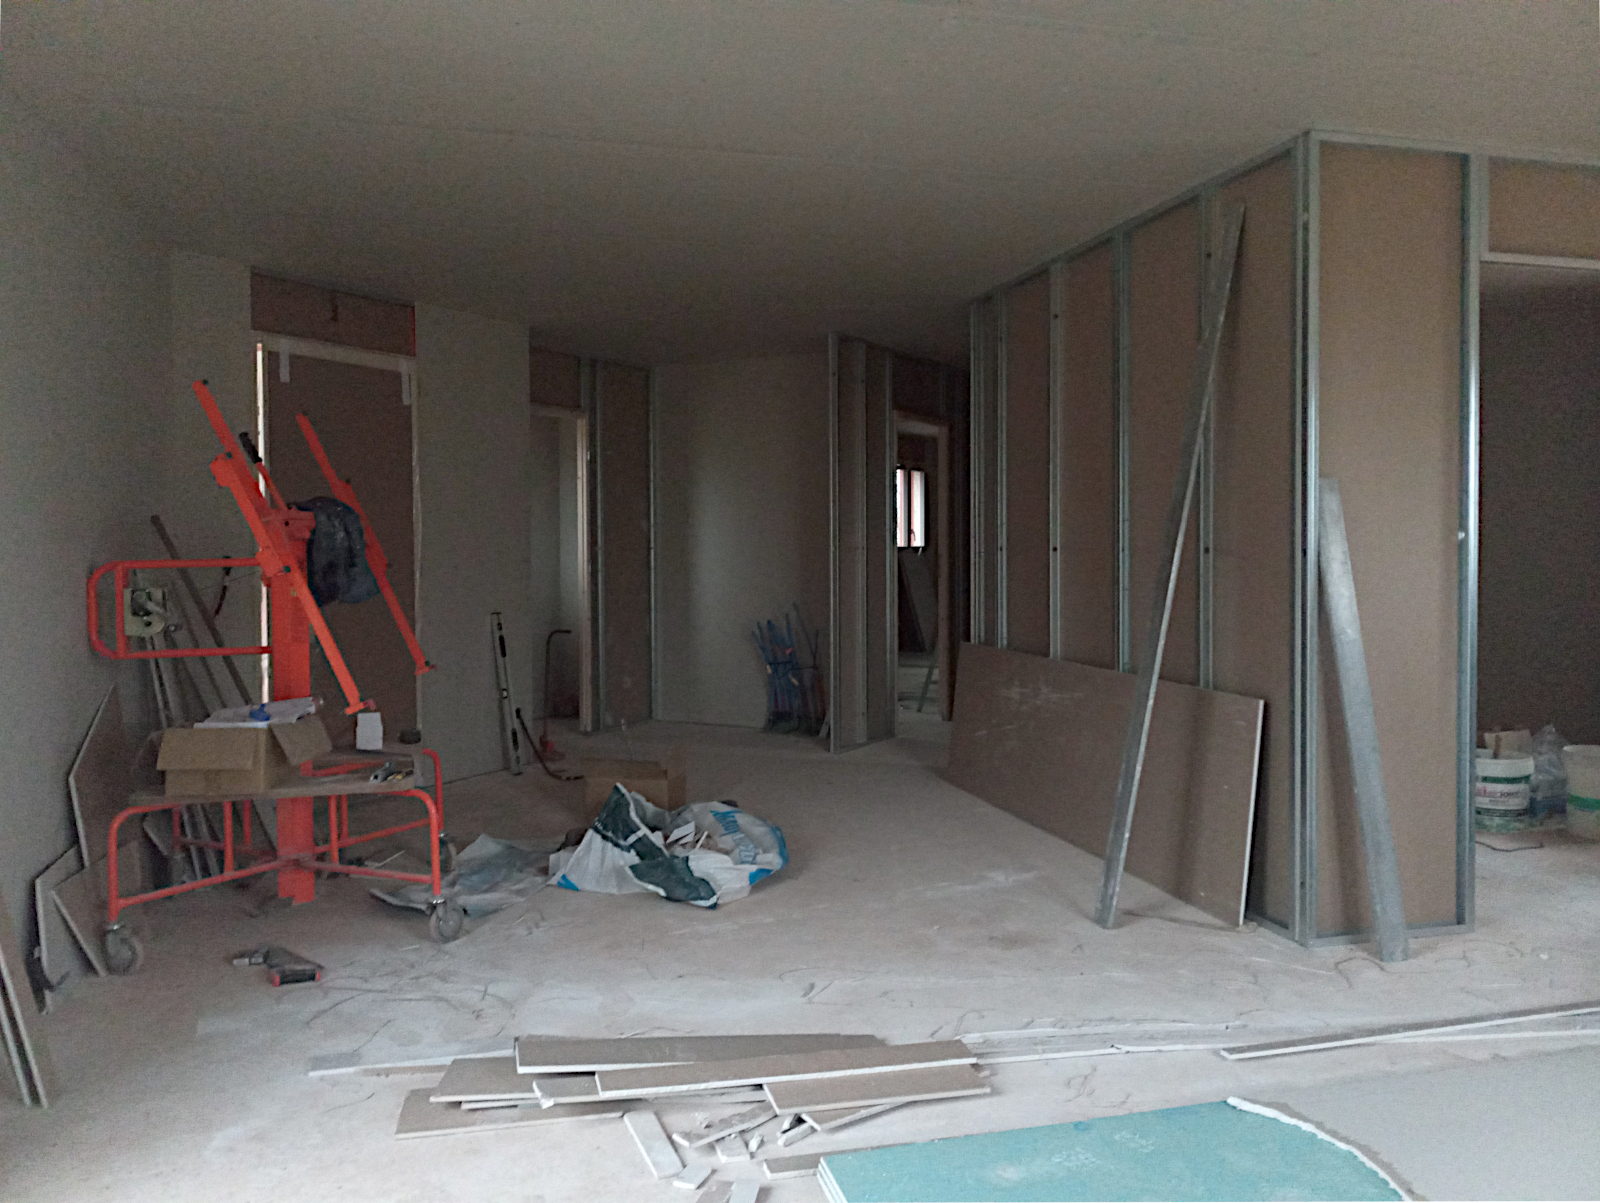
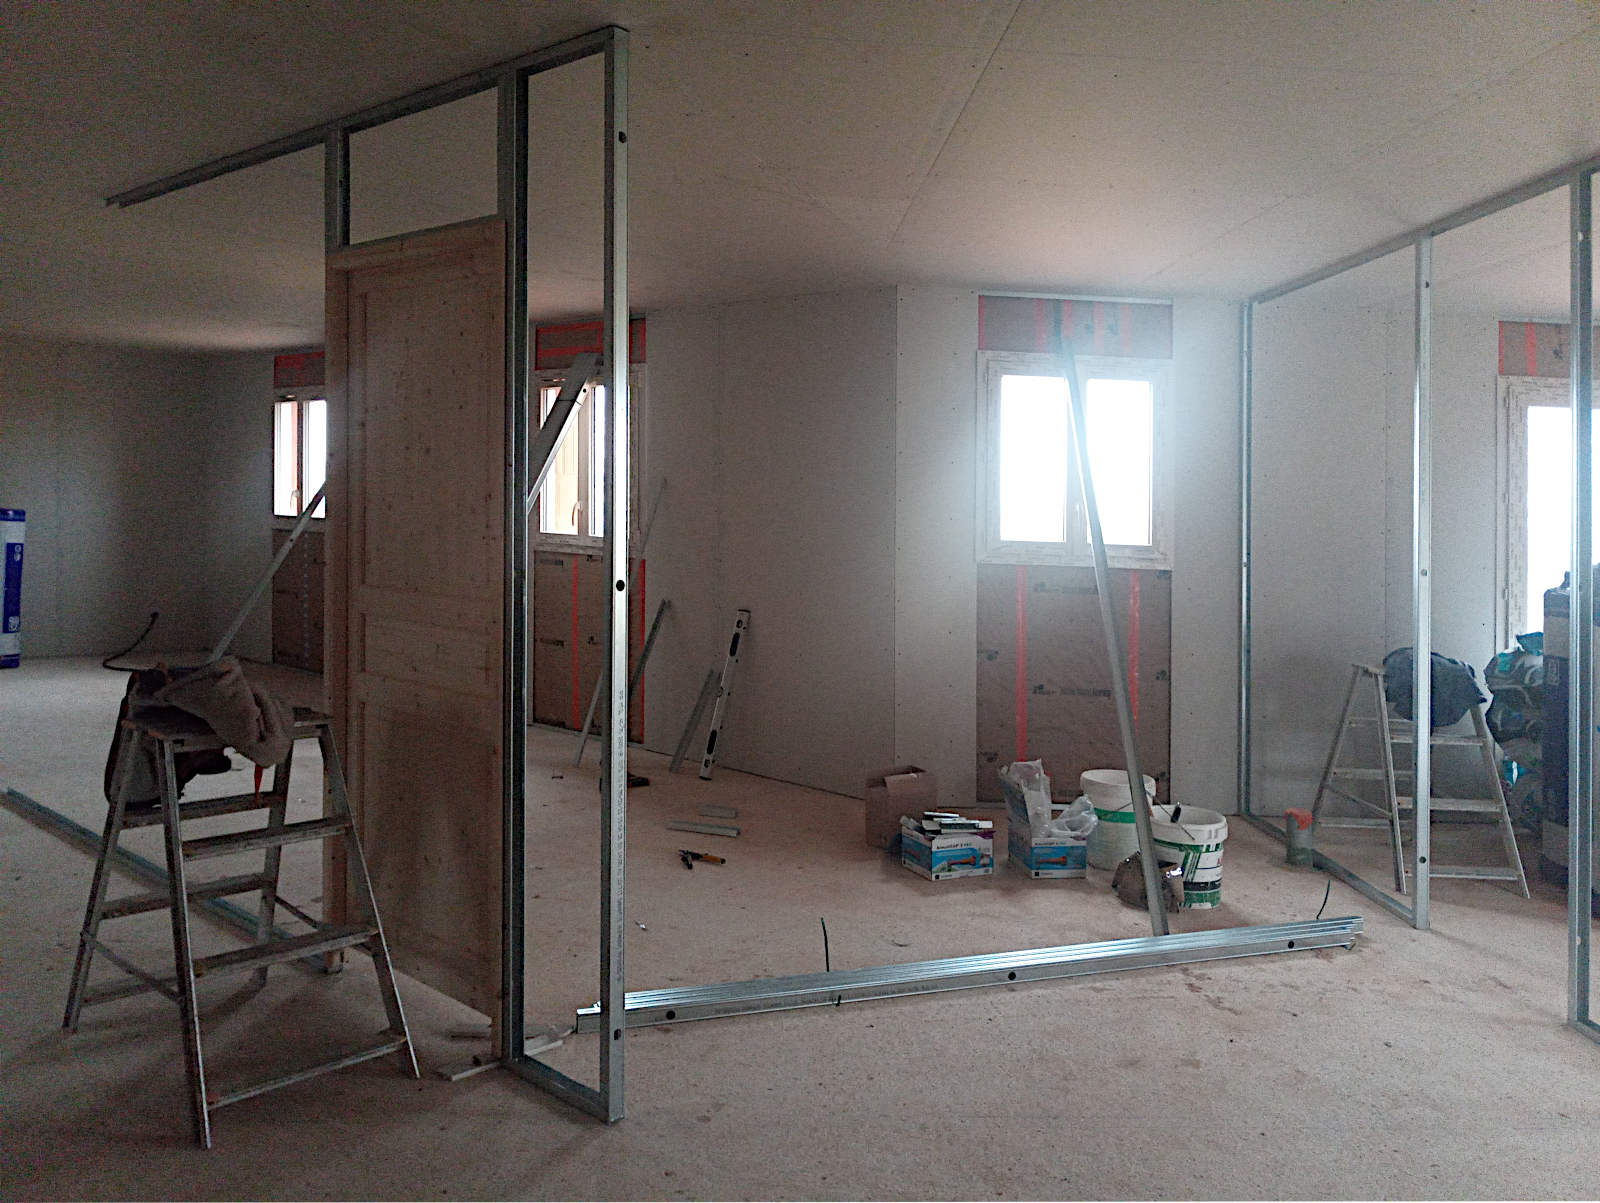
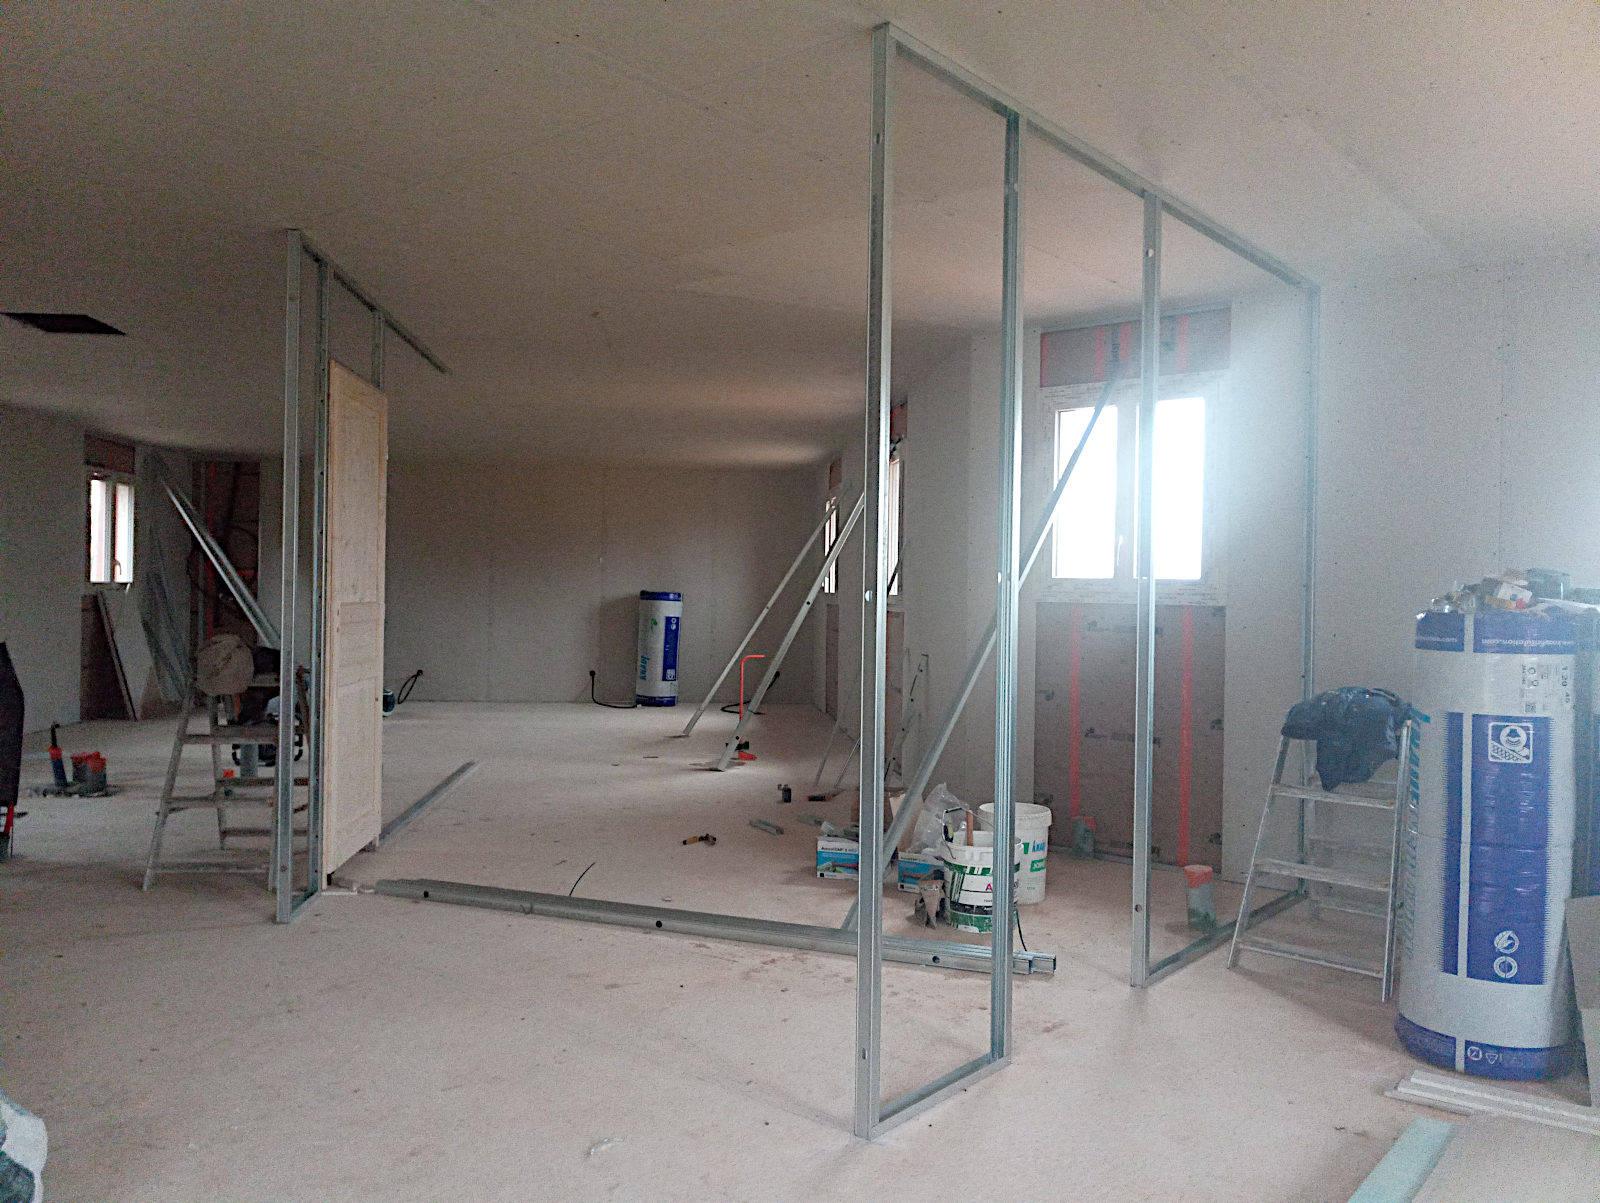
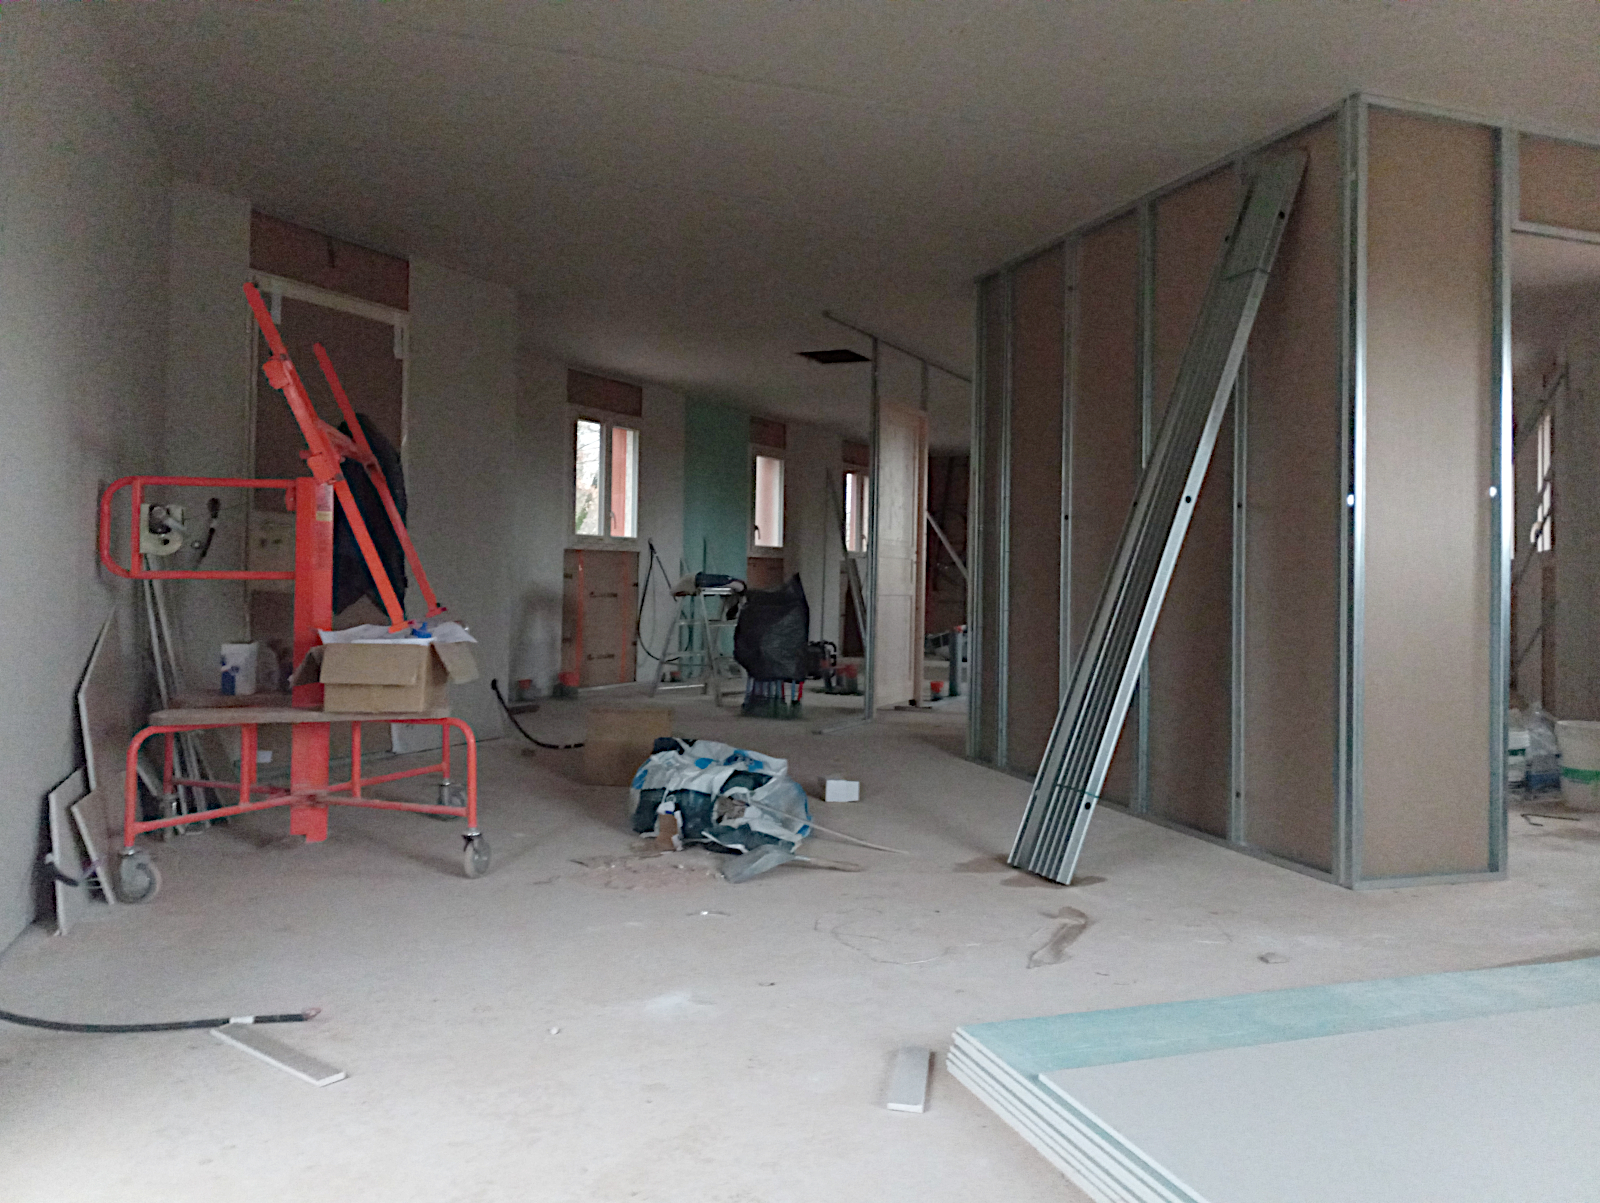
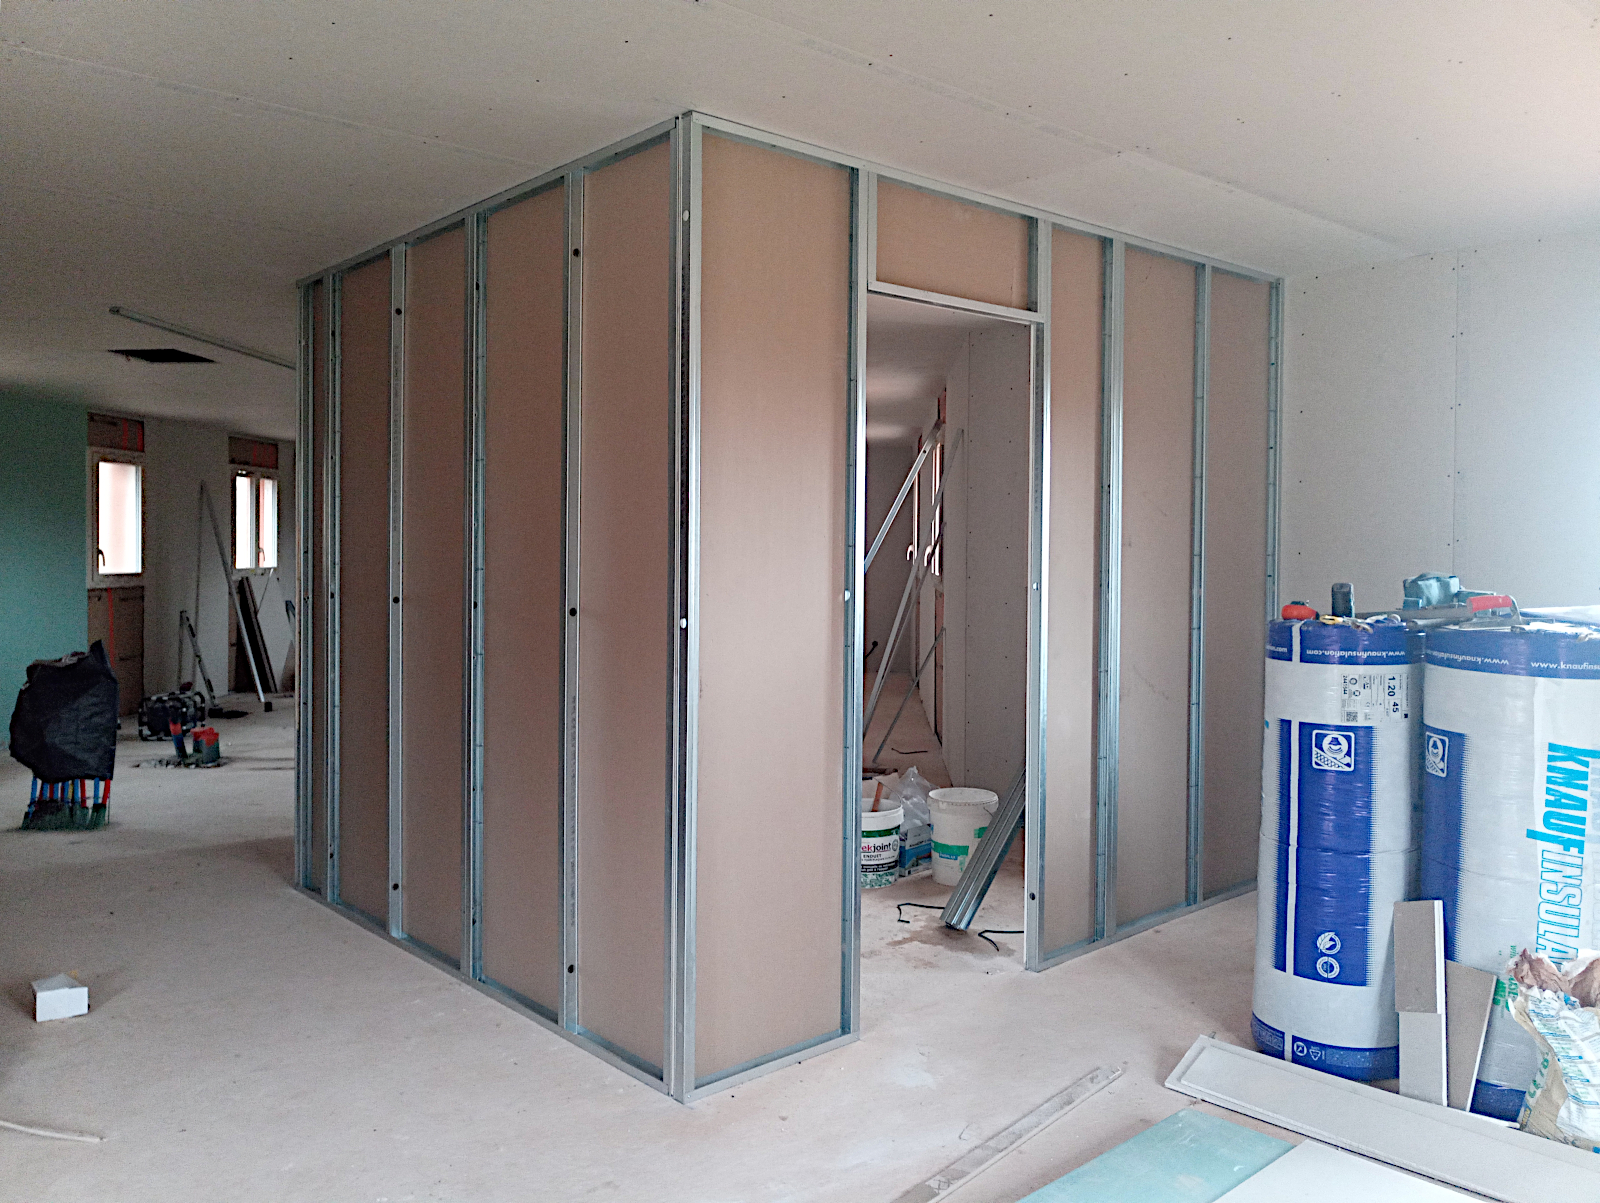
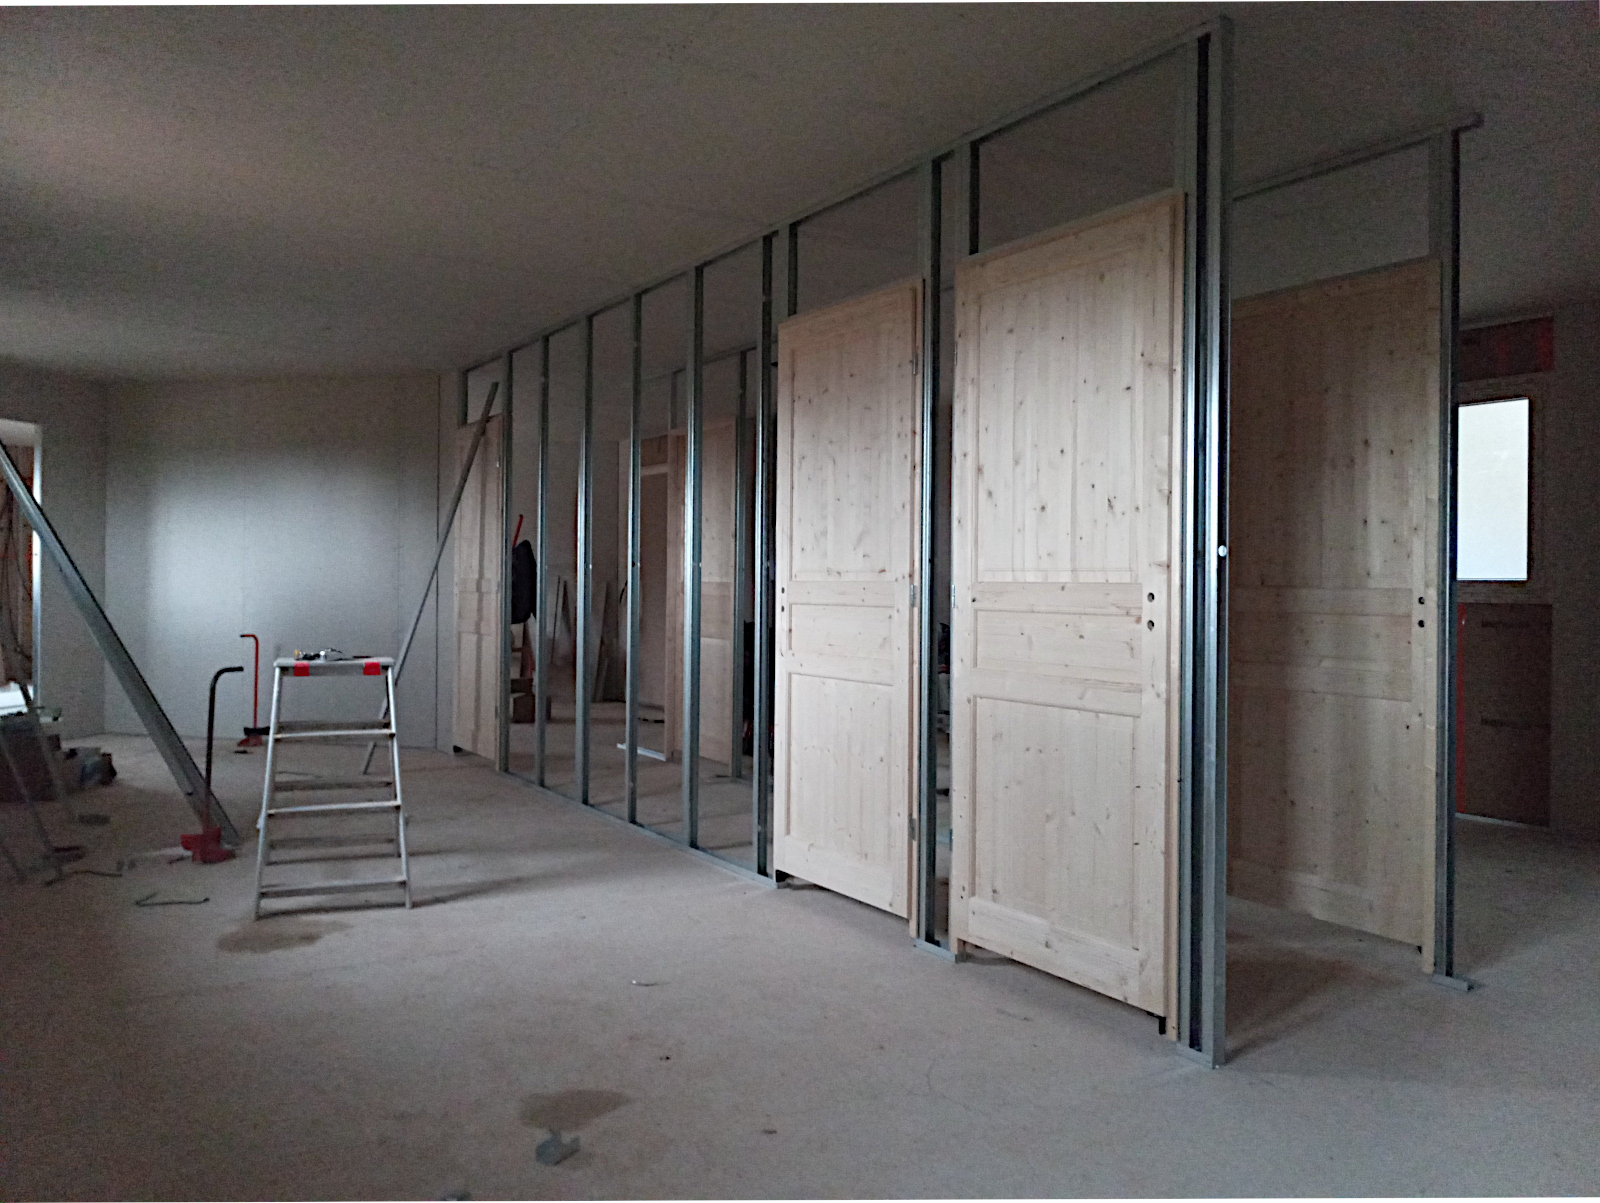
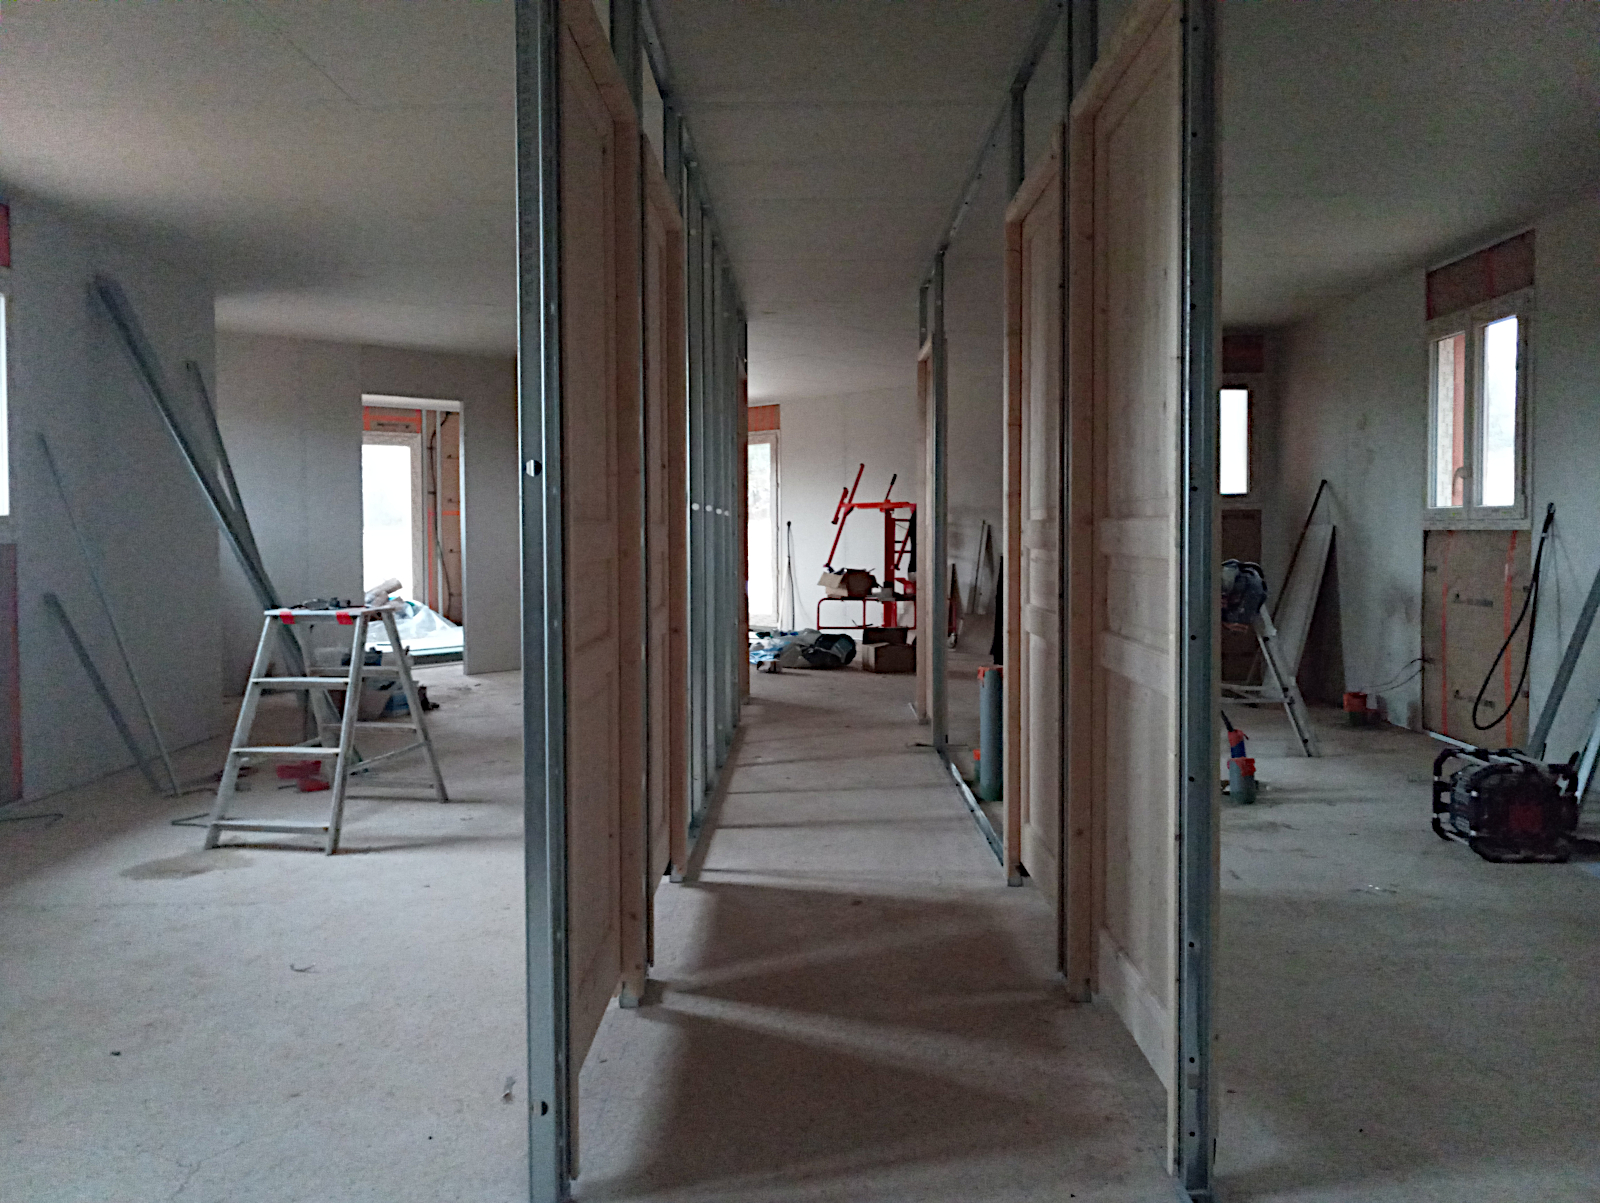
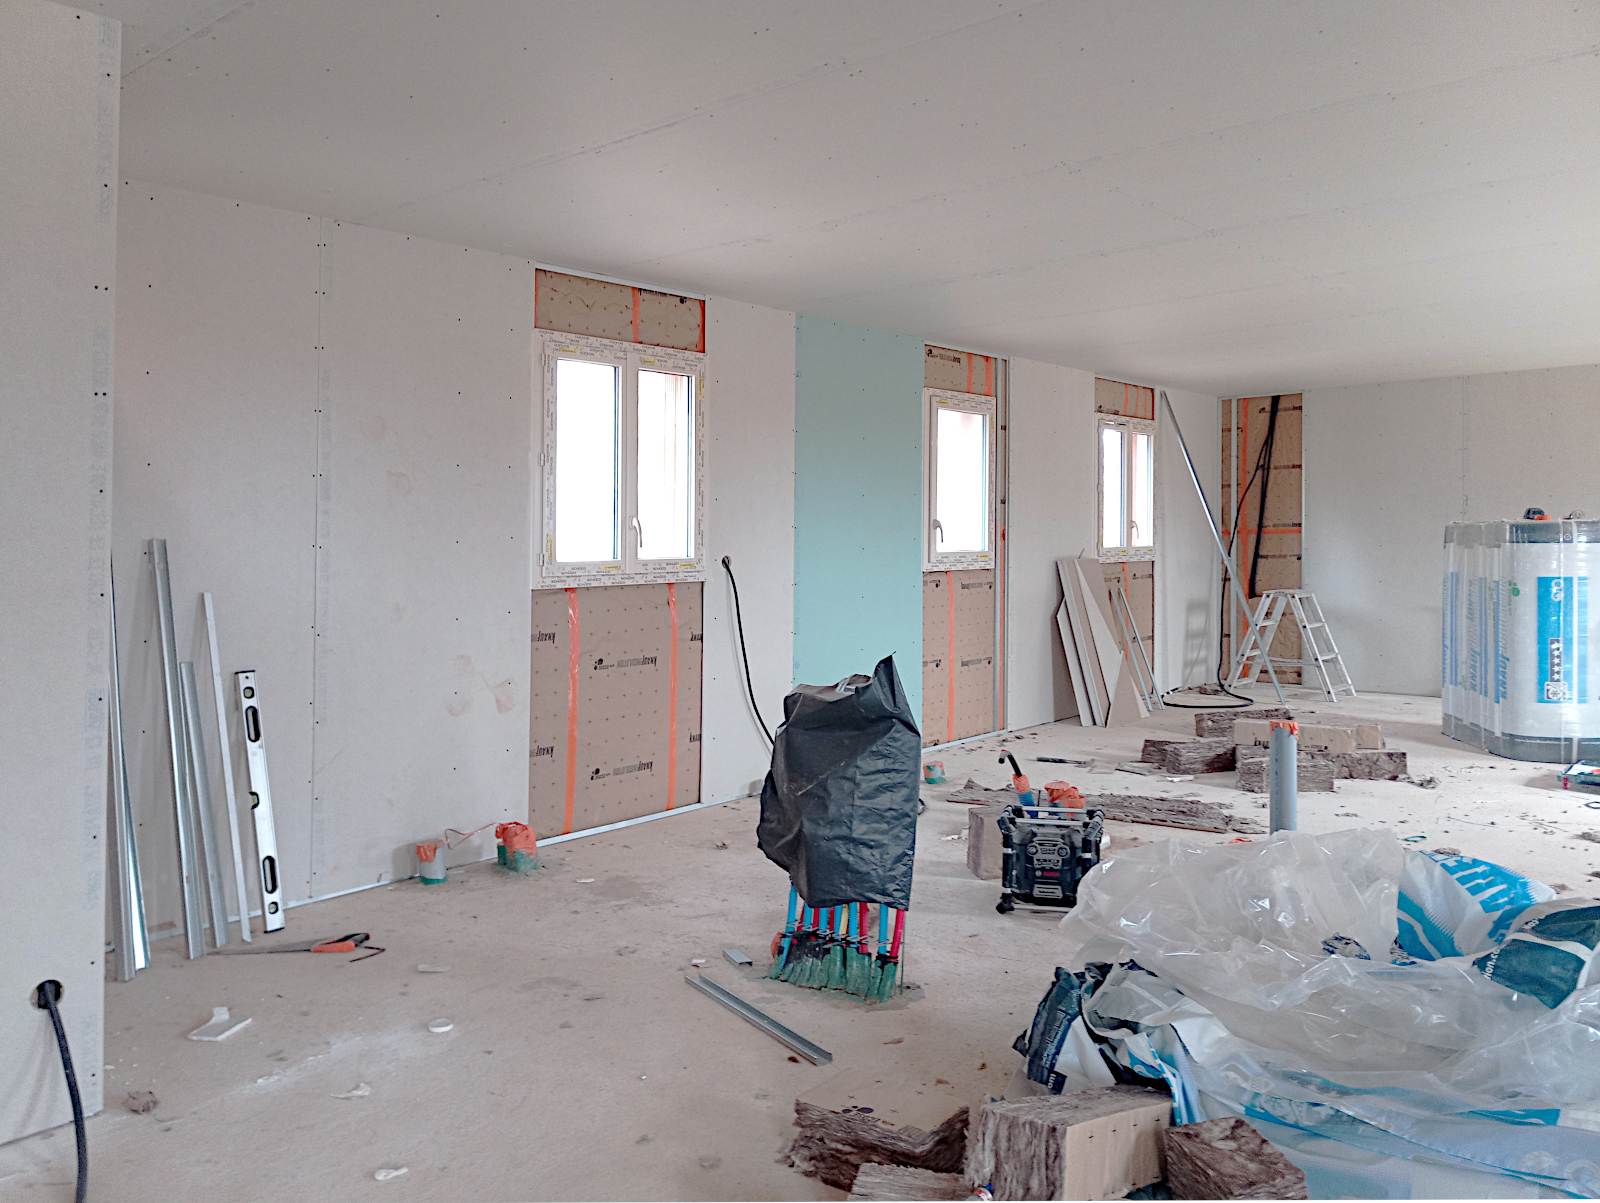
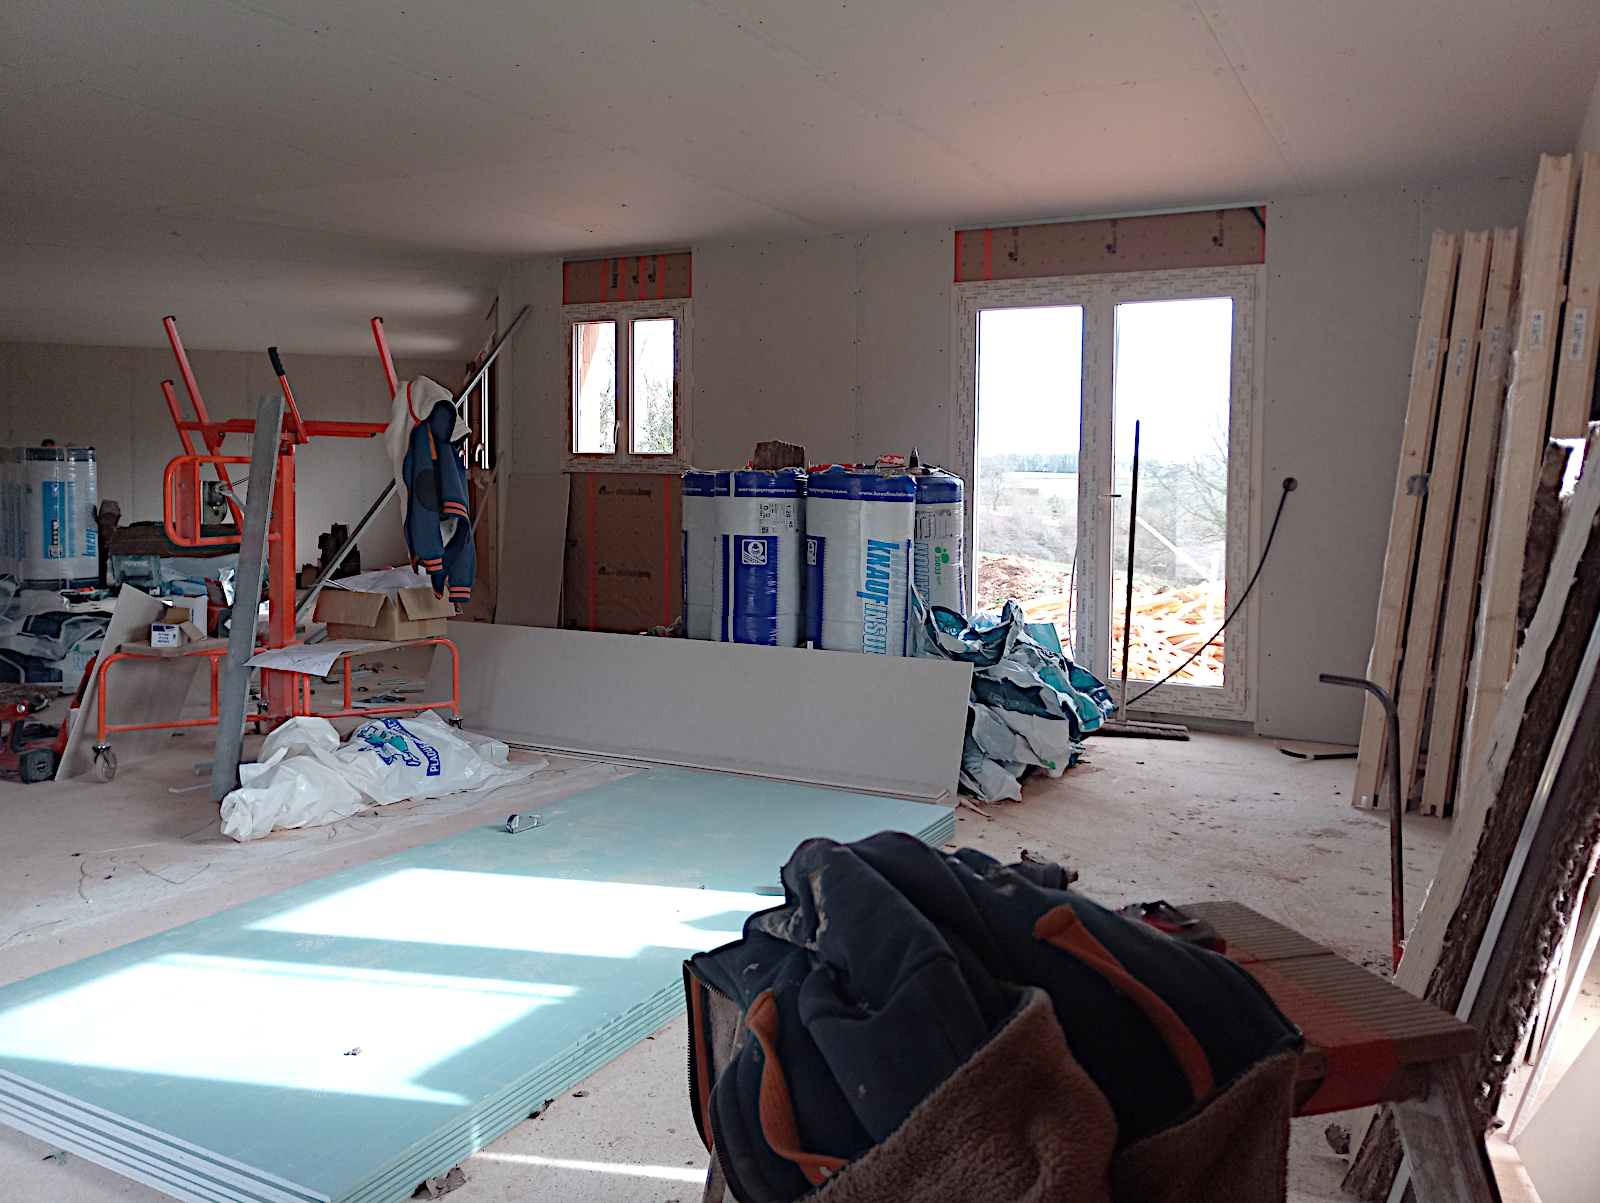
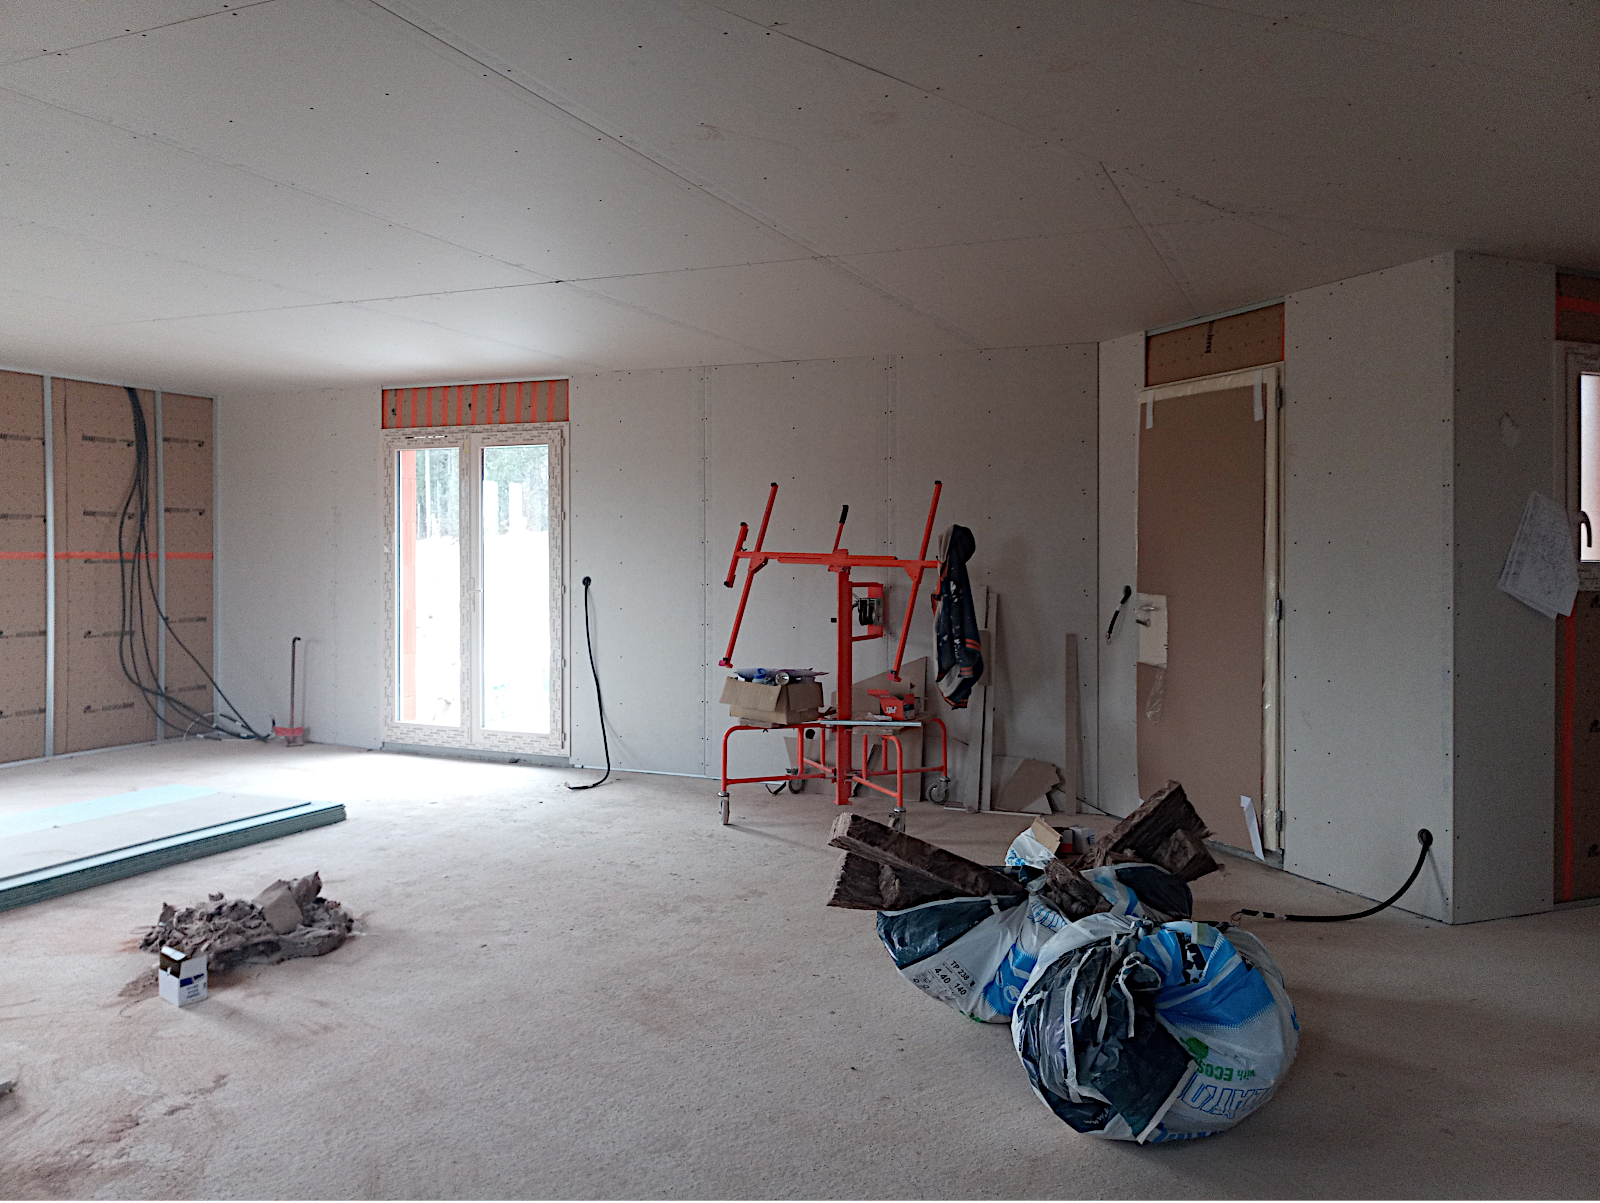
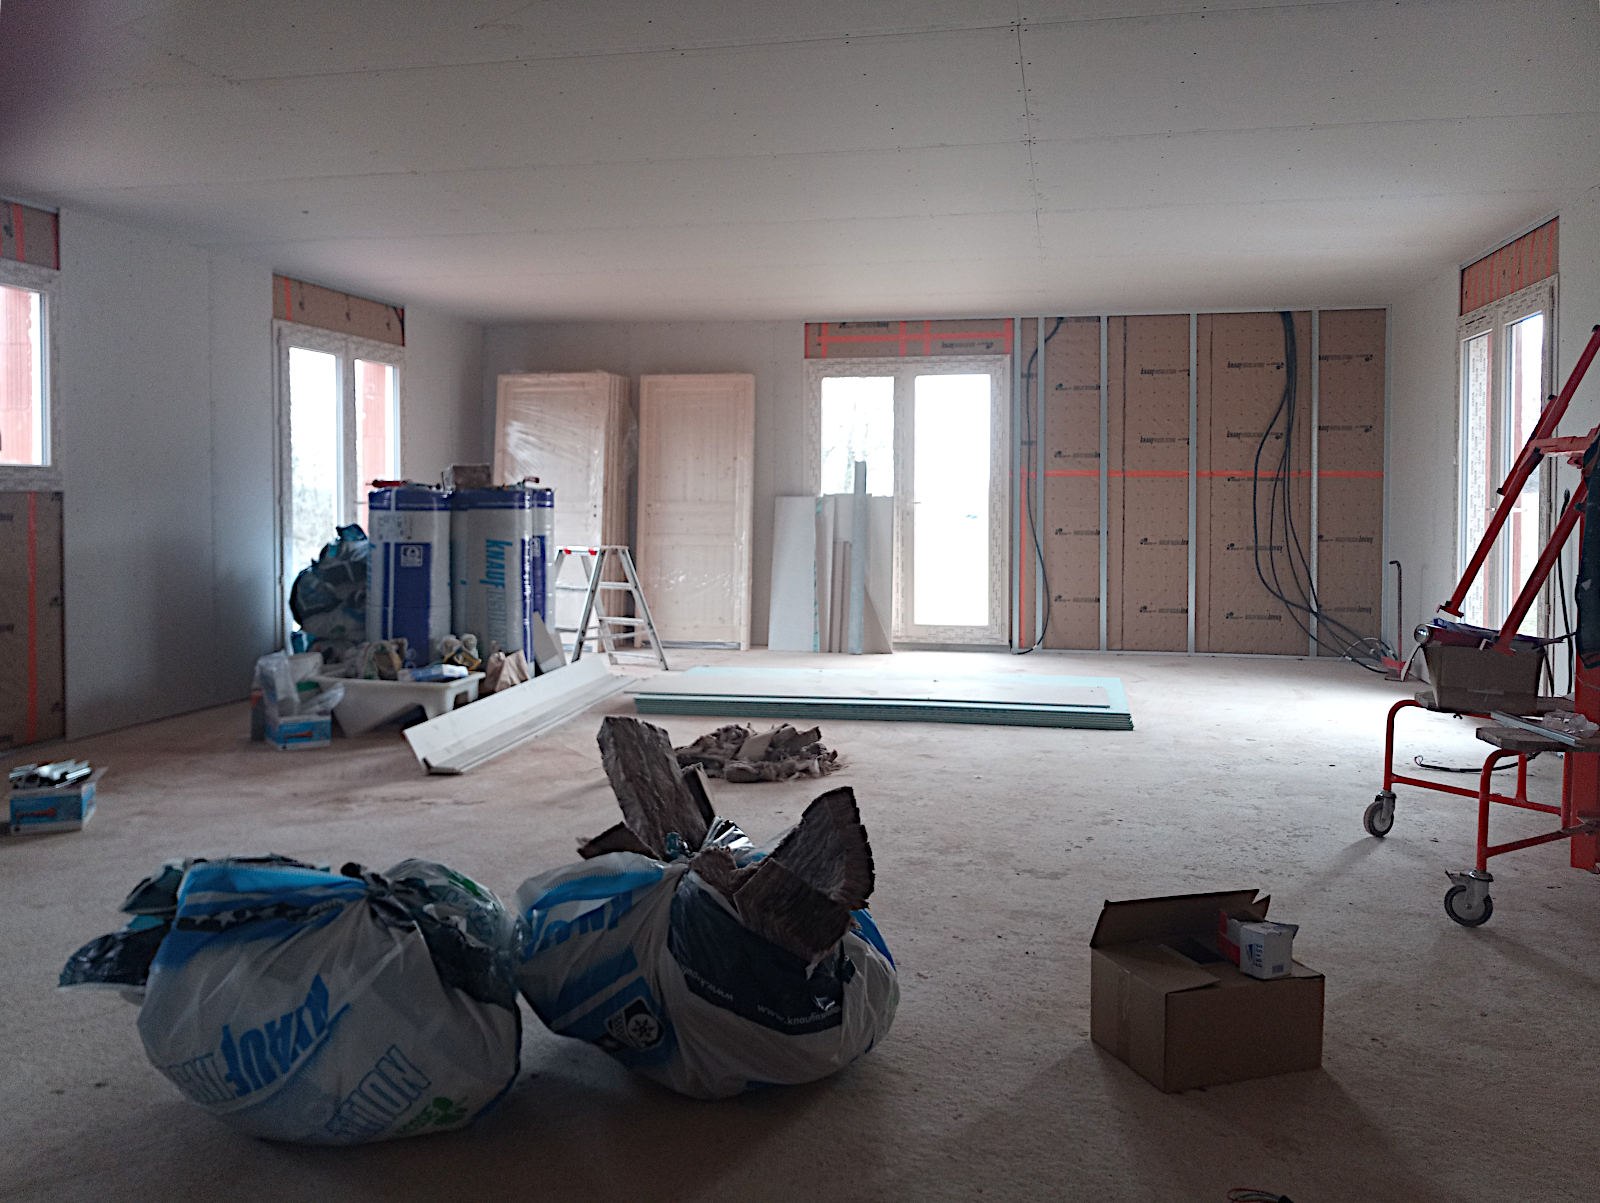
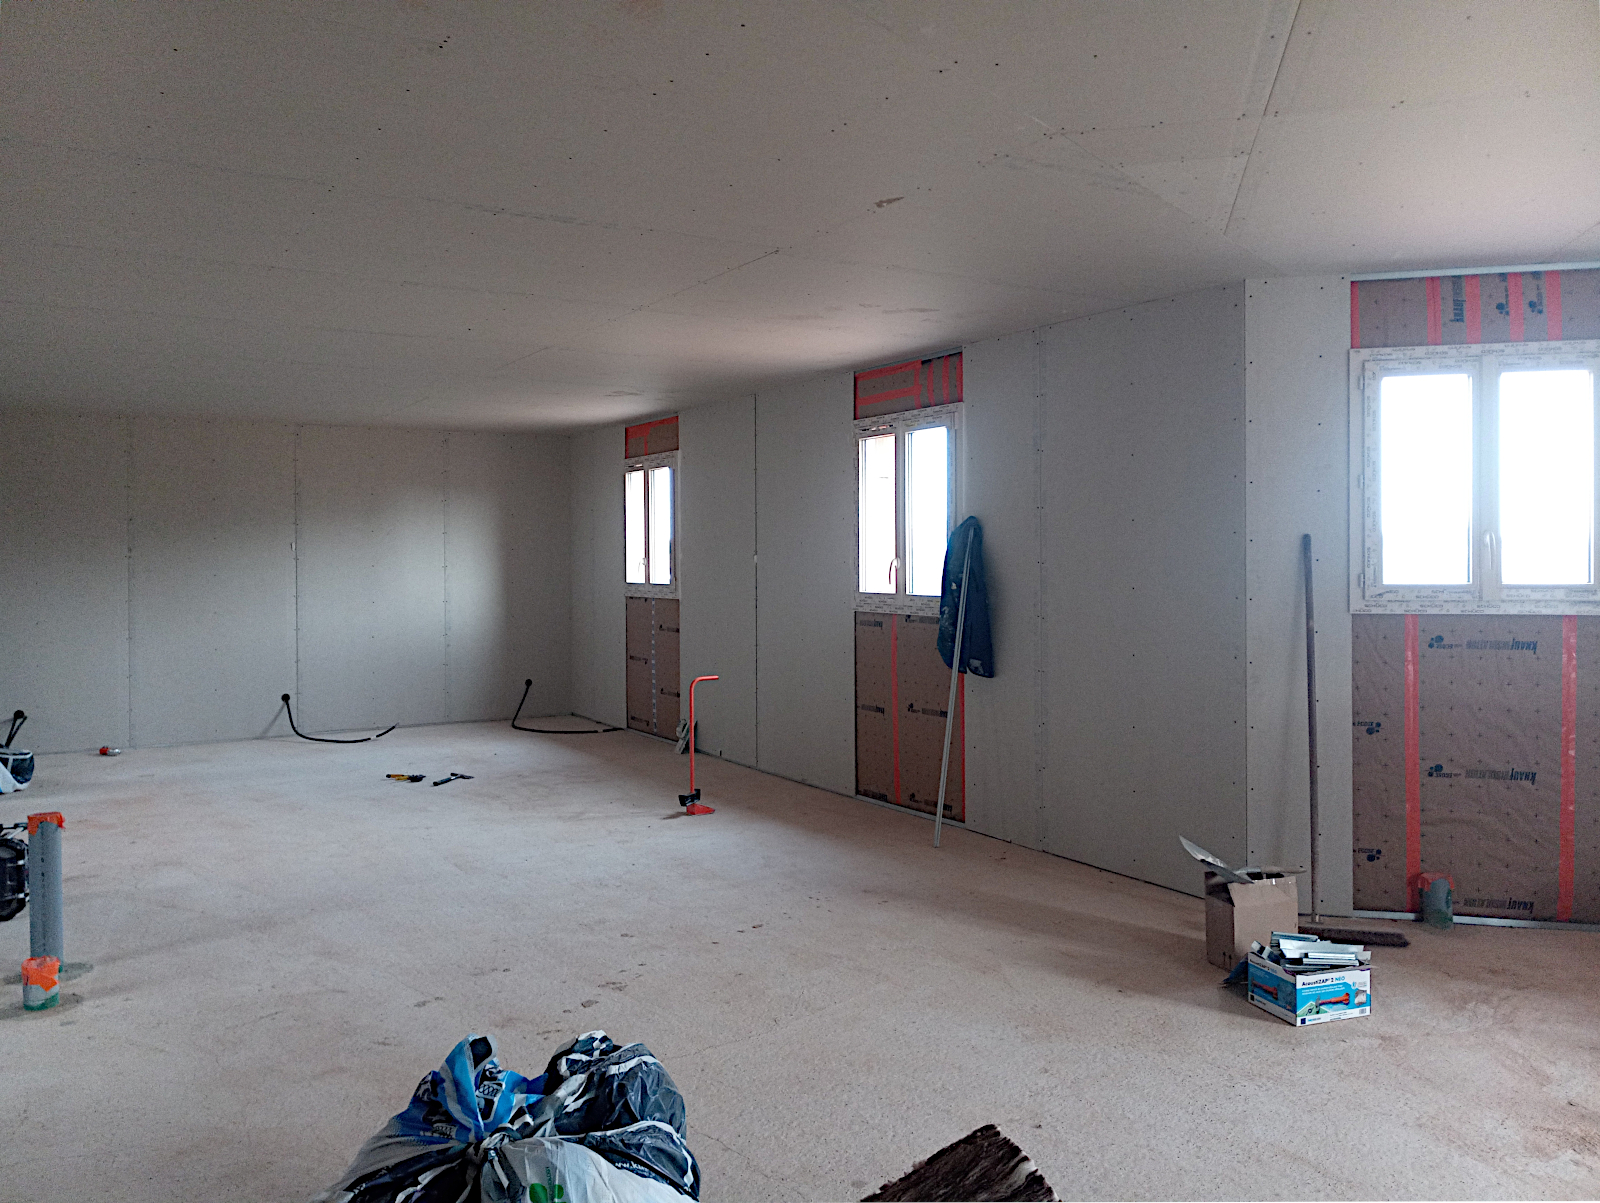
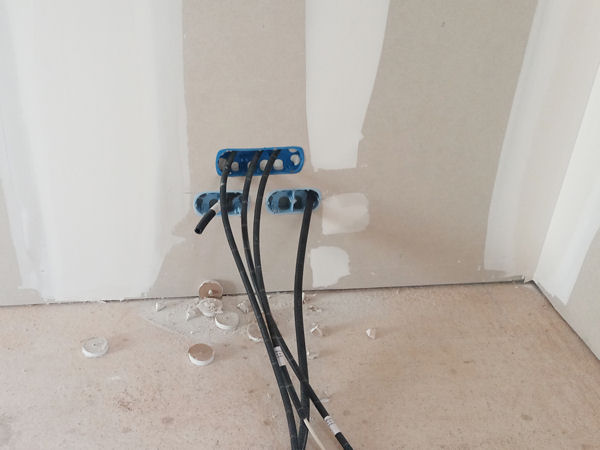
Now was time to take a look inside to see how the electricians and the plumbers had done while I was away, starting with the sockets in the TV corner of the living room. Still work to be done.

null

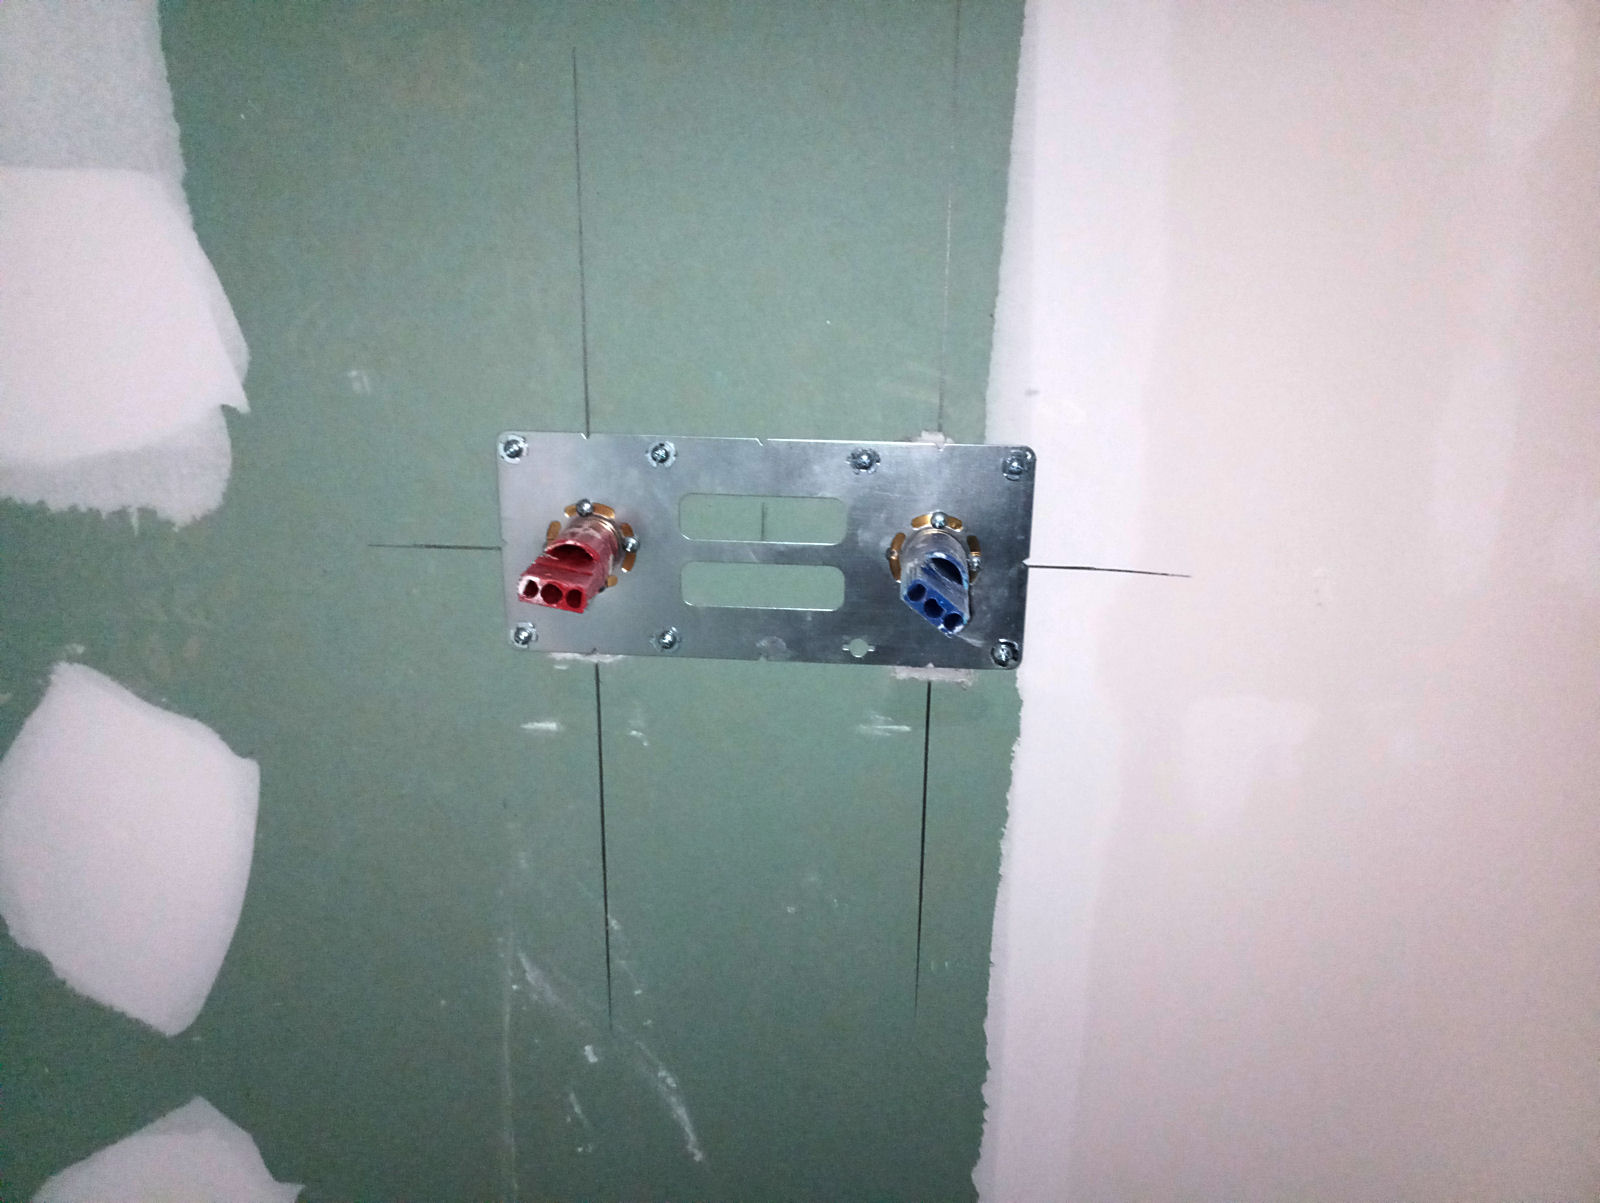
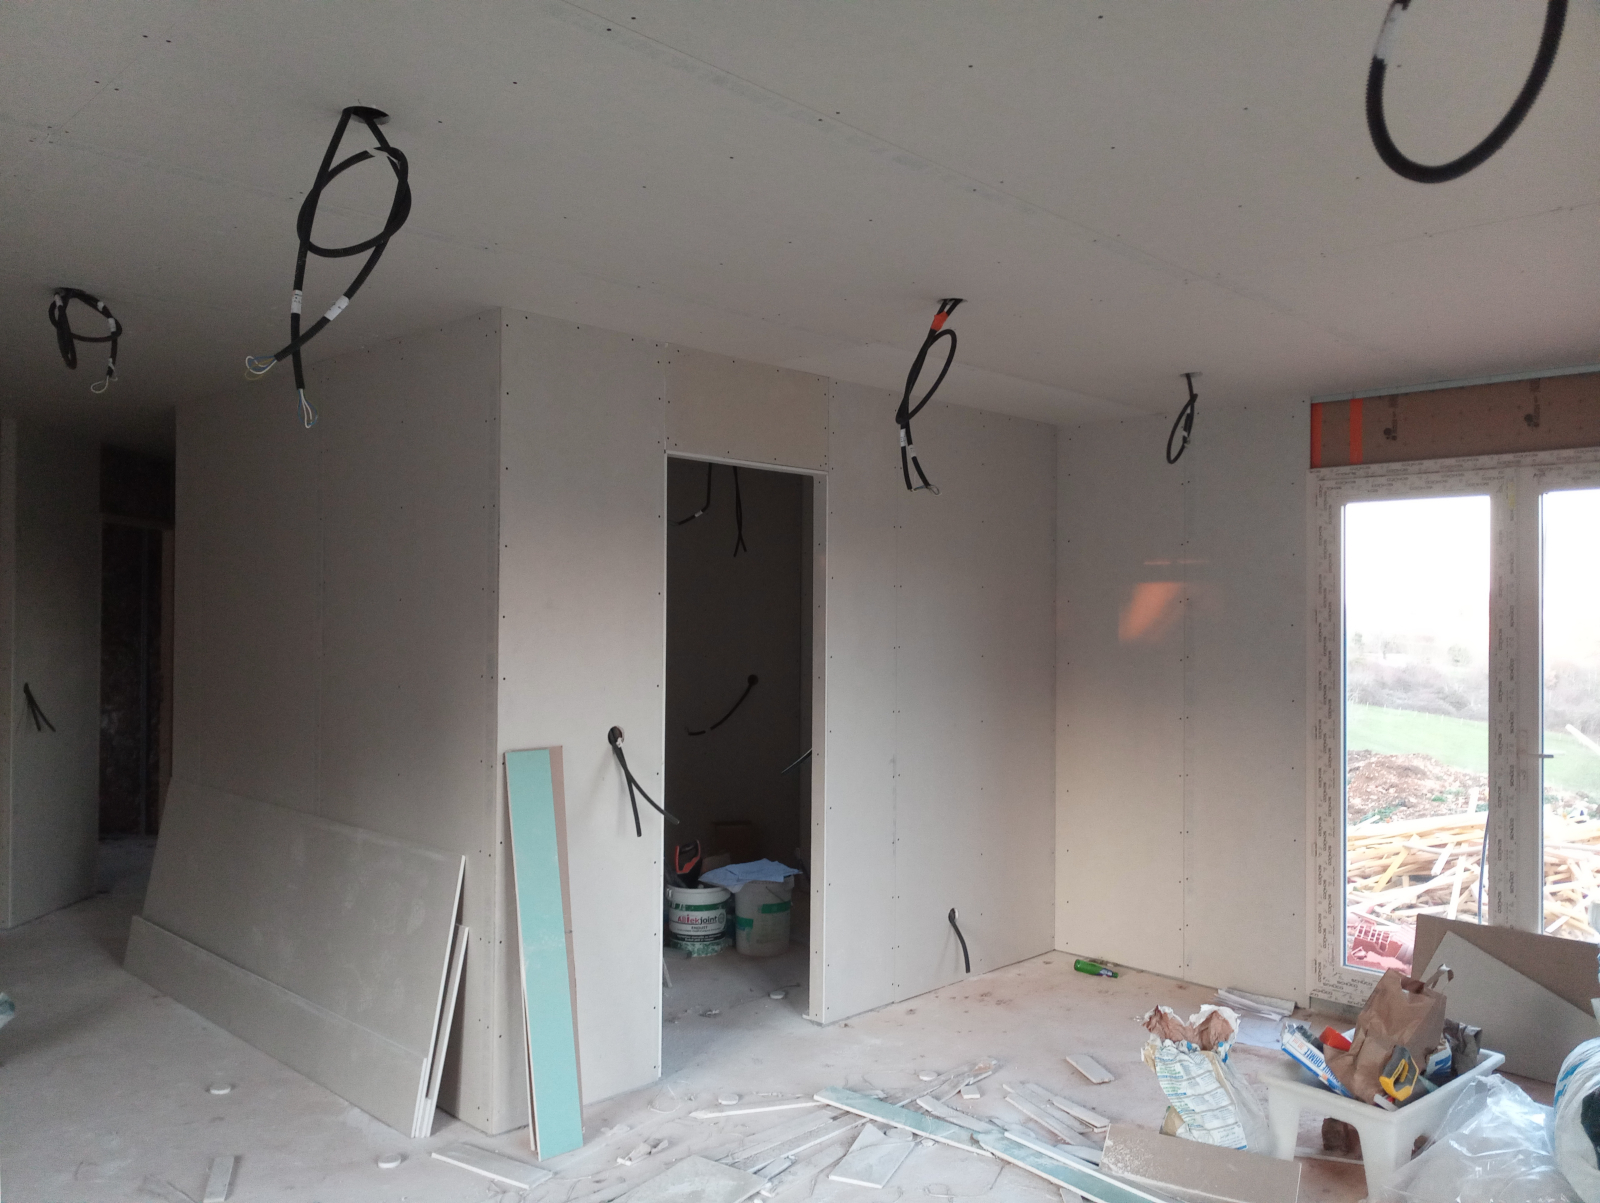
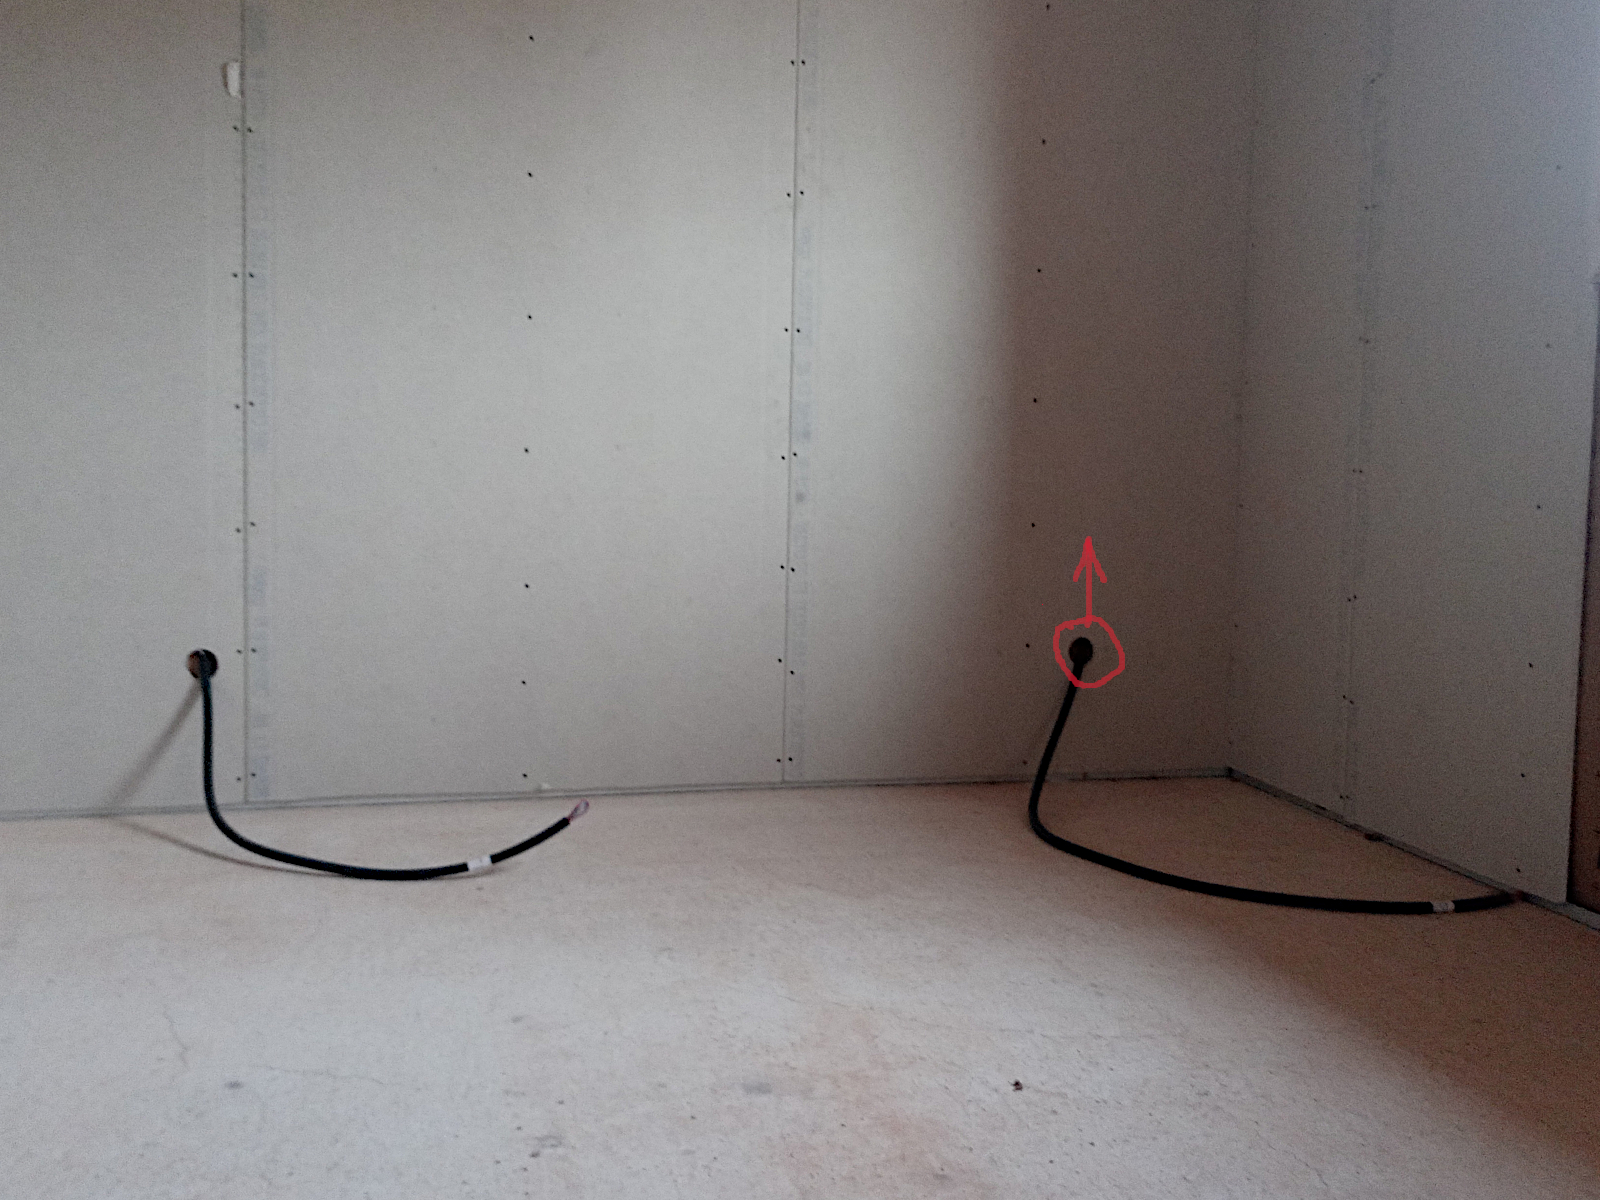
Now the connections for the oven and hob in the kitchen.

null

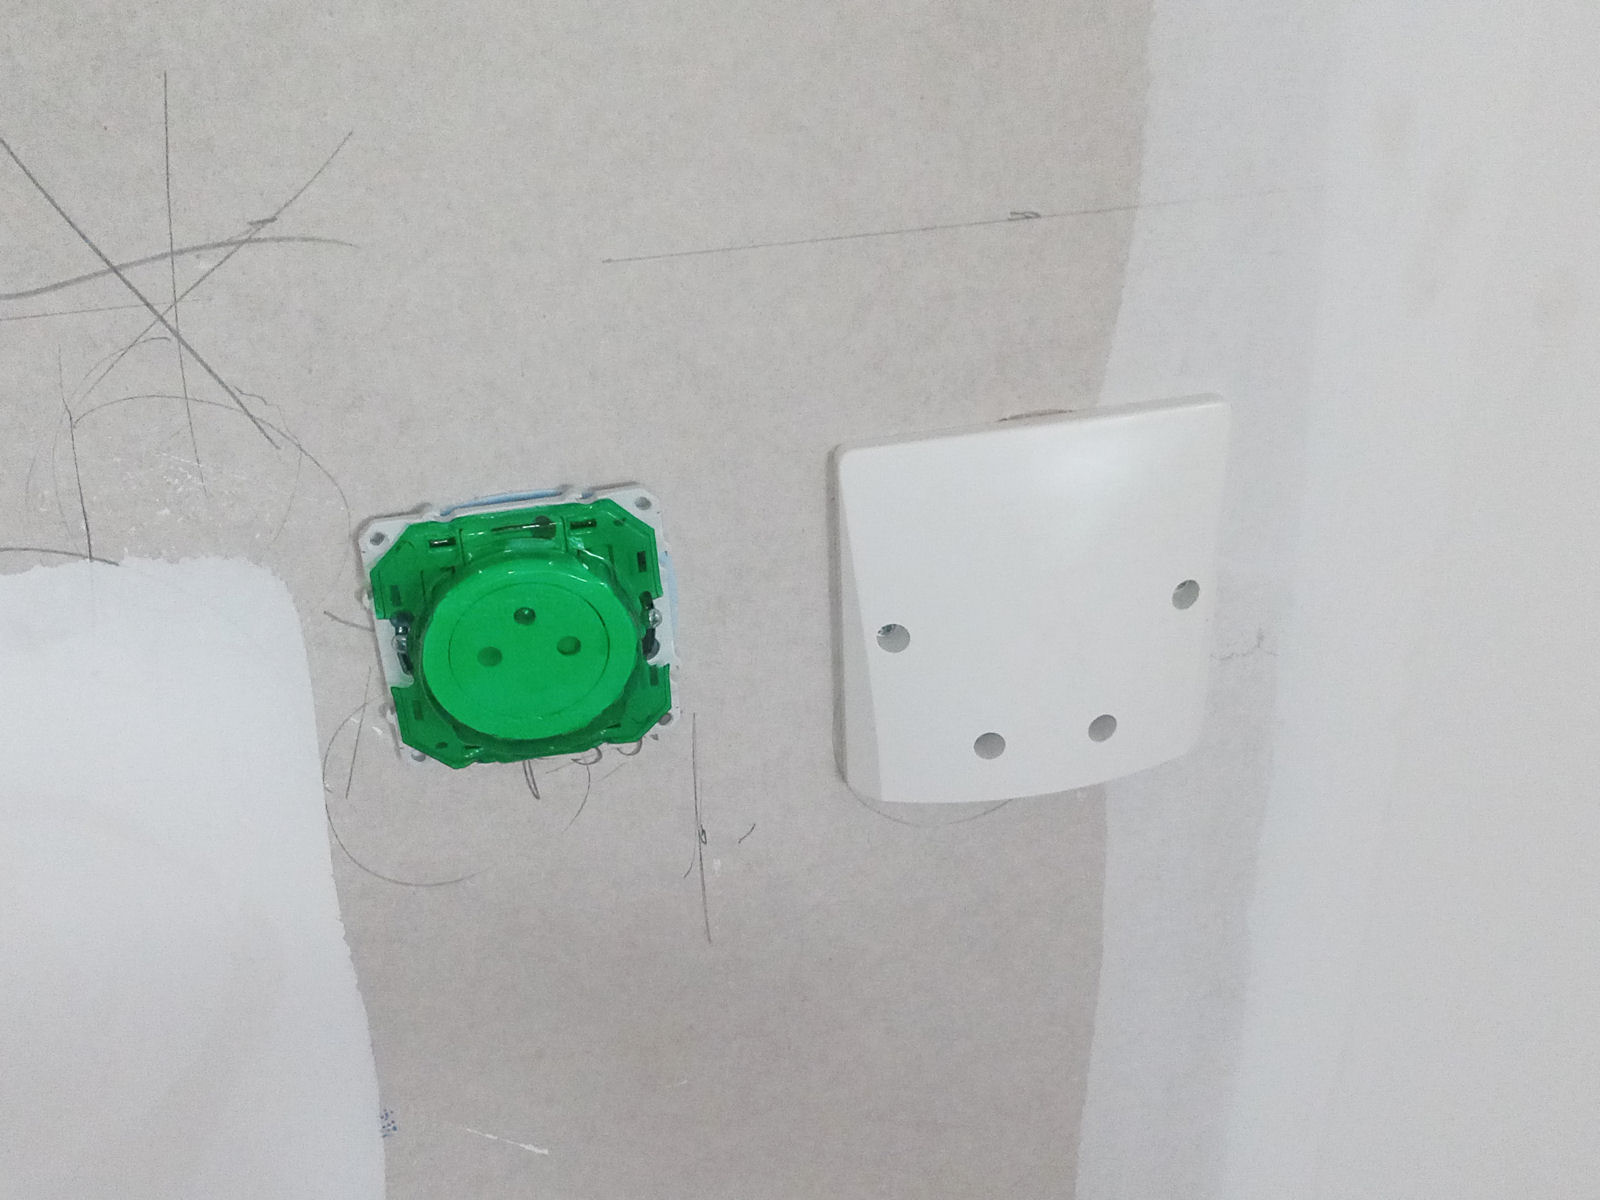
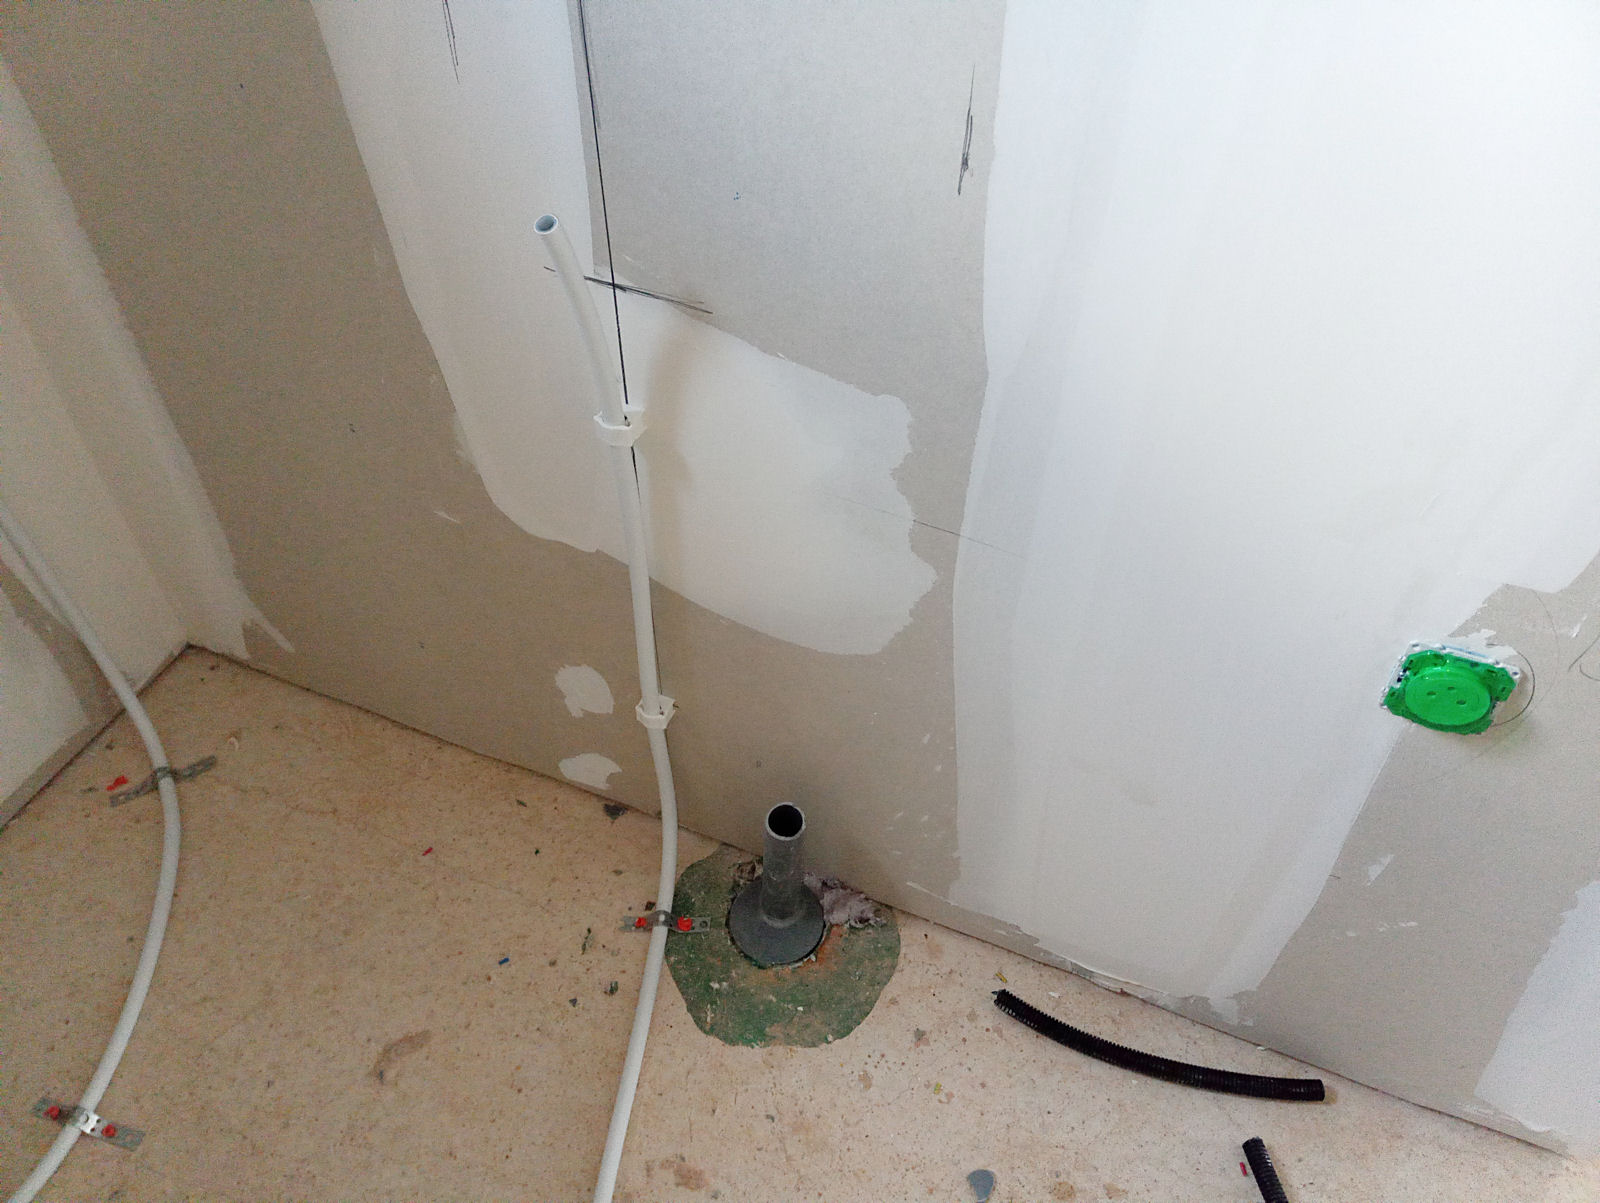
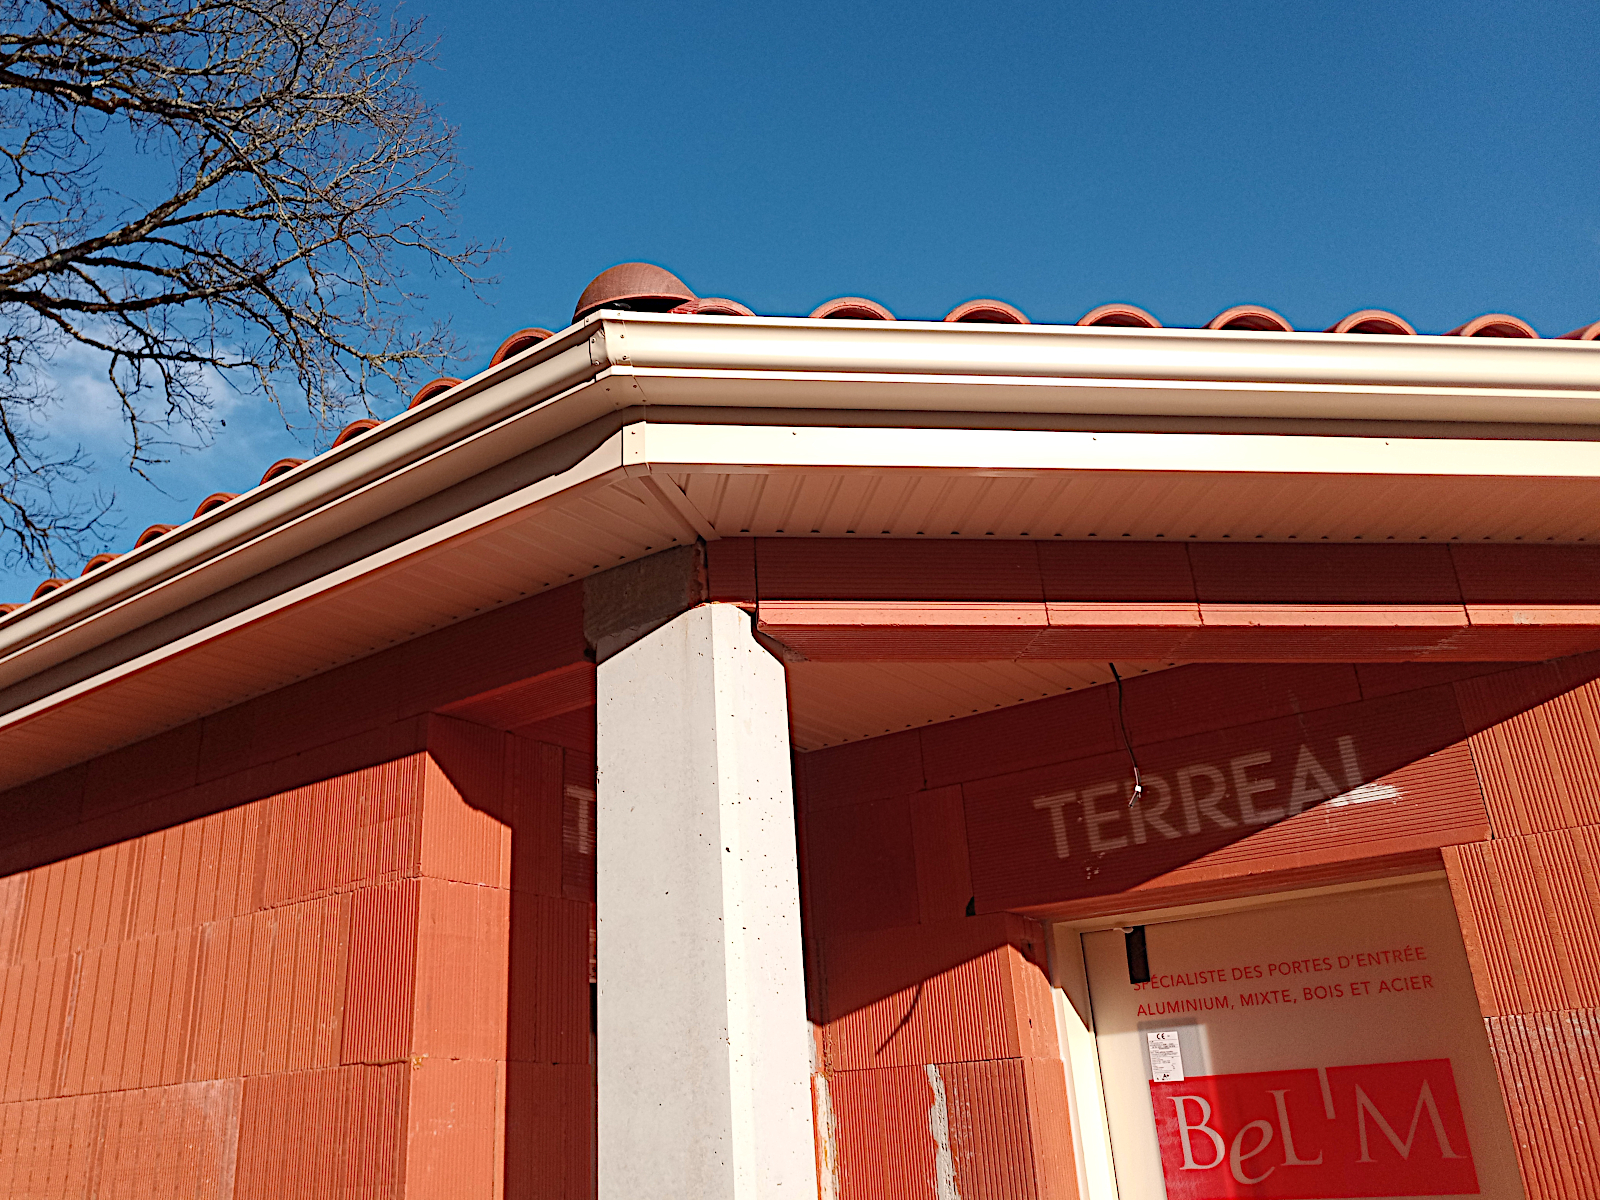
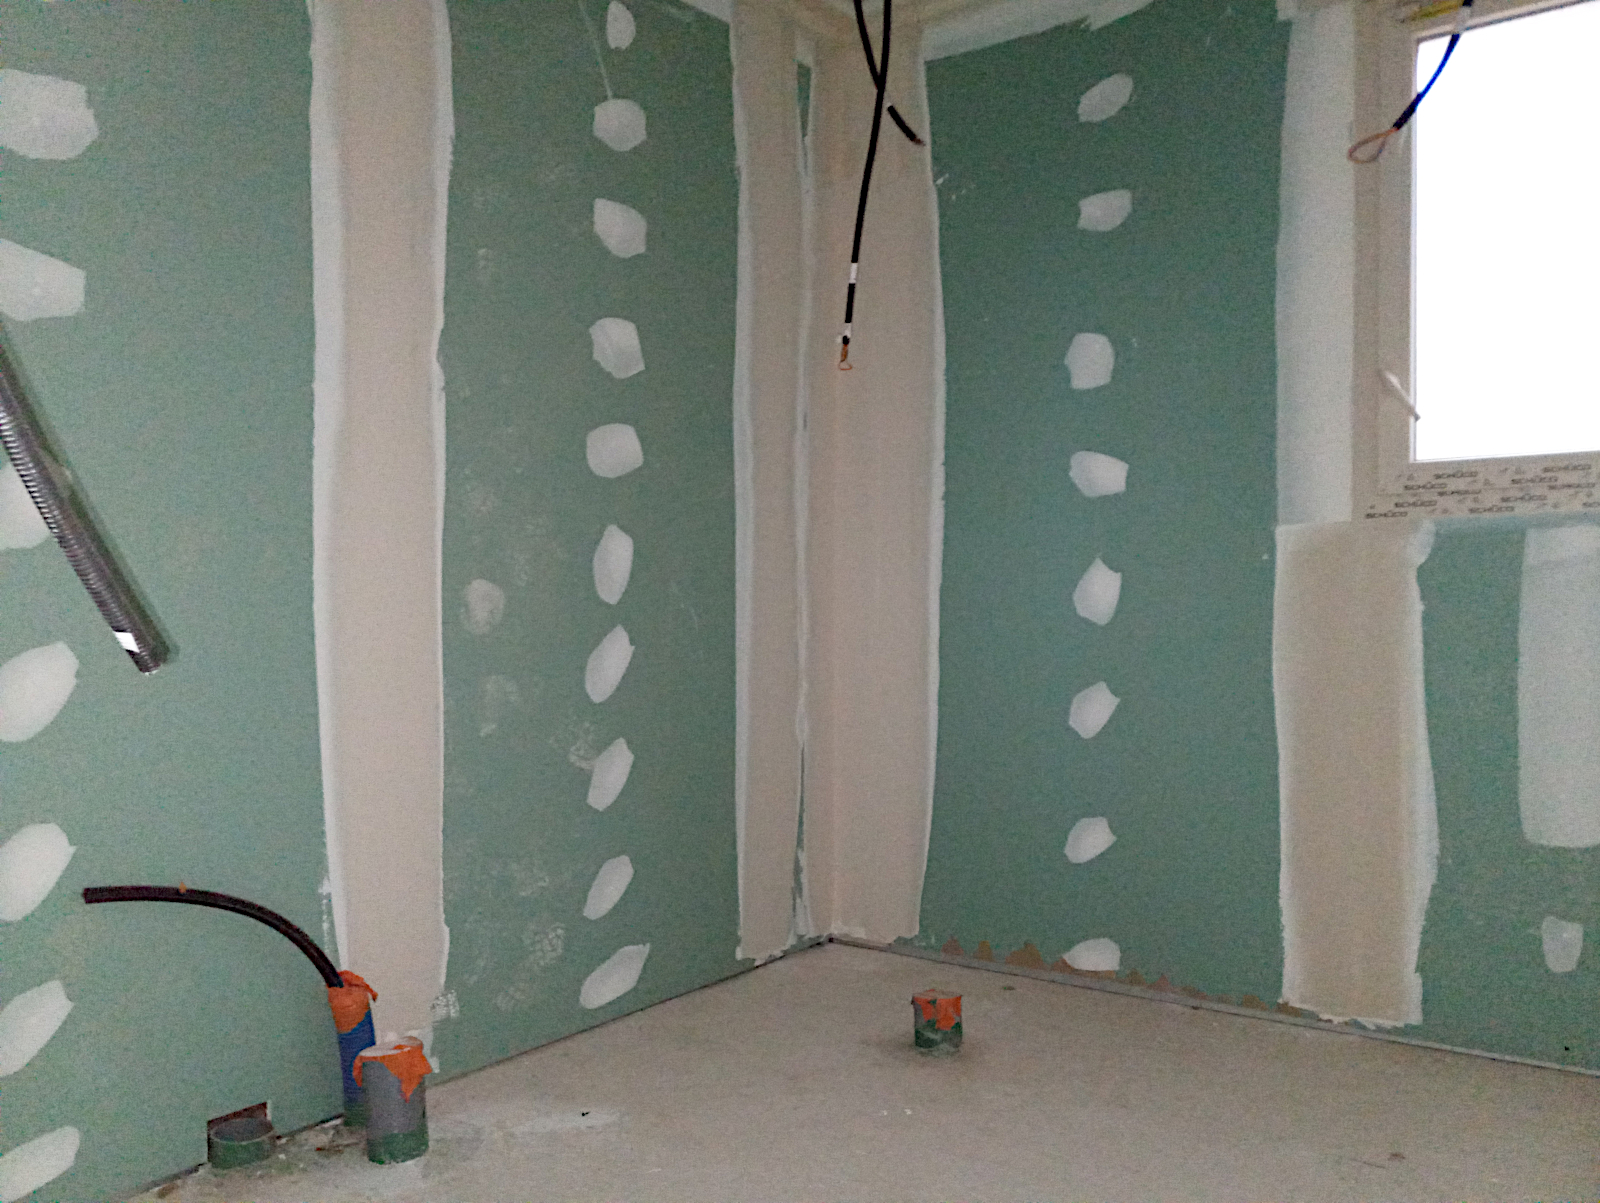
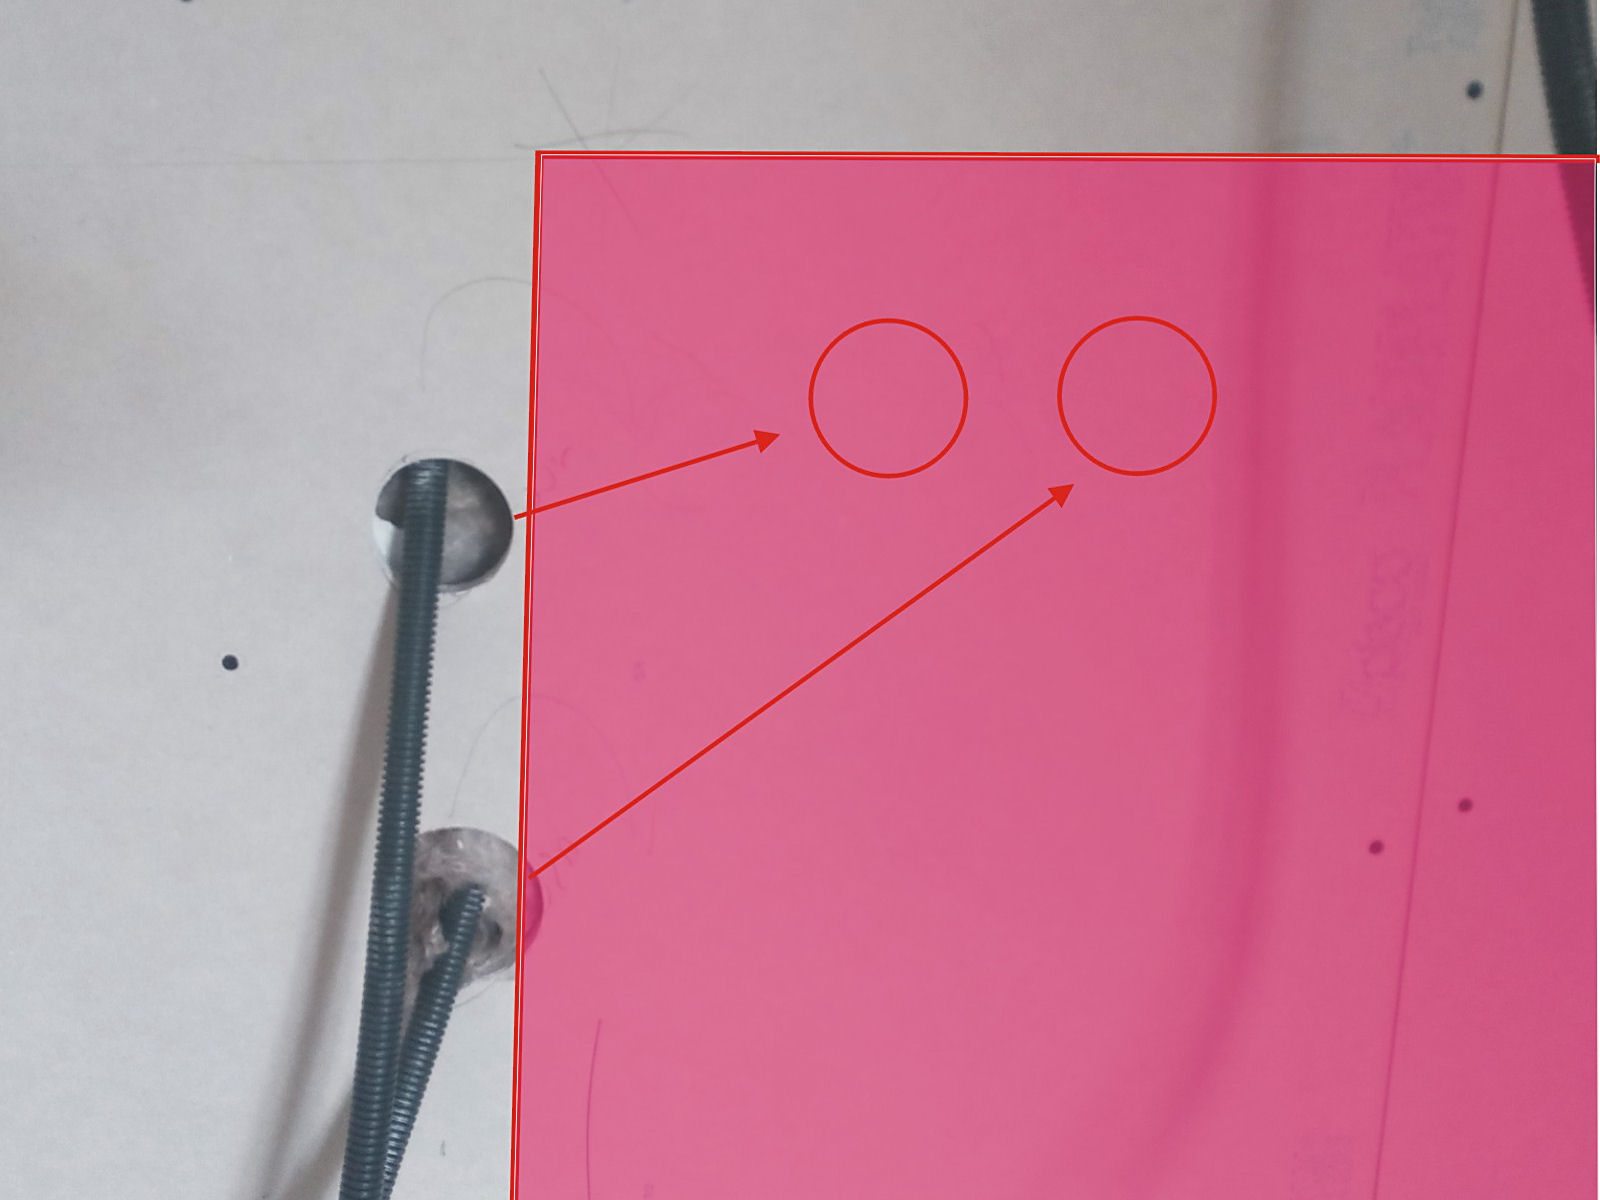
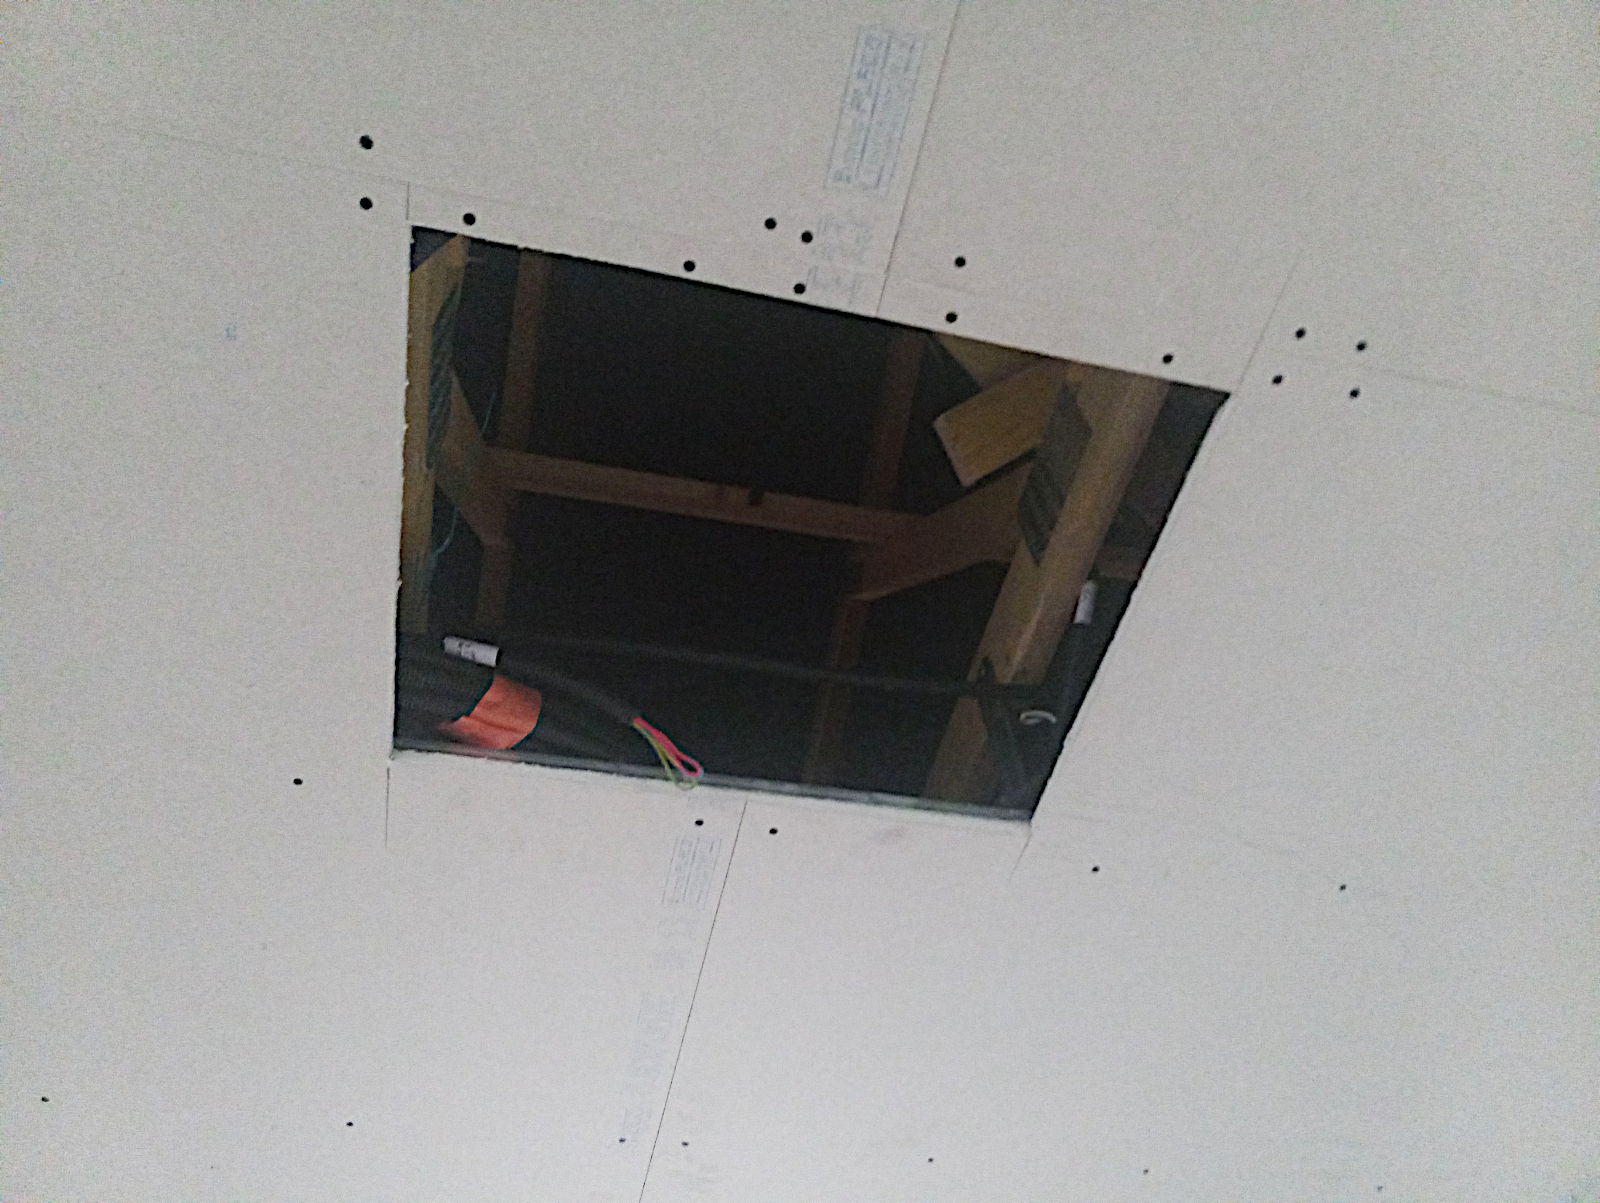
These two boxes are over the kitchen worktop in the corner where the fridge will be. One of them is a normal power socket but the other is the switch that will operate the house’s ventilation system that is installed in the roof. I wondered how that was going to work and now I have the answer.

null

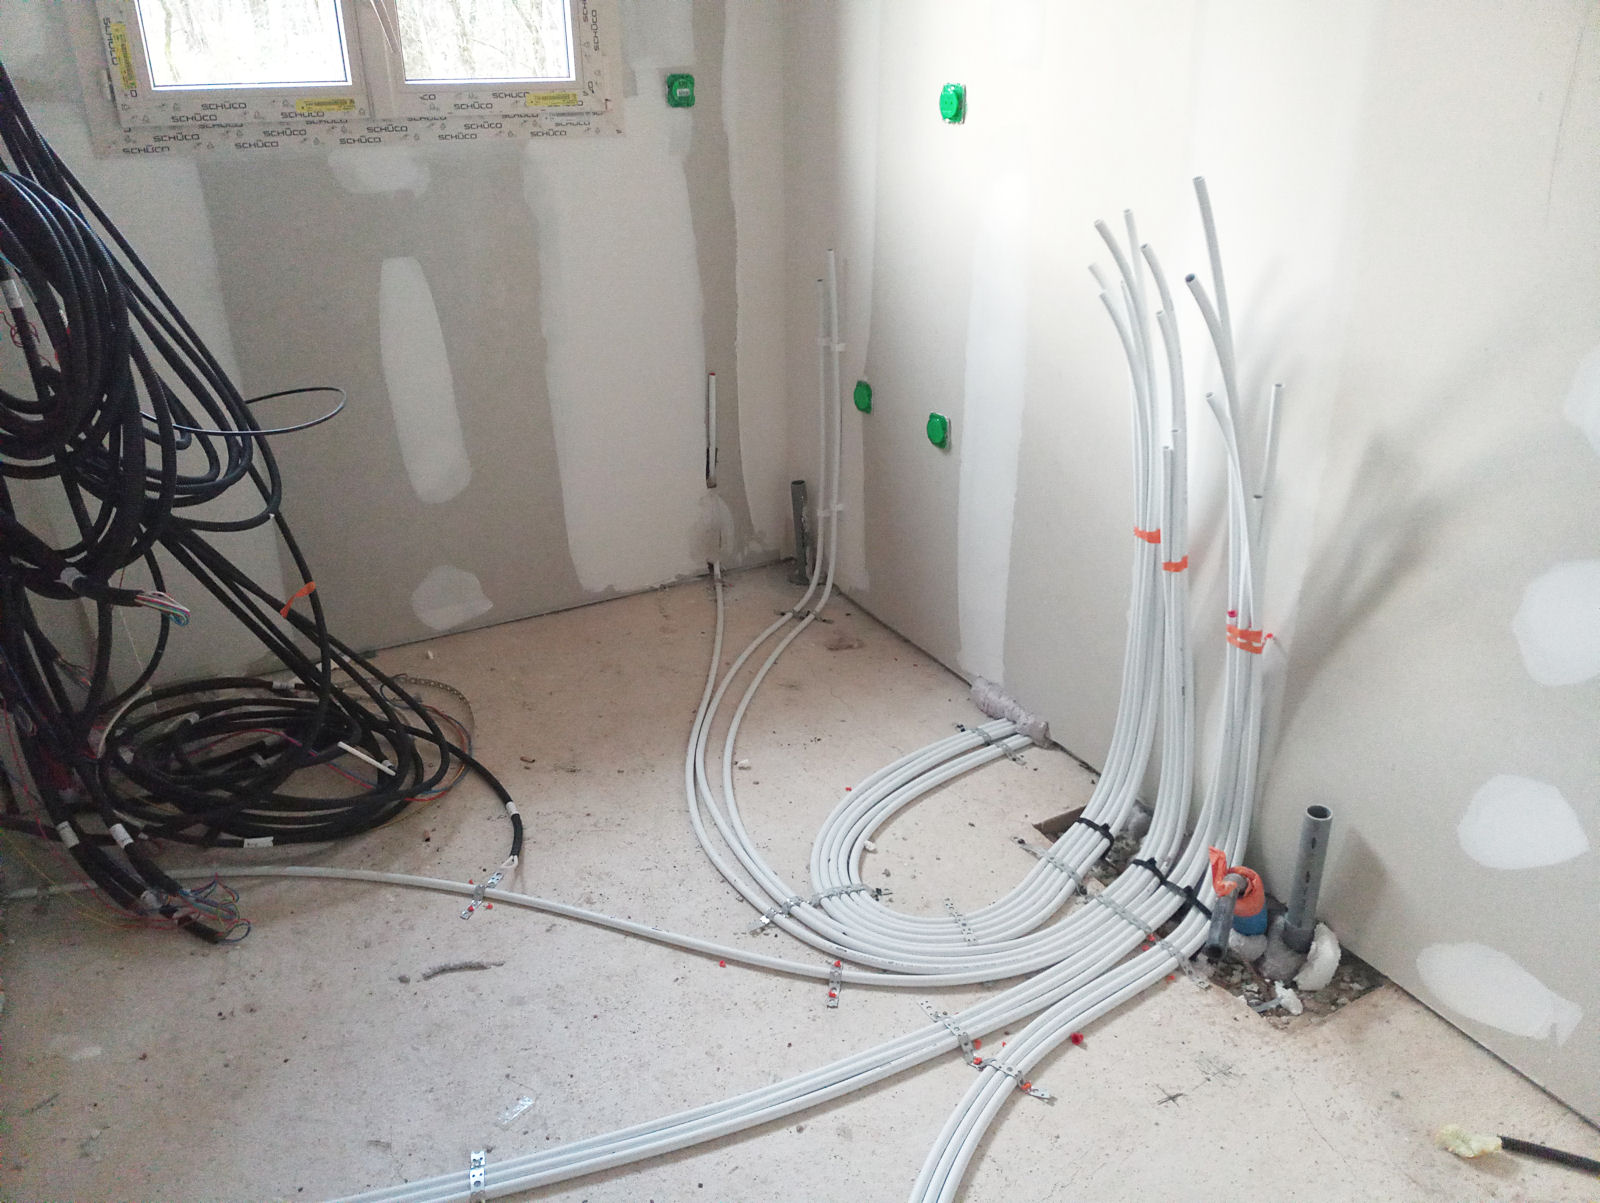
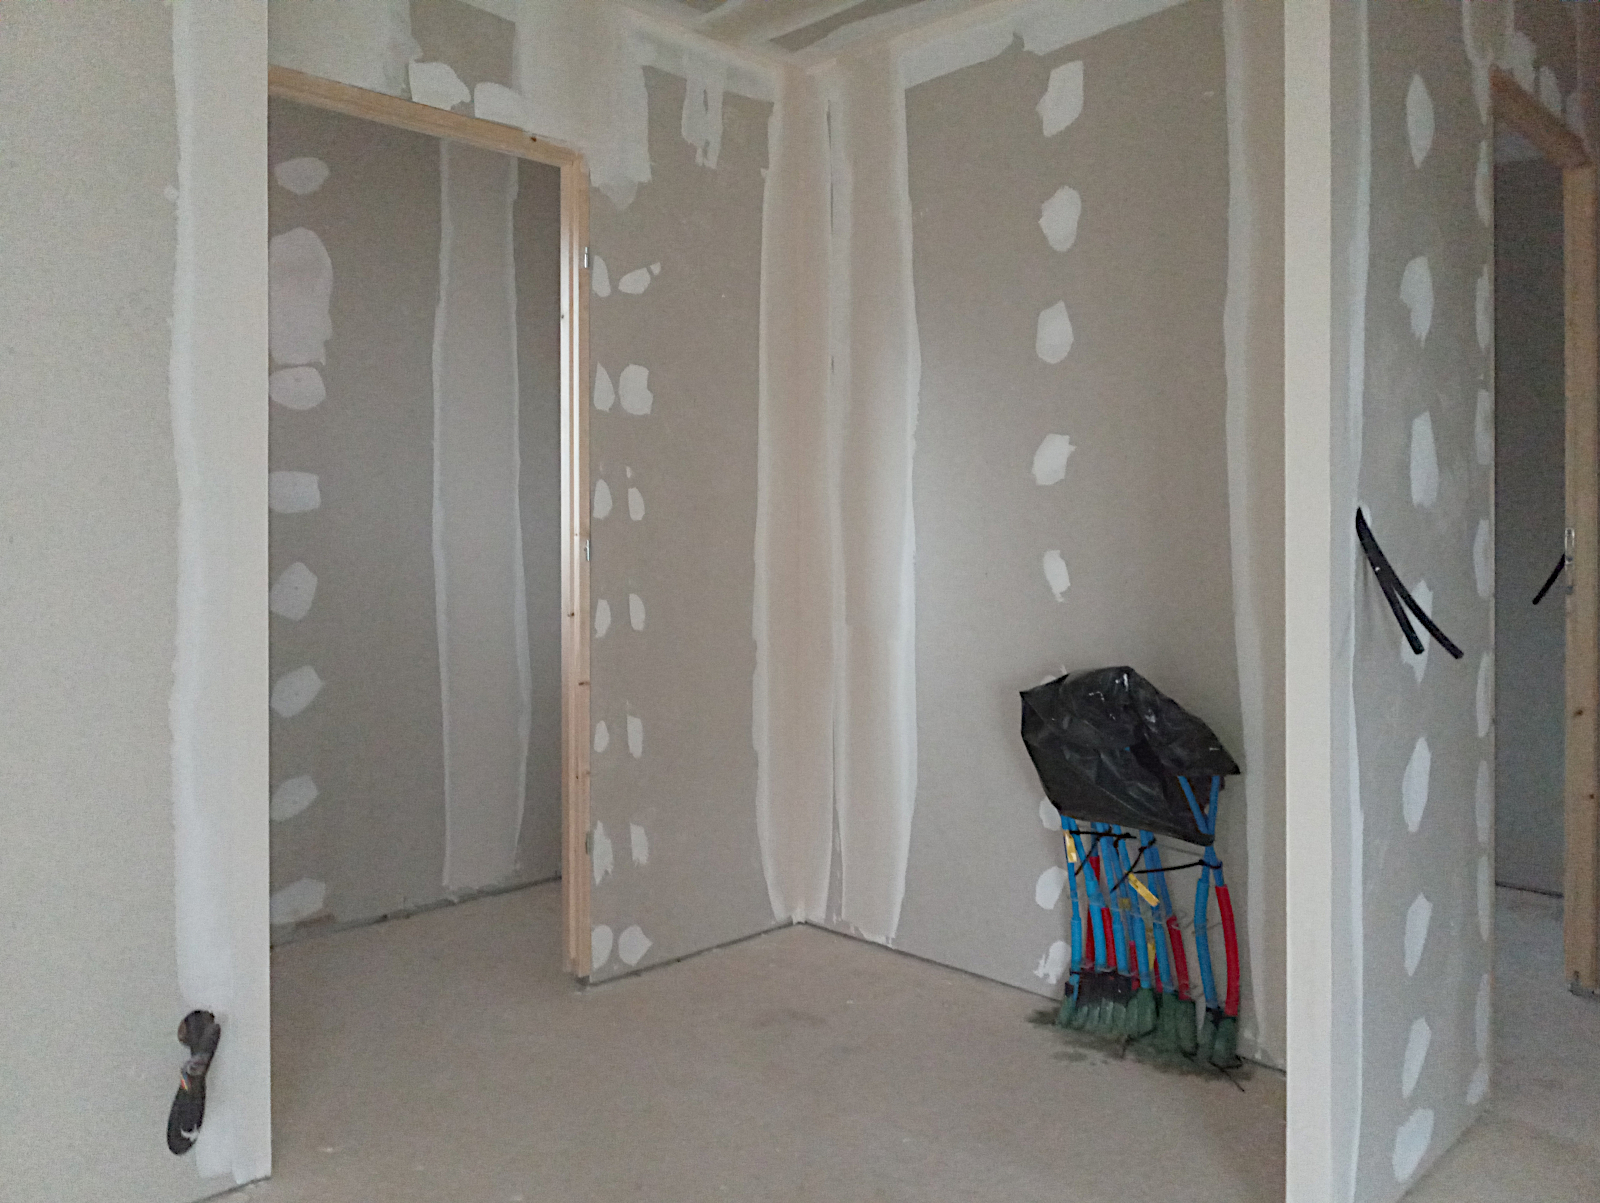
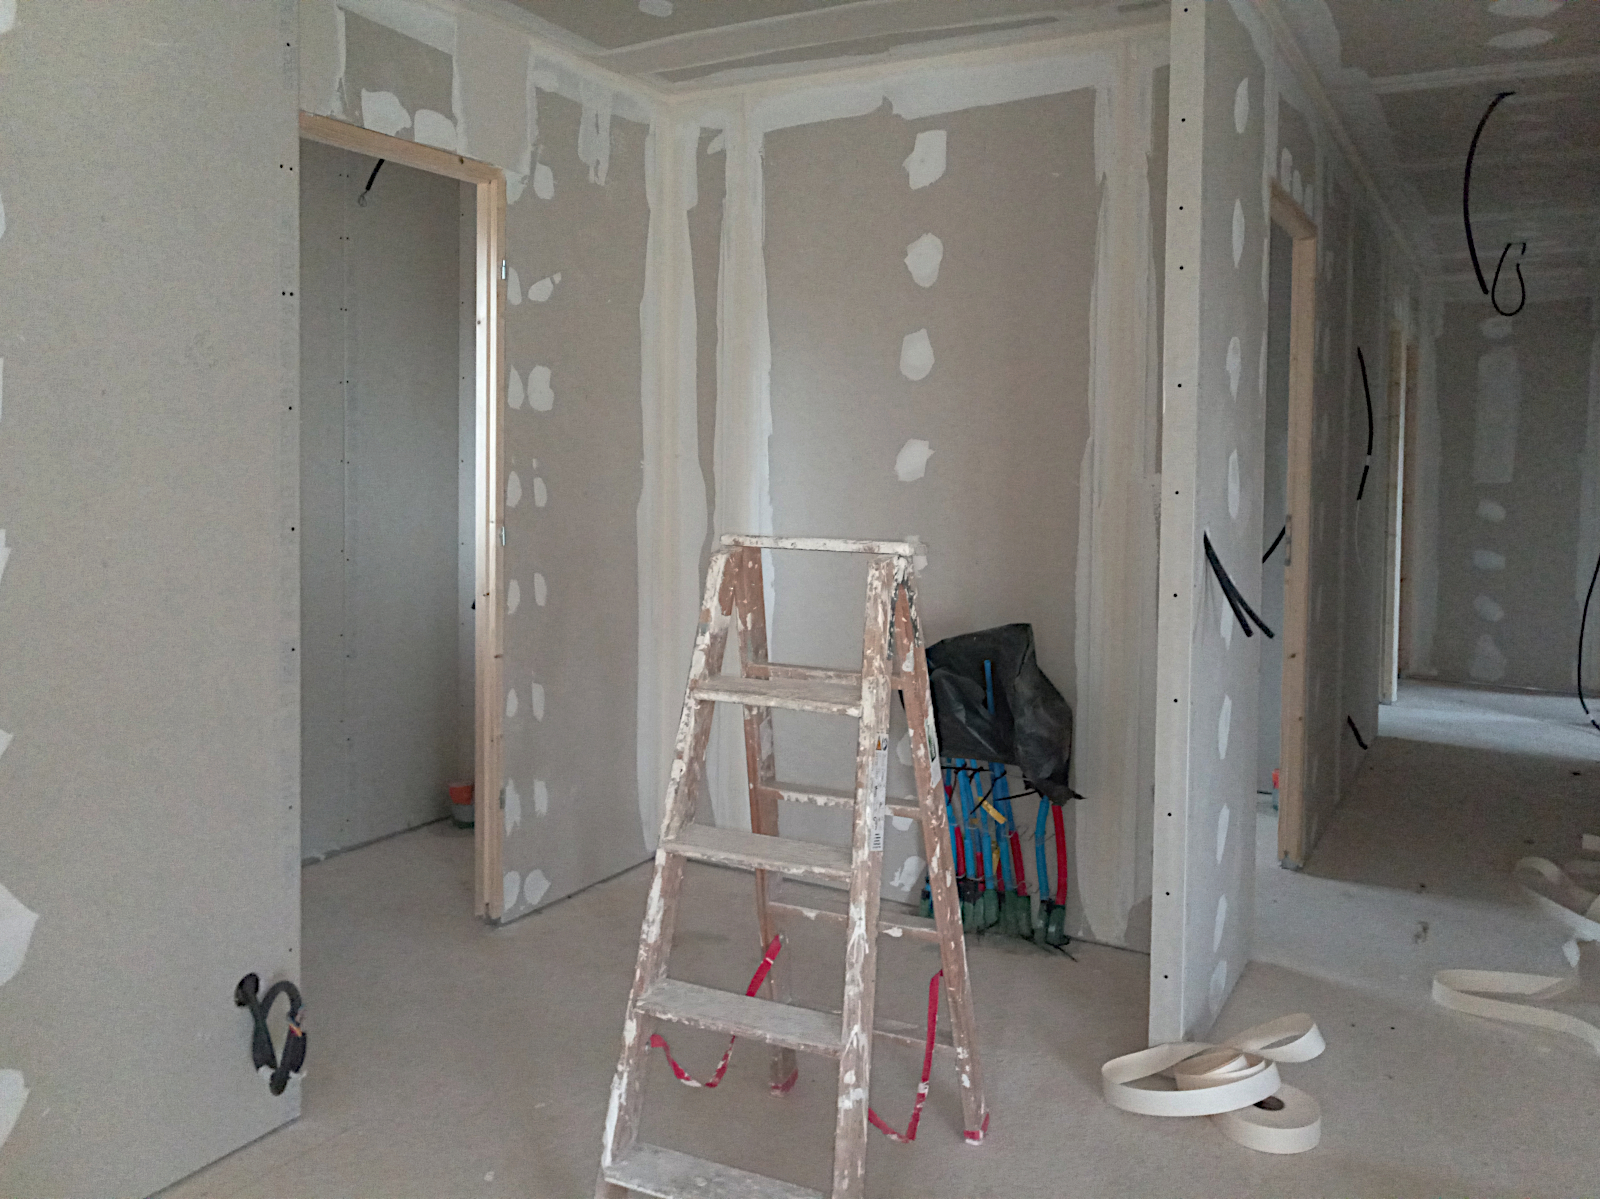
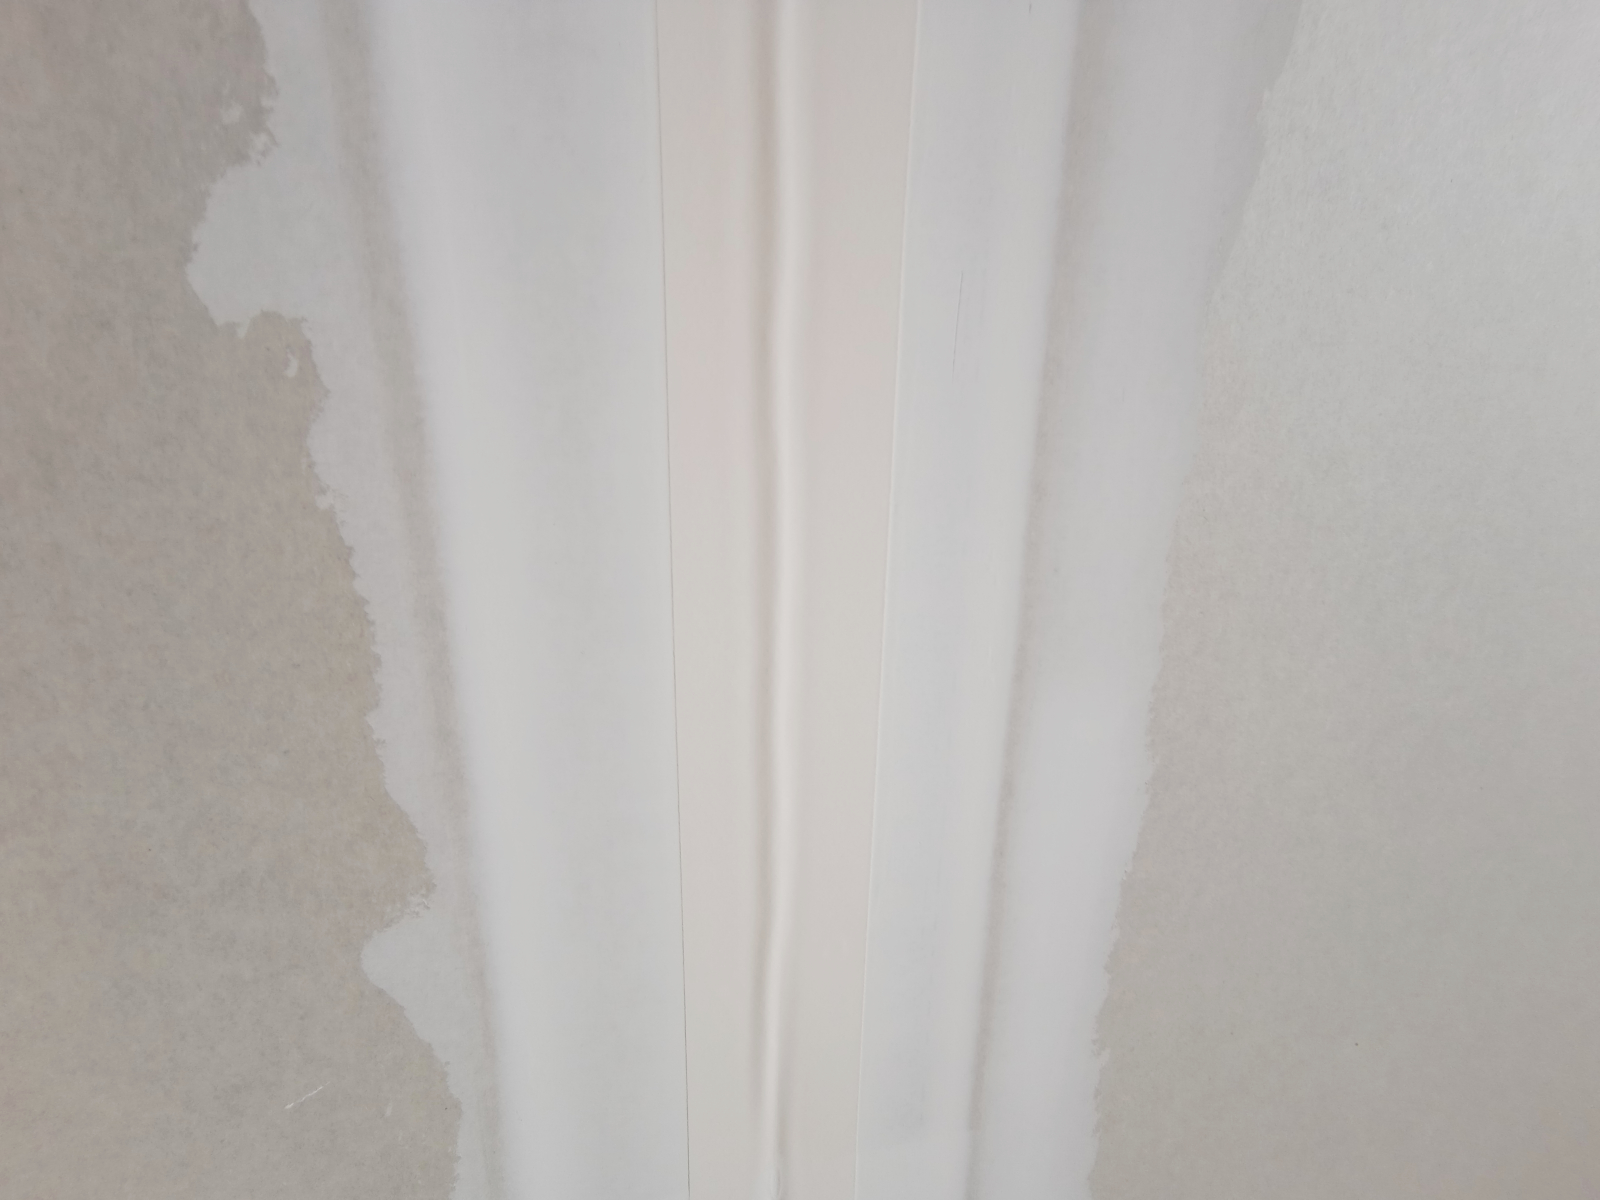
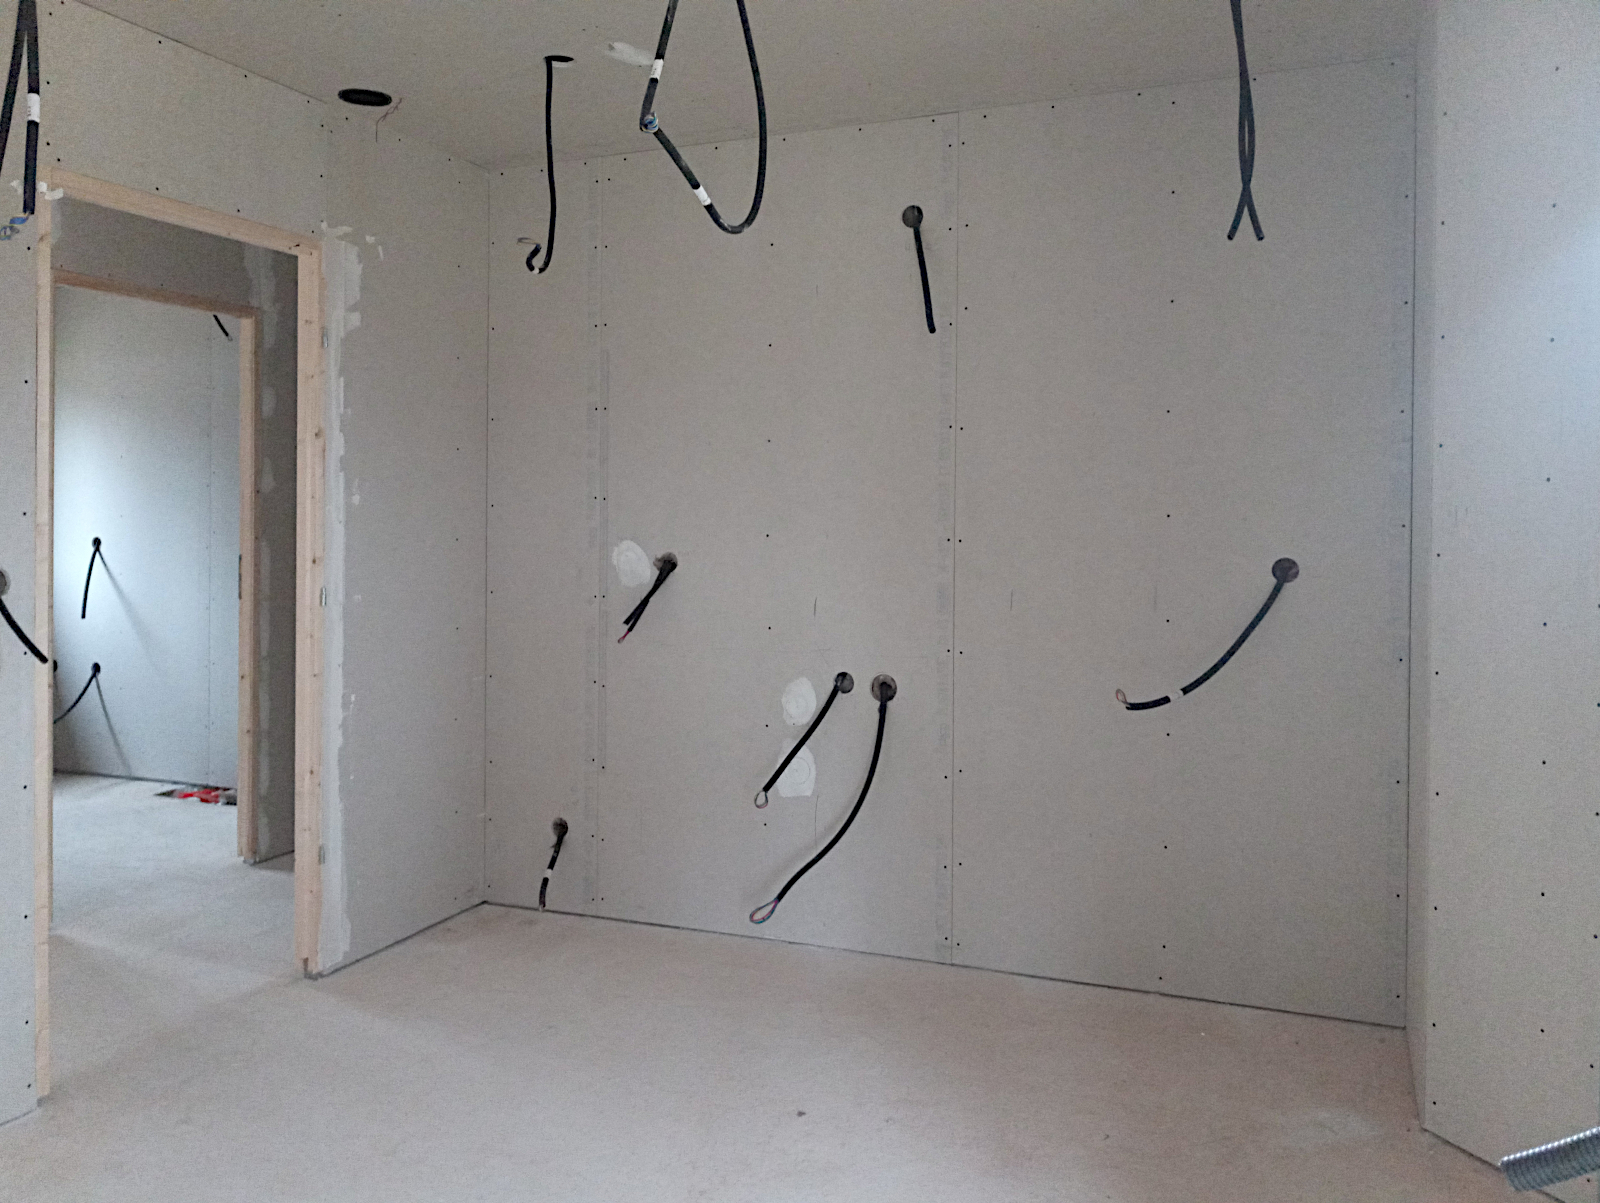
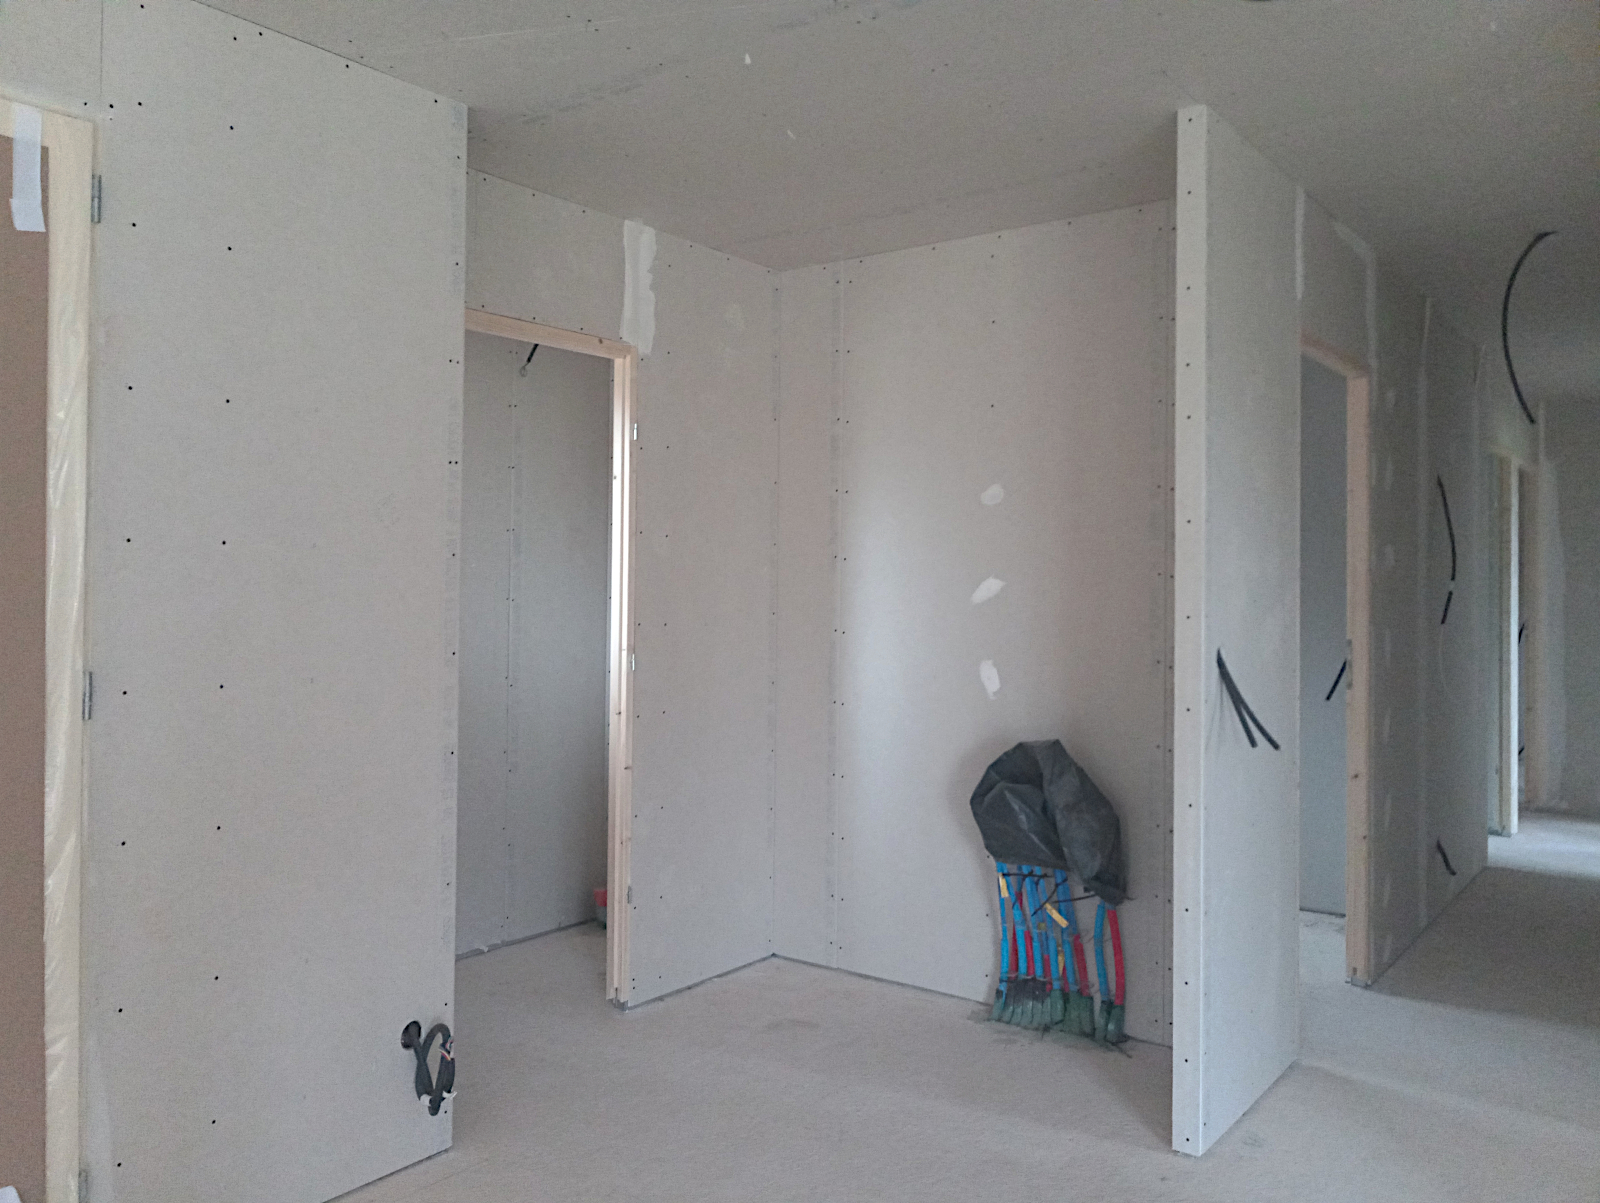
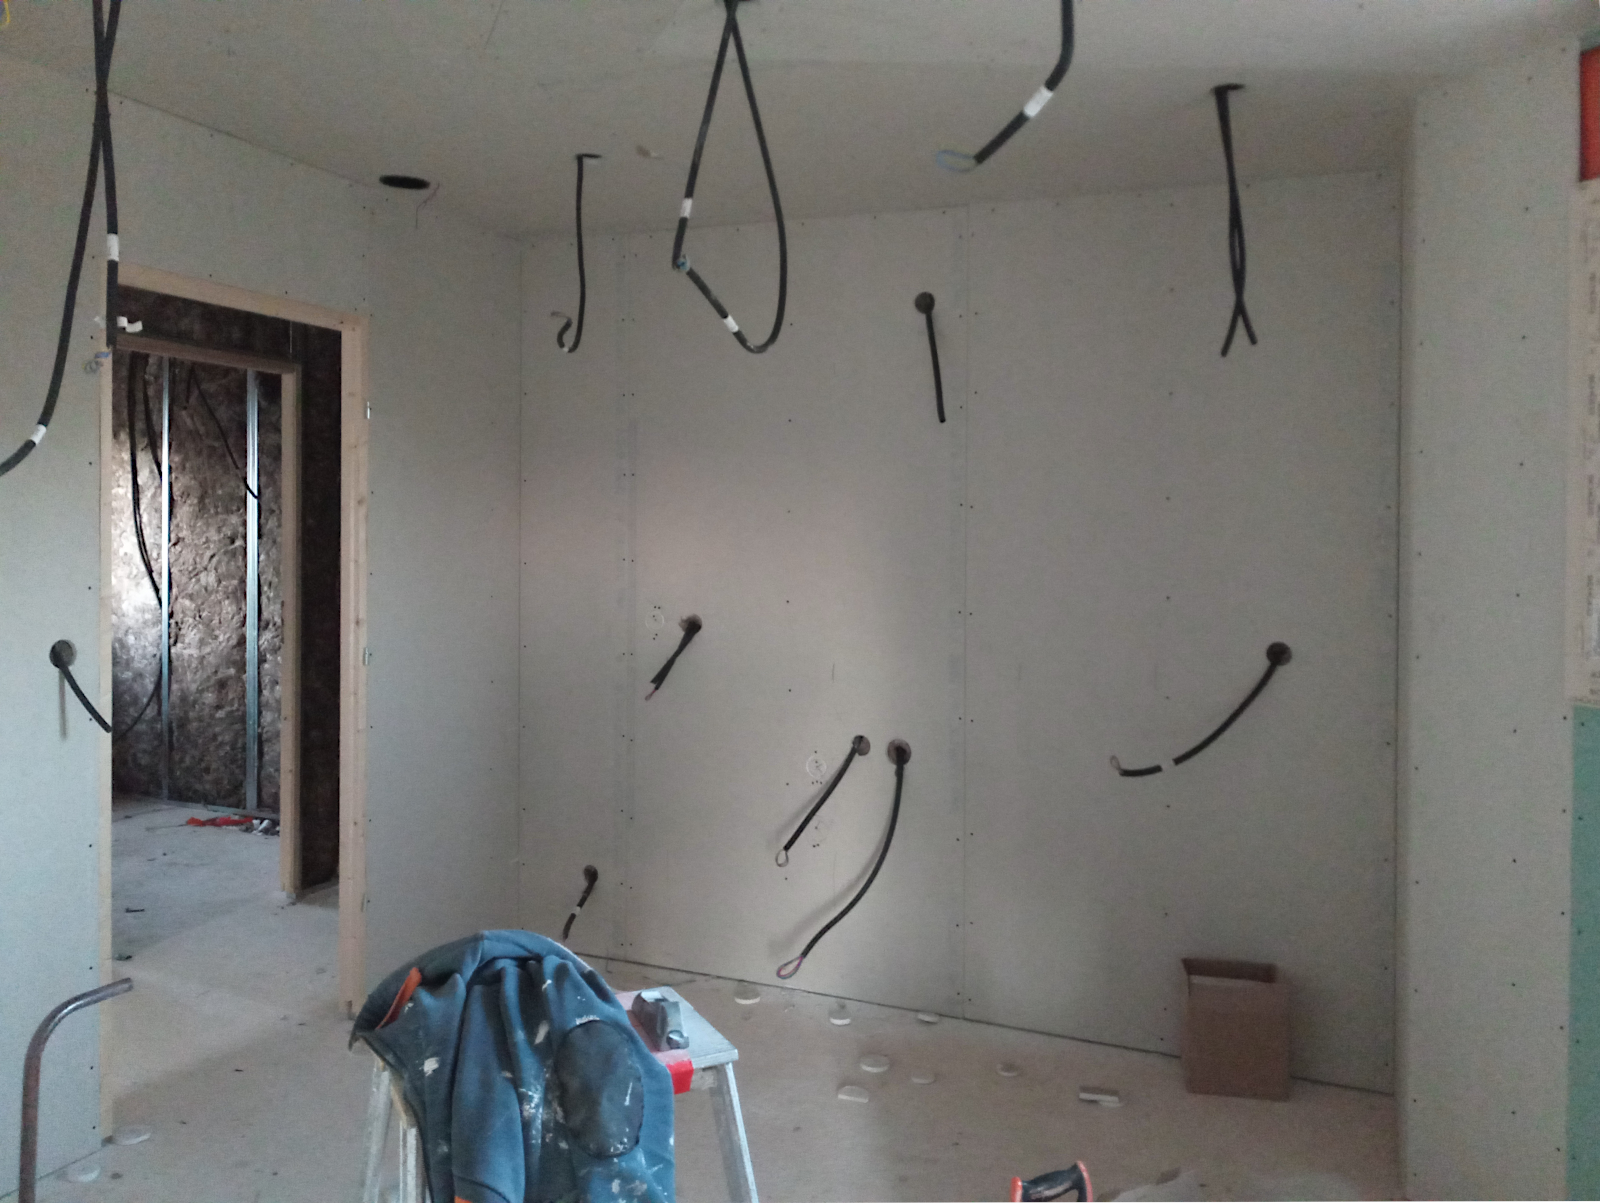
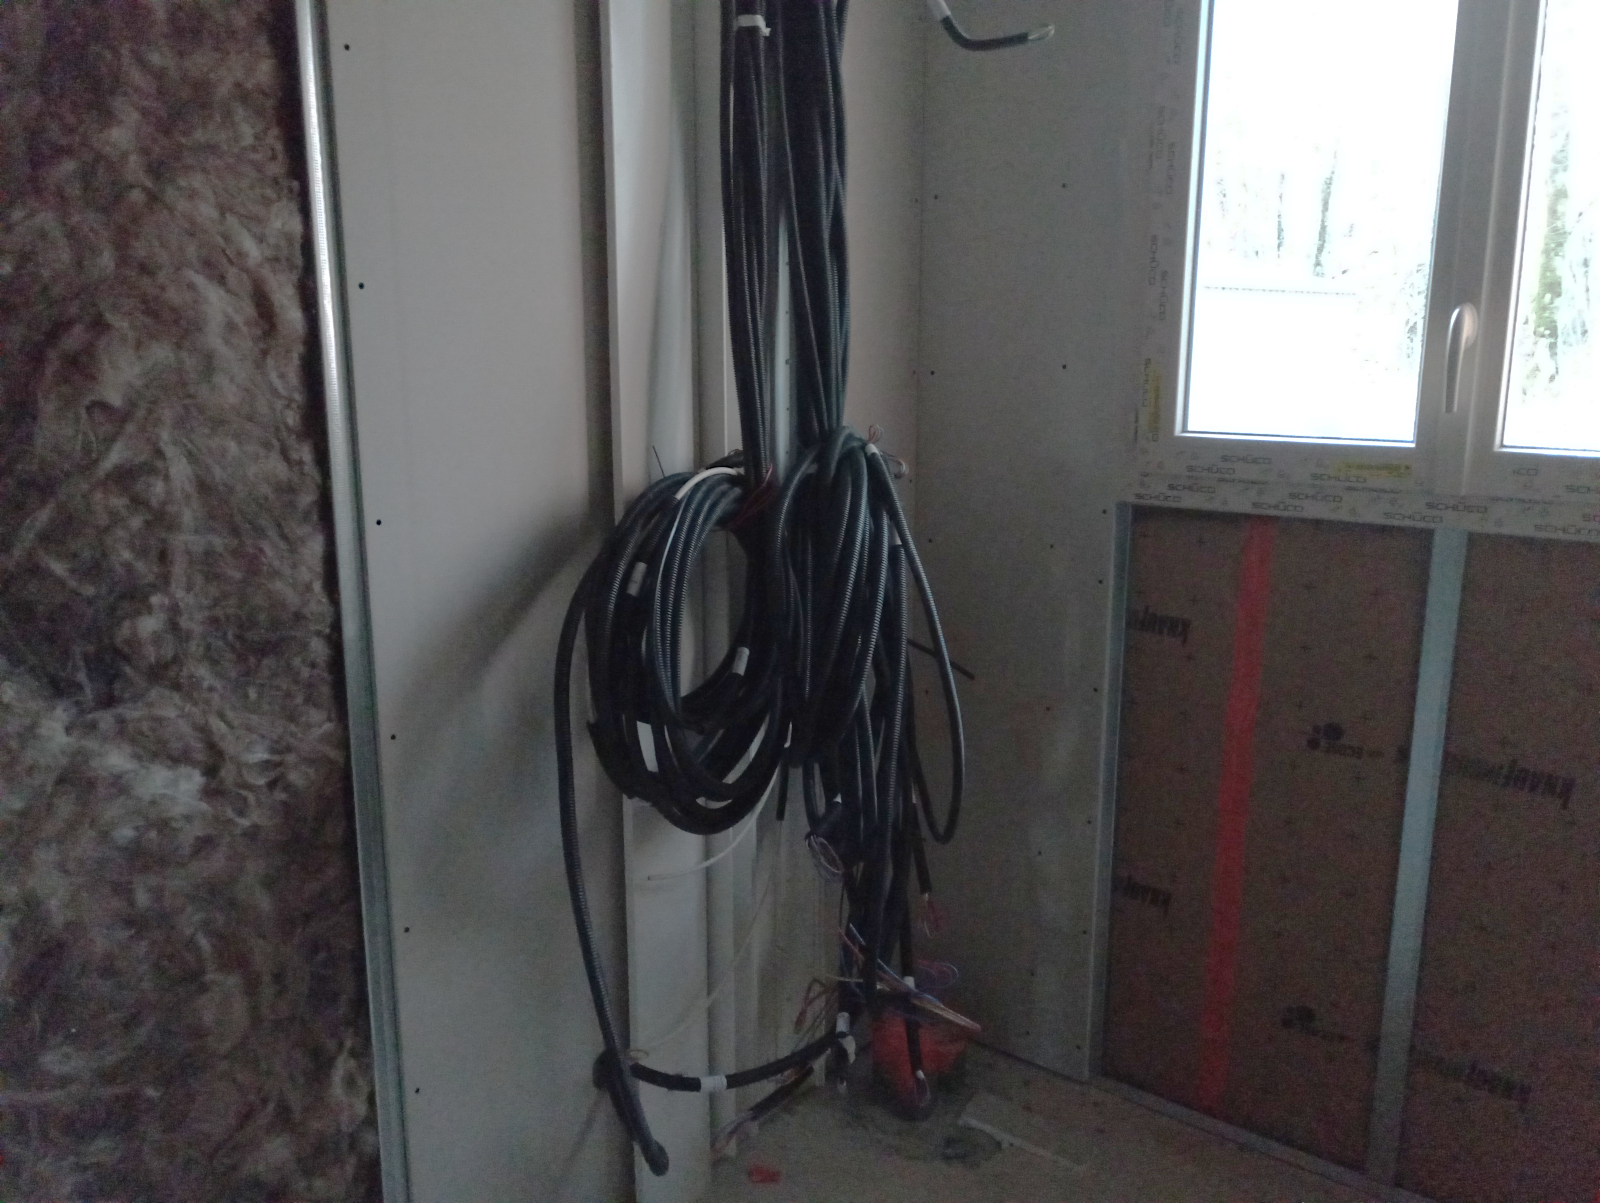
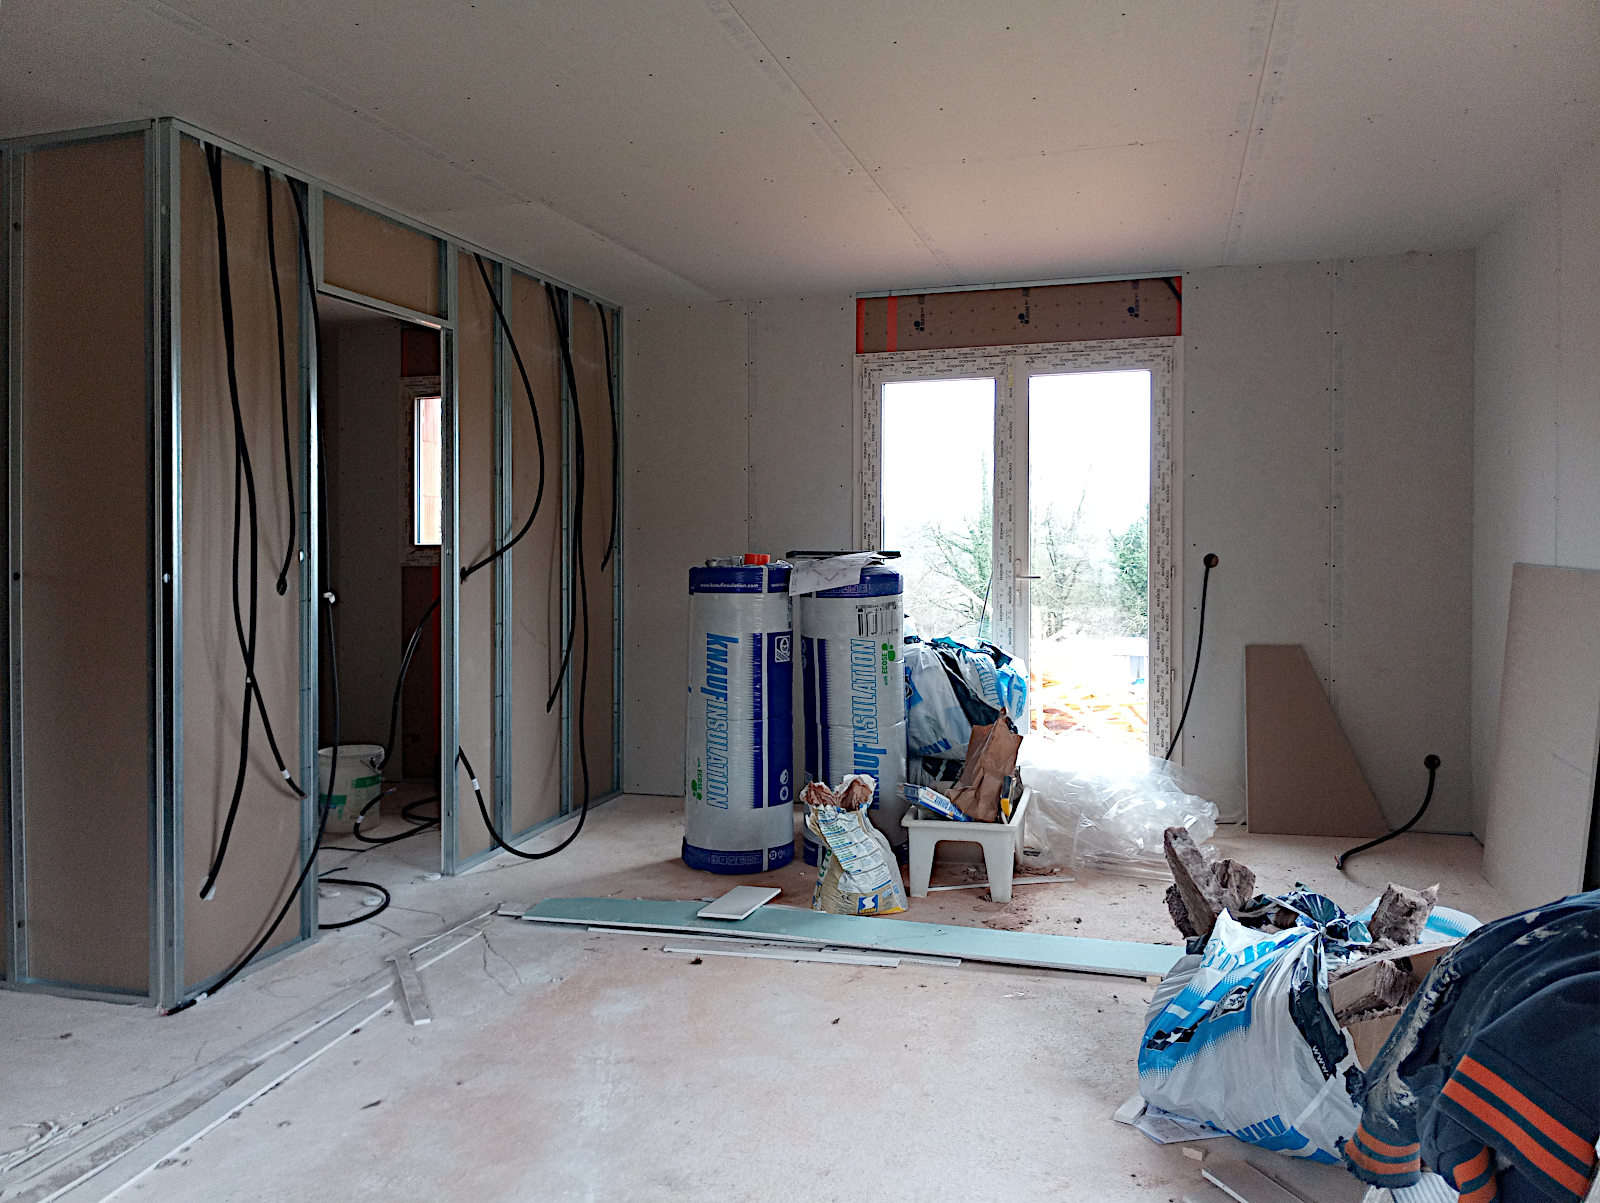
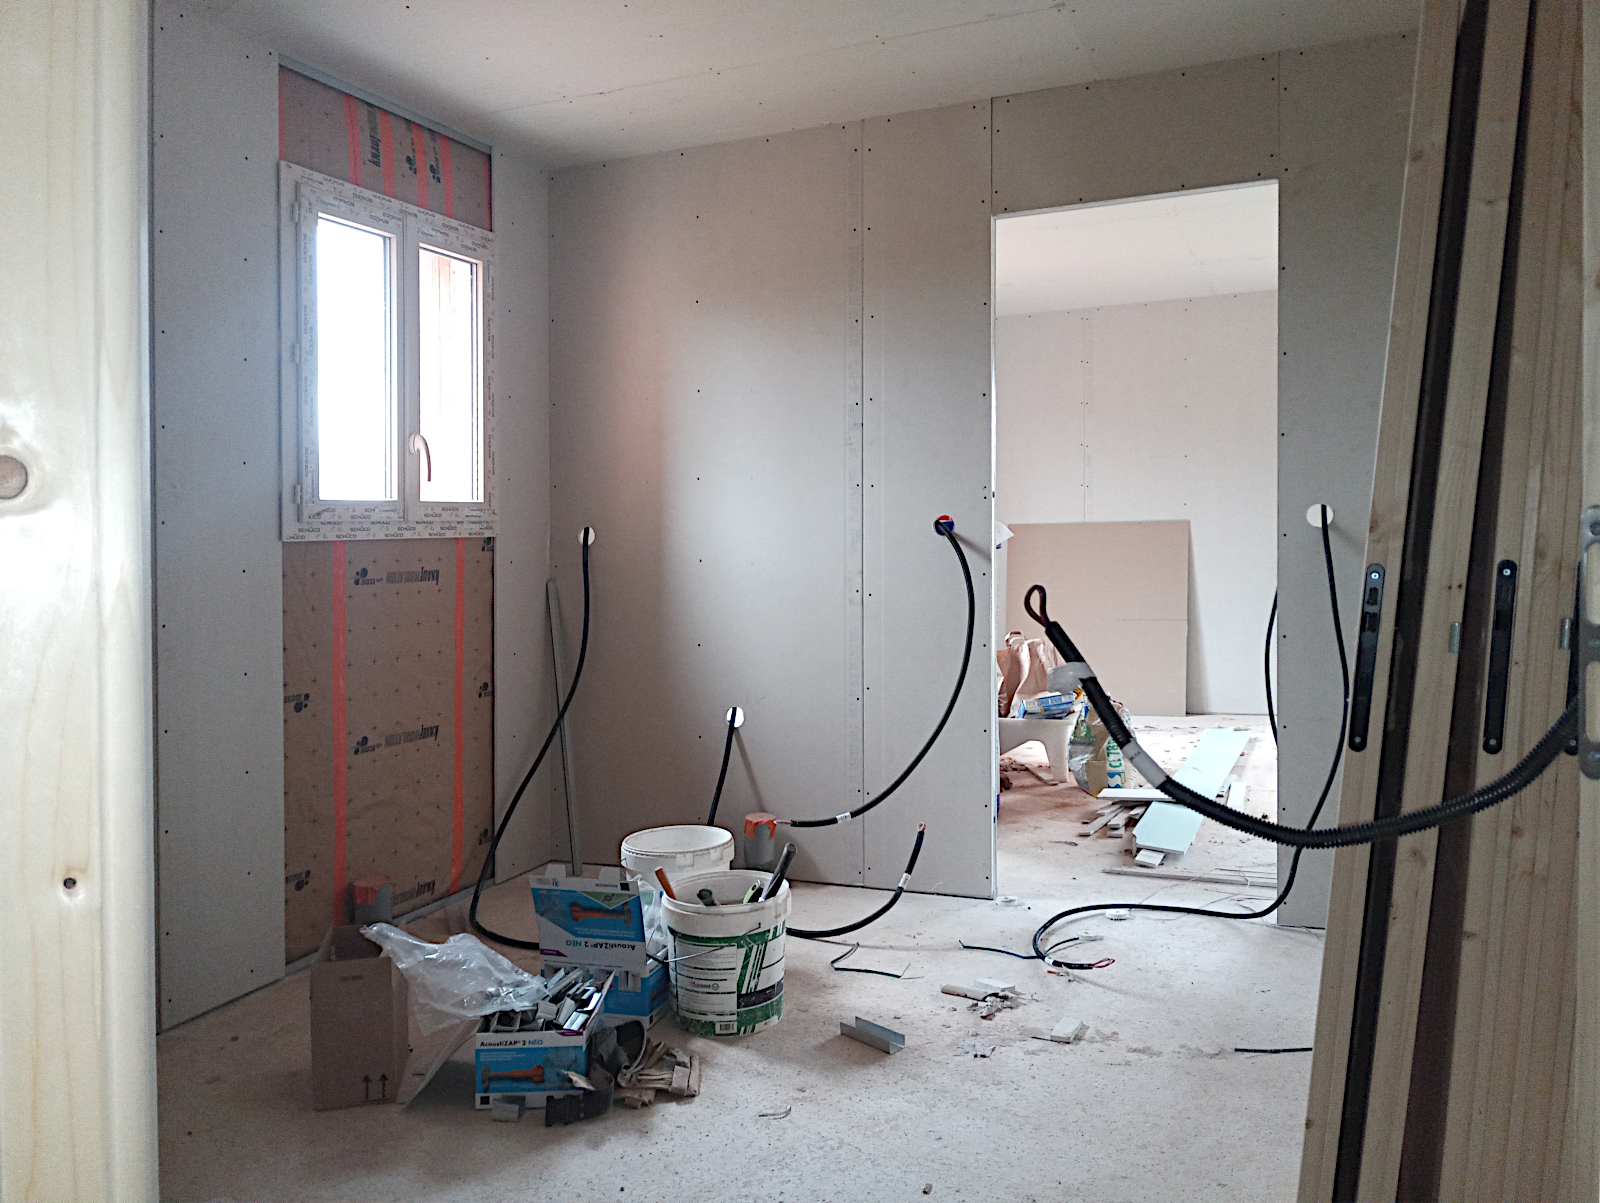
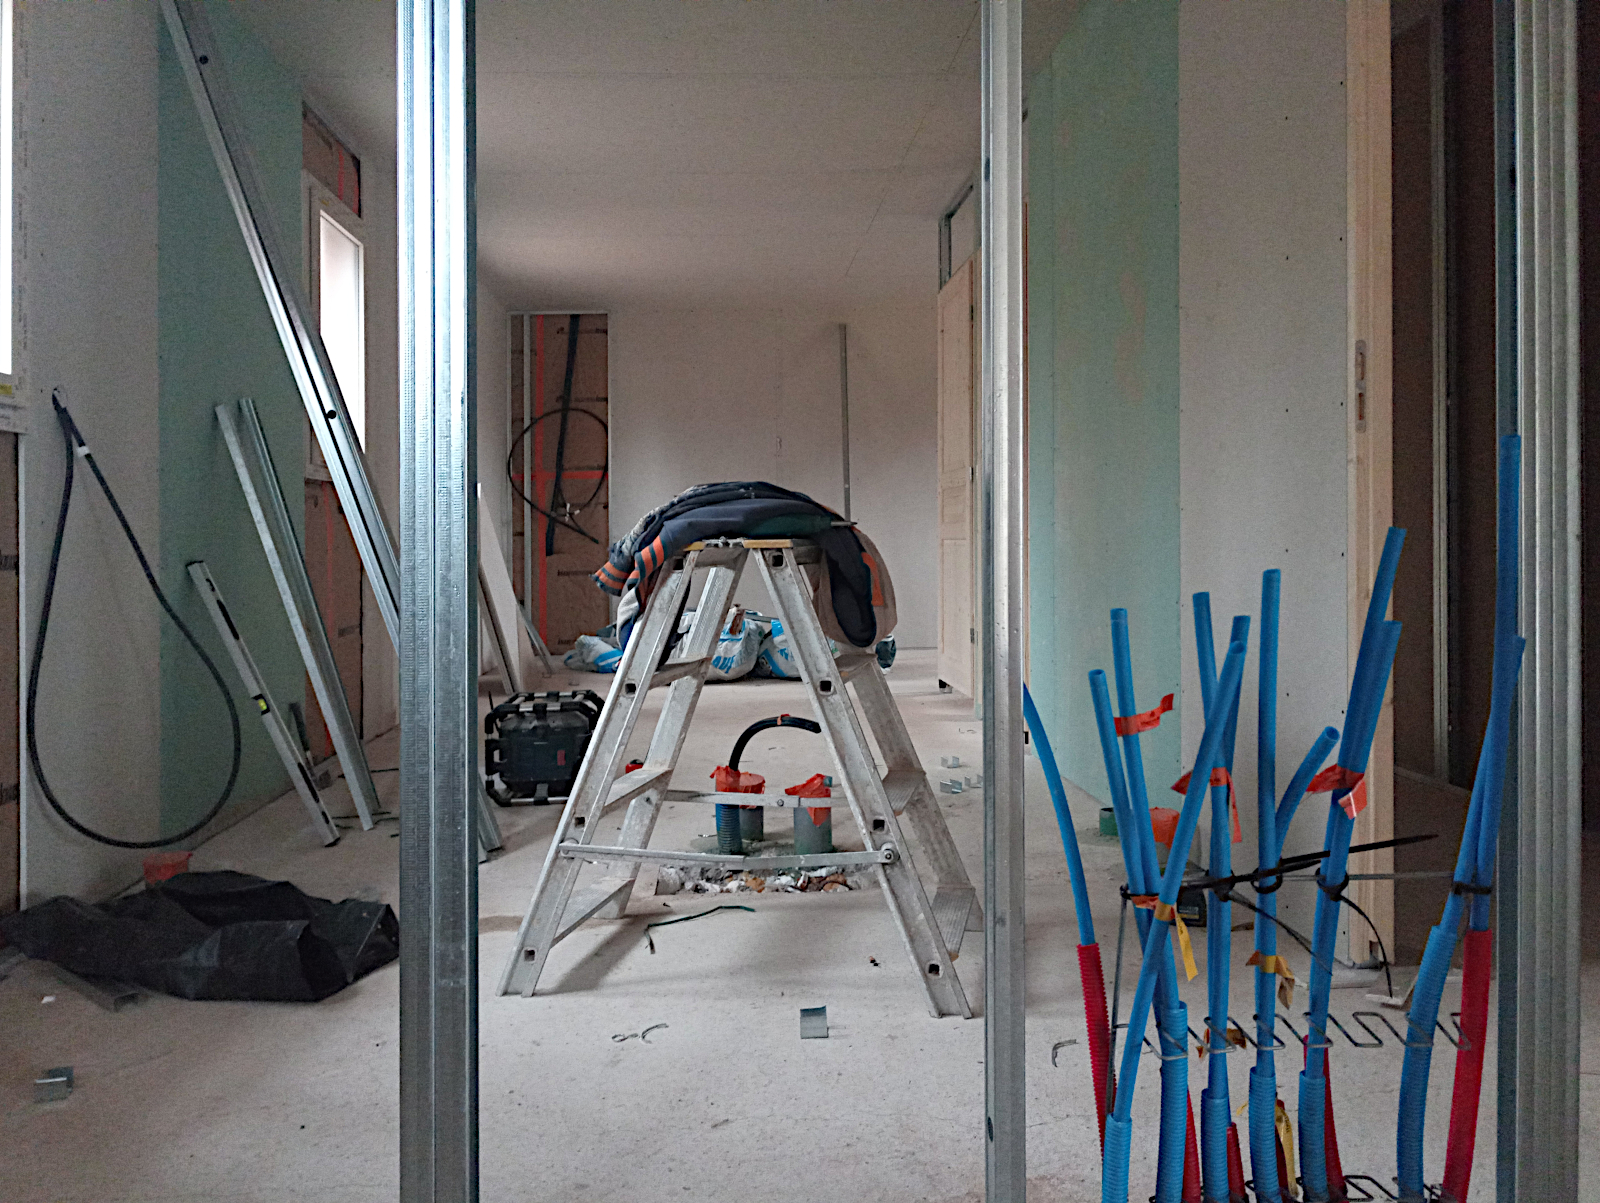
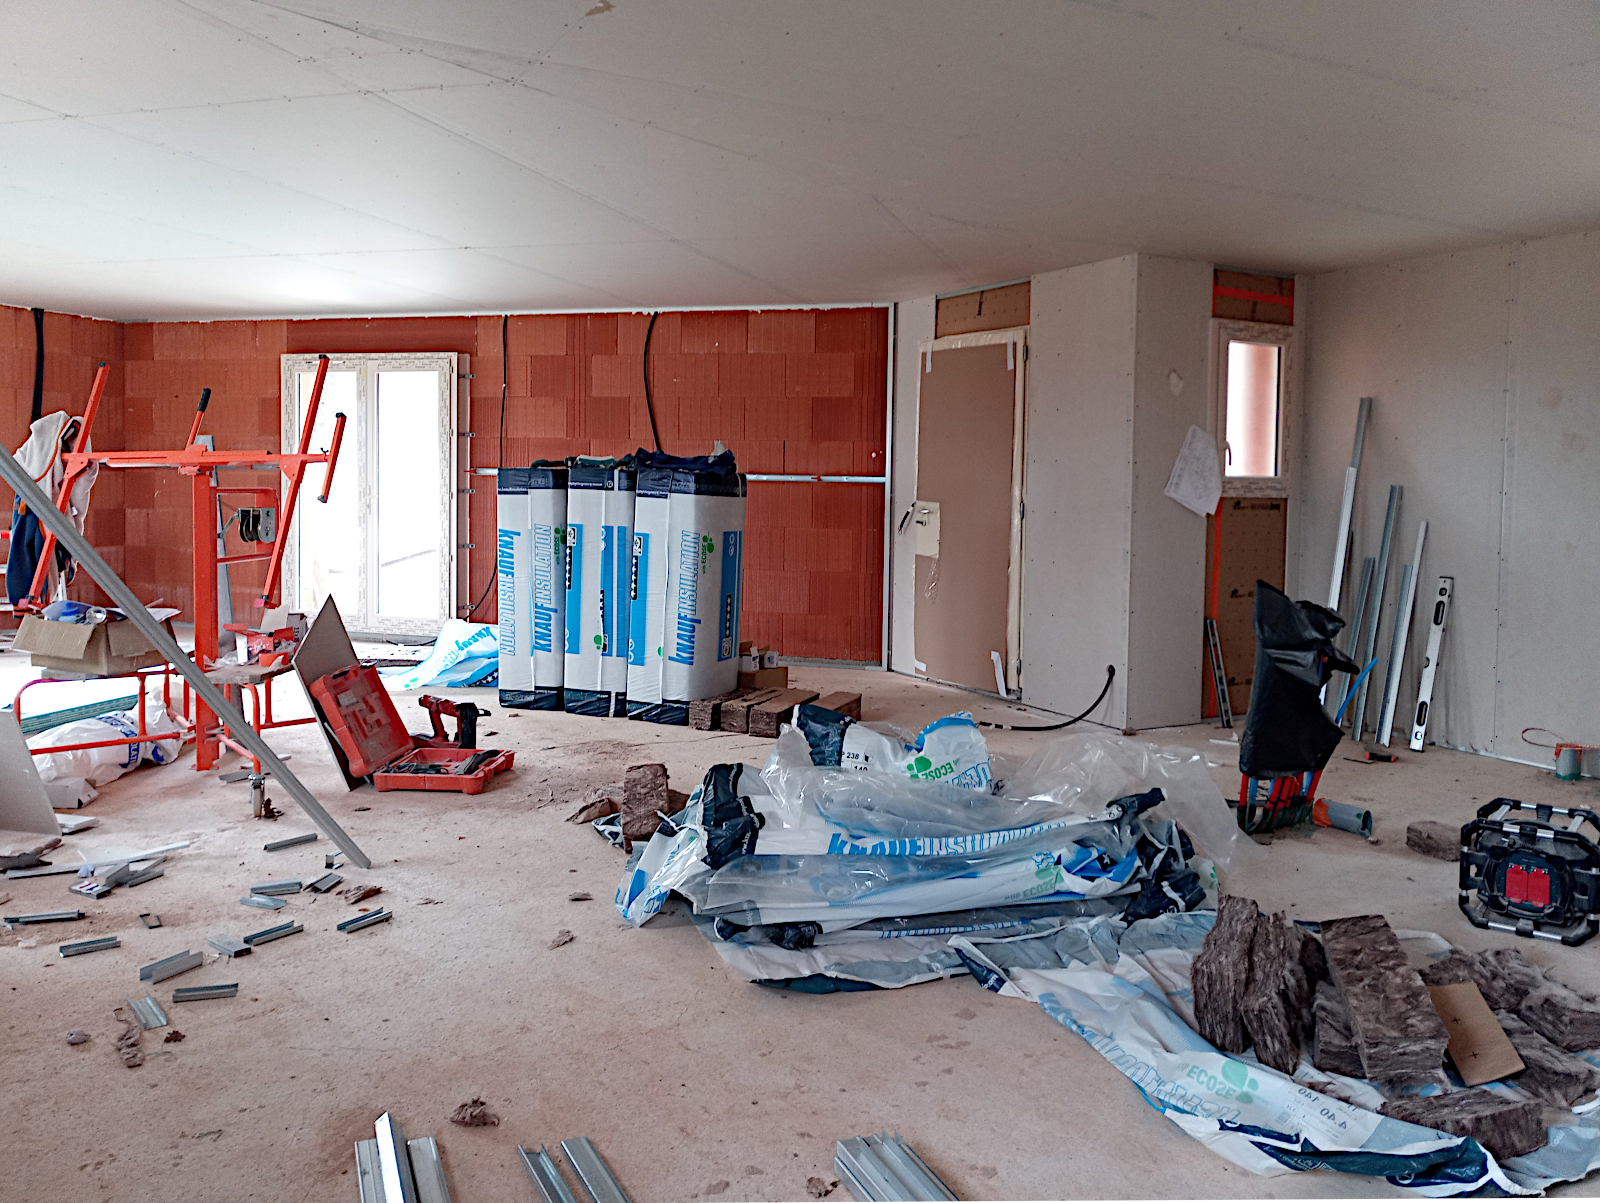
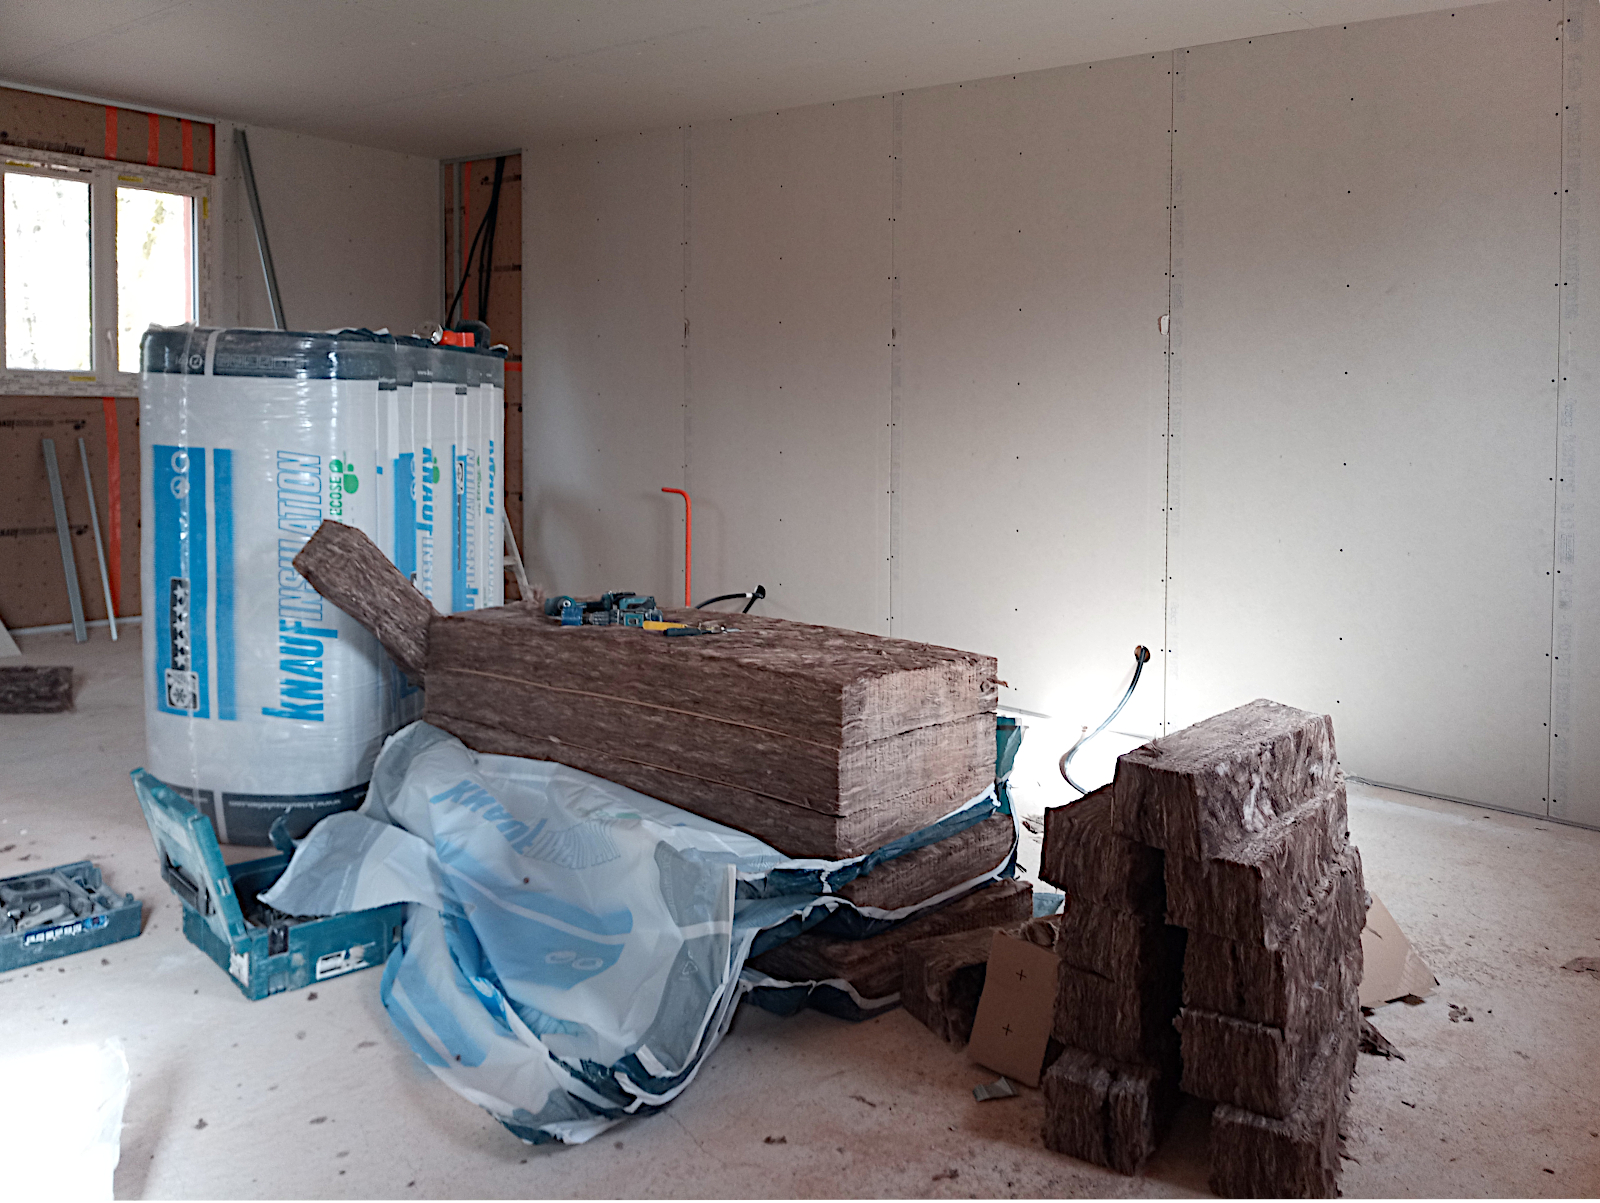
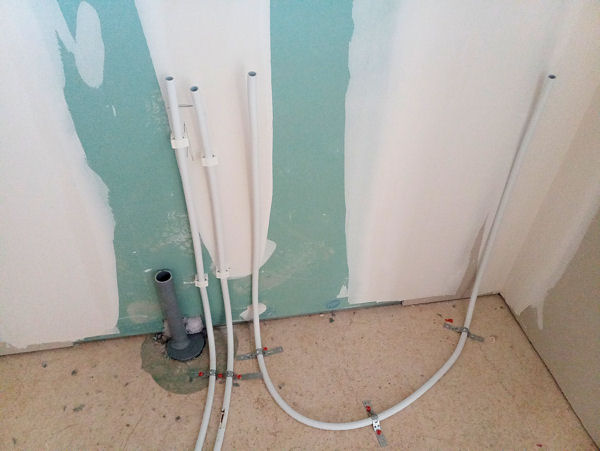
The next shot is of the ‘cellier’ (utility room) which appears to be where the heart of the plumbing system will be located, not surprisingly as that’s where the heat pump’s internal unit will be. A myriad of plastic piping has been installed and I have no idea at this time where it all goes to.

null

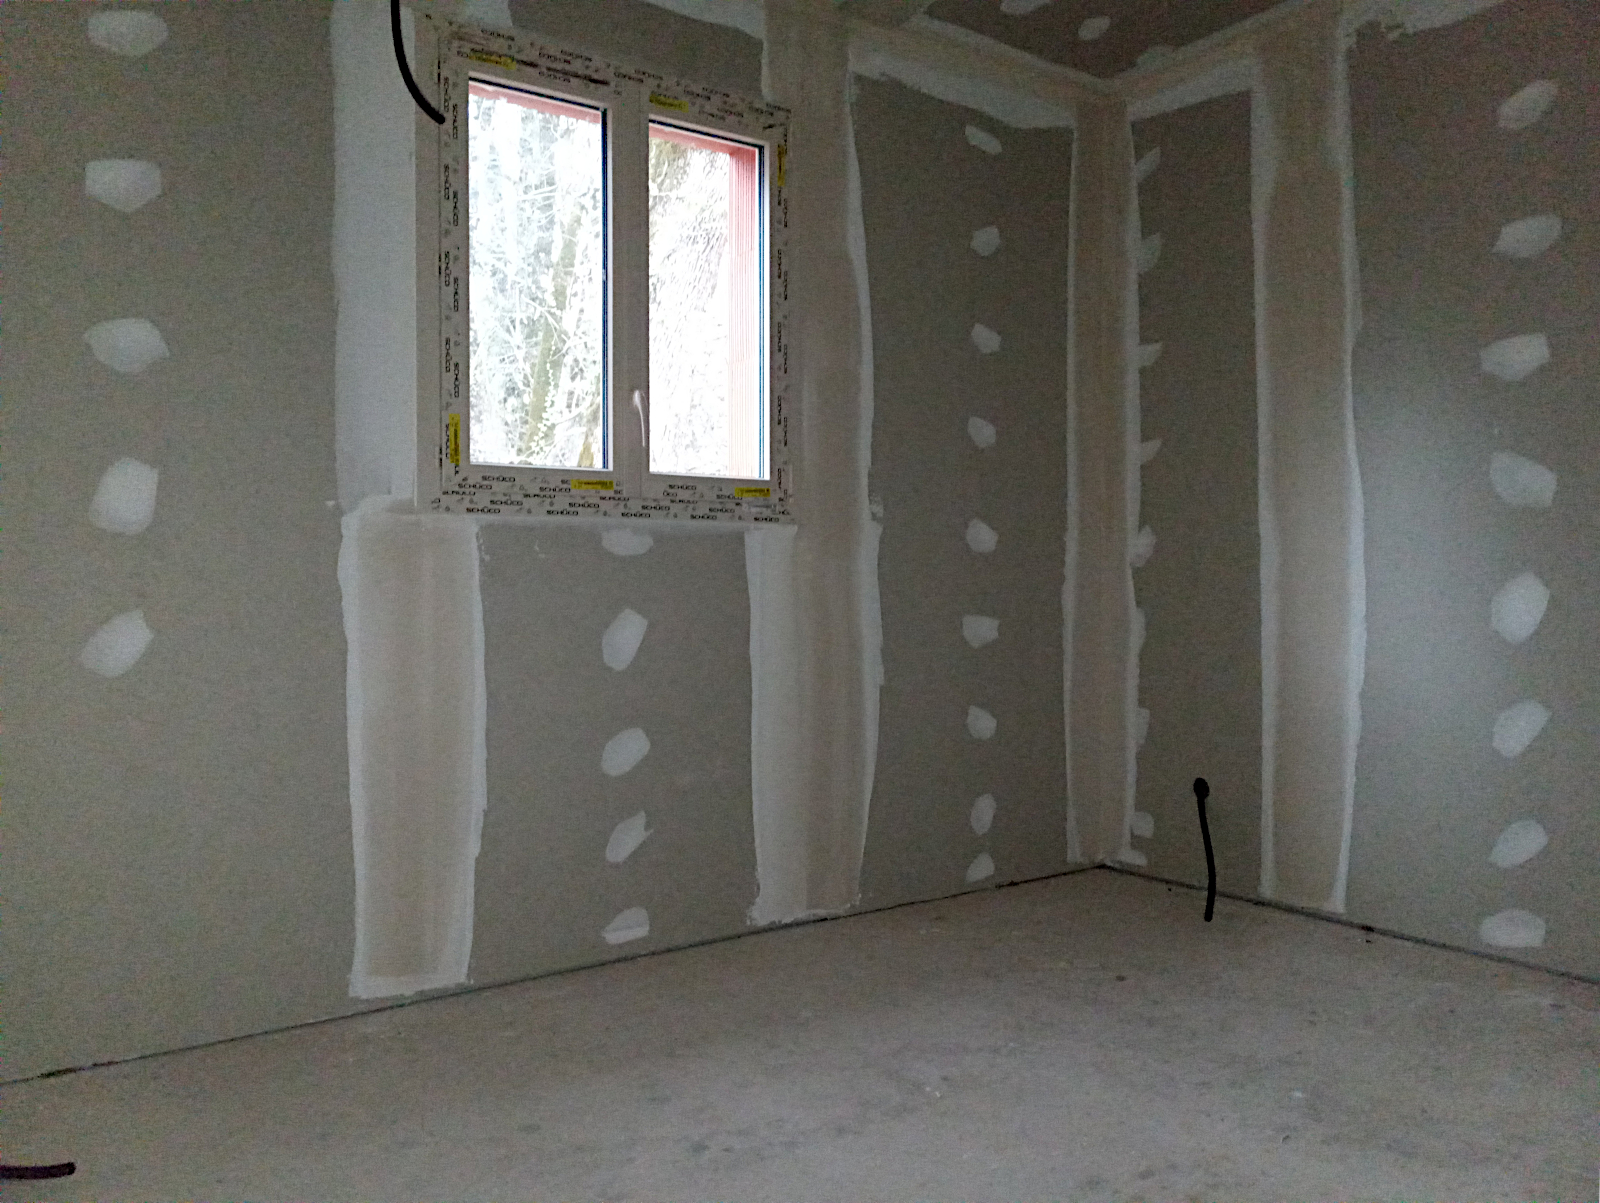
What I do know is that it’s been very simply and quickly installed, much as the heat pump underfloor heating pipes were, by just clipping it to the concrete floor slab. This can be done because eventually (next week) the floor levelling screed will be poured encasing, hiding and protecting all of the pipework that’s currently visible. Only the open ends will be left as can be seen in the photos, clipped to the walls where they will in most cases be hidden behind floor cabinets, ready to be connected.

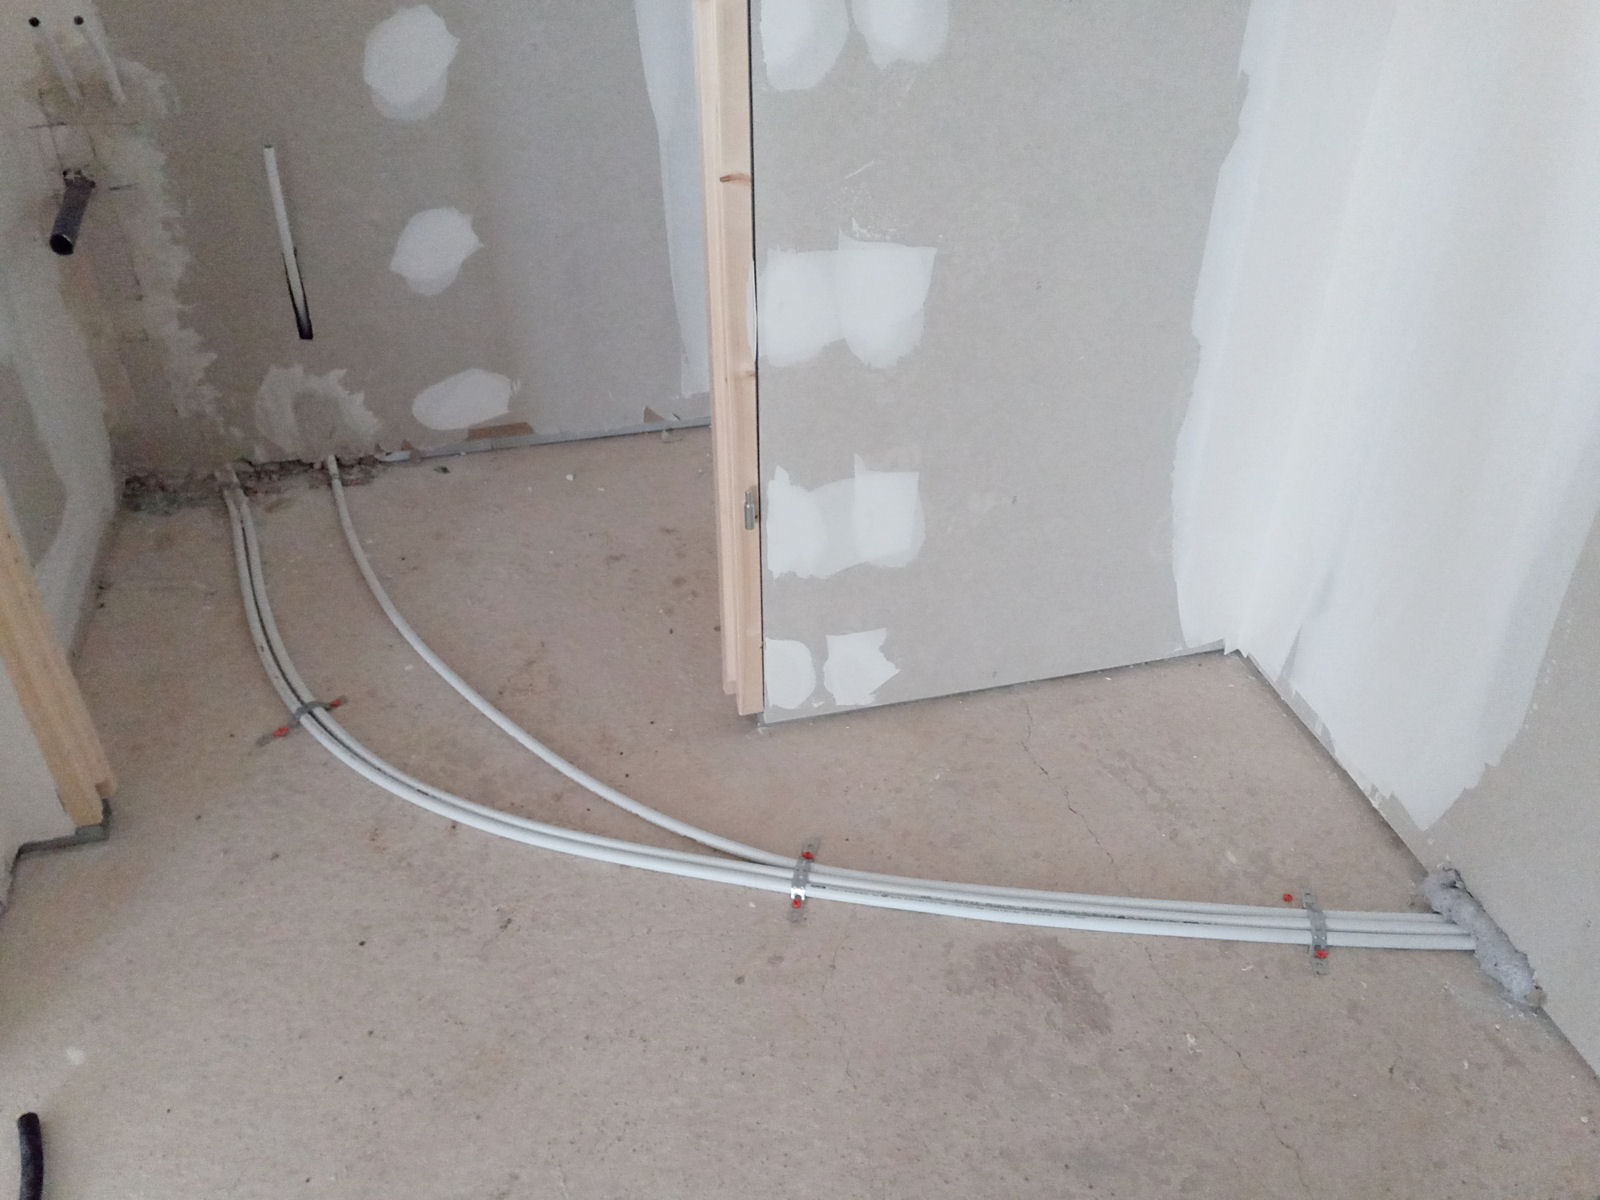
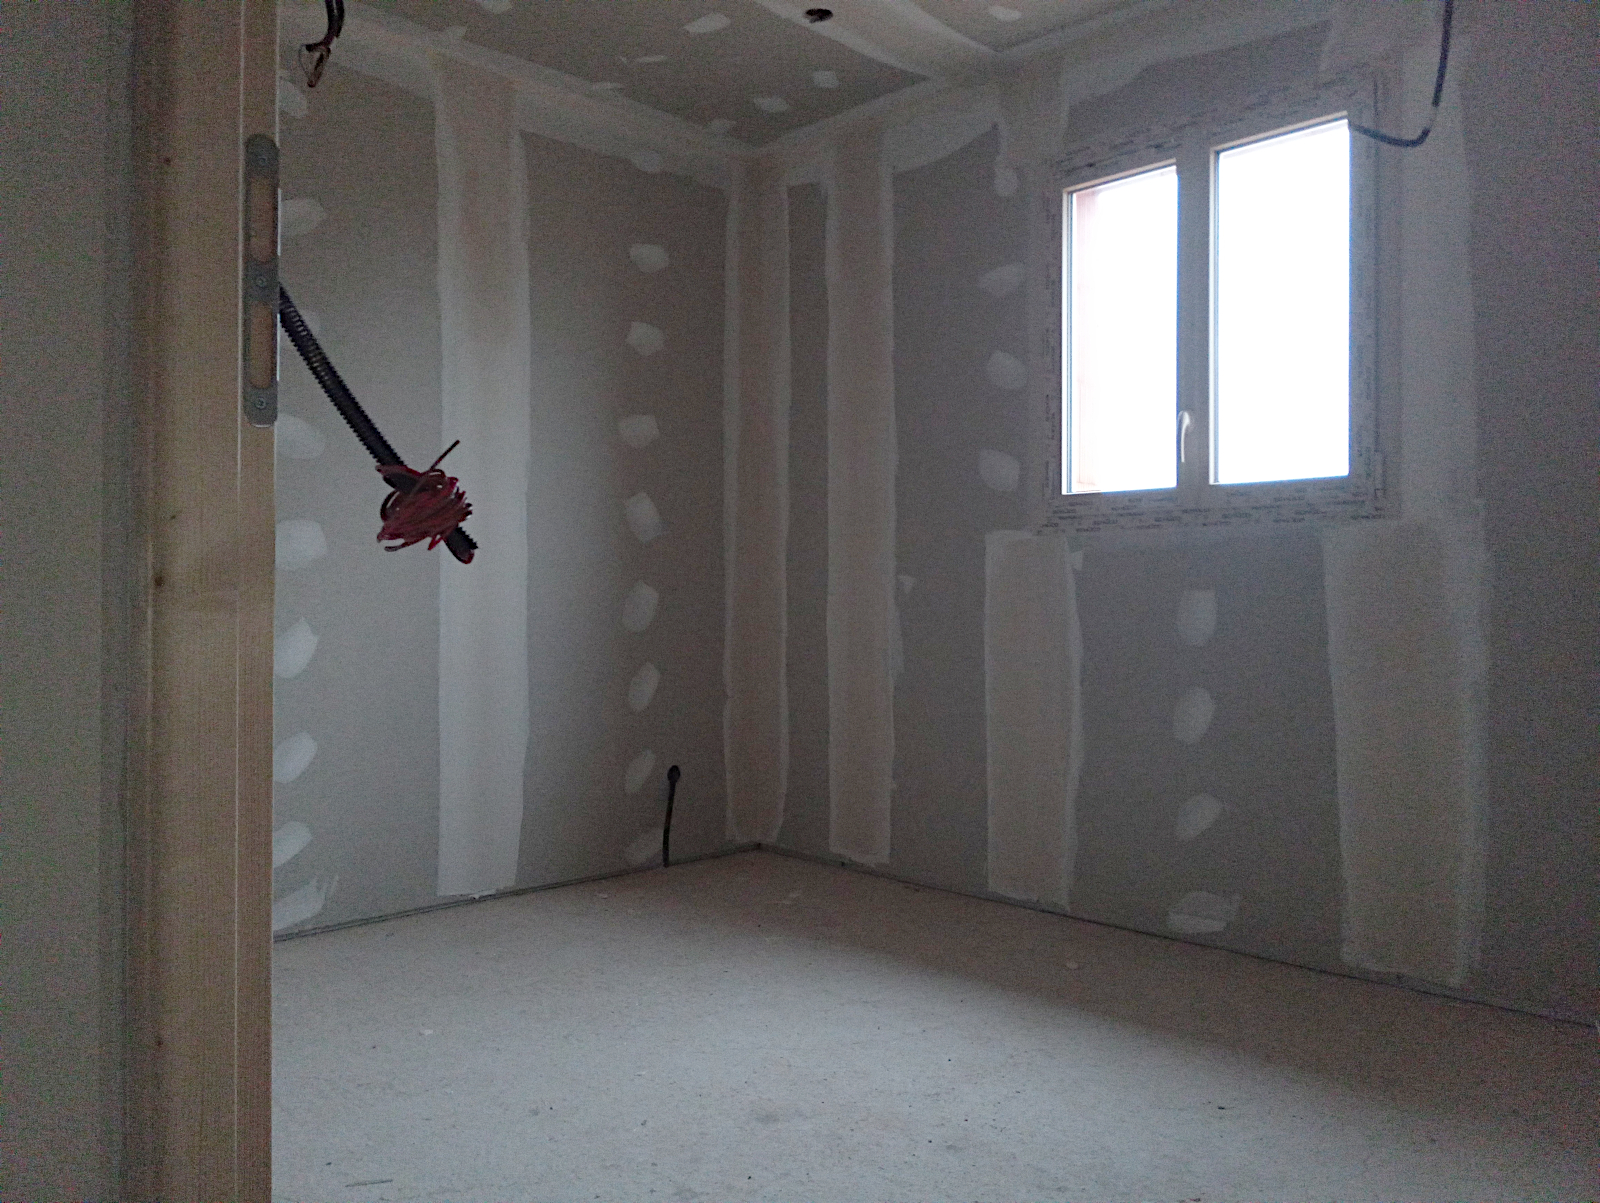
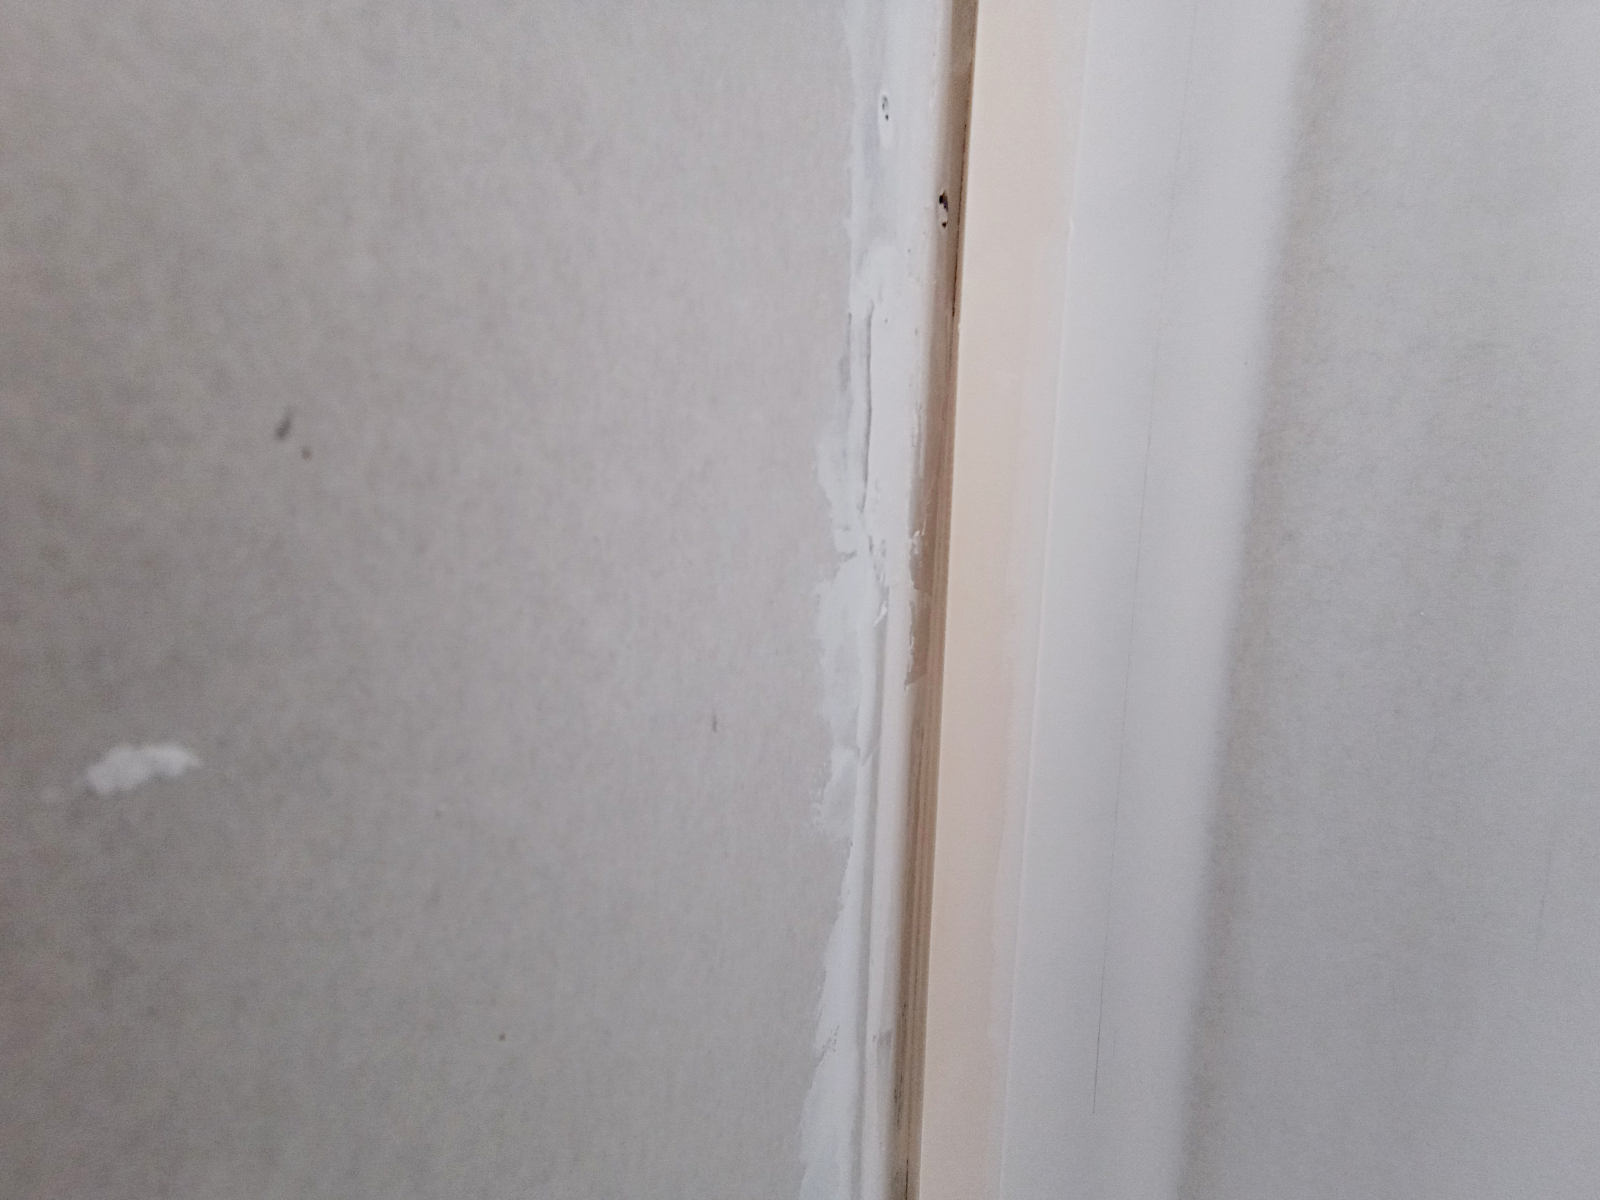
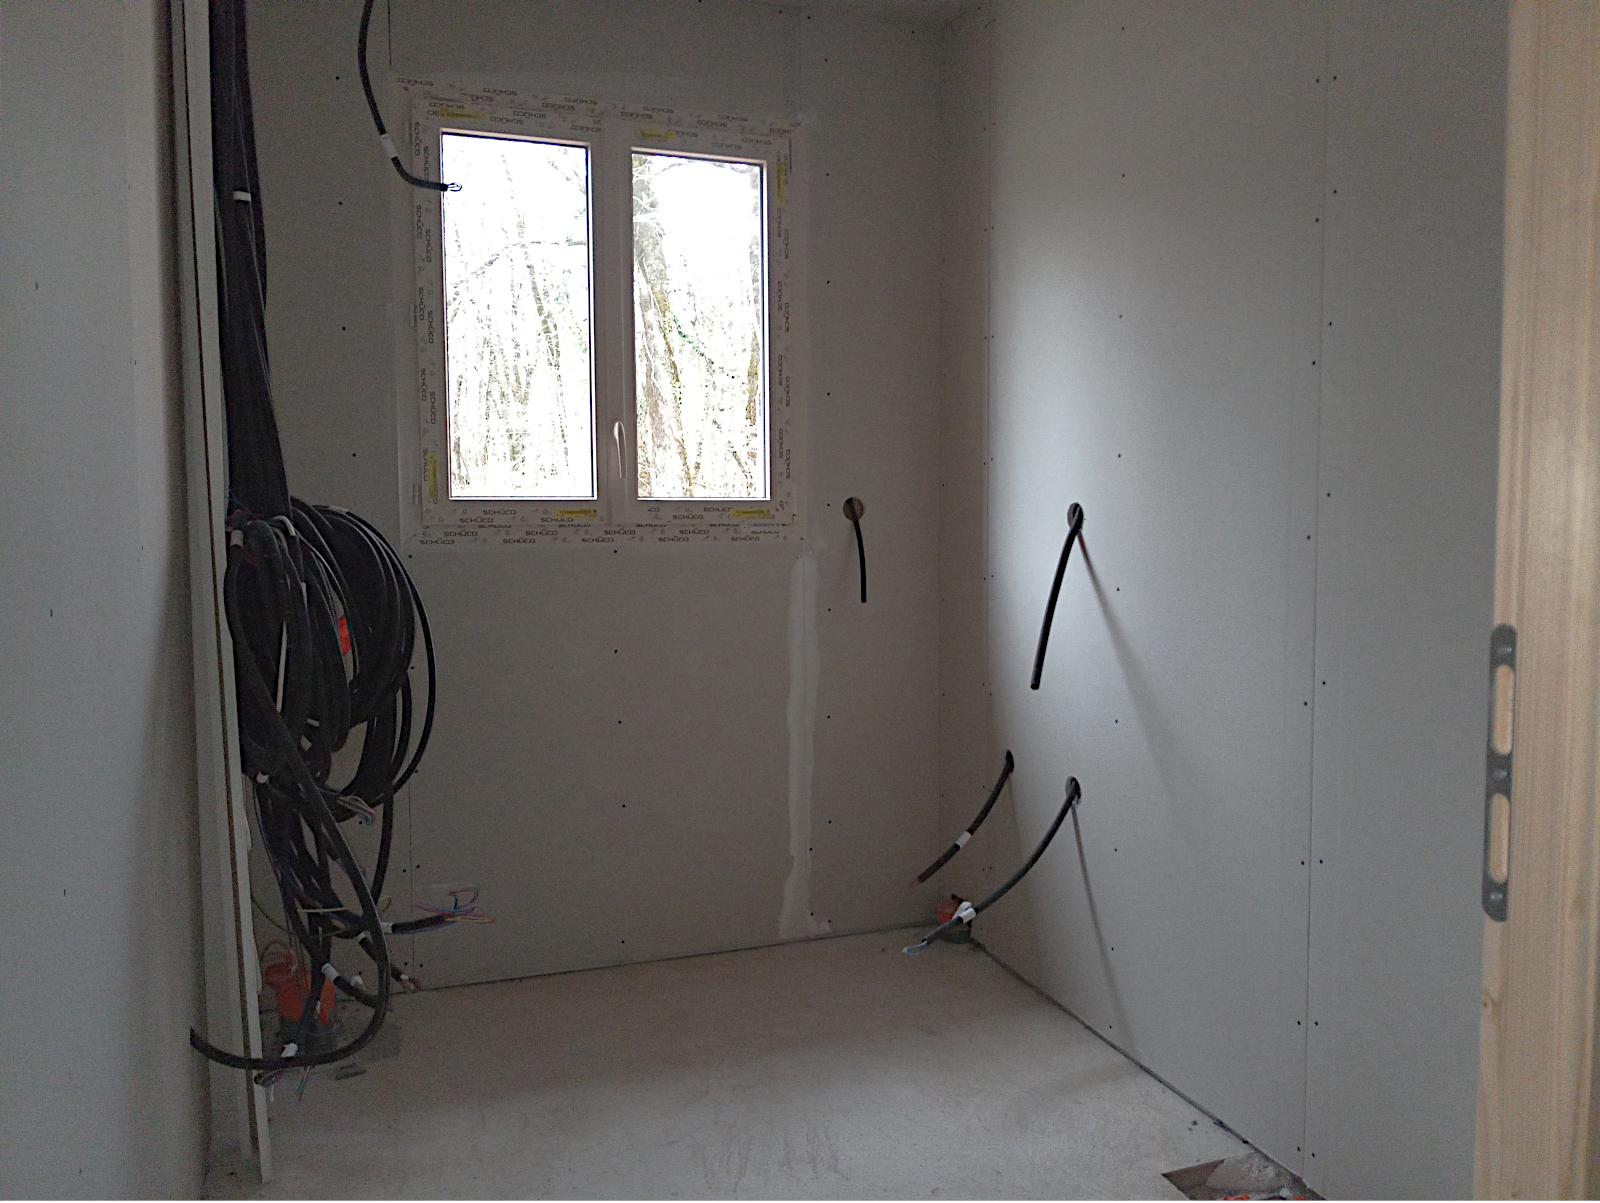
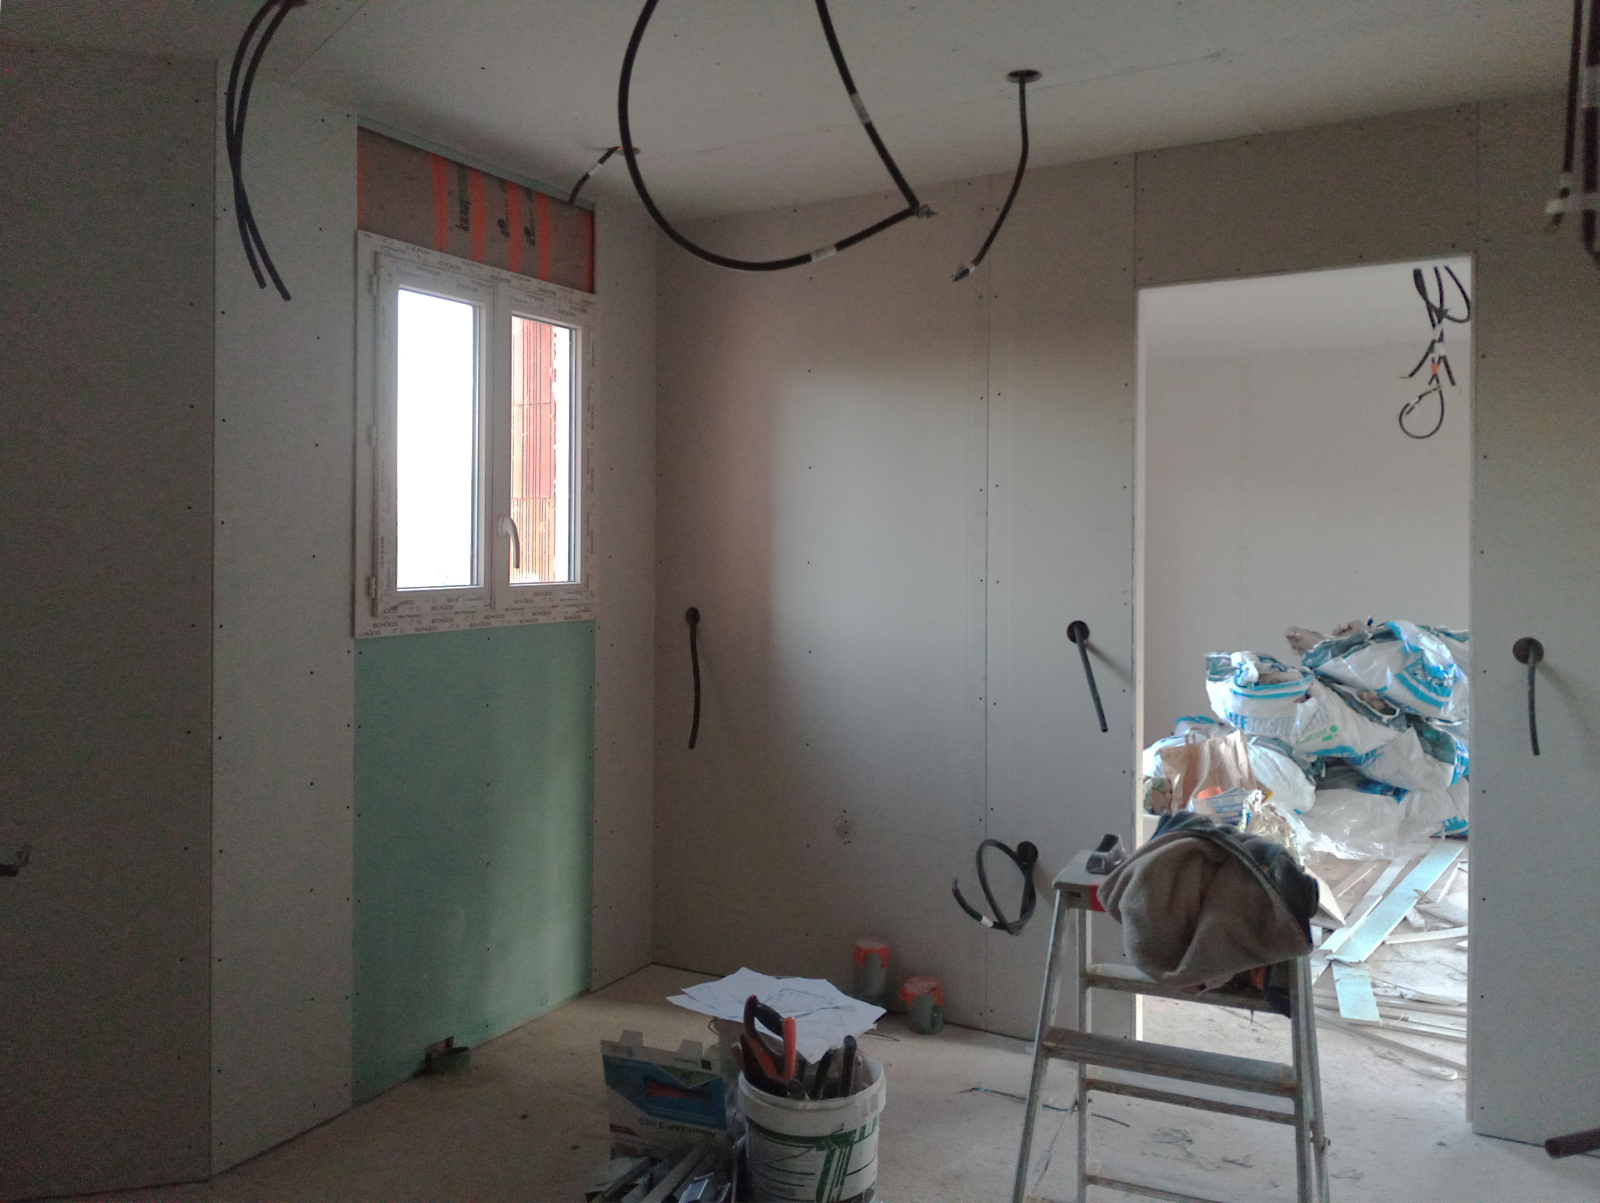
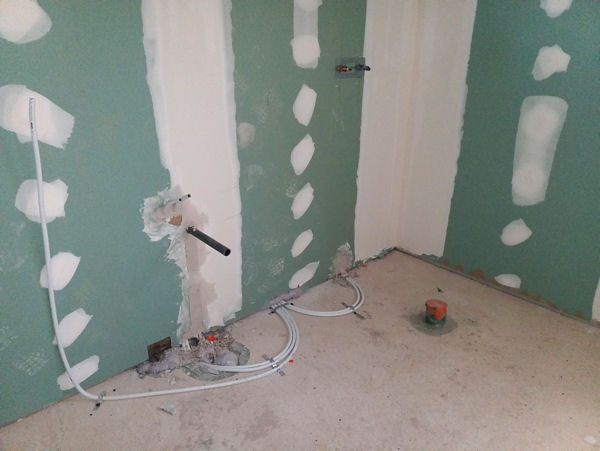
The next shot is an example of this and shows where the washer/dryer will be connected in the corner of the ‘cellier’ with a pipe now ready and in position to accept its water outlet. The pipe on the left I think is for the proposed outdoor tap as well as the washer.

null

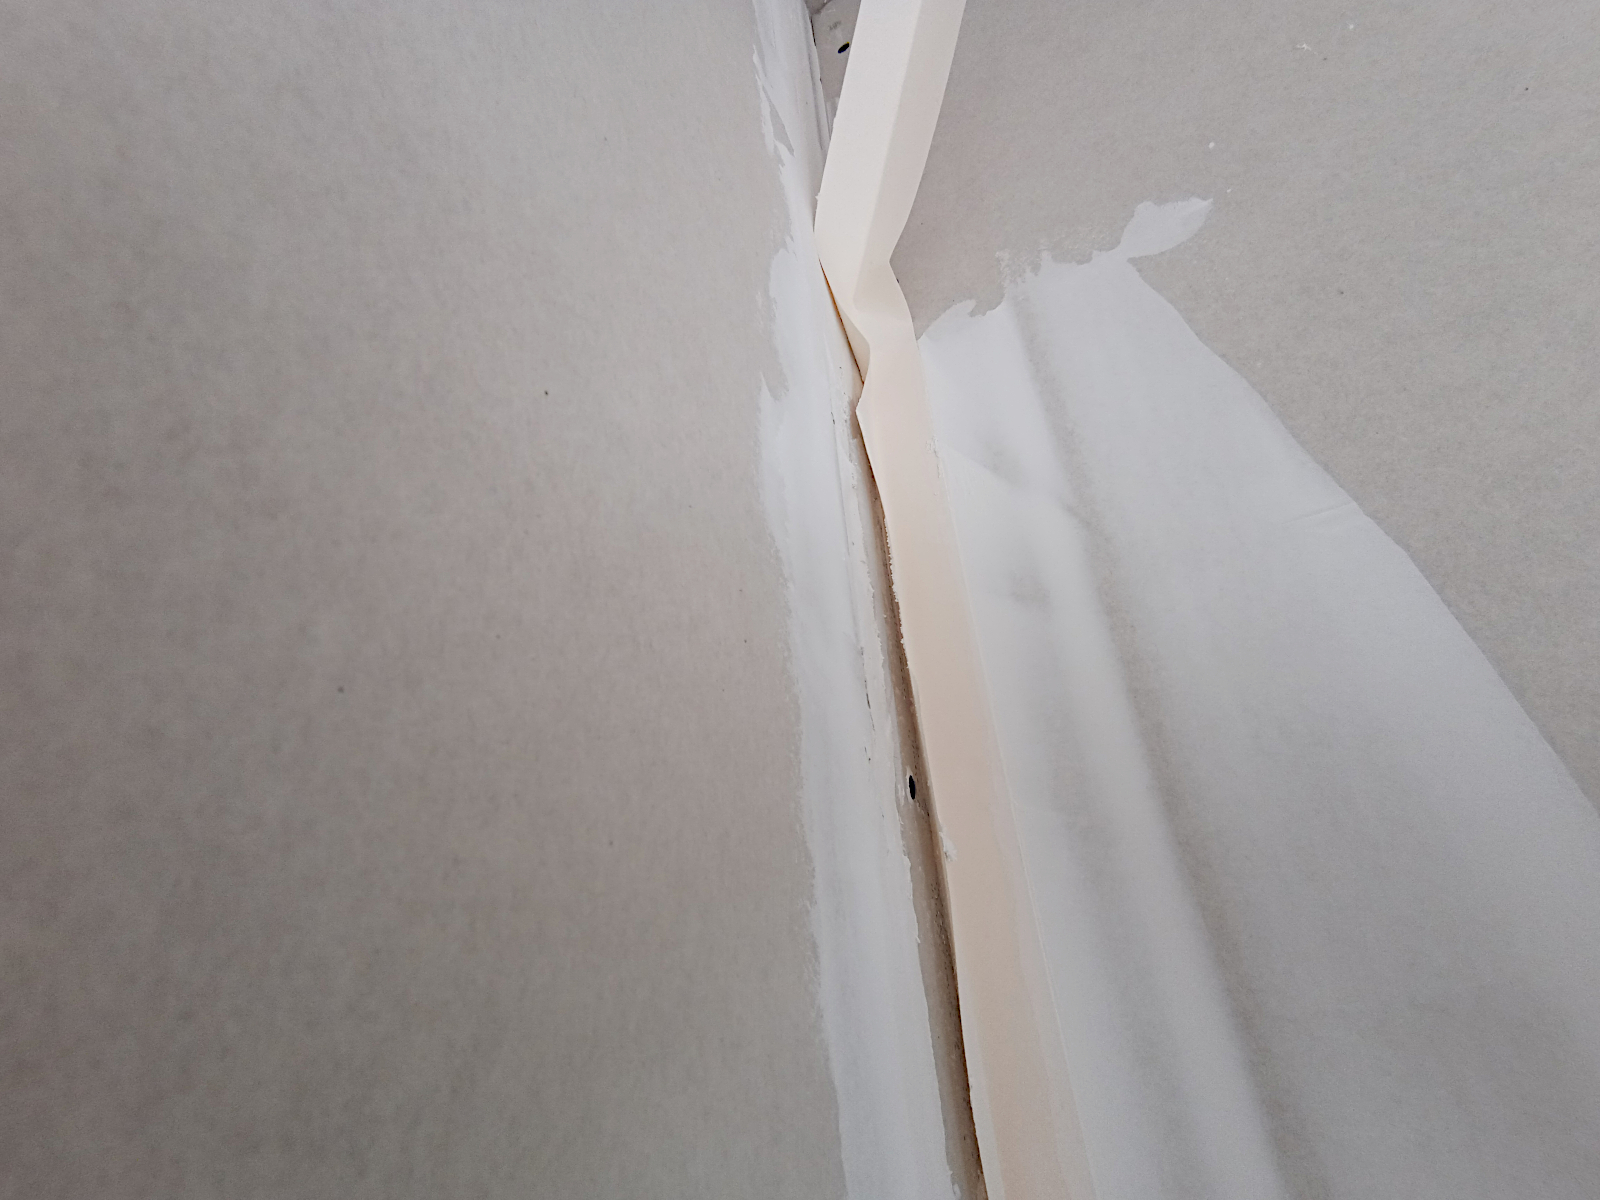
The next two shots show the connections and outlet for the sink and another outside tap at the back of the house and the connection and outlet adjacent to them for the dishwasher,

null

null

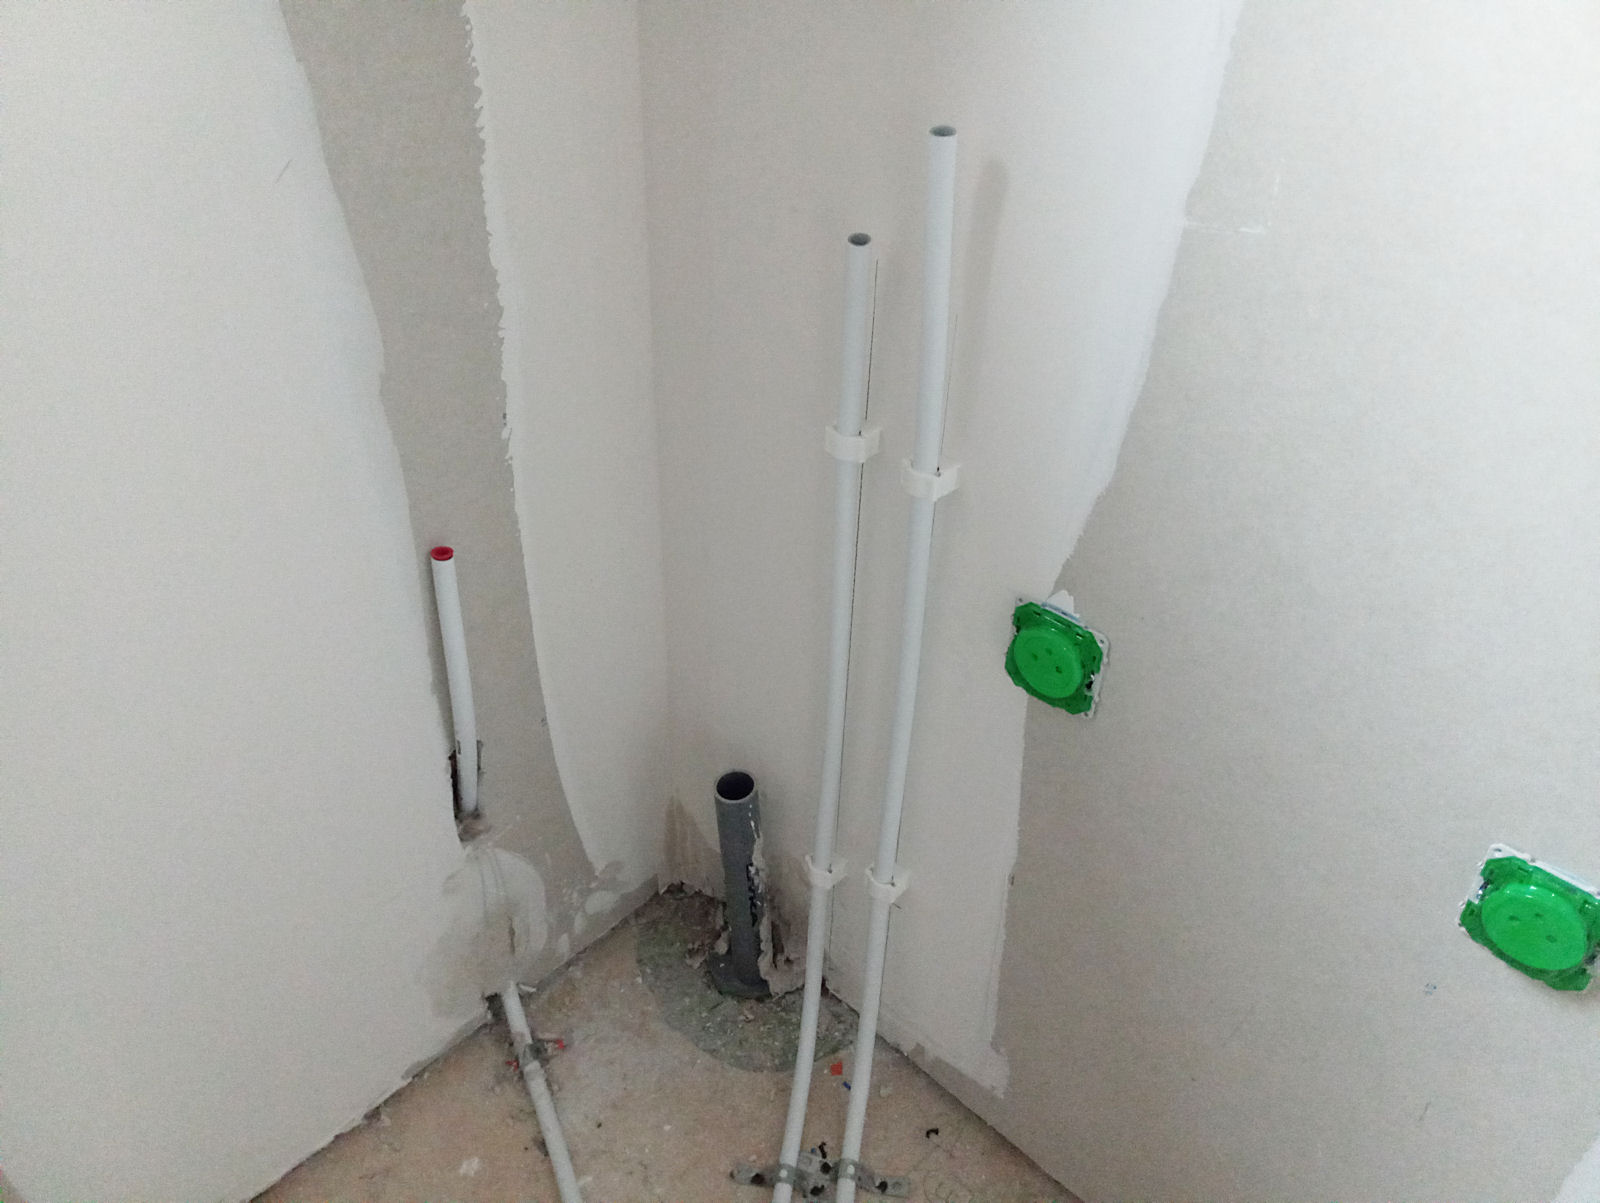
Here is the pipework for the small handbasin that will be in the corner of the separate WC.

null

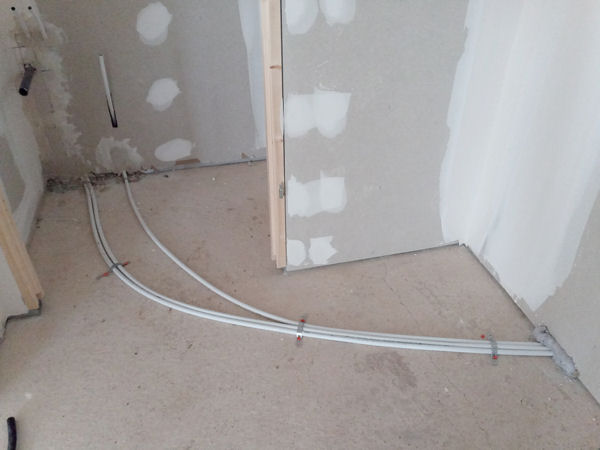
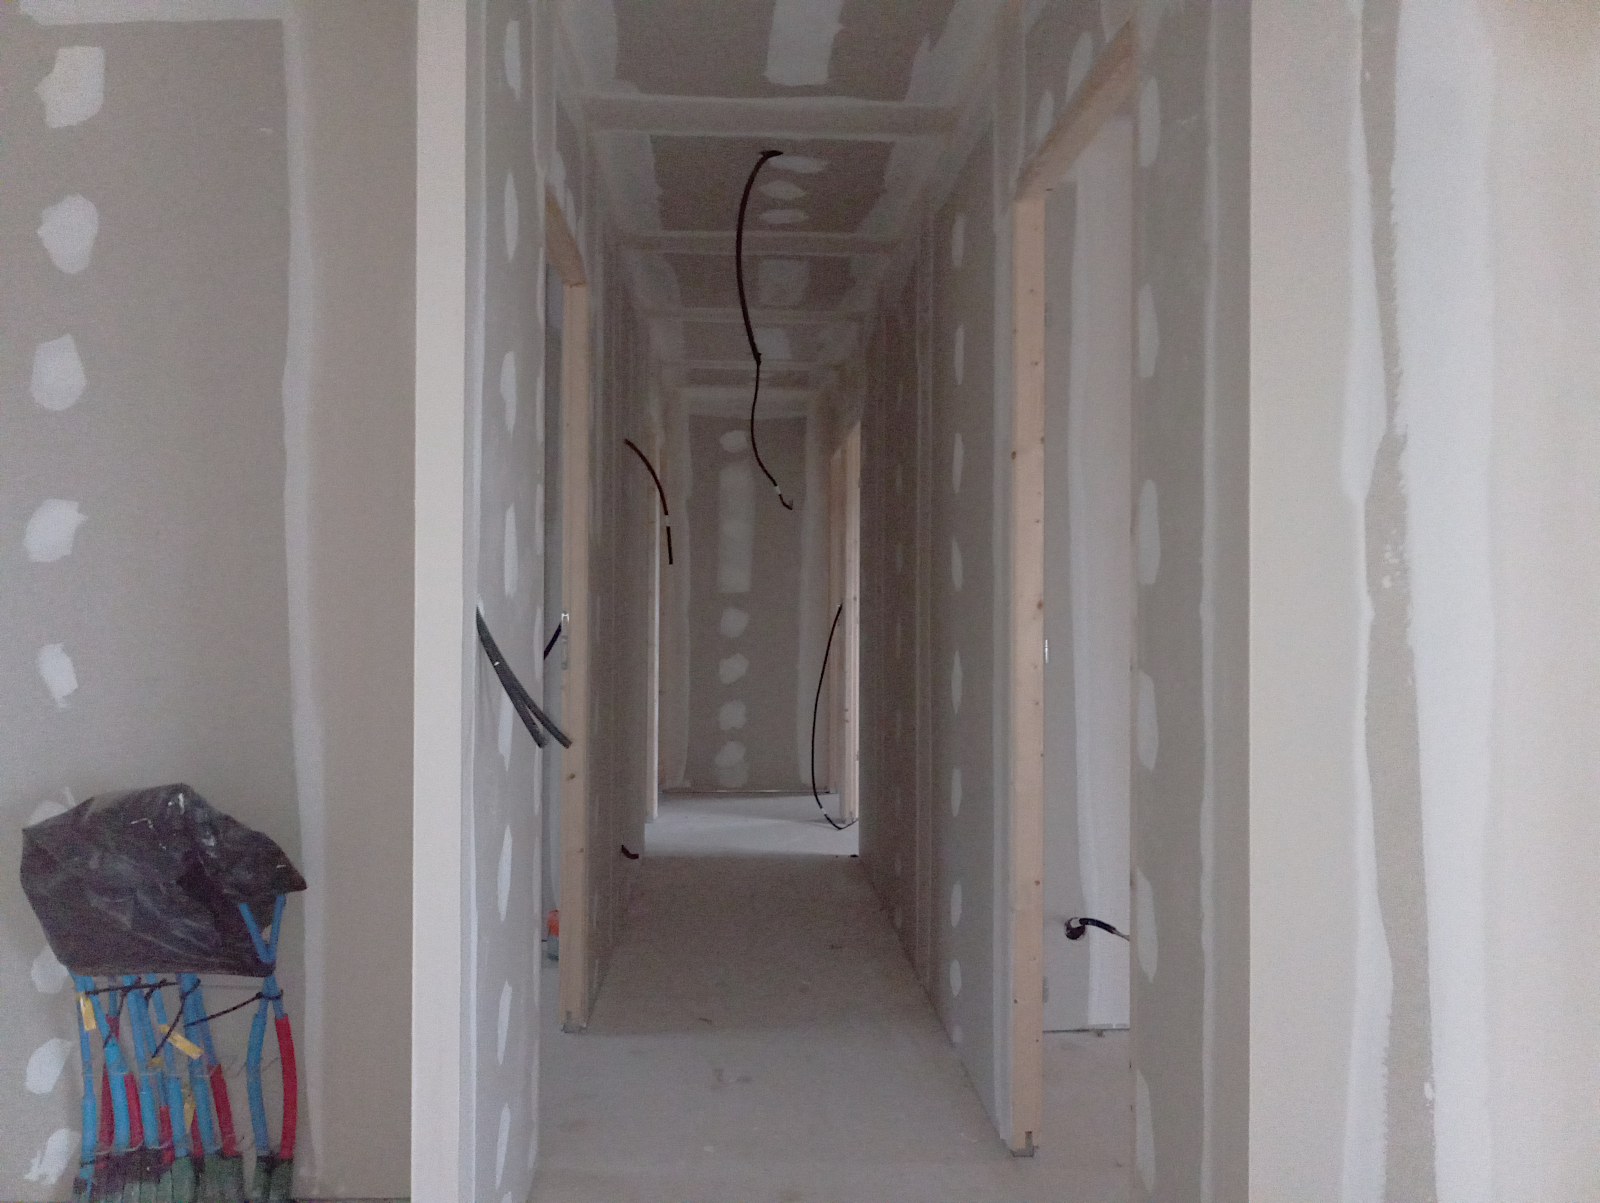
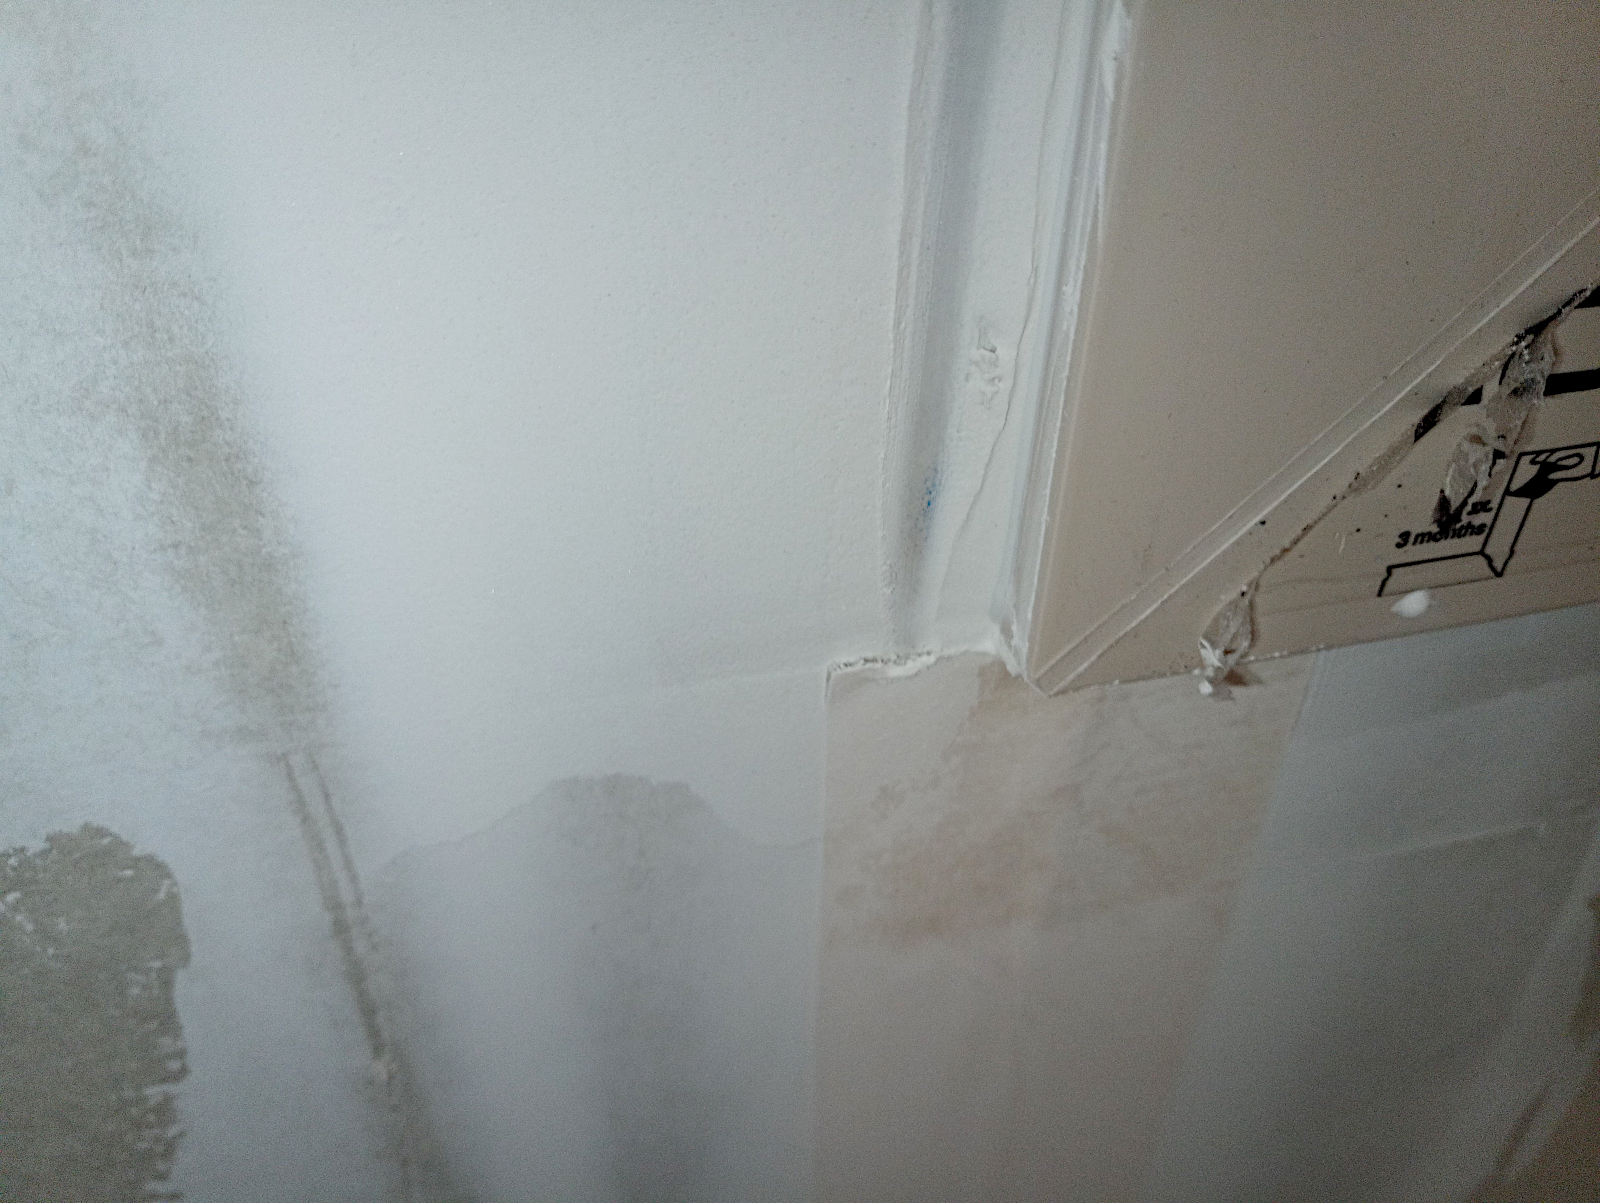
This is another shot of the pipework running from the ‘cellier’ into the kitchen.

null

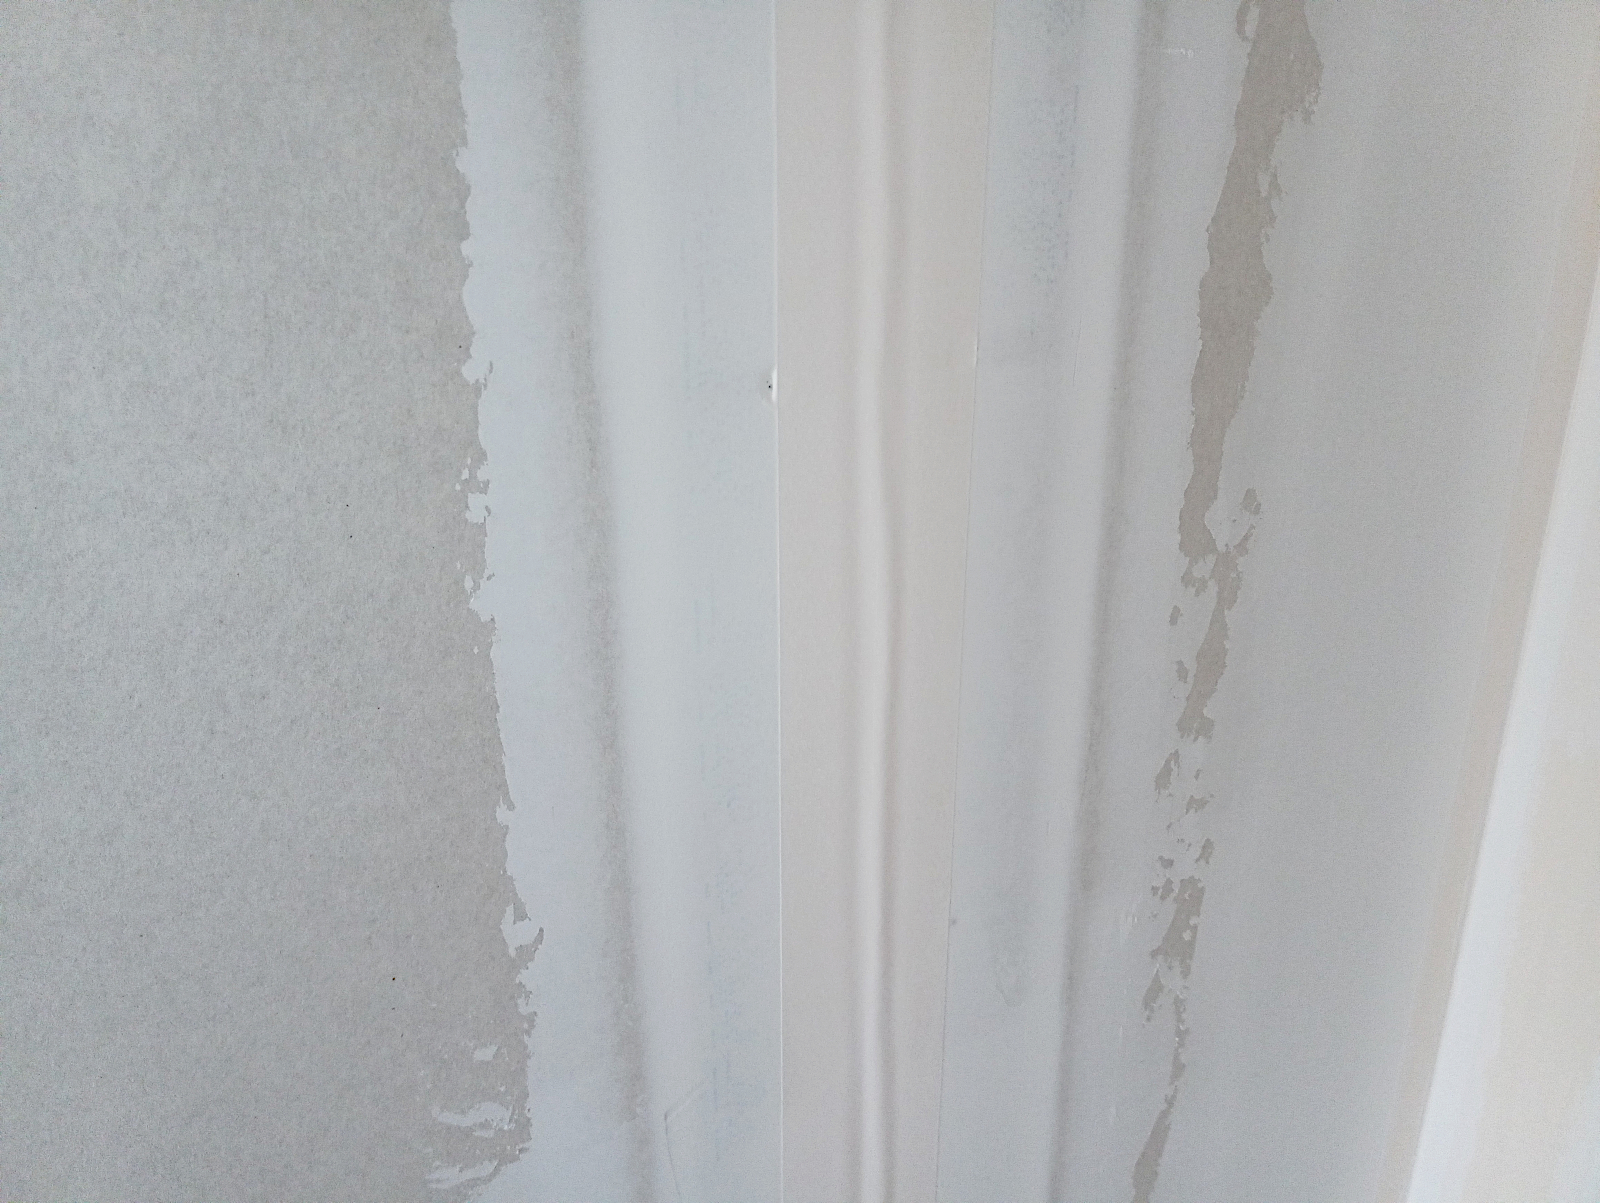
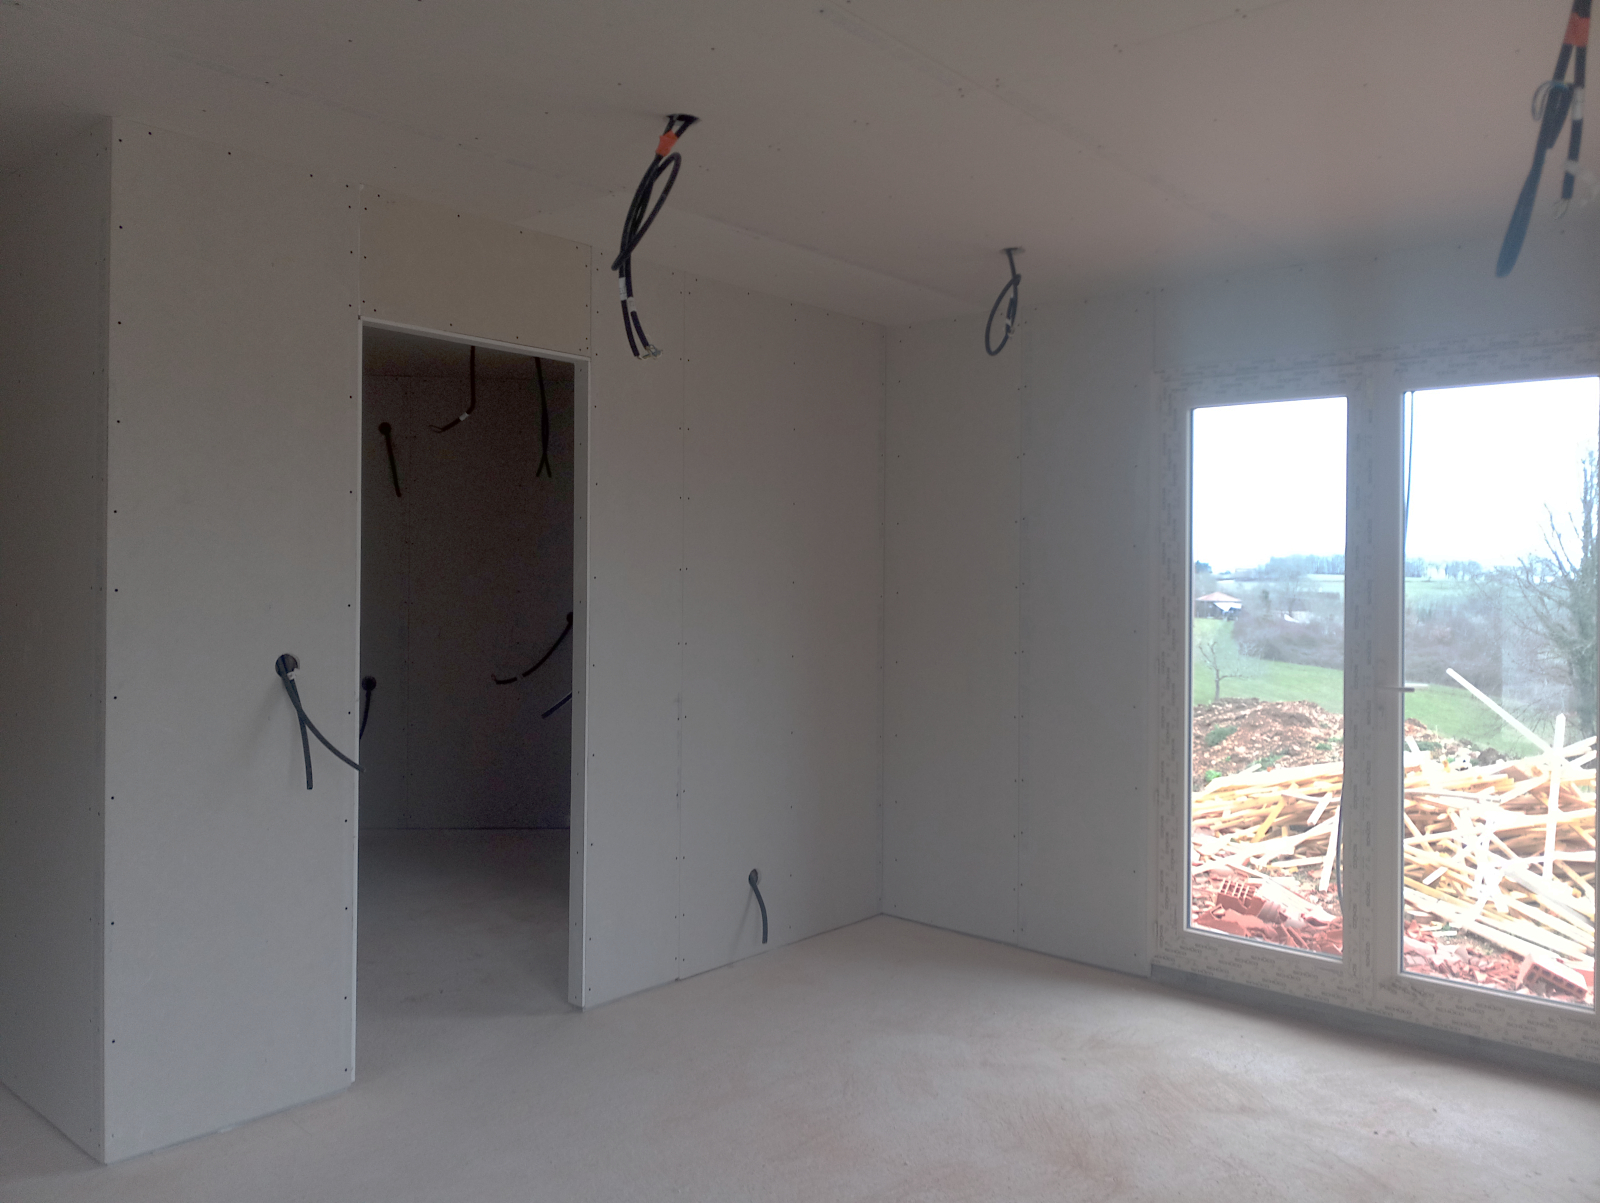
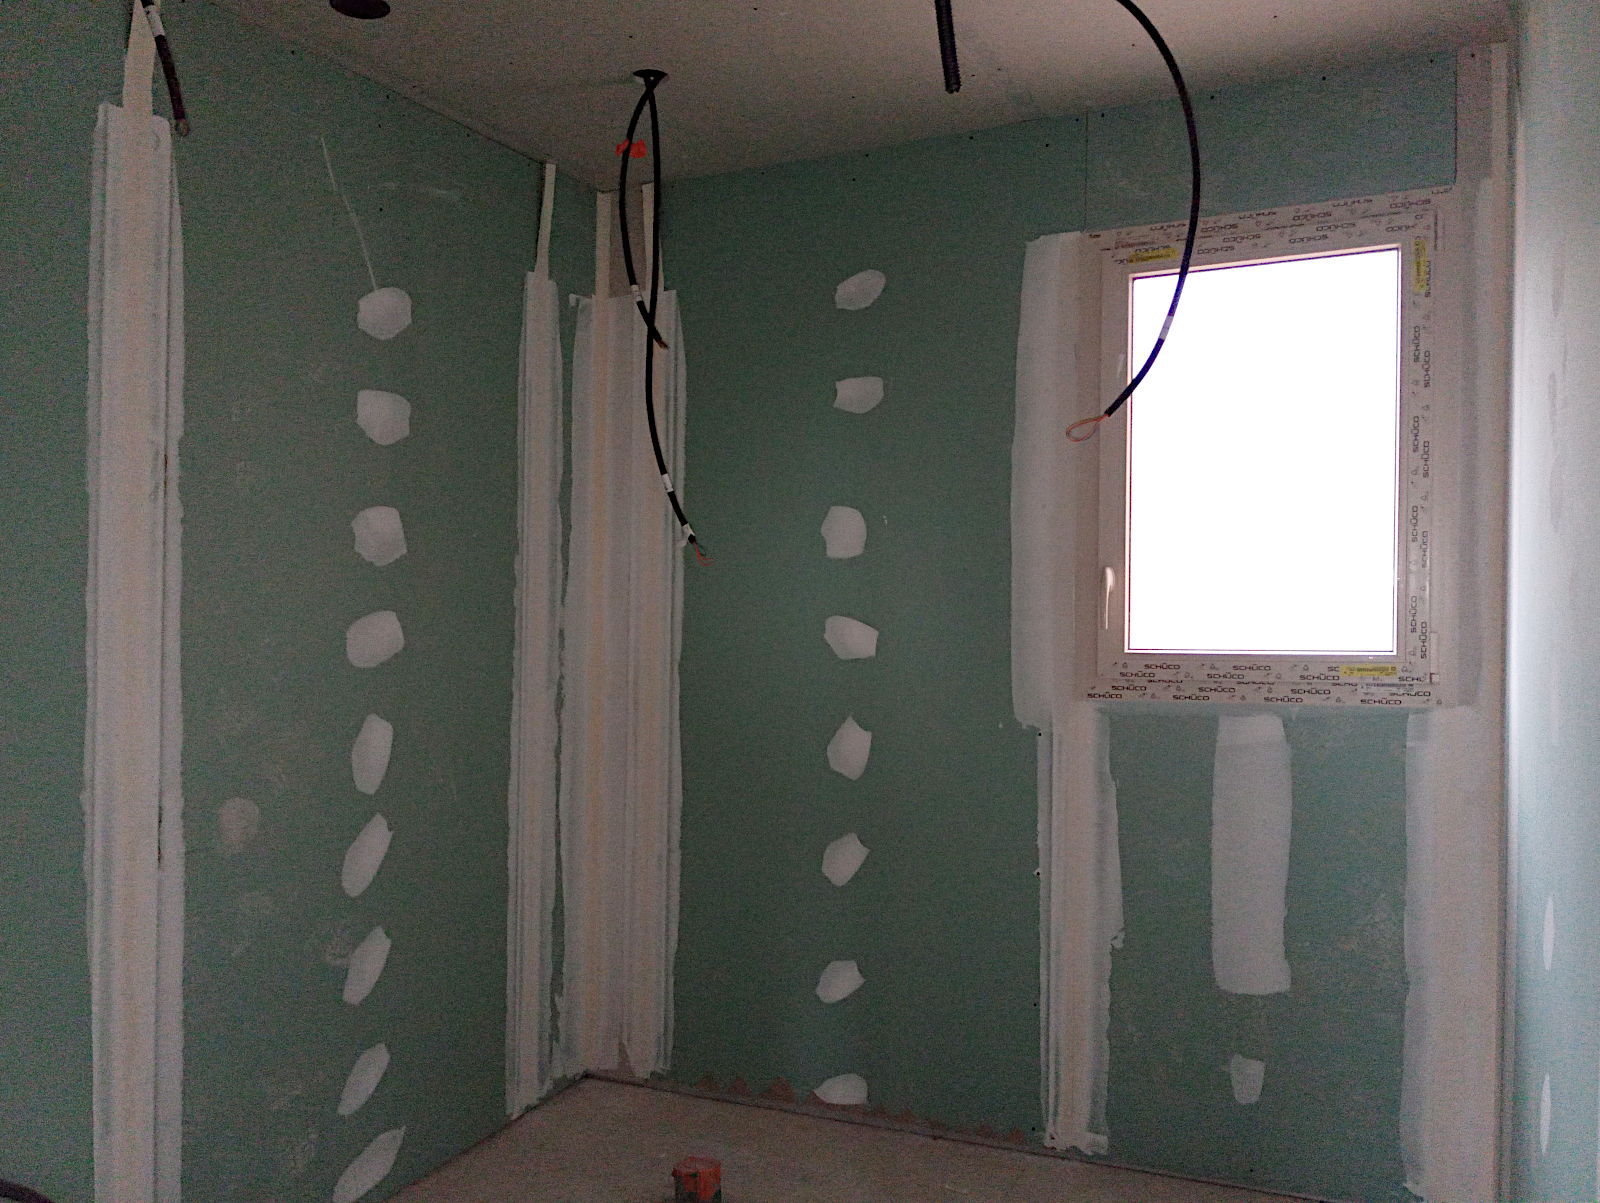
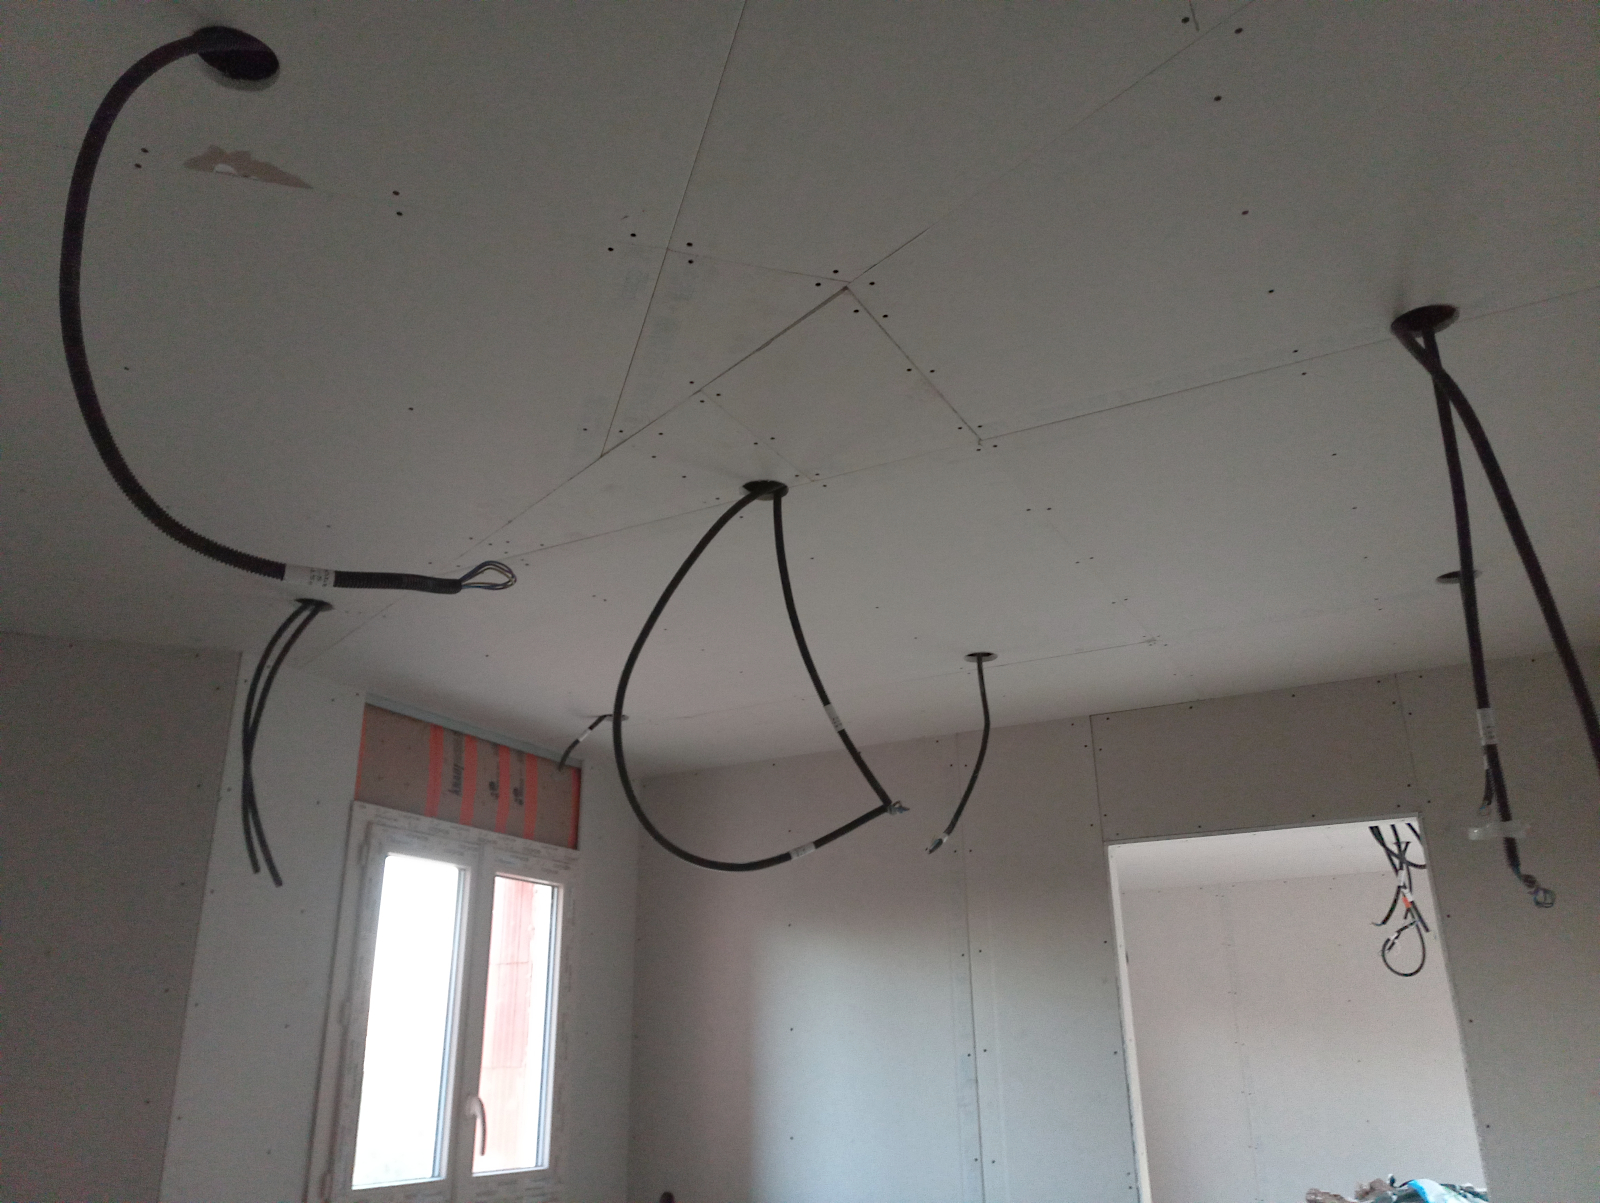
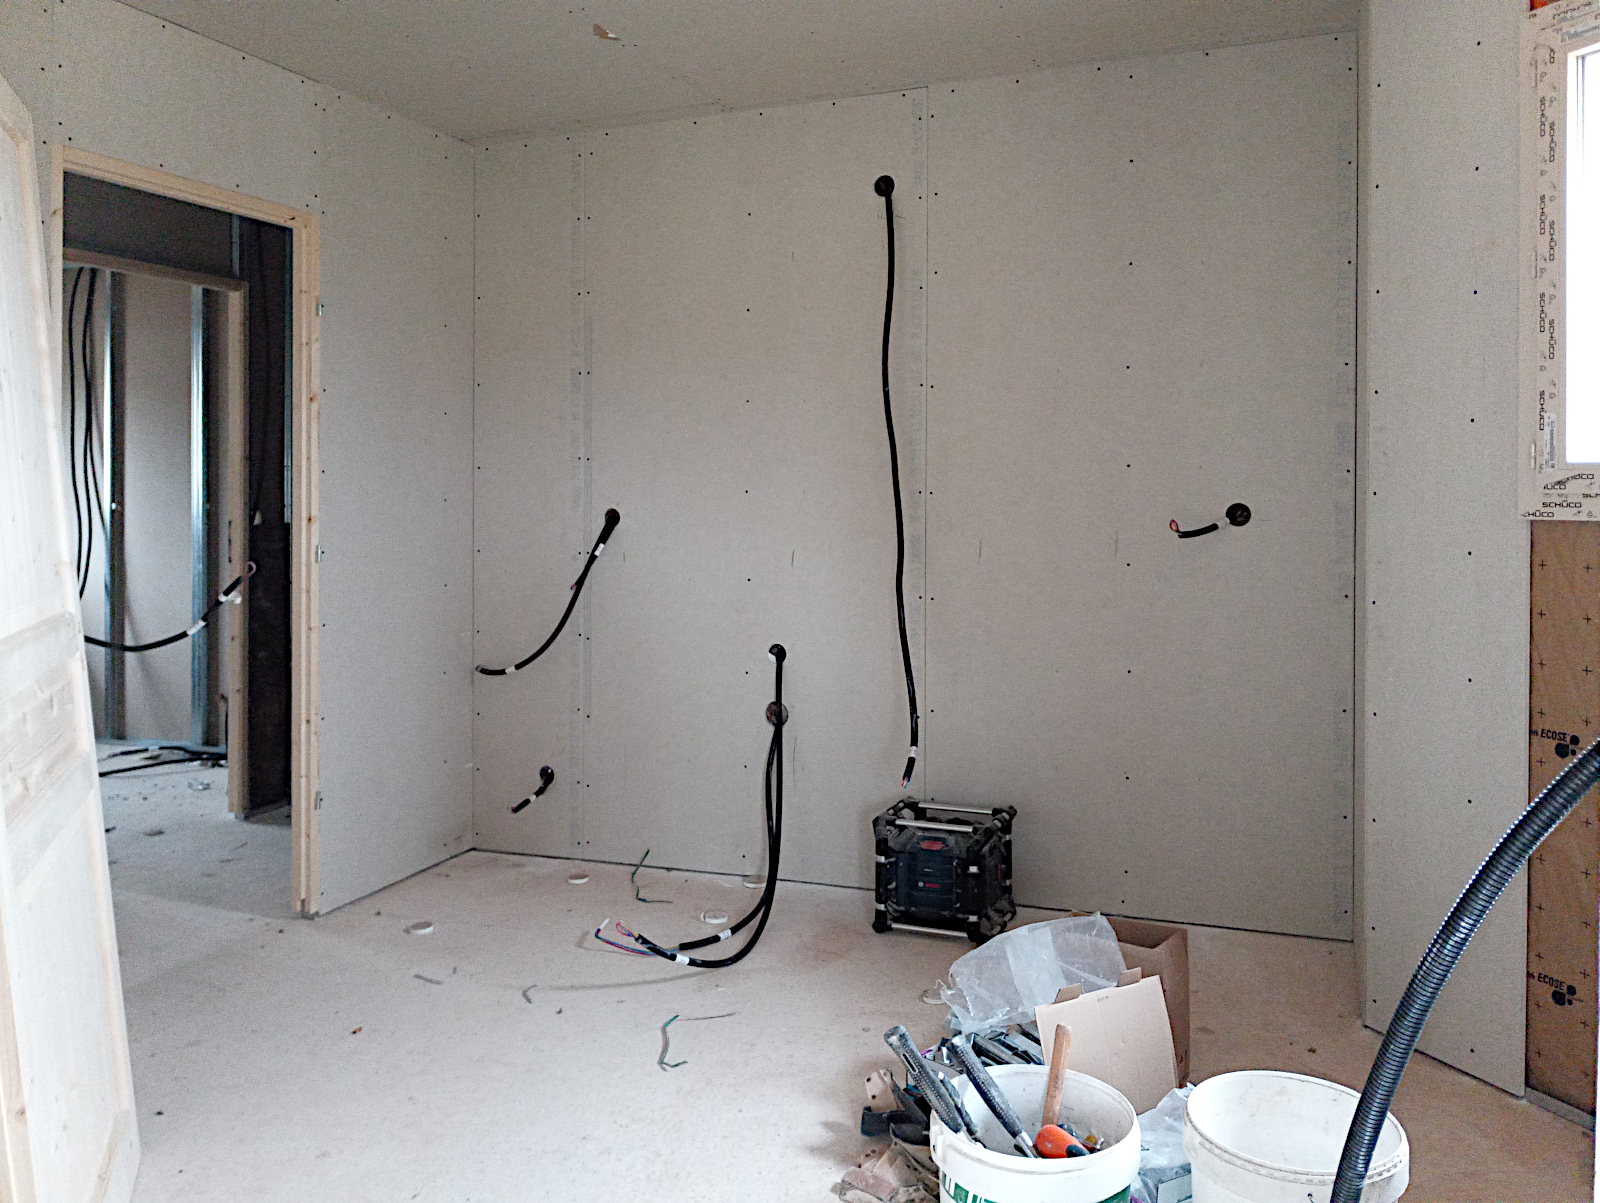
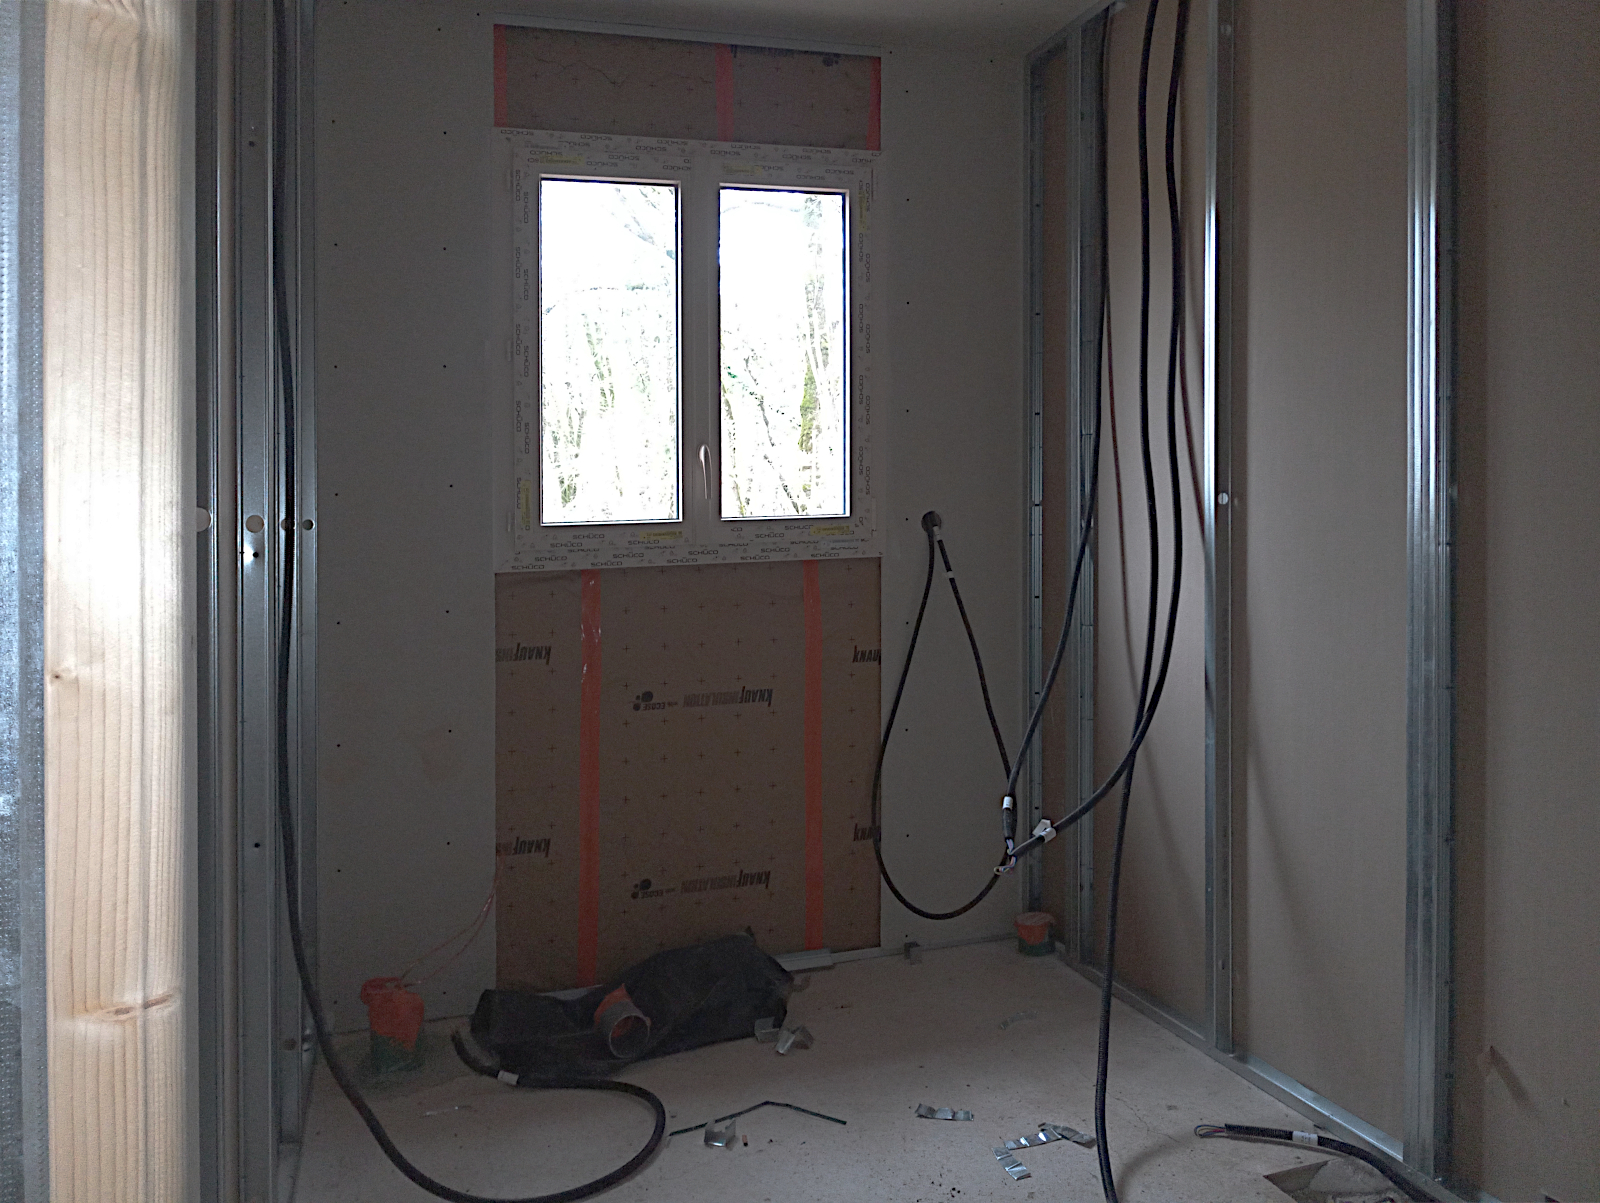
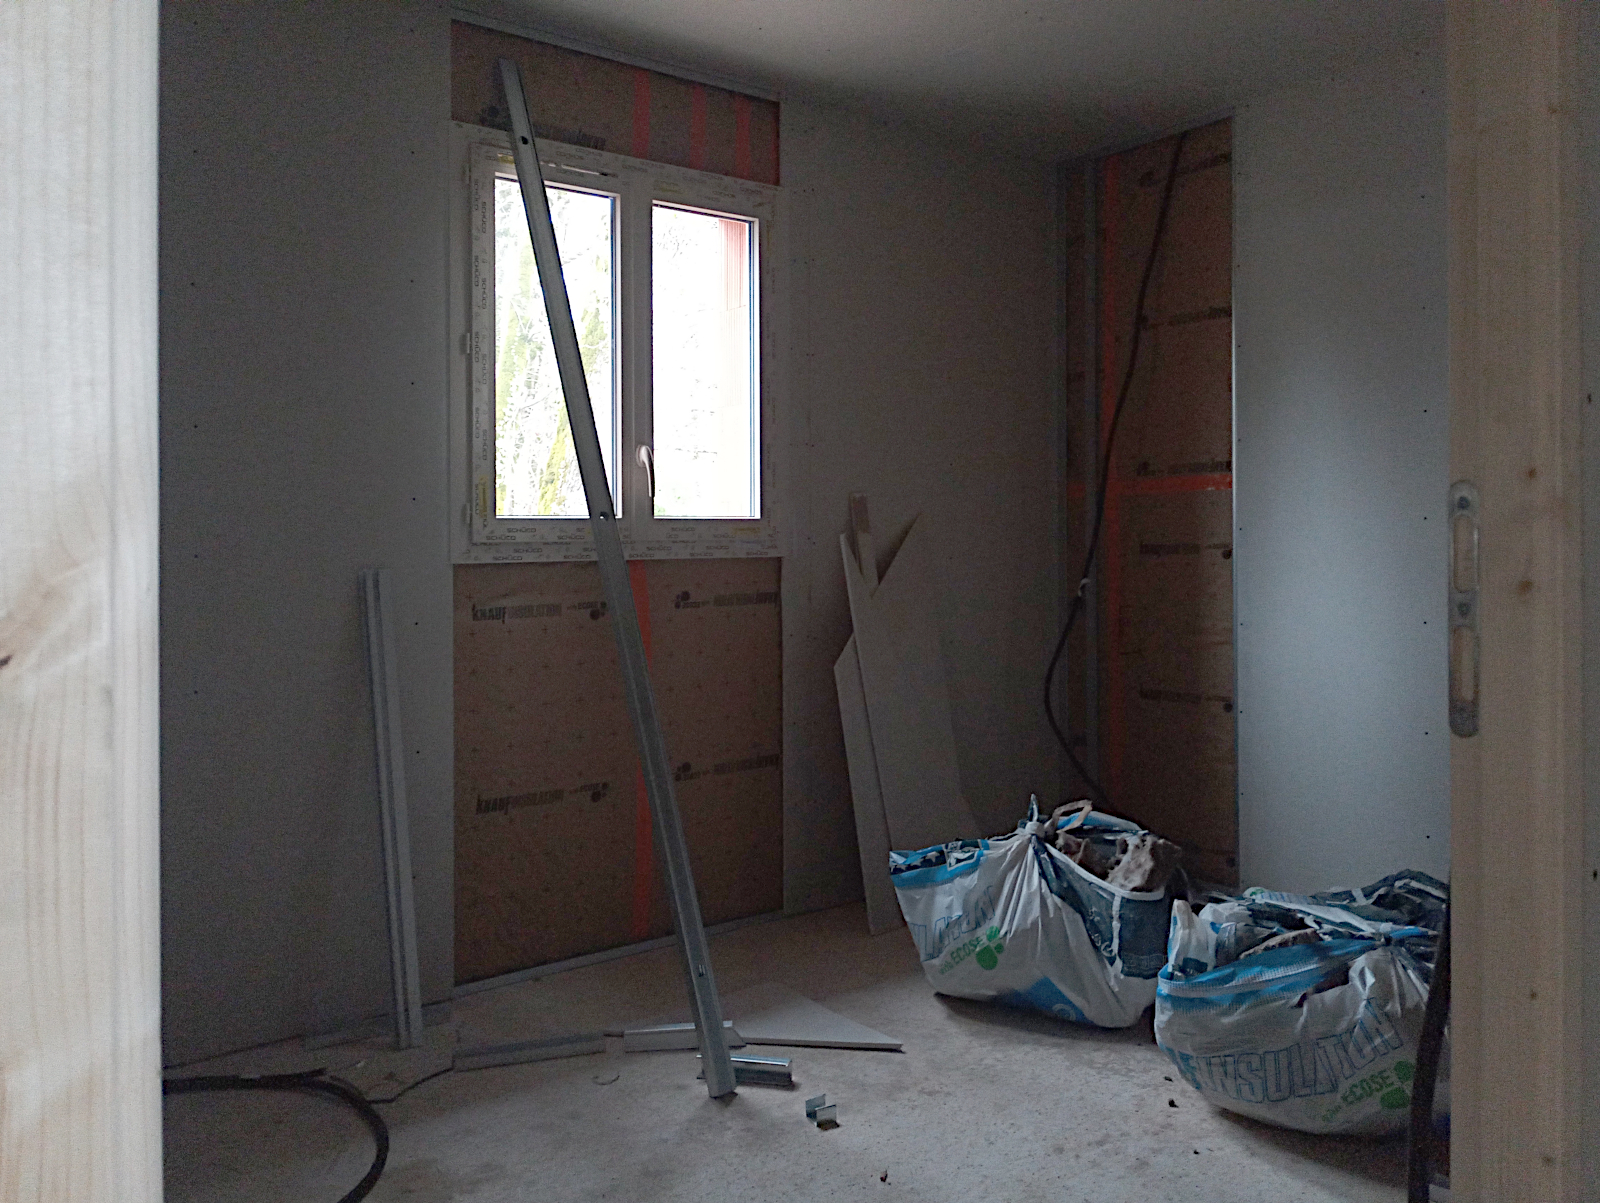
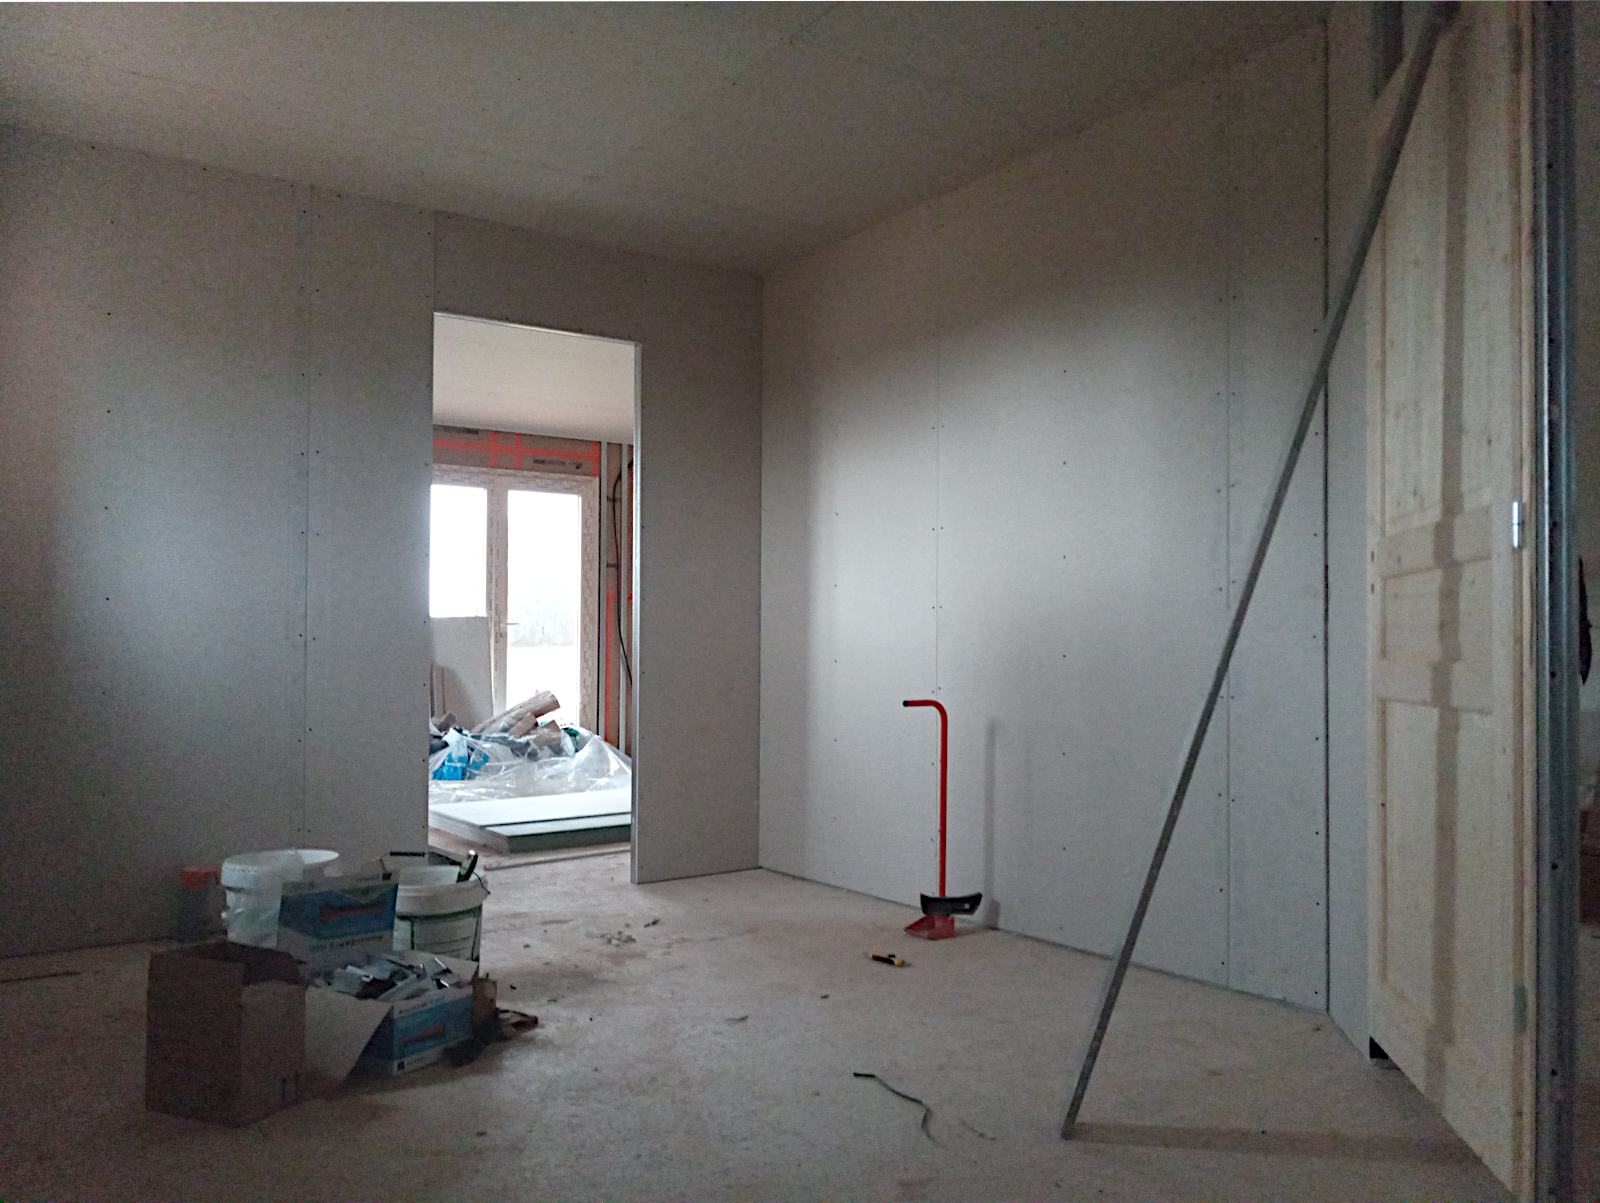
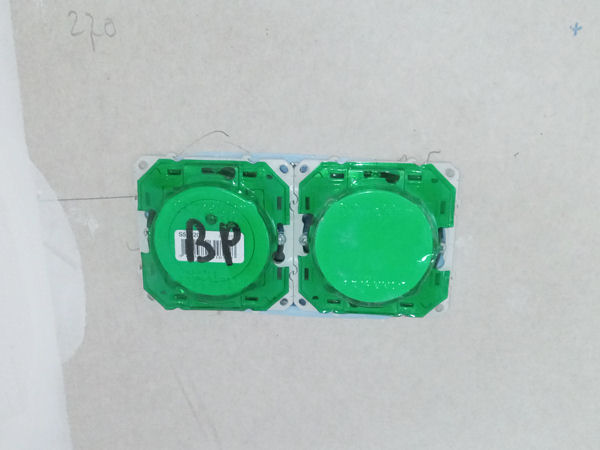
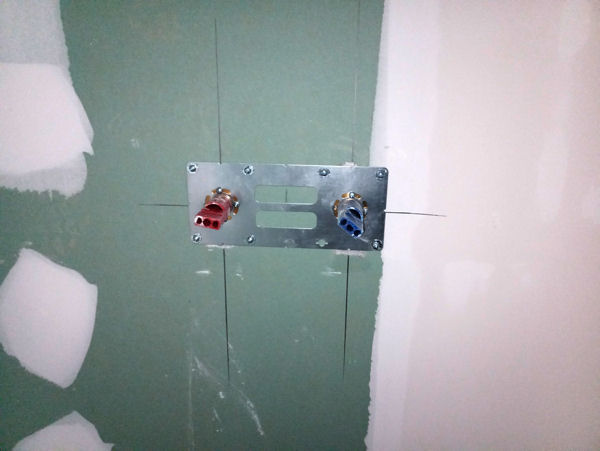
There’s still quite a bit of work to be done in the bathroom. The second of the next two shots shows the shower controller.

null

null

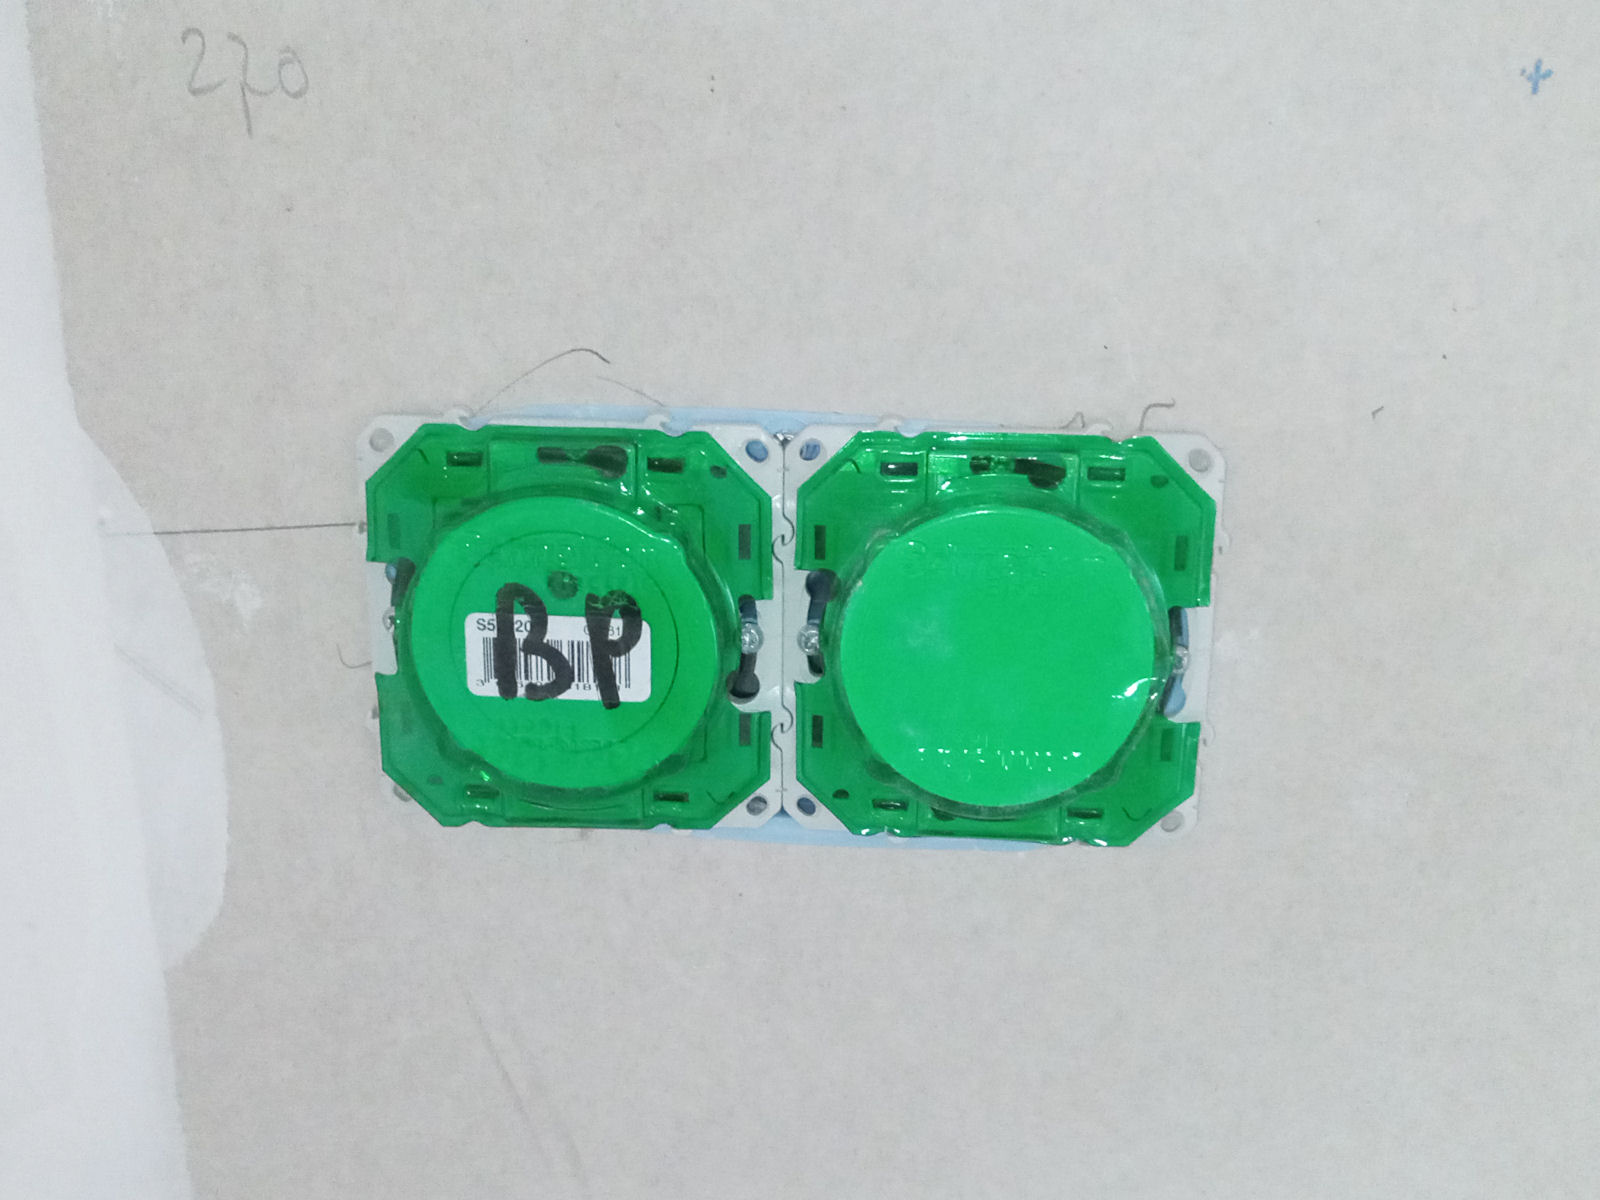
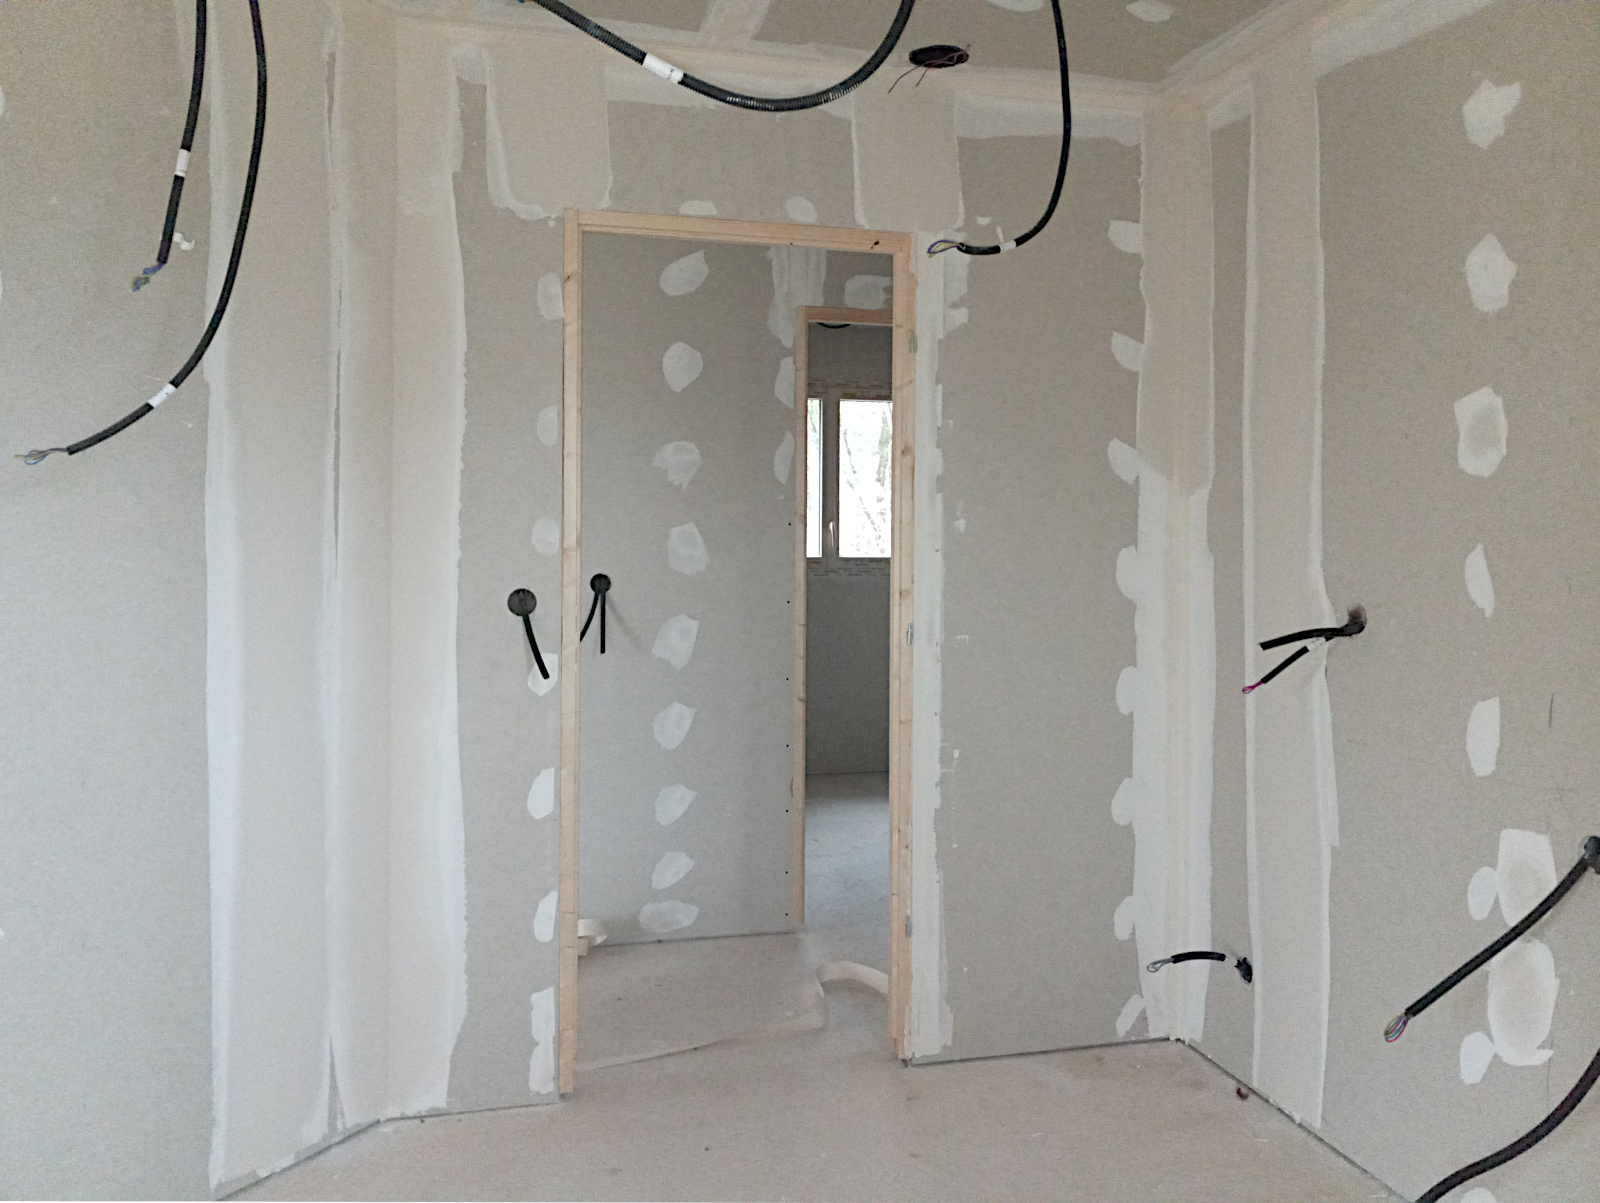
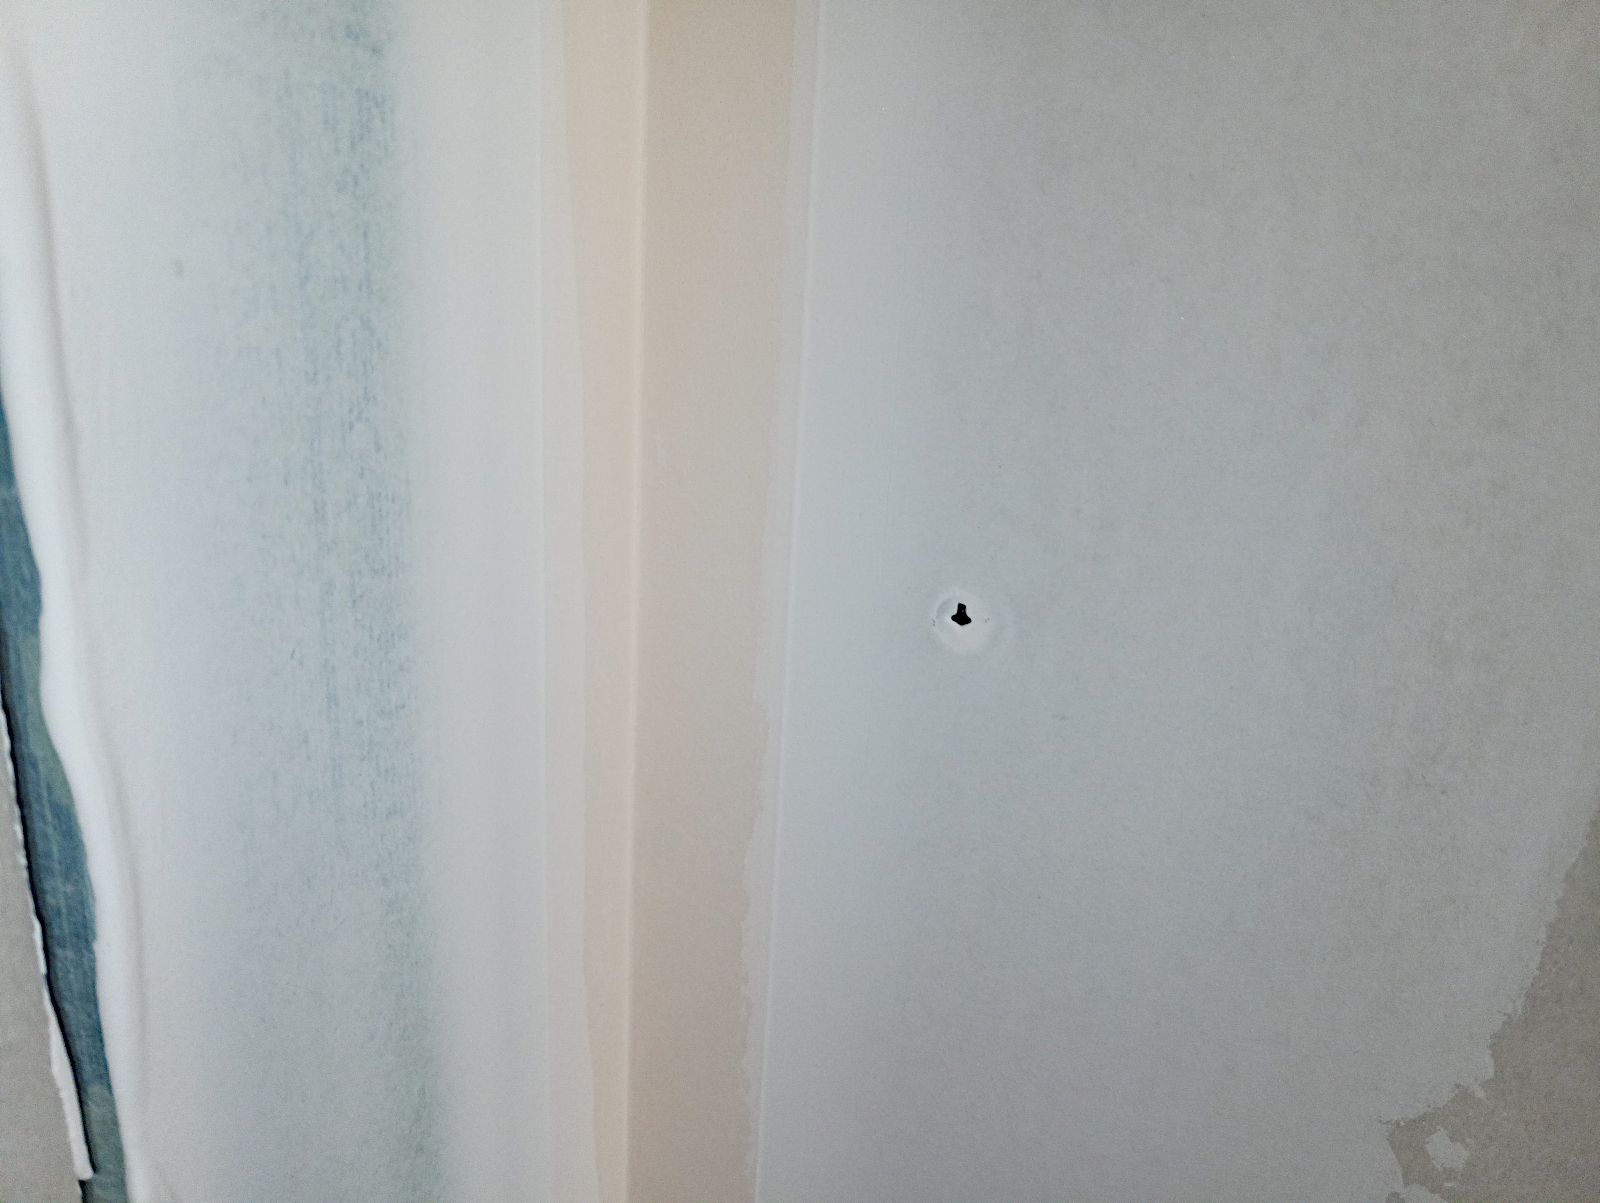
The next shot is an example of the bedside plug point and light switch combination that will be installed in each bedroom.

null

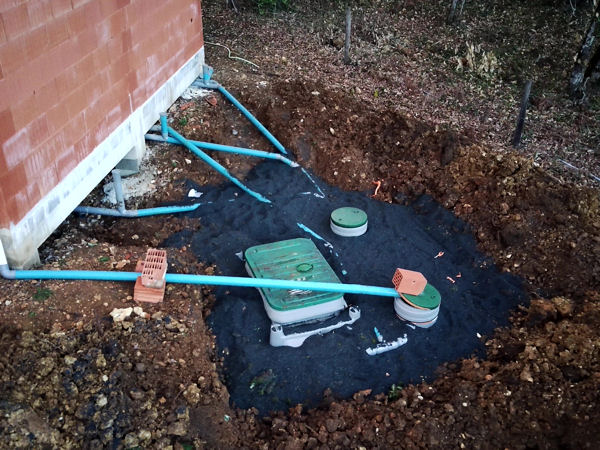
And to finish off, another shot of the ‘fosse septique’ from the opposite direction to before.

null

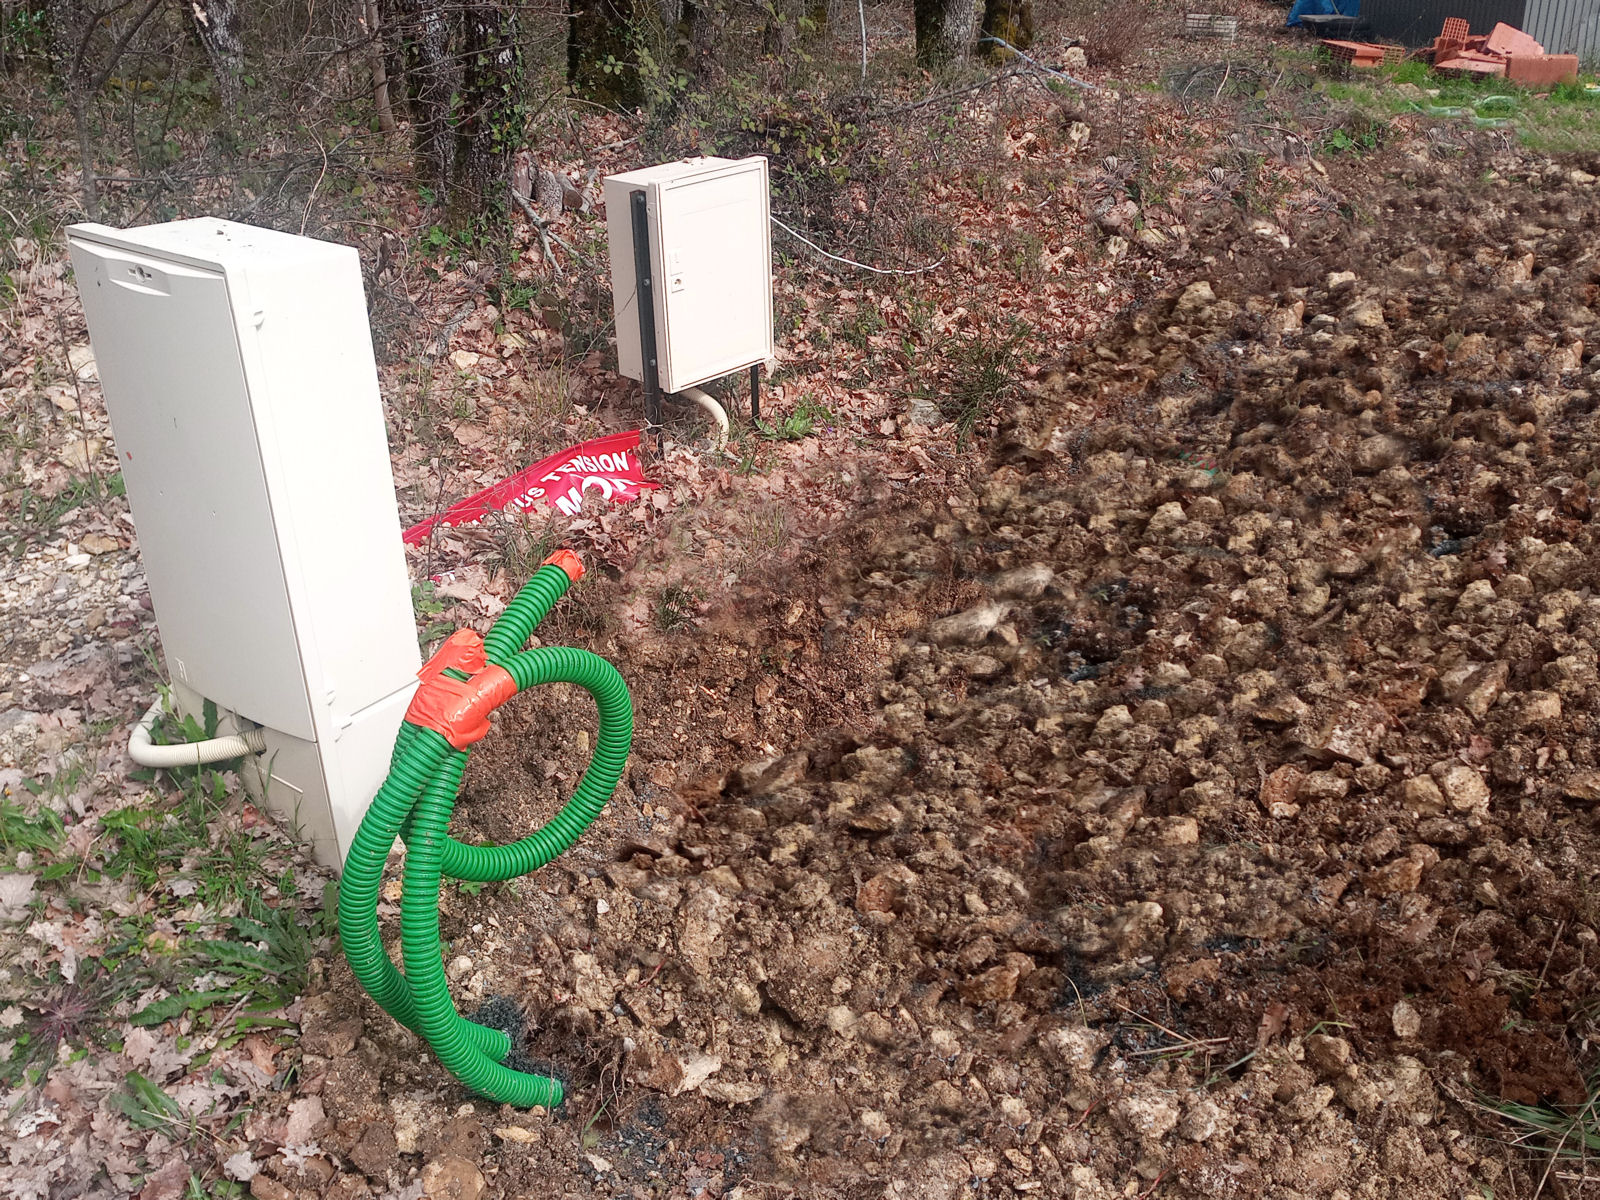
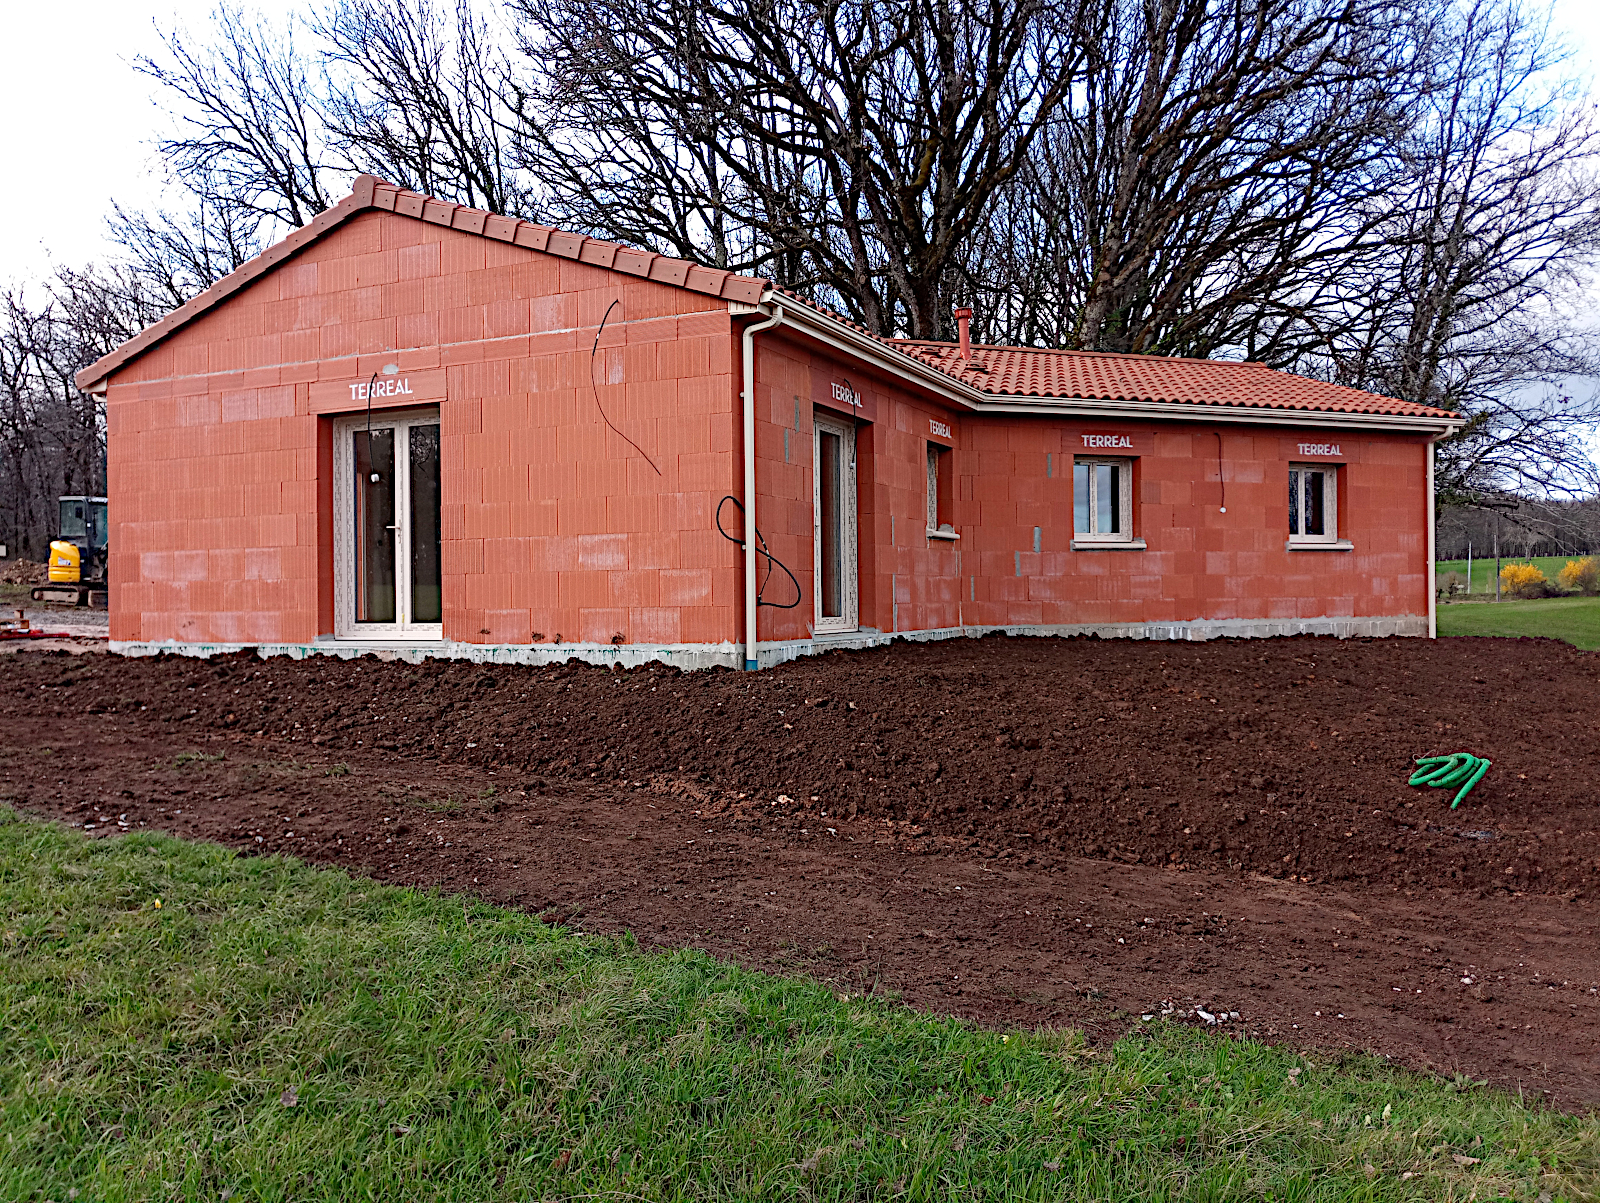
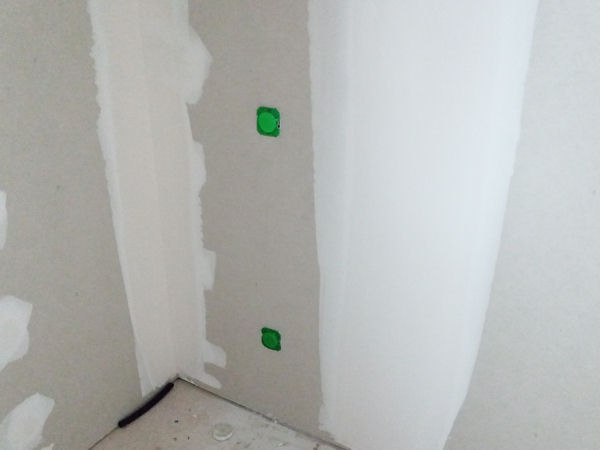
I’m worried that I might have made too hasty a decision regarding the septic tank’s position. When asked, I suggested putting it close to the house but this could have been a mistake. As I’ve mentioned several times, the ground falls away very quickly at the bedroom end of the house where the septic tank is being installed. As shown in the photos, there are three green covers o the top of the tank that must be left at or above ground level.

There has to be a ‘fall’ from the house into the tank and the closer the tank is to the house, the more abrupt this fall will be. I’m now worried, therefore, that the difference in ground level between the house wall and the green covers will be so great due to the proximity of the septic tank to the house that it will be difficult, if not impossible, to create a path along the end of the house between the house and the septic tank, but I’ll only know when the ground has been filled in again back to level.

Yippee!

Things are coming together nicely. Didier, the builder’s clerk of works, turned up this morning and we had a chat about a few things. He told me that tomorrow the plumber will be coming on site to start on the plumbing pipework, which I guess will take a day or so to complete as there’s not a huge amount.

The electrician will also be returning at the beginning of next week to complete his work, so that should be ready in time for the mandatory inspection before the house is connected to electricity on the 29th of this month.

And I’ve just received a telephone call in which we discussed the ‘système d’assainissement’ (the septic tank waste water system). The builder is now recommending a compact ‘bio’ system that employs nut shells to purify the water (Bionut) that will take up less space in the garden, can be installed more quickly and is easier to maintain than the more traditional ‘toutes eaux’ system that was originally included in the contract. The cost to me is no different so I’ve agreed on the recommendation and work will start tomorrow.

So that’s brilliant – things are moving along nicely. And to cap it all, I replaced the second brake pad on my Savannah yesterday, so it’s now flyable again and I’m thinking about popping over to Malbec and running the engines of both aircraft this afternoon. It seems that for now at least everything is calm for once and there are no crises looming on the horizon, a rare luxury in these times!

Guttering.. at last!

It’s been several days since any work was done on my house but it gave me the chance to clear and sweep out the interior and remove all of the scrap wood and much of the rubble that had been piled up out at the back. I don’t need to do any of this as it’s really the job of the builder and/or their sub-contractors but I think that if when they turn up to work they see the site in a clean and tidy condition it’ll encourage them to treat it with respect and do a good job.

But this morning when I peeked out of my caravan door at just gone 7.30 am expecting to see nothing happening as usual, a workman was already up on a ladder at the back of the house preparing to start work on the fascias and guttering. In fact there turned out to be a team of three workers who were a friendly bunch and who got stuck in with gusto getting the job done.

Here are some shots that I took with my drone after they’d already got the rear fascia in place and had started on the front of the house.

null

null

null

null

null

I popped into Victor and Madeleine’s during the afternoon and dashed back at around 5.00 pm expecting to find the team still on site and maybe clearing up. But no, they’d finished and gone leaving everything clean and tidy behind themselves.

When I left for Victor and Madeleine’s I noticed that they were fabricating the guttering in continuous lengths on site using an extrusion machine mounted in the back of their van. It’s a technique I’ve only ever seen previously on Youtube in the USA and I wish now that I’d taken a photograph before leaving.

It means that there’s only a single joint in the guttering on both the front and the back of the building and as the bends in the down-pipes are also created without joints on site, the finished job looks very smart and streamlined as the following pics show.

null

null

null

null

As the lengths of guttering are extruded spacers are inserted at a regular intervals inside between the front and back faces. These act as strengtheners and also prevent the guttering being too easily crushed from the front. You can see them in the next pic. The guttering material comes in the form of aluminium strip in rolls. It’s already coloured, by powder coating I think, and in the pic you can see that it’s ‘beige’ (what we’d call cream) on the outside and white inside.

null

The final series of images include various general shots and some close-ups of some of the details.

null

null

null

null

null

The next shot shows the ceiling in the porch. I was asked where I wanted the light to be and I decided that it should be in the centre of the doorway and mid-way between the door frame and the front of the porch. It means that it’s offset from the ‘geometric centre’ but I think that if a visitor comes to the door, the light should be right over their head.

null

null

Here’s a shot showing how the soffits look, the space under the edge of the roof between the guttering and the wall.

null

I was wondering how, since they’ve fixed the down-pipes to the walls, what would happen when the next team arrives to apply the ‘Crépi’ (the special wall plaster). As the final image shows, they’ve thought of that because the brackets attaching the pipes to the walls have ‘stand-offs’ of the same size as what will be the thickness of the ‘Crépi’.

null

So after today the exterior of the house is ready for the ‘Crépi’ gang to turn up and do their stuff. I don’t know when that will be – it would be nice if it was tomorrow as it’s forecast to turn out as glorious as it was today as the final shots, which were taken at around 5.30 pm, show. As I mentioned in an earlier post, it would be even nicer if two teams turned up and both the ‘Crépi’ went up and the floor-levelling screed went down on the same day, but I think that might be asking for a bit too much 😕

Step by step

I’ve been keeping a record and documenting the steps in my house-build project for myself, obviously, but also for anyone else who’s been following along and is interested to know what’s involved in building a new house from scratch in France. So here’s the latest news.

A week or so ago I received the latest ‘appel de fonds’ (call for money), two actually because the builder had missed one a few weeks ago. Money is handed over in stages according to the point of construction that has been arrived at and these are clearly set out in the contract so the buyer, me, doesn’t get any nasty surprises. I’d already made payments up to stage 3 and the latest call was to cover stages 4 and 5, so as of last week I’ve now paid for 75% of the agreed price of my house.

A down-payment of 15% had to be made on day 1 when building work started when a machine and driver turned up and a large hole was dug in the ground. 75% corresponds to the house being ‘airtight’ ie all windows and external doors fitted, and the internal walls all being in place and finished, and I think it also includes the levelling floor screed having been laid, which is still outstanding.

Finishing of the internal walls was completed today with the plasterers having returned, gone over all of the walls again to ensure that they are clean and smooth and cleared all of their tools and equipment off site. The next call will be for another 20%, bringing the total at that time up to 95% of the agreed price, and that will be after the electricity, plumbing and external works have been completed. The final 5% will be handed over on completion when the buyer ie me, has signed a certificate of satisfaction.

Something else that I had to arrange was house insurance which I did yesterday and today. Up to now the builder’s insurance had covered the house as a ‘construction’ but at this stage I have now had to arrange my own cover as a ‘house’. The builder only asked for minimum cover – accidents, acts of God, vandalism, that kind of thing – but to be honest, with completion only being a few weeks away I didn’t think it worth the hassle of arranging minimum cover now and extending it later when I move in, so I’ve arranged and am already paying for full cover.

That brings things up to date for now. I’m just hoping that the electrician returns tomorrow or on Friday because that will push things along nicely and give the builder no excuse for not getting the plumber in and the floor screed laid. And if they really got their ducks in a row, I can’t see why the ‘Crépi’ (exterior wall plaster) and the floor screed shouldn’t shouldn’t go up and down on the same day 😉

Outstanding work

It’s been a week since the plasterers, or anyone else, have been on site so there has been no further progress in that time. Didier, the builder’s clerk of works, arrived this morning to do some measuring up and we discussed what the plans are from here. Apart from saying that the plasterers would be back to finish off this week and that depending on the weather, the Crépi (special coloured wall plaster) would probably be applied to the walls next week, he was a bit vague and I suspect that timing is under the control of the office, not him.

So knowing what’s still left to be done I’ve rejigged the work program that I produced a few months ago and knocked off all of the items on it that have since been completed. Shown below is what’s left.

null

By coincidence (or is it?) the completion date for the house turns out to be w/e 21st April which just happens to be almost the exact date quoted to me by the builder several weeks ago. I rejected it at the time as I was still trying to enforce the contractual 12 month termination date of 8th March but since then, of course, there have been problems with faults that had to be rectified and consequent delays.

We’ve been battered by high winds for the last few days – I could hardly get to sleep last night in the caravan and every time I managed to doze off I was woken up again. I’ve feared for the survival of my second ‘tonnelle’, having lost one a week or so ago to high winds, but so far it’s remained standing and once the wind dies down later today we’re expecting a little more of the same going into the week-end after which things should calm down a bit.

So with a bit of luck the external work that I’ve indicated should be able to go ahead next week without too much disruption. I’ve also allocated a full week to each task and it’s likely that some time will be made up as not every task will require that long, thus allowing others to be started sooner than shown in the program. Who knows, the end of the second week of April might be on 😉

House-build walk round 12th March 2023

There’s still a bit more to do but this video shows exactly where we now are. Completion was scheduled for on or before 8th March but due to the problems and delays encountered along the way, that date was missed. I doubt that we’ll even make March, although I may be pleasantly surprised. The second half of April looks more likely.

Finishing not yet finished

After my initial reservations I think that the two plasterers are doing a great job of the finishing work and putting in enormous effort, maybe to rub my nose in it a bit. I feel quite bad about it now, actually. Yet again they were on site this morning at around 9.00 am and worked right through until gone 6.00 pm without leaving for lunch. In fact they were trowelling and touching up areas on the walls and ceiling right up to the time that they left because they wanted to make them perfect.

Here are some shots that I took as the light was just beginning to fail, starting with two views looking back towards the front door.

null

null

Looking towards the kitchen from the front corner of the living room.

null

Two shots of the kitchen from each direction.

null

null

The separate WC and the alcove that will eventually become the cloaks cupboard.

null

Two views of the corridor from each direction.

null

null

The ‘cellier’, or utility room.

null

The bathroom.

null

Bedroom 2.

null

Bedroom 1.

null

The corner of bedroom 1 that originally looked awful with the joint tape hanging off the wall but which now looks great, or will do when it’s completely dry.

null

The other side of bedroom 1. The wide vertical strip on the right is where there was originally a large crease in the joint tape which I said could never be masked. But here’s the evidence that shows I was wrong as there will be no sign of it when it’s dry.

null

The two plasterers haven’t quite yet finished although I think they probably will do tomorrow. But I think that they have done a splendid job and are to be congratulated on their work.

On another topic, today is the original ‘D-Day’ for the house – the first anniversary of the day when work began on site by which time it should contractually have been completed and handed over. But not to worry, it’ll be late but good things are worth waiting for and in the event the builder has made a fine job of dealing with and correcting the problems that have arisen along the way.

It’s the same with all projects like this and many builders try to wash their hands and skimp any remedial measures that they might actually make. But to their credit, my builder hasn’t, so I won’t be inclined to implement the penalty clause that’s built into the contract, especially if they hit the target before the end of this month, which they say they should 😉

Another catchup video

I’ve been lazy and not kept up to date with building project videos since December. Here’s the video for Day 16, 5th December 2022.

I’m going to have to keep them coming now otherwise the house will be finished before I’m anywhere near up to date 😕

I was wrong

They are nailing it. I’m not really surprised because when I watched the guy this morning I could see immediately that he knew how to handle a trowel from his hand and wrist action. It’s a pleasure to see an expert lay plaster on a wall. I left the pair of them to it for the whole day and have to say that they were totally committed as they were still working with the time approaching 6.00 pm.

I went in to take a few shots before it got too dark after they’d gone and they show how good the work is. I didn’t touch anything though, to see how smooth things were as it would have been all too easy to find a wet bit and mess it up. I did that once as a very small boy with my dad. It was a hard lesson to learn and one I’ve never forgotten. But things were transformed compared to previously.

null

null

null

null

null

null

null

null

null

null

So it looks as though my fears were totally unjustified as although I may not like their way of working (OK, I am an old-fashioned traditionalist, I know) their results certainly come up to scratch. I’m relieved to be able to say that because it would be a killer to lose even more time at this stage of the game 🙁

Sorted

There was an exchange of emails with the builder late yesterday regarding my concerns about the plasterboard finishing work that was done a few days ago. The builder assured me that ‘it would be alright on the night’ so to speak but I never accept such assurances, because with building work, if it’s not it’s too late.

So I suggested that I would choose several places on the walls where I was particularly unhappy with the work for the plasterer to show me the finish that he could achieve and left it at that without having received a reply.

The plasterers turned up this morning with the builder’s clerk of works and I explained my concerns about the work that had been done in a conversation that became, let’s say, somewhat agitated. However, the plasterer was confident that everything was going to be fine and without being asked, proceeded to demonstrate to me in two places which I’d said were particularly poor how the finished job would come out.

And it was fine and I told him so. So afterwards we were all smiles and everyone was still friends, which was a great relief all round, especially to me in view of the time that keeps being lost. As I type this the two plasterers are busy working so the interior will soon be ready for the floor levelling screed to go down after which things should really begin to speed up. I hope 😐

Here we go again

Sadly, more problems. I just don’t get the thinking of my builder. Are they just hiring the cheapest possible sub-contractors available or is there actually such a severe sub-contractor shortage that they are hiring anyone off the street with the relevant tool in their hand and calling themself a ‘maçon’ or plasterer, or whatever?

After the two plasterboard workers did sterling work putting the walls and ceilings up in my house, along has come someone with the job of finishing the work off but who has instead sabotaged a lot of what they did. And would obviously have done even more damage if they’d had more time.

The theory behind dry-lining is very simple. Instead of building walls and ceilings and then plastering them by hand, which takes time and a lot of the kind of expertise that is almost unavailable these days, sheets of plasterboard are mounted on wood or metal frames and then finished off ready for decoration. It’s quick and it’s cheap and although it’s nice to have solid walls inside houses, nowadays almost all new-builds have partition walling like mine.

But the finishing is the key to getting a good final result. All of the joints between the sheets have to be made to ‘disappear’ as must all of the nails or whatever fixings have been used, and you do need certain basic skills to do that.

Dealing with the fixings is relatively easy. When the sheets are put up, the aim is to ensure that all of the heads of the fixings are hammered in to just below the surface of the board. Making them ‘disappear’ is then just a matter of carefully applying a scraping of plaster over them to fill the depression and cover the heads and a skilled worker can do that in moments such that the final result will need only a light rubbing down at the most before being painted over without a trace.

Dealing with the joints is a bit more challenging. Usually the first step is to run some plaster into the gap and there are two reasons for that. Firstly, it makes it easier for the gap to be bridged and secondly it removes the air that’s in the gap, which is very important whatever ‘gap-bridging’ method is used.

Many amateurs think that all you need to do is trowel or scrape plaster into the gap and that’s it, but it’s not. Due to differential expansion, a simple joint like that will eventually crack ruining the appearance of the surrounding surface, but there’s also another consideration. When you trowel plaster into the gap ‘right up to the top’ the air that was in the gap and was compressed when the plaster was applied will then expand again causing a ridge along the joint.

So how is this relevant? It’s because the nitwit who was sent to finish off my job apparently had absolutely no idea what he was doing. All the fixing heads that he’s ‘covered’ are either still depressed below the board surface or only partially covered, so will have to be redone, or are covered with plaster and sticking up proud of the surface. But that’s the least of the problems which magnify hugely when you come to the joints between the sheets.

Firstly he hasn’t filled the joints before applying a bridging tape but instead has just applied the tape straight over the gaps without any preparation. This means that every tape has a ridge up its centre which will be impossible to disguise. Secondly, he’s used totally the wrong type of tape.

For dry-lining it’s best to apply a thin mesh tape over the filled joint using a light skim of plaster then when that’s more or less dry, you go over it again but this time with a much wider tool. By doing that a joint can be made to blend into the surface and to all intents become invisible, such that it can be painted over and not be seen. And to make it worse, the plasterboard sheets that were used had depressed edges making it even easier to ‘lose’ the thickness of the tape in the depression.

But even that is not all. Plasterboard sheets all start off with a perfect finish and although some minor blemishes may occur during the erection work, that’s only to be expected and they can usually be easily repaired. But what the ‘finisher’ has to avoid doing is (a) themself causing any damage and (b) leaving indentations or unevenness in the plasterwork that they do.

The worker concerned was guilty of all of the above plus the taping that he has done is not only incomplete, as it doesn’t extend up the full height of the walls, but much of it also dry and hanging off the walls because it was never properly attached in the first place.

Here are some shots that I’ve shared with my builder showing not the full extent of what’s been perpetrated but just some examples of the shoddiness of the work involved.

null

null

null

null

null

null

null

null

null

null

null

So what does this mean? Well, more delay inevitably. Nothing more can be done, except electrical work, until all of the myriad of faults have been rectified. The reason for this is that the levelling floor screed can’t be poured until the walls are all finished as their feet will be submerged in the screed itself.

What I also fail to understand is how, after all that has gone before with problems that have had to be rectified by the builder, something like this can happen again. As I’ve said before, all I’m asking for is the house that the builder contracted to build, no more, no less. I will not accept work that is not up to the proper standard and done properly and to be honest, I’m getting a bit tired of it.

More catching up

Although I’ve been posting links about my house-build here and on Facebook, I haven’t posted a video on Youtube for ages. It’s not only that I’ve had other things taking my attention, I have to admit that I’ve also been a bit lazy, and the longer I’ve left it, the harder it’s been to get myself motivated again.

The problem is that ultimately I want to produce a video showing the whole of the build from beginning to end and unless I create videos along the way of each stage of the build, I won’t be able to do that. So at last I’ve managed to get myself into gear and below is the latest video to date, of Day 15 of the build, that I shot all the way back on 1st December 2022.

I’ve already begun putting together the video for Day 16 (5th December) so should have that ready to be uploaded to Youtube soon. Then I’ll just have to keep cranking them out until I’m right up to date

Pleasantly surprised

No work done today because nobody turned up, not even the electrician, which I confess came as a bit of a surprise in view of what still has to be done. However, they know the date on which the house is due to be connected to electricity (29th of this month), which means that it’ll have to be pretty much complete and ready for occupation. So I assume they all know what they’re doing.

Out of the wind the sunshine outside is very warm, about the same as a typical UK summer I’d say, but the wind still has a bitterly cold edge to it and the overnight temperature was also below freezing. So it’s not a good time to be working outside and it’s also incredibly cold inside the house. I suppose that as it’s so well insulated it’ll take a long time to warm up even when the weather gets warmer.

As the house is now clear of all tools and rubbish, I thought this would be a good time to go around and check some measurements in view of the small discrepancy that I found previously in the kitchen. And as it turned out, I was very pleasantly surprised because the small error in the kitchen is the only one and in fact the internal dimensions of every other space in the house are the same as or, mostly, slighter great than on my plan.

I was a bit worried about the space on the living room side of the kitchen wall in view of the kitchen wall being slightly longer than plan (166cm compared to 160cm). I still have the dining room set that I brought with me from the UK which I was never able to use in Plazac because of its size. It comprises a table and eight chairs, two of which are ‘captain’ style with arms. And the table also comes with an extension and has sat ten people in the past, at Christmas and times like that.

So the size of the space that I allowed for it in my plan was critical, but I needn’t have worried. I mentioned in my last post that the living room is almost 10 cm longer externally than my original plan and even with the longer kitchen wall dimension, this translated into a 4cm difference in the width of the dining area – 397cm compared to 393cm. That will be very useful as it’ll provide enough space for the drinks and china cabinet that will be standing against the walls opposite the ends of the table.

And then I looked at the width of the living room, which I’d planned to be 679cm. It’s actually 682cm, and the length of the wall turning back towards the front door is also 2cm longer than plan at 648cm compared to 646cm. Even the little separate WC is 2cm wider than planned – 84cm compared to 82cm.

And so it goes on. We already know that the kitchen wall backing onto the 3rd bedroom is 2cm longer than planned – 184cm compared to 182cm. This means that the equivalent walls of bedrooms 3 and 1 are also longer by the same amount meaning the bedrooms are that much wider. The length of bedroom 3 is as per plan at 329cm but bedroom 1 is 1cm longer than planned at 351cm compared to plan 350cm.

However, at the ‘bedhead’ end, bedroom 1 is also 1cm wider than plan (338cm compared to 337cm) and bedroom 2, 2cm wider (323cm compared to 321cm), while in addition the alcoves in each bedroom in which I’ll be building fitted cupboards are also 1cm longer than planned (249cm compared to 248cm). But the biggest gains have been made down the front of the house.

The length of the ‘cellier’ and bathroom were supposed to be 266cm but actually they’ve come out at 269cm. And that’s even after the corridor running up the house has been made 2cm wider than plan (102cm compared to 100cm). The width of the bathroom was planned to be 226cm and it’s come out at 228cm and the width of the ‘cellier’ is also 2cm wider than planned, at 188cm compared to 186cm.

So taken all round, the house’s size outcome is very pleasing. No space has come out to be smaller than planned – in fact they’ve all come out to be slightly larger, and where it matters as well, in the ‘bedhead’ widths of the bedrooms where you want to have bedside cabinets either side of the bed and still have space left over and the size of the dining space.

I have to say, I’m looking forward very much to moving in and enjoying the house, especially after having spent the past 21 months in the cramped and primitive confines of my old caravan. The upside is, though, that it has saved me thousands of euros that I’ll be able to spend on decorating and equipping the house and making it really comfortable to live in.

I’ve asked the electrician to provide a cable at the rear ready for a small swimming pool pump. Nothing fancy, just a little 8.2 x 4.7 metre job, 1.3 metres deep, ‘semi enterrée’ (partially in the ground) with wooden sides. That’ll be lovely for languishing in during the hot summer days to come and it’ll be a great swap after the caravan 😉

null

The beginning of the end?

Or just the end of the beginning, to paraphrase Winston Churchill’s immortal words? OK, a lot has been done but there’s still a long way to go before the house is finished and ready to be handed over. No electrician today, just the plaster-board workers who finished getting all of the plaster-board up everywhere in the house and cleaning up behind themselves before they left around mid-afternoon.

Another worker, I don’t know if he was a member of the same team, was also on site early on but had disappeared later. His job was finishing the walls and ceilings off by taping over the joints in the plaster-board and skimming plaster over the nail heads that had been used to fix them to give a flat surface ready for decorating. He left a lot still to be done as the following pictures show.

First the now standard shot taken from just inside the front door.

null

The next two shots were taken from in the living room looking back towards and then past the kitchen. With all of the walls now up and all of the rubbish gone you can get a feel for the size of the spaces in the house for the first time. I’m very pleased with the results and think the spaces will be very comfortable to live in.

null

null

Now two shots of the kitchen taken from each direction.

null

null

The next shot shows the alcove that will become the cloaks cupboard with the separate WC beyond.

null

Here’s the ‘cellier’, or utility room.

null

The next shot shows the bathroom. The far corner will contain a walk-in shower (what’s known as a ‘douche italienne’ here) with a washbasin between it and the WC along the same wall. I’ve kept it pretty simple and they’ll just be a mirror-fronted cupboard like I had at Plazac (I had two actually) on the wall opposite the basin for toiletries, shampoo and all that stuff.

I intend to keep all my cleaning products in the kitchen and/or utility room and there shouldn’t be a need for a heated towel rail as towels should dry easily in the summer and in the winter the room will be under-floor heated by the heat pump. That’s my hope anyway.

null

Now three shots of the bedrooms in order bedroom 3, bedroom 1, bedroom 2.

null

null

null

Next are a couple of shots up and down the corridor.

null

null

And to finish off, a longer shot from the living room looking down the corridor past the kitchen.

null

I don’t know what the plans are for tomorrow. I assume the plaster-finishing man will be along but I don’t know about the electrician who has a lot of work still to do. As will I have when he’s finished, because it’ll be my job to install and connect all of the ceiling lights – all 41 of them!

Coming on fast

Today saw another great leap forward with the interior of the house. The electrician arrived early at about 8.15 am and I nipped up to tell him about needing to move the plug points that I mentioned in a previous post. He said that putting them to one side of the appliances they were for was usually OK and I said that it wasn’t for me.

I referred to the dishwasher and asked how on earth was I supposed to plug it in with the fitted cabinets in place if its power point was behind the adjacent cabinet and over half a metre away? He got the message and said it wouldn’t be a problem moving all three of them.

I also said that I’m probably going for Indesit appliances and whereas I can buy an under-counter Indesit fridge in the UK, there’s no such thing in France (true). The only Indesit model I could fit in is 142cm high, so it would mean shortening the worktop and making it free-standing in the corner.

In that case as it stands, it would cover the power point that he’s placed in that corner above the counter. He understood that too (he’d marked the wall out to show where the various appliances and power outlets would be) and said that he’d move that over as well.

I popped my head into the house at lunchtime and while I was there I told the plaster-work team about the mis-positioned walls. They didn’t like it and said that they’d worked to the builder’s plan. I said that I’d given them a print of my plan as I’d designed the house and highlighted the importance of getting the measurements dead right, especially at the bedroom end wall. They said that the difference was all down to the angle, which was just plain silly.

I said that anyway, it wasn’t worth arguing about because I’d worked out over the week-end how to cope with the difference in measurements but I emphasised that if I hadn’t done so and couldn’t get my kitchen units in they’d have had no choice but to move the wall. End of.

I then had to leave and was away for the afternoon checking out kitchen stuff at Brico-Depot. I’ve now definitely decided I’ll be sourcing my kitchen furniture from there, as I did for my old house at Plazac. Their stuff is of high quality and their marketing is second-to-none in my opinion.

As well as having several models on display incorporating many features and accessories, they also provide a 12 page leaflet covering every model, worktop, accessory, component, finishing piece etc that they offer together with the price of every single item. This means that while you’re making your choice of model you can also do detailed calculations showing exactly how much to the centime your choice will work out to.

Having obtained the information I needed, by the time I got back to the house the workers had all left and unfortunately the light was beginning to fail. Nevertheless I managed to get several usable shots showing the progress that had been made, with several walls now being full double-sided, enormous strides made with the wiring for the lighting throughout the house and the cable bundle now hanging down in the ‘cellier’ ready to be connected up to the breaker box.

First some general shots of the living room showing the mass of cabling now hanging down for the ceiling lighting. The electrician is a bright spark, if you’ll excuse the pun, because he showed me how he’d marked out the positions of the spots (and therefore the ceiling holes) on the floor and then used a laser to project them up onto the ceiling. Very clever, and it meant that the ceiling positions and lighting pattern were exactly right. You could say ‘spot on’ ahemm…

null

null

null

Now a couple of shots of the kitchen showing the lighting cables and in which you can make out the moved power outlets.

null

null

Here’s a shot showing the kitchen lighting cables (seven of them) in more detail.

null

The next two shots show the ‘cellier’ (utility room) and the huge bundle of cables hanging down in the far left corner ready to be connected to the main breaker box.

null

null

The next shot shows the lighting in bedroom 3. Both of the other bedrooms have the same number of ceiling spots and are therefore similar.

null

The final shot shows the ceiling cabling in the bathroom. There are four spots and also visible is another hole in the centre of the left-hand wall. This is for ventilation and there are also similar vents in the kitchen, utility room and the separate WC.

null

Only the kitchen vent has a switch and my guess is that the other three will be working non-stop. This makes sense because the main living spaces (the living room and the three bedrooms) will be constantly ventilated by way of the system mounted in the roof space and slots in the tops of all of the double-glazed widows and doors.

So that was it for today. I’m happier and more relaxed than I was over the week-end as I now know precisely how I’ll be installing the kitchen cabinets in a way that will give me exactly what I want. And as a result of my discussion with the plaster-work man who showed me what he had discovered, it now appears that the living room end of the house is about 10cm longer than the plan, so my house will end up being slightly bigger and even more value for money than I originally thought it was 😀

Disaster struck

My priority today was to try and see if the problem concerning the mis-positioning of my kitchen walls could be resolved without tearing them down and rebuilding them. My plan was to drive to Brico-Depot before they closed at 1.00 pm to take detailed measurements of their base units as I’d done yesterday at Brico-Marché in Le Bugue and pick up any other information that might help. But it was to be thwarted.

I was quietly drinking a cup of tea mid-morning and thinking about my plan of action when there was an almighty thump and when I looked up I couldn’t see out of my caravan window because it was blocked by the roof of one of my ‘tonnelles’. I knew that high winds had been forecast for today with strong gusts so I’d made preparations accordingly by opening the curtains of my ‘tonnelles’ so the wind could blow through them rather than against them. But it appeared that this wasn’t enough this time.

Moments before there had been a huge gust which had snapped the ties of the ‘tonnelle’ concerned, picked it up, turned it over and hurled it against the side of my caravan. When I tried to get out to see what was going on I couldn’t because the force of the wind was so great blowing the ‘tonnelle’ against the outside of my caravan door that I couldn’t open it.

I managed to however, when the wind dropped slightly and this is what I found although the pictures were taken after I’d removed the ‘tonnelle’s’ side curtains which were being blown in the wind and risked being further damaged and moved the framework away from my caravan.

null

null

null

null

null

As can be seen, several parts of the framework have been broken exactly as had occurred almost a year ago when the same thing happened with my original ‘tonnelle’. However, I’m a ‘glass-half-full’ kind of a person and as I’ve never got around to disposing of the parts, damaged and otherwise, of the original ‘tonnelle’ I decided to go and see what I could find. Here’s what I managed to salvage.

null

The bundle shown above contains just about everything I need to repair this ‘tonnelle’. Some of the parts are a little bit rusty from where they’ve been left outside for so long but that won’t matter. There’s also a part of this damaged ‘tonnelle’ that I don’t have a replacement for. However, it’s straight and the damage it’s suffered is only slight in the form of a crack in one of its welds. The crack is actually a bit rusty so it might have been there before today’s incident, so I don’t think it will be important.

It’s still blowing a hooley out there so I’ve added another extra strong tie-down to the second ‘tonnelle’ which is weathering the storm quite well despite the wind trying to rip its roof off. I can’t do anything more for now until the wind drops fully after which I’ll have a go at getting the damaged one back into some kind of shape as although I think there may be a few nicks in its fabric, its condition otherwise doesn’t look too bad. Getting the framework upright again without doing any more damage will be quite a challenge, though.

I didn’t end up making it to Brico-Depot of course, which means that I’ll have to ‘wing’ my decision about the mis-positioned kitchen walls. However, this afternoon I’ve been carefully checking the geometry by drawing a series of very detailed drawings and I think that I can get around the problem when I fit my kitchen units without too much effort. I hope I’m right because after tomorrow I doubt there’ll be another opportunity to return to the issue 🙁

Oh dear, more problems

When the plaster-work men started working on the interior of my house we had a conversation about the kitchen. I emphasised to them that the dimensions had to be precise because I’d planned them so standard size kitchen units would fit exactly into the spaces. I even went so far as to do a print of my original plan on my computer which I gave them to refer to.

So you can imagine my dismay when I went around and checked all of the measurements and found that ONLY ONE was actually correct! But that’s not the worst part.

One of the kitchen walls, the one along which I plan to have the oven, hot plate and fridge, is offset into bedroom 3. The size of the offset is not random – it was carefully calculated to allow the fitted items, the oven and the fridge, to fit under the worktop with the proper amount of worktop overhang in the front, and the hot plate to go on top with a proper amount of worktop around it on all sides.

Standard under-worktop units are 57cm deep and items like the oven and fridge need all of that. So I decided on a worktop depth of 60cm which means that the wall has to be offset by the same amount, or even just a bit more, and that measurement is critical. But see the image below. When I measured it I found it to be only 58cm.

null

So that was when I went around and checked all of the other dimensions and the image below shows what I found. Only one, the wall marked B in the image below, to the right of the sink, is of the correct length. However, because the length of the run in which the sink unit will be installed is 6cm too long (166cm compared to 160cm) it means that the wall B has been placed 6cm too far to the right, into the living room.

null

And there’s more wrong with wall A. As the wall offset is 2cm too small, it means that the wall has not been set back far enough into bedroom 3, but as well as that, it’s also 2cm too long at 284cm rather than the 282cm it should be (not shown in the above image). I can live with that difference but I’m not sure about the 2cm difference in the wall offset and hence the depth of the worktop.

I’m having to see how much can be trimmed off the backs of the frames of the base units yet still leave enough space inside to accommodate the oven, fridge and hob unit while still having a reasonable front overhang. When I say ‘reasonable’ I’m only talking about 1-1.5cm which isn’t reasonable at all really, because so as not to look weird, it’ll have to be repeated all around the kitchen.

Today I went to Brico Marché in Le Bugue to check out the exact dimensions of their base units as I’m (slightly) interested in one of their models. Tomorrow I’ll do the same at Brico Depot, but if things go pear-shaped I’m afraid that the plaster-work boys (and Didier and the builder) will be told on Monday that they’re going to have to take down and move a wall because there are limits to how much I can, and will, compromise with my kitchen.

But sadly, that’s not all. When I looked at the photographs that I posted yesterday I noticed something that I hadn’t been aware of before. Whoever prepared my house’s technical plan has obviously never previously designed a kitchen because the outlets for the under-worktop units have been specified in completely the wrong places ie behind the units to the side of the ones housing the appliances.

Take a look at the next shot which shows the outlets for the oven and hob units and where they are in relation to the wallspace (in red) at the rear of the units in which the units will be housed.

null

OK, so what does this mean? It means that when the base units are secured in place and you come to install the appliances there won’t be any access to plug them into their power outlets as they’ll be behind the base unit next to them. I’ve shown in the above image by how much the electrician will have to move them on Monday.

And the following image shows how the same has occurred with the power outlet for the dishwasher – except this time the error is even greater!

null

It’s a pretty fundamental error and it’s a pity that I didn’t spot it previously when I was scanning the technical plan. It won’t take much to move the cables but even though the existing holes will be hidden behind the base units when the latter are installed, I think I’d still like them to be patched up.

‘Sparks’ did well

‘Sparks’ is what we call an electrician in Britain. He started at around 9.00 am as usual and the two-man plaster-board team only turned up today for a short while to give him a clear field. And he needed it because he was everywhere, including up in the roof-space, as the following pictures show.

I didn’t take any photos at lunchtime because I had to go out to get hold of a few things, including a 5 x 4 metre plastic tarpaulin. I needed that because I wanted to move the interior doors out of the house today and my plan was to put them in one of my ‘tonnelles’ double wrapped in the tarp so even if any rainwater did blow in there, it wouldn’t stand a chance of wetting the doors.

The first thing I saw when I went up to see how Sparks was doing was the cable for my satellite dish that he’d drilled the wall for and poked through. He said that he would to save me climbing a ladder and crawling around in the roof space myself but I didn’t expect him to do it today.

null

First off as usual, a general shot from the living room.

null

Next the TV corner. We had a short debate on where to site the plug sockets – close to the front wall or further away towards the middle of the section of wall. After umming-and-ahhing for a few moments we decided on a compromise 🙂

null

Now a view from the TV corner towards the kitchen showing the cables that have been poked down from the ceiling in that area alone.

null

Another view back towards the corridor leading to the utility room, bathroom and bedrooms showing yet more cables.

null

The kitchen wall showing the cables for plug points, the fridge, the oven, the hob unit and the cooker hood that will vent to the outdoors through the roof.

null

The view straight up the corridor towards the bedrooms. Insulation-come-sound deadening material has now been placed in position along the right hand side as viewed ready for the plaster-board to be attached along that side.

null

Looking back through the kitchen door at the wall on the opposite side showing the cables for two plug points, a light switch and the plug point for a dishwasher. There’s also another low level plug point on the right which can’t be seen as it’s behind the doors leaning against the right hand wall.

null

Now the ‘cellier’, or utility room. The washer-dryer combo will be on the right against the outer wall and there will also be lots of storage and other stuff that I’ll go into in more detail in another post. It’ll be great because I had no such thing in my old house in Plazac and it was a total nightmare just because of the lack of storage space alone.

null

The next two shots show bedroom 1 and the alcove space it contains in which I’ll be building full-height wardrobes and storage cupboards.

null

null

Now the same again – two shots of bedroom 2.

null

null

And now bedroom 3.

null

And finally two shots in each direction up and down the corridor.

null

null

I also received some excellent news today. As regular readers will know, the cables and water pipes were put into place before the the concrete floor slab was laid so are now pretty much fixed in place with additional ones being hard to do. I recently asked whether as I’ve now decided to build a garage-workshop in front a cable could be laid to supply power to it ready for when it’s built and was told that this would be OK.

Today, while the electrician was there, I asked whether the same again could be done to provide a power cable at the back of the house that I could use to run a small swimming pool pump. That’s more challenging because it would mean a cable being pushed through under the house from above and someone then going into the space below to bring it out at the back.

It would be an ‘extra’, of course, but my view is that it would be better to do it now, during the build, than to leave it to afterwards. The electrician, fine chap that he is, said that he would be able to do it, so I can look forward to having a proper little semi-above-ground swimming pool (what’s called ‘hors sol’ in France) to languish in during the hot summer months when I’m not slaving in the garden. And if the worst comes to the worst, it could always be used for some fancy lights on the terrace 🙂

Shaping up nicely

The interior of my house is looking more and more like an interior now the internal walls are going up. The walls and the doors as well as the windows seem very high but that’s because the floor is low and will be raised by something like 3 inches (7.5 cm) when the second layer of concrete is poured as a screed to completely level the floor and the floor tiles go down.

When I went up to take a look at progress half-way through the day all of the doors bar one had been installed and a good start had been made on putting up the internal partitions that will form the interior walls. When all of the doors are in I’ll then have to remove them from the house to ensure that they won’t be damaged during the work that follows.

As yet none of the internal partitions have had plaster-board fixed on both sides because several will have cables fed down through them from the ceiling and from the unopened rolls that are standing around, I assume that insulation will be inserted between the wall surfaces as a sandwich that will also act as sound deadening. Here are the shots that I took at lunchtime.

null

The next shot was taken looking across the kitchen with bedroom 3 on the other side of the partition.

null

The following shot was taken looking towards the bedroom end of the house through the utility room and bathroom. The coloured heating pipes sticking up in the foreground will end up being in the back of the cloaks cupboard.

null

The following shot was taken looking into bedroom 3 with the kitchen beyond.

null

null

null

null

It was dull and wet all-day today and by the time that I went up to check on progress after the workmen had finished it was really dark inside the house. Although there’s a power socket available in my ‘coffre de chantier’ (site electric box) that I installed before work began on the house, these guys haven’t been using it and I’m thinking that they could hardly be seeing what they were doing by the time they finished work in the late afternoon.

For some reason I can’t get my phone camera flash to work either and many of the shots that I took were unusable as a result. The ones that follow below are heavily edited and of rather poor quality but are the best of the bunch.

The first was taken from the middle of the living room and shows the door into the separate WC behind the front door with the cloaks cupboard beside it. I will be fitting a pair of bi-fold doors on the latter with a shelf inside.

null

The next one is from the living room looking down the corridor towards the bedrooms. All of the doors are now installed and have been removed ready for me to take them out to keep them safe.

null

The next shot was taken from inside what will be the bathroom looking across to the entrances to bedrooms 1 (farther doorway on the left) and 3. Bedroom 2 is on the left of the position from where the photo was taken.

null

Next is a shot taken from inside bedroom 1 looking out across to the doorways of bedroom 2 (on the right) and the bathroom.

null

The next shot was taken from the kitchen looking out through the opening (that will stay open) into the living room. I wish now that I’d specified a curved/arched top to the opening but I was told that it’s now too late as they would have needed to cut the plaster-board to shape before fitting it.

null

And finally a general shot looking back from the living room towards the corridor leading to the utility room, bathroom and the bedrooms.

null

Although the interior still has a way to go, it’s beginning to look remarkably like the ‘walk through’ that I did of my computer model. When it’s finally completed it’ll be interesting to do a proper comparison.

The plaster-work duo will be back tomorrow as should be the electrician. The latter will start on installing all the cabling for the lighting and power points and will need to climb up into the roof-space. While he’s there I’ll also ask him to drill a hole through the southern-facing wall for my satellite cable.

It shouldn’t come as a complete surprise to him as we discussed it the last time he was here. I assembled the satellite dish today so we can work out exactly where the hole should be with the dish as close to the roof corner as possible without breaking above the roof line. If he doesn’t want to do it I’ll just grab my drill and ladder and do it myself 😉

Getting it done

First off, I managed to resolve my dilemma by just saying that I thought I’d spotted a problem yesterday with one of the electrical cables. The guy in charge of the plaster-work just said that on his drawing the cable is shown as containing the wiring for both a plug point and a light switch and that it would be up to the electrician who is due to return on Friday to make sure that they are each at the correct heights. So that was that one sorted and we’re able to keep our little secret concerning the key 😉

He said that they’d start putting the doors in today and when I went up to have a look at progress at lunchtime I found that they’d been marking out the positions of all of the partitions that will make up the rooms and had started on the kitchen door. They’d also cut an access into the roof space in the utility room ceiling as they’d said they would do a few days ago.

null

This is the far, bedroom end of the central corridor.

null

null

null

null

null

A gap of about 2 cm has to be left below each door to allow for ventilation I was told, so the above images show what the combined thickness of the second concrete layer plus floor tiles will be. They measure the floor to ceiling height downwards from the ceiling so the thickness will become greater approaching the bedroom end of the house, especially in the outer corner of bedroom 1.

I had to go up to the house mid-afternoon to discuss a small problem with Didier concerning the electric cabling for the heat pump. The original plan was to enclose it in the wall of bedroom 2 (see the far corner in the above image that hasn’t yet been plaster-boarded) with the heat pump being positioned outside on the back corner of the house.

However, apparently there’s now a regulation that says that the heat pump cabling has to be ‘accessible’ so the builder has recommended moving the heat pump to the centre of the bedroom wall and running the cabling up into the ceiling in the corner of the space that’s being created for fitted cupboards in bedroom 2. This is the only alternative as it clearly can’t go outside the wall in the other corner where it would be a visual eyesore, so I’ve agreed to it.

After we’d finished talking I took the next couple of shots showing the progress that had been made with the walls and doors since the morning.

null

null

And finally, here’s the situation at the end of the day.

null

null

null

null

null

null

The next view is looking across the kitchen out into the living room.

null

If the electrician is due back on Friday, the two guys doing the plaster-board work must expect to be finished tomorrow. And I won’t be surprised if they are the way they are going 🙂

More solid progress

Still working on the walls and making slow but steady progress. I’ve been left with a dilemma which I’ll go into at the end of the post. The first shots show the situation as at lunchtime today.

null

null

null

null

null

null

The next shot shows the thickness of the insulation that’s being put into the walls and now I see why the door and window frames all protruded so much into the house’s interior and when they marked out the floor so much interior space was being given up.

null

The next batch of shots show that at the end of the day all of the insulation had been put into place together with most of the dry lining board. The site had also had a good clean and tidy-up.

null

null

null

null

null

And now we come to my dilemma. I noticed this evening after the workmen had left that they’d made a small error. Two cables emerge where the heads of the beds will be in bedrooms 1 and 2, one of which is a plug point and the other a switch for the main room lights.

The plug point needs to be low-level but the light switch needs to be higher so it can be operated while you’re in bed. You can see what I mean in the following image.

null

Here’s my dilemma. If I don’t tell the workmen they could make the same mistake in bedroom 2 and then both bedrooms will need to be rectified. If they have by then applied any finish to the walls, this could be even more difficult, and possibly unsightly even, than if the problem is brought to their attention now.

So far so good. But what’s my dilemma? If I tell them they’ll know that I’ve been into the house after they’d left and that to do so I must have a key, which I’m not really supposed to have. But I do have one as I had a copy made over the week-end when I moved my doors into the house. Now d’you see the problem? 🙂