


For the time being, the ground is still too muddy for me to work on the shuttering for the concrete base of my new tool store, so I thought that I’d grab the opportunity to do some preparatory work on 28AAD, my little French Weedhopper ULM. All that I really wanted to do was release the pressure from the pod in the hope that it might help ease some of the distortion that resulted from Chris’s hard landing accident, but in fact I was able to get much more done than I’d originally thought.
Having done similar work twice in the past on MYRO, my original old UK Weedhopper, I now know the procedure pretty well, so was able to crack on at a fair rate of knots. I knew from having inspected the aircraft in Chartres before I bought it that the pod had been resprayed, which didn’t worry me. There could be various reasons for that but in my mind, any ULM, unless it’s led a very sheltered life indeed, is liable to have been involved in the odd scrape and accident here and there that might have made it necessary. I’ll go onto the dismantling procedure shortly, but it soon became clear that before being resprayed, the pod had had some small repairs done to it too. Initially I didn’t know why, but it soon became clear as things progressed.
I knew that there was something a bit strange about the trailing links that had snapped during the accident because there was something red and metallic showing inside each of the snapped ends. When I removed them and looked at them closely, this is what I found.

They were far from original – in fact it was pretty obvious that they’d been knocked up as a very poor repair. The red metallic items inside each one turned out to be shims crudely made out of an old Coke can that were being used to pack out the end pieces within the tubes of the links, and there was only one reason why that should have been necessary. The aluminium tube that had been used in the fabrication of the links was of too thin a gauge. Now why should that have been, and why had replacement trailing links been necessary anyway?
Time to look a little bit more closely, and the next clue was one of the snapped cabin tubes, the one on the passenger side. The next shot shows that two extra bolts had been added at some time to the lower part of the tube and closer examination revealed why.

The lower part of the snapped tube had had a metal sleeve inserted into it that had been attached to the tube by the two bolts. Only one conclusion could therefore be drawn from all this. Chris’s accident was not the first time that 28AAD had suffered a hard landing and collapsed undercarriage and whoever had done the repair work last time had done a very poor job.
I have no idea just how hard Chris’s landing was – he said that it was pretty hard – but these little Weedhoppers are very sturdy little beasts, as I know only too well from experience. Was the fuselage tube that snapped already cracked from the previous accident and was that why the metal sleeve had been inserted into its lower end? And what about those trailing links? If whoever knocked them up had used the correct gauge aluminium – I’ve ordered 20mm o/d with wall thickness of 2mm, which my micrometer suggests is correct – would they still have snapped causing the undercarriage to collapse? We’ll never know for sure, but it doesn’t really matter as at least now the job is going to be done properly, as it should be.
So let’s get into the dismantling sequence. First to come off was the fuselage cover so I could get to where the work needs to be done and also closely inspect the rest of the aircraft’s structure.

Once the cover was off, the twin tank arrangement was revealed in all its glory. It looked pretty good, except for where someone had packed the top webbing strap of the second tank out with an old bit of aluminium tube, so I’ll have to sort that out a bit later on.


You can also see how someone’s suspended a plastic container from the main tube in the rear of the fuselage. It’s accessible from between the seats and is obviously there as a handy container for small items of baggage eg spare oil, things like that, but I can only imagine the fuss it would have caused as an unauthorised mod if an inspector had found it in a UK Weedhopper!

Next to come out was the instrument panel. Its foot hadn’t been secured by cable ties as is done in the UK. Instead it was fixed by two long, thin bolts that had both bent during the accident. I can’t help but think that cable ties are a better arrangement.

With the panel front out, the next job was to remove the panel top and screen. Usually it’s a two-person job unless you have arms that are 2 metres long so you can reach under the panel on the inside to the nuts securing its front while unscrewing the screws or bolts from the outside.

This time, because the screen is scrap anyway, I decided that the best course of action would be to just cut the screen across its front with metal shears so it could be removed to give easy access to the securing nuts and screws.

So with the panel and screen both out of the way, it was then time to move on to the preparations for removing the pod.

However, before doing so, I noticed that the left hand tube that forms the fuselage side and acts as an engine support had been quite seriously abraded by an ill-fitting screen, so will have to be replaced with one from MYRO as part of the general repair.

The next job was to disconnect the rudder cables and remove the rudder pedals. By this stage, you’re beginning to think of the pod being unsupported, so what I do is support it front and rear from both sides using rubber bungies. The front of MYRO’s pod was only supported by the two large bolts that also secure the pedal assembly, but 28AAD is a bit different in that it also has two aluminium plates positioned in front of the pedal assembly above the fuselage tubes on the inside and below the pod on the outside secured by four bolts. This is there to provide the pod with more support and is a good idea I think.
And don’t overlook the fact that in order to remove the rudder pedals, you must also disconnect the nose wheel steering links. I prefer to remove them completely from both the pedal and wheels ends because it avoids lots of fiddling about if they’re allowed to hang free.

So with the pedals and those plates removed, the pod begins to become quite bare.

You can see my bungie support arrangement for the pod more clearly in the next shot. If you don’t do it, I know from experience that it’s easy to drop the pod while you’re trying to remove (or refit) it with the possibility of damage being caused by impact against bits of hard metal.

There are two more supporting bolts that need to be removed at the ends of the floor crossmember and once that’s done, the pod is basically hanging freely. Usually you’d also then need to disconnect the trailing links at the cabin ends but on this occasion I didn’t need to as they’d been snapped off. To finally remove the pod you need to drop the nose wheel out. This is easy as it’s only held on by one large nut, which has been removed in the next shot.

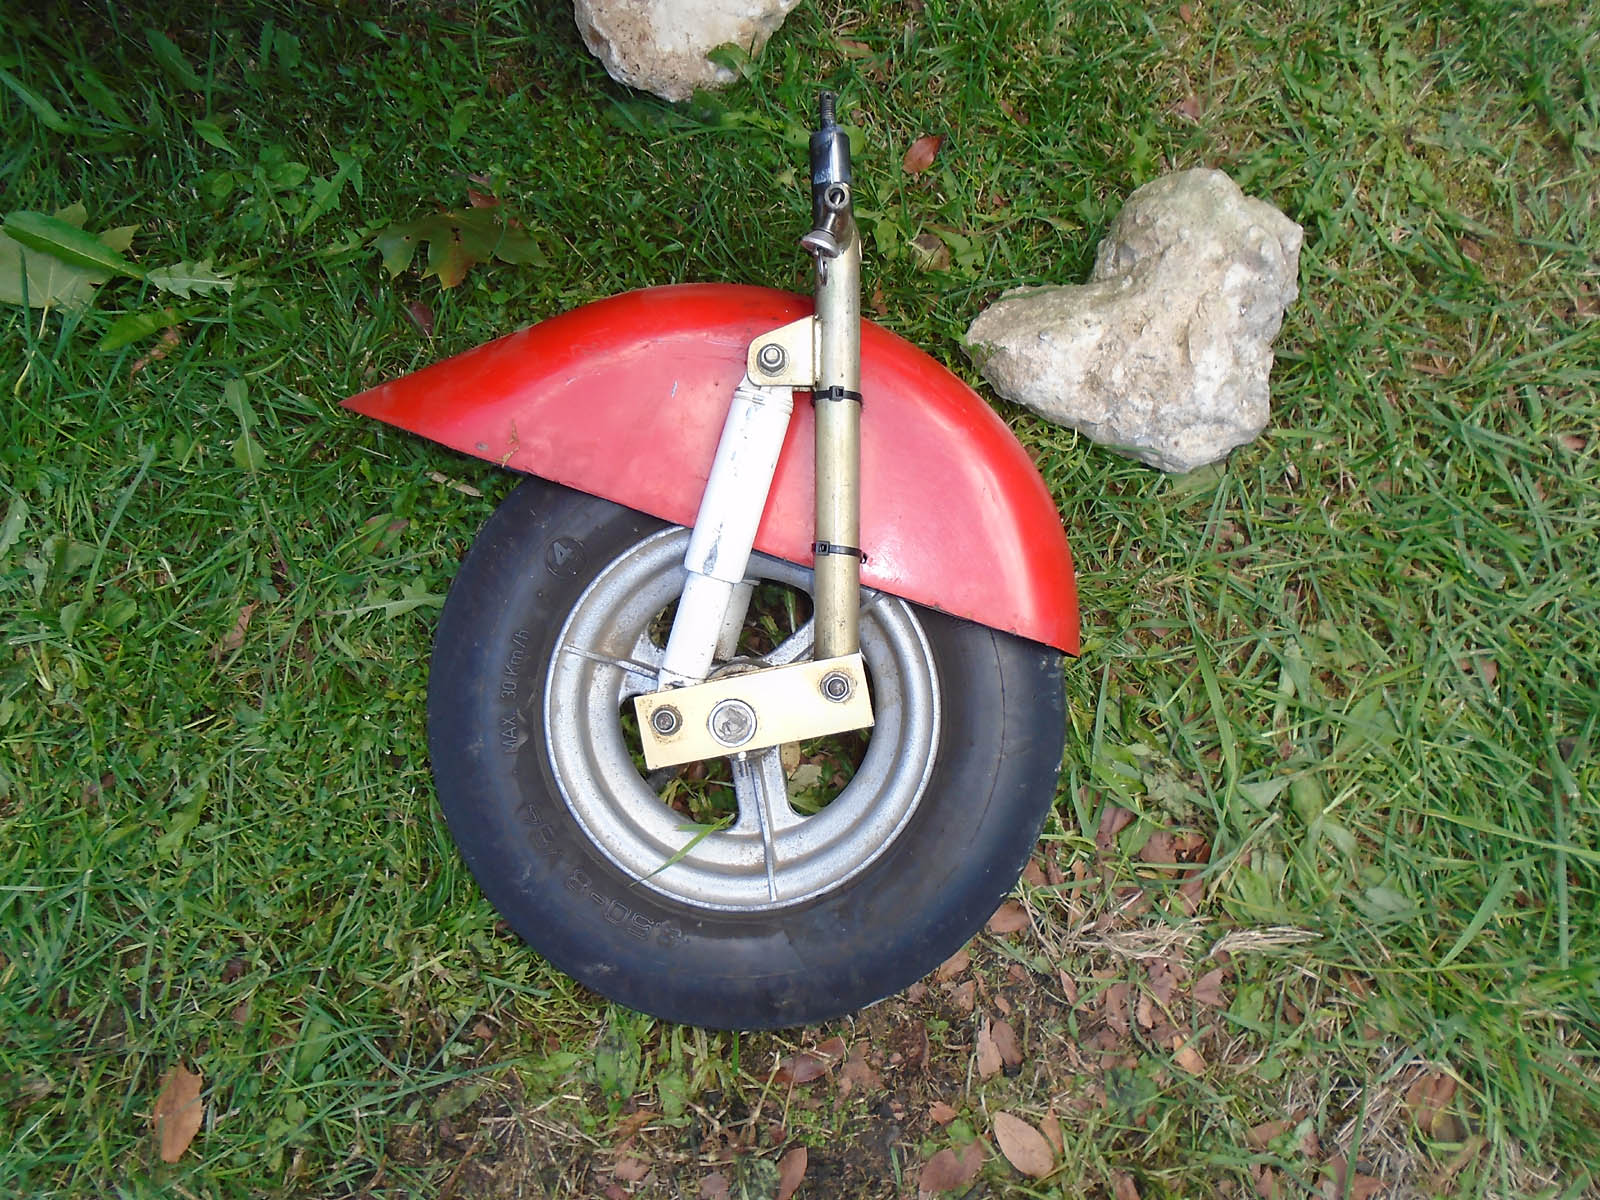
Here are two shots, the first showing the pod with the nose wheel removed and the second showing the nose wheel and fork assembly itself.

It’s then just a matter of releasing the bungies and carefully dropping the nose of the pod slightly and pulling it forward in order to remove it.

Then you can replace the nose wheel to get the aircraft standing back on its undercarriage again, but take care as with little weight on the front now, it’s essential to have a firm support under the tail to keep it from tipping up.
This then seemed like a good time to me to see if 28AAD’s main undercarriage had actually been damaged in the accident or not. It was a simple matter to loosen three bolts on either side and then give it a good shove with my foot while firmly hanging onto a fuselage tube. Clunk, click and it slipped smoothly back into position, as shown by the next couple of shots.


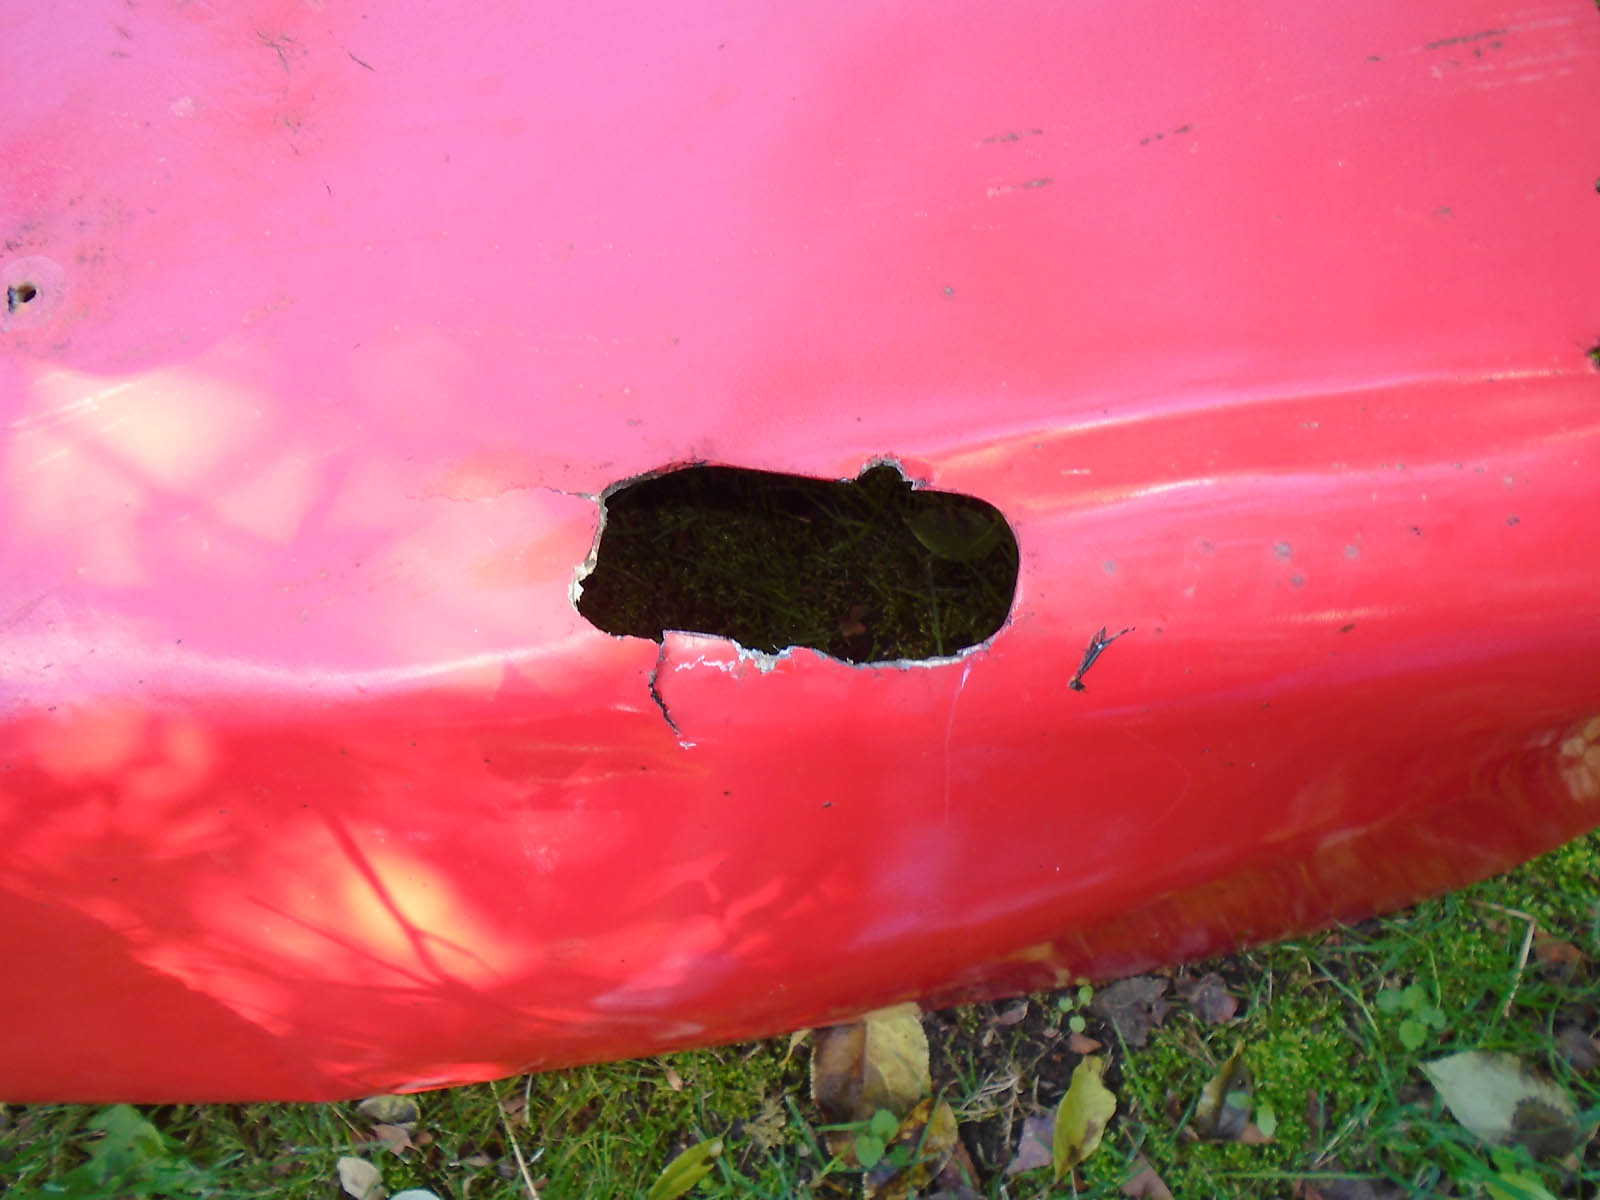
That was not really unexpected but was good news nevertheless. But what about the pod? Upturning it revealed that despite what it had been through, it is still in pretty good shape, and much better than MYRO’s was when I first refurbished it.

Sure, as the next couple of pics show, there is a little bit of damage that will have to be seen to, but it won’t be hard to fix and isn’t in areas that are easily visible anyway.

What will probably need to be addressed, though, is the creasing. I already have ideas on how to do that, which will involve removing paint from the inside walls and fibre-glassing in some strengthening patches, not too hard a job but a bit time-consuming if it’s to be done well and properly.
So at the end of the day, to my great surprise there was 28AAD standing there back up on its undercarriage and with everything removed from its structure to enable the repair work to proceed, a very satisfactory state of affairs, I thought.

This evening I ordered some aluminium tube from which to fabricate the new trailing links and that will take a few days to be delivered. The rest of the items that will be needed will come from my old friend MYRO, sad but true. In the meantime I will get back to working on my new tool store and I just hope that I can make as quick progress on that as I managed to on 28AAD today.