


Yesterday I got my decks at home clear by painting a large, thick strip of silicone roof sealant across the joint on my wood store roof that’s begun letting in water again. The job looked to be a good’un so I hope that it will see me through the coming winter and maybe a few more as well before I have to do anything more extensive on the roof to solve the leaking problem.
So today was the day to embark on the repair of the Savannah’s windscreen. Before I got going this morning I quite expected that I’d be able to get the job done in not much more than a day but pretty soon it became clear that that was not going to be the case, as the following diagram shows.
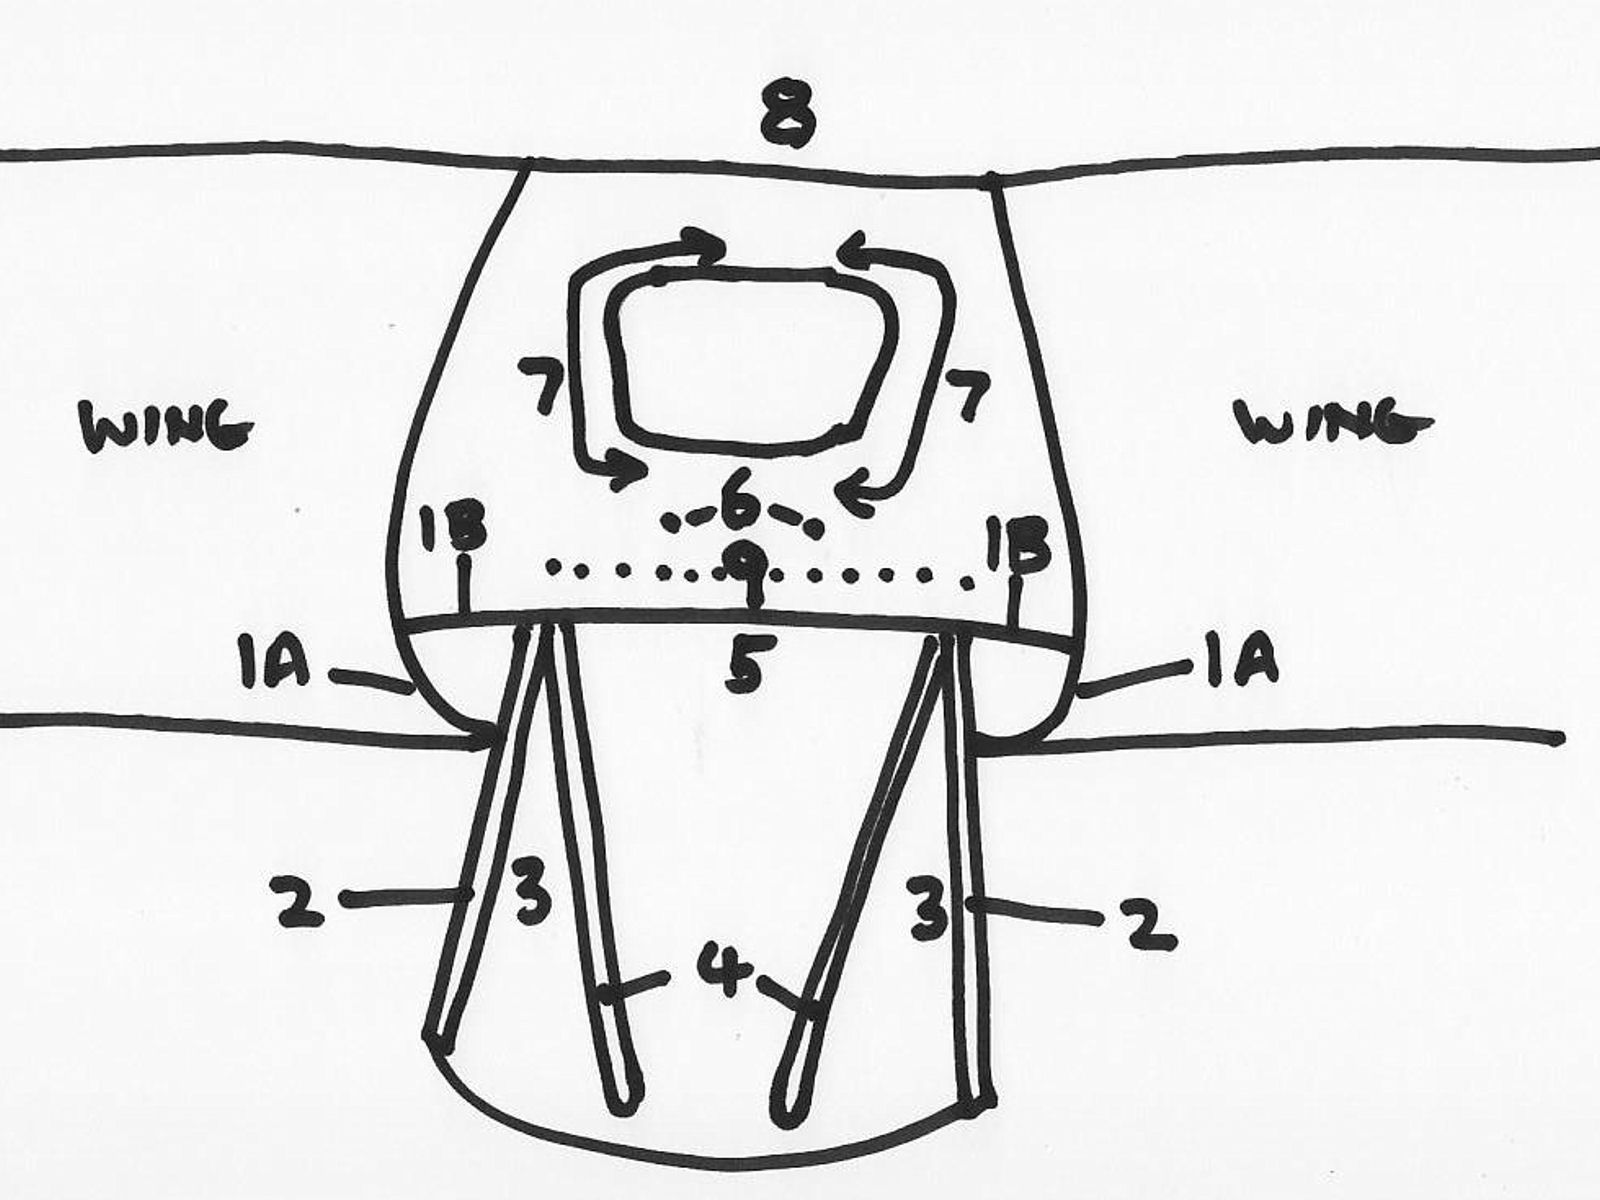
I started off by drilling out the 3mm pop rivets holding the wing leading edge trims on each side at 1A and 1B, a total of something like 16 or so. The vertical rear sides of the screen are covered by wrap-around aluminium capping strips that go up the complete height of the screen and are covered by the door leading edges when closed. The pop rivets holding those also go through the screen itself and so had then to be drilled out at positions 2 (externally) and 3 (internally.
When I removed the wing leading edge trims previously it was obvious that the rivets at the tops of the strips on both sides had been installed with the wings off and to drill them out I had to borrow an angle drive to get into the narrow gap between the wing roots and fuselage, an exercise that was very tricky indeed. But I succeeded, so thanks Victor for the loan of your angle drive.
Then the rivets securing the front of the screen to the two internal tubes at positions 4 had to be drilled out, but although the front edge of the screen is merely sealed and not secured at all, the screen itself couldn’t be budged until all of the rivets securing all along its visible top edge to the cabin top plate between the wings had been drilled out (5).
That’s when things began to get a bit more involved because even with those rivets removed, the screen would still not budge, except at the sides. The reason for this became clear by carefully lifting up the front edge of the top plate which revealed a further line of rivets securing the whole top edge of the screen to a transverse fuselage tube under the plate at 9.
So this meant that the top plate itself would need to be removed, involving the drilling out of umpteen rivets at 6 (just 2) 7 (all around the cabin top glass) and 8 (along the rear edge of the top plate. I didn’t count how many, but there were a lot of them, so as the temperature was already over 30 degrees by that time, I thought it was a good time to stop work and continue working tomorrow morning when it’s cooler.
The job’s not too difficult, just tedious, and you have to be careful so as not to cause any damage. I’ve already slipped once when drilling out a rivet on a bit of an angle, so I don’t want too many more episodes like that. The up-side is that by removing the whole top plate, I’ll be able to replace the cabin top light as I have plenty of polycarbonate and the existing one has some fuel marks on it and is also leaking a bit when it rains. But there’s a bit more work to do before all that’s finished 😕