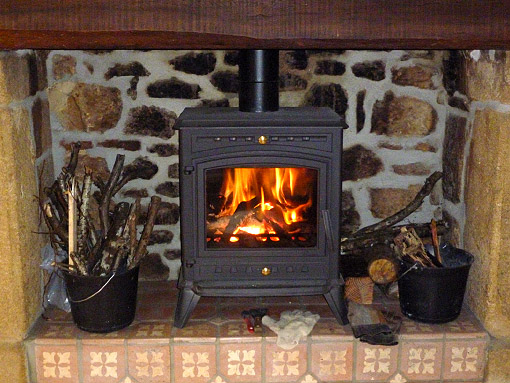
It was a fine day yesterday so although there was quite a high wind, I decided that I had to take the opportunity to finish off my wood burner work. Unfortunately, when I took the extra length of flue pipe that I bought the other evening out of my car, I found that I should have taken a closer look at it (that’ll teach me to go without my glasses), because it had been dropped and bent at both ends. It was still usable, but it meant that first I had to gingerly dress both ends back into shape using a pair of pliers and then give it a respray using black high temperature paint where the original finish had been damaged, to prevent it rusting.
Having done that it was time to put my ladders up and climb up onto the roof, which was not very pleasant because of the wind. Nevertheless, I managed to carry up the new length of flue tubing and lower it down the chimney to connect up with the existing pipe and then do the same with the last cut length that I had measured and cut down beforehand so that it just came a couple of centimetres above the rim of the chimney. Then it was time to fit the securing bracket on the top so the flue stack couldn’t move around on top of the wood burner down below, which went exactly as planned. I used my old cordless drill to make a hole in the masonry of the chimney for a large plastic plug that held the single bracket fixing surprisingly securely. The fixing then screwed into the plug and one half of the bracket then screwed onto a thread on that. I needed a lock nut to make it firmer on the thread and a search in my toolbox yielded a bolt of exactly the right thread with a wing nut on it, that I’d had for years. The wing nut worked a treat! All that I then had to do was attach the other half of the bracket, lightly tighten the fixing bolts and the work up-top was finished, with my wood burner flue nicely secured vertically and away from the walls of the chimney. Hooray 😀
Then I had to fabricate my chimney sealing plate. I’ll say as little as possible about this as in all honesty, I think it’s the worst DIY job that I’ve ever had to do – and that really is ever! I carefully measured the plate as best I could for the location of the hole for the flue pipe and then cut the plate in two from front to back through the centre of the hole. Then I used my jig saw to cut the two halves of the hole out, which was so far, so good. Fitting the plate turned out to be an absolute nightmare that took me hours, because with the imperfections inside the chimney that prevented each of the two halves of the plate from dropping down, I had to keep trying, seeing where the plate was catching and then taking it out again, usually after it was stuck fast, to trim a bit off. And all the while, every time I moved the plate inside the chimney soot, grit and muck kept falling down onto me and into my eyes until I and the clothes I was wearing were covered. I broke two jig saw metal-cutting blades and had to go down to Les Briconautes to buy some more before they closed, filthy and looking like a chimney sweep.
It was well into the evening before I managed to get both halves of the plate in and seating in a reasonably satisfactory way by which time I was covered in soot, tired and aching all over. I couldn’t wait to get my filthy clothes off and get into the shower but I had to wash my face and head separately first otherwise the shower would have ended up almost as dirty as I was. I got the wood burner going but it was too late to bank it up to see how it performed and I thought I’d leave that until today before I went off to bed and a rather fitful night’s sleep because I was aching so much. My first impressions were that it still seemed to be reluctant to get really fired up so it could begin to chuck out some good heat, but that remained to be seen.
So this morning I gave it a good clean out and got some more wood in and ready to go. It’s raining again while I’m typing this but this morning it was dry and with little wind before the grey began to move in and the clouds began to lower. Then I got it fired up. I did it without paper this time, just using dry twigs with wood on top that I got going with my blowlamp. There’s still no wind so there’s little natural ‘draw’ in the chimney and I thought I’d try and counter that by getting a good blaze going that would create its own. And after a rather slow and smoky start, because I’m still using up my old garden wood, it’s looking encouraging.
I think the wood burner is working more or less as it should for the first time today, and that’s still without there being very much wind outside to pull the smoke out and away. After getting a good burn going, it’s running well with the bottom vent closed and the top only half open, which it hasn’t done before and the heat it’s giving is, I think, the best so far. So now I just have to wait and see – and just keep cutting and chopping more wood! It’s a hard life down here, in the country, but I think that after yesterday’s efforts, I’ll give myself the rest of the day off 😉


